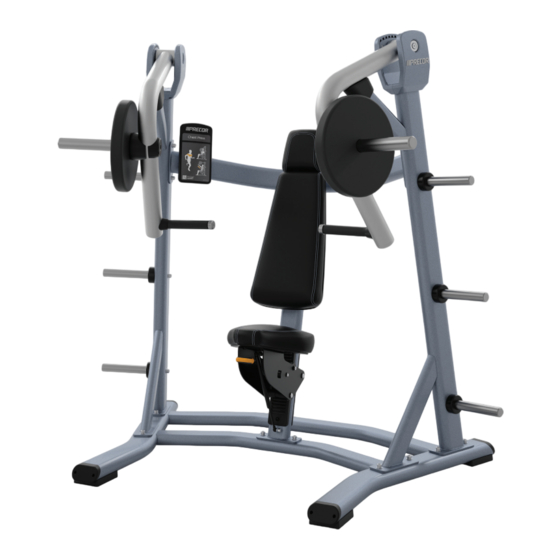
Precor Discovery Series Plate Loaded Line Owner's Manual
Plate loaded line
Hide thumbs
Also See for Discovery Series Plate Loaded Line:
- Assembly manual (40 pages) ,
- Owner's manual (36 pages) ,
- Assembly manual (36 pages)
Table of Contents
Advertisement
Quick Links
Advertisement
Chapters
Table of Contents

Related Manuals for Precor Discovery Series Plate Loaded Line


Summary of Contents for Precor Discovery Series Plate Loaded Line
- Page 1 Owner’s Manual Discovery™ Series Plate Loaded Line...
-
Page 3: Important Safety Guidelines For Owners
Since floor construction varies, please consult a professional building engineer for proper fastening. Discovery Series Plate Loaded Line Owner's Manual: Important Safety Guidelines for Owners... -
Page 4: Important Safety Information For Users
Do not use the equipment if an "out of order" sign has been placed on it. Read all posted instructions, including all safety instructions and warnings. Discovery Series Plate Loaded Line Owner's Manual: Important Safety Information for Users... -
Page 5: Table Of Contents
Inspect and Lubricate Bearings and Bushings ......10 Check and Lubricate Seat Adjustment .......... 10 Monthly Inspection ..............11 Inspect Frames and Movement Arms ..........11 Inspect All Fasteners ................11 Discovery Series Plate Loaded Line Owner's Manual: Table of Contents... -
Page 6: Before You Begin
Important: Always purchase replacement parts and hardware from Precor. Many parts are tested and manufactured specifically for Precor commercial strength equipment. If you use parts not approved by Precor, you could void the Precor Limited Warranty. Use of parts not approved by Precor may cause injury. -
Page 7: Obtaining Service
Model #: Serial #: your dealer. If you need more information regarding customer support numbers or a list of Precor authorized service centers, visit the Precor website Date purchased: at www.precor.com. If you have any questions regarding a piece of equipment, locate its serial... -
Page 8: Daily Inspection
Inspect pads for wear. Service to purchase new pads). Clean and inspect equipment frames. Important: Do not reupholster pads or use pads not approved by Precor. Check warning and instructional labels. Clean and Inspect Frames Clean Upholstery... -
Page 9: Check Warning And Instructional Labels
Service for purchase information). Clean labels as needed with a mild soap and water solution in a spray bottle, and dry thoroughly with a soft cloth. Figure 1: Example instructional placard Discovery Series Plate Loaded Line Owner's Manual: Daily Inspection... - Page 10 Precor products come equipped with a number of standard warning labels. The following two figures show sample warning labels you may see on the equipment depending on the model and product line: Figure 2: Warning label indicating pinching hazard Figure 3: General warning label mounted on the equipment frame...
-
Page 11: Weekly Inspection
Important: To clean the upholstery, do not use cleaning products that have any of these ingredients: solvents, alcohol, ammonia, or petroleum. Use a mild Check and lubricate the seat adjustment mechanism. detergent-based cleaner instead. Discovery Series Plate Loaded Line Owner's Manual: Weekly Inspection... -
Page 12: Inspect And Lubricate Bearings And Bushings
The seat adjustment mechanism requires little maintenance. However, because seat safety is important to the safety of a workout, you should check Precor uses high quality bearings designed for strength applications and long the seat lever regularly to see if it sticks when used. -
Page 13: Monthly Inspection
Replace any component at first signs of wear. Important: Fastener quality and specifications vary considerably. Replace only with Note: You can order touch-up paint from Precor by calling Customer Support. the Precor approved fastener specifically engineered for the precise application. - Page 14 Notes : Discovery Series Plate Loaded Line Owner’s Manual: Monthly Inspection...
- Page 16 U.S. and foreign patents for both the mechanical construction and the visual aspects of its P.O. Box 7202 product design. Any party contemplating the use of Precor product designs is hereby forewarned that Precor Discovery™ Series Plate Loaded Line Owner’s Manual Woodinville, WA USA 98072-4002 considers the unauthorized appropriation of its proprietary rights to be a very serious matter.
-
Page 17: Assembly Guide
Assembly Guide Discovery™ Series Plate Loaded Line Leg Curl... - Page 19 Table of Contents Getting Started ................2 Opening the Boxes ................2 Installation Requirements ..............2 Hardware Kit (not to scale) ..............3 Assembling the Equipment ............6 Stabilizing the Equipment ..............7 Attaching the Upright Support Assembly to the Base Frame .. 8 Attaching the Knee Pad Frame ............
-
Page 20: Getting Started
Getting Started Opening the Boxes Installation Requirements WARNING You will need assistance to assemble this unit. DO Open the boxes and remove the packing materials. Be careful to open the NOT attempt assembly by yourself. boxes and assemble the components in the sequence presented in this manual. -
Page 21: Hardware Kit (Not To Scale)
Hardware Kit (not to scale) The following pieces of hardware are provided on a shrink-wrapped card. Each part is labeled on the card for easy reference. Table 1. Hardware kit contents Fasteners Quantity Buttonhead cap screw (M8 x 15 mm) Socket head cap screw (M12 x 35 mm) Flat head cap screw (M12 x 30 mm) Flat head cap screw (M6 x 30 mm) - Page 22 Fasteners Quantity Flat washer (13 mm internal diameter) Flat washer (9 mm internal diameter) Set screw (M8 x 6 mm) Table 2. Other Components Part Quantity Weight horn Weight arm pivot axle Movement arm axle end Roller end plate Leg Curl Assembly Guide: Getting Started...
- Page 23 Part Quantity Frame plug Instructional placard Hex wrench (10 mm) Hex wrench (8 mm) Hex wrench (5 mm) Leg Curl Assembly Guide: Getting Started...
-
Page 24: Assembling The Equipment
Precor highly recommends that the equipment be bolted to the floor to reduce the risk of toppling due to improper use. Because floor construction varies, consult a professional building engineer for proper fastening. -
Page 25: Stabilizing The Equipment
Stabilizing the Equipment 4. Using the same open-end wrench, turn the positioning bolt to the left or the right to move the adjustable foot to the appropriate level, as shown in Once you have positioned the base frame where you want the equipment to be the following figure. -
Page 26: Attaching The Upright Support Assembly To The Base Frame
Attaching the Upright Support Assembly Attaching the Knee Pad Frame to the Base Frame The knee pad frame extends outward from the upright support assembly and upward from the base frame. Perform the following procedure to begin assembling the frame. To attach the knee pad frame: To attach the upright support assembly to the base frame: 1. -
Page 27: Attaching The Movement Arm Supports
Attaching the Movement Arm Supports Installing the Handlebars Note: Before you attach the movement arm supports, position each one near Important: When you perform this procedure, make sure that the handlebars face the side of the equipment where it should be installed. When the movement away from the person using the equipment. -
Page 28: Installing The Movement Arms
Installing the Movement Arms 4. Place an axle mount end on each end of the axle and attach a M12 x 30 mm flat head screw to each end, as shown in the following figure. You will need an assistant to hold the movement arms in place while you complete this procedure. -
Page 29: Attaching Weight Horns To The Movement Arms
Attaching Weight Horns to the Movement To attach the weight horns: Arms 1. Insert a weight horn into the outward side of the weight horn fitting on the movement arm. Slide the weight horn into the fitting until it stops. The weight horns that attach to the movement arms are slightly larger than 2. -
Page 30: Attaching The Pads
Attaching the Pads To attach the knee pad: 1. Position the pad over the bracket on the seat frame as shown in the Perform the following procedures to attach the pads to the equipment. following figure. To attach the thigh pad: 1. - Page 31 To attach the arm pad: 3. Insert the wrench through one of the access holes in the handlebar assembly so that the screw extends into the screw hole in the pad. Partially 1. Position the arm pad over the handlebar assembly so that the screw holes tighten the screw.
- Page 32 To attach the roller pads: 1. Slide a knee roller pad onto the roller bar on one movement arm. 2. Secure the roller pad using one end cap and one M6 x 30 mm flat head cap screw. Tighten the screw completely. Note: There is a small pin on the end of the roller bar and a small hole next to the center hole on each end cap.
-
Page 33: Attaching The Instructional Placard And Safety Labels
2. Place the large hole near the bottom of the placard over the button, then Attaching the Instructional Placard and slide the placard downward to lock it into place as shown in the following Safety Labels figure. The equipment includes a metal bracket for the instructional placard. The placard slides over a metal button near the bottom of the bracket. - Page 34 3. Insert an M8 x 15 mm buttonhead screw with 9mm flat washer into the Note: If you are installing labels in a language other than English, remove screw hole near the top of the bracket, as shown in the following figure. the general warning label attached to the equipment.
- Page 36 U.S. and foreign patents for both the mechanical construction and the visual aspects of its Discovery™ Series Plate Loaded Line P.O. Box 7202 product design. Any party contemplating the use of Precor product designs is hereby forewarned that Precor Leg Curl Assembly Guide Woodinville, WA USA 98072-4002 considers the unauthorized appropriation of its proprietary rights to be a very serious matter.
Need help?
Do you have a question about the Discovery Series Plate Loaded Line and is the answer not in the manual?
Questions and answers