Intermec CK61 User Manual
Mobile computer with windows ce
Hide thumbs
Also See for CK61:
- User manual (190 pages) ,
- Installation instructions manual (16 pages) ,
- Supplementary manual (4 pages)
Table of Contents
Advertisement
Quick Links
Advertisement
Table of Contents
Troubleshooting

Related Manuals for Intermec CK61


Summary of Contents for Intermec CK61
- Page 1 CK 61 Mobile Computer With Windows CE User’s Manual...
- Page 2 Intermec Technologies Corporation. Information and specifications contained in this document are subject to change without prior notice and do not represent a commitment on the part of Intermec Technologies Corporation. © 2009 by Intermec Technologies Corporation. All rights reserved.
- Page 3 Changed part number to 935-021-001 and added alphanumeric and numeric key presses. 12/2006 Replaced Audio Devices applet information with Bluetooth Audio applet information. Updated 802.11 information to include “A” functionality. Added information about Microsoft WordPad and Media Player. CK61 Mobile Computer User’s Manual With Windows CE...
- Page 4 CK61 Mobile Computer User’s Manual With Windows CE...
-
Page 5: Table Of Contents
Introducing the CK61 Mobile Computer........ - Page 6 Configuring the CK61 Parameters ..........21 Configuring the CK61 With Intermec Settings ......21 Configuring the CK61 Using SmartSystems Foundation .
- Page 7 Upgrading the CK61 Using an SD Card ........
-
Page 8: Before You Begin
Global Services and Support Warranty Information To understand the warranty for your Intermec product, visit the Intermec web site at www.intermec.com and click Support > Returns and Repairs > Warranty. -
Page 9: Web Support
Web Support Visit the Intermec web site at www.intermec.com to download our current manuals (in PDF). To order printed versions of the Intermec manuals, contact your local Intermec representative or distributor. Visit the Intermec technical knowledge base (Knowledge Central) at www.intermec.com and click Support >... -
Page 10: Who Should Read This Manual
Who Should Read This Manual This CK61 Mobile Computer User’s Manual is for the person who is responsible for installing, configuring, and maintaining the CK61. This manual provides you with information about the features of the CK61, and how to install, configure, operate, maintain, and troubleshoot it. - Page 11 2 Click Support > Manuals. 3 In the Select a Product field, choose the product whose documentation you want to download. To order printed versions of the Intermec manuals, contact your local Intermec representative or distributor. CK61 Mobile Computer User’s Manual With Windows CE...
- Page 12 Before You Begin CK61 Mobile Computer User’s Manual With Windows CE...
-
Page 13: Using The Ck61 Mobile Computer
Using the CK61 Mobile Computer This chapter introduces the CK61 Mobile Computer with ® Microsoft Windows CE and contains these topics:. • Introducing the CK61 Mobile Computer • Using the Battery Using the Keypad • • Understanding the Audio Features •... -
Page 14: Introducing The Ck61 Mobile Computer
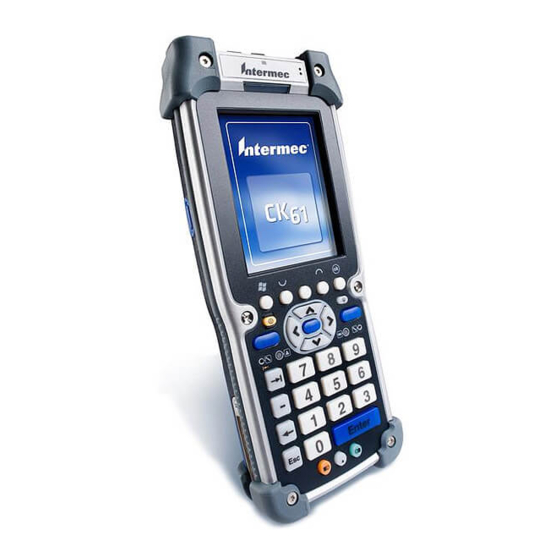
The Intermec CK61 Mobile Computer is an ergonomically designed mobile computer built on the Microsoft Windows CE operating system. The CK61 is a rugged, easy-to-use, reliable computer, and runs most software developed for the Windows CE platform, including standalone, client-server, and browser-based applications. -
Page 15: What's New
Chapter 1 — Using the CK61 Mobile Computer The CK61 is available with the following: • Ethernet • 802.11a/b/g radio ® • Bluetooth • Disk on Chip (128MB) Memory options: • • 64 MB RAM • 128 MB RAM •... -
Page 16: Finding The Software Build Versions
Finding the Software Build Versions You can easily check to see what version of the operating system and the SmartSystems Platform Bundle (SSPB) are loaded on your CK61. To find your operating system version Double-tap the Internet Explorer icon from the desktop. Internet •... -
Page 17: Charging The Battery
Chapter 1 — Using the CK61 Mobile Computer Note: If the CK61 is not on external power and you remove the battery pack, it goes into Suspend mode. Dispose of used batteries promptly. Keep away from children. Contact your Intermec representative for replacement batteries. - Page 18 2 Press the battery release tab down and pull the battery out of the CK61. 3 Install a new battery by inserting it into the CK61 as shown in the illustration below. CK61 Mobile Computer User’s Manual With Windows CE...
-
Page 19: Maximizing Battery Life
Maximizing Battery Life Batteries are chemical devices. If the batteries are left sitting on a shelf for long periods of time outside the CK61, the batteries slowly discharge, eventually to zero if left uncharged. The battery chemistry resists normal degradation if you store the battery in a charger as opposed to leaving the battery in a discharged state. - Page 20 Chapter 1 — Using the CK61 Mobile Computer Good Read LED and Ready-to-Work Indicator Battery LED Function LED For more information on the Good Read LED or Ready-to-Work Indicator, see “Understanding the Status LEDs” on page You can also check the battery status by using the Power application.
-
Page 21: Using The Keypad
Chapter 1 — Using the CK61 Mobile Computer Using the Keypad The CK61 can have a 32-key large numeric keypad, or a 58-key full alphanumeric keypad. Enter CK61 Numeric 32-key Large Numeric Keypad and 58-key full Alphanumeric Keypad The full alphabetic keypad is for applications that require primary input of alphabetic data. -
Page 22: Using The Color-Coded Keys
Using the Color-Coded Keys Each keypad available for the CK61 provides color-coded keys to let you access additional characters, symbols, and functions printed on the keypad overlay. Once you understand how to use the color-coded key sequences, you can access all of the additional features printed on the keypad overlay. -
Page 23: Using The Power Button
Chapter 1 — Using the CK61 Mobile Computer Using the Power Button When you press the Power button, you put the CK61 into a lower power mode. In this lower power mode, the CK61 continues to supply power to all memory, but turns off power to most hardware such as the display. -
Page 24: Understanding The Audio Features
Intermec Settings, see the Intermec Computer Command Reference Manual (P/N 073529) available from the Intermec web site. Using the Touch Screen The CK61 has a 3.8 in diagonal, 240 x 320 pixel (QVGA) transflective TFT-LCD 64K color display. • The Desktop screen displays shortcuts to some of the applications installed on the CK61. -
Page 25: Using The Stylus
Chapter 1 — Using the CK61 Mobile Computer The Windows CE Screen Using the Stylus Your computer has a stylus for selecting items and entering information on the touch screen. Functions You Can Perform With the Stylus Action Description Touch the screen once with the stylus to select options, open or close applications, or launch menus from the Task bar. -
Page 26: Understanding The Status Leds
Chapter 1 — Using the CK61 Mobile Computer Understanding the Status LEDs Use this section to understand the status LEDs. Good Read LED and Ready-to-Work Indicator Battery LED Function LED For more information on the Battery Status LED, see “Checking the Battery Status”... -
Page 27: Scanning Bar Codes
Intermec Settings” on page Scanning With the Area Imager The CK61 has an area imager that can scan 1D and 2D bar code symbologies, composite, and postal codes. It also supports omnidirectional (360°) scanning where you can position the CK61 in any orientation to scan a bar code label. -
Page 28: Improving The Performance Of The Area Imager
Using the Secure Digital Card The CK61 uses a secure digital (SD) card to increase file storage and install software. The SD card slot is located above the scanner window behind the stylus holder . Remove the two screws securing the stylus holder to reach the SD card. - Page 29 2 Remove the two screws that secure the stylus holder to the CK61. Screw (2 places) 3 Insert the SD card into the CK61 with the printed side facing the keypad of the CK61. 4 Push the card into the slot until it latches into place.
- Page 30 Chapter 1 — Using the CK61 Mobile Computer CK61 Mobile Computer User’s Manual With Windows CE...
-
Page 31: Connecting And Configuring The Ck61
Connecting and Configuring the CK61 Use this chapter to understand how to configure the CK61 to communicate in your network. In this chapter, you will find these sections: • Connecting to the CK61 • Configuring the CK61 Parameters • Configuring Bluetooth Devices •... -
Page 32: Connecting To The Ck61
Chapter 2 — Connecting and Configuring the CK61 Connecting to the CK61 Use Microsoft ActiveSync to synchronize the information on your desktop with the information on the computer. Synchronization compares the data on the computer with your desktop PC and updates both computers with the most recent information. -
Page 33: Configuring The Ck61 Parameters
Configuring the CK61 With Intermec Settings Use Intermec Settings to configure the computer and view system information. You can access Intermec Settings while running any application. To open Intermec Settings •... -
Page 34: Configuring The Ck61 Using Smartsystems Foundation
Network time servers acquire Coordinated Universal Time (UTC) from an outside source such as the U.S. Naval Observatory (USNO). The CK61 uses Simple Network Time Protocol (SNTP) to synchronize with a network time server. CK61 Handheld Computer User’s Manual With Windows CE... -
Page 35: Configuring Bluetooth Devices
Resource Kit and the Bluetooth Resource Kit User’s Guide which is part of the Intermec Developer Library (IDL). The IDL is available as a download from the Intermec web site at www.intermec.com/idl. You can send and receive information to a Bluetooth device wirelessly using the Bluetooth radio in the computer. - Page 36 Chapter 2 — Connecting and Configuring the CK61 2 Go to Communications > Bluetooth > Power. 3 Tap On. Intermec Settings prompts you to save your settings. Tap Yes and exit Intermec Settings. Once Bluetooth is enabled, it stays enabled through a warm or cold boot and maintains virtual COM ports (such as printing) registration.
-
Page 37: Configuring To Communicate With A Wireless Scanner
Intermec Settings at the end of this section. To configure Bluetooth communications on the CK61 1 Select the Windows icon > Control Panel > the Intermec Settings icon. 2 Select Communications > Bluetooth. - Page 38 1 Using your wireless scanner, scan the Bluetooth association label on your CK61. 2 The CK61 prompts you to enter the passcode for your scanner. The default password for Intermec bluetooth scanners is 0000. To connect to a wireless scanner using the Wireless Scanner Wizard 1 Select the Windows icon >...
- Page 39 To remove a wireless scanner from the computer 1 Select the Windows icon > Programs > Windows Explorer. The Windows Explorer screen appears. 2 Select Program Files > Intermec > Network > Bluetooth > the Bluetooth Scanner Wizard icon. The Bluetooth Scanner Wizard appears.
-
Page 40: Configuring To Communicate With A Wireless Printer
Chapter 2 — Connecting and Configuring the CK61 Configuring to Communicate With a Wireless Printer This section explains how to configure the computer for Bluetooth wireless printing. You need to: • make sure Bluetooth power is on. For help, see the procedure in “Configuring Bluetooth Devices”... -
Page 41: Selecting The Current Wireless Printer On The Ck61
To discover the printer with Bluetooth device discovery 1 Select the Windows icon > Programs > Windows Explorer. The Windows Explorer screen appears. 2 Select Program Files > Intermec > Network > Bluetooth > the Wireless Printing Wizard icon. The Wireless Printing Wizard appears. - Page 42 Chapter 2 — Connecting and Configuring the CK61 3 Tap Search to initiate printer discovery. All Bluetooth printers discovered within range appear in the devices list. 4 Select the printer you want to connect to and then tap OK. 5 If your preferred printer does not appear, make sure the printer is turned on and discovery is enabled, and then repeat this procedure.
- Page 43 Chapter 2 — Connecting and Configuring the CK61 2 Select Program Files > Intermec > Network > Bluetooth > the Wireless Printing Wizard icon. The Wireless Printing Wizard appears. 3 Tap Manual. The wizard advances to the next screen where you enter the device address.
-
Page 44: Connecting To A Bluetooth Audio Device
1 Select the Windows icon > Settings > Control Panel > the Bluetooth Audio icon. The Bluetooth Audio screen appears. 2 Tap Search for Devices. The CK61 searches for audio devices. 3 When searching for a device, select Yes when you are prompted to add a device to your list. -
Page 45: Configuring Local Area Networks
You must set a device to default before you can connect to that device. Configuring Local Area Networks Your CK61 is a versatile computer that easily adds to your wired or wireless data collection network. You can connect your computer to a network using: •... -
Page 46: Configuring Ethernet Communications
Configuring 802.11 Radio Communications The CK61 may have an internal 802.11 b/g radio to transfer data using wireless communications. This section of the manual assumes that you have already set up your wireless communications network including your access points. - Page 47 • Network name (SSID) • IP settings (if not using DHCP) 3 Make sure the CK61 is talking to the network and that the network can see the CK61. 4 Configure security. For help “Configuring Security On the CK61” on page The easiest way to configure the network parameters on the CK61 is to use Intermec Settings.
-
Page 48: Checking The Status Of Your Wireless Connection
• IP settings (if not using DHCP) • Network port 3 Make sure the CK61 is talking to the network and that the network can see the CK61. 4 Configure security. For help, “Configuring Security On the CK61” on page... - Page 49 2 Navigate to the Windows folder and scroll down to find the ISpyWiFi icon. 3 Double-tap ISpyWiFi. To add an ISpyWiFi shortcut to the CK61 Programs folder 1 Press and hold your stylus on the ISpyWiFi executable until the pop-up menu appears.
- Page 50 2 Tap the Scan button. 3 Tap any of the columns to sort in ascending or descending order. Use the Supplicant tab to view information on security and authentication settings that you have configured on the CK61. To use the Supplicant tab •...
-
Page 51: Connecting To An Isp
Chapter 2 — Connecting and Configuring the CK61 To ping a host 1 From the Host drop-down list, select an IP address for the host you want to ping. Enter a new IP address using the input panel or the keypad. Select Clear List to remove all the IP addresses from the drop-down list. - Page 52 3 Enter a name for the connection, such as “ISP Connection” and select Dial-Up Connection as the connection type. When you are finished tap Next. 4 If using an external modem connected to your CK61 with a cable, select Hayes Compatible on COM1 from the Select a modem drop-down list.
-
Page 53: Connecting To A Network With A Vpn Server
Chapter 2 — Connecting and Configuring the CK61 Connecting to a Network with a VPN Server A VPN connection helps you to securely connect to servers, such as a corporate network, through the Internet. Before you can make a VPN... -
Page 54: Configuring Security On The Ck61
Chapter 2 — Connecting and Configuring the CK61 5 Tap Configure and select a way for the CK61 to authenticate the connection. If you select A pre-shared key, enter the key provided by your network administrator. When you are finished, tap OK . - Page 55 WEP keys also authenticate the CK61 to the access point - unless the CK61 can prove it knows the WEP key, it is not allowed onto the network. WEP keys are only needed if they are expected by your clients.
- Page 56 Chapter 2 — Connecting and Configuring the CK61 Key Management Protocols Terminology Acronym Description Wi-Fi Protected Access. This is an enhanced version of WEP that does not rely on a static, shared key. It encompasses a number of security enhancements over WEP, including improved data encryption via TKIP and 802.11b/g...
-
Page 57: Choosing Between Microsoft And Funk Security
WPA2. Another authentication method for WPA and WPA2 would be the Pre-Shared Key (PSK). Choosing Between Microsoft and Funk Security Before you can implement a security solution on the CK61, you need to choose between Microsoft and Funk security: •... -
Page 58: Configuring Funk Security Using Intermec Settings
Configuring Funk Security Using Intermec Settings You can define up to four profiles for Funk security. Different profiles let your CK61 communicate in different networks without having to change all of your security settings. For example, you may want to set up one profile for the manufacturing floor and one for the warehouse. - Page 59 Select User name and type your user name. c Select User Password and type a user password. d For Validate Server Certificate, choose Yes. Note: You must have the date on the CK61 set correctly when you enable Validate Server Certificate. If you choose TLS: a Load a user and root certificate on your CK61.
- Page 60 66 characters. The value must match the key value on the access point. The passphrase must be from 8 to 63 characters. After you enter a passphrase, the CK61 internally converts it to a pre-shared key.
- Page 61 For Validate Server Certificate, choose Enabled. If you choose TLS: a Load a user and root certificate on your CK61. b For Validate Server Certificate, choose Yes. c You must enter a User Name and Subject Name. You can also enter a Server Common Name if you want to increase your level of security.
-
Page 62: Configuring Funk Security Using The Profile Wizard
10 Exit Intermec Settings. Configuring Funk Security Using the Profile Wizard You can start 802.11a/ b/g communications on the CK61 using the Profile Wizard. A profile contains all the information necessary to authenticate you to the network, such as login name, password or certificate, and protocols by which the CK61 is authenticated. - Page 63 Chapter 2 — Connecting and Configuring the CK61 Tap the iConnect icon ( ) in the lower right corner of the Today screen and select Tools > Wireless Settings. The Profile Wizard appears. 2 From the Profile list, select the profile you want to configure.
- Page 64 Chapter 2 — Connecting and Configuring the CK61 3 For Association, choose WPA. 4 For Pre-Shared Key field, enter the passphrase as ASCII. The passphrase must be 8 to 63 characters and match the passphrase on the access point. 5 Tap OK.
- Page 65 Chapter 2 — Connecting and Configuring the CK61 9 Tap Additional Settings to assign an inner PEAP authentication and set options for server certificate validation and trust. 10 From the Inner PEAP Authentication list, choose EAP/MS-CHAP- V2, EAT/Token Card, or EAP/MD5-Challenge.
- Page 66 Chapter 2 — Connecting and Configuring the CK61 Configuring TTLS Security With Profile Wizard TTLS protocol provides authentication like EAP-TLS but does not require user certificates. User authentication is done using a password or other credentials that are transported in a securely encrypted “tunnel”...
- Page 67 Chapter 2 — Connecting and Configuring the CK61 16 Tap OK. Configuring LEAP Security With Profile Wizard LEAP is the Cisco Lightweight version of EAP. To configure LEAP security 1 In the Profile Wizard, select the Security page. 2 For 802.1x Security, choose LEAP.
-
Page 68: Creating A Debug Log For Funk Security
9 Tap PAC Manager to view the PAC files currently installed on the CK61. Tap OK to return to the Additional Settings screen. 10 If you already have a PAC on the CK61, clear Allow Automatic PAC provisioning to avoid receiving more PACs from the server. - Page 69 An alert box appears telling you that you must save your settings and warm boot the CK61 for the new security choice to take effect. 4 Tap Yes. The CK61 resets and starts with Microsoft Security as the Security Choice. Networks already configured are preferred networks. You can connect to only preferred networks or search for and connect to any available network.
- Page 70 7 Tap OK to close the screen. Note: If you select to automatically connect to non-preferred networks, the CK61 detects any new networks and provides you with the opportunity to configure them. CK61 Handheld Computer User’s Manual With Windows CE...
-
Page 71: Loading A Certificate
If you have multiple certificates to install, you can use the Import Root Certificates and Import User Certificates functions. Note: For certificates to be valid, the CK61 must be set to the correct date and time. After cold booting the CK61, you may need to correct the date and time. - Page 72 9 Tap OK to close the Success message box. 10 Configure your CK61 for WEP, WPA, or WPA2 security. To load multiple certificates 1 Create the \Temp\Root and the \Temp\User folders on the CK61. 2 Copy at least one root certificate .cer file into the \Temp\Root folder.
-
Page 73: Disabling Security
8 Configure your CV30 for WEP, WPA, or WPA2 security. Disabling Security If you choose not to use security with your wireless network, you can disable it on the CK61. Intermec recommends that you always set security in your network. To disable security 1 Open Intermec Settings. - Page 74 Chapter 2 — Connecting and Configuring the CK61 CK61 Handheld Computer User’s Manual With Windows CE...
-
Page 75: Developing And Installing Applications
Developing and Installing Applications Use this chapter to understand the guidelines for developing applications for use on the CK61. This chapter contains these sections: • Developing Applications for the Computer • Installing Applications on the Computer • Freeing Up Virtual Memory for Applications •... -
Page 76: Developing Applications For The Computer
Use the Intermec resource kits to develop new applications to run on the CK61. The Intermec resource kits are a library of C++ and .NET components grouped by functionality that you can use to create applications for the computer. The resource kits are part of the Intermec Developer Library (IDL), and can be downloaded from the Intermec web site at www.intermec.com/idl. - Page 77 DLLs, images, and data files. Intermec recommends using .cab files to install your applications. The CK61 uses standard Windows .cab files and will install third- party .cab files. You can have your .cab files place your application in any of these memory locations on the CK61: •...
-
Page 78: Installing Applications Using Smartsystems Foundation
To install an application on the computer using ActiveSync 1 Connect the CK61 to a PC using a USB cable. You may have to disconnect and then connect the cable to “wake” the connection. 2 Wait for a “Connected” message to appear in the Microsoft ActiveSync application to signal a connection to the mobile CK61 Mobile Computer User’s Manual With Windows CE... -
Page 79: Installing Applications Using A Storage Card
9 Tap the .cab files to install them. Installing Applications Using a Storage Card If you have an SD card for your CK61, it is the best place for you to install applications. To install applications using the storage card 1 Suspend the CK61 and remove the SD card. -
Page 80: Installing Applications Using The Ftp Server
PC. 3 Copy your application file to the SD card. 4 Remove the SD card from the adapter and insert it into the CK61. 5 On your CK61, navigate to the storage card folder and run your application. -
Page 81: Freeing Up Virtual Memory For Applications
Do not run InstallSelect while using any other applications. InstallSelect manages the installation of value-added software features of the CK61. Removing software features may result in loss of CK61 functionality or the ability to manage device settings. See page 71 or contact your Intermec service representative for information about each software feature before making changes. - Page 82 6 Click Apply to initiate the clean boot and install only the files that are selected. 7 Click Yes to continue with the clean boot. The CK61 performs a clean boot and restarts with all of the checked components installed.
-
Page 83: Launching An Application Automatically
You can configure AutoRun.exe through the Autorun data file, AutoRun.dat. For compatibility with other Intermec computers, you can place a copy of AutoRun.exe in the same folder as your AutoRun.dat file but it is not required. -
Page 84: Upgrading The System Software
3 Write commands for AutoRun.dat using the supported AutoRun script commands. 4 Save the Notepad file as AutoRun.dat. 5 Copy the AutoRun.dat file to the System folder on the CK61. During every boot, the system scans for AutoRun.dat in the System folder. -
Page 85: Upgrading The Ck61 Using An Sd Card
3 Remove the SD card from the adapter card and insert it into the CK61. 4 Place the CK61 in a dock connected to external power and press the Reset button (using a stylus) located in the battery cavity on the back of the CK61. -
Page 86: Upgrading The Ck61 Using Smartsystems Foundation
6 Release the Power button, read the message, and press the Enter key. When the progress is complete, the CK61 warm boots to reset the configuration. 7 Set the date, time, and network communication parameters to reestablish communications with the other devices in the wireless network. - Page 87 Progress messages appear on the computer screen. Note: The SmartSystems console will show your computer as offline (note the red stop sign) until the computer reboots and reconnects to the system. CK61 Mobile Computer User’s Manual With Windows CE...
- Page 88 Chapter 3 — Developing and Installing Applications CK61 Mobile Computer User’s Manual With Windows CE...
-
Page 89: Troubleshooting And Maintaining The Ck61
Troubleshooting and Maintaining the CK61 If you encounter any problems while using the mobile computer, look in this chapter to find a possible solution. You will also find information on routine maintenance. This chapter contains these sections: • Calling Product Support •... -
Page 90: Calling Product Support
If you still need help after visiting Knowledge Central, you may need to call Product Support. To talk to an Intermec Product Support representative, call: 1-800-755-5505 Before you call Intermec Product Support, make sure you have the following information ready: • Configuration number •... -
Page 91: Troubleshooting Your Ck61
Troubleshooting Your CK61 If you send the CK61 in for service, it is your responsibility to save the computer data and configuration. Intermec is responsible only for ensuring that the hardware matches the original configuration when repairing or replacing the computer. - Page 92 Chapter 4 — Troubleshooting and Maintaining the CK61 Problems While Operating the CK61 Problem Solution • You press the Power button and Make sure the backlight is on. nothing happens. • Make sure you have a charged battery that is installed correctly.
- Page 93 Problems While Configuring 802.1x Security Problem Solution The CK61 indicates that it is Make sure the CK61 IP address, host IP address, subnet authenticated, but it does not mask, default router are configured for network. communicate with the host. The CK61 does not appear to be The CK61 may not be communicating with the access point.
- Page 94 Problem Solution You are setting up multiple access The CK61 does not save WEP key values when changing the points in a network, with different SSID. Reenter the WEP key value after changing the SSID SSIDs, and the connection fails.
- Page 95 Chapter 4 — Troubleshooting and Maintaining the CK61 Problems While Scanning Bar Codes (continued) Problem Solution The input device attached to the Set the Scanner Model command to the specific attached computer does not work well or input device. Check enabled bar code symbologies and read bar code labels very quickly.
-
Page 96: Resetting The Ck61
You rarely need to reset the computer. If the computer does not resume after pressing the Power button, or if the computer or an application lock up, you may need to reset the CK61. The CK61 uses the configuration currently saved in flash memory during the boot process. -
Page 97: Clean Booting The Computer
Chapter 4 — Troubleshooting and Maintaining the CK61 Clean Booting the Computer When you clean boot the CK61, it loads only those files and programs that are absolutely required by the operating system. Use the clean boot to troubleshoot the CK61 by getting it up and running so that you can perform diagnostic tests to determine which elements of the normal boot process are causing problems. -
Page 98: Cleaning The Ck61
Chapter 4 — Troubleshooting and Maintaining the CK61 Cleaning the CK61 To keep the CK61 in good working order, you may need to clean the imager window, color camera window, and the touch screen. Clean the windows and the touch screen as often as needed for the environment in which you are using the CK61. -
Page 99: Specifications
Specifications... -
Page 100: Physical And Environmental Specifications
Multiple 1.8 m (6 ft) drops to steel or concrete Power Specifications Battery type: Rechargeable Lithium-Ion (Li-ion) batteries: AB11: 7.2 V, 2400 mAh (17.3 Watt-hours) Recharge time: 4 hours or less Backup battery: Super capacitor supplies 10 minutes bridge time CK61 Mobile Computer User’s Manual With Windows CE... - Page 101 Plessey, Postnet, QR Code, RSS 14, RSS Expanded, RSS Limited, Telepen, TLC39, UCC-EAN Composite Code, UPC/EAN Regulatory Approvals UL and cUL Listed, UL60950 and UL 1604 and CSA 22.2 No. 157, FCC Part 15, TUV, CE mark CK61 Mobile Computer User’s Manual With Windows CE...
- Page 102 0.254 mm (10 mils) 4.47 cm (1.76 in) 21.74 cm (8.56 in) 0.381 mm (15 mils) 4.98 cm (1.96 in) 33.43 cm (13.16 in) Minimum distance depends on symbology length and scan angle. CK61 Mobile Computer User’s Manual With Windows CE...
- Page 103 PDF417 6.6 mils 4" 2" 0" 2" 4" 0.125mm / 5mils 6" 0.25 mm / 10 mils 8" 100% contrast UPC EAN 10" 0.5 mm / 20 mils EA11 Minimum Reading Distances CK61 Mobile Computer User’s Manual With Windows CE...
- Page 104 Minimum reading distances are measured in the dark (0 lux). When correctly mounted, and exit window reduces reading distances by about 4% for all scan engines. Both reading distances are provided in respective scan engine integration guides. Contact your local Intermec representative for more information. EL10 Minimum Reading Distances...
- Page 105 8" 4" 0" 4" 8" 0.125 mm / 5 mils 12" 0.25 mm / 10 mils 16" 0.5 mm / 20 mils 1 mm / 40 mils 20" EL10 Minimum Reading Distances CK61 Mobile Computer User’s Manual With Windows CE...
- Page 106 Minimum reading distances are measured in the dark (0 lux). When correctly mounted, and exit window reduces reading distances by about 4% for all scan engines. Both reading distances are provided in respective scan engine integration guides. Contact your local Intermec representative for more information. EV10 Minimum Reading Distances...
- Page 107 20" 10" 8" 100% contrast UPC/EAN 6" 4" 2" 0" 2" 4" 0.125 mm/ 5 mil 0.25 mm/10 mil 6" 0.5 mm/20 mil 8" 1 mm/40 mil 10" EV10 Minimum Reading Distances CK61 Mobile Computer User’s Manual With Windows CE...
- Page 108 4% for all scan engines. Both reading distances are provided in respective scan engine integration guides. Contact your local Intermec representative for more information. EX25 Minimum Reading Distances for 1D Symbologies...
- Page 109 0.5 mm / 20 mils 43.3" 220 cm 1 mm / 40 mils 86.6" " 430 cm 2.54 mm / 100 mils 169.3" 80 " EX25 Minimum Reading Distances for 1D Symbologies CK61 Mobile Computer User’s Manual With Windows CE...
-
Page 110: Accessories
Ethernet connector, a USB port, an ActiveSync USB port, and a serial port for the inserted CK61. AD6 Single Dock with Modem Use the vehicle dock to hold and charge the CK61 while using it on a vehicle. CK61 Holster and Belt Use the holster and belt to carry your CK61. -
Page 111: Keypads And Keystrokes
Keypads and Keystrokes... -
Page 112: Standard Characters
Appendix B — Keypads and Keystrokes Standard Characters Use the following tables to learn how to enter standard characters with the CK61 keypads. Standard Key Characters Character Alphanumeric Keypad CK61 Mobile Computer User’s Manual With Windows CE... - Page 113 [Shift] [N] [Shift] [O] [Shift] [P] [Shift] [Q] [Shift] [R] [Shift] [S] [Shift] [T] [Shift] [U] [Shift] [V] [Shift] [W] [Shift] [X] [Shift] [Y] [Shift] [Z] 0 - 9 [0 - 9] CK61 Mobile Computer User’s Manual With Windows CE...
- Page 114 Character Alphanumeric Keypad [Shift] [0] [Shift] [1] [Shift] [2] [Shift] [3] [Shift] [4] [Shift] [5] [Shift] [6] & [Shift] [7] [Shift] [8] [Shift] [9] [F1] [F2] [F3] [F4] [F1] [F2] [F3] [F4] CK61 Mobile Computer User’s Manual With Windows CE...
- Page 115 Appendix B — Keypads and Keystrokes Standard Key Characters (continued) Character Alphanumeric Keypad < > ‘ Home [Ctrl] Caps [Space] CK61 Mobile Computer User’s Manual With Windows CE...
- Page 116 Appendix B — Keypads and Keystrokes CK61 Mobile Computer User’s Manual With Windows CE...
-
Page 117: Index
Index... - Page 118 LED area imager Bluetooth 1D bar code association label 2D bar code audio device, connecting to performance, improving CK61 description communications, configuring performance improving on the CK61 performance, improving description using CK61 Mobile Computer User’s Manual With Windows CE...
- Page 119 ISpyWiFi description diagnostic tests, running to characters, capitalizing troubleshoot charging, battery disable caps lock check battery status discover printer checking status Discoverable, Bluetooth setting battery DiskOnChip, storing applications CK61 features display information CK61 Mobile Computer User’s Manual With Windows CE...
- Page 120 ISP (Internet Service Provider) configuring connecting to CK61 802.1x ISP, connecting to LEAP ISpyWiFi Profile Wizard antenna, description association, description BCMCFI, description WPA2 BSSID, description creating a debug log channel setting, description selecting a profile CK61 Mobile Computer User’s Manual With Windows CE...
- Page 121 Ready-to-Work Indicator, parameters, configuring description PEAP LED status choosing with WPA security blinking blue LED configuring with Profile Wizard blinking red blue LED persistent storage manager, how to good read upgrade green LED CK61 Mobile Computer User’s Manual With Windows CE...
- Page 122 LED using to upgrade the computer Ready-toWork Indicator no LED software build version Ready-to-Work Indicator, software, required for developing description regulatory approvals specifications removing battery battery specifications, physical and reset, performing environmental CK61 Mobile Computer User’s Manual With Windows CE...
- Page 123 Profile – persistant storage manager, Wizard overview WPA2 using an SD card configuring security using SmartSystems definition Foundation www.intermec.com/idl USB communications, configuring yellow LED, description using CK61 Mobile Computer User’s Manual With Windows CE...
- Page 124 Index CK61 Mobile Computer User’s Manual With Windows CE...
- Page 126 Worldwide Headquarters 6001 36th Avenue West Everett, Washington 98203 U.S.A. tel 425.348.2600 fax 425.355.9551 www.intermec.com CK61 Mobile Computer User’s Manual With Windows CE *935-021-001* P/N 935-021-001...
Need help?
Do you have a question about the CK61 and is the answer not in the manual?
Questions and answers