Intermec CK60 User Manual
Mobile computer with windows mobile
Hide thumbs
Also See for CK60:
- User manual (136 pages) ,
- Supplementary manual (8 pages) ,
- Instructions (2 pages)
Table of Contents
Advertisement
Quick Links
Advertisement
Table of Contents

Related Manuals for Intermec CK60


Summary of Contents for Intermec CK60
- Page 1 User's Manual CK60 Mobile Computer with Windows Mobile...
- Page 2 The information contained herein is provided solely for the purpose of allowing customers to operate and service Intermec-manufactured equipment and is not to be released, reproduced, or used for any other purpose without written permission of Intermec Technologies Corporation.
- Page 3 This page records changes to this document. The document was originally released as version 001. Version Number Date Description of Change 12/2006 Added more troubleshooting information, RoHS model numbers, refined the installation procedure, and updated 802.11 information to include the “A” functionality. CK60 Mobile Computer with Windows Mobile User’s Manual...
- Page 4 CK60 Mobile Computer with Windows Mobile User’s Manual...
-
Page 5: Table Of Contents
Introducing the CK60 Mobile Computer ........ - Page 6 Customizing Your CK60 ........
- Page 7 Using the SmartSystems Console ........84 CK60 Handheld Computer with Windows Mobile User’s Manual...
- Page 8 AutoCab............89 Customizing How Applications Load on the CK60......91 Configuring CK60 Parameters.
- Page 9 Bluetooth Audio ..........121 Configuring Bluetooth Using Intermec Settings ......124 Connecting with Bluetooth .
- Page 10 Contents CK60 Handheld Computer with Windows Mobile User’s Manual...
-
Page 11: Before You Begin
Service & Support. The Intermec Global Sales & Service page appears. From the Service & Support menu, move your pointer over Support, and then click Warranty. Disclaimer of warranties: The sample code included in this document is presented for reference only. -
Page 12: Who Should Read This Manual
This document provides you with information about the features of the CK60, and how to install, configure, operate, maintain, and troubleshoot. Before you work with the CK60, you should be familiar with your network and general networking terms, such as IP address. -
Page 13: Patent Information
2 Click Service & Support > Manuals. 3 In the Select a Product field, choose the product whose documentation you want to download. To order printed versions of the Intermec manuals, contact your local Intermec representative or distributor. Patent Information 4,882,476;... - Page 14 Before You Begin CK60 Mobile Computer with Windows Mobile User’s Manual...
-
Page 15: Using The Computer
Using the Computer This chapter introduces the CK60 Mobile Computer, developed by Intermec to enhance wireless connectivity needs and contains hardware and software configuration information to assist you in making the most out of your CK60. Note: Desktop icons and settings applet icons are shown to the left. Any place that Start is mentioned, tap the following Windows icon in the top, left corner of your CK60 desktop. -
Page 16: Introducing The Ck60 Mobile Computer
Chapter 1 — Using the Computer Introducing the CK60 Mobile Computer The Intermec CK60 Mobile Computer is an ergonomically designed mobile computer built on the Microsoftr Windowsr Mobile 5.0 operating system. It is a lightweight, easy-to-use, reliable computer that runs client/ server applications, terminal emulation applications, as well as browser- based applications. -
Page 17: Learning Software Build Versions
To recover the CK60 • Press and hold the power switch on the front of the CK60 for about 10 seconds. CK60 Mobile Computer with Windows Mobile User’s Manual... -
Page 18: Secondary Reset Method
All other data is preserved. To press the reset button 1 Press the power switch to suspend the CK60, then remove the battery pack from the back of the CK60. 2 With a stylus, press the reset button in the battery cavity in the back. -
Page 19: Scanning Bar Codes
The CK60 supports the scanning of 2D images. Plus, if you are using an integrated handle or a tethered scanner, the way you scan bar codes is different. - Page 20 Data Matrix 0.254 mm/ 10 mil 6.50 cm/ 2.56" 17.93 cm/ 7.06" 0.381 mm/ 15 mil 5.99 cm/ 2.36" 27.84 cm/ 10.96" 0.508 mm/ 20 mil 4.98 cm/ 1.96" 32.92 cm/ 12.96" CK60 Mobile Computer with Windows Mobile User’s Manual...
- Page 21 Data Matrix 7.5 mils 6" PDF417 6.6 mils 4" 2" 0" 2" 4" 6" 0.125mm / 5mils 0.25 mm / 10 mils 8" 100% contrast UPC EAN 10" 0.5 mm / 20 mils CK60 Mobile Computer with Windows Mobile User’s Manual...
- Page 22 11.84 cm/ 4.66" 0.125 mm/ 5 mil 8.28 cm/ 3.26" 14.48 cm/ 5.86" 0.33 mm/ 13 mil (EAN) 5.49 cm/ 2.16" 34.95 cm/ 13.76" 1.00 mm/ 40 mil 9.55 cm/ 3.86" 63.91 cm/ 25.16" CK60 Mobile Computer with Windows Mobile User’s Manual...
-
Page 23: Scanning With The 2D Area Imager
18.95 cm/ 7.46" Scanning with the 2D Area Imager The CK60 has the 2D area imager, which provides the ability to scan 2D bar code symbologies and supports omni-directional (360°) scanning where you can position the CK60 in any orientation to scan a bar code label. -
Page 24: Intermec Settings
Chapter 1 — Using the Computer 2 Point the scanner window at the bar code label and hold the CK60 steady a few inches from the label. 3 Press the Scan button on the keypad or pull the trigger on a handle and center the red aiming beam over the bar code label. -
Page 25: Supported Devices
Using the Battery The CK60 uses a 17.3 Watt-hour, 7.2V, replaceable Lithium-Ion (Li-ion) battery. You must fully charge the battery before you can use the CK60. When you change the battery, a backup battery (super capacitor) maintains your status, memory, and real-time clock for at least 10 minutes. -
Page 26: Changing And Installing The Battery
• Either insert the battery into the quad battery charger, or • place the CK60 with battery installed in a single dock, a single dock with modem, or a multidock. The battery charge time is four hours or less on any of these docks if the temperature is within battery charging range. -
Page 27: Maximizing Battery Life
2 Remove the battery and insert another fully charged battery as quickly as possible or you may lose state. Or, you can insert the CK60 into a powered quad battery charger. Stop using the CK60 for five minutes or longer. -
Page 28: Checking The Battery Status Using The Power Applet
1 Tap Start > Settings > the Personal tab > the Sounds & Notifications icon. 2 Tap the Sounds tab. 3 Check for which features the CK60 should enable sounds. 4 Tap ok to close. CK60 Mobile Computer with Windows Mobile User’s Manual... -
Page 29: Using The Intermec Settings Applet
Intermec web site at www.intermec.com/idl. Contact your Intermec representative for more information. To access the Intermec Settings applet • Tap Start > Settings > the System tab > the Intermec Settings icon. CK60 Mobile Computer with Windows Mobile User’s Manual... -
Page 30: Using The Keypad
Chapter 1 — Using the Computer Using the Keypad Your CK60 has one of the following keypad overlay options: 32-key large numeric keypad, or 58-key full alphanumeric keypad. 32-Key Large Numeric Keypad This keypad is for applications that enter mainly numeric data (0-9). It also lets you enter special characters by pressing color-coded key sequences. -
Page 31: Using The Color-Coded Keys
You press and release the first key, then press and release the second key to access the color-coded character or function printed above a key. Note that there are several hidden characters (such as < or >) on each CK60 keypad that require using the color-coded keys to access them. -
Page 32: Turning On The Keypad Backlight
Chapter 1 — Using the Computer Turning on the Keypad Backlight With the CK60, you can light up the keypad to work in low light settings. This backlight can stay lit until you disable it, or be set on a timer to dim or turn off after so many seconds of inactivity. -
Page 33: Using The Secure Digital Card
CK60. Use a Delkin Devices Secure Digital card to increase file storage and install software. Its card slot is on the top of the CK60 just above the scanner window. Do the following to insert a card in the CK60: You can corrupt your Secure Digital card if you do not follow these installation and removal procedures exactly. -
Page 34: Smartsystems Platform Bundles (Sspb)
This is for anyone who develops software for the CK60. Using the Speakers The high-volume speaker on the back of the CK60, is capable of variable volume levels. This speaker is capable of reproducing voice and WAV files, and is used primarily to convey status tones. There is a separate volume control in the toolbar at the top of the display. - Page 35 Settings applet. To adjust the volume control 1 Tap Start > Settings > the System tab > the Intermec Settings icon. 2 Tap (+) to expand Device Settings > Beeper > Volume. 3 Tap any of the options other than “Off ” to enable and adjust. To disable the speaker, tap the Off option.
-
Page 36: Using The Status Lights
5 Select File > Exit to close the applet. Using the Status Lights The status lights on the CK60 turn on to indicate the battery status or a successful bar code decode. The battery lights and screen icon work to alert you to your battery status. -
Page 37: Setting The Vibrate Mode Using Intermec Settings
You can also set the vibrate using the Intermec Settings applet. To set your CK60 to vibrate 1 Tap Start > Settings > the System tab > the Intermec Settings icon. 2 Tap (+) to expand Device Settings > Good Read > any of the Scanner options >... -
Page 38: Setting The Vibrate Mode Using Sounds & Notifications
3 Select the event from the Event drop-down list. 4 Check Vibrate. 5 Tap ok to close. Physical and Environmental Specifications Use this section to locate technical information about the CK60 and its available features and options. Physical Dimensions Length: 22.2 cm (8.75") - Page 39 Device Management SmartSystems™ Support: Centralized remote support capability; configures, updates, and maintains single devices or entire populations; real-time or batch, wired or wireless. Based on Wavelink Avalanche™ with Intermec value added utilities. CK60 Mobile Computer with Windows Mobile User’s Manual...
-
Page 40: Accessories For The Ck60
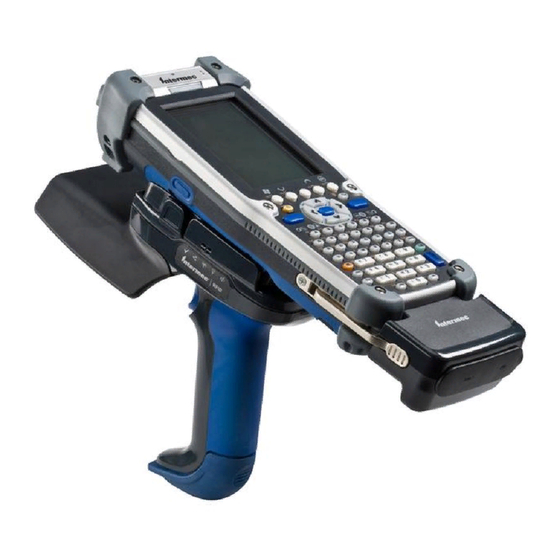
AC4 Quad Battery Charger Use the Quad Battery Charger to charge up to four AB11 Batteries without having to remove them from the CK60. You can insert up to four CK60s with batteries installed making it easy to remember to charge your batteries overnight. - Page 41 CK60 with or without a handle. You can only use this with a CK60 that has either the 1D linear imager or the 2D imager.
- Page 42 Chapter 1 — Using the Computer CK60 Mobile Computer with Windows Mobile User’s Manual...
-
Page 43: Windows Mobile
Pop-up menus give you quick and easy access to the most common actions. Below is a list of Windows Mobile components described in this chapter. Tap Start > Help, then select a topic on your CK60 to find additional information on Windows Mobile components. Windows Mobile 5.0 Components... -
Page 44: Software Builds
Where to Find Information This chapter describes your CK60 hardware, provides an overview of the programs on your CK60, and explains how to connect your CK60 to a desktop, a network, or the Internet. For instructions on setting up your CK60 and installing ActiveSync, see the Quick Start Guide. -
Page 45: Today Screen
Chapter 2 — Windows Mobile Today Screen When you turn on your CK60 for the first time each day (or after four hours of inactivity), you see the Today screen. You can also display it by tapping the Start flag at the top left of your display and then Today. On the Today screen, you can see important information for the day. -
Page 46: Navigation Bar And Command Bar
Internet. Send and receive e-mail messages. Keep track of your tasks. Play digital audio and video files that are stored on your CK60 or on a network. Navigation Bar and Command Bar The navigation bar is located at the top of the screen. It displays the active program and current time, switch to programs, and close screens. -
Page 47: Notifications
(which you can specify) is played, a light flashes on your CK60, or the CK60 vibrates. You can choose the notification types. -
Page 48: Typing With The Onscreen Keyboard
Tap to see your choices Input Panel icon When you use the input panel, your CK60 anticipates the word you are typing or writing and displays it above the input panel. When you tap the displayed word, it is inserted into your text at the insertion point. The more you use your CK60, the more it learns to anticipate. -
Page 49: Using Block Recognizer
Using Block Recognizer Character recognition software gives you a fast and easy method for entering information in any program on your CK60. Letters, numbers, and punctuation you write are translated into typed text. Tap the input panel arrow, then tap Block Recognizer. Write a letter in the box. -
Page 50: Using Letter Recognizer
Write the way you do on paper. You can edit and format what you have written and convert the information to text at a later time. Tap the Pen icon to switch to writing mode. This action displays CK60 Mobile Computer with Windows Mobile User’s Manual... -
Page 51: Selecting The Writing
• Tap Menu > Tools > Recognize. If a word is not recognized, it stays in its original form. To convert only certain words 1 Tap Pen to disable the writing function. 2 Tap twice over the word or phrase to highlight. CK60 Mobile Computer with Windows Mobile User’s Manual... - Page 52 Menu > Zoom. Recognition is not good under a 150% zoom. • Write the letters of a word closely and leave big gaps between words so that the CK60 can easily tell where words begin and end. CK60 Mobile Computer with Windows Mobile User’s Manual...
-
Page 53: Drawing On The Screen
Menu. To resize a drawing, make sure the Pen icon is not selected, and drag a selection handle. CK60 Mobile Computer with Windows Mobile User’s Manual... -
Page 54: Recording A Message
1 Tap Menu > View Recording Toolbar to add the recording toolbar to the bottom of the screen. 2 Hold the CK60’s microphone near your mouth or source of sound. 3 Tap the red circle to start your recording. 4 Tap the black box when finished. If you are recording in an open note, an icon appears in the note, like in the following sample. -
Page 55: Finding And Organizing Information
Finding and Organizing Information You can use the File Explorer to find files on the CK60, and organize these files into folders, and move files using the cut or copy-and-paste methods. Tap Start > Programs > the File Explorer icon. - Page 56 CK60 after factory installation are stored in RAM (Random Access Memory). You can install any program created for the CK60, as long as there is enough memory. A popular place to find software for your CK60 is on the Windows Mobile Web site (www.microsoft.com/windowsmobile/...
- Page 57 Install the appropriate software for your CK60 on your desktop before installing it on your CK60. 1 Determine your CK60 and processor type so that you know which version of the software to install. 2 Tap Start > Settings > the System tab > the About icon > the Version tab, then make a note of the information in Processor.
- Page 58 If you do not see the program listed, you can either use File Explorer on the CK60 to move the program to the Start Menu folder, or use ActiveSync on the desktop to create a shortcut to the program and place the shortcut in the Start Menu folder.
-
Page 59: Microsoft Activesync
1 Tap Start > Programs > the File Explorer icon. 2 Locate the program (tap the folder list, labeled My Documents by default, then My Device to see a list of all folders on the CK60). 3 Tap and hold the program and tap Cut on the pop-up menu. - Page 60 After your first synchronization, look at Calendar and Contacts on your CK60. Notice that information you have stored in Microsoft Outlook on your desktop was copied to your CK60, and you did not have to type a word. Disconnect the CK60 from your computer and you are ready to go! Once you have set up ActiveSync and completed the first synchronization process, you can initiate synchronization from your CK60.
-
Page 61: Microsoft Pocket Outlook
Messaging. Using ActiveSync, you can synchronize information in Microsoft Outlook or Microsoft Exchange on your desktop with your CK60. You can also synchronize this information directly with a Microsoft Exchange server. Each time you synchronize, ActiveSync compares the changes you made on your CK60 and desktop or server and updates both computers with the latest information. -
Page 62: Synchronizing Calendar
Use categories to group related tasks, contacts, and appointments. Then, use these groupings to quickly display only the information you want. For example, you can easily share your CK60 with another by assigning your appointments to a category with a special project’s name. You can then use this category to filter Calendar and only display appointments for that project. -
Page 63: What's An All Day Event
Calendar; they appear in banners at the top of the calendar. Note: You cannot modify or create all-day events with attendees on the CK60. If you create all day events with attendees on your desktop, use ActiveSync to copy such events to the CK60, then view them in Calendar. -
Page 64: Viewing Appointments
• When entering a time, you can type military and abbreviated time forms, such as 2300 (becomes 11:00 PM), 913pm (becomes 9:13 PM), 911 (becomes 9:11 AM), and 9p (becomes 9:00 PM). CK60 Mobile Computer with Windows Mobile User’s Manual... - Page 65 4 Change any appointment detail by tapping it and entering the new information. You cannot modify or create all day events with attendees on the CK60. If you create all-day events with attendees on your desktop, use ActiveSync to copy such events to the CK60. Then, view them in Calendar. For more information on copying files, see ActiveSync Help.
-
Page 66: Adding A Note To An Appointment
Sounds & Notifications icon. Adding a Note to an Appointment You can add written or typed notes and even recordings (if your CK60 supports recordings) to an appointment. This is a good place for maps, drawings, and other detailed information. - Page 67 2 Check the categories to which you want to assign the appointment. 3 To create a new category, tap New, enter the category name, then tap Done. The new category is automatically checked in the list. CK60 Mobile Computer with Windows Mobile User’s Manual...
-
Page 68: Sending A Meeting Request
7 Messaging automatically creates a meeting request and sends it to the attendees the next time you synchronize with your desktop. Textual notes entered in the Notes tab (excluding writing) are also sent. CK60 Mobile Computer with Windows Mobile User’s Manual... - Page 69 Deleting an Appointment 1 In the calendar, tap and hold the appointment. 2 On the pop-up menu, tap Delete Appointment. The next time you synchronize, the appointment is also deleted from the desktop. CK60 Mobile Computer with Windows Mobile User’s Manual...
-
Page 70: Changing Calendar Options
Selected icons are in black. Contacts: Tracking Friends and Colleagues To switch to Contacts on the CK60, tap Start > Contacts. Contacts maintains a list of your friends and colleagues so that you can easily find the information you are looking for, whether you are at home or on the road. -
Page 71: Synchronizing Contacts
Use Notes to include maps and directions Synchronizing Contacts Contacts stored on your CK60 can be synchronized with Outlook contacts stored on your desktop or with Mobile Information Server 2002 or later. New items entered in one location are copied to the other during synchronization. -
Page 72: Viewing Contacts
• Tap it in the contact list, then tap Menu > Edit. Tap Menu > Undo to undo any edits. When finished making changes, tap ok to return to the contact list. CK60 Mobile Computer with Windows Mobile User’s Manual... -
Page 73: Adding A Note To A Contact
Tap outside the box to close and return to details Adding a Note to a Contact You can add written or typed notes and even recordings (if your CK60 supports recordings) to a contact. Notes are handy for maps and drawings. -
Page 74: Finding A Contact
• To find a contact assigned to a category, tap Menu > Filter, then select the type of contact to display. To show all contacts again, tap Menu > Filter > All Contacts to clear all categories. CK60 Mobile Computer with Windows Mobile User’s Manual... -
Page 75: Tasks: Keeping A To Do List
Contacts list. Tasks: Keeping a To Do List To switch to Tasks on the CK60, tap Start > Tasks. Use Tasks to keep track of what you have to do. A variety of task information can display on the Today screen. If you use Microsoft Outlook on your desktop, you can synchronize tasks between your CK60 and desktop. - Page 76 To assign the task to a category, tap Categories and check categories from the list. In the task list, you can filter tasks by category. When finished, tap ok to return to the list. CK60 Mobile Computer with Windows Mobile User’s Manual...
-
Page 77: Notes: Capturing Thoughts And Ideas
Using the stylus, write directly on the screen. Drawing Using the stylus, draw directly on the screen. Typing Using the input panel, enter typed text into the CK60. Do this by tapping keys on the onscreen keyboard or by using handwriting recognition software. Recording Create a stand-alone recording or embed a recording into a note. -
Page 78: Messaging: Sending And Receiving E-Mail Messages
2 When you select Files, the “\My Documents” folder for the CK60 is created on your desktop. 3 All .pwi files placed in the “\My Documents” folder on your CK60 and all .doc files placed in the “\My Documents” folder for the CK60 on your desktop are synchronized. -
Page 79: Synchronizing E-Mail Messages
Exchange or Outlook and then sent from those programs. • The messages on the two computers are linked. When you delete a message on your CK60, it is deleted from your desktop the next time you synchronize. • Messages in subfolders in other e-mail folders in Outlook are synchronized only if they were selected for synchronization in ActiveSync. -
Page 80: Connecting To A Mail Server
• If you use POP3 and you move e-mail messages to a folder you created, the link is broken between the messages on the CK60 and their copies on the mail server. The next time you connect, the mail server sees that the messages are missing from the CK60 Inbox and deletes them from the server. -
Page 81: Composing And Sending Messages
CK60 Inbox folder, messages in the CK60 Outbox folder are sent, and messages that were deleted from the server are removed from the CK60 Inbox. Tap a message in the message list to open it. -
Page 82: Companion Programs
Word Mobile works with Microsoft Word on your desktop to give you access to copies of your documents. You can create new documents on your CK60, or you can copy documents from your desktop to your CK60. Synchronize documents between your desktop and your CK60 to have up-to-date content in both locations. -
Page 83: Typing Mode
Word (.doc), Rich Text Format (.rtf ), and Plain Text (.txt). Word Mobile contains a list of files stored on your CK60. Tap a file in the list to open it. To delete, make copies of, and send files, tap and hold a file in the list, then, select the action on the pop-up menu. -
Page 84: Writing Mode
2 When you select Files, the “\My Documents” folder for the CK60 is created on your desktop. 3 Place all files you want to synchronize with the CK60 in this folder. Password-protected files cannot be synchronized. All Word Mobile files stored in “\My Documents” and its subfolders are synchronized with the desktop. -
Page 85: Excel Mobile
Templates folder. Excel Mobile contains a list of the files stored on your CK60. Tap a file in the list to open it. To delete, make copies of, and send files, tap and hold a file in the list, then select an action from the pop-up menu. -
Page 86: Tips For Working In Excel Mobile
For future use, this is added to your Start menu in the Recent Programs area, via Start > PowerPoint Mobile. With PowerPoint Mobile on your CK60, you can open and view slide show presentations created on your PC. Whether the presentation is... - Page 87 5 Tap Show Options > the Orientation tab, then select an orientation. 6 Tap Default to view the presentation in the orientation that best fits the size and shape of the screen. CK60 Mobile Computer with Windows Mobile User’s Manual...
-
Page 88: Windows Media
Windows Media, tap Start > Help, then select a topic. Use Windows Media Player on your desktop to copy digital audio and video files to your CK60. You can play Windows Media and MP3 files on your Windows Mobile. -
Page 89: Mobile Favorites
If using Microsoft Internet Explorer 5.0 or later on your desktop, you can download mobile favorites to your CK60. Synchronizing mobile favorites downloads Web content to your CK60 so that you can view pages while you are disconnected from your ISP and desktop. -
Page 90: Using Internet Explorer Mobile
Click OK for the desktop Internet Explorer to download the latest version of the page to your CK60. 4 Connect your CK60 to your desktop. If synchronization does not start automatically, in ActiveSync on your desktop, click Sync. - Page 91 Tap to add or remove a folder or link 3 The page that was downloaded the last time you synchronized with your desktop opens. If the page is not on your CK60, the favorite is dimmed. Synchronize with your desktop again to download the page to your CK60, or connect to the Internet to view the page.
- Page 92 Chapter 2 — Windows Mobile CK60 Mobile Computer with Windows Mobile User’s Manual...
-
Page 93: Configuring The Computer
Configuring the Computer There are multiple ways to get an application to your CK60 Mobile Computer; like there are ways to package the application for delivery. Note: Desktop icons and settings applet icons are shown to the left. Any place that Start is mentioned, tap the following Windows icon in the top, left corner of your CK60 desktop. -
Page 94: Developing Applications For The Computer
Consider any of the following when choosing a location into which to store your application: • In the basic CK60, there are two built-in storage options: the Object Store and the Flash File Store. The Object Store is a Disk on Chip (DOC) Flash that looks like a disk. -
Page 95: Installing Applications On The Computer
• Use the AUTOCAB method to extract all files when a cold-boot or clean-boot is performed on the CK60. This method is in the IDL via the Intermec web site. Installing Applications on the Computer... -
Page 96: Using Microsoft Activesync
Mobile” for an URL from which to download the latest application. 1 Connect your CK60 to your desktop using a USB or serial cable. You may have to detach, then reattach the cable to “wake” the connection. 2 Wait for a “Connected” message to appear in the Microsoft ActiveSync application to signal a connection to the CK60. -
Page 97: Using A Storage Card
Chapter 3 — Configuring the Computer Using a Storage Card If you have a Secure Digital storage card for your CK60, this is the best place for you to installation applications. 1 If you are using a Secure Digital card reader, suspend the CK60, remove its Secure Digital storage card, and place it in the reader. -
Page 98: Using The Smartsystems Console
Device Management page. To use SmartSystems Console to install an application 1 Download your application file from the Intermec web site and unzip it on your desktop. 2 From the SmartSystems Console, drag-and-drop the application onto each CK60 discovered in your network. -
Page 99: Preshell
• Disk on Chip (DOC) - may map as Object Store • Flash File Store - may map as Object Store. This is the default location for the AutoExec program in Intermec systems. Intermec system applica- tions are started from this folder. The ordering of mounted volumes overrides this feature. -
Page 100: Autoexec
AutoExec is reserved for Intermec use to configure Intermec-specific applications. It launches the CAB installer, AutoCab (AutoCab.exe), to install platform cab files to the system, such as Intermec Data Collection. When the AutoExec.exe process completes, Run Autorun then checks for the existence of AutoRun (AutoRun.exe) and executes this program from... - Page 101 ; Change the default EXEC wait time to 90 seconds. EXECWAIT 90 ; Suspend processing any commands for 10 seconds. WAIT 10 ; Suspend processing any commands until event called MyEventName is signaled. WAITFOR "MyEventName" CK60 Handheld Computer with Windows Mobile User’s Manual...
-
Page 102: Autorun
AutoRun.dat. Note: If you need to add steps at boot time, add them to AutoUser.dat, not to AutoRun.dat. AutoRun.dat is provided by Intermec and is subject to change. AutoUser.dat is the designated place for the end user to add steps to the boot time process. -
Page 103: Autoreg
“\CabFiles” directory relative to the current location of Autocab, unless the location is overridden by command line arguments. AutoCab can run as a stand-alone program to install a CAB file or a directory of CAB files. CK60 Handheld Computer with Windows Mobile User’s Manual... - Page 104 Set to 0 to prevent showing any installation progress interfaces. Also prevents user from canceling installation. Set to 1 to show normal installation. Set to 2 to show Intermec installation progress interface (user can see what is installing but cannot cancel it). Default is 1 (show normal).
-
Page 105: Customizing How Applications Load On The Ck60
Customizing How Applications Load on the CK60 If you have several processes that you need running in a specific order as the CK60 turns on, you can use the AutoRun system to customize the way applications load. For compatibility with other Intermec computers, you can place a copy of AutoRun.exe in the same folder as your AutoRun.dat... -
Page 106: Configuring Ck60 Parameters
You can access the Intermec Settings applet while running any application. To access the Intermec Settings applet • From the CK60 desktop, select Start > Settings > the System tab > the Intermec Settings icon. For detailed information on most of the commands available in the Intermec Settings applet, see the Intermec Computer Command Reference Manual (P/N 073529) via the Intermec web site. -
Page 107: Synchronizing The Computer System Time With A Time Server
The default reference time server is the USNO (tock.usno.navy.mil). To synchronize the time on your CK60 with this time server, you must have a valid connection to the Internet. You can also synchronize the CK60 system time with a corporate network server within your firewall that is SNTP-capable. -
Page 108: Configuring The Computer In A Udp Plus Network
4, which is a very high beeper volume. Configuring the Computer in a UDP Plus Network You can use the host computer to configure a CK60 in your wireless or Ethernet network. To send and receive configuration data or files, you need to write a host application that can communicate with an Intermec Application Server (formerly Gateway or DCS 30X). -
Page 109: Reprogramming The Ck60 Keypad
To set up the application, prepare and write a host application that can communicate with the Intermec Application Server and send transactions to and receive transactions from the CK60 in this format. For an example of the host application transaction, see... -
Page 110: Registry Entries
These are the registry entries (which are arrays of 128 WORDs) you need to modify to remap your keypad. Programming the Keypad Do the following to change a single key on the CK60 keypad. You can change more than one key, if desired. 1 Identify your keypad Read the four bytes of text stored in the registry entry. -
Page 111: Alphanumeric Scan Codes
5 Signal the keypad to reload Open the “ITC_KEYBOARD_CHANGE” named event and call SetEvent() to signal the keypad to reload. Alphanumeric Scan Codes Green key Orange key Numeric Scan Codes Green key Orange key CK60 Handheld Computer with Windows Mobile User’s Manual... -
Page 112: Configuring The Sf51 Cordless Scanner
Manual, available from the Intermec web site at www.intermec.com, for more information about each enabled option. Enabling Bluetooth Bluetooth is required for the SF51. On the CK60, use the Bluetooth applet to enable Bluetooth communications before you configure the SF51. To enable Bluetooth 1 Select Start >... -
Page 113: Creating An Sf51 Connection Label
To initiate a connection from the SF51, use EasySet to create an SF51 connection label with the CK60 Bluetooth address. The device address is listed in the Bluetooth applet via the Devices tab on your CK60, like the following example:... -
Page 114: Viewing Sf51 Information From Your Computer
SF51 data gets wedged through the keyboard interface. Viewing SF51 Information from Your Computer Note that in the CK60, the Intermec Settings applet can display up to seven separate SF51 connections. The following illustration shows such connections under the Data Collection option. -
Page 115: Using Configuration Parameters
SF51 is reconnected. Using Configuration Parameters A configuration parameter changes the way the CK60 operates, such as configuring a parameter to have the CK60 emit a very loud beep in a noisy environment. Use any of these methods to execute configuration parameters:... - Page 116 Chapter 3 — Configuring the Computer CK60 Handheld Computer with Windows Mobile User’s Manual...
-
Page 117: Maintaining The Computer
Maintaining the Computer Use this chapter to upgrade the operating system, solve problems you may encounter, and perform routine maintenance on your CK60 Mobile Computer: Note: Desktop icons and applet icons are shown to the left. Any place that Start is mentioned, tap the following Windows icon in the top, left corner of your CK60 desktop. -
Page 118: Upgrading The Operating System On Your Computer
There are two ways to upgrade the CK60: • You can use a Secure Digital card to upgrade the CK60. For help, see below. • You can use the SmartSystems Console to upgrade the CK60. For help, “Using the SmartSystems Console to Upgrade the Computer”... -
Page 119: Using A Secure Digital Card To Upgrade The Computer
6 Close the link and download the .zip file to your desktop or laptop computer. 7 If you are using a Secure Digital card to upgrade the CK60, see below. If you are using the SmartSystems Console to upgrade the CK60, see “Using the SmartSystems Console to Upgrade the Computer”... -
Page 120: Upgrading The Operating System
You may download files that upgrade only the operating system. 1 Extract the upgrade files to a Secure Digital card. 2 Remove the battery pack from the CK60 and place the CK60 in a dock connected to external power. For help, see “Changing and Installing the... -
Page 121: Using The Smartsystems Console To Upgrade The Computer
After this, remove the files from the Secure Digital card. When the CK60 finishes booting, you may use it. You have reset the CK60 to its default configuration. You need to set the date and time and to set its network communications parameters to reestablish communications with the other devices in the wireless network. -
Page 122: Troubleshooting Your Computer
• If the battery status LED is a steady amber for more than 12 hours, then replace the battery pack. The CK60 appears to locked up and you cannot enter data. • Press and hold the to turn off the CK60, then press the power switch again to turn on the CK60. - Page 123 You may have locked a modifier key on the keypad. Check type uppercase or lowercase letters. the CK60 status bar to see if it contains an icon with a locked symbol. Press the necessary key sequence to unlock the key. See “Using the Keypad”...
-
Page 124: Problems With Wireless Connectivity
Problems with Wireless Connectivity Problem Solution When you turn on the CK60 after it was suspended for a Host may have deactivated or lost current terminal while (10-15 minutes or longer), it can no longer send or emulation session. In a TCP/IP direct connect network, receive messages over the network. -
Page 125: Problems While Scanning Bar Codes
If you are having problems sending or receiving data through the integrated serial port on the CK60, check these possible problems: • Make sure the CK60 is connected to the PC, host computer, or RS-232 serial device using the appropriate cable adapter and null modem cable. -
Page 126: Cleaning The Scanner Window And Computer Screen
Press the power switch to turn off the CK60. Dip a clean towel or rag in the ammonia solution and wring out the excess. Wipe off the scanner window and screen. -
Page 127: Network Support
Network Support This chapter includes information about the different networks supported by the CK60 Mobile Computer, and ways to configure and manage those networks. Note that the CK60 automatically installs the appropriate software for radio or phone use when the unit is turned on. -
Page 128: Personal Area Networks
Information about other Bluetooth software is in the Bluetooth Resource Kit and the Bluetooth Resource Kit User's Guide via the Intermec Developer Library (IDL), which is available as a download from the Intermec web via www.intermec.com/idl. See your Intermec representative for information. - Page 129 Devices tab. 2 Tap Add new device to scan for remote Bluetooth devices. 3 When the CK60 is finished scanning, any newly found devices appear in the box. Tap Refresh to do additional searches. CK60 Mobile Computer with Windows Mobile User’s Manual...
- Page 130 4 Select a device to which to connect, then click Next. 5 Enter a passkey to establish a secure connection, then tap Next. 6 Tap Yes if prompted to let the other device connect with your CK60. 7 Select what services you want from this remote device, then click Finish to return to the Devices tab.
- Page 131 2 Select the device to add. 3 Click Next. 4 Select a port from the Port drop-down list. 5 Check Secure Connection. 6 Click Finish to return to the COM Ports page. CK60 Mobile Computer with Windows Mobile User’s Manual...
-
Page 132: Wireless Printing
Bluetooth management items not relevant to this task. Wireless Printing has a concept of the “current wireless printer.” This printer is the one to which the CK60 makes a connection when the wireless printing COM port is opened. If there is no current wireless printer, there is no wireless printing COM port. - Page 133 If your preferred printer is in the list, select to highlight the printer, then tap OK. 5 If you do not see your preferred device, make sure this device is powered on and set to search, then tap Search again. CK60 Mobile Computer with Windows Mobile User’s Manual...
- Page 134 When you set your printer manually, your device may not receive the printer name. Therefore, “-unknown-” can display under Device Name unless you enter the correct value in to the registry in some other way. CK60 Mobile Computer with Windows Mobile User’s Manual...
-
Page 135: Bluetooth Audio
Use this to find, activate, and connect to Bluetooth audio devices, such as Bluetooth headsets. You can select a desired audio mode or control the audio volume and amplification for the connected Bluetooth headset (if the connected headset has these capabilities). CK60 Mobile Computer with Windows Mobile User’s Manual... - Page 136 1 Tap a Bluetooth audio device from the list of found devices. 2 When a pop-up menu appears and if the device selected was not authenticated during the search, select Authenticate to continue. CK60 Mobile Computer with Windows Mobile User’s Manual...
- Page 137 See the user manual for the Bluetooth device for information on what button to press. 5 To establish an audio connection from the CK60 to the activated device with either a “headset” or “hands-free” profile, tap the device name, then select Connect from the menu.
-
Page 138: Configuring Bluetooth Using Intermec Settings
Settings applet. To configure Bluetooth using the Intermec Settings applet 1 Select Start > Settings > the System tab > the Intermec Settings icon. 2 Tap (+) to expand Communications. 3 Tap (+) to expand Bluetooth to configure its settings. - Page 139 Chapter 5 — Network Support To establish a Bluetooth connection between your CK60 and your mobile phone 1 Tap Start > Settings > the Connections tab > the Connections icon. 2 Tap Add a new modem connection. 3 Enter a name for the connection, such as “Nokia.”...
- Page 140 1 When the search for devices is complete, select your Bluetooth device, then tap Next to continue. 2 Enter the correct Passkey on both the Bluetooth device and the CK60, then tap Next to continue. 3 Enter a name for the device if needed, or select what services to use, then tap Finish.
- Page 141 Finish. Now you can establish a connection to your network via the Internet Explorer application. To disconnect, tap the Connectivity icon in the top menu bar, then select Disconnect. CK60 Mobile Computer with Windows Mobile User’s Manual...
-
Page 142: Local Area Networks
Note: The 802.11a radio is an extra cost option not supported on all CK60s. Contact your Intermec representative for more information. The CK60 is a versatile mobile computer that you can add to your wired or wireless data collection network. You can connect your CK60 to your network using any of these communications: •... -
Page 143: Configuring The Network Parameters For A Tcp/Ip Network
• Select the desired band, tap ok, then perform a warm-boot for the new setting to take effect. Your CK60 may be capable of using both bands or just the B/G band. The BandEnable applet can enable or mask usage of any band the CK60 is capable of using. -
Page 144: Configuring Ethernet Communications
Configuring Ethernet Communications You can use the CK60 directly in an Ethernet network if you have ordered the Ethernet option on your CK60 and you insert it into a dock. The communications dock as an Ethernet connector makes it possible for the CK60 to communicate with your Ethernet network. -
Page 145: Wide Area Networks
Internet or intranet, send and receive e-mail, and synchronize information using ActiveSync. Connections are made via wireless networks. Your CK60 has two groups of connection settings: My ISP and My Work Network. Use My ISP settings to connect to the Internet. Use My Work Network settings to connect to any private network. -
Page 146: Connecting To An Internet Service Provider
2 In My ISP, tap Add a new modem connection. 3 Enter a name for the connection, such as “ISP Connection.” If using an external modem connected to your CK60 with a cable, select “Hayes Compatible on COM1” from the Select a modem list drop- down, then tap Next to continue. - Page 147 6 Tap the Advanced tab from the Connections screen, then tap Dialing Rules to specify your current location. These settings apply to all connections. 7 Tap Use dialing rules, tap OK, then tap Edit to continue. CK60 Mobile Computer with Windows Mobile User’s Manual...
-
Page 148: Connecting To Work
Connecting to Work If you have access to a network at work, you can send e-mail messages, view intranet pages, synchronize your CK60, and possibly access the Internet. Create a modem connection via a RAS (Remote Access Server) account. Before you can create this modem connection, your network administrator needs to set up a RAS account for you. - Page 149 If your modem type does not appear, try reinserting your CK60 into your modem dock. • If using an external modem connected to your CK60 with a cable, select “Hayes Compatible on COM1.” • If using any type of external modem, select the modem by name. If a listing does not exist for your external modem, select “Hayes...
- Page 150 4 Enter the user name, password, and domain (if provided by an ISP or your network administrator). If a domain name was not provided, try the connection without entering a domain name. Tap Finish. CK60 Mobile Computer with Windows Mobile User’s Manual...
-
Page 151: Creating A Vpn Server Connection To Work
5 Next to VPN type, select the type of authentication to use with your device: “IPSec/L2TP” or “PPTP.” If you are not sure which option to choose, ask your network administrator. Tap Next to continue. CK60 Mobile Computer with Windows Mobile User’s Manual... -
Page 152: Ending A Connection
Disconnect. • When connected via cable or cradle, detach your CK60. • When connected via Infrared, move the CK60 away from the other computer or device. • When connected via a wireless network, switch off the connection. -
Page 153: Iconnect
CK60, the iConnect application restores your network interfaces to what they were before the warm-boot was performed. See the Developer’s Support area of the Intermec web site for the latest information on network adapters for your unit. To access the iConnect menu, tap the iConnect icon (shown to the left) above your command bar for the following menu: •... -
Page 154: No Networking
“Configuring Microsoft Security” on page 159 for information. To configure wireless 802.11b communications on the CK60 • Select Tools > Wireless Settings from the iConnect menu to access the Profile Wizard for the 802.11a/b/g radio module. To view information about the Wireless 802.11b communications •... -
Page 155: Testing Your Network Connections
Tap Try Again to check the status after you make changes to the connection. Testing Your Network Connections Use the Ping Test feature to test the connection of your CK60 against your network. To test your CK60 connection against your network •... -
Page 156: Choosing Between Microsoft And Funk Security
Chapter 5 — Network Support Choosing Between Microsoft and Funk Security Before you can implement a security solution on the CK60, you need to choose between Microsoft and Funk security: • By default, Funk security is enabled. It provides everything you get with Microsoft security plus the addition of Cisco Compatible Extensions features. - Page 157 Select User Password, type a user password, then press Enter. c For Validate Server Certificate, select “Yes,” then press Enter. Note: You must have the date on the CK60 set correctly when you enable Validate Server Certificate. d You must enter a User Name and Subject Name. You can also enter a Server 1 Common name or Server 2 Common name if you want to increase your level of security.
- Page 158 Select User Name, type your user name, then press Enter. b Select User Password, type a user password, then press Enter. 5 Select File > Save Settings, then select File > Exit to close the Intermec Settings applet. To configure WPA-PSK security with Funk Security Use this procedure to set WPA-PSK security on your CK60 with Funk security.
- Page 159 Chapter 5 — Network Support 6 Select File > Save Settings, then select File > Exit to close the Intermec Settings applet. Using 802.1x Authentication 802.1x authentication provides centralized user authentication using an authentication server, authenticators (access points), and supplicants. These...
- Page 160 Press Enter. c Select User Password, then type a user password. d Press Enter. 6 Select File > Save Settings, then select File > Exit to close the Intermec Settings applet. Using Static WEP Security The CK60 uses the Wired Equivalent Privacy (WEP) protocol to add security to your wireless network based on the 802.11b/g standard.
- Page 161 Edit Select Profile, make the changes needed for this profile (starting on the next page), then tap ok to return to the Profiles page. Enable Microsoft's Check this to enable Microsoft's Wireless Zero Config application and disable the Intermec Wireless Zero Config software solution for 802.11b/g, including configuration via the Wireless Network applet.
- Page 162 Security These are available from the 8021x Security drop-down list: • None • PEAP (page 150) 152) • TLS (page • TTLS (page 153) • LEAP (page 156) • EAP-FAST (page 157) CK60 Mobile Computer with Windows Mobile User’s Manual...
- Page 163 Key # field. Set a 5-byte value for 64- bit WEP or a 13-byte value for 128-bit WEP. Precede hex keys with 0x and make sure the keys use 5 or 13 hex pairs. CK60 Mobile Computer with Windows Mobile User’s Manual...
- Page 164 EAP-TTLS. Microsoft and Cisco both support this protocol. Use “PEAP” to configure the use of PEAP as an authentication protocol and to select “Open,” “WPA,” “WPA2,” or “Network EAP” as an association mode. CK60 Mobile Computer with Windows Mobile User’s Manual...
- Page 165 2 Check Validate Server Certificate to verify the identity of the authentication server based on its certificate when using PEAP. 3 Tap Root CA, select a root certificate, then OK to close. CK60 Mobile Computer with Windows Mobile User’s Manual...
- Page 166 1 Set 8021x Security as “TLS, then choose any of the following: • Set Association to “Open.” • Set Association to “WPA.” • Set Association to “WPA2” and Encryption to “TKIP” or “AES.” CK60 Mobile Computer with Windows Mobile User’s Manual...
- Page 167 • Set Association to “Network EAP” and Encryption to either “WEP” or “CKIP.” 2 Enter your unique Subject Name and User Name of the corresponding certificate installed on your CK60 to use this protocol. 3 Tap Get Certificates to obtain or import server certificates (page 155).
- Page 168 Windows NT Domain or Active Directory. MS-CHAP; Authenticates against a Windows Domain Controller and other MS-CHAP-V2 non-Windows user databases. PAP/Token Use with token cards. The password value entered is never cached. Card Extensible Authentication Protocol CK60 Mobile Computer with Windows Mobile User’s Manual...
- Page 169 They contain a public key and the entity name that owns the key. Each certificate is issued by a certificate authority. Use this page to import a certificate onto the CK60. To select a root certificate 1 Tap the <<<...
- Page 170 • Set Association to “WPA2” and Encryption to “TKIP” or “AES.” • Set Association to “Network EAP” and Encryption to either “WEP” or “CKIP.” (default configuration) 2 Enter your unique Username to use this protocol. CK60 Mobile Computer with Windows Mobile User’s Manual...
- Page 171 CK60. 4 Tap Additional Settings to set options for PAC management and assign an anonymous EAP-FAST name. CK60 Mobile Computer with Windows Mobile User’s Manual...
- Page 172 1 Tap PAC Manager to view the PAC files currently installed on your CK60. Tap ok to return to the Additional Settings screen. 2 If you already have a PAC on your CK60, clear (uncheck) Allow Automatic PAC provisioning to avoid receiving more PACs from the server.
-
Page 173: Configuring Microsoft Security
Check this box to detect and report client behavior suspected of being rogue APs. Once a rouge AP is detected, your CK60 no longer associates with that AP until you perform a clean boot. -
Page 174: Loading Certificates
Loading Certificates If you choose to use Transport Layer Security (TLS) with WPA or 802.1x security, you need to have a unique client certificate on the CK60 and a trusted root certificate authority (CA) certificate. If you choose to use PEAP, you need to load a root CA certificate. -
Page 175: Wireless Network
WEP keys also authenticate the CK60 to the access point - unless the CK60 can prove it knows the WEP key, it is not allowed onto the network. WEP keys are only needed if they are expected by your clients. - Page 176 802.11b/g uses this protocol to perform authentication. This is not necessarily an Protocol) authentication mechanism, but is a common framework for transporting actual authentication protocols. Intermec provides a number of EAP protocols for you to choose the best for your network. EAP-FAST (Flexible A publicly accessible IEEE 802.1X EAP type developed by Cisco Systems.
-
Page 177: Smartsystems™ Foundation
Help in the console to access the manual. To view SmartSystems information • Tap Start > Settings > the System tab > the Intermec Settings icon, then tap to expand the SmartSystems Information option. CK60 Mobile Computer with Windows Mobile User’s Manual... - Page 178 Chapter 5 — Network Support CK60 Mobile Computer with Windows Mobile User’s Manual...
-
Page 179: Index
Index CK60 Mobile Computer with Windows Mobile User’s Manual... - Page 180 CK60, beeper volume, 15, devices, intermec settings enabling for SF51 scanner, beeper volume, Bluetooth Audio applet Bluetooth, Bluetooth, funk security, Browsing the Internet SF51 scanner information, Internet Explorer Mobile, smartsystems, 15, CK60 Mobile Computer with Windows Mobile User’s Manual...
- Page 181 Configuring the SF51 scanner, Connecting to an ISP, EAP (Extensible Authentication Protocol), work, EAP-FAST, Connecting to a mail server profile security information, via Messaging, WEP encryption, Connections EAP-TLS, EAP-Tunneled TLS, ending, CK60 Mobile Computer with Windows Mobile User’s Manual...
- Page 182 VPN server connection, Intermec settings applet Windows Mobile, smartsystems, 15, Green shift plane, Internal scanners reading distances EA10, Headsets EA11, connecting, EL10, discovering, EL11, EV10, iConnect, Internet explorer disabling network communications, Windows Mobile, CK60 Mobile Computer with Windows Mobile User’s Manual...
- Page 183 Numeric scan codes, contacts, via Messaging Object Store composing/sending, packaging an application, Messaging Operating the CK60 accounts, troubleshooting, composing/sending messages, Orange shift plane, connecting to a mail server, CK60 Mobile Computer with Windows Mobile User’s Manual...
- Page 184 AutoCfg, SF51 scanner information, AutoInterval, power, AutoIP/DHCP, battery status, DhcpRetryDialogue, sounds & notifications, 14, Removing programs wireless printing, Windows Mobile, 42, Setup Assistant Reprogramming the keypad, configuring with, Reset methods CK60 Mobile Computer with Windows Mobile User’s Manual...
- Page 185 Time server, connecting to an ISP, Tips for working WEP (Wired Equivalent Privacy) encryption, Excel Mobile, WEP encryption TKIP (Temporal Key Integrity Protocol), EAP-FAST security method, TLS security Wi-Fi Protected Access, 142, Microsoft, CK60 Mobile Computer with Windows Mobile User’s Manual...
- Page 186 WPA security status icons, Funk, support URLs, WPA2 (Wi-Fi Protected Access), Tasks, Writing mode Today screen, Word Mobile, where to find information, Writing on the screen Windows Media Player, Word Mobile, CK60 Mobile Computer with Windows Mobile User’s Manual...
- Page 188 Worldwide Headquarters 6001 36th Avenue West Everett, Washington 98203 U.S.A. tel 425.348.2600 fax 425.355.9551 www.intermec.com CK60 Mobile Computer with Windows Mobile User's Manual *935-000-002* P/N 935-000-002...
Need help?
Do you have a question about the CK60 and is the answer not in the manual?
Questions and answers