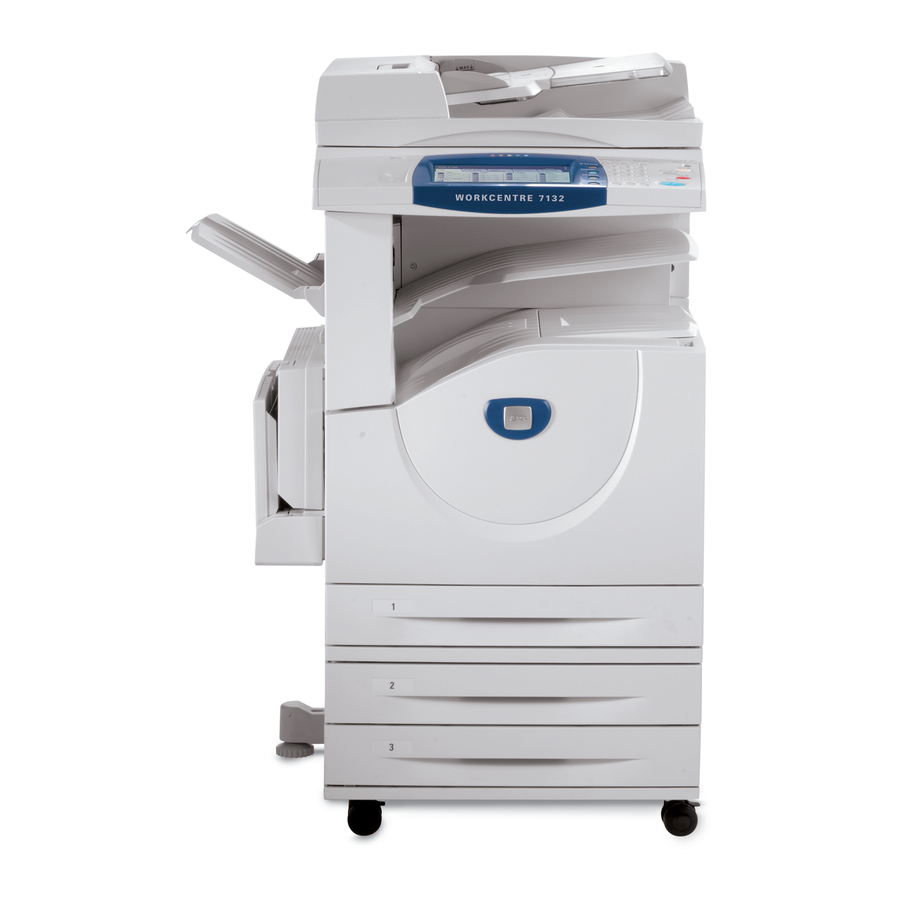
Xerox WorkCentre 7132 System Administration Manual
Print copy scan fax email
Hide thumbs
Also See for WorkCentre 7132:
- Service documentation (1726 pages) ,
- User manual (468 pages) ,
- Quick network setup manual (73 pages)
Table of Contents
Advertisement
Quick Links
Advertisement
Table of Contents
Troubleshooting

Related Manuals for Xerox WorkCentre 7132


Summary of Contents for Xerox WorkCentre 7132
- Page 1 System Administration Guide ME3613E4-2...
- Page 2 Xerox Corporation. Product names and trademarks of other companies are hereby acknowledged. The information in this document is correct at the time of publication. Xerox reserves the right at any time to change the information without notice. Changes and technical updates will be added in subsequent...
-
Page 3: Table Of Contents
Ethernet Port...35 Resident Fonts ...37 PCL Resident Fonts...37 Symbol Set ...38 Windows TCP/IP ...41 Quick Network Setup (DHCP) ...41 Prerequisites for Quick Network Setup Using TCP/IP ...41 Configuring an IP Address via DHCP ...41 Xerox WorkCentre 7132 System Administration Guide... - Page 4 E-mail ... 59 HTTP ...62 UPnP ...62 SSDP...63 LDAP ...63 Web DAV... 64 Bonjour ... 64 NetWare...67 Information Checklist... 67 NetWare Environments ... 68 NetWare Installation...69 Installation Procedure...69 Network Communication Setup ...69 NetWare Setup ... 71 Xerox WorkCentre 7132 System Administration Guide...
- Page 5 Workstation Setup ...95 Test Print ...95 Microsoft Networking...97 Information Checklist...97 SMB Environments...98 SMB Installation ...99 Installation Procedure ...99 Network Communication Setup ...99 Workstation Setup ...101 Test Print ...101 TCP/IP (LPD or Port9100) ...103 Information Checklist...103 Xerox WorkCentre 7132 System Administration Guide...
- Page 6 E-mail Environments ... 119 E-mail Installation... 119 Installation Procedure...119 Network Communication Setup ...120 Test Mail ...122 13 Scanning Services ...125 Scanning Overview ... 125 Scanning with the machine... 125 Scanning Process... 126 Scan to E-mail Setup ...126 Xerox WorkCentre 7132 System Administration Guide...
- Page 7 Information Checklist ...137 iFax Environments...138 iFax Installation ...138 Installation Procedure ...138 Network Communication Setup ...139 Test iFax ...142 15 Problem Solving ...143 Problem Solving Procedures...143 SMB...144 Troubleshooting ...144 Restrictions ...146 NetWare ...148 UNIX...152 Troubleshooting ...152 TCP/IP...154 Xerox WorkCentre 7132 System Administration Guide...
- Page 8 Xerox Standard Accounting ... 169 Overview...169 Installation Checklist... 169 Enable Xerox Standard Accounting (from Internet Services) ... 170 Create a Group Account...170 Create a User Account and Set Usage Limits ...170 Maximum Usage Limits and Resetting Individual Usage Limits ...171 Using XSA at the machine...
-
Page 9: Before Using The Machine
This System Administration Guide provides detailed information, technical specifications and procedures for using the integral features of the machine. Xerox Welcome Center If you need assistance during or after product installation, visit the Xerox website for on-line solutions and support. http://www.xerox.com/support If you require further assistance, contact our experts at the Xerox Welcome Center. -
Page 10: Languages Displayed On The Touch Screen
Guide. In this guide, you will find that some terms are used interchangeably: • Paper is synonymous with media. • Document is synonymous with original. • Xerox WorkCentre 7132 is synonymous with the machine. Key Operator/System Administrator Key Operator describes the person who is responsible for hardware maintenance. -
Page 11: Italic Typeface
Cautions are statements that suggest the possibility of mechanical damage as a result of an action. For example: CAUTION: Do not connect the network cable to the machine until instructed to do so. Xerox WorkCentre 7132 System Administration Guide LEF Orientation SEF Orientation Paper feed direction Paper feed direction... -
Page 12: Related Information Sources
Related Information Sources The following additional sources of information are available for the machine. • Xerox WorkCentre 7132 Quick Network Setup Guide on the PCL Print Driver CD- • Xerox WorkCentre 7132 Quick Use Guide • Xerox WorkCentre 7132 User Guide •... -
Page 13: Product Overview
Machine Components The following diagrams show the standard and optional components of the machine. Configuration may vary depending on the model. Duplex Module Tray 5 (Bypass Tray) Xerox WorkCentre 7132 System Administration Guide Side Tray Tray 1 Tray 2 Tray 3... -
Page 14: Telephone Socket
Allows you to staple or sort copies automatically. The Office Finisher Tray can hold 1,000 sheets of 20 lb bond or 80 g/m Ethernet USB2.0 paper in Letter/A4 size or smaller. Xerox WorkCentre 7132 System Administration Guide Office Finisher Tray Office Finisher (Optional) - Page 15 NOTE: Do not place paper with a length less than 140mm in the Bypass Tray, as this may cause paper jams and potentially damage the inside of the machine. Xerox WorkCentre 7132 System Administration Guide Staple Cartridge paper in Letter or A4 size, long edge feed. Tray 3 can hold 1,200 sheets paper in Letter or A4 size.
-
Page 16: Services And Features
You can retrieve the stored electronic documents by accessing the file server from a PC. For more information, refer to Network Scanning in the Scan/E-mail chapter, and Job Templates in the CentreWare Internet Services chapter of the User Guide. Xerox WorkCentre 7132 System Administration Guide... -
Page 17: Power On/Off
Press the power switch to the <I> position. NOTE: If the machine does not start up, check that the RESET button on the back of the machine is in the reset position (depressed). Xerox WorkCentre 7132 System Administration Guide Power On/Off... -
Page 18: Powering Off
The machine is compatible with SMB, LPD, EtherTalk, NetWare, IPP, HTTP, DHCP, SMTP, POP, DDNS, RARP, Bonjour and Port9100. It supports an Ethernet connector as a standard feature. Xerox WorkCentre 7132 System Administration Guide USB 1.1 Port Ethernet Port USB 2.0 Port... -
Page 19: Modes
Use this button to access all the services available on the machine. NOTE: The arrangement of service icons displayed on the screen can be changed by the Key Operator. Press the <All Services> button on the control panel. Xerox WorkCentre 7132 System Administration Guide <Machine Status> button Modes <All Services> button <Features>... -
Page 20: Features
Press the <Job Status> button on the control panel. Select the [Current and Pending Jobs] tab. Use the scroll buttons to switch between screens. Select a job to cancel or promote as required. Xerox WorkCentre 7132 System Administration Guide <Job Status> button... -
Page 21: Completed Jobs
Select the [Completed Jobs] tab. Use the scroll buttons to switch between screens. Document/Job Type Identifies each job by job number and type. Status Displays the status of the job, such as completed, cancelled, shutdown. Xerox WorkCentre 7132 System Administration Guide Modes... -
Page 22: Stored Documents
Select the [Stored Documents] tab. Select the required option. Secure Print This feature allows you to print or delete password-protected stored documents. A secure print job requires a User ID and a password registered in the machine. Xerox WorkCentre 7132 System Administration Guide... -
Page 23: Sample Print
• Go to – Specifies the Sample Print number to be displayed on the screen. Enter a number within the range of 001 to 200 using the scroll buttons or the numeric keypad. Xerox WorkCentre 7132 System Administration Guide Modes... - Page 24 • Stored Date – Displays the date the document was stored. • Pages – Displays the number of printed, scanned, sent, or received pages. • Refresh – Refreshes the displayed information. • Select All – Selects all the documents in the [Public Mailbox]. Xerox WorkCentre 7132 System Administration Guide...
-
Page 25: Machine Status
For more information on each feature, refer to the following. Machine Status – page 26 Billing Meter/Print Report – page 28 Supplies – page 31 Faults – page 31 Xerox WorkCentre 7132 System Administration Guide Modes... - Page 26 • Machine Configuration – Displays the [Machine Configuration] screen. You can view the status of the machine components. The list displays the hardware components and the options supported on the machine. <Machine Status> button Xerox WorkCentre 7132 System Administration Guide...
- Page 27 • HP-GL/2 Emulation – Allows you to set parameter values for HP-GL/2 emulation to print documents. It also allows you to store, retrieve, and delete up to 20 emulation settings. – Retrieve Programming – Retrieves emulation settings and makes them active. Xerox WorkCentre 7132 System Administration Guide Modes...
- Page 28 This feature allows you to view the total number of prints made on the machine using the [Current Meter Reading]. You can also view the serial number. Select [Billing Meter] on the [Billing Meter/Print Report] screen. Xerox WorkCentre 7132 System Administration Guide...
- Page 29 – PCL Settings List – PCL Form List – PDF Settings List – TIFF Settings List – TIFF Logical Printer List – PS Logical Printer List – HP-GL/2 Settings List Xerox WorkCentre 7132 System Administration Guide Modes...
- Page 30 – Job Counter Report – Lists the job counter reports for each feature. • Auditron Administration – Displays the [Auditron Administration] screen. Select a report option and press the <Start> button on the control panel to print the report. When Auditron is [Off]: Xerox WorkCentre 7132 System Administration Guide...
- Page 31 This feature allows you to print a report of recent errors, the date and time of the errors, the error codes, and the status of each error. The status is either active or cleared. Xerox WorkCentre 7132 System Administration Guide Modes...
-
Page 32: System Controls
Indicates whether the machine is in power saver mode. Also cancels the current power saver mode setting. Resets to the default settings and displays the first screen for the current pathway. Temporarily interrupts a job for programming a priority job. Xerox WorkCentre 7132 System Administration Guide Function... -
Page 33: System Settings
• Print Mode Settings • Scan Mode Settings • Fax Mode Settings Xerox WorkCentre 7132 System Administration Guide Function Suspends or cancels a job depending on the job type. When multiple jobs are being processed, all the jobs will be suspended or cancelled. -
Page 34: Printing The System Settings List
NOTE: You are advised to change the default password. For further assistance, contact your Xerox Welcome Center. Follow these steps to change the default settings: Press the <Log In/Out> button on the control panel. Xerox WorkCentre 7132 System Administration Guide <Log In/Out> button... -
Page 35: Ethernet Port
If you need to change the speed setting of the Ethernet port, perform the following steps: Select [System Settings] on the [System Administration Menu] screen. NOTE: For more information on how to display the [System Settings] screen, refer to Changing the Settings on page 34. Xerox WorkCentre 7132 System Administration Guide System Settings... - Page 36 Sets the transmission speed to 100 Mbps (Full Duplex). 100BASE-TX (Half-Duplex) Sets the transmission speed to 100 Mbps (Half-Duplex). 10BASE-T (Full Duplex) Sets the transmission speed to 10 Mbps (Full Duplex). 10BASE-T (Half-Duplex) Sets the transmission speed to 10 Mbps (Half-Duplex). Xerox WorkCentre 7132 System Administration Guide...
-
Page 37: Resident Fonts
CG Omega CG Omega Italic CG Omega Bold CG Omega Bold Italic Garamond Antiqua Garamond Kursiv Garamond Halbfett Garamond Kursiv Halbfett Xerox WorkCentre 7132 System Administration Guide Description Value Resident Fonts Description Times New Bold Times New Bold Italic Symbol... -
Page 38: Symbol Set
Short Display ROMAN-8 ISO L1 ISO L2 ISO L5 ISO L6 PC-8 PC-8 DN Xerox WorkCentre 7132 System Administration Guide Value Description ITC Bookman Light Italic ITC Bookman Demi ITC Bookman Demi Italic Helvetica Nscroll Helvetica Nscroll Oblique Helvetica Nscroll Bold... - Page 39 Code 579L 18540 Xerox WorkCentre 7132 System Administration Guide Value Short Display PC-775 PC-850 PC-852 PC-1004 PC-8 TK WIN L1 WIN L2 WIN L5 DESKTOP PS TEXT MC TEXT MS PUB MATH-8 PS MATH PI FONT LEGAL ISO-4 ISO-6 ISO-11...
- Page 40 2 Product Overview Xerox WorkCentre 7132 System Administration Guide...
-
Page 41: Windows Tcp/Ip
Confirm that the Ethernet cable is plugged into the multifunction machine and into an operational Ethernet port on the network. NOTE: The Ethernet cable is an RJ45 type and is not supplied by Xerox. Configuring an IP Address via DHCP On startup, the multifunction device defaults to DHCP to obtain its network configurations. -
Page 42: Quick Network Setup (Static Ip)
Select [TCP/IP - IP Address], and then [Change Settings]. Use the keypad on the screen to enter the IP Address for the machine in the format “XXX.XXX.XXX.XXX”. Enter relevant values (0 to 255) into the highlighted Xerox WorkCentre 7132 System Administration Guide... - Page 43 Refer to the CentreWare Internet Services chapter of the User Guide. When you have finished establishing TCP/IP, select [Close] from the [Protocol Settings] screen. Xerox WorkCentre 7132 System Administration Guide Quick Network Setup (Static IP)
- Page 44 3 Windows TCP/IP Xerox WorkCentre 7132 System Administration Guide...
-
Page 45: Centreware Internet Services
Test the machine to make sure that it is installed fully and functioning correctly. If problems are encountered during the installation of the machine, refer to the Problem Solving chapter for assistance. Xerox WorkCentre 7132 System Administration Guide Item Customer Customer... -
Page 46: Centreware Internet Services Environments
Netscape 7.1 Navigator Internet Explorer 6.0 SP1 Netscape 7.1 Navigator Opera 7.2.3 Internet Explorer 6.0 SP1 Netscape 7.1 Navigator Internet Explorer 5.1 Netscape 7.02 Navigator Netscape 7.1 Navigator Safari Xerox WorkCentre 7132 System Administration Guide Browsers Activating two or more browsers... -
Page 47: Centreware Internet Services Installation
NOTE: For more information about how to display the [System Settings] screen, refer to the Setups chapter of the User Guide. Select [Network Settings]. Select [Protocol Settings]. Select [TCP/IP - Get IP Address], then [Change Settings]. Xerox WorkCentre 7132 System Administration Guide CentreWare Internet Services Installation... -
Page 48: Test Access
If the Port number is set, append that to the internet address as follows. In this example, the port number is 80. http://vvv.xxx.yyy.zzz:80 Verify that the home page of CentreWare Internet Services is displayed. The CentreWare Internet Services installation process is now completed. Xerox WorkCentre 7132 System Administration Guide... -
Page 49: Selecting Transport Protocols
At the CentreWare Internet Services home page for the machine, select the [Properties] tab. In the [Properties] frame, select [Port Status]. Select the required transport protocol. NetWare: IPX/SPX, TCP/IP SMB: NetBEUI, TCP/IP SNMP: UDP, IPX Select [Apply]. Xerox WorkCentre 7132 System Administration Guide Selecting Transport Protocols... -
Page 50: Using Centreware Internet Services To Configure Settings On The Machine
At the CentreWare Internet Services home page for the machine, select the [Properties] tab. In the [Properties] frame, select the plus symbol [+] to the left of the [Proxy Server Settings] folder. Set up the following option to be displayed in the frame. Xerox WorkCentre 7132 System Administration Guide... -
Page 51: Ethernet
At the CentreWare Internet Services home page for the machine, select the [Properties] tab. In the [Properties] frame, select the plus symbol [+] to the left of the [Port Settings] folder. Select [Ethernet]. Xerox WorkCentre 7132 System Administration Guide Using CentreWare Internet Services to Configure Settings on the Machine... -
Page 52: Usb
NOTE: The default user ID is "11111" and the default password is "x-admin". When the reboot message appears, select [Reboot Machine]. NOTE: For more information about the contents of items, refer to the CentreWare Internet Services chapter of the User Guide. Xerox WorkCentre 7132 System Administration Guide... -
Page 53: Ethertalk
• TBCP Filter (Only available when the optional PostScript Kit is installed.) • Unicode Support – Allows you to specify whether to enable Unicode support in the host name and workgroup name during SMB transmission. Xerox WorkCentre 7132 System Administration Guide Using CentreWare Internet Services to Configure Settings on the Machine... -
Page 54: Netware
• Tree Name – Enter the tree name. • Context Name – Enter the context name of the Print Server. Transport Protocol (IPX/SPX): • Frame Type – Select the frame type (Auto, Ethernet II, Ethernet 802.3, Ethernet 802.2, Ethernet SNAP). Xerox WorkCentre 7132 System Administration Guide... -
Page 55: Tcp/Ip
• DNS Server Address 1 to 3 – Enter the DNS address 1, DNS address 2 and DNS address 3 in the xxx.xxx.xxx.xxx format. • DNS Domain Name – Enter the DNS domain name. Xerox WorkCentre 7132 System Administration Guide Using CentreWare Internet Services to Configure Settings on the Machine... -
Page 56: Lpd
Internet Services, or after the machine is switched off and on. At the CentreWare Internet Services home page for the machine, select the [Properties] tab. In the [Properties] frame, select the plus symbol [+] to the left of the [Protocol Settings] folder. Select [LPD]. Xerox WorkCentre 7132 System Administration Guide... -
Page 57: Snmp
- MAC address (IPX) - Socket number (IPX) - IP address (UDP) - Port number (UDP) - Trap version - Community String (Trap Notification) Xerox WorkCentre 7132 System Administration Guide Using CentreWare Internet Services to Configure Settings on the Machine... -
Page 58: Ipp
NOTE: The default user ID is "11111" and the default password is "x-admin". When the reboot message appears, select [Reboot Machine]. NOTE: For more information about the contents of items, refer to the CentreWare Internet Services chapter of the User Guide. Xerox WorkCentre 7132 System Administration Guide... -
Page 59: Port9100
In the [Properties] frame, select the plus symbol [+] to the left of the [Protocol Settings] folder. Select [E-mail]. Set up the following options to be displayed in the frame. Xerox WorkCentre 7132 System Administration Guide Using CentreWare Internet Services to Configure Settings on the Machine... - Page 60 • Device Information – Select whether to send machine name, serial number, IP address and other machine information. Signature: • Default – Specify a default signature to e-mail. Xerox WorkCentre 7132 System Administration Guide...
- Page 61 When the reboot message appears, select [Reboot Machine]. NOTE: For more information about the contents of items, refer to the CentreWare Internet Services chapter of the User Guide. Xerox WorkCentre 7132 System Administration Guide Using CentreWare Internet Services to Configure Settings on the Machine...
-
Page 62: Http
• Port Number – Specify the UPnP port number. Select [Apply] to reflect the new setting. Enter the user ID and password, then select [OK]. NOTE: The default user ID is "11111" and the default password is "x-admin". Xerox WorkCentre 7132 System Administration Guide... -
Page 63: Ssdp
At the CentreWare Internet Services home page for the machine, select the [Properties] tab. In the [Properties] frame, select the plus symbol [+] to the left of the [Protocol Settings] folder. Select [LDAP]. Xerox WorkCentre 7132 System Administration Guide Using CentreWare Internet Services to Configure Settings on the Machine... -
Page 64: Web Dav
Internet Services, or after the machine is switched off and on. At the CentreWare Internet Services home page for the machine, select the [Properties] tab. In the [Properties] frame, select the plus symbol [+] to the left of the [Protocol Settings] folder. Xerox WorkCentre 7132 System Administration Guide... - Page 65 When the reboot message appears, select [Reboot Machine]. NOTE: For more information about the contents of items, refer to the CentreWare Internet Services chapter of the User Guide. Xerox WorkCentre 7132 System Administration Guide Using CentreWare Internet Services to Configure Settings on the Machine...
- Page 66 4 CentreWare Internet Services Xerox WorkCentre 7132 System Administration Guide...
-
Page 67: Netware
If problems arise during the machine installation, refer to the Problem Solving chapter for assistance. CAUTION: Do not connect the network cable to the machine until instructed to do so. Xerox WorkCentre 7132 System Administration Guide Item Customer Customer Customer... -
Page 68: Netware Environments
If the data link indicator light of the port does not light up, match the IPX/ SPX setting of the frame type of the machine, to the frame type of the file server. Xerox WorkCentre 7132 System Administration Guide... -
Page 69: Netware Installation
NOTE: Some of the configuration options for this protocol are only available from the CentreWare Internet Services. Refer to the CentreWare Internet Services chapter of the User Guide. First, enable the NetWare port. Connect the machine to the network. Xerox WorkCentre 7132 System Administration Guide NetWare Installation... - Page 70 NOTE: If you do not wish to set the Gateway Address, enter “0.0.0.0”. Select [TCP/IP - IP Filter], then [Change Settings]. Select [On] to filter access to the machine. NOTE: If you do not wish to use the IP filter feature, select [Off]. Xerox WorkCentre 7132 System Administration Guide...
-
Page 71: Netware Setup
Repeat the test for all workstations that will be sending jobs to the machine. The installation process is now complete. If the test print fails, refer to the Problem Solving chapter for assistance. Xerox WorkCentre 7132 System Administration Guide NetWare Installation... - Page 72 5 NetWare Xerox WorkCentre 7132 System Administration Guide...
-
Page 73: Unix Tcp/Ip
Make sure that the Subnet Mask is set correctly. Make sure that the Host Name is set correctly. Test the copy and fax features of the machine, to make sure that they are installed fully and functioning correctly. Xerox WorkCentre 7132 System Administration Guide Item Customer Customer... -
Page 74: Unix Tcp/Ip Environments
The machine needs to be set up and configured for TCP/IP. Workstation Setup The workstation OS needs to be configured for the machine. Test Print A print job should be submitted to make sure that the machine has been installed and configured correctly. Xerox WorkCentre 7132 System Administration Guide... -
Page 75: Network Communication Setup
NOTE: If you do not wish to set the Gateway Address, enter “0.0.0.0”. Select [TCP/IP - IP Filter], then [Change Settings]. Select [On] to filter access to the machine. NOTE: If you do not wish to use the IP filter feature, select [Off]. Xerox WorkCentre 7132 System Administration Guide UNIX TCP/IP Installation... -
Page 76: Workstation Setup
Auto detection mode TIFF direct print TIFF (%n: Logical Printer Number 1 to 10 which were registered through CentreWare Internet Services.) PostScript (%n: Logical Printer Number 1 to 10 which were registered through CentreWare Internet Services.) Xerox WorkCentre 7132 System Administration Guide... - Page 77 Verify connectivity to the machine, by using a UNIX command such as ping, as shown in the following example: ping PrinterName PrinterName is alive NOTE: The remote queue name must be set to lp to spool jobs to the machine. Xerox WorkCentre 7132 System Administration Guide UNIX TCP/IP Installation...
- Page 78 The remote printer name defaults to lp, the default printer. 4) mx#0 is the indicator that there is no limit on the document size. 5) sd= is the path of the queue for the machine. 6) lf= is the error log file name. Xerox WorkCentre 7132 System Administration Guide...
- Page 79 Follow the steps below to use the command window to manually enter command strings. Open a command window on the desktop. From the command prompt (#), enter the information below. Remember that UNIX commands are case-sensitive. Xerox WorkCentre 7132 System Administration Guide UNIX TCP/IP Installation...
- Page 80 NOTE: The Printer Name is the name of the print queue being created. The Remote System Name is the PrinterName for the machine from the etc/hosts file. The Remote Printer Name must be set to lp to spool jobs to the machine. Xerox WorkCentre 7132 System Administration Guide...
-
Page 81: Test Print
Print (lp) The lp command is used for printing. Command format lp [-d printer name] [-n number of copies] File name Command options The following command options are available. Xerox WorkCentre 7132 System Administration Guide Printing... - Page 82 This option is only valid in the spool mode. Deletes all the print data belonging to the user issuing the command, from the specified printer. Deletes all the print data from the specified printer. specified printer. Xerox WorkCentre 7132 System Administration Guide...
-
Page 83: Sunos
This option is only valid in the spool mode. • -C parameter To print from the machine using the PostScript language, use the -C option to specify the form of output. Xerox WorkCentre 7132 System Administration Guide Printing... - Page 84 • User name is only valid when you log-in as a superuser. When this option is taken, all the print data you specify will be deleted. This option is invalid in the non-spool mode. Xerox WorkCentre 7132 System Administration Guide...
-
Page 85: Printer Status
To use more than one argument at the same time, separate them by commas and enclose all the arguments with “ ”. E.g. %lpstat -u “user1,user2,user3” • -o [printer name] This option displays the print data for the specified printer. Xerox WorkCentre 7132 System Administration Guide Printer Status... -
Page 86: Sunos
• -l This option displays information about the workstation which is sending the print instruction in long format. • User name This option displays information about print data received from a specified user. Xerox WorkCentre 7132 System Administration Guide... -
Page 87: C Option
When selecting a paper tray, specify either a paper size or a tray. If the paper size is specified, the machine automatically searches and selects the tray. The following parameters can be specified. Parameter INTRAY1/intray1 INTRAY2/intray2 Xerox WorkCentre 7132 System Administration Guide Description Selects Tray 1. Selects Tray 2. -C Option... - Page 88 11.0 inches) paper loaded. Selects the tray which has legal size (216 × 356 mm/8.5 × 14.0 inches) paper loaded. Description Delivers prints to the face-down tray. Delivers prints to a finisher tray. (%n: bin number 1) Xerox WorkCentre 7132 System Administration Guide...
- Page 89 Specifying paper size and double-sided printing Select a paper size and a binding option. The following parameters can be specified: Parameter A3D/a3d Xerox WorkCentre 7132 System Administration Guide Description Selects plain paper. Selects thick paper 1. Selects thick paper 2.
- Page 90 Double-sided printing on B5 (182 × 257 mm/7.2 × 10.1 inches) paper and short-edge binding Sorts prints electronically. Selects color for color mode and quality priority for print mode. Xerox WorkCentre 7132 System Administration Guide Description Description Description...
- Page 91 %lpr -PfxPS -C,DUP,A4 file1 Xerox WorkCentre 7132 System Administration Guide Selects color for color mode and speed priority for print mode. Selects monochrome for color mode and quality priority for print mode.
- Page 92 6 UNIX TCP/IP NOTE: If the parameter string of the -C option exceeds 64 characters, the operation may not function correctly. Xerox WorkCentre 7132 System Administration Guide...
-
Page 93: Ethertalk
If problems are encountered during the machine installation, refer to the Problem Solving chapter for assistance. CAUTION: Do not connect the network cable to the machine until instructed to do so. Xerox WorkCentre 7132 System Administration Guide Item Customer Customer... -
Page 94: Ethertalk Environments
NOTE: Keep the SNMP port enabled while you use the machine on the TCP/IP network. NOTE: Some of the configuration options for this protocol are only available from the CentreWare Internet Services. Refer to the CentreWare Internet Services chapter of the User Guide. Xerox WorkCentre 7132 System Administration Guide... -
Page 95: Workstation Setup
Repeat the test for all workstations that will be sending jobs to the machine. The installation process is now complete. If the test print fails, refer to the Problem Solving chapter for assistance. Xerox WorkCentre 7132 System Administration Guide EtherTalk Installation... - Page 96 7 EtherTalk Xerox WorkCentre 7132 System Administration Guide...
-
Page 97: Microsoft Networking
If problems are encountered during the installation, refer to the Problem Solving chapter for assistance. CAUTION: Do not connect the network cable to the machine until instructed to do so. Xerox WorkCentre 7132 System Administration Guide Item Customer Customer Customer... -
Page 98: Smb Environments
It is recommended that this protocol is only used in small networks where existing legacy clients require it. Windows 95 Windows 98 Windows Me Windows NT 4.0 Windows 2000 Windows XP Windows Server 2003 Xerox WorkCentre 7132 System Administration Guide Protocol NetBEUI TCP/IP NetBEUI TCP/IP NetBEUI TCP/IP TCP/IP... -
Page 99: Smb Installation
Connect the machine to the network. Display the [System Settings] screen. NOTE: For more information about how to display the [System Settings] screen, refer to the Setups chapter of the User Guide. Xerox WorkCentre 7132 System Administration Guide SMB Installation... - Page 100 NOTE: Use CentreWare Internet Services to register the IP addresses which are not allowed to access the machine. Refer to the CentreWare Internet Services chapter of the User Guide. When you have finished establishing TCP/IP, select [Close] from the [Protocol Settings] screen. Xerox WorkCentre 7132 System Administration Guide...
-
Page 101: Workstation Setup
Repeat the test for all workstations that will be sending jobs to the machine. The installation process is now complete. If the test print fails, refer to the Problem Solving chapter for assistance. Xerox WorkCentre 7132 System Administration Guide SMB Installation... - Page 102 8 Microsoft Networking Xerox WorkCentre 7132 System Administration Guide...
-
Page 103: Tcp/Ip (Lpd Or Port9100)
If problems are encountered during machine setup, refer to the Problem Solving chapter for assistance. CAUTION: Do not connect the network cable to the machine until instructed to do so. Xerox WorkCentre 7132 System Administration Guide Item Customer Customer Customer... -
Page 104: Tcp/Ip (Lpd Or Port9100) Environments
There are three stages to enable printing to the machine through LPD or Port9100. Windows 95 Windows 98 Windows Me Windows NT 4.0 Windows 2000 Windows XP Windows Server 2003 Mac OS X 10.x Windows 2000 Windows XP Windows Server 2003 Xerox WorkCentre 7132 System Administration Guide Protocol TCP/IP TCP/IP... -
Page 105: Network Communication Setup
Port9100, select [Port9100] and [Change Settings]. If you are using the LPD port, select [Port Status] and [Change Settings]. If you are using Port9100, select [Port Status] and [Change Settings]. Select [Enabled] and [Save]. Xerox WorkCentre 7132 System Administration Guide TCP/IP (LPD or Port9100) Installation... -
Page 106: Workstation Setup
Install print drivers on each client workstation that will be sending print jobs to the machine, and map to the machine as a printer. Refer to the HTML document in PCL Print Driver CD-ROM or document provided with the optional PostScript Kit. Xerox WorkCentre 7132 System Administration Guide... -
Page 107: Test Print
Repeat the test for all workstations that will be sending jobs to the machine. The installation process is now complete. If the test print fails, refer to the Problem Solving chapter for assistance. Xerox WorkCentre 7132 System Administration Guide TCP/IP (LPD or Port9100) Installation... - Page 108 9 TCP/IP (LPD or Port9100) Xerox WorkCentre 7132 System Administration Guide...
-
Page 109: 10 Usb Port
If problems are encountered during the installation of the machine, refer to the Problem Solving chapter for assistance. CAUTION: Do not connect the USB cable to the machine until instructed to do Xerox WorkCentre 7132 System Administration Guide Item Customer... -
Page 110: Usb Port Environment
Workstation Setup This requires the workstation to be configured to print to the machine. Test Print A print job should be submitted to make sure that the machine has been installed and configured correctly. Xerox WorkCentre 7132 System Administration Guide... -
Page 111: Usb Port Communication Setup
PostScript Kit, and install the print drivers for the machine on the workstation that will be sending jobs to the machine. Connect the USB cable to the machine and the workstation. Xerox WorkCentre 7132 System Administration Guide USB Port Installation... -
Page 112: Test Print
Print the document on the machine and verify that it prints correctly. Repeat the test for all workstations that will be sending jobs to the machine. The installation process is now complete. If the test print fails, refer to the Problem Solving chapter for assistance. Xerox WorkCentre 7132 System Administration Guide... -
Page 113: Ipp (Internet Printing Protocol)
If problems are encountered during the installation of the machine, refer to the Problem Solving chapter for assistance. CAUTION: Do not connect the network cable to the machine until instructed to do so. Xerox WorkCentre 7132 System Administration Guide Item Customer Customer... -
Page 114: Ipp Environment
This requires the workstation to be configured to print to the machine. Test Print A print job should be submitted to make sure that the machine has been installed and configured correctly. Windows 2000 Windows XP Windows Server 2003 Windows Me Xerox WorkCentre 7132 System Administration Guide Protocol TCP/IP... -
Page 115: Network Communication Setup
(WINS) server. If you selected [Manual] in step 5, then complete steps 6 to 11 to enter the [Protocol Settings]. Otherwise, complete step 14. Select [TCP/IP - IP Address], then [Change Settings]. Xerox WorkCentre 7132 System Administration Guide IPP Installation... -
Page 116: Workstation Setup
Repeat the test for all workstations that will be sending jobs to the machine. The installation process is now complete. If the test print fails, refer to the Problem Solving chapter for assistance. Xerox WorkCentre 7132 System Administration Guide... -
Page 117: 12 E-Mail
E-mail reception requests or print requests. You can also configure so that an E-mail is sent notifying the completion of a print job which has been requested from your computer. Xerox WorkCentre 7132 System Administration Guide... -
Page 118: Information Checklist
NOTE: You must have an Internet Service Provider if you wish to acquire an E-mail account through ISP. If problems are encountered during machine setup, refer to the Problem Solving chapter of the User Guide. Item Xerox WorkCentre 7132 System Administration Guide Customer Customer Customer Customer... -
Page 119: E-Mail Environments
• Receive E-mail • Send E-mail • Mail Notice Service Then, set the IP address. Finally, set the other items required for the E-mail feature. Xerox WorkCentre 7132 System Administration Guide Item ITU-T T.37, T.30, F.185 and E.164 RFC2304, RFC2305 RFC1891, 1894... -
Page 120: Network Communication Setup
NOTE: Use the DHCP server together with the Windows Internet Name Server (WINS) server. If you selected [Manual] in step 5, then complete steps 6 to 11 to enter the [Protocol Settings]. Otherwise, complete step 14. Xerox WorkCentre 7132 System Administration Guide... - Page 121 E-mail via POP3 – POP3 Server Setup – POP3 Server IP Address – POP3 Server Name – If server name is used, then DNS needs to be configured properly via CentreWare Internet Services. Xerox WorkCentre 7132 System Administration Guide E-mail Installation...
-
Page 122: Test Mail
Select the required features for the job. Enter the E-mail address of the recipient. Press the <Start> button. The document will be scanned and converted to the format that you specified. Then it will be sent as an E-mail attachment. Xerox WorkCentre 7132 System Administration Guide... - Page 123 Use your E-mail software to create an E-mail and then attach a TIFF or PDF document. Enter the E-mail address of the receiving machine. Send the E-mail. After the machine has received the E-mail, printing starts automatically. Xerox WorkCentre 7132 System Administration Guide E-mail Installation...
- Page 124 12 E-mail Xerox WorkCentre 7132 System Administration Guide...
-
Page 125: 13 Scanning Services
TCP/IP protocol. To retrieve a scanned document file, it must be transferred to a file server. NOTE: ASCII characters are used for the user name, password, and all job template fields when assigned using Scanning Services. Xerox WorkCentre 7132 System Administration Guide... -
Page 126: Scanning Process
IP address. Required* Required Optional A Local Address Book can be created to store e-mail addresses. LDAP Host Name Displays only e-mail addresses on the corporate (LDAP) internal address book. Xerox WorkCentre 7132 System Administration Guide... -
Page 127: Procedure For Scan To E-Mail Setup
• If LDAP is enabled, you can select the [Address Book], and then select the destination. Press the <Start> button on the machine. Verify that the recipient(s) received the e-mail with the document attached. Xerox WorkCentre 7132 System Administration Guide Scan to E-mail Setup... -
Page 128: Scan To E-Mail Troubleshooting
If so, login to the Microsoft Outlook Express account, and then try sending the e-mail. If this is successful, you can set Outlook Express to check e-mail every 5 or 10 minutes for the multifunction machine’s e-mail account. Xerox WorkCentre 7132 System Administration Guide... -
Page 129: Scan To Mailbox Setup
4) Enter the appropriate information. 5) Click on [Apply]. NOTE: A password will be required when accessing a mailbox, if mailboxes are password-protected on creation. From the touch screen, select [Scan to Mailbox]. Xerox WorkCentre 7132 System Administration Guide Install Comments Requirement Required For additional information, refer to the User Guide. -
Page 130: Procedure For Scan To Mailbox Setup Through The Control Panel
HTML document in PCL Print Driver CD-ROM. For more information how to retrieve the document, refer to the CentreWare Internet Services chapter of the User Guide. Xerox WorkCentre 7132 System Administration Guide... -
Page 131: Network Scanning Setup
Load a sample document into the document feeder. Press the green <Start> button on the machine. The job is sent to the server using FTP or SMB protocol as defined within the template. Xerox WorkCentre 7132 System Administration Guide Install Comments... -
Page 132: Remote Authentication Setup (If Required)
When using Scan to FTP/SMB, Kerberos authentication has the following effect on the feature: Selects [Scan to FTP/SMB]. Item Xerox WorkCentre 7132 System Administration Guide Customer Customer... - Page 133 Select [Primary Server Port Number] and enter the port number. The default is Port 88. Repeat steps 6 to 9 for the Secondary Server settings. Select [Realm Name] and enter the realm name. This is the fully qualified domain which Kerberos server supports. Xerox WorkCentre 7132 System Administration Guide Network Scanning Setup...
-
Page 134: Workstation Setup
This is the IP address of the FTP server. Optional This is required if the FTP server requires login/password authentication. Most FTP servers require a login/password. Optional If Remote Authentication is required, then Kerberos needs to be enabled. Xerox WorkCentre 7132 System Administration Guide... -
Page 135: Procedure For Scan To Ftp
Data to Set Up Scan to SMB Server IP address Server Shared Name Repository – directory path, where the document will be stored on the SMB server Xerox WorkCentre 7132 System Administration Guide Install Comments Requirement Required This is the IP address of the SMB server. -
Page 136: Procedure For Scan To Smb Setup
Kerberos server authenticates user access. Install Comments Requirement Optional This is required, if the SMB server requires login/password authentication. Most SMB servers require a login/password. Optional If Remote Authentication is required, then Kerberos needs to be enabled. Xerox WorkCentre 7132 System Administration Guide... -
Page 137: 14 Internet Fax
Subnet mask. Set up the mail server and E-mail accounts. Test the machine to make sure that it is installed fully and functioning correctly. Install the Internet Fax Kit. Xerox WorkCentre 7132 System Administration Guide Item Customer Customer Customer... -
Page 138: Ifax Environments
Finally, set the other items required for the iFax feature. Item ITU-T T.37, T.30, F.185 and E.164 Sending: RFC2301 (TIFFprofileS/F/J) and 600 x 600 Receiving: RFC2301 (TIFFprofileS/F/J/C) RFC2304, RFC2305 RFC1891, 1894 RFC2298 RFC821, 822, 1869 RFC1939 Version1.0 (RFC2049) Xerox WorkCentre 7132 System Administration Guide Correspondent Specifications... -
Page 139: Network Communication Setup
NOTE: For more information about how to display the [System Settings], refer to the Setups chapter of the User Guide. Select [Network Settings]. Select [Protocol Settings]. Select [TCP/IP - Get IP Address], and then [Change Settings]. Xerox WorkCentre 7132 System Administration Guide iFax Installation... - Page 140 Select the following items, then [Change Settings]. • [Machine’s E-mail Address/Host Name] – E-mail Address – Host Name – Domain Name • [Outgoing/Incoming E-mail Settings] > [POP3 Server Settings]: when receiving E-mail via POP3 – POP3 Server Setup Xerox WorkCentre 7132 System Administration Guide...
- Page 141 – Receive Untrusted E-mail – Receive Untrusted iFax – Message Digest Algorithm – Contents Encryption Method – Digital Signature - Outgoing E-mail – Digital Signature - Outgoing iFax – Certificate Auto Store Select [Save]. Xerox WorkCentre 7132 System Administration Guide iFax Installation...
-
Page 142: Test Ifax
Enter the E-mail address of the recipient. Press the <Start> button. The document will be scanned and converted to TIFF format. Then it will be sent as an E-mail attachment. Receiving: When the machine receives an iFax, printing starts automatically. Xerox WorkCentre 7132 System Administration Guide... -
Page 143: 15 Problem Solving
If one workstation is not printing/faxing, then re-install the print driver on the workstation. Call the local Xerox Welcome Center, where a representative will assist in the diagnosis and solution of the problem. Xerox WorkCentre 7132 System Administration Guide... -
Page 144: Smb
Confirmation Method The machine or other SMB machines cannot be found using the network computer icon. Xerox WorkCentre 7132 System Administration Guide Action Match the SMB transport protocol between the machine and each client. Set up the machine and client computers in the same networks. - Page 145 Job history displays a message that the document name is undefined instead of the correct job name. Xerox WorkCentre 7132 System Administration Guide Confirmation Method Check that the machine has a print job in progress. (This indicates whether there are...
-
Page 146: Restrictions
There is no print data on the machine when the machine is subsequently switched on. However, if the machine is switched off immediately after a print request, the print data may be stored on the client. In this case, the print request can be reissued when Xerox WorkCentre 7132 System Administration Guide... - Page 147 When SMB authentication is performed using the assigned IP address or host name, authentication is successful if only the user name and password matches the authentication server, even if the domain name does not match. Xerox WorkCentre 7132 System Administration Guide...
-
Page 148: Netware
PCONSOLE to check whether the user name or group name of the job is registered in the target print server.* Xerox WorkCentre 7132 System Administration Guide Action Set the machine to the frame type specified for the file server to be connected. - Page 149 The IPX checksum is set to an invalid level. The NCP packet signature is set to an invalid level. Xerox WorkCentre 7132 System Administration Guide Confirmation Method Use NWADMIN or PCONSOLE to check whether the machine is assigned to the print queue.
- Page 150 (DHCP server down). Use NWADMIN or PCONSOLE to check that the printer configuration is correct.* Xerox WorkCentre 7132 System Administration Guide Action Specify the correct Ethernet address, or assign a name other than the default. Specify a tree name.
- Page 151 Cause When sending the print job from the client, the NOTIFY option is not specified. NetWareCASTOFF has been executed on the client. Xerox WorkCentre 7132 System Administration Guide Confirmation Method – Confirmation Method Check the print language of the machine.
-
Page 152: Unix
Check the LPD error message displayed on the control panel. Xerox WorkCentre 7132 System Administration Guide Action Specify the correct IP address for the machine. Check the error. Define the correct printer entry setting. - Page 153 When the required printing result is not obtained Cause The specified print language is different from the print language of the print data. Xerox WorkCentre 7132 System Administration Guide Confirmation Method Check whether the transmission speed is specified correctly. Check whether the source routing is specified correctly.
-
Page 154: Tcp/Ip
(Network Error) is displayed. Check whether the machine is switched on. Print disabled status (Network Error) is displayed. Xerox WorkCentre 7132 System Administration Guide Action Directly connect the machine to the network connected to your computer. Check the network fault. - Page 155 The print data format to be processed by the machine does not match the data format sent from the client. Xerox WorkCentre 7132 System Administration Guide Confirmation Method Print disabled status (spool error) is displayed. Open [My Computer], then right-click...
-
Page 156: Restrictions
Check whether the print driver that accompanies the machine is selected. Confirmation Method Check whether the LPD port has been activated. Xerox WorkCentre 7132 System Administration Guide Action Specify a print language matching that of the print data. Select the print driver that accompanies the machine. - Page 157 When the client IP address or computer name is changed, the machine cannot perform query processing and cancel processing. Turn the machine off and on with the receiving buffer empty of print data. Xerox WorkCentre 7132 System Administration Guide TCP/IP...
-
Page 158: Ethertalk
Xerox WorkCentre 7132 System Administration Guide Action Change the machine names so that all machine names on the network are unique. -
Page 159: Restrictions
When setting the zone name, make sure that the zone name exists on the network connected to the machine. Xerox WorkCentre 7132 System Administration Guide EtherTalk... -
Page 160: Bonjour
• If the machine name or host name is changed, there are restrictions on the number of characters and the type of characters that are valid for name registration. Therefore, it is recommended that the machine name and host name are not changed. Xerox WorkCentre 7132 System Administration Guide... -
Page 161: Centreware Internet Services
The screen display is distorted. The latest information is not displayed. Xerox WorkCentre 7132 System Administration Guide Confirmation Method Check if the power of the machine is switched on. Print out the System Settings List to check if CentreWare Internet Services port is activated. -
Page 162: Scanning Services
2. Select [Security Settings] > [Local Policies] > [Security Options]. 3. Set [Accounts: Limit local account use of blank passwords to console logon only] to [Disabled]. Xerox WorkCentre 7132 System Administration Guide Action Enter the correct value. If the entry is not valid, it will be automatically changed within the limit. -
Page 163: Restrictions
When polling from another fax machine A scanned document is not transmitted when polling the machine from another fax machine. Xerox WorkCentre 7132 System Administration Guide Action The SMB direct host function (SMB transmission without requiring NetBIOS) is not supported. Change NetBIOS over TCP/IP to [Enabled]. - Page 164 256 or more, the shared resources are displayed in the shared resources list. • The list display of workgroup names, server names, shared names, and others on the network are not displayed in alphabetical order. Xerox WorkCentre 7132 System Administration Guide...
-
Page 165: E-Mail Services
Notice Service, iFax, or Scan to E-mail feature. The possible causes, confirmation methods, and actions are as follows. Cause Cannot receive E-mail. (E-mail Print, iFax) Xerox WorkCentre 7132 System Administration Guide Confirmation Method Check if the E-mail address of the machine is set. Check if [Receive E-mail] is activated. -
Page 166: Internet/Intranet Connection
Check the IP address setting. If the IP address is not set correctly, supply a fixed IP address, or use DHCP or Autonet to assign an IP address. Xerox WorkCentre 7132 System Administration Guide Action Set the E-mail address of the machine. - Page 167 Cannot connect due to proxy server, firewall, or web server access restrictions. Xerox WorkCentre 7132 System Administration Guide Action Enter the correct IP gateway address if connected to a proxy server or a web server through an IP gateway.
-
Page 168: Restrictions
When setting up a proxy server, the web server cannot be connected if the proxy server address is not set correctly. Enter the correct proxy server address. Register the user name and password on the machine to grant connection access to the proxy server. Xerox WorkCentre 7132 System Administration Guide... -
Page 169: 16 Appendix
Xerox Standard Accounting Overview When enabled, Xerox Standard Accounting (XSA) tracks the numbers of Copy, Print, Network Scanning, E-mail, Internet Fax and Embedded Fax jobs (when these features are installed on the machine), for each user. Usage limits can also be applied to users to restrict the total numbers of copy, print, fax and scan jobs that a user can perform. -
Page 170: Enable Xerox Standard Accounting (From Internet Services)
Group Account ID's must be unique. Enter a name for the group account in the Account Name box (for example Xerox). The group name can be alphanumeric characters to a maximum of 32 characters. The Group Account name must be unique. -
Page 171: Maximum Usage Limits And Resetting Individual Usage Limits
When you enable XSA, users must enter a valid user name at the machine to access any services to which access restriction has been applied. Refer to Enable Xerox Standard Accounting in this section for the specific service restricting procedure. -
Page 172: Resetting Usage Data
Open your web browser and enter the TCP/IP address of the machine in the Address or Location field. Press [Enter]. Click the [Properties] tab. Click the [Xerox Standard Accounting] folder in the directory tree. Click [Report and Reset]. To reset all usage data to zero, click the [Reset Usage Data] button. -
Page 173: Enable Xsa In Your Print Drivers
Press [Enter]. Click the [Properties] tab. See if Xerox Standard Accounting is shown in the directory tree. If it is not, you cannot clone to this machine. Click the [Xerox Standard Accounting] folder in the directory tree. - Page 174 Locate the .dat clone file. Click [Import Now]. NOTE: It may be necessary for you to use your web browser to view the Xerox Standard Accounting set up of Users and Groups on the new machine. Xerox WorkCentre 7132 System Administration Guide...
-
Page 175: 17 Glossary
1000Base-TX ASCII Auditron BOOTP Xerox WorkCentre 7132 System Administration Guide 10-Mbps baseband Ethernet specification using two pairs of twisted-pair cabling: one pair for transmitting data and the other for receiving data. 10Base-T, which is part of the IEEE 802.3 specification, has a distance limit of approximately 100 meters per segment. - Page 176 An abbreviation of Lightweight Directory Access Protocol. A protocol that allows sharing of corporate phone book information. An abbreviation of Line Printer Daemon. This is a print management program that runs on a host. Xerox WorkCentre 7132 System Administration Guide...
- Page 177 PCL5e PCL6 PCONSOLE Peer-to-Peer Xerox WorkCentre 7132 System Administration Guide An abbreviation of Novell Directory Services that was formerly known as NetWare Directory Services. This is a database used by Novell NetWare to organize resources for an entire network of NetWare servers. The database itself can be distributed across the network and accessed by all servers.
- Page 178 IP Address contains the Subnet Address and which part contains the host (or device) address. An abbreviation of Tagged Binary Control Protocol. This filter is only available when PostScript is enabled. Xerox WorkCentre 7132 System Administration Guide...
- Page 179 TCP/IP TIFF Twisted Pair Xerox WorkCentre 7132 System Administration Guide An abbreviation of Transmission Control Protocol / Internet Protocol. TCP/IP is a set of communications protocols that is supported by a variety of computer platforms. TCP controls the data transfer and IP controls the routing of the data. The IP Address is a unique address that identifies a device in a network.
- Page 180 17 Glossary Xerox WorkCentre 7132 System Administration Guide...
-
Page 181: 18 Index
Control Panel ...13 conventions ...10 Copy ...16 Copy Mode Settings ...29 current and pending Jobs ...20 Xerox WorkCentre 7132 System Administration Guide Delayed Print ... 24 DHCP ... 41 Dial Pause button ... 33 Document Feeder ... 13 Document Glass ... 13 documents, stored ... - Page 182 PDF ... 28 PDF Settings List ... 29 POP3 ... 61 port 100Base-TX/10Base-T ... 14 USB 1.1 ... 14 USB 2.0 ... 14 Port9100 ... 59 PostScript Font List ... 30 Power Saver button ... 32 Xerox WorkCentre 7132 System Administration Guide...
- Page 183 ...9 Services and Features ...16 Setting List ...29 Short Edge Feed (SEF) ...10 Side Tray ...13 Xerox WorkCentre 7132 System Administration Guide SMB ...53 Information Checklist ... 97 Network Communication Setup ... 99 problem solving ... 144 SMB Environments ... 98 SMB Installation ...
- Page 184 Print a Usage Report ... 172 Resetting Individual Usage Limits ... 171 Resetting Usage Data ... 172 Restore Settings ... 173 Set Usage Limits ... 170 Using XSA at the machine ... 171 Xerox Welcome Center ... 9 Xerox WorkCentre 7132 System Administration Guide...
Need help?
Do you have a question about the WorkCentre 7132 and is the answer not in the manual?
Questions and answers