
Related Manuals for TOHATSU MFS 4D


Summary of Contents for TOHATSU MFS 4D
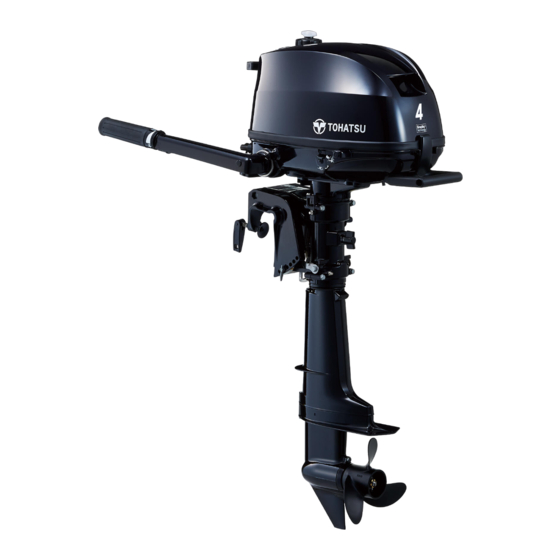
- Page 1 S E R V I C E M A N U A L 4 STROKE MFS 4D MFS 5D MFS 6D Models OB No.003-21034-4BA1 | 04-21 NB...
- Page 3 Introduction Before reading this manual This service manual provides information that is needed for inspection, service and repair of applicable outboard motors. For information about operation of the products that are not described in this document, refer to the owners manual. For our customers' safe and dependable use of the product for long term, it is essential to maintain the performance and quality of the outboard.
- Page 4 About this manual This service manual is designed so that service persons are able to perform their work correctly. Understand the following matters well for efficient repairs. 1 Each chapter begins with the introduction of special tools that are used for the work described in the chapter so that the service persons are able to understand the tools needed.
- Page 5 This manual uses SI unit system (International System of Units) for pressure, force (load), torque and stress. In this manual, the main units are as follows. Example : <Pressure> 0.90 MPa (128 psi) [9.0 kgf/cm Conventional system (kilo-gram meter unit) Conventional system (US pound inch unit) SI unit (1 kgf/cm = 0.0980665 MPa)
-
Page 6: Service Information
Description of Pictograph The following symbols represent the contents of individual chapters. Service Fuel System Service Data Maintenance Information (Carburetor) Electrical Power Unit Lower Unit Bracket System Wiring r/min Troubleshooting Accessories Diagrams The following symbols indicate items needed for the service. Lubrication Tightening Special Tool... -
Page 7: Table Of Contents
16) Inspection of Anode ……………………… 3-18 1.Service Information 17) Replacement of Anode …………………… 3-18 1. Identification 18) Inspection of Propeller …………………… 3-19 (Engine Serial Number) ……………… 1-2 19) Inspection of Thermostat ………………… 3-19 2. Work Safety ……………………………… 1-2 20) Inspection of Cooling Water Passage …… 3-20 1) Fire Prevention ……………………………... - Page 8 15) Disassembly of Cylinder and Oil Pan …… 5-28 23) Disassembly of Gear Case ……………… 6-20 16) Disassembly and Inspection of 24) Inspection of Gear Case ………………… 6-21 Breather Chamber ………………………… 5-30 25) Assembly of Gear Case ………………… 6-21 17) Inspection of Lifter ………………………… 5-30 26) Installation of Forward Gear and 18) Inspection of Camshaft ……………………...
- Page 9 INDEX Service Information Service Data Inspections and Adjustments Fuel System Power Unit Lower Unit Bracket Electrical System Troubleshooting Wiring Diagram 4st 4/5/6 2020...
- Page 10 viii 4st 4/5/6 2020...
- Page 11 Service Information 1. Identification 2) Gear Shift ………………………………… 1-8 (Engine Serial Number) ……………… 1-2 3) Engine Oil ………………………………… 1-8 2. Work Safety ……………………………… 1-2 4) Gear Oil …………………………………… 1-8 1) Fire Prevention …………………………… 1-2 5) Fuel Tank Line …………………………… 1-9 2) Ventilation …………………………………...
-
Page 12: Identification (Engine Serial Number)
Service Information 1. Identification (Engine Serial Number) Engine serial number is located on the swivel bracket. 1 Model Name MFS6DD 2 Model Type 3 XXXXXX 3 Serial Number r/min 4.41 - 5500 25.6 - 27.1 kg 2. Work Safety 1) Fire Prevention Gasoline is hazardous material and very flammable. -
Page 13: Tools
5) Tools Use specified special tools to prevent damaging to parts and to perform work safely and surely. Be sure to follow installation procedures and specified torque described in this manual. 3AC728710 6) Recommendations on Service Remove foreign substances and dirt from outboard motor and individual parts by cleaning. -
Page 14: Cautions In Disassembling And Assembling Components
Service Information 7) Cautions in Disassembling and Assembling Components Secure outboard motor to a dedicated stand. Replace parts that cannot be reused such as packings, gaskets, O-rings, oil seals, spring pins or split pins with new ones after disassembly. Replace deformed snap rings with new ones. -
Page 15: Tools And Instruments
(Reference value) 164 mm Speed at WOT Model (Wide Open Throttle) (rpm) MFS 4D/5D 4,500 – 5,500 MFS 6D 5,000 – 6,000 This test propeller has been designed for break-in operation and load test operation. The engine speed at WOT varies depending on... -
Page 16: Special Tools
Service Information 3) Special Tools Vacuum/Pressure Gauge Spring Pin Tool A Spring Pin Tool B Spring Pin Tool A P/N. 3AC-99020-1 P/N. 345-72227-0 P/N. 345-72228-0 P/N. 369-72217-0 Removing spring pin Installing spring pin Removing spring pin Inspecting pressure (ϕ 3.0) (ϕ... - Page 17 Backlash Measuring Tool Kit Clamp A Dial Gauge Plate P/N. 369-72740-0 P/N. 3B7-72720-0 P/N. 3B7-72729-0 Measuring gap between forward and Used to attach dial gauge Measuring backlash pinion gears (A and B gears) when measuring backlash 4st 4/5/6 2020...
-
Page 18: Pre-Delivery Inspection
Service Information å ∫ 4. Pre-delivery Inspection 1) Steering Handle å Check installations for clattering and play. ∫ Adjust steering friction. ç ∂ ç Check throttle grip for movement. (Fully Open/Fully Close). ∂ Adjust throttle friction. 1 Steering Adjust Screw c Heavier d Lighter 2) Gear Shift Check that shift lever 1 moves from neutral (N) to forward... -
Page 19: Fuel Tank Line
5) Fuel Tank Line Check that fuel tank contains sufficient amount of gasoline, fuel line is connected and is free of leak. CAUTION Since this is a four stroke engine model, do not use fuel mixed with engine oil. Use of fuel mixed with engine oil will cause engine trouble. -
Page 20: Inspection Of Stop Switch
Service Information 8) Inspection of Stop Switch Press stop switch 1 hard or pull out lock 2 from stop switch 1 to check that engine stops. 1 Stop Switch 2 Stop Switch Lock 1 Stop Switch 2 Stop Switch Lock 9) Cooling Water Check Port Check that cooling water check port 1 discharges water while the engine is running. -
Page 21: Propeller Selection
11) Propeller Selection Select a propeller that is most suitable for the type of boat and application. Range of operating engine revolution at WOT 4D/5D : 4,500 - 5,500 min (rpm) 6D : 5,000 - 6,000 min (rpm) CAUTION Selecting a wrong propeller may cause adverse effects on the engine l i f e , fuel consumption, etc. -
Page 22: Break-In Operation
Service Information 5. Break-in Operation B r e a k - i n o p e r a t i o n i s n e e d e d f o r t h e p u r p o s e o f smoothening sliding surfaces (Includes lower unit gears, etc.) between components such as pistons and cylinder, piston rings, piston pins, crank shaft, connecting rods, and... -
Page 23: Checks After Test Run
Run at 2,000 min (rpm) or 1/2 of WOT or less for initial 2 hours, then at 3,000 min (rpm) or 3/4 of WOT or less for 1 hour. Check that the outboard motor is not tilted up and that water does not infiltrate the boat when the gear is shifted to the Reverse (R) position. - Page 24 Service Information 1-14 4st 4/5/6 2020...
-
Page 25: Service Data
Service Data 1. Outline Dimensions …………………… 2-2 3. Cooling Water System Diagram 1) Engine Dimensions ……………………… 2-2 Specifications …………………………… 2-6 2) Clamp Dimensions ……………………… 2-4 5. Maintenance Data ……………………… 2-10 2. Engine Lubrication System 6. Tightening Torque Specifications … 2-14 Diagram ……………………………………... -
Page 26: Outline Dimensions
Service Data 1.Outline Dimensions 1) Engine Dimensions <Dual Tank model> Item Type Unit *EPA mm/in 16.15 mm/in 15.60 mm/in 25.80 mm/in 30.80 mm/in 35.80 mm/in 17.15 mm/in 22.15 mm/in 27.15 mm/in 15.05 mm/in 19.60 mm/in 4.35 mm/in 16.55 mm/in 15.80 mm/in 13.75 mm/in... - Page 27 <Separate Tank model> Item Type Unit mm/in 14.75 mm/in 25.80 mm/in 30.80 mm/in 35.80 mm/in 17.15 mm/in 22.15 mm/in 27.15 mm/in 15.05 mm/in 19.60 mm/in 4.35 mm/in 16.55 mm/in 15.80 mm/in 13.75 mm/in 30-55 1.20-2.15 mm/in 10.80 mm/in 25.90 mm/in 29.85 mm/in 33.75...
-
Page 28: Clamp Dimensions
Service Data 2) Clamp Dimensions CENTER LINE 85mm (3.35in) 85mm (3.35in) TOP OF TRANSOM 55.5mm 55.5mm (2.20in) (2.20in) Allowable Transom Thikness 30~55mm(1.20-2.15in) 4st 4/5/6 2020... -
Page 29: Engine Lubrication System Diagram
2. Engine Lubrication System Diagram Cylinder head rocker arm valve Push rod Crankshaft upper bearing (Ball bearing) Lifter Cylinder wall Crank pin Camshaft Piston Piston pin Cam shaft lower journal (Metal bearing) Oil regulator Oil pressure switch Main gallery Oil pump Oil strainer Oil pan 4st 4/5/6 2020... -
Page 30: Cooling Water System Diagram
Service Data 3. Cooling Water System Diagram Thermostat 1 Cylinder head 2 Cylinder 3 Oil Pan 4 Cooling Water Check Port 5 Water Discharging Water Feed Passage in Passage in Drive Drive Shaft Housing Shaft Housing Water Pipe 9 Drive Shaft Housing 8 Water Pump 0 Exhaust Gas and... - Page 31 4st 4/5/6 2020...
-
Page 32: Specifications
Service Data 4. Specifications Model Item Unit Dual Tank Model Sepalate Tank Model Sail Pro 4/5/6D 4/5/6D Dimensions Overall length Overall width 1051 1030 — Overall height 1178 1157 — 1284 — Transom height Weight 26.0 25.5 — 26.5 26.0 —... - Page 33 Model Item Unit Dual Tank Model Sepalate Tank Model Sail Pro 4/5/6D 4/5/6D Fuel and oil Type of fuel Unleaded regular octane gasoline (Research octane number 91 or more) Fuel tank capacity Starting fuel enrichment system Choke valve Fuel pump Mechanical (plunger pump) Type 4 stroke engine (motor) oil...
-
Page 34: Maintenance Data
Service Data 5. Maintenance Data Part Name Item Standard Value Carbon deposition on combustion chamber wall Deformation of mating surface and flaws Cylinder Head Corrosion of mating surface Plugging of cooling water passages Deposition on water jacket interior walls Wear of bore : Measure bore by using cylinder gauge 59.00 mm (2.3228 in) Seizure, cylinder liner damage, or wear Cylinder... - Page 35 Functional Limit Action to be taken Clean to remove. 0.03 mm (0.0012 in) Correct. (Use #240 to 400 waterproof sand paper and put on the surface plate to correct. Use #600 to finish.) Correct or replace if possible. Clean to remove. Clean to remove.
- Page 36 Service Data Standard value Part name Item Sail Pro Setting mark 3JDA 3GRA 3JEA Venturi bore Throttle bore Main jet (MJ) Main air jet (MAJ) #135 #150 #155 #155 Carburetor Main nozzle bore (MN) (refer to Chapter 4) Pilot jet (PJ) Pilot air jet (PAJ) #125 #115...
- Page 37 Functional Limit Action to be taken 23.13 mm (0.9106 in) Replace if over upper limit. 0.25 mm (0.0100 in) Replace if over upper limit. 5.96 mm (0.2346 in) Replace if under lower limit. 0.10 mm (0.0039 in) Wear of oil pump cover is included. Replace if over upper limit.
-
Page 38: Tightening Torque Specifications
Service Data 6. Tightening Torque Specifications Tightening torque Wrench Type of Tightening location Thread B x Pitch fastener N•m lb•ft kgf•m Engine Connecting rod M7×1.0 Bolt Cylinder head M8×1.25 Bolt Oil pan M8×1.25 Bolt M6×1.0 Bolt Exhaust cover M6×1.0 Bolt Oil drain bolt M10×1.25 Bolt... -
Page 39: Sealant And Lubricant
7. Sealant and Lubricant Apply to Remarks Three Three Shin-Etsu Konishi Chuoh Yuka Bond Bond Chemical Centax Bentax 1342 G17 G103 1741 Camshaft Bearings and cams Rocker arm Sliding surface Valve (IN, EX) Stem and stem end Cylinder Valve spring Whole area Head Valve spring seat... - Page 40 Service Data Apply to Remarks Three Three Shin-Etsu Konishi Chuoh Yuka Bond Bond Chemical Centax Bentax 1342 G17 G103 1741 O ring (shift lever) Shift Shift lever Sliding surface Drive shaft (spline) Crankshaft spline Ball bearing at press fitting Drive shaft Needle bearing inner at press fitting...
-
Page 41: Maintenance
Maintenance 1. Special Tools ……………………………… 3-2 12) Inspection and Adjustment of 2. Inspection Schedule …………………… 3-3 Valve Clearance …………………………… 3-13 3. Inspection Items ………………………… 3-4 13) Throttle Cable……………………………… 3-15 1) Inspection of Top Cowl …………………… 3-4 14) Inspection of Idle Engine Speed ………… 3-17 2) Fuel System ………………………………... -
Page 42: Special Tools
Maintenance 1. Special Tools Tachometer Compression Gauge Thickness Gauge P/N. 3AC-99010-0 P/N. 3AC-99030-0 P/N. 353-72251-1 Measuring engine revolution Measuring compression Measuring gaps speed pressure 4st 4/5/6 2020... -
Page 43: Inspection Schedule
2. Inspection Schedule Inspection period Initial 20 50 hours Inspection item Remarks hours or or 3 hours or hours or 1 month months 6 months 1 year Disassembly, cleaning and Carburetor inspection Fuel Filter Damage and leak from Piping connections Fuel Tank Cleaning Check and clean or Replace if... -
Page 44: Inspection Items
Maintenance 3. Inspection Items 1) Inspection of Top Cowl Push top cowl using both hands to check for looseness and seal when cowl latched. 2) Fuel System Check piping Remove top cowl and check each section for fuel leak, dirt, deterioration and damage. Clean or replace parts if necessary. -
Page 45: Inspection Of Fuel Tank
3) Inspection of Fuel Tank < For Dual Fuel Tank model > R e m o v e d i r t a n d w a t e r f r o m f u e l t a n k 1 i f necessary. -
Page 46: Replacement Of Engine Oil
Maintenance 5) Replacement of Engine Oil Oil Level Quantity of Oil for Full Replacement 450 mL Upper Limit 350 mL Lower Limit Oil Specification Engine Oil : 4 Stroke Engine Oil API: SH, SJ, SL SAE: 10W-30, 10W-40 NMMA : FC-W Certified 10W-30/40 Quantity of Engine Oil : Use oil with a viscosity that is suitable for the ambient air temperature of the operating region. -
Page 47: Inspection Of Gear Oil Quantity
5. Tighten drain bolt 1. 6. Pour new oil through oil inlet until oil level reaches between upper limit and lower limit mark of oil level gauge. 7. Start and run the engine for 5 minutes to warm up. 8. 5 minutes after stopping the engine, check oil level and leakage. - Page 48 Maintenance Remove lower unit ass'y installation bolts 2, and pull lower unit ass'y downward to remove. Remove pump case (Upper) 3. Remove impeller 4 and check it. Check pump case for deformation. Replace if necessary. Check impeller 4 and pump case liner 5 for cracks and wear.
-
Page 49: Replacement Of Gear Oil
8) Replacement of Gear Oil Tilt up outboard motor a little as shown. Place the drain pan below oil plug 1, remove lower oil plug 1 and then upper oil plug 2 to drain oil. Remove lower oil plug first when draining. Check gear oil for presence of metal particles, change of color (abnormal if clouded), and viscosity. -
Page 50: Inspection Of Gear Case (For Leakage)
Maintenance 9) Inspection of Gear Case (for leakage) Drain gear oil. Remove upper oil plug 1 and connect a commercially available leakage tester to this hole. Apply specified pressure to gear case, and check if t h e p r e s s u r e i s m a i n t a i n e d w i t h o u t f u r t h e r compression for 10 seconds. -
Page 51: Inspection Of Spark Plug
10) Inspection of Spark Plug Remove plug cap and then spark plug. Use spark plug cleaner or nyron brush to clean spark plug electrodes 1. Replace if necessary. Check electrodes 1 for corrosion or excessive buildup of carbon, and washer 2 for damage. Replace if necessary. -
Page 52: Inspection Of Compression Pressure
Maintenance 11) Inspection of Compression Pressure Start the engine to warm up for 5 minutes, then stop the engine. Shift gear into neutral (N). Remove lock plate 1 (of stop switch lanyard) from stop switch. CAUTION Remove lock plate (of stop switch lanyard) f r o m s t o p s w i t c h b e f o r e m e a s u r i n g compression pressure. -
Page 53: Inspection And Adjustment Of Valve Clearance
12) Inspection and Adjustment of Valve Clearance Perform inspection and adjustment of valve clearances when engine is cold. Remove cylinder head cover, fuel pump and spark plug. Align locating marks 1 of flywheel and camshaft with each other. ① ① When fuel pump is removed, camshaft can be seen. - Page 54 Maintenance Hold pivot and loosen lock nut. Put thickness gauge 3 in the gap between rocker arm and valve, measure the gap between rocker arm and valve with thickness gauge 3. Valve Clearance (when engine is cold) : (IN) intake side : 0.06 - 0.14mm (0.0025 - 0.0055in) (EX) exhaust side : 0.11 - 0.19mm (0.0045 - 0.0075in)
-
Page 55: Throttle Cable
13) Throttle Cable Adjustment of Throttle Cable Check position of cable on low speed and high speed sides. Set throttle grip to slowest position, and fully pull choke knob to close choke valve. Lock nut 1 while applying tension to outer wire by pulling it with a hand to fix low speed side wire. - Page 56 Maintenance Set throttle grip to full-open position, and check if throttle lever of carburetor contacts with stopper. Set throttle grip to full-close position, and check if throttle lever of carburetor contacts with stopper. 3-16 4st 4/5/6 2020...
-
Page 57: Inspection Of Idle Engine Speed
14) Inspection of Idle Engine Speed Start the engine to warm up for 5 minutes. Attach tachometer to spark plug high tension cord 1 to check idle speed. Tachometer : P/N. 3AC-99010-0 Idle Speed : 1300 min (rpm) 15) Inspection of Ignition Timing Adjusting system : Automatic control, no adjustment required. -
Page 58: Inspection Of Anode
Maintenance 16) Inspection of Anode CAUTION Do not coat anode with oil, grease or paint, or the anti-corrosion function does not work normally. Since periphery of anode installation bolt is corroded more than other areas, be sure to retighten bolt on every inspection. Inspection of Exterior Check the anode 1 for buildup of scale and staining by grease and oil. -
Page 59: Inspection Of Propeller
18) Inspection of Propeller Check propeller blades and spline for cracks, damage, wear and corrosion. Replace if necessary. 19) Inspection of Thermostat Loosen thermostat cover and thermostat cover bolts, and remove thermostat 1. Hang thermostat 1 and put it into the water container. Put thermometer in the water, and warm up water to measure valve opening temperature. -
Page 60: Inspection Of Cooling Water Passage
Maintenance 20) Inspection of Cooling Water Passage Check water strainer 1 for clogging. Clean if necessary. Place the outboard motor in the water and start the engine. Check that cooling water is discharged from cooling water check port 2. If not, check water pump and cooling water passage in the engine. -
Page 61: Flushing With Water
21) Flushing with Water CAUTION Touching rotating propeller could lead to injury. Be sure to remove propeller before running engine on the land. WARNING Exhaust gas contains carbon monoxide, which will cause gas poisoning. Do not start engine with outboard motor placed in a closed area such as boat house. -
Page 62: Greasing Points
Maintenance 22) Greasing Points Apply grease to throttle cable and sliding areas. Apply grease through grease nipples 1 until excessive grease appears from bushing a. Apply grease to thread of clamp screws 2. Apply grease to throttle cable b and sliding areas. Do not apply oil or grease to the friction piece c as it will not function. - Page 63 Apply grease to propeller shaft spline 4. 4st 4/5/6 2020 3-23...
- Page 64 Maintenance 3-24 4st 4/5/6 2020...
-
Page 65: Fuel System
Fuel System 1. Special Tools ……………………………… 4-2 4) Inspection of Fuel Cock ………………… 4-13 2. Parts Layout ……………………………… 4-3 5) Inspection of Fuel Filter ………………… 4-13 Fuel Tank ……………………………………… 4-3 6) Removing Carburetor …………………… 4-15 Carburetor • Fuel Pump……………………… 4-4 7) Disassembling Carburetor ………………... -
Page 66: Special Tools
Fuel System 1. Special Tools Vacuum/Pressure Gauge P/N. 3AC-99020-1 Inspecting pressure 4st 4/5/6 2020... -
Page 67: Parts Layout
P/C Fig. 12 2. Parts Layout Fuel Tank Fig.10-32 Ref. Ref. Description Q'ty Remarks Description Q'ty Remarks 1-1 Primer Bulb Assy 1 STD 11 Clamp 12 Fuel Tank Assy 12L 1 STD 1-2 Primer Bulb Assy 1 for USA Model 2 Joint Assy (Inlet) 13 Fuel Tank Assy 12L 1 for USA Model... -
Page 68: Carburetor • Fuel Pump
Fuel System P/C Fig. 4 Carburetor • Fuel Pump Fig.1-53 Fig.1-52 Fig.10-43 Fig.10-1 4st OIL Fig.10-36 Fig.10-37 Fig.13-5 Fig.10-38 Fig.13-7 Fig.13-13 4st OIL 4st 4/5/6 2020... - Page 69 Ref. Description Q'ty Remarks Intake Manifold Assy Intake Manifold Gasket 2-33.5 Bolt M6 L=25mm Carburetor Assy Carburetor Assy Carburetor Assy Main Nozzle Main Nozzle Main Nozzle Main Jet (#62) Main Jet (#68) Main Jet (#70) Slow Jet (#38) 4/5/6ps Float Float Valve Clip Float Arm Pin...
-
Page 70: Integral Fuel Tank
Fuel System P/C Fig. 13 Integral Fuel Tank Fig. 10-39 Fig. 4-26 Fig. 10-32 4st 4/5/6 2020... - Page 71 Ref. Description Q'ty Remarks Fuel Tank Assy Fuel Tank Assy for USA Model Sealing Plate Fuel Tank Seal Fuel Hose 275-20 Fuel Hose 455-25 Fuel Hose W/Protector 275-20 for USA Model Fuel Hose W/Protector 455-25 for USA Model Fuel Hose 30-25 Bolt M6 L=30mm Washer 6.5-23-1.5...
-
Page 72: Carburetor Inner Passages
Fuel System 3. Carburetor Inner Passages 1) Idling Passage a - Air intake b - Air vent inlet c - Main air jet <Over view> d - Pilot air jet e - Bypass port f - Pilot outlet g - Throttle valve h - Fuel inlet i - Main jet j - Pilot jet... -
Page 73: Off-Idle Passage
2) Off-Idle Passage a - Air intake b - Air vent inlet c - Main air jet <Over view> d - Pilot air jet e - Bypass port f - Pilot outlet g - Throttle valve h - Fuel inlet i - Main jet j - Pilot jet k - Choke valve... -
Page 74: High Speed Passage
Fuel System 3) High Speed Passage a - Air intake b - Air vent inlet c - Main air jet <Over view> d - Pilot air jet e - Bypass port f - Pilot outlet g - Throttle valve h - Fuel inlet i - Main jet j - Pilot jet k - Choke valve... -
Page 75: Choking Passage
4) Choking Passage a - Air intake b - Air vent inlet c - Main air jet <Over view> d - Pilot air jet e - Bypass port f - Pilot outlet g - Throttle valve h - Fuel inlet i - Main jet j - Pilot jet k - Choke valve... -
Page 76: Inspection Items
Fuel System 4. Inspection Items 1) Inspection of Fuel Feed System Piping Remove top cowl and check each section for fuel leak, dirt, deterioration and damage. Clean or replace parts if necessary. 2) Draining Fuel WARNING Remove fuel tank, fuel hose and carburetor after fully drain the fuel from these parts. -
Page 77: Inspection Of Fuel Tank And Fuel Tank Cap
3) Inspection of Fuel Tank and Fuel Tank Cap Check fuel tank and fuel tank cap for crack, leakage and damage. Replace if necessary. 4) Inspection of Fuel Cock Check fuel cock for leakage. 5) Inspection of Fuel Filter Check fuel filter (in-line) for dirt and clogging, and clean if necessary. -
Page 78: Removing Carburetor
Fuel System 6) Removing Carburetor WARNING Before working on fuel system, make sure to disconnect batter y cables from the batter y, or electric sparks can occur, possibly igniting fuel or causing fuel to explode. Disconnect choke link wire. B e c a r e f u l n o t t o b e n d w i r e t i p 1 w h e n disconnecting. - Page 79 Loosen carburetor mounting bolts and remove carburetor Be careful not to bend throttle rod when removing the rod and carburetor. 4st 4/5/6 2020 4-15...
-
Page 80: Disassembling Carburetor
Fuel System 7) Disassembling Carburetor Remove drain screw 1 to drain fuel. CAUTION Use rag to absorb fuel flowing out from hose. Remove float bowl 2. Remove float ass'y 3 using commercially available pin tool. Remove jets and nozzle. CAUTION When removing any jets, be careful not to damage or distort jet surface. -
Page 81: Inspection And Clean Of Carburetor
8) Inspection and clean of Carburetor Check air and fuel passages for dirt in the jet and foreign substances. Clean carburetor body with cleaning fluid. Squirt all passages and jet passages with compressed air. CAUTION · Point the compressed air downward, taking care that detergent and dust do not enter the eyes and do not damage small parts of the carburetor. -
Page 82: Inspection Of Fuel Connector
Fuel System 9) Inspection of Fuel Connector Check fuel connector for crack and damage. Connect vacuum/pressure gauge to outlet of fuel connector. Apply specified pressure, and check if the pressure is maintained for 10 seconds. Replace if necessary. Vacuum/Pressure Gauge : P/N. -
Page 83: Adjustment Of Float Height
11) Adjustment of Float Height Measure height a of float 1. Adjust height a of float 1 by bending tab b if the height is out of specified range. Float Height a : 9.0 - 10.0 mm (0.354 - 0.394 in) Make tab b of folat 1 contacts top of float valve 2 lightly. -
Page 84: Removing Fuel Pump
Fuel System 13) Removing Fuel Pump Remove fuel hose from fuel pump. Place a piece of cloth below fuel pump to prevent fuel leaking.. Loose fuel pump mounting screw and remove fuel pump. 14) Disassembly and Inspection of Fuel Pump CAUTION To prevent fuel from dripping on the floor, use a cloth to catch the fuel. -
Page 85: Assembly Of Fuel Pump
Check diaphragm 1 for break, crack and damage, and replace if necessary. Check check valve 2 for damage and deterioration, and replace if necessary. Check fuel pump body for crack and damage, and replace if necessary. Check push rod 3 for wear on the slipper surface a, and replace if severely worn. - Page 86 Fuel System 4-22 4st 4/5/6 2020...
- Page 87 Power Unit 1. Special Tools ……………………………… 5-2 18) Inspection of Camshaft …………………… 5-31 2. Parts Layout ……………………………… 5-3 19) Inspection of Piston Outer Diameter …… 5-32 Engine ………………………………………… 5-3 20) Inspection of Cylinder Inner Diameter …… 5-32 Magneto ……………………………………… 5-4 21) Inspection of Piston Clearance …………...
-
Page 88: Power Unit
Power Unit Power Unit 1.Special Tools Piston Slider Compression Gauge Valve Spring Compressor Attachment Flywheel Puller Kit P/N. 3H6-72871-0 P/N. 3AC-99030-0 P/N. 3AB-99076-0 P/N. 369-72211-0 Measuring compression Removing or installing valve Installing piston Removing/installing flywheel pressure springs Thickness Gauge P/N. 353-72251-1 Measuring gaps 4st 4/5/6 2020... -
Page 89: Parts Layout
2.Parts Layout Engine 7 N·m (5 lb·ft) [0.7 kgf·m] Ref. Description Remarks Q'ty 1 Ricoil Starter 2 Fuel Tank 3 Oil Level Gauge 4 Dowel Pin 5 Bolt 6 M6 L=30mm 6 Gasket Do not reuse. 4st 4/5/6 2020... -
Page 90: Magneto
Power Unit Power Unit Magneto P/C Fig. 6 SAIL PRO 50 N·m (37 lb·ft) [5.0 kgf·m] SAIL PRO Fig.1-46 SAIL PRO Fig.16-3 4st 4/5/6 2020... - Page 91 Ref. Description Q'ty Remarks Flywheel STD with out Alternator Flywheel for Sail Pro (with Alternater) Alternator Assy for Sail Pro 12V60W (with Alternater) Screw for Sail Pro (with Alternater) M5 L=25mm Washer for Sail Pro (with Alternater) M5 Clamp 4.2-3-8 for Sail Pro (with Alternater) Screw for Sail Pro (with Alternater) M4 L=8mm...
-
Page 92: Cylinder & Oil Pan
Power Unit P/C Fig. 1 Cylinder & Oil Pan 1 12 N·m (9 lb·ft) [1.2 kgf·m] 2 25 N·m (18 lb·ft) [2.5 kgf·m] 18 N·m (13 lb·ft) [1.8 kgf·m] 9 N·m (7 lb·ft) [0.9 kgf·m] 4st OIL G103 G103 G103 G103 G103 G103... - Page 93 Ref. Description Q'ty Remarks Cylinder Block Oil Seal 20-35-7 Ball Bearing 6205 Breather Chamber Cover Gasket Collar 8-10-20.1 Wave Washer D=5 Screw M6 L=16mm Cable Holder Clamp 6-9.5L Bolt M6 L=12mm Oilpan Sub-Assy Oil Seal 25-40-8 Grommet Dowel Pin 6-12 Oil Pump Rotor (Inner) Oil Pump Rotor (Outer) O-Ring...
- Page 94 Power Unit P/C Fig. 1 1 12 N·m (9 lb·ft) [1.2 kgf·m] 2 25 N·m (18 lb·ft) [2.5 kgf·m] 18 N·m (13 lb·ft) [1.8 kgf·m] 9 N·m (7 lb·ft) [0.9 kgf·m] 4st OIL G103 G103 G103 G103 G103 G103 Fig.6-22 1342 1342 1342...
- Page 95 Ref. Description Q'ty Remarks Crankcase Head Gasket Do not reuse. Bolt M6 L=20mm Breather Hose Clip Oil Level Gauge O-Ring 2.6-18.7 Do not reuse. Bolt M6 L=12mm Clamp 6.5-47.5P 4st 4/5/6 2020...
-
Page 96: Cylinder Head & Valve & Camshaft
Power Unit Cylinder Head & Valve & Camshaft P/C Fig. 3 10 N·m (7 lb·ft) [1.0 kgf·m] Fig.4-4 4st OIL 25 N·m (18 lb·ft) [2.5 kgf·m] Fig.10-27 1 12 N·m (9 lb·ft) [1.2 kgf·m] 2 25 N·m (18 lb·ft) [2.5 kgf·m] 16 15 6 N·m (4 lb·ft) [0.6 kgf·m] 4st OIL... - Page 97 Ref. Description Q'ty Remarks Cylinder Head Assy Intake Valve Exhaust Valve Valve Spring Seat Valve Spring L=35 Retainer Cotter Dowel Pin 6-12 Cylinder Head Gasket Do not reuse. Bolt 8-90 Cylinder Head Bolt 8-60 Exhaust Cover Gasket Do not reuse. Cylinder Head Cover Cylinder Head Cover Gasket Do not reuse.
-
Page 98: Piston & Crankshaft
Power Unit Piston & Crankshaft P/C Fig. 2 1 6 N·m (4 lb·ft) [0.6 kgf·m] 2 12 N·m (9 lb·ft) [1.2 kgf·m] 4st OIL 4st OIL 4st OIL 4st OIL 4st OIL 4st OIL Ref. Ref. Description Remarks Description Remarks Q'ty Q'ty 9 Piston Pin Clip... -
Page 99: Recoil Starter
Recoil Starter P/C Fig. 5 18 17 1342 1342 1342 22 19 1741 1741 1741 Fig.7-30 1342 1342 1342 4 N·m (3 lb·ft) [0.4 kgf·m] 1342 1342 1342 1741 1741 1741 Ref. Ref. Description Remarks Description Remarks Q'ty Q'ty 17 Collar 4-6-21 1 Recoil Starter Assy 18 Starter Lock Spring 2 Starter Case... -
Page 100: Top Cowl
Power Unit Top Cowl P/C Fig. 11 Ref. Ref. Description Q'ty Remarks Description Q'ty Remarks 1-1 Sail Pro Decal 1 for Sail Pro (USA) 7 Top Cowl Sub-Assy 1 Separate Fuel Tank Model 1-2 Sp Decal 1 for Sail Pro (EU) 8 Top Cowl Seal 2 Caution Decal (A) 12-1 Decal Set (MFS4D) -
Page 101: Inspection Items
3. Inspection Items 1) Inspection of Compression Pressure Run the engine to warm up for 5 minutes, and then stop. Shift gear into neutral (N). Remove lock plate 1 (of stop switch lanyard) from stop switch. CAUTION Remove lock plate (of stop switch lanyard) f r o m s t o p s w i t c h b e f o r e m e a s u r i n g compression pressure. -
Page 102: Inspection Of Valve Clearance
Power Unit 2) Inspection of Valve Clearance Disconnect plug cap 1 and then, remove spark plug and cylinder head cover 2. Pull recoil starter 3 to turn flywheel clockwise until flywheel “T” mark a comes cylinder mark b. · This step brings piston to top dead center of compression stroke. - Page 103 Loosen adjust nut 5 and then pivot nut. Put thickness gauge 6 into valve clearance, and then, tighten pivot nut temporarily. Tighten Adjust nut 5 to specified torque, and check valve clearance again. Adjust Nut 5 : 10 N · m (7 lb · ft) [1.0 kgf · m] Torque Wrench : P/N.
-
Page 104: Removing Power Unit
Power Unit 3) Removing Power Unit Remove fuel from fuel tank before disconnecting fuel hose from fuel cock 1 on fuel tank side. Remove fuel tank mounting bolts and then remove fuel tank Disconnect choke wire 4 from carburetor 3. Remove choke wire fixing bracket 5 from stay 6. -
Page 105: Removal And Disassembly Of Crank Case Head
Disconnect rod snap lower and upper, and remove starter lock rod. Disconnect wires from igniter 8. Disconnect ground wire from cylinder. Turn throttle grip to full close position, and disconnect throttle cables 9 (2 pcs.) from throttle drum 0. Remove bolts q (6 pcs.), and then, lift power unit to remove. -
Page 106: Inspection Of Crank Case Head
Power Unit Remove gasket 2. ② Do not reuse. Remove two oil seals 3. ③ Do not reuse. 5) Inspection of Crank Case Head Check crank case head for crack, damage and corrosion. Replace if necessary. 6) Assembly of Crank Case Head Attach new oil seal 1 to crank case head by using a commercially available mandrel. -
Page 107: Installation Of Crank Case Head
7) Installation of Crank Case Head Attach a new Gasket 1. Do not reuse. Install crank case head ass'y to cylinder block ass'y. Crank Case Head Bolt : 6 N · m (4 lb · ft) [0.6 kgf · m] 8) Disassembly of Power Unit Place power unit on the work bench a. - Page 108 Power Unit Remove flywheel 5 and key. Flywheel Holder 4 : (Commercially available) Flywheel Puller Kit 6 : P/N. 369-72211-0 CAUTION Apply forces to tools toward directions as shown, and perform work taking care not to allow flywheel holder to slip. Screw the puller onto crankshaft end until flywheel is disengaged from tapered section of crankshaft.
- Page 109 Loosen intake manifold mounting bolts and then remove manifold 9. Loosen thermostat cap mounting bolts, remove cap 0 and then thermostat q. 4st 4/5/6 2020 5-23...
-
Page 110: Removal Of Rocker Arm
Power Unit Loosen igniter mounting bolts and then remove igniter w. Loosen fuel pump mounting screws and then remove fuel pump e. 9) Removal of Rocker Arm Check position of flywheel marking T to confirm that piston is at top dead center. Remove bolts and then cylinder head cover. -
Page 111: Removing Cylinder Head
Remove adjust nut 1, and then pivot 2 and rocker arm Remove push rod 4. Store “IN” side and “EX” side rocker arms and push rods separately. Remove pivot bolt 5, and then push rod plate 6. 10) Removing Cylinder Head Remove cylinder head bolts in the order shown, and then, remove cylinder head. -
Page 112: Inspection Of Push Rod Plate
Power Unit 12) Inspection of Push Rod Plate Check push rod plate for crack and damage. Replace if necessary. 13) Inspection of Push Rod Check push rod for bend, wear and damage. Replace if necessary. 14) Disassembly and Inspection of Oil Pump Loosen oil pump cover mounting bolts and then pump cover Remove oil pump cover O ring 2 carefully. - Page 113 Check gap a between inner and outer rotors. Replace outer or inner rotor if the gap is over specified value. Standard Value: 0.15 mm (0.0059 in) Functional Limit : 0.2 mm (0.0078 in) Check gap b between outer rotor and body. Replace outer rotor or crank case if the gap is over specified value.
-
Page 114: Disassembly Of Cylinder And Oil Pan
Power Unit 15) Disassembly of Cylinder and Oil Pan Loosen oil pan bolts in the reverse order with referring to the numbers shown, and remove oil pan — · Wipe off spilt oil completely. · When tightening bolts, follow the numbers shown. - Page 115 Turn crankshaft to a position where connecting rod bolts 4 and connecting rod cap 5 can be removed, remove the bolts, and then remove the cap. Remove connecting rod 6 and piston ass'y from cylinder block. · Removed bearings should be arranged in the order they are removed.
-
Page 116: Disassembly And Inspection Of Breather Chamber
Power Unit 16) Disassembly and Inspection of Breather Chamber Loosen breather cover mounting screws and then remove the cover. Remove two breather collars 1 and two wave washers 2, check the parts, and replace if necessary. Attach breather collars 3 and wave washers 4. Position breather collar so that the hole a is directed as shown. -
Page 117: Inspection Of Camshaft
18) Inspection of Camshaft Check camshaft gear and decompressor for damage and wear. Replace if necessary. Measure cam height. Replace if the diameter is less than specified value. Cam Height a , both intake and exhaust : Standard value 28.33 mm (1.1154 in) Functional Limit : 28.07 mm (1.1051 in) Measure camshaft run out. -
Page 118: Inspection Of Piston Outer Diameter
Power Unit 19) Inspection of Piston Outer Diameter Measure piston outer diameter between points specified. Replace if it is less than specified value. Piston Outer Diameter a : Standard value 58.96 mm (2.3213 in) Measuring Point b : 7mm (0.28 in) upward from the bottom of piston skirt Functional Limit : 58.90 mm (2.3189 in) 20) Inspection of Cylinder Inner... -
Page 119: Inspection Of Piston Ring Side Clearance
22) Inspection of Piston Ring Side Clearance Measure piston ring side clearance. Replace piston and piston rings as a set if the clearance is over specified value. Piston Ring Side Clearance : Top Ring a : 0.04 - 0.08mm (0.0016 - 0.0031 in) Second Ring b : 0.03 - 0.07mm (0.0012 - 0.0028 in) Oil Ring c : 0.01 - 0.18mm (0.0004 - 0.0071 in) Functional Limit... -
Page 120: Inspection Of Piston Pin
Power Unit 24) Inspection of Piston Pin Measure piston pin outer diameter. Replace if it is less than specified value. Piston Pin Outer Diameter : Standard value 16.00 mm (0.6299in) Functional Limit : 15.97 mm (0.6287 in) Measure piston pin boss hole inner diameter a. Obtain clearance between piston pin and pin boss. -
Page 121: Inspection Of Connecting Rod Big End Side Clearance
Remove connecting rod and measure crashed width of plastic gauge. 0.002 0.051 0.003 0.076 0.004 0.102 0.005 0.127 Connecting rod big end and crankshaft clearance: 0.006 0.152 corresponding value 0.040 - 0.066 mm (0.00157 - 0.00260 in) Functional Limit : 0.080 mm (0.00315 in) 27) Inspection of Connecting Rod Big End Side Clearance... -
Page 122: Disassembly And Inspection Of Oil Pan
Power Unit 29) Disassembly and Inspection of Oil Pan Remove oil pressure switch 1 from oil pan. Loosen oil strainer cover mounting bolts and strainer pipe mounting bolts, and then remove cover 2. Check oil strainer cover screen mesh 3 for dirt and clogging. -
Page 123: Removal Of Valves And Springs
30) Removal of Valves and Springs Place cylinder head on the work bench. Push in valve spring retainer 1 by using valve spring compressor attachment 2, remove cotter pin 3, and then, remove spring 4 and valve 5. · Place a piece of cloth below cylinder head to prevent valves from moving downward. -
Page 124: Inspection Of Valve
Power Unit 32) Inspection of Valve Check valve for dent and wear on the face. Replace if necessary. Measure valve stem outer diameter a. Replace if it is less than specified value. Valve Stem Outer Diameter a : Standard value Intake Side (IN) : 5.47 mm (0.2154 in) Exhaust Side (EX) : 5.44 mm (0.2142 in) -
Page 125: Inspection Of Valve Seat
34) Inspection of Valve Seat Remove carbon built up on the valve. Apply thin coat of red lead on the valve seat. Use valve lapper 1 (commercially available item) as shown to push valve 2 onto valve seat lightly. Measure width of area where valve face contacted with valve seat a that can be identified with red lead adhered to valve face. -
Page 126: Correction Of Valve Seat
Power Unit 35) Correction of Valve Seat Use valve seat cutter 1 (commercially available item) to correct valve seat. 30˚ 45˚ 60˚ Turn 45 degree cutter clockwise to cut valve seat surface to make it smooth. 45˚ Be careful not to over-cut valve seat. Turn valve seat cutter while pushing down evenly. - Page 127 Use 45 degree cutter to adjust contact width of valve seat c to specified value. 45˚ b Width before correction c Specified width Valve seat contact area is located on the center, which should be adjusted to specified value by cutting upper and 30˚...
- Page 128 Power Unit Apply thin coat of abrasive compound on the overall valve seat contact area, and turn valve lapper 2 (commercially available item) while tapping valve. CAUTION Perform the work by taking care not to allow abrasive compound to adhere to valve stem and valve guide.
-
Page 129: Installation Of Valves
36) Installation of Valves Apply oil to valve guide and attach new valve stem seal 4st OIL Intake Side : Black Exhaust Side : Green Do not reuse the seal. Use new one. 4st OIL Assemble valve 3, valve spring seat 4, valve spring 5 and retainer 6 in this order, and then, push in the assembly by using valve spring compressor attachment 8. -
Page 130: Installation Of Piston And Connecting Rod
Power Unit 37) Installation of Piston and Connecting Rod Install connecting rod 2, piston pin 3, and piston pin clip 4 to piston 1. · Point "3AB-UP" mark a of connecting rod and "UP" mark b of piston to the same direction. ·... -
Page 131: Assembly Of Cylinder Oil Pan
38) Assembly of Cylinder Oil Pan Press fit bearing into cylinder block, use with proper mandrel. Install crankshaft 1 on the cylinder block. Before installing, apply engine oil to mating surface between bearing and crankshaft. 4st OIL Use piston slider 2 as shown to install piston ass’y into cylinder block. - Page 132 Power Unit Attach connecting rod cap 4 to connecting rod, and tightening connecting rod bolts 5 in two steps to specified torque. · Install connecting rod cap 4 after applying engine oil to inside of the part. · Bring locating marks a of connecting rod cap 4 and connecting rod, and install in original position (direction).
-
Page 133: Installation Of Cylinder Head
39) Installation of Cylinder Head Attach gasket and cylinder head ass’y to cylinder block, and then, tighten bolts to specified torque in two steps in the order as shown. Cylinder head installation bolts: 1st tightening torque : 12 N • m (9 lb • ft)[1.2 kgf • m] 2nd tightening torque : 25 N •... - Page 134 Power Unit Attach O ring 5 and oil pump cover 6 and secure with bolts. Apply much engine oil to oil pump and rotors (outer and inner). Attach push rods 7, rocker arms 8, rocker arm pivots and adjusting nuts 9 to cylinder head. Ensure that push rods 7 are engaged with valve lifters.
-
Page 135: Installing Flywheel
40) Installing Flywheel Attach key to crankshaft and install flywheel. Tighten flywheel nut to specified torque. Flywheel puller kit : P/N. 369-72211-0 Flywheel Nut : 50 N · m (37 lb · ft) [5.0 kgf · m] Attach igniter. Thickness Gauge: P/N. - Page 136 Power Unit Attach intake manifold to cylinder and tighten bolts to specified torque. Ensure that O ring is attached properly. Intake manifold installation bolt: 6 N · m (4 lb · ft) [0.6 kgf · m] Install carburetor. Install fuel pump and connect fuel hose. 5-50 4st 4/5/6 2020...
- Page 137 Install recoil starter. 1342 1342 1342 Attach breather hose 4. Apply SOC grease to attach oil pressure switch terminal and then attach pressure switch code. Attach crankcase head 5. 4st 4/5/6 2020 5-51...
-
Page 138: Installation Of Power Unit
Power Unit 41) Installation of Power Unit Clean mating surface of power unit and attach new gasket Install power unit 2. Tighten power unit installation bolts 3 in two or three steps to specified torque. Power Unit Installation Bolt : 7 N ·... - Page 139 Connect rod 6 and choke wire 7. Install fuel tank 8 and connect pipe. 4st 4/5/6 2020 5-53...
- Page 140 Power Unit Power Unit 5-54 4st 4/5/6 2020...
-
Page 141: Lower Unit
Lower Unit 1. Special Tools ……………………………… 6-2 16) Inspection of Clutch Cam and Cam Rod …… 6-17 2. Parts Layout ……………………………… 6-4 17) Assembly of Clutch Cam and Cam Rod ……6-18 Drive Shaft Housing ………………………… 6-4 18) Removing Pump Case (Lower) ………… 6-18 Gear Case (Drive Shaft) •... - Page 142 Lower Unit 1. Special Tools Spring Pin Tool A Spring Pin Tool B Spring Pin Tool A Spring Pin Tool B P/N. 345-72227-0 P/N. 345-72228-0 P/N. 369-72217-0 P/N. 369-72218-0 Removing spring pin Installing spring pin Removing spring pin Installing spring pin (ϕ3.0) (ϕ3.0) (ϕ3.5)
- Page 143 4st 4/5/6 2020...
-
Page 144: Drive Shaft Housing
Lower Unit P/C Fig. 7 2. Parts Layout Drive Shaft Housing Fig.10-46 Fig.5-30 4 N·m (3 lb·ft) [0.4 kgf·m] 7 N·m (5 lb·ft) [0.7 kgf·m] 6 N·m (4 lb·ft) [0.6 kgf·m] L&UL Fig.8-47 13 N·m (9 lb·ft) [1.3 kgf·m] 13 N·m (9 lb·ft) [1.3 kgf·m] 1342 1342 1342... - Page 145 Ref. Description Q'ty Remarks Drive Shaft Housing Assy (S) for Transom "S" Drive Shaft Housing Assy (L) for Transom "L" use Slate Color Bushing Drive Shaft Housing Assy (Ul) for Transom "UL" use Dark Brown Bushing Bushing Drive Shaft Bushing Assy Slate Color Bushing for Transom "L"...
-
Page 146: Gear Case (Drive Shaft) • Gear Case (Propeller Shaft)
Lower Unit P/C Fig. 8 Gear Case (Drive Shaft) • Gear Case (Propeller Shaft) GEAR GEAR GEAR GEAR GEAR GEAR Sail Pro GEAR GEAR GEAR 6 N·m (4 lb·ft) [0.6 kgf·m] 13 N·m (9 lb·ft) [1.3 kgf·m] GEAR GEAR GEAR GEAR GEAR GEAR... - Page 147 Ref. Description Q'ty Remarks Gear Case Assy Gear Case Assy for Sail Pro Roller Bearing 14-20-12 Plug 8-8 Gasket Do not reuse. Anode Bolt M6 L=16mm Ball Bearing 6004 Propeller Shaft Housing Assy Propeller Shaft Housing Oil Seal 15-28-10 O-Ring 3.2-47 Do not reuse.
- Page 148 Lower Unit GEAR GEAR GEAR GEAR GEAR GEAR Sail Pro GEAR GEAR GEAR 6 N·m (4 lb·ft) [0.6 kgf·m] 13 N·m (9 lb·ft) [1.3 kgf·m] GEAR GEAR GEAR GEAR GEAR GEAR 4st 4/5/6 2020...
- Page 149 Ref. Description Q'ty Remarks 43-1 Drive Shaft Assy (S) For Transom "S" 43-2 Drive Shaft Assy (L) For Transom "L" 43-3 Drive Shaft Assy (Ul) For Transom "UL" Ball Bearing 6300 Clutch Cam Spring Pin 3-10 47-1 Cam Rod (S) For Transom "S"...
-
Page 150: Inspection Item
Lower Unit 3. Inspection Item 1) Draining Gear Oil Remove oil plugs 2 and then 1 to drain gear oil. Refer to "Replacement of Gear Oil" in Chapter 3. Remove lower oil plug 1 first. 3 Gasket Do not reuse. 2) Removing Propeller Shift into reverse (R). -
Page 151: Removing Lower Unit
3) Removing Lower Unit Ass'y Removal of lower unit ass'y does not require removal of power unit from outboard motor body. Tilt up and lock with tilt stopper. Shift in reverse. Remove grommet 1 and loosen bolt 2. Bolt 2 should be loosened, not removed from joint 3. -
Page 152: Inspection Of Water Pump
Lower Unit Remove impeller 2. 5) Inspection of Water Pump Check pump case (upper) 1 for deformation. Replace if necessary. Check impeller 2 and pump case liner 3 for crack and wear. Replace if necessary. Check key 4 and drive shaft installation face a for wear. Replace if necessary. -
Page 153: Removing Propeller Shaft Housing Ass'y
Check water pump guide plate 5 for cracks and wear. Replace if necessary. 6) Removing Propeller Shaft Housing Ass'y Remove bolts 1 and pull out propeller shaft housing ass'y When the ass'y is pulled out a little, put bladed screw driver 3 in the mating surface of lower gear case to separate it from the case. -
Page 154: Disassembly Of Propeller Shaft Housing
Lower Unit 7) Disassembly of Propeller Shaft Housing Ass'y Remove bearing 1 by using commercially available bearing puller. Before removing, check bearing for play or deflection. Replace if necessary. CAUTION Do not reuse removed bearing. 1 Bearing Do not reuse. Remove oil seal 2. -
Page 155: Assembly Of Propeller Shaft Housing
9) Assembly of Propeller Shaft Housing Ass'y Apply gear oil to outside of new oil seal 1, and attach it to propeller shaft housing 3 by using a commercially available mandrel 2. GEAR GEAR GEAR GEAR GEAR GEAR 1 Oil Seal Do not reuse. -
Page 156: Disassembly Of Propeller Shaft Ass'y
Lower Unit 11) Disassembly of Propeller Shaft Ass'y Pull out clutch pin 2 while pushing push rod 1. Remove clutch 3, push rod 1, spring retainer 4, and spring 5. · Take care not to allow parts to fly out by easing spring tension gradually. -
Page 157: Removing Clutch Cam And Cam Rod
Using bladed screw driver, shorten spring 1 by referring to illustration, insert spring pin tool A 4 into hole of clutch 2 to secure spring. Slowly press fit new spring pin 3 from the other side, putting it on the spring pin tool A and by using spring pin tool B 5. -
Page 158: Assembly Of Clutch Cam And Cam Rod
Lower Unit 17) Assembly of Clutch Cam and Cam Rod Install clutch cam 3 and spring pin 2 to cam rod 1. Spring Pin Tool B (ϕ3.0): P/N. 345-72228-0 GEAR GEAR Forward GEAR Be careful of direction of cam rod. direction 2 Spring Pin Do not reuse. -
Page 159: Assembly Of Pump Case (Lower)
20) Assembly of Pump Case (Lower) Apply gear oil to outside of new oil seal 1, and attach it to pump case (lower) 3 with numbered side down by using a commercially available mandrel 2. GEAR GEAR GEAR GEAR GEAR GEAR Apply LIT grease to lip of oil seal 1. -
Page 160: Disassembly Of Gear Case
Lower Unit 23) Disassembly of Gear Case Ass'y Check bearings 1 for cracks and generation of abnormal noise. Replace if necessary. CAUTION Do not reuse removed bearing. · Do not remove bearing unless it is replaced with new one. · Before removing, check bearing for play or deflection. -
Page 161: Inspection Of Gear Case
24) Inspection of Gear Case Check skeg area a and torpedo-like front area b for cracks and damage. Replace if necessary. 25) Assembly of Gear Case Ass'y Do not reuse removed bearing. Install bearing 1 with numbered side up to gear case 2 to specified depth. -
Page 162: Installation Of Forward Gear And Pinion Gear (A And B Gears)
Lower Unit 26) Installation of Forward Gear and Pinion Gear (A and B Gears) Install shim 1 and forward (A) gear 2 that were removed previously. Install pinion (B) gear 3 and drive shaft ass'y 4. R e p l a c e s h i m w i t h n e w o n e o f t h e s a m e thickness if any deformation or damage is found on removed shim. -
Page 163: Determination Of Forward (A) Gear Backlash
29) Determination of forward (A) gear backlash Backlash Measuring Tool Kit : P/N. 369-72740-0 Backlash Measuring Tool Ass’y 1 : P/N. 369-72730-0 Measuring Tool Set Piece 2 : P/N. 369-72727-0 Clamp A : P/N. 3B7-72720-0 Dial Gauge Plate : P/N. 3B7-72729-0 Perform measurement of backlash between forward (A) gear and pinion (B) gear with propeller shaft housing, propeller shaft and reverse (C) - Page 164 Lower Unit First, pull up drive shaft by using hand. Fix shaft B 1 with bladed screw driver, and tighten nut 2 while pushing the shaft. At this time, be careful not to 90° 90° overtighten the nut, or shaft B is locked. Tighten nut 2 fully by using fingers, and then, additionally tighten approximately 90 degrees by using spanner wrench.
-
Page 165: Installation Of Water Pump
30) Installation of Water Pump Attach new gaskets 1 and 2, water pump guide plate 3 and dowel pin. 12 Gasket Do not reuse. Attach key 4 to drive shaft. Bring impeller 5 groove a to key 4 and install impeller to drive shaft. -
Page 166: Installation Of Propeller Shaft Housing
Lower Unit Install pump case (upper) ass'y 8 on the gear case, and tighten bolts 9 in two or three steps to specified torque. Apply grease to interior of pump case liner, and install pump case (upper) by pushing it down with hand while turning drive shaft clockwise. -
Page 167: Filling With Gear Oil
32) Filling with Gear Oil Fill gear case with specified quantity a of gear oil. "Refer to GEAR GEAR Chapter 3." GEAR Perform "Inspection of Gear Case (Leakage)" in Chapter 3 if necessary. GEAR GEAR GEAR 1 Gasket Do not reuse. GEAR GEAR GEAR... - Page 168 Lower Unit Attach lower unit ass'y to drive shaft housing, and tighten lower unit ass'y installation bolts 2 (nut 3 ) to specified torque. Connect water pipe securely. Move flywheel a little to align the drive shaft spline to crank shaft spline.
- Page 169 Turn propeller nut q to tightening direction to align one of grooves to propeller shaft hole, and attach split pin w. If propeller nut groove cannot be aligned with split pin hole, loosen nut and repeat steps 6 and Check gear oil level. "Refer to Chapter 3." Perform "Inspection of Lower Unit (Air Leakage)"...
- Page 170 Lower Unit 6-30 4st 4/5/6 2020...
-
Page 171: Bracket
Bracket 1. Parts Layout ……………………………… 7-2 2) Removal and Inspection of Clamp Bracket • Reverse Lock ……………………… 7-2 Bracket …………………………………… 7-13 Drive Shaft Housing • Shift ………………… 7-4 3 ) Installation of Clamp Bracket and Bottom Cowl • Tiller Handle ………………… 7-6 Drive Shaft Housing ………………………... -
Page 172: Parts Layout
Bracket Bracket P/C Fig. 9 1. Parts Layout Bracket • Reverse Lock 4st 4/5/6 2020... - Page 173 Ref. Description Q'ty Remarks Swivel Bracket Swivel Bracket Clamp Bracket (R) Stern Bracket Right Starboard Side Clamp Bracket (L) Stern Bracket Left Port Side Bolt 8-122 Nylon Nut 8-P1.25 Washer Washer 8.5-28-1 Distance Plate Screw M6 L=12mm Stern Bracket Spring Screw M4 L=6mm Washer 4.3-16-1.5...
-
Page 174: Drive Shaft Housing • Shift
Bracket Bracket Drive Shaft Housing • Shift P/C Fig. 7 Fig.10-46 Fig.5-30 4 N·m (3 lb·ft) [0.4 kgf·m] 7 N·m (5 lb·ft) [0.7 kgf·m] 6 N·m (4 lb·ft) [0.6 kgf·m] L&UL Fig.8-47 13 N·m (9 lb·ft) [1.3 kgf·m] 13 N·m (9 lb·ft) [1.3 kgf·m] 4st 4/5/6 2020... - Page 175 Ref. Description Q'ty Remarks Drive Shaft Housing Assy (S) for Transom "S" Drive Shaft Housing Assy (L) for Transom "L" use Slate Color Bushing Drive Shaft Housing Assy (Ul) for Transom "UL" use Dark Brown Bushing Bushing Drive Shaft Bushing Assy Slate Color Bushing for Transom "L"...
-
Page 176: Bottom Cowl • Tiller Handle
Bracket Bracket P/C Fig. 10 Bottom Cowl • Tiller Handle Fig.3-28 Fig.3-18 Fig.6-22 Fig.4-26 Fig.7-34 Fig.6-23 4st 4/5/6 2020... - Page 177 Ref. Description Q'ty Remarks Bottom Cowl Grommet 22-3 Cowl Latch Assy Bolt M6 L=16mm Grommet 15.5-27 Grommet 18-2.5 Grommet 25-5 Grommet 17-2.7 Plastic Rivet 6.5 Tiller Handle Assy Tiller Handle Plastic Rivet 6.5 Grip Throttle Shaft Throttle Shaft Damper Bushing 14-15.8-7 Screw Screw Throttle Shaft Support...
- Page 178 Bracket P/C Fig. 10 Fig.3-28 Fig.3-18 Fig.6-22 Fig.4-26 Fig.7-34 Fig.6-23 4st 4/5/6 2020...
- Page 179 Ref. Description Q'ty Remarks Bolt 6-35 Washer 6.5-23-1.5 Cable Terminal Plug Oil Pressure Decal Fuel Lever Decal Fuel Lever Decal Shift Decal Bolt Dual Fuel Tank Model M6 L=12mm Washer 6.5-23-1.5 Dual Fuel Tank Model Bolt Separate Fuel Tank Model M6 L=12mm Washer 6.5-23-1.5 Separate Fuel Tank Model Carrying Handle...
-
Page 180: Top Cowl
Bracket Bracket Top Cowl P/C Fig. 11 Ref. Ref. Description Remarks Description Remarks Q'ty Q'ty 1-1 Sail Pro Decal 1 for Sail Pro (USA) 7 Top Cowl Sub-Assy 1 Separate Fuel Tank Model 1-2 Sp Decal 1 for Sail Pro (EU) 8 Top Cowl Seal 2 Caution Decal (A) 12-1 Decal Set (MFS4D) -
Page 181: Disassembling And Assembling Procedure
2. Disassembling and Assembling Procedure 1) Removal and Inspection of Drive Shaft Housing Tilt up drive shaft housing. Remove reverse lock arm 1. Remove thrust rod 2. Remove wing nut 3 for co-pilot. Loosen four swivel bracket (B) bolts 4. Hold drive shaft housing to prevent it from dropping. - Page 182 Bracket Bracket Remove drive shaft housing 5. Check steering bushing 6 and thrust place 7 for wear and damage, and replace if necessary. 7-12 4st 4/5/6 2020...
-
Page 183: Removal And Inspection Of Clamp Bracket
2) Removal and Inspection of Clamp Bracket Loosen clamp bracket mounting nut 1 and remove bolt, then remove swivel bracket. Remove mounting screws 3 of bracket distance plate Remove tilt stopper 5 mounting bolt 6 from swivel bracket 4, and then remove tilt stopper 5. Check tilt stopper and bracket for damage. -
Page 184: Installation Of Clamp Bracket And Drive Shaft Housing
Bracket Bracket 3 ) Installation of Clamp Bracket and Drive Shaft Housing Install tilt stopper 1 to swivel bracket (A). Apply grease to sliding areas of tilt stopper. Install clamp bracket to swivel bracket (A). Apply grease to both sides of washer 2. Install distance plate 3 to clamp bracket. - Page 185 Install drive shaft housing and swivel bracket (B) to swivel bracket. Attach wing nut 0, and check operation of steering friction. Install reverse lock arm q on the swivel bracket. Check operation of each part, and put grease through swivel bracket grease nipple w. Keep putting grease until excessive grease appears from thrust bushing.
-
Page 186: Removal, Inspection And Installation Of Water Pipe
Bracket Bracket 4) Removal, Inspection and Installation of Water Pipe Remove water pipe 1 from drive shaft housing 2. Check water pipe for crack and damage. Install water pipe 1 into drive shaft housing 2. · Apply grease to water pipe seal 3 before installation. -
Page 187: Remove, Inspection And Installation Of Tiller Handle
5) Remove, Inspection and Installation of Tiller Handle Loosen stud bolt 1 of tiller handle, and remove tiller handle from bottom cowl. Check tiller handle spacer 2 and bushings 3 for wear and damage. Loosen throttle grip screw 4 and remove the grip 5. Remove throttle shaft supporter 6 screw. - Page 188 Bracket Bracket Attach throttle wire 9 to throttle shaft 0 as shown. Attach throttle shaft 0 with throttle wire 9 to tiller handle q, and tighten adjusting screw w securely. Tighten throttle supporter. Be careful of the location of throttle friction e. Install throttle grip r to tiller handle, and secure with screw.
- Page 189 Install tiller handle to bottom cowl. Tighten bolt 1 to specified torque. Tiller handle securing bolt 1 : 6 N · m (4 lb · ft) [0.6 kgf · m] Arrange throttle cable 9 as shown. a<High speed side>, b<Low speed side> Check operations of tiller handle and throttle grip.
-
Page 190: Adjustment Of Throttle Cable
Bracket Bracket 6) Adjustment of Throttle Cable Check position of cable on low speed side and high speed side. Set throttle grip to the slowest position, and fully pull choke knob to close choke valve. Adjust lock nut 1 while applying tension to outer wire by pulling it with a hand to fix low speed side wire. - Page 191 Set throttle grip to full-open position, and check if throttle lever of carburetor contacts stopper. Set throttle grip to full-close position, and check if throttle lever of carburetor contacts stopper. 4st 4/5/6 2020 7-21...
- Page 192 Bracket Bracket 7-22 4st 4/5/6 2020...
- Page 193 Electrical System 1. Special Tools ……………………………… 8-2 2) Inspection of Plug Cap …………………… 8-7 2. Parts Layout ……………………………… 8-4 4) Inspection of Stop Switch ………………… 8-9 Magneto ……………………………………… 8-4 5) Inspection of Oil Pressure Switch ……… 8-9 6) Inspection of Rectifier …………………… 8-10 3.
-
Page 194: Special Tools
Electrical System 1. Special Tools Thickness Gauge Vacuum/Pressure Gauge Spark Tester P/N. 353-72251-1 P/N. 3AC-99020-1 P/N. 3F3-72540-0 Inspecting pressure Inspecting spark Measuring gaps 4st 4/5/6 2020... - Page 195 4st 4/5/6 2020...
-
Page 196: Parts Layout
Electrical System P/C Fig. 6 2. Parts Layout Magneto SAIL PRO 50 N·m (37 lb·ft) [5.0 kgf·m] SAIL PRO Fig.1-46 SAIL PRO Fig.16-3 4st 4/5/6 2020... - Page 197 Ref. Description Q'ty Remarks Flywheel STD with out Alternator Flywheel for Sail Pro (with Alternater) Alternator Assy for Sail Pro 12V60W (with Alternater) Screw for Sail Pro (with Alternater) M5 L=25mm Washer for Sail Pro (with Alternater) M5 Clamp 4.2-3-8 for Sail Pro (with Alternater) Screw for Sail Pro (with Alternater) M4 L=8mm...
-
Page 198: Ignition System And Ignition Control System
Electrical System 3. Ignition System and Ignition Control System 1) Inspection of Ignition Spark Disconnect the plug cap from the spark plug. Connect the plug cap to the spark tester. Connect the spark tester clip to the spark plug tip a electrode. -
Page 199: Inspection Of Plug Cap
2) Inspection of Plug Cap Remove the part and test it as a separate unit. Disconnect plug cap from spark plug. Remove plug cap from high tension cable. Measure plug cap resistance. Replace if other than specified value. 3.0 - 7.0 kΩ 4st 4/5/6 2020... - Page 200 Electrical System 3) Inspection of Igniter Measure igniter resistance. Replace if other than specified value. Remove the part and test it as a separate unit. Igniter tester check chart (3GR-06041-0) Tester “+” terminal Stop terminal Spark plug cap terminal Stop terminal ∞...
-
Page 201: Inspection Of Stop Switch
4) Inspection of Stop Switch Check conduction of stop switch, and replace if not conductive. This test can be made without removing parts. Lead Wire Color Switch Position Brown (Br) Black (B) Remove lock plate. a Attach lock plate. b Press switch. -
Page 202: Inspection Of Rectifier
Electrical System 6) Inspection of Rectifier Check conduction of fuse (10 A) contained in the fuse box 1. Replace if non-conductive. Check conduction between rectifier terminals. Replace if out of specification. Rectifier tester check chart (3GR-76060-0) Tester “+” terminal Yellow a Red c Black b Yellow a... - Page 203 Troubleshooting Ignition System …………………………… 9-6 1. Troubleshooting List …………………… 9-2 Intake • Compression Pressure ………… 9-7 2. Power Unit ………………………………… 9-3 1 Engine will not start or is a little hard to start. 3 Idle engine speed will not stabilize. …… 9-8 (Recoil starter operates normally.) …………...
-
Page 204: Troubleshooting
Troubleshooting 1. Troubleshooting List Probable Cause Fuel level is low in the tank. ○ ○ Fuel system connection is incomplete. ○ ○ ○ ○ ○ ○ ○ Air suctioned through fuel system. ○ ○ ○ ○ ○ ○ ○ Fuel pipe is twisted. -
Page 205: Power Unit
Before working on the outboard motor, check the hull, rigging, installation of outboard motor, fuel level, and wire connections. For mechanical troubleshooting, refer to relevant troubleshooting section in this chapter. For checking and servicing outboard motor, refer to service procedures described in this manual to perform the work safely. - Page 206 Troubleshooting Check valve clearance. Normal ? Adjust valve clearance. Check valves, cylinder block and/or piston ass’y. 4st 4/5/6 2020...
-
Page 207: Engine Starts But Stalls Soon
Trouble 2 Engine starts but stalls soon. • Inspection of Fuel System, Ignition System, Compression Pressure Fuel System Check air vent screw of fuel tank. Open air vent screw. Open? Check if fuel contains water and fuel filter is clogged. Check fuel hose for bend Does fuel contains water, and fuel leak. -
Page 208: Ignition System
Troubleshooting Ignition System Use spark tester to check ignition sparks. Check igniter Normal ? and/or plug cap. WARNING • When testing, put electrode cap assuredly to prevent Replace spark plug direct contact with spark tester wiring and leak of with new one. electrical current. -
Page 209: Intake • Compression Pressure
Intake • Compression Pressure Check if secondary air is sucked through mating surface of carburetor or intake manifold. Check compression Is secondary air pressure. sucked? Replace defective part and seal with new ones. 4st 4/5/6 2020... -
Page 210: Idle Engine Speed Will Not Stabilize
Troubleshooting Trouble 3 Idle engine speed will not stabilize. • Inspection of Intake Manifold, Air Intake System and Ignition System Check operations of throttle cable and drum. Normal ? Adjust throttle cable. Check ignition timing. Check gaskets Out of specified if secondary air is range? sucked through them. - Page 211 Trouble 4 Rough acceleration. Rapid opening of throttle causes engine to stall. Acceleration is not smooth. Inspection of Carburetor, Ignition System and Compression Pressure • Check operation of throttle cable. Is the throttle Adjust throttle cable. valve tuned ? Disassemble carburetor, and check internal components for clogging, dirt and damage.
-
Page 212: Gear Shifting Cannot Be Made Normally
Troubleshooting Trouble 5 Gear shifting cannot be made normally. Check operations of shift lever. Normal ? Check spring and ball. Check shift rod joint. Normal ? Adjust shift rod joint. Disassemble lower unit and check operation of clutch. Replace defective part Normal ? with new one. -
Page 213: Wiring Diagram
Wiring Diagram... - Page 214 WIring Diagram F 4D/5D/6D OPTION LIGHT EXTENSION CORD ALTERNATOR B ------- Black Br ----- Brown *MAGNETO RECTIFIER R ------- Red W ------ White * Only for 3SP model. Lg ----- Light Green FUSE MAGNETO IGNITER FLAT TERMINAL FLAT (Large) TERMINAL (Small) WARNING LIGHT BATTERY...
- Page 215 OPTION IGNITER STOP SWITCH STOP SWITCH ASSEMBLY REMOTE CONTROL REMOTE CONTROL 4st 4/5/6 2020 10-3...
- Page 216 WIring Diagram 10-4 4st 4/5/6 2020...
- Page 217 Copyright © 2021 Tohatsu Corporation. All rights reserved. No part of this manual may be reproduced or transmitted in any form or by any means without the express written permission of Tohatsu Corporation.
- Page 218 S E R V I C E M A N U A L 4 STROKE MFS 4D MFS 5D MFS 6D Models 5-4, Azusawa 3-Chome, Itabashi-Ku Tokyo 174-0051, Japan Tel: +81-3-3966-3117 Fax: +81-3-3966-0090 OB No.003-21034-4BA1 2104NB www.tohatsu.com Printed in Japan...
Need help?
Do you have a question about the MFS 4D and is the answer not in the manual?
Questions and answers