
Related Manuals for Ruijie RG-AP680-AR


Summary of Contents for Ruijie RG-AP680-AR
- Page 1 Ruijie RG-AP680-AR Access Point Hardware Installation and Reference Guide Document Version: V1.1 Date: August 16, 2023 Copyright © 2023 Ruijie Networks...
- Page 2 Due to product version upgrades or other reasons, the content of this document will be updated from time to time. Ruijie Networks reserves the right to modify the content of the document without any notice or prompt.
-
Page 3: Preface
Preface Intended Audience This document is intended for: Network engineers Technical support and servicing engineers Network administrators Technical Support Ruijie Networks Website: https://www.ruijienetworks.com/ Technical Support Website: https://ruijienetworks.com/support Case Portal: https://caseportal.ruijienetworks.com Community: https://community.ruijienetworks.com Technical Support Email: service_rj@ruijienetworks.com... - Page 4 Specification An alert that contains a description of product or version support. 2. Note The manual offers configuration information (including model, port type and command line interface) for indicative purpose only. In case of any discrepancy or inconsistency between the manual and the actual version, the actual version prevails.
-
Page 5: Table Of Contents
Contents Preface ..............................I 1 Product Introduction ........................1 1.1 Overview ........................... 1 1.2 Product Appearance ........................ 2 1.3 Package Contents ........................6 1.4 Technical Specifications ......................7 1.4.1 Dimensions and Weight....................7 1.4.2 RF Specifications ......................8 1.4.3 Port Specifications ...................... 10 1.4.4 Power Supply and Consumption ................ - Page 6 2.2 Installation Environment Requirements ................17 2.2.1 Bearing Requirements ....................18 2.2.2 Ventilation Requirements ..................18 2.2.3 Space Requirements ....................18 2.2.4 Temperature/Humidity Requirements ..............18 2.2.5 Anti-interference Requirements ................19 2.2.6 Lightning Protection Requirements ................. 19 2.2.7 Waterproof Requirements ..................20 2.2.8 Other Requirements ....................
- Page 7 3.6.2 Connecting the Network Cable ................. 30 3.6.3 Connecting the Optical Fiber ..................31 3.6.4 Connecting the Power Cable ..................32 3.6.5 Connecting the External Antenna ................33 3.7 Bundling Cables........................33 3.7.1 Precautions ......................... 33 3.7.2 Bundling Description ....................33 3.8 Installation Verification ......................
- Page 8 5.3 Hardware Maintenance ......................36 6 Troubleshooting ..........................37 6.1 General Troubleshooting Procedure ..................37 6.2 Common Troubleshooting Procedures ................37 6.2.1 Ethernet Port Is Not Working After the Ethernet Cable Is Plugged In ....37 6.2.2 LED Is Off for a Long Time ..................37 6.2.3 LED Is Steady Red .......................
-
Page 9: Product Introduction
Ruijie Access Controllers (ACs) and WIS to implement STA data forwarding, security, access control, and IoT application extension. Thanks to its IP68 rated housing, the RG-AP680-AR is suitable for use in extreme industrial environments and capable of effectively withstanding harsh weather and environments. -
Page 10: Product Appearance
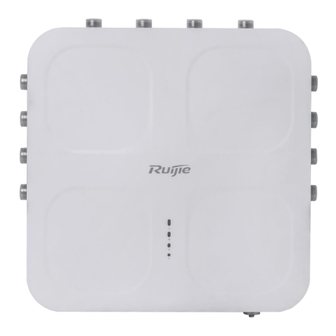
Hardware Installation and Reference Guide Product Introduction Product Appearance Figure 1-1 Front View... - Page 11 Hardware Installation and Reference Guide Product Introduction Figure 1-2 Rear View Figure 1-3 Right View...
- Page 12 Hardware Installation and Reference Guide Product Introduction Table 1-1 Port Description Item Description LAN4/SFP+ Uplink service port for data transmission, 10G SFP port LAN3/SFP+ Uplink service port for data transmission, 10G SFP port Downlink service port for data transmission, 1000Base-T adaptive Ethernet port LAN2/IoT Support for 802.3af-complaint power supply to external...
- Page 13 Hardware Installation and Reference Guide Product Introduction Figure 1-4 Left View Table 1-2 Port Description Item Description The console port is used to connect with a serial cable for device management. Console port and Reset button The Reset button is used to restart the device or restore factory settings of the device.
-
Page 14: Package Contents
Hardware Installation and Reference Guide Product Introduction Item Description Used to connect with the N-type ports of the 2.4G 6–9 2.4G antenna ports external antennas Used to indicate the system working status, including one system status LED and three RSSI LEDs Package Contents Table 1-3 Package Contents... -
Page 15: Technical Specifications
Technical Specifications 1.4.1 Dimensions and Weight Table 1-4 Dimensions and Weight Dimensions and RG-AP680-AR Weight Dimensions (W × D 300 mm × 300 mm × 94 mm (11.81 in. x 11.81 in. x 3.70 in.) × H) AP: ≤ 4.5 kg (9.92 lbs) Weight Mounting bracket: ≤... -
Page 16: Rf Specifications
Hardware Installation and Reference Guide Product Introduction Dimensions and RG-AP680-AR Weight Mounting Hole 105 mm × 65 mm (4.13 in. x 2.56 in.) Pattern Mounting Hole 9 mm (0.35 in.) Diameter Pole Diameter 80–140 mm (3.15-5.51 in.) 1.4.2 RF Specifications... - Page 17 Hardware Installation and Reference Guide Product Introduction RF Specifications RG-AP680-AR Note: The operating bands vary in different countries. Radio 1: 2.4 GHz, 1.147 Gbps Radio 2: 5 GHz, 4.804 Gbps Radio 3: 5 GHz, 4.804 Gbps Transmission Rate Radio 4: 2.4 GHz/5 GHz, 300 Mbps/867 Mbps Max.
-
Page 18: Port Specifications
Fixed Service Ports compatible with 2.5 Gbps/1 Gbps optical ports Downlink: One 10/100/1000Base-T adaptive Ethernet port, which allows the PSE to power external devices (802.3af, 15.4 W) and can connect to Ruijie IoT module One RJ45 console port Fixed Management... -
Page 19: Power Supply And Consumption
1. 100–240 V AC power supply (equipped with the RG-PL-M16-3M cable, and 1 A current must be guaranteed) Power Type 2. PoE/PoE+/PoE++ (IEEE 802.3af/at/bt-compliant) Power Supply to Supported (Connect to Ruijie IoT module, 802.3af-compliant, External Devices support for 15.4 W output power) Maximum Power ≤ 50 W... -
Page 20: Environment And Reliability
AP for air circulation. 1.4.5 Environment and Reliability Table 1-8 Standard Compliance Environment and RG-AP680-AR Reliability Working temperature: –40°C to +70°C Storage temperature: –40°C to +85°C Temperature At a height between 3000 m and 5000 m above the sea level, every time the altitude increases by 166 m (546 ft.), the maximum... - Page 21 Hardware Installation and Reference Guide Product Introduction Figure 1-5 LED Status Status Frequency Description The AP is not powered on. The AP is powered on, but the LED is manually turned off. The software system of the AP is being Steady green initialized.
-
Page 22: Optical Module
Hardware Installation and Reference Guide Product Introduction Press and hold the button for longer Restore to factory settings. than 5s Table 1-10 Bridge LED No. of LED Color Steady-on Description The AP does not enable the bridge function. The AP has enabled the bridge function, but bridging fails. Bridging is successful, and the strength of the wireless Green signals dedicated for bridging is less than –70 dBm. - Page 23 Hardware Installation and Reference Guide Product Introduction Table 1-11 Rate Negotiation for an Optical Port on the Peer Device Negotiated Rate Supported by the Port on the Peer Optical Device Optical Port Rate Module Rate 1 Gbps/10 1 Gbps/2.5 Gbps/10 of the AP 1 Gbps Gbps/Auto...
-
Page 24: Preparing For Installation
Hardware Installation and Reference Guide Preparing Installation Preparing for Installation Safety Precautions Note To avoid personal injury and device damage, carefully read the safety precautions before you install the device. The following safety precautions may not cover all possible dangers. 2.1.1 General Safety Precautions Do not expose the AP to high temperature, dusts, or harmful gases. -
Page 25: Electric Safety
Hardware Installation and Reference Guide Preparing Installation 2.1.3 Electric Safety Warning Improper or incorrect electric operations may cause a fire, electric shock, and other accidents, and lead to severe and fatal personal injury and device damage. Direct or indirect contact with high voltage or mains power supply via wet objects may cause fatal dangers. -
Page 26: Bearing Requirements
Hardware Installation and Reference Guide Preparing Installation 2.2.1 Bearing Requirements Evaluate the weight of the device and its accessories (such as the bracket and power supply module), and ensure that the ground of the installation site meets the requirements. 2.2.2 Ventilation Requirements Reserve sufficient space in front of the air vents to ensure normal heat dissipation. -
Page 27: Anti-Interference Requirements
2.2.6 Lightning Protection Requirements The RG-AP680-AR can guard against lightning strikes. As an electric device, too strong lightning strikes may still damage the device. Take the following lightning protection measures: Ensure that the neutral point of the AC power socket is in good contact with the ... -
Page 28: Waterproof Requirements
Hardware Installation and Reference Guide Preparing Installation Ensure that the ground resistance is less than 5 ohms. In areas with high soil resistivity, reduce the soil resistivity via measures such as spreading resistivity reduction mixture around the grounding conductor. 2.2.7 Waterproof Requirements Cap unused ports to ensure waterproof. - Page 29 ESD tools, crimping pliers, diagonal pliers, network cable pliers, and wire Tools stripper Meter Multimeter Relevant PC, display, and keyboard Devices Note The RG-AP680-AR is not shipped with a tool kit. You need to prepare a tool kit by yourself.
-
Page 30: Installation
Hardware Installation and Reference Guide Installation Installation The RG-AP680-AR must be installed at a fixed position. Caution Before installing the device, make sure that you have carefully read the requirements described in Chapter 2. Installation Procedure The installation steps are shown in the following figure. -
Page 31: Before You Begin
Hardware Installation and Reference Guide Installation Before You Begin Carefully plan and arrange the installation location, networking mode, power supply, and cabling before installing the device. Confirm the following requirements before installation: The installation location provides sufficient space for heat dissipation. ... -
Page 32: Installing The Device
Hardware Installation and Reference Guide Installation Fasten the device tightly. Installing the Device 3.4.1 Installing the Support for Wall-mounted Installation Use four M6 expansion screws (hole of 105 mm × 65 mm) to fix the support on the wall with the TOP label facing up. -
Page 33: Mounting Bracket And Device Installation
Hardware Installation and Reference Guide Installation Figure 3-3 Installing the Support for Pole-mounted Installation Caution Use matching screws for the screw holes, and tighten the structural parts in different installation links. Tighten all fastening screws. If any screw is not installed, the device may vibrate violently, shift, or fall down. - Page 34 Hardware Installation and Reference Guide Installation Figure 3-4 Installing the Mounting Bracket (2) Assemble the mounting bracket flange and installation pole and use two M6 hex socket combined screws to fix the left and right sides. Note The mounting bracket flange and installation pole can be assembled in vertical or horizontal mode based on the actual coverage requirements.
- Page 35 Hardware Installation and Reference Guide Installation Figure 3-5 Connecting the Mounting Bracket and Installation Pole Based on the Wall-mounted Direction Figure 3-6 Connecting the Mounting Bracket and Installation Pole Based on the Ceiling-mounted Direction...
-
Page 36: Installing An Optical Module
Hardware Installation and Reference Guide Installation (3) Mount the device with the installation pole installed to the fixed support. Use hooks on the installation pole to connect with the support, and tighten a M8 combined screw on the left and right sides. Figure 3-7 Connecting with the Support Installing an Optical Module... -
Page 37: Connecting Cables
Hardware Installation and Reference Guide Installation Figure 3-8 Installing an Optical Module Connecting Cables Note You need to prepare waterproof materials yourself. 3.6.1 Connecting the Ground Cable The ground cable needs to be made on site. Connect one end of the yellow/green ground cable delivered with the device to the ground hole of the device through an OT terminal and the other end to the ground through another OT terminal. -
Page 38: Connecting The Network Cable
Hardware Installation and Reference Guide Installation Figure 3-9 Connecting the Ground Cable 3.6.2 Connecting the Network Cable Caution Ensure that the crystal connector of the network cable is properly inserted into the AP. If not, the crystal connector may be damaged when waterproof PG connector is installed. -
Page 39: Connecting The Optical Fiber
Hardware Installation and Reference Guide Installation Figure 3-10 Passing the Network Cable Through the Waterproof PG Connector (3) Insert the crystal connector of the network cable into the network port on the AP and tighten the waterproof PG connector based on the sequence of parts B, C, D, and E. The network cable is installed. -
Page 40: Connecting The Power Cable
Hardware Installation and Reference Guide Installation Figure 3-11 Passing the Optical Fiber Through the Waterproof Connector (2) Insert the optical module into the optical port of the device, and insert the optical fiber into the optical module connector. (3) Tighten part B of the waterproof connector on the device, combine parts C and D and place them into B, and tighten part E. -
Page 41: Connecting The External Antenna
Hardware Installation and Reference Guide Installation When the AC power supply is used, use the RG-PL-M16-3M cable, properly insert it into the port, and fix it. Then, paint waterproof cement and wrap waterproof tapes on the connector. Figure 3-12 Connecting the AC Power Cable 3.6.5 Connecting the External Antenna The feeder port of the external antenna uses a standard N-type connector, which is an N-J... -
Page 42: Installation Verification
Hardware Installation and Reference Guide Installation Figure 3-13 Bundling the Cables on the Support Using a Cable Tie Caution After the cables are bundled, check whether waterproof measures are taken properly. The circle in the preceding figure shows the fastening rope installation. Use a M8 screw to lock one end of the fastening rope on the back of the device and lock the other end of the fastening rope in a safe position. -
Page 43: Debugging
Hardware Installation and Reference Guide Debugging Debugging Establishing the Configuration Environment Use a power adapter or PoE to power the AP. When setting up the environment, pay attention to the following: Verify that the AP is properly connected to the power source. ... -
Page 44: Monitoring And Maintenance
If the AP works in fat mode, you can log in to the AP remotely for maintenance. If the AP works in fit mode, you can use an AC to centrally manage and maintain the Hardware Maintenance If the hardware is faulty, please contact Ruijie technical support. -
Page 45: Troubleshooting
Check whether the LEDs are normal. Check whether cables properly connected with ports. Contact Ruijie technical support to check whether hardware faults exist. Common Troubleshooting Procedures 6.2.1 Ethernet Port Is Not Working After the Ethernet Cable Is Plugged In Verify that the device at the other end of the Ethernet cable is working properly. And then verify that the Ethernet cable is capable of providing the required data rate and is properly connected. -
Page 46: Led Is Steady Red
Hardware Installation and Reference Guide Troubleshooting and then verify that the cable is connected properly. If you use a power adapter, verify that the power adapter is connected with an active power outlet, and then verify that the power adapter works properly. 6.2.3 LED Is Steady Red The LED keeps steady red for a long time, indicating that the Ethernet port is not... -
Page 47: Appendix
Hardware Installation and Reference Guide Appendix Appendix Connectors and Media 5000BASE-T/2500BASE-T/1000BASE-T/100BASE-TX/10BASE-T port The 5000BASE-T/2500BASE-T/1000BASE-T/100BASE-TX/10BASE-T port supports five kinds of adaptive speeds and supports the automatic MDI/MDIX crossover function under at these five kinds of speeds. Compliant with IEEE 802.3bz, the 5000BASE-T/2500BASE-T port requires at least Category 6 STP with a maximum distance of 100 meters. - Page 48 Hardware Installation and Reference Guide Appendix In addition to cables with the above-mentioned specifications, the 100BASE-TX/10BASE-T port can be connected using 100-ohm CAT-3, CAT-4, and CAT-5 cables for at 10 Mbps data speed or using to 100-ohm CAT-5 cables for at 100 Mbps data speed with a maximum connection distance of 100 meters. The following table shows 100BASE-TX/10BASE-T pin assignments.
- Page 49 Hardware Installation and Reference Guide Appendix...
-
Page 50: Cabling Recommendations
Hardware Installation and Reference Guide Appendix Cabling Recommendations During installation, route cable bundles upward or downward along the sides of the rack depending on the actual situation in the equipment room. All cable connectors should be placed at the bottom of the cabinet rather than be exposed outside of the cabinet. Power cords are routed beside the cabinet, and top cabling or bottom cabling is adopted according to the actual situation in the equipment room, such as the positions of the DC power distribution box, AC socket, or lightning protection box. - Page 51 Hardware Installation and Reference Guide Appendix Figure 7-4 Bundling Cables Twisting Bending Cables of different types (such as power cables, signal cables, and ground cables) ○ should be separated in cabling and bundling. Mixed bundling is not allowed. When they are close to each other, it is recommended that crossover cabling be adopted. In the case of parallel cabling, maintain a minimum distance of 30 mm between power cords and signal cables.
- Page 52 Hardware Installation and Reference Guide Appendix Figure 7-5 Cutting off Excess Cable Tie When cables need to be bent, bind them first but do not tie cable ties within the ○ bend. Otherwise, considerable stress may be generated in cables, breaking cable cores, as shown in Figure 7-6.
- Page 53 Hardware Installation and Reference Guide Appendix part should not touch heat sources, sharp corners, or sharp edges. If heat sources cannot be avoided, high-temperature cables should be used. When screw threads are used to fasten cable terminals, the bolt or screw must be ○...
- Page 54 Hardware Installation and Reference Guide Appendix No knot is allowed in cabling or bundling. ○ For wiring terminal blocks (such as circuit breakers) with cord end terminals, the ○ metal part of the cord end terminal should not be exposed outside the terminal block when assembled.
-
Page 55: Optical Modules And Specifications
Hardware Installation and Reference Guide Appendix Optical Modules and Specifications We provide appropriate optical modules according to the port types. You can select the module to suit your specific needs. The optical module types and corresponding specifications are provided for reference. Table 7-1 SFP Modules and Specifications Intensity of...
Need help?
Do you have a question about the RG-AP680-AR and is the answer not in the manual?
Questions and answers