Table of Contents

Related Manuals for Mircom FR-320 Series


Summary of Contents for Mircom FR-320 Series
- Page 1 FR-320 Series Pre-Action/Deluge and Agent Release Control Panel FM APPLICATIONS MUST HAVE CLASS A INITIATING CIRCUITS ONLY (FOR RELEASING) AND 90 HOUR BATTERY STANDBY OPERATION LT-951 Rev. 14 Installation and Operation Manual July 2023...
-
Page 3: Table Of Contents
Zone ..........................Display Points ........................ Wiring Classes ....................... System Components Main Pre-Action/Deluge and Agent Release Control Panel ........... FR-320 Series System Components ................Additional System Accessories ..................Mechanical Installation Installing the Enclosure ....................BBX-1024DS and BBX-1024DSR Mechanical Installation ..........Installing the Adder Modules .................. - Page 4 Four-Wire Smoke Detector Wiring ................. Relay Adder Module Wiring ................... Releasing Circuit Bypass Switch Wiring ................ Power Supply Connection ....................Wiring Tables and Information ..................6.10 Releasing Circuits ......................6.11 Annunciators ........................6.12 Four-Wire Smoke Power (regulated) ................6.13 Supervised Auxiliary Power (regulated) ................. 6.14 Unfiltered Supply (full wave rectified) ................
- Page 5 10.2 General Panel Operation ....................11.0 Pre-Programmed Modes 11.1 Mode 1: Agent Release, Single Hazard, Cross-zoned, Combined Release ....11.2 Mode 2: Agent Release, Single Hazard, Not Cross-zoned, Combined Release ... 11.3 Mode 3: Agent Release, Dual Hazard, Cross-zoned, Split Release ......11.4 Mode 4: Agent Release, Dual Hazard, Not Cross-zoned, Split Release .......
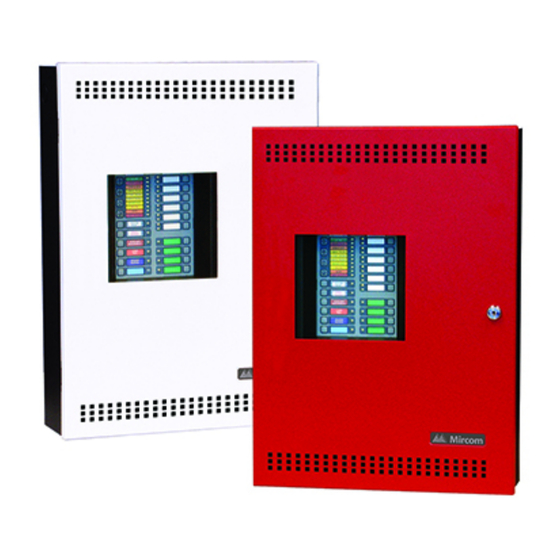
- Page 6 List of Figures Figure 1 FR-320 Series panel ...................... Figure 2 Enclosure dimensions ....................Figure 3 Box dimensions, semi-flush mounting and trim ring ............Figure 4 Flush Trim Detail ......................Figure 5 BBX-1024DS and BBX-1024DSR installation instructions and dimensions ....
- Page 7 Troubleshooting ......................Table 8 Common Relays ......................Table 9 Settings Permitted in CAN/ULCS527 ................Table 10 Settings Permitted in UL864 ..................Table 11 Access Levels ........................ Table 12 FR-320 Series Specifications ..................Table 13 FR-320 Series System Modules and Annunciators ............
-
Page 8: Introduction
It supports auxiliary relays. The auxiliary relays are based on a hazard area status. The FR-320 Series has six input zones and four output zones, allowing for flexibility in most single and dual-hazard applications for both deluge and agent releasing applications. - Page 9 • Subsequent Alarm, Supervisory, and Trouble operation. • Non-resettable auxiliary power supply, 300mA max. • Four wire resettable smoke power supply, 100mA max. • Relay Contacts for Common Alarm, Common Supervisory, Common Trouble, and Auxiliary Alarm Relay (disconnectable). • RS-485 Interface for RA-1000 Series Remote Multiplex Annunciators and Smart relay Module.
-
Page 10: Conventions
There is a display point associated with every Initiating Device Circuit and Notification Appliance Circuit of the FR-320 Series fire panel. For an Initiating Device Circuit there are two LEDs for every display point: one single color (amber) and one dual color (red/amber). For a Notification Appliance Circuit there is only one LED: one single color (amber), for every display point. -
Page 11: System Components
Input Class A Converter adder module may be used for class A wiring of Initiating Device Circuits. • The FR-320 Series contains Common Alarm, Common Supervisory & Common Trouble relays, auxiliary alarm relay (disconnectable), an RS-485 interface for remote annunciators, non-resettable auxiliary power, and a resettable four wire smoke detector power supply. -
Page 12: 320 Series System Components
FR-320 Series System Components Table 1 FR-320 Series System Components Model Description RM-306 Six-relay adder module RELAY 1 RELAY 2 RELAY 3 RELAY 4 RELAY 5 RELAY 6 NO/NC NO/NC NO/NC NO/NC NO/NC NO/NC Smart Relay Module (12 relays) with white... -
Page 13: Additional System Accessories
Table 1 FR-320 Series System Components (Continued) Model Description Remote Annunciator module, LCD display, white RAM-300LCDW painted box Remote Annunciator Module, LCD display, red RAM-300LCDR painted box Model RAM-1032TZDS Main Chassis Remote Annunciator with 16 bi-colored LEDs and 32 trouble LEDs. Model RAM-1032TZDS-CC is the... -
Page 14: Mechanical Installation
Mechanical Installation Note: Installation, use and maintenance should be in accordance with the manufacturer’s documents and the National Electrical Code, ANSI/NFPA 70, and the National Fire Alarm Code ANSI/NFPA 72. Installing the Enclosure Install the FR-320-R/W panel enclosure as shown in Figure 2 and Figure 3. Mount enclosure surface mount using the four mounting holes with the provided screws. -
Page 15: Figure 3 Box Dimensions, Semi-Flush Mounting And Trim Ring
PLACE FA-300-TRB TRIM RING OVER BACKBOX Mounting Holes for 17" Surface Mounting Adhere trim ring to 22.5" wall surface around the FR-320-R/W backbox Mounting Holes for Surface Mounting 1" is the minimum depth 3.5" is the maximum above the wall required depth for semi-flush mounting using the for semi-flush mounting... -
Page 16: Bbx-1024Ds And Bbx-1024Dsr Mechanical Installation
BBX-1024DS and BBX-1024DSR Mechanical Installation The BBX-1024DS and BBX-1024DSR are suitable for flush or surface mounting, and have a built-in trim ring. Dimensions of Enclosure (minus built in trim ring) 14 1/2” x 4 1/4” x 26” Distance between horizontal mounting screws 12”... -
Page 17: Installing The Adder Modules
Installing the Adder Modules The FR-320 Series panel comes pre-assembled with all components and boards except for adder modules. Module installation locations are shown below. Refer to Figure 7 on the next page for Jumper or DIP Switch settings and see Wiring Tables and Information on page 30 for wiring specifications. -
Page 18: Cable And Jumper Connections For Main Board, Core Board And Adder Modules
Cable and Jumper Connections for Main Board, Core Board and Adder Modules Main Pre-Action/Deluge and Agent Release Control Board • For front panel programming use CFG-300 configuration tool not UL-864 or ULC-S527 listed. Connect UIMA interface module JW5 - Normally open JW4 - Normally closed Please refer to Document LT-922 for details for upgrading firmware... -
Page 19: Icac-306 Input Class A Converter Adder Module
5.1.1 Connectors and Jumpers on the Main Fire Alarm Board P1 and P2 Power supply and control interface, including AC power and battery supplies. Not Used. Cable from connector P1 of the RM-306 Relay Adder Module connects here. Otherwise not used. Connect UIMA interface module for upgrading firmware. -
Page 20: Ocac-302 Output Class A Converter Adder Module
fixed here) to the Main Fire Alarm Board. Initiating Device Circuits must be wired from the ICAC-306 module to the Main Fire Alarm board. For example, Initiating Device Circuit 1 positive (red) and negative (black) wires are connected to the positive and negative terminals (respectively) of Initiating Device Circuit 1 on the Main Fire Alarm Board. -
Page 21: Annunciators
Alarm Release Alert Alarm Release Annunciators Connect the annunciators to the RS-485 terminals and to auxiliary power. Use class B wiring for RS-485. For instructions, see the following Mircom documents: • RAM-208/RAM-208R: LT-648 • RAM-216/RAM-216R: LT-658 • RAM-300LCDR/RAM-300LCDW: LT-1002 •... -
Page 22: Field Wiring
Field Wiring Main Board Field Wiring Wire devices to the terminals as shown in the figures that follow. Refer to Wiring Tables and Information on page 30 for wire gauges and Appendix C: Specifications on page 90 for specifications. Caution: Do not exceed power supply ratings. -
Page 23: Abort And Manual Release Switch Wiring
Abort and Manual Release Switch Wiring Wiring for the abort and manual release switches is shown in Figure 13 and Figure 14. The Abort and Manual release switches must be on different circuits. DET5 is used for the Abort switch and DET6 is used for the manual release switch. Abort and Manual Release switches on separate circuits FIRE ALARM MAIN BOARD INITIATING... -
Page 24: Figure 14 Abort And Manual Release Switch Class A Wiring
Abort and Manual Release switches on separate circuits CLASS A FIRE ALARM MAIN BOARD CONVERTER MODULE INITIATING CIRCUIT #5 INITIATING CIRCUIT #6 Manual Release switches on separate circuits CLASS A CONVERTER FIRE ALARM MAIN BOARD MODULE INITIATING CIRCUIT #5 INITIATING CIRCUIT #6 ABORT SWITCH MANUAL RELEASE... -
Page 25: Notification Appliance Circuit Wiring
Notification Appliance Circuit Wiring The FR-320 Series Fire Alarm supports class B and class A wiring for its Notification Appliance Circuits. Each circuit is supervised by a 3.9 kΩ EOL resistor or an active EOL resistor. Each Notification Appliance Circuit provides up to 1.7 A, 5 A maximum total if no auxiliaries are used. -
Page 26: Releasing Circuit Wiring
Releasing Circuit Wiring Attention: See Appendix A: Compatible Solenoids on page 87 for the list of compatible solenoids. Wiring for the releasing circuit is shown in Figure 17 below. SIG3 and SIG4 output circuits are reserved for the releasing circuits. Solenoid EOL module (MP-320R/W) is used to supervise the solenoid coil. -
Page 27: Four-Wire Smoke Detector Wiring
Four-Wire Smoke Detector Wiring • FIRE ALARM MAIN BOARD POWER RESETTABLE 4-WIRE SMOKE DETECTOR POWER SUPPLY 22VDC, 200mA MAX. CURRENT - 300mA MAX. RIPPLE VOL. 5mV (POWER LIMITED) DETECTION END OF LINE RELAY 4-WIRE DETECTION DEVICE LISTED S3403 MODEL A77-716B TO INITIATING MANUFACTURED BY CIRCUIT... -
Page 28: Releasing Circuit Bypass Switch Wiring
Releasing Circuit Bypass Switch Wiring According to UL 864 10th edition, the bypass operation must trigger a supervisory alarm. In each mode (section 11 on page 62) there is a zone designated supervisory. The circuit from the bypass switch shown in Figure 20 must be wired into a designated supervisory zone in the applicable mode. -
Page 29: Figure 21 Power Supply Connection
Wire the power supply as shown below using the proper wire gauge. Deluge Panel Control Board ALM/SUP/TBL/ RAC1 BLDG AUDIBLE SIL (ZONE 3) RAC2 SPARE (ZONE 4) blue Power Supply Control Board slow blow BATTERY brown 240 VAC 50Hz 120 VAC 60Hz blue on white green... -
Page 30: Wiring Tables And Information
Wiring Tables and Information The numbers in these tables represent the entire loop length. Table 3 Initiating Device Circuit Wiring Distances WIRE GAUGE MAXIMUM WIRING RUN TO LAST DEVICE FEET METERS 2990 4760 1450 7560 2300 12000 3600 19000 5800 30400 9200 Notes: For class A the maximum wiring run to the last device is divided by two. -
Page 31: Releasing Circuits
6.10 Releasing Circuits The numbers in this table represent the entire loop length Table 5 Releasing Circuits Wiring Table MAXIMUM WIRING RUN TO LAST DEVICE MAX. LOOP (ELR) RESISTANCE 16AWG 14AWG 12AWG Ohms 1231 6.11 Annunciators The numbers in this table represent the entire loop length. Table 6 RS-485 Wiring to Annunciators and other Devices Wire gauge Maximum wiring run to last device... -
Page 32: System Checkout
7.1.2 Take a Photo of the Circuit Board Mircom recommends taking a photo of the circuit board during each inspection. This will help confirm the state of the panel at the time of inspection. Mircom recommends sending this photo to the building owner. -
Page 33: Power-Up Procedure
Power-up procedure After completing the System Checkout procedures outlined above, 1. Power up the panel. The "AC ON" green LED and the “Common Trouble” LED should illuminate, and the buzzer should sound. Press the “System Reset” button. Since the batteries are not connected, the trouble buzzer should sound intermittently and the common trouble LED should flash. -
Page 34: Indicators, Controls And Operations
Indicators, Controls and Operations Refer to Figure 22 below for LED indicator and control button locations. Initiating Device Circuit alarm LEDs and Initiating Device Circuit trouble LED indicators Common LED indicators AC ON IDC 1 COMMON ALARM COMMON SUPV IDC 2 COMMON TROUBLE BATTERY TROUBLE Menu buttons... - Page 35 8.1.2 Common Alarm The common alarm LED is illuminated steady red as a result of any active alarm present in the system. 8.1.3 Common Trouble The common trouble LED is illuminated steady amber as a result of a trouble condition being detected on the system.
-
Page 36: Menu Buttons
Cancel Button To return to previous menu in the configuration or command mode. Switches and Common Indicators The FR-320 Series panel is a six-zone panel with four output circuits. The circuits are arranged in the following configuration: Label on Label in... -
Page 37: Circuit (Zone) Disconnect Buttons (Bypass Switches)
8.3.2 IDC 5 and IDC 6 • Alarm LED & Trouble LED The zone type and LED behavior varies upon the configuration. Steady when turned on. 8.3.3 NAC 1 and NAC 2 (NAC Circuits) • Trouble LED (amber) turns on at slow flash rate when in trouble or bypassed 8.3.4 RAC 3 and RAC 4 (Releasing Circuits) -
Page 38: Common Relays
• Processes inputs as new events • Does not affect Aux Disconnect • Reset cannot be activated until the Signal Silence Inhibit timer has expired 8.5.2 Signal Silence Button Activation of the Signal Silence button when the panel is in alarm turns on the Signal Silence indicator and deactivates any Silenceable Notification Appliance Circuits. -
Page 39: Circuit Types
Circuit Types 8.7.1 Initiating (Detection) Circuit Types 8.7.2 Non-Verified Alarm A Non-Verified alarm is a “normal” type of alarm that can have pull stations, smoke detectors, or heat detectors attached to it. Activation of any of these devices will immediately result in an alarm condition in the Fire Alarm Control Panel. - Page 40 8.7.8 Notification Appliance Circuit (Signal) Types 8.7.9 Silenceable Signal The Silenceable Signal circuit is used for audible devices such as bells and piezo mini-horns that may be silenced either manually or automatically. 8.7.10 Non-Silenceable Signal The Non-Silenceable Signal Circuit is used for audible devices such as bells and piezo mini- horns that may not be silenced either manually or automatically.
-
Page 41: Evacuation Codes
Evacuation codes Continuous On 100% of the time Temporal Code 3 of 0.5 second on, 0.5 second off then, 1.5 second pause 20 BPM 1.5 seconds on, 1.5 seconds off 60 BPM 0.5 second on, 0.5 second off 120 BPM 0.25 second on, 0.25 second off •... -
Page 42: Configuration
Configuration Table 9 Settings Permitted in CAN/ULCS527 NOTICE TO USERS, INSTALLERS, AUTHORITIES HAVING JURISDICTION, AND OTHER INVOLVED PARTIES This product incorporates field-programmable software. In order for the product to comply with the requirements in CAN/ULCS527, Standard for Control Units for Fire Alarm Systems, certain programming features or options must be limited to specific values or not used at all as indicated below. -
Page 43: Table 10 Settings Permitted In Ul864
Temporal, 60 BPM, 120 BPM Temporal Code (see page 51) Enabled if using an Active EOL (see Enabled, Disabled active EOL resistor page 52) ICAC-306 Configure the FR-320 Series Panels using the CFG-300 LCD Tool (see further documentation packaged with CFG-300 for configuration information). -
Page 44: Using The Cfg-300 Tool
It is critical to configure these settings on the panel before operation. Annual Maintenance Requirement: Verify annually that the time, date, daylight saving time, and time compensation are correct. In addition, Mircom recommends keeping a log of when these settings were checked. See section 2. Set Time (Command-Menu) on page 52. -
Page 45: Entering The Passcode
Entering the Passcode Attention: Mircom recommends that you change the passwords from the defaults (section 9.7 on page 54), write them down, and store them in a safe place. If you lose the passwords, you will not be able to access the logs. -
Page 46: Command Menu
7. Once you have made the correct selection, press to confirm the change. The display will return to the submenu screen. 8. Press (Cancel button) to return to the previous menu. Command Menu The main command menu is shown in Figure 25. The first line of the LCD will always show “-Command Menu-”, and the second line scrolls through different selections. -
Page 47: Panel Config (Command-Menu)
1. Panel Config (Command-Menu) The following is a detailed description of the FR-320 configuration menu. Note: Refer to How to Use the Keypad to Program the FR-320 on page 45 for detailed instructions on making menu selections. -P anel C o nfi g- 1. - Page 48 9.5.2 Command Menu-->Panel Config-->Hazard Config -Hazard P aram . - 1. R el ease ti m er 2. Abo rt D el ay 3. Manu al R l s D el ay 4. S o ak ti m er Note: Refer to How to Use the Keypad to Program the FR-320 on page 45 for detailed instructions on making menu selections.
- Page 49 Command Menu-->Panel Config--> Hazard Config Use this function to set the time delay of 0->Default 3. Man. Rls Delay activation of corresponding releasing circuit(s) after activation of the manual Available options: release switch. 0, 5, 10, 15, 20, 25, 30 M a n .
- Page 50 Command Menu-->Panel Config-->Features 1. Manual Sig. Silence Use this function to enable or [X] ENABLE ->Default disable the Signal Silence operation Man. S i g. S i l. [ ] DISABLE on the panel. [X ] EN AB LE Command Menu-->Panel Config-->Features By default all the Initiating Device 2.
- Page 51 Command Menu-->Panel Config-->Features 9. Pwr Fail Tmr Use this function to delay the [X] NONE->Default reporting of AC power fail trouble for [ ] 1 HRS a specific time period. If disabled, A C Pwr Fail Dly Tmr. the AC power fail will be reported [ ] 3 HRS immediately.
-
Page 52: Set Time (Command-Menu)
It is critical to configure these settings on the panel before operation. Annual Maintenance Requirement: Verify annually that the time, date, daylight saving time, and time compensation are correct. In addition, Mircom recommends keeping a log of when these settings were checked. See section 2. Set Time (Command-Menu) on page 52. - Page 53 Command Menu/Time Clock Use this function to set the time and date. Use the “LEFT” and “RIGHT” keys to move the 2. Set time and date cursor to the desired location in the display and Default use the “UP” and “DOWN” keys to increase or HH:MM WKD YYYY-MM-DD decrease the values.
-
Page 54: Set Password (Command-Menu)
Refer to How to Use the Keypad to Program the FR-320 on page 45 for detailed instructions on making menu selections. Attention: Mircom recommends that you change the passwords from the defaults, write them down, and store them in a safe place. If you lose the passwords, you will not be able to access the logs. -
Page 55: Print Event Log
You need: • Windows 7, 10 or 11 • Tera Term software application • Mircom’s MGC-CONFIG-KIT4 Connect the computer to FR-320 • Connect the computer to the P7 connector on the main FR-320 board. USB connector 10 pin connector Computer... -
Page 56: Figure 28 Tera Term New Connection
Configure Tera Term 1. Start the Tera Term application. The New connection window appears. Figure 28 Tera Term New connection 2. Select Serial. 3. In the Port menu, select the COM port that the USB cable is using. 4. Click OK. 5. -
Page 57: Figure 30 Example Event Log Printout
The panel prints the log to the virtual terminal program. An example general log is shown in Figure 30. Figure 30 Example event log printout... -
Page 58: Clear Event Log (Command-Menu)
9.10 6. Clear Event Log (Command-Menu) Note: Refer to How to Use the Keypad to Program the FR-320 on page 45 for detailed instructions on making menu selections. -Select Log- 1. Alarm Log 2. General Log 3. All Logs Select the type of log to clear. Press the “ENTER”... -
Page 59: Operating The Panel
10.0 Operating the Panel 10.1 Panel Operation During Various Hazard States The escalating hazard zone states include Idle, Alert, Alarm and Release. They are defined based on the status of Hazard Area input zone(s), correlated Abort Switch and Manual Release Switch. 10.1.1 Hazard Idle •... -
Page 60: General Panel Operation
running. The value of release timer depends on Abort Delay Type. The corresponding NAC sounds Alarm rate again. ZONE Release timer 1 Message Zone-4 RT1:44s ACTIVE EVENT EVENT type 1 of 3 Figure 31 1 release timer active Release timer 1: 44 seconds ZONE Release timer 2: 20 seconds Message... - Page 61 • To avoid the conflict of different NAC code on the same circuit, the priority of signals are defined as, Water-flow alarm has the highest priority, then hazard cadence. The supervisory signal has the lowest priority. • Soak Timer sets the time period how long the releasing circuits should be active. Upon the expiration of soak timer, the releasing circuits will be shut off.
-
Page 62: Pre-Programmed Modes
11.0 Pre-Programmed Modes See tables 9 and 10 for permitted ULC and UL settings. This section uses the following abbreviations. Initiating Device Circuits 1 to 6 (also referred to as Input Zones) Z1 - Z6 marked DET 1 to DET 6 on circuit board Notification Appliance Circuits marked SIG 1 to SIG 4 on circuit board Out1 and Out2 are equivalent to NAC 1 and NAC 2 Out1 - Out4... - Page 63 • Detection Zone -5: Abort Switch • Detection Zone -6: Manual Release Switch • NAC-1: Signal, will be on steady if there is any alarm zone or manual release switch active • NAC-2: Signal, indicates the cadence of hazard area 1 state or supervisory circuit (optional) •...
-
Page 64: Mode 2: Agent Release, Single Hazard, Not Cross-Zoned, Combined Release
11.2 Mode 2: Agent Release, Single Hazard, Not Cross-zoned, Combined Release Detection Zones Phantom Zones Release Timers RT1 Exp Z1+Z2 Z3+Z4 Out1 Signal Steady Out2 Signal Escalating Out3 Rel. Releasing Out4 Rel. Releasing RLS TMR 1 Started RLS Tmr 1 Interrupted RLS Tmr 1 Cancelled RLS Tmr 2 Started RLS Tmr 2 Interrupted... - Page 65 11.2.4 How the Panel Works in Mode 2 • Activation of either Z-1 or Z-2 turns NAC-1 on steady. • Activation of either Z-1 or Z-2 changes the Hazard Area 1 state from Idle into Alarm directly. NAC-1 turns on steady. NAC-2 turns on Temporal. Release Timer-1 is started. •...
-
Page 66: Mode 3: Agent Release, Dual Hazard, Cross-Zoned, Split Release
11.3 Mode 3: Agent Release, Dual Hazard, Cross-zoned, Split Release Attention: Dual hazard operation is not permissible for UL/ULC operation. Detection Zones Phantom Zones Release Timers AB/MR AB/MR Z1+Z2 Z3+Z4 Out1 Signal Steady Out2 Signal Escalating Out3 Rel. Releasing Out4 Rel. - Page 67 11.3.4 How the Panel Works in Mode 3 • Activation of either Z-1 or Z-2 changes Hazard Area1 state from Idle into Alert. NAC-1 turns on at Temporal. • Activations of both Z-1 and Z-2 change Hazard Area1 state from Alert into Alarm. NAC- 1 turns on at 120BPM.
-
Page 68: Mode 4: Agent Release, Dual Hazard, Not Cross-Zoned, Split Release
11.4 Mode 4: Agent Release, Dual Hazard, Not Cross-zoned, Split Release Attention: Dual hazard operation is not permissible for UL/ULC operation. Detection Zones Phantom Zones Release Timers AB/MR AB/MR Z1+Z2 Z3+Z4 Out1 Signal Steady Out2 Signal Escalating Out3 Rel. Releasing Out4 Rel. - Page 69 11.4.4 How the Panel Works in Mode 4 • Activation of either Z-1 or Z-2 changes Hazard Area1 state from Idle to Alarm. NAC-1 turns on at Temporal. Release Timer-1 is started. • Upon expiration of Release Timer-1. RAC-3 is activated. NAC-1 turns on Steady. •...
-
Page 70: Mode 5: Pre-Action/Deluge, Single Hazard, Cross-Zoned, Combined Release
11.5 Mode 5: Pre-action/Deluge, Single Hazard, Cross-zoned, Combined Release Detection Zones Phantom Zone Release Timer RT1 Exp Supv Z1+Z2+Z3+Z4 Out1 Signal Steady Out2 Signal Escalating Out3 Rel. Releasing Out4 Rel. Releasing RLS TMR 1 Started RLS Tmr 1 Interrupted RLS Tmr 1 Cancelled 11.5.1 Zone Configuration •... -
Page 71: Mode 6: Pre-Action/Deluge, Single Hazard, Not Cross-Zoned, Combined Release
11.6 Mode 6: Pre-action/Deluge, Single Hazard, Not Cross-zoned, Combined Release Detection Zones Phantom Zone Release Timer RT1 Exp Supv Z1+Z2+Z3+Z4 Out1 Signal Steady Out2 Signal Escalating Out3 Rel. Releasing Out4 Rel. Releasing RLS TMR 1 Started RLS Tmr 1 Interrupted RLS Tmr 1 Cancelled 11.6.1 Zone Configuration •... -
Page 72: Mode 7: Pre-Action/Deluge, Dual Hazard, Cross-Zoned, Split Release
11.7 Mode 7: Pre-action/Deluge, Dual Hazard, Cross-zoned, Split Release Detection Zones Phantom Zones Release Timers Supv Z1+Z2 Z3+Z4 Out1 Signal Steady Out2 Signal Escalating Out3 Rel. Releasing Out4 Rel. Releasing RLS TMR 1 Started RLS Tmr 1 Interrupted RLS Tmr 1 Cancelled RLS Tmr 2 Started RLS Tmr 2 Interrupted RLS Tmr 2 Cancelled... - Page 73 11.7.4 How the Panel Works in Mode 7 • Activation of either Z-1 or Z-2 changes Hazard Area 1 state into Alert. NAC-1 turns on at Temporal. • Activations of both Z-1 and Z-2 change Hazard Area 1 state into Alarm. Release Timer- 1 is started.
-
Page 74: Mode 8: Pre-Action/Deluge, Dual Hazard, Not Cross-Zoned, Split Release
11.8 Mode 8: Pre-action/Deluge, Dual Hazard, Not Cross-zoned, Split Release Detection Zones Phantom Zones Release Timers Supv Z1+Z2 Z3+Z4 Out1 Signal Steady Out2 Signal Escalating Out3 Rel. Releasing Out4 Rel. Releasing RLS TMR 1 Started RLS Tmr 1 Interrupted RLS Tmr 1 Cancelled RLS Tmr 2 Started RLS Tmr 2 Interrupted RLS Tmr 2 Cancelled... - Page 75 11.8.4 How the Panel Works in Mode 8 • Activation of either Z-1 or Z-2 changes Hazard Area 1 state into Alarm. Release Timer 1 is started. NAC-1 turns on at Temporal. Upon the expiration of Release Timer 1, RAC-3 is active.
-
Page 76: Mode 9: Agent Release, Single Hazard, Cross-Zoned, Nyc Abort
11.9 Mode 9: Agent Release, Single Hazard, Cross-zoned, NYC abort Detection Zones Phantom Zones Release Timers Supv Z1+Z2 Z3+Z4 Out1 Signal Steady Out2 Signal Escalating Out3 Rel. Releasing Out4 Strobe Steady RLS TMR 1 Started RLS Tmr 1 Interrupted RLS Tmr 1 Cancelled RLS Tmr 2 Started RLS Tmr 2 Interrupted RLS Tmr 2 Cancelled... - Page 77 11.9.4 How the Panel Works in Mode 9 • The activation of either Z-1 or Z-2 turns NAC-1 on steady. • The activations of both Z-1 and Z-2 turn NAC-1 off, turn NAC-2 on at 120BPM, and turn NAC-4 on steady. Hazard Area 1 state changes to Alarm. Release Timer-1 is started. Upon the expiration of Release Timer 1, RAC-3 is active, NAC-1 and NAC-2 turn on steady, and NAC-4 remains on steady.
-
Page 78: Mode 10: Agent Release, Single Hazard, Not Cross-Zoned, Combined Release
11.10 Mode 10: Agent Release, Single Hazard, Not Cross-zoned, Combined Release Detection Zones Phantom Zones Release Timers Supv Z1+Z2 Z3+Z4 Out1 Signal Steady Out2 Signal Escalating Out3 Rel. Releasing Out4 Rel. Releasing RLS TMR 1 Started RLS Tmr 1 Interrupted RLS Tmr 1 Cancelled RLS Tmr 2 Started RLS Tmr 2 Interrupted... - Page 79 11.10.4 How the Panel Works in Mode 10 • Activation of either Z-1 or Z-2 turns NAC-1 on steady. • Activation of either Z-1 or Z-2 turns NAC-2 on at 60BPM. Release Timer-1 is started. • Expiration of Release Timer-1 activates both RAC-3 and RAC-4. NAC-1 and NAC-2 turn on steady.
-
Page 80: Mode 11: Agent Release, Single Hazard, Cross-Zoned, Combined Release
11.11 Mode 11: Agent Release, Single Hazard, Cross-zoned, Combined Release Detection Zones Phantom Zones Release Timers Supv Z1+Z2 Z3+Z4 Out1 Signal Steady Out2 Signal Escalating Out3 Rel. Releasing Out4 Rel. Releasing RLS TMR 1 Started RLS Tmr 1 Interrupted RLS Tmr 1 Cancelled RLS Tmr 2 Started RLS Tmr 2 Interrupted RLS Tmr 2 Cancelled... - Page 81 11.11.4 How the Panel Works in Mode 11 • The activation of either Z-1 or Z-2 turns NAC-1 on at Temporal. • The activations of both Z-1 and Z-2 turn NAC-1 off and turn NAC-2 on at 60BPM. Release Timer-1 is started. •...
-
Page 82: Mode 12: Pre-Action/Deluge, Single Hazard, Cross-Zoned, Combined Release
11.12 Mode 12: Pre-action/Deluge, Single Hazard, Cross-zoned, Combined Release Attention: This mode of operation is not FM approved. Detection Zones Phantom Zone Release Timer RT1 Exp Supv Supv Z1+Z2+Z3 Out1 Signal Steady Out2 Signal Escalating Out3 Rel. Releasing Out4 Rel. Releasing RLS TMR 1 Started RLS Tmr 1 Interrupted... - Page 83 11.12.4 How the Panel Works in Mode 12 • Activation of Z-1, Z-2 or Z-3 changes Hazard Area 1 state from Idle to Alert. NAC-1 turns on steady. NAC-2 sounds Temporal. • Activations of any two of Z-1, Z-2 and Z-3 change Hazard Area 1 state into Alarm. Release Timer-1 is started.
-
Page 84: Mode 13: Pre-Action/Deluge, Single Hazard, Not Cross-Zoned, Combined Release
11.13 Mode 13: Pre-action/Deluge, Single Hazard, Not Cross-zoned, Combined Release Detection Zones Phantom Zone Release Timer RT1 Exp Supv Supv Z1+Z2+Z3 Out1 Signal Steady Out2 Signal Escalating Out3 Rel. Releasing Out4 Rel. Releasing RLS TMR 1 Started RLS Tmr 1 Interrupted RLS Tmr 1 Cancelled 11.13.1 Zone Configuration •... -
Page 85: Mode 14: Pre-Action/Deluge, Single Hazard, Not Cross-Zoned, Combined Release
11.14 Mode 14: Pre-action/Deluge, Single Hazard, Not Cross-zoned, Combined Release Attention: This mode of operation is neither FM nor UL approved. Detection Zones Phantom Zone Release Timer RT1 Exp Supv Z1+Z2+Z3 Out1 Signal Steady Out2 Signal Escalating Out3 Rel. Releasing Out4 Rel. - Page 86 Activation of Z-6 turns NAC-1 and NAC-2 steady. • For the use of the system for pre-action, deluge releasing applications. • Acceptable, Approved solenoids for the FR-320 Series are listed in Appendix A: Compatible Solenoids on page 87. • Secondary power supply must provide for minimum of 90 hours of standby operation followed by 10 minutes of releasing and alarm operation.
-
Page 87: Appendix A: Compatible Solenoids
12.0 Appendix A: Compatible Solenoids Manufacturer Description Safety Hi-Tech SH21006403 (S3023024SHT) Valve solenoid SH21006404 (S3023024SHT) Valve solenoid ASCO 8210 series T8210A107 24VDC R8210A107 24VDC 8210A107 24VDC AMEREX 17014 Actuator BSCO 510006 Actuator Kidde Fenwal Protection Systems 486500-01 Actuator Parker 73212 Valve Solenoid Parker Skinner Valve Division Cardox 7-061-0006 V5L 72750... -
Page 88: Appendix B: Compatible Synchronized Modules And Horn/Strobes (Ul/Ulc)
Manufacturer Part # Sync. Candela Rated Max # Module Current per NAC (mA) Mircom FH-400-WW, FH-400-RR, FS- MIX-4050 400-WW, FS-400-RR, FS-400C- WW, FS-400C-RR, FHS-400- WW, FHS-400-RR, FHS-400C- WW, FHS-400C-RR 15/75 Manufacturer Brand Sync. Module... -
Page 89: Compatible Bells
13.1 Compatible Bells Brand Bells Maximum # of Bells MBDC-6, -10 Bells Siemens B10-115-R Bell B6-24AC-R Bell Note: Synchronization is on a NAC zone basis. -
Page 90: Appendix C: Specifications
14.0 Appendix C: Specifications Table 12 FR-320 Series Specifications FR-320 Series Fire Control Panel Chassis General Digital Signal Processor (DSP) based design. Fully configurable using front panel LCD display with Password Access. Notification Appliance 2 supervised class B Notification Appliance Circuits, configured as strobes or Circuits audibles. -
Page 91: Table 13 Fr-320 Series System Modules And Annunciators
Less than 3.3 kΩ will generate a ground fault. Ground Fault Circuit Testing impedance: 1 MΩ open, 0.1 Ω short Compliance System Model FR-320 Series Control Unit - Fire Alarm, for Releasing services System Type Local Type of Service A, M, WF, SS... - Page 92 Table 13 FR-320 Series System Modules and Annunciators (Continued) FR-320 Series System Modules and Annunciators SRM-312W Must be connected to a listed power-limited source of supply Smart Relay Contact rating FormC/ 28VDC per contact / 1A resistive load max, zoned...
-
Page 93: Appendix D: Power Supply And Battery Calculations
Battery (AH) = ([STANDBY (A) ______ ] x [(24,60 or 90 Hours) ___ ]) + ([ALARM (B) ______ ] x [Alarm in Hr.] _____) = (C) ______AH Total System Current in Alarm State: Must be 5.5 amperes or less for FR-320 Series. Battery Selection: Multiply (C) by 1.25 to derate battery. -
Page 94: Warranty And Warning Information
As the only individual in contact with system users, please bring each item in this warning to the attention of the users of this Mircom System. Failure to properly inform system end-users of the circumstances in which the system might fail may result in over-reliance upon the system. - Page 95 11. Battery Failure. If the Mircom System or any device connected to the system operates from batteries it is possible for the batteries to fail. Even if the batteries have not failed, they must be fully charged, in good condition, and installed correctly.
- Page 96 20. Integrated Products. Mircom System might not function as intended if it is connected to a non-Mircom product or to a Mircom product that is deemed non-compatible with a particular Mircom System.
- Page 98 CANADA - Main Office U.S.A © Mircom 2023 25 Interchange Way 4575 Witmer Industrial Estates Printed in Canada Subject to change without prior notice Vaughan, ON L4K 5W3 Niagara Falls, NY 14305 Tel: (905) 660-4655 Tel: (905) 660-4655 www.mircom.com (888) 660-4655...
Need help?
Do you have a question about the FR-320 Series and is the answer not in the manual?
Questions and answers