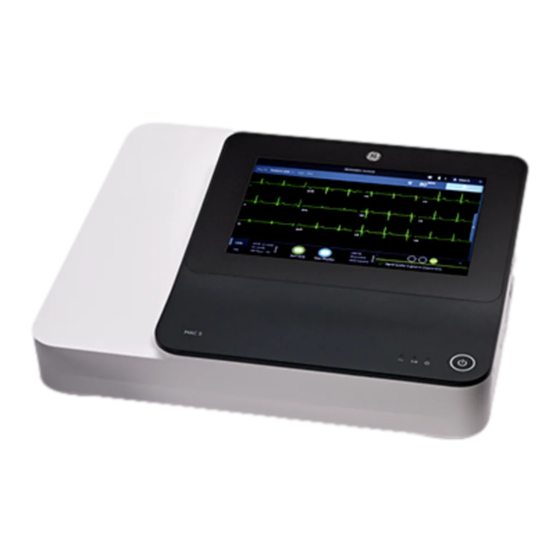
GE MAC 5 A4 Operator's Manual

GE MAC 5 A4 Operator's Manual

Resting ecg analysis system
Table of Contents

Advertisement

Quick Links

GE Healthcare
MAC
5 A4/MAC
Resting ECG Analysis System
Operator Manual
5864335-001-1
5 A5/MAC
5 Lite
MAC
5 A4/MAC
5 A5/MAC
Resting ECG Analysis System
English
©
2021  General Electric Company
All Rights Reserved.
5 Lite

Advertisement

Table of Contents
loading

Summary of Contents for GE MAC 5 A4

  • Page 1 GE Healthcare ™ ™ ™ 5 A4/MAC 5 A5/MAC 5 Lite Resting ECG Analysis System Operator Manual 5864335-001-1 ™ ™ ™ 5 A4/MAC 5 A5/MAC 5 Lite Resting ECG Analysis System English © 2021  General Electric Company All Rights Reserved.
  • Page 2: Publication Information

    12SL, CASE, CardioSoft, InSite ExC, MAC, MACCRA, MARS, MUSE, Marquette, MobileLink, and MULTI-LINK are trademarks owned by GE Medical Systems Information Technologies, Inc., a General Electric Company going to market as GE Healthcare. All other trademarks contained herein are the property of their respective owners.
  • Page 3 (https://openprinting.org/) License details of the software used in the product can be viewed in the online help in the Open Source Licenses section. Contact GE Service to obtain the source code of the open-source software used in the product, if required.
  • Page 4: Table Of Contents

    Table of Contents Publication Information................... 2 1: Product Overview....................10 Front View................................10 Side and Rear View............................11 Acquisition Screen Overview......................... 12 User Menu Options Description........................16 Battery Status............................... 18 Show Battery Status............................19 Show Network Connection Status......................20 Change the Brightness of the Screen....................... 21 2: Equipment Setup....................
  • Page 5 5: Record an ECG or Rhythm................62 Hookup Advisor Overview..........................62 Acquire an ECG based on the Hookup Advisor status in Post-Acquisition Mode..65 Acquire an ECG based on the Hookup Advisor status in Pre-Acquisition Mode..65 Change Lead Sets and Lead Formats...................... 65 Enable ACS Interpretation..........................66 Enable HD Pace..............................
  • Page 6 9: Work with the Patients List................124 Open the Patients List............................126 Select a Patient from the Patients List....................126 10: Configure Settings..................127 Settings Screen Overview..........................127 Open the Settings Screen..........................128 Configure General Tasks..........................128 Configure ECG..............................129 Configure ECG Acquisition........................129 Configure Filters, Gain, and Speed....................132 Configure 12SL Interpretations......................135 Configure Display Formats of ECG and Rhythm Leads............137 Configure Patient Reports........................
  • Page 7 Configure Hardware............................260 Configure the Barcode........................260 Configure the USB Ports........................261 Configure Keyboard Tone and KISS Pump................261 Configure Standby Modes........................262 11: Maintenance....................265 Store Thermal Paper............................265 Clean the Printhead............................266 Charge the Battery............................266 Replace the Battery............................267 12: Cleaning and Disinfection................269 Inspect the Device............................269 Care at the Point of Use..........................
  • Page 8 D: Configure the MUSE System for Network Communication...... 312 MUSEAPI3 Installation............................ 312 Before You Start............................ 312 Install MUSEAPI3 on MUSE v8 Server..................313 Install MUSEAPI3 on MUSE v9 Server..................319 Change the MUSEAPI3 Service Protocol Configuration............. 323 Uninstall MUSEAPI3..........................324 Restore the MUSEAPI3 Configuration..................325 MUSEAPI Test Client..........................
  • Page 9 Product and Packaging Information.......................351 MAC 5 A4 Hardware Label Locations..................351 MAC 5 A5 Hardware Label Locations..................355 MAC 5 Lite Hardware Label Locations..................360 Serial Number Label............................364 Device Address Label and Rating Plate....................365 Symbol Descriptions............................366 Serial Number Format............................370 Unique Device Identifier..........................371 Wireless Regulations............................371...
  • Page 10: 1: Product Overview

    ECG measurement and interpretative analysis, prints 12-leads of ECG, and transmits ECG data to and from a central ECG cardiovascular information system. Front View The image below is an example of the MAC 5 A4. The information in the table applies to all MAC 5 devices.   MAC ™...
  • Page 11: Side And Rear View

    No light - the device is not plugged into AC power. Side and Rear View Side View The image below is an example of the MAC 5 A4. The information in the table applies to all MAC 5 devices. Item...
  • Page 12: Acquisition Screen Overview

    Use to insert the battery. Equipotential Use to connect non-grounded peripheral devices. Grounding Plug Rear View The image below is an example of the MAC 5 A4. The information in the table also applies to MAC 5 A5. Item Name Description Printer Door Button Use to release the printer door.
  • Page 13 Product Overview Table 1: Acquisition Screen Item Name Description Patient Information Banner Shows Patient Information such as the patient first name, surname, and gender. Select anywhere on the banner to add or edit patient information. Date and Time Current local date and time in the configured date and time format.
  • Page 14 Product Overview Item Name Description Orders/Patients, Files, and • The Orders tab displays when you enable order Queue tabs management. Select Orders to open the Orders list and view a list of the available orders. • The Orders tab does not display if you disable order management, the Patients tab displays.
  • Page 15 Product Overview Item Name Description Notification Area Displays messages: • printing status and progress • report transmission status • Hookup Advisor lead quality status The messages display one at a time in the sequence of occurrence. The messages do not display when a patient is connected and the hookup advisor is evaluating the waveform.
  • Page 16: User Menu Options Description

    Product Overview Item Name Description Preview ECG icon Select anywhere on the Full Disclosure ECG. The 10 seconds of ECG data is selected. Click Preview ECG. A preview of the recorded 10 seconds of data for all leads displays in the configured preview report format in the maximize view.
  • Page 17 Product Overview Table 2: User Menu Options Item Option Description <User> Displays the name of the user logged into the device as configured by your administrator. Pre-defined users display as follows: • Admin • STAT • Service • Default Settings Displays the Settings screen used to configure the device.
  • Page 18: Battery Status

    Product Overview Item Option Description Service Displays the Service screen used to service the device. Your administrator must grant you privileges to access this screen. If the user does not have access to the screen and if user authentication is disabled or configured with Technician ID access, the Default user is prompted to log on as a user with sufficient privileges.
  • Page 19: Show Battery Status

    Product Overview Icon Status Description White Battery – Fully The battery is fully charged and the device is disconnected Charged and from the AC Mains power. Disconnected from AC Mains Solid Green Battery - Fully The battery is fully charged and the device is connected to Charged and the AC Mains power.
  • Page 20: Show Network Connection Status

    Product Overview Show Network Connection Status When the wireless and wired connection is set to Enable, the device uses a wired connection when you connect a Local Area Network (LAN) cable. If you remove the LAN cable, the device uses the wireless connection. To view the status of your device's connection to your LAN or Wireless Local Area Network (WLAN), perform the procedure as follows: Select the Network Status icon on the status bar.
  • Page 21: Change The Brightness Of The Screen

    Product Overview Icon Status Description WLAN Disconnected The device is not connected to a WLAN. For more information about wireless certificate errors, see Wireless Network Connectivity Errors on page 284. Close the Network Status window by selecting something on the screen outside of the window.
  • Page 22: 2: Equipment Setup

    AC power while the battery is charging. Place your thumb on the door release tab of the battery compartment door and gently pull it open. MAC 5 A4 MAC 5 A5 MAC 5 Lite Slide the battery into the battery compartment slots in the correct orientation.
  • Page 23: Connect The Ac Power

    Equipment Setup MAC 5 Lite Lift the battery compartment door to close it. MAC 5 A4 MAC 5 A5 MAC 5 Lite Connect the AC Power This device can run with AC or battery power. When the device is plugged into an AC outlet, it uses AC power and charges the installed battery.
  • Page 24: Connect The External Barcode Reader

    Equipment Setup Item Description Male end of the AC power cord connected to an AC outlet. Female end of the AC/DC adapter cord connected to the back of the device. Male end of the AC/DC adapter connected to the AC power cord. NOTE: Before you connect the device to the power line, check that the voltage and frequency ratings of the power line are the same as those indicated on the...
  • Page 25 Equipment Setup NOTE: The BRCD - External Barcode Reader option is activated at the factory when you purchase the barcode reader with the device. Configure the barcode settings for your site before you use the barcode reader. Table 7: Barcode Reader Parts Item Description Barcode reader...
  • Page 26 Equipment Setup Attach the cable clamp to the external barcode reader cable approximately 100 mm from the ferrite. Use the M3x10 screw and cable clamp provided along with the external barcode reader kit, to assemble the external barcode reader cable to the Display rear cover.
  • Page 27: Adjust The Device For Paper Size

    MAC 5 Lite does not support paper printing. You can configure the printer module to use the appropriate paper size only on the MAC 5 A4 device. Use the instructions below to change the paper size. Turn off the device.
  • Page 28 Equipment Setup The paper spacer placement depends on the paper size. If the paper Then size is Put the paper spacer at the inside slot of the printer head. Modified Put the paper spacer at the outside slot of the printer head. letter Make sure that the paper spacer is applied at the correct position.
  • Page 29 Equipment Setup If the paper Then size is Move the two paper latches to the position of "A4", and fasten the screws using a PH 1x150 mm screwdriver. 5864335-001-1   MAC ™ 5 A4/MAC ™ 5 A5/MAC ™ 5 Lite  29...
  • Page 30 Equipment Setup If the paper Then size is Modified Move the two paper latches to the position of "Letter", and fasten the screws letter using a PH 1x150 mm screwdriver. Move the screw at the bottom of the device. The screw position depends on the paper size.  ...
  • Page 31 Equipment Setup If the paper Then size is Place the screw at below position, and fasten it using a PH 1x150 mm screwdriver. Modified Place the screw at below position, and fasten it using a PH 1x150 mm letter screwdriver. Adjust the paper film.
  • Page 32: Insert The Paper

    Fold and paste the paper file along the Letter line. letter Insert the Paper MAC 5 A4 printer supports the paper sizes: • A4 (8.27 x 11.7 inches) - 2104772-001 • Letter (8.4 x 11 inches) - 2104771-001 MAC 5 A5 printer supports the paper sizes: •...
  • Page 33 Equipment Setup Pull out the paper film and place the paper above it, then slide the paper into the device until it is fully inserted. NOTE: • If the paper has Q holes, the Q holes must be on the top left side. •...
  • Page 34 Equipment Setup Advance the first sheet of paper.   MAC ™ 5 A4/MAC ™ 5 A5/MAC ™ 5 Lite  5864335-001-1...
  • Page 35: Lock And Unlock The Trolley Wheels

    Equipment Setup Push both ends of the printer door to close it and verify that the unit closes. Lock and Unlock the Trolley Wheels To lock each trolley wheel, press the wheel brake down. Lock the wheels before each use for safety purposes. 5864335-001-1  ...
  • Page 36: Attach The Device To The Trolley

    Gently put the device on the trolley top plate and insert the foot pads on the bottom of the device into the holes on the top plate MAC 5 A4 MAC 5 A5 MAC 5 Lite  ...
  • Page 37: Connect The Lan Cable

    Insert the screws (M6x20) and washers (D12xD6.5x1.5) provided with the trolley through the bottom of the top plate into the device, and tighten them with 4mm torque spanner. MAC 5 A4 MAC 5 A5 MAC 5 Lite Connect the LAN Cable A wireless module is installed in the device before it is shipped from the factory.
  • Page 38: Configure The Device

    Equipment Setup NOTE: This applies only if you use the device as a stationary device. If you use it as a mobile unit, do not connect the device to a LAN until you are ready to import, transmit, or export patient reports. Configure the device to connect to a wired network.
  • Page 39: 3: Login And Security

    Login and Security Login and Security Power On the ECG Device Press the Power button on the front panel for a few seconds to start the device. The device is powered on. The Power on LED on the front panel is green. A notification message displays, if it is configured by the administrator.
  • Page 40: User Authentication

    Login and Security The device is off. The Power on LED on the front panel is off. User Authentication The device supports different modes of user authentication. Table 8: Supported User Authentication Modes User Authentication Mode Description Full authentication with The Login screen displays with these fields when the device is STAT login powered on or unlocked.
  • Page 41: Log On To The Device

    Login and Security User Authentication Mode Description Technician ID login The Login screen displays when the device is powered on or unlocked. A technician can access the device by entering the Technician ID. No authentication A Login screen does not display when you power on the device. You are automatically logged on as the Default User.
  • Page 42 Login and Security Do one of these steps: • If the device is shutdown, power on the device. See Power On the ECG Device on page • If the device is locked, unlock the device. See Unlock the Device on page The Login screen displays.
  • Page 43: Log On The Device As A Stat User

    Login and Security Symptom Cause Solution • You do not belong to any • Contact your LDAP groups authorized access to administrator to assign your this device. user profile to an LDAP group authorized for this device and log on to the device again. •...
  • Page 44: Change The User Password

    Login and Security If you log off before a task is completed, a message displays that you will lose incomplete data. Perform one of these steps: • If you have unsaved data, select Cancel. • If you want to log off, select Log Out. You are logged off your user session.
  • Page 45: Lock The Device

    The Power Options window opens with Cancel, Standby, Log Out, Privacy, and Power Off options. Select Privacy. The GE logo displays on the center of the screen with a black background, and a message displays indicating screen privacy is turned on.
  • Page 46: Put The Device On Standby

    Login and Security You can also log in as: • A STAT User (if STAT access is enabled) • A different user A message displays that the current user will be logged out and any unsaved data will be lost. Select Continue to log into the device. Put the Device on Standby Perform one of the steps below to put the device on standby: •...
  • Page 47 Login and Security When the Login screen displays, press ↑↓←→↑↓←→ , consecutively, on the soft keyboard. The System Restore screen displays a warning that the System Restore will return your system to the original factory shipped configuration. All patient data, system setup changes, logs, and user data will be lost and unrecoverable.
  • Page 48: 4: Patient Information

    Patient Information Patient Information Patient Information Screen Overview Patient information helps you to identify the patient. View and make sure the patient information is complete and correct before you start an ECG. You can update the patient information on the Patient Information screen as follows: •...
  • Page 49 Patient Information Item Field Description PID# Shows the unique identification number of the patient (patient ID). Gender Shows the patient gender. DOB (Age) Shows the patient date of birth and age. If the Date of Birth field is configured to be hidden on the Patient Information screen, only Age Shows on the bar.
  • Page 50 Patient Information Item Field Description Save button Select Save to save the patient information. If the bottom of the Patient Information screen is blurred, it indicates that the configured information does not display completely. Swipe your finger in the upward or downward direction on the screen to scroll through the screen.
  • Page 51: Start A Test For A New Patient

    Patient Information Start a Test for a New Patient Start a test for a new patient in the Acquisition screen. Select the New Patient icon located in the upper right corner of the Acquisition screen: Then A patient test is open with unsaved data, a Select one: message opens that unsaved patient data •...
  • Page 52: Update Patient Information With A Barcode Reader

    Patient Information • Attach an order, see Work with Orders on page • Use a software keyboard, see Enter or Edit Patient Information Using the Software Keyboard on page Update Patient Information with a Barcode Reader Using a barcode reader can simplify the entry of patient information and reduce the chance of introducing errors.
  • Page 53: Query Orders Or Adt For Patient Demographics

    Patient Information • Select Use Scanned Data to populate the barcode data into the relevant fields on the Patient Information screen, and confirm the data entered from the barcode is accurate. • Select Use Current Data to retain the manually entered information on the Patient Information screen, and enter or modify patient information as necessary.
  • Page 54 Patient Information Then One local order is found on the device The order fills in the Patient Information screen, if there is no mismatch with the patient data on the screen. No local orders are found on the device A message displays in the notification area that no matching local orders are found.
  • Page 55 Patient Information Then Only one ADT record is found on the MUSE system System searches for the Patient ID order found in that ADT record. • If multiple orders are found on the system - The orders show on the Orders tab in a filtered list.
  • Page 56 Patient Information Then One local order is found on the device The order fills in the Patient Information screen, if there is no mismatch with the patient data on the screen. No local orders are found on the device A message displays in the notification area that no matching local orders are found.
  • Page 57 Patient Information Then No remote orders are found on the MUSE system A message displays in the notification area that no matching remote orders are found. The device then searches for ADT data in the MUSE system. • If multiple ADT records are found on the MUSE system - The matching records show on the Acquisition screen, and a message displays in the notification area that matching ADT data...
  • Page 58 Patient Information Then Only one ADT record is found on the MUSE system System searches for the Patient ID order found in that ADT record. • If multiple orders are found on the system - The orders show on the Orders tab in a filtered list.
  • Page 59: Enter Or Edit Patient Information Using The Software Keyboard

    Patient Information Then Multiple ADT records that match the Patient ID or The matching records show on the Acquisition Visit Number are found on the MUSE system screen, and a message opens in the notification area that matching ADT data is found. Select a ADT record, and click Select to fill in the patient demographics on the Patient Information screen.
  • Page 60: Enter Or Edit Clinical Trial

    Patient Information Item Name Description Input Method Switches between different input methods. NOTE: If you use an English user interface, you cannot switch the input methods from English to Chinese Pinyin. If you use the Chinese user interface, you can switch the input methods freely between English and Chinese Pinyin.
  • Page 61 Patient Information Select or enter the number of the desired value in the list to populate the Chinese character in the field. • If you enter incorrect data in a field, the field border changes to red. • An asterisk (*) displays adjacent to mandatory fields in the Clinical Trial. NOTE: If you go to the Settings or Service screen before you complete a patient test, the data entered in the Clinical Trial screen clears when you go back to...
  • Page 62: 5: Record An Ecg Or Rhythm

    Record an ECG or Rhythm Record an ECG or Rhythm Hookup Advisor Overview The Hookup Advisor is a tool to monitor the lead signal quality during ECG acquisition. It can decrease or eliminate the occurrence of poor quality ECGs, by allowing you to view each leadwire signal quality and adjust as necessary.
  • Page 63 Record an ECG or Rhythm Table 14: Hookup Advisor Panel Item Name Description Collapse arrow Select the arrow to collapse the electrode placement image. Electrode Displays electrode placement and quality of each lead. Each lead quality Placement indicator changes color to red, yellow or green, based on its connection Image status.
  • Page 64 Record an ECG or Rhythm Lead Quality Description Indicator The lead is disconnected or not receiving a usable signal. No color (unlit) No ECG data is being acquired. Table 16: Hookup Advisor Lead Quality Status Indicators Indicator Description Shows a lead fail condition or extreme baseline shifts. The red indicator is always the left circle of the indicator.
  • Page 65: Acquire An Ecg Based On The Hookup Advisor Status In Post-Acquisition Mode

    Record an ECG or Rhythm If the device does not recover from the error, troubleshoot the error. Restart the ECG after the error is resolved and the Hookup Advisor displays a green status. After you resolve the errors, the electrode placement image collapses after the Hookup Advisor status indicator is green for at least four seconds.
  • Page 66: Enable Acs Interpretation

    Record an ECG or Rhythm The Mode and Display menus (2) are expanded. Select a different lead set below Mode. If you change the lead set, it resets the acquisition of data. The selected lead set is applied to the waveform. Select a different lead format below Display.
  • Page 67: Enable Hd Pace

    Record an ECG or Rhythm If you enable this option, it will stay enabled for the subsequent patient test(s) for that visit. It must be enabled again for the next patient. If the patient demographics show that the patient is younger than 16 years of age, the device records a pediatric ECG with a standard 12SL analysis.
  • Page 68: Change Speed, Gain, And Filter

    Record an ECG or Rhythm Change Speed, Gain, and Filter The Acquisition screen displays the waveform based on the configured speed, gain, and filter. After starting a new patient, you can change the speed, gain, or filter on the Acquisition screen. At the bottom, right-side of the Acquisition screen, select anywhere to the left of the ellipsis icon.
  • Page 69: Ecg Acquisition Overview

    Record an ECG or Rhythm These changes apply only to the current patient test(s). If you start a new patient, the changes reset to the values configured for the device. ECG Acquisition Overview You can record an ECG in pre-acquisition or post-acquisition modes. Table 17: ECG Acquisition Modes Acquisition Description...
  • Page 70: Manually Start An Ecg Recording

    Record an ECG or Rhythm Automatic ECG acquisition is triggered only one time for the current patient test. Start any new ECG tests for that same patient manually. When Auto-ECG is in progress, the Start ECG button changes to the Stop ECG button: •...
  • Page 71 Record an ECG or Rhythm you have recorded 10 seconds of data. You can cancel the acquisition before 10 seconds of data is recorded. For more information, see Cancel an ECG on page In post-acquistion mode, the system starts recording the next 10 seconds of ECG data for analysis.
  • Page 72: Cancel An Ecg

    Record an ECG or Rhythm If ... Then ... Print preview mode is configured The ECG patient report preview does not display. The ECG as Yellow and the Hookup patient report is automatically accepted, saved in the Advisor Status is Green Files list, and displayed for review.
  • Page 73 Record an ECG or Rhythm A preview of the recorded 10 seconds of data displays in the configured preview report format if: • The ECG is recorded in automatic ECG mode. • Your administrator has configured the preview mode to display the recorded 10 seconds of data.
  • Page 74 Record an ECG or Rhythm Item Name Description Preview of ECG patient Displays the preview of the ECG patient report. If a patient report report contains multiple pages, a part of another page displays on the right side of the screen. Press the left and right arrows on the screen to navigate from one page to another.
  • Page 75 Record an ECG or Rhythm If ... Then ... Next Steps Hookup Advisor status Select the Accept icon: • Review the ECG patient report is green, the ECG signal and decide on the next steps. quality is good. The Accept For more information, see icon is highlighted in green.
  • Page 76: Review An Ecg Patient Report

    Record an ECG or Rhythm If ... Then ... Next Steps Hookup Advisor status Select the Reject icon: Start a new ECG on the same is yellow or red, there are patient. For more information, see issues with the ECG signal ECG Acquisition Overview on page quality during the recording of this ECG.
  • Page 77 Record an ECG or Rhythm Table 19: Displaying an ECG Patient Report for Review Item Name Description Patient Information Displays patient information such as patient first name, last name, Banner gender, age, and so on. Select anywhere in the Patient Information banner to edit patient information for the patient report.
  • Page 78: Automatically Print An Ecg Patient Report

    Record an ECG or Rhythm Item Name Description Delete icon Deletes the patient report. For more information, see Delete a Patient Report on page Edit icon Edits patient information for the patient report. For more information, see Edit Patient Information in a Patient Report on page Copy icon Prints a copy of the patient report.
  • Page 79: Record A Rhythm

    Record an ECG or Rhythm If the device is configured to print the barcode of the patient ID in the patient reports, the printed patient report includes the barcode. The barcode can be used to perform a query by patient ID in the MUSE system. If a printer error occurs, the progress message is replaced by the related printer error.
  • Page 80: Review A Digital Rhythm Report

    Record an ECG or Rhythm If the Rhythm Then Mode is ... Digital Only The rhythm is only digitally recorded in real-time at the configured speed and for the configured duration. When the configured duration is reached, the rhythm stops recording. The digital rhythm report is displayed in a new Rhythm tab and saved in the Files list.
  • Page 81 Record an ECG or Rhythm Table 20: Rhythm Tab Item Name Description Patient Information Displays patient information such as patient first name, last name, Banner gender, age, and so on. Select anywhere in the Patient Information banner to edit patient information for the rhythm report. Rhythm report Displays the rhythm report.
  • Page 82: Transmit A Patient Report To A Configured Destination

    Record an ECG or Rhythm Item Name Description Edit icon Edits patient information for the rhythm report. For more information, see Edit Patient Information in a Patient Report on page Copy icon Prints a copy of the rhythm report. For more information, see Print a Patient Report on page Transmit icon...
  • Page 83 Record an ECG or Rhythm Patient Report Type Destination Supported File Format Digital Rhythm DCP server destination (MUSE v9 PDF format SP6 or higher, or MUSE NX and MUSE DICOM Gateway Pro SP6 or higher) Digital Rhythm SFTP server destination with remote PDF format directory path Digital Rhythm...
  • Page 84 Record an ECG or Rhythm To transmit the report ... Perform the following: To another configured Select anywhere around the ellipsis icon on the left, bottom destination corner of the tab to view the Transmit menu. From the expanded Transmit menu, select the destination where you want to transmit the patient report.
  • Page 85: Print A Patient Report

    Record an ECG or Rhythm Then Patient information is incomplete in the Perform the steps below: patient report (for example, mandatory fields Edit the patient report to enter missing are blank or contain invalid data), a message patient data. displays in the notification area indicating that the patient report cannot be transmitted Retry transmission.
  • Page 86 Record an ECG or Rhythm To print a copy of the patient Perform the following: report ... In the default or selected report Select the Copy icon: format displayed on the ECG or Rhythm or FD Report tab A job to print one copy of the patient report in the default report format is sent to the printer.
  • Page 87: Edit Patient Information In A Patient Report

    Record an ECG or Rhythm Edit Patient Information in a Patient Report Make sure that you have the privilege to edit patient reports. After a test is acquired, you can edit patient information using the software keyboard or by attaching an order. When an order is attached to a patient test, some fields are read-only.
  • Page 88: View The Patient Report

    Record an ECG or Rhythm Select the Delete icon in the Report Review page on the Acquisition screen to delete the patient report: A message displays asking you to confirm if you want to permanently delete the patient report. Select Delete to delete the patient report. The selected patient report(s) are deleted from the Files list.
  • Page 89: Full Disclosure Overview

    Record an ECG or Rhythm After completing your tasks, select the Done icon to close the patient report. A message displays asking you if you want to start a new patient test. Select one of the options below: • New Patient to start a test for a new patient, see Start a Test for a New 51.
  • Page 90: Record A Full Disclosure Ecg

    Record an ECG or Rhythm Record a Full Disclosure ECG Before you start this procedure, make sure: • You purchase and enable the Full Disclosure option in the Options Manager. • You enable the Full Disclosure option in the Setting screen. Start a new patient test.
  • Page 91: Review A Full Disclosure Report

    Record an ECG or Rhythm Select anywhere on the Full Disclosure ECG. The 10 seconds of ECG data is selected. Click Preview ECG. A preview of the recorded 10 seconds of data for all leads displays in the configured preview report. Select the minimize icon to view the report. To accept or reject an ECG Patient Report, see Accept or Reject an ECG Patient Report on page...
  • Page 92 Record an ECG or Rhythm Table 21: Full Disclosure Report Tab Item Name Description Patient Information The information that displays on the screen for the patient such as Banner first name, last name, gender, age, and so on. To edit the patient information, click anywhere on the Patient Information screen.
  • Page 93 Record an ECG or Rhythm Item Name Description Full Disclosure Report Displays the Full Disclosure report. If a Full Disclosure report contains more than one pages, click the left and right arrows on the screen to see the next page. When you record Full Disclosure ECG: •...
  • Page 94: 6: Work With Orders

    Work with Orders Work with Orders Make sure that the ORDM option is enabled on the device. Contact a GE Healthcare Service Support representative to enable this option. If order management is enabled, the Orders list displays in the Acquisition screen. You can retrieve orders from an order management server (such as a MUSE system) that is connected to your network.
  • Page 95 Work with Orders Table 22: Orders Collapsed List Item Name Description Orders tab Displays a list of orders downloaded from an order management server. A filter icon next to the tab name indicates that the order list is filtered by a location.
  • Page 96 Work with Orders Item Name Description Orders Displays up to eleven configurable columns that provide information expanded list about the orders. columns Navigation Navigates to the previous and next pages in the Orders list. arrows Last Updated Displays the date and time the order list was last updated. date and time Refresh icon Downloads the list of orders.
  • Page 97: Automatically Update The Orders List

    Work with Orders WARNING: INACCURATE PATIENT DATA - Incorrect patient information can cause patient data mismatch. Data assigned to the wrong patient causes erroneous patient data that can affect diagnosis and treatment. Be sure to check the patient information screen for each new patient. Make sure that you attach the correct order for the correct patient.
  • Page 98: Sort Orders In The Orders List

    Work with Orders You can download a maximum of 1000 orders. If the number of orders exceeds this limit, an error message displays asking you to restrict the order download filter. Sort Orders in the Orders List By default, the Orders list is sorted in descending order by the Location column, if the Location column is configured as one of the display columns.
  • Page 99 Work with Orders Select the necessary filter location from the drop-down list. The order list refreshes and displays only the locations in the selected filter. If you select the filter drop-down list, the filter icon changes to . If you apply a location filter in the Orders list, the filter icon changes to to indicate that the order list is filtered and does not display all orders.
  • Page 100 Work with Orders If you select... Then... The Current Patient Location The orders list displays only the orders from the current location of the device configured in the device settings. The Show All Locations The orders list displays the orders from all the locations of the device configured in the device settings.
  • Page 101: Attach An Order When The Patient Test Is Not Started

    Work with Orders By default, the applied filter is Current Patient Location , and displays all orders from the current location of the device. Attach an Order when the Patient Test is Not Started Start a test for the new patient. For more information, see Start a Test for a New Patient on page Double-tap the order in the Orders list to attach it to a patient test.
  • Page 102: Attach An Order When The Patient Test Is Completed

    Work with Orders Then You manually entered patient data in the There is a data mismatch between the order Patient Information screen after starting the data and the manually entered patient data. test A warning message displays indicating a mismatch in the patient name or patient ID and asks you to confirm that the selected order can be attached to the patient test, overwriting existing patient data.
  • Page 103: Attach An Order That Is Attached To A Different Patient Test

    Work with Orders Then You manually entered patient data in the There is a data mismatch between the order Patient Information screen after starting the data and the manually entered patient data. test A warning message displays indicating a mismatch in the patient name or patient ID and asks you to confirm that the selected order can be attached to the patient test, overwriting existing patient data.
  • Page 104: Change The Order Attached To A Patient Test

    Work with Orders • Select View Test to open the patient test and view it as if the test had been opened from the Files list. Select Continue to detach the order from the existing patient test and attach the order to the new patient test.
  • Page 105: Order Status

    Work with Orders A message displays asking you to confirm if you want to detach the order from the selected test. Select Yes to detach the order from the current test. The order number field is cleared. Select Save to save your changes. The order is detached from the patient test and moves back to the Open status.
  • Page 106 Work with Orders NOTE: The Attached order status is not included in the transmitted patient reports.   MAC ™ 5 A4/MAC ™ 5 A5/MAC ™ 5 Lite  5864335-001-1...
  • Page 107: 7: Work With The Files List

    Work with the Files List Work with the Files List The Files list displays stored digital rhythm and ECG patient reports. The figure illustrates the Files collapsed list: Table 24: Files Collapsed List Item Name Description Files tab Opens the Files collapsed list that stores the saved patient reports. Expand icon Opens the Files expanded list.
  • Page 108 Work with the Files List Item Name Description Navigation Navigates to the previous and next page in the Files list. arrows Expand arrow Expands the Hookup Advisor electrode placement image. When expanded, the image overlays the Files list. The figure illustrates the Files expanded list: Table 25: Files Expanded List Item Name...
  • Page 109: Review A Stored Patient Report

    Work with the Files List Item Name Description Delete icon Deletes the selected patient reports. Edit icon Edits patient information for the selected patient report. Copy icon Prints a copy of the selected patient reports. Transmit icon Transmits the patient reports to the selected destination. Destination menu Review a Stored Patient Report...
  • Page 110 Work with the Files List Table 26: Displaying a Stored Patient Report Item Name Description Patient Displays patient information. A grey banner indicates the patient Information report has been stored in the device. Select anywhere in the banner Banner to expand the screen and edit patient information. ECG patient Displays the patient report.
  • Page 111: Transmit A Stored Patient Report To A Configured Destination

    Work with the Files List Item Name Description Delete icon Select the Delete icon to delete the patient report from the Files list. Deleting the patient report closes the current tab and displays the Live tab. For more information, see Delete Stored Patient Reports from the Files List on page 117.
  • Page 112 Work with the Files List Patient Report Destination Supported File Format Type Digital Rhythm DCP server destination (MUSE v9 PDF format SP6 or higher, or MUSE NX and MUSE DICOM Gateway Pro SP6 or higher) Digital Rhythm SFTP server destination with remote PDF format directory path Digital Rhythm...
  • Page 113 Work with the Files List To transmit the report(s) ... Perform the following: To another configured Select anywhere around the ellipsis icon on the lower, left- destination side of the screen to expand the Transmit menu. From the expanded Transmit menu, select any configured destination to transmit the patient report(s).
  • Page 114: Print A Stored Patient Report

    Work with the Files List Then Patient information is incomplete in one Perform the steps below: or more patient reports selected for Edit the incomplete patient report to transmission (for example, required fields enter missing patient data. are blank or contain invalid data), a message displays in the notification area indicating Retry transmission.
  • Page 115: Print A List Of Stored Records

    Select the Stop icon on the Report Printing screen to stop printing a patient report. Print a List of Stored Records You can print all the stored records that display in the Files Manager on MAC 5 A4 and A5 device. Lite device does not support this function.
  • Page 116: Edit Patient Information In A Stored Patient Report

    Work with the Files List From the Acquisition screen, select the Files list. The Files collapsed list opens. Select the Expand icon to open the Files list. The Files expanded list opens. Select the Print List button to print the list of stored records. The printing starts and a stop icon displays on the screen.
  • Page 117: Delete Stored Patient Reports From The Files List

    Work with the Files List Then You are in the Select the check box next to the patient report you want to edit. Files expanded list Select the Edit icon to edit patient information for the stored patient report: The Patient Information screen opens with a grey background indicating that this is a stored patient report.
  • Page 118 Work with the Files List Select the Delete icon: A message displays asking you to confirm if you want to permanently delete the selected patient report(s). Select Delete to delete the patient reports. The selected patient reports are deleted from the Files list. An alert may be configured by your administrator to warn you before deletion of untransmitted reports.
  • Page 119: 8: Work With The Queue List

    Work with the Queue List Work with the Queue List The digital rhythm, FD report and ECG patient reports transmitting to a designated location and in-completed network printing jobs are temporarily stored in the Queue list. The successfully transmitted digital rhythm, FD report and ECG patient reports and completed network printing jobs are immediately deleted from the Queue list.
  • Page 120 Work with the Queue List Table 27: Queue Collapsed List Item Name Description Queue tab Displays the list of patient reports in the transmission queue. Expand icon Opens the Queue expanded list. Queue collapsed Displays columns that provide information about the patient reports in list columns the transmission queue.
  • Page 121: Display The Report Queue

    Work with the Queue List Item Name Description Retry icon Retries the transmission of an unsuccessful job. Table 29: Columns in the Queue List Column Name Description Acquisition Displays the date and time of the rhythm, FD report or ECG patient report, in the Date/Time configured date and time format.
  • Page 122: Delete Jobs From The Queue

    Work with the Queue List From the Acquisition screen, select Queue. The Queue collapsed list opens. To open the Queue expanded list, select the Expand icon: The Queue expanded list opens. Select the Collapse icon to collapse the list and return to the Acquisition screen: Delete Jobs from the Queue From the Acquisition screen, select Queue.
  • Page 123 Work with the Queue List The system automatically tries to transmit a patient report. If you need to re-transmit the patient report before the next automatic attempt, you can use this procedure to transmit the patient report immediately. From the Acquisition screen, select Queue. The Queue collapsed list opens.
  • Page 124: 9: Work With The Patients List

    Work with the Patients List Work with the Patients List If the Order Manager is disabled in the Settings screen, the Patients list displays in the Acquisition screen. The information of recent patients is stored in the Patients list, and you can view up to 500 recent patient information records. The figure below illustrates the Patients collapsed list: The figure below illustrates the Patients expanded list:  ...
  • Page 125 Work with the Patients List Table 30: Patients List Item Name Description Patients tab Displays the Patients list. Expand or Expands or collapses the Patients list. Collapse icon Patients Displays these four columns in the collapsed list: collapsed and • Patient ID expanded list columns...
  • Page 126: Open The Patients List

    Work with the Patients List Open the Patients List The Patients list displays on the Acquisition screen if order management is disabled. Make sure that you have the privilege to view the patients lists or an error message will display when you try to view it. From the Acquisition screen, select Patients.
  • Page 127: 10: Configure Settings

    Configure Settings Configure Settings Settings Screen Overview Select the Settings screen to set up the features below. • ECG - Configure ECG on page 129 • Patient Data - Configure Patient Information on page 152 • Workflow - Configure Workflow on page 163 •...
  • Page 128: Open The Settings Screen

    Configure Settings Open the Settings Screen Select Settings from the User Menu on the Acquisition screen. If you have sufficient privileges, the Settings screen opens. If you do not have privileges to access the Settings screen, a message displays based on your user profile. Log on as a user with sufficient privileges to access the Settings screen.
  • Page 129: Configure Ecg

    Configure Settings Button Action Test Connection Select this setting to test the particular destination is available and online. • If the connection is successful, a success message displays and the Save button is enabled. • If the connection fails due to an error, a failure message displays.
  • Page 130 Configure Settings Configure the fields as per the information in the table. Table 32: Acquisition Settings Field Action Description Lead Label Select a value The supported lead labels are from the American Heart Type from the drop- Association (AHA) and International Electrotechnical down list to Commission (IEC).
  • Page 131 Configure Settings Field Action Description Hookup Select a value The Hookup Advisor indicator displays yellow or red Advisor Level from the drop- depending on the severity of the signal failure in a down list to leadwire. configure when • If you select Yellow, the Electrode Placement Image the Electrode automatically expands when the indicator is yellow Placement Image...
  • Page 132: Configure Filters, Gain, And Speed

    Configure Settings Field Action Description Simulated Enable or disable If this setting is enabled, you can use simulation patient Patient Data this setting. data for demonstrations or troubleshooting. The system generates and displays simulated ECG waveforms on the Acquisition screen. The label at the top of the screen indicates that the ECG waveform is based on simulated data from the internal simulator, and not actual patient data.
  • Page 133 Configure Settings Configure the fields as per the information in the table. Table 33: Filter, Gain and Speed Settings Field Action Description AC Filter Select a value The AC Filter frequency is set prior to shipping the unit from the drop- and is based on the country of purchase.
  • Page 134 Configure Settings Field Action Description Baseline Roll Enable or disable If this setting is enabled, the system applies a 0.56 Hz Filter this setting. baseline roll filter to the waveforms. Use the baseline roll filter to remove low frequency components such as motion artifact, respiratory variation, and baseline shift.
  • Page 135: Configure 12Sl Interpretations

    Configure Settings Field Action Description Default Gain Select a value Gain indicates how many mm represent 1 mV of sample from the drop- data on the printout. Changing the gain changes the down list, to amplitude of the waveforms. A higher gain makes the configure the amplitude of the waveform appear higher;...
  • Page 136 Configure Settings Configure the fields as per the information in the table. Table 34: 12SL Settings Field Action Description QTc Method Select a value The name of the QT Correction Method and the QTc to use a QT value display on the report. Correction Default value: Bazett Method with the...
  • Page 137: Configure Display Formats Of Ecg And Rhythm Leads

    Configure Settings Field Action Description Suppress Enable or disable If this setting is enabled, no abnormal or borderline Abnormal this setting. interpretative statements generate or display on the Statements report when you do as follows: • View a report in the preview and review screens •...
  • Page 138 Configure Settings Name No. of Lead Leads Default Auto- Digital Leads Format rhythm Rhythm Swedish standard: CH1 to CH12: aVL, I, -aVR, II, aVF, III, V1, V2, V3, V4, V5, V6 3 Leads CH1 to CH3: V1, II, V5 6 Lead CH1 to CH6: I, II, III, aVR, aVL, aVF Group 1 Swedish standard:...
  • Page 139 Configure Settings Select the Add icon to add a lead format. A new row is added to the lead format table. Configure the lead format as per the information in the table: Table 36: Display Format Settings for ECG and Rhythm Leads Field Action Description...
  • Page 140: Configure Patient Reports

    Configure Settings Field Action Description Auto-rhythm Enable or disable If this setting is enabled, this lead set format is the this setting. default format used for an Auto Rhythm report on this device. There can be only one default format used for an Auto Rhythm report.
  • Page 141 Configure Settings Select 12 Lead as ECG type. Configure the preview report format and leads as per the information in the table: 5864335-001-1   MAC ™ 5 A4/MAC ™ 5 A5/MAC ™ 5 Lite  141...
  • Page 142 Configure Settings Table 37: Preview Report Format and Lead Settings Field Description Allowed Values Default Value Preview Report Select a value from the drop- Supported report 4 by 2.5s + 3 down list to preview the formats for 12 lead Rhythm Lds recorded ECG of the selected ECG type...
  • Page 143 Configure Settings Field Description Allowed Values Default Value Select a value from the fifth column to configure the fifth rhythm lead for the Swedish report format. Select a value from the sixth column to configure the sixth rhythm lead for the Swedish rhythm report.
  • Page 144 Configure Settings Perform any of the steps below to configure report printing for each supported report format: • To add a report printing configuration, perform step to step 8. • To edit a report printing configuration, perform step 9. • To delete a report printing configuration, perform step 10. Select the Add icon to add a report printing configuration.
  • Page 145: Configure Lead Sets

    Configure Settings Field Action Description 12SL Enable or disable Displays or hides the 12SL analysis in the ECG report. Interpretation this setting. Default value: • Not applicable for 1 by 10s @25mm/s, 1 by 10s @50mm/s and Expanded media 12ld formats. •...
  • Page 146 Configure Settings Table 39: Default Lead Set Configurations Lead Set Lead Set Default Lead Set Channels Name Type Adult 12 12 Lead CH1 to CH12: I, II, III, aVR, aVL, aVF, V1, V2, V3, V4, V5, V6 Lead You can edit or delete the default or user-defined ECG lead set configurations by performing the procedure below: Select Settings >...
  • Page 147 Configure Settings Table 40: ECG Lead Set Configuration Field Name Action Description Type Select the lead set Default value: 12 Lead type you want to include in the lead set. Name Enter a name for User-defined value up to 15 characters. your lead set.
  • Page 148: Configure Rhythm

    Configure Settings NOTE: You can delete only one lead set configuration at a time. To delete more than one lead set configuration, repeat this step. Select Save. Configure Rhythm Select Settings > ECG > Rhythm Record. The Rhythm Record screen displays. Configure the fields as per the information in the table: Table 41: Rhythm Settings Field...
  • Page 149: Configure Critical Value Notifications

    Configure Critical Value Notifications Before you start this procedure, make sure that: • The CRIT option is enabled on the device. Contact a GE Healthcare Service Support representative to enable this option. • Your user role is assigned the privileges to access the Settings screen and edit critical value settings.
  • Page 150 Configure Settings Enable the Critical Value Notifications setting to configure notifications to display when configured critical value thresholds are met or prescribed critical conditions are detected. Enable the Use Custom Notification Text setting to configure custom notification text in the text field. Edit the default phrase Critical Test Result in the text field with a customized phrase.
  • Page 151: Configure Full Disclosure

    Configure Full Disclosure Before you start this procedure, make sure that: • The FLDS - Full Disclosure option is enabled on the device. Contact a GE Healthcare Service Support representative to enable this option. • Your user role is assigned the privileges to access the Settings screen. See Configure User Roles on page 209.
  • Page 152: Configure Patient Data

    Configure Settings Select Settings > ECG > Full Disclosure. The Full Disclosure screen displays. Do one of the below steps. • Enable the Full Disclosure setting and select Save to activate the full disclosure functionality. The Full Disclosure tab is available on the Acquistion screen. •...
  • Page 153 Configure Settings Configure the fields as per the information in the table. NOTE: If you enable a field in the Mandatory column and Mandatory fields apply for Transmission or Acquisition option, it becomes a required field or option settings and an asterisk (*) displays next to the field on the Patient Information screen.
  • Page 154 Configure Settings Field Action Description Patient ID Enable or disable • If this setting is enabled, the patient ID is padded Padding this setting. with the required number of leading zeros as per the configured PID length. • If this setting is disabled, the patient ID is not padded with leading zeros as per the configured PID length.
  • Page 155 Configure Settings Field Action Description Mandatory Enable or disble If the Transmission setting is enabled, the mandatory fields apply for the Transmission fields need to be set in the Patient Information screen. or Acquisition Otherwise the transmission of the ECG report is failed setting.
  • Page 156 Configure Settings Field Action Description Race Enable or disable Displays or hides the field in the Patient Information this setting. screen. This setting is automatically enabled when the device language below is set and the device is restored to factory defaults: •...
  • Page 157 Configure Settings Field Action Description Bed Number Enable or disable Displays or hides the field in the Patient Information this setting. screen. Default value: Disabled Comments Enable or disable Displays or hides the field in the Patient Information this setting. screen.
  • Page 158 Configure Settings Field Action Description Order Number Enable or disable Displays or hides the field in the Patient Information this setting. screen. If this field is configured to display, you can enable or disable the field in the Mandatory column. Default value: Enabled Secondary ID Enable or disable...
  • Page 159: Configure Clinical Trial

    Configure Clinical Trial Before you start this procedure, make sure that: • The PHAR - Pharmacy option is enabled on the device. Contact a GE Healthcare Service Support representative to enable this option. • Your user role is assigned the privileges to access the Settings screen. See Configure User Roles on page 209.
  • Page 160 Configure Settings Table 44: Clinical Trial Settings Field Action Description Make All Enable or disable If you enable this setting, all the configured clinical trial Clinical this setting. settings are required fields and an asterisk (*) displays Trial Fields next to each field on the Clinical Trial screen. Mandatory If you disable this setting, all the configured clinical trial settings are optional fields on the Clinical Trial screen.
  • Page 161 Configure Settings Field Action Description Visit Type Enable or Disable Displays or hides the field in the Clinical Trial screen. this setting. Default value: Disabled If you enable this setting, follow below steps to configure the visit types displaying in the drop down list of the Visit Type field in the Clinical Trial screen.
  • Page 162 Configure Settings Field Action Description Dose Type Enable or Disable Displays or hides the field in the Clinical Trial screen. this setting. Default value: Disabled If you enable this setting, follow below steps to configure the visit types displaying in the drop down list of the Dose Type field in the Clinical Trial screen.
  • Page 163: Configure Workflow

    Configure Settings Field Action Description Question Enter the question This field is enabled if the related Question field is to display in the enabled. Clinical Trial Default value: Enter the question screen. Allowed values: 10 characters • A to Z •...
  • Page 164: Configure Transmission Settings

    Configure Settings Configure Transmission Settings Select Settings > Workflow > Transmission. Enable or disable Delete after sending to default transmission mode to configure auto-deletion of the ECG patient report from the Files list after it is sent to the default destination. When Delete after sending to default transmission mode is enabled and user does not have Delete Reports privilege, the report continues to be deleted after transmission.
  • Page 165 Configure Settings Select Settings > Workflow > Transmission. Select the Add icon to add transmission modes. Select USB to configure a USB server destination. Configure the destination as per the information in the table. Table 45: Configure a USB Destination to Transmit Reports Field Action Description...
  • Page 166 Configure Settings Field Action Description Rhythm Type Select the Default and allowed value: PDF supported file type of rhythm report sent through USB by your facility. Select Test Connection to test the configured connection. • If the test displays Test Success, you have a successful connection to that destination.
  • Page 167 Configure Settings Field Action Description ECG Type Select the You can select multiple format types. supported file Default available values: type of ECG report sent • Hilltop through USB by • your facility. Allowed values (Option): • XML (This type is available only if XML format output is enabled in Option Manager).
  • Page 168 NOTE: You can secure some communication channels with encryption and authentication. GE Healthcare recommends that you use the encrypted channels, not the unencrypted channels. For example: • Upgrade the MUSE server 8.0/9.0 API3 version to the MUSE NX API3 version, to have a secure communication between the MAC 5 system and the MUSE server.
  • Page 169 Configure Settings Table 47: Configure a DCP Server Destination to Send Reports Field Name Action Description Destination Enter the name of the DCP server destination A user-defined value Name where the reports will be sent. up to 20 characters. Allowed values: •...
  • Page 170 Configure Settings Make changes to the destination as per the information in the table below. Table 48: Modify a DCP Server Destination to Send Reports Field Name Action Description Destination Modify the name of the DCP server A user-defined value Name destination where the reports will be sent, if up to 20 characters.
  • Page 171 Configure Settings NOTE: You can delete only one destination at a time. Select anywhere in the row of the destination you want to delete. Select the Delete icon . Select Save. Configure an SFTP Destination to Transmit Reports Select Settings > Workflow > Transmission. Select the Add icon to add transmission modes.
  • Page 172 Configure Settings Field Action Description Server Name Enter the IP Allowed values: Address or • A to Z Hostname of the SFTP server • a to z where the reports • 0 to 9 will be sent. • All special characters Remote Enter the path Allowed values:...
  • Page 173 Configure Settings Field Action Description Authorize Server Select Authorize The Authorize setting is enabled only after entering to acknowledge, the values for Destination Name, Server Name, upload the Remote Directory, User Name, Password, and ECG key file, and Type mandatory fields. download the Default value: Disabled SFTP server...
  • Page 174 Configure Settings To authorize a server, perform step or step 8. To authorize the server through a public key file that is used to sign the host certificate: Select Upload File to upload the public key file that is used to sign the host certificate.
  • Page 175 Configure Settings Select Download to download the finger print. NOTE: Make sure that you connect to the correct SFTP server by comparing the displayed finger print against the expected server finger print. • If the download is successful, the finger print displays in the Downloaded Print field.
  • Page 176 Configure Settings 10. Select Test Connection to test the SFTP server configuration. • If the test connection is successful, the SFTP server is configured and you can transmit the reports. • If the test connection is failed, the SFTP server is not configured and you cannot trasnmit the reports.
  • Page 177 Configure Settings Field Action Description Server Name Enter the IP Allowed values: Address or • A to Z Hostname of the SFTP server • a to z where the • 0 to 9 reports will be sent. • All special characters Remote Enter the path Allowed values:...
  • Page 178 Configure Settings Field Action Description Authorize Select Authorize The Authorize setting is enabled only after Server to acknowledge entering the values for Destination Name, Server and download Name, Remote Directory, User Name, Password, the SFTP server and ECG Type mandatory fields. advertised Default value: Disabled finger print key.
  • Page 179 Configure Settings Select Settings > Workflow > Transmission. Select the Add icon to add transmission modes. Select Shared Directory. Configure a shared directory as per the information in the table. Table 51: Configure a Shared Directory Destination to Transmit Reports Field Action Description...
  • Page 180 Configure Settings Field Action Description User Name Enter the user Allowed values: name allowed • A to Z to access the shared directory. • a to z • 0 to 9 • All special characters Password Enter the Allowed values: password of •...
  • Page 181 Configure Settings Select anywhere in the row of the destination you want to modify to enable the edit mode. Make changes to the destination as per the information in the table. Table 52: Modify a Shared Directory Destination to Transmit Reports Field Action Description...
  • Page 182 Configure Settings Field Action Description Rhythm Type Select the Default and allowed value: PDF supported file type of rhythm report sent to the shared directory by your facility. Test the connection as per step 5. Select Save. To delete an existing shared directory destination: NOTE: You can delete only one destination at a time.
  • Page 183: Configure Network Printer

    Configure Settings Table 53: Configure Transmission Modes Field Action Description Default Enable or disable If this setting is enabled, all generated patient reports this setting. are sent to this destination by default. A destination can be both the default and automatic destination.
  • Page 184 Configure Settings User Interface on Lite device For MAC 5 devices with printer, the default printer is thermal printer. For MAC 5 Lite device, the network printer is disabled by default. Enable network printer, and configure the network printer per the information in the table below:  ...
  • Page 185 Configure Settings NOTE: Make sure that the device is connected to a LAN or WLAN network, which is the same with the printer you are configuring. See for Configure Network on detailed information. page 226 Table 54: Configure Network Printer Field Action Description...
  • Page 186: Configure Order Management

    Configure Order Management Before you start this procedure, make sure that: • The ORDM - Order Manager option is enabled on the device. Contact a GE Healthcare Service Support representative to enable this option. • Your user role is assigned the privileges to access the Settings screen and edit critical value settings.
  • Page 187 Configure Settings Select Settings > Workflow > Order Manager. Select MUSE. Configure the MUSE server settings as per the information in the table. 5864335-001-1   MAC ™ 5 A4/MAC ™ 5 A5/MAC ™ 5 Lite  187...
  • Page 188 Enter a valid http NOTE: or https URL of You can secure some communication channels the MUSE server. with encryption and authentication. GE Healthcare recommends that you use the encrypted channels, not the unencrypted channels. For example: • Upgrade the MUSE server 8.0/9.0 API3 version...
  • Page 189 Configure Settings Field Action Description Password Enter the MUSE Default value: No default value account user Allowed values: password. Up to 128 characters • a to z • A to Z • 0 to 9 • All special characters (a single space) Install Enable or disable If you configure a https URL, a valid CA certificate is...
  • Page 190 Configure Settings If the MAC 5 device is set for LDAP authentication and Order Management with the MUSE system, when a user authenticates through LDAP, the MAC 5 connects to the MUSE server through MUSEAPI3. It checks if any users in MUSE User Setup have a Windows username that matches the user that logged into the MAC 5 device.
  • Page 191 Configure Settings Perform the steps below to install a CA certificate: Select Browse from the Install Certificate field and select the CA certificate from the USB flash drive. Select Install. • If the installation is successful, the CA certificate is saved. •...
  • Page 192 Configure Settings Delete MUSE SSL CA Certificate Before you start this procedure, make sure that your user role is assigned with user management privilege. Select Settings > Workflow > Order Manager. Select MUSE to view the MUSE server settings. Perform the steps below to delete the currently installed MUSE CA certificate: Select Browse from the Install Certificate field.
  • Page 193 Configure Settings Perform any of the steps below in the Display Filter Groups section to configure filter groups. • To add a Display Filter Group, perform step to step 7. • To edit a Display Filter Group, perform step 8. •...
  • Page 194 Configure Settings Table 57: Configure Display Filter Groups Field Action Description Name Enter a name for The display filter group name must be unique. the display filter No default value group. Allowed values: Up to 20 characters • a to z •...
  • Page 195 Configure Settings Select Save. Configure Order Settings Make sure that order management is enabled. See Configure Order Management on page 186. Select Settings > Workflow > Order Manager. Select Orders. Configure order settings as per the information in the table. Table 58: Order Settings Field Action...
  • Page 196 Configure Settings Select Collapsed or Expanded in the Displayed in Order to List drop-down list. Table 59: Column Settings for Orders List Field Number of Default Columns in List Columns Supported Displayed in Order to List 1 to 4 columns •...
  • Page 197 Configure Settings Field Number of Default Columns in List Columns Supported Displayed in Order to List 1 to 11 columns • Patient Name (Expanded) • Patient ID NOTE: • This list includes the columns in the collpased list by default. •...
  • Page 198: Patient Query Overview

    Configure Settings Patient Query Overview The patient query results differ depending on the privileges assigned to the user and the configured patient query setting. When the View Orders user privilege or Allow Unprivileged User to Attach Orders setting is on and the Query Remote Patient Data user privilege is on: NOTE: The ADT and Orders can only be retrieved by the Patient ID or Visit Number and not by both.
  • Page 199: Configure Remote Patient Query

    Configure Settings Search criterion Patient query setting DCP destination Search result with ADT enabled and MUSE order server setting Visit Number Query Orders Configure DCP Matching local or remote server with orders are retrieved. ADT enabled corresponding to MUSE Order Server settings and make sure that both IP...
  • Page 200: User Account

    Configure Settings Configure the fields as per the information in the table: Table 61: Patient Query Settings Field Action Description Patient Query Select an option Default value: No Patient Query Mode to configure the Allowed values: patient query mode. • Query Orders •...
  • Page 201: Configure Security

    Configure Settings If... Then... Users are managed locally Perform the following configurations: • Configure User Profiles on page 213 • Configure User Roles on page 209 Users are managed using LDAP Configure LDAP on page 216. Select Settings > User Account menu to configure the following: •...
  • Page 202 Configure Settings Table 62: Configure Security Field Action Description User Select a value • If Full Authentication with STAT is selected, the Authentication from the drop- device displays a login screen. down list to configure the type of user authentication for the device.
  • Page 203 Configure Settings Field Action Description STAT Access Enter the label This field is enabled only when the Full Authentication Label name to display in with STAT setting is selected from the User the login screen. Authentication field. Default value: STAT Allowed values: 1 to 20 characters •...
  • Page 204 Configure Settings Field Action Description Password Set the Minimum Minimum duration: This specifies the minimum amount lifetime and Maximum of time a password needs to remain unchanged. duration password • If it is set to one day then the password cannot be (days) expiration changed again until tomorrow.
  • Page 205 Configure Settings Field Action Description Account Select a value This specifies to configure the duration in minutes to lockout from the drop- lock the account. duration (min) down list to set If it is set to one minute then the account will be locked the duration for one minute.
  • Page 206: Types Of User Roles

    Configure Settings Types of User Roles The roles below are pre-defined on the device: • System Admin • Clinical • STAT • Service Table 63: Pre-Defined User Roles User Role Description Default Privileges System Admin The System Admin role has all privileges by •...
  • Page 207: Types Of User Profiles

    Configure Settings User Role Description Default Privileges Service The Service role is assigned to the Service • Access Settings user by default. The privileges of the Service • Activate ECG Simulator role can be changed. The role of the Service user cannot be changed.
  • Page 208 Configure Settings Table 64: Pre-Defined User Profiles User Profile Description Admin This pre-defined administrator can access the device with password credentials to set up, edit, and delete configurations. The default password to login as the Admin user is admin123. The Admin user is prompted to change the default password immediately after the first login.
  • Page 209: Configure User Roles

    Configure Settings User Profile Description STAT User When user authentication with STAT access is enabled, the STAT User can access the device without entering a password to acquire, print, and transmit an ECG. The STAT User is assigned the STAT role by default. The role of the STAT User can be modified.
  • Page 210 Configure Settings Perform the required procedures to configure user roles, as applicable: • To add a user role, perform step to step 7. • To edit a user role, perform step 9. • To delete a user role, perform step 10. Select the Add icon to add a user role.
  • Page 211 Configure Settings Table 66: Configure User Roles Field Description Role Name Enter the unique name of the user role. Up to 15 characters are allowed. Access Settings Access the Settings screen and view the newtork parameters upon selecting the network status icon. NOTE: If this privilege is disabled: •...
  • Page 212 Edit Critical Value Settings Edit the critical values setting. NOTE: This privilege displays only if the CRIT option is purchased and enabled. Contact GE Healthcare Service Support to purchase this option. If you enable this privilege, the Access Settings privilege is also enabled.
  • Page 213: Configure User Profiles

    Configure Settings Select Save. Configure User Profiles Make sure that your user role is assigned to the user management privilege. Select Settings > User Account > Users. Select User Profiles. The configured user profiles are listed in the table Table 67: Configure User 214.
  • Page 214 Configure Settings Table 67: Configure User Profiles Field Action Description User Name Enter a unique If a user with the same user name already exists, an name for the user. error message displays. This is a required field. No default value. Allowed values: User-defined value up to 15 characters Display Name Enter a unique...
  • Page 215 Configure Settings Field Action Description Password Enter the Each character in the password displays an asterisk (*). password for the If the password rules are not met, the Password field user according display a red box and relevant error messages. to the password Allowed values: rules listed in...
  • Page 216: Configure Ldap

    Configure Settings Field Action Description Disable User Enable or disable • If this setting is enabled, the user is disabled from this setting. using the device. • If this setting is disabled, the user is enabled to access the device. Default value: Disabled Force User Enable or disable...
  • Page 217 Configure Settings Select LDAP to view the LDAP settings. The LDAP screen displays. Enable LDAP setting. Configure LDAP as per the information in the table. Table 68: Configure LDAP Field Action Description LDAP Enable or disable If this option is enabled, technicians can log in to the this option.
  • Page 218 This field is enabled if the LDAP option is enabled. Mode down list, select Default value: Simple the desired Authentication GE Healthcare recommends that you use ldaps:// Mode. server or TLS encryption certificate if you configure Simple authentication mode. Allowed value: •...
  • Page 219 • If you configure an ldap URL, the Use TLS Encryption option displays. NOTE: You can secure some communication channels with encryption and authentication. GE Healthcare recommends that you use the encrypted channels, not the unencrypted channels. For example: •...
  • Page 220 LDAP server. The data is encrypted regardless of whether a CA certificate is installed. NOTE: GE Healthcare recommends that you use a CA certificate when you connect to the LDAP server. If you do not use a CA certificate, the device runs the...
  • Page 221 Enter a valid name path to groups (For example, This field is enabled Path to OU=Groups, OU=Clinical Users, DC=domain, DC=com; if the LDAP option is Groups CN=Roles, O=GE, C=US). enabled. Default value: No default value Allowed values: • A to Z •...
  • Page 222 Field Action Description Name Enter a valid name path to users (For example, OU=Users, This field is enabled Path to OU=Clinical Staff, DC=domain, OU=Users, DC=com; O=GE, if the LDAP option is Users C=US). enabled. Default value: No default value Allowed values: •...
  • Page 223 Configure Settings Perform any of the steps below to configure an LDAP group role, as applicable: • To add an LDAP group role, perform step to step 6. • To edit an LDAP group role, perform step 7. • To delete an LDAP group role, perform step 8. •...
  • Page 224 Configure Settings The users belonging to the LDAP group are assigned the privileges of the user role mapped to the LDAP group. Repeat steps to add more LDAP group roles. After adding the LDAP group roles, save and close the screen. The Acquisition screen displays.
  • Page 225 Configure Settings To modify the added LDAP user, see Configure LDAP on page 216. When you are logged in as LDAP user and try to configure different LDAP user and server configuration, the error message: Changes to the LDAP server configuration may affect the added groups displays.
  • Page 226: Configure Network

    Configure Settings Connect the USB flash drive containing the CA certificate to the device. Select Settings > User Account > LDAP. Select LDAP to view the LDAP settings. Enable LDAP setting. Perform the steps below to install a CA certificate: Select Browse from the Install Certificate field and select the CA certificate from the USB flash drive.
  • Page 227: Configure Shared Network Settings

    Configure Settings • Wireless Certificates - Install Wireless Certificates on page 239 • Proxy Settings - Configure Proxy Settings on page 243 Configure Shared Network Settings Select Settings > Network > Shared Network. The shared network setting screen displays. Enable Shared Path. Configure the fields as per the information in the table.
  • Page 228: Configure Device Host Name

    Configure Settings Table 72: Configure Shared Network Settings Field Action Description Shared Path Enable or If this setting is enabled: disable a shared Enter a valid shared path in the text field. folder in the network to store Example: ///<IP address> or <Hostname>/ software files <Shared Folder>...
  • Page 229: Configure Wired Network

    Configure Settings Table 73: Configure Device Host Name Field Action Description Cardiograph Enter the host The host name cannot start or end with a hyphen. Device Name name of the The host name cannot be blank as this is a required device in the field.
  • Page 230 Configure Settings Configure the wired network settings as per the information in the table. Table 74: Configure a Wired Connection Field Action Description Network Enable or disable • If this option is enabled, the LAN connection to the Status this option. device is enabled.
  • Page 231: Configure Wireless Network

    If wireless country of operation is not configured because the expansion board was replaced or the device does not have a wireless certification in the specific country, contact your GE Healthcare Service support representative to configure this setting. Select Settings > Network > Wireless Network.
  • Page 232 Configure Settings Enable wireless and configure the authentication protocol as per the information in the table. Table 75: Configure Wireless Authentication Protocol Field Action Description Network Enable or disable • If this setting is enabled, the WLAN connection to Status this setting.
  • Page 233 Configure WEP authentication as per the information in the table, and then go to step 7. NOTE: You can secure some communication channels with encryption and authentication. GE Healthcare recommends that you use the encrypted channels, not the unencrypted channels. For example, WPA2 for wireless authentication protocol instead of WEP. 5864335-001-1  ...
  • Page 234 Configure Settings Table 76: Configure WEP Authentication Field Action Description Active Passkey Select a value The device uses the Active Passkey to encrypt and from the drop- decrypt data sent to and received from other entities on down list to the WLAN.
  • Page 235 Configure Settings Field Action Description Encryption Select a value TKIP is the Temporal Key Integrity Protocol. Protocol from the drop- CCMP is the Counter Mode Ciper Block Chaining down list to Message Authentication Code Protocol. configure the encryption Default value: protocol.
  • Page 236 Configure Settings Field Action Description EAP Phase 2 Select a value This field is available only when EAP Phase 1 is from the drop- configured as PEAP or TTLS. down list to Default value: MSCHAPv2 configure EAP Phase 2. Allowed values: •...
  • Page 237 Configure Settings Configure the setting to obtain the IP address automatically or manually as per the information in the table. Table 80: Enable or Disable DHCP Field Name Action Description Obtain IP Enable or disable Automatically obtains the IP address. Address this setting.
  • Page 238: Configure Wireless Country Of Operation

    Configure Settings Save and close the screen. The Acquisition screen displays. Configure Wireless Country of Operation NOTE: The device ships with configured settings for the Wireless Country of Operation option. You can only edit the country code for the Rest of the World setting.
  • Page 239: Install Wireless Certificates

    Configure Settings To set Wireless Country Perform the following steps: of Operation in: Rest of the World The Country of Operation option displays. Enter a two-character country code in the text field. The list of possible country codes is available at: https://www.iso.org/obp/ui/#search/code/.
  • Page 240 Configure Settings NOTE: If the client certificate is self-signed, a CA Certificate is not required. Select Settings > Network > Wireless Network. In the Wireless Network section, select Install Certificate. The Install Certificate screen opens. By default, the CA Certificate tab is selected.
  • Page 241 Configure Settings NOTE: The Client Private Key and Client Public Key can be in the same certificate. Select Client Private Key. Select a valid client private key from the USB flash drive. Enter a valid client private key password in the Password field. Select Client Public Key.
  • Page 242: Intermediate Certificates

    Configure Settings Select a valid client public key from the USB flash drive. Select Install to install the selected client private and public keys. The Install button is enabled only after you select client private and public keys. • If the installation is successful, the Certificate name, Issuing Authority, Validity Dates, and Issuing Subject details display in the Currently Installed Certificate Details section.
  • Page 243: Configure Proxy Settings

    Configure Settings If an Intermediate Certificate is used, convert the root and intermediate certificates to PEM format. Open the PEM format certificates in a Notepad editor. Perform the steps below to create a Chained CA Certificate: Concatenate the root and intermediate certificates as explained in the example below.
  • Page 244: Show Network Connection Status

    Configure Settings Configure the proxy settings as per the information in the table. Table 81: Configure Proxy Settings Field Action Description Network Proxy Enable or disable • If this setting is enabled, the HTTP Proxy and HTTPS this setting. Proxy fields display. You can configure the proxy settings.
  • Page 245 Configure Settings To view the status of your device's connection to your LAN or Wireless Local Area Network (WLAN), perform the procedure as follows: Select the Network Status icon on the status bar. Review the tables for the description of the network status icon when connected to a LAN or WLAN network.
  • Page 246: Configure System

    Configure Settings Configure System Select Settings > System menu to configure the settings below: • Device Parameters - Configure Device Parameters on page 246 • External Storage - Configure External Storage on page 247 • Save and Restore Configuration Settings - Save and Restore Configuration Settings on page 248 •...
  • Page 247: Configure External Storage

    Configure Settings Field Action Description Location ID Set the default For each patient test, the location ID is populated in the location ID. Location field of the Patient Information screen. No default value Allowed values: 0 to 65535 Site Set the site Default value: 1 number.
  • Page 248: Save And Restore Configuration Settings

    Configure Settings Table 85: External Storage Settings Field Action Description Enable Enable or disable Only an Admin user or Service user can enable or External USB access to USB disable this setting. Storage flash drives for NOTE: external data If you try to disable this setting, and a USB storage.
  • Page 249 Configure Settings If you want to... Then... Save the Select Save to USB. configuration A message displays indicating that the selected settings will be settings to a USB saved to an external USB storage. flash drive Select the Select All check box or select specific check boxes to save required settings to the USB flash drive.
  • Page 250: Save And Restore User Settings

    Configure Settings To resolve errors related to the USB flash drive, see USB Flash Drive Errors on page 282. Save and Restore User Settings Before you start this procedure, make sure that: • The Enable External USB Storage is enabled in Settings > System > Storage setting.
  • Page 251 Configure Settings If you want to... Then... Save the user Select Save to USB. settings to a USB Select Select All to save all the settings to USB flash drive. flash drive Select specific check boxes to save the settings below to USB flash drive: •...
  • Page 252: Restore To Factory Defaults

    Configure Settings Restore to Factory Defaults NOTE: A System Reset is used to delete all data including patient data and settings. The system is reset to factory defaults and the default password for the admin user can be used to log in. It retains the previously enabled option codes, serial number, MAC address, and Wireless Country of Operation configuration.
  • Page 253: Configure Log Server

    Configure Settings • Select Restore to confirm the action. • Select Cancel to cancel the action. If you select Restore, the selected settings are restored to default values. Close the screen. The Acquisition screen displays. Configure Log Server Before you start this procedure, make sure that: •...
  • Page 254 Configure Settings Field Action Description Send Log Enable or disable this If this setting is enabled, the device transmits setting. the captured system logs and event logs to the configured server location. Default value: Disabled IP Address Enter IP address of the Allowed values: A valid IP address configured log server.
  • Page 255: Delete Tls Encryption Certificate

    Configure Region on page 259 Configure the Date and Time The items below are set by GE Healthcare before the device is shipped. • Date and time formats based on the customer’s country preferences • The default time zone (GMT/UTC) Use this procedure if you want to change the default date and time configurations.
  • Page 256 Configure Settings Configure the fields as per the information in the table. Table 86: Date and Time Settings Field Action Description Date Format Select the date The date format is automatically set to: format. • DD.MM.YYYY when the device language is set as Finnish, or the device is restored to factory defaults settings.
  • Page 257 Configure Settings Field Action Description Date Click anywhere on the Date field to populate the Calendar. Select the date from the Calendar. Select Save. If you select Cancel, the calendar closes and your changes are not applied. The Restore to Factory Defaults procedure does not change the date. Default value: Date set at factory Time Enter the current...
  • Page 258: Configure Ntp

    Configure Settings Field Action Description Daylight Enable or disable Default value: Disabled saving time this setting to adjustment automatically adjust the time for daylight savings time according to the selected time zone. Select Save. Configure NTP Network Time Protocol (NTP) is a networking protocol used for clock synchronization between the device and the configured NTP server.
  • Page 259: Configure Region

    Configure Settings Field Action Description NTP via DHCP Enable or disable If this setting is enabled, the device receives the NTP this setting. server configuration through DHCP. Default value: Disabled NTP Server Enter the IP Default value: No default value Address address of the Allowed values : A valid IP address...
  • Page 260: Configure Hardware

    Configure Settings Table 88: Region Settings Field Action Description Language Set the default Default value: English language of the Allowed values: List of supported languages device. Height and Select the height The configured unit of measurement is applied in Weight Unit and weight unit the Patient Information screen and the ECG patient of measurement...
  • Page 261: Configure The Usb Ports

    Configure Settings • Data Matrix symbology for characters A-Z (upper case), a-z (lower case), and 0-9 If you are using an external barcode reader, make sure that the barcode reader is connected to this device and the BRCD option is enabled to test the barcode configuration.
  • Page 262: Configure Standby Modes

    Configure Settings Configure the fields as per the information in the table. Table 90: Configure Keyboard Tone and KISS Pump Field Action Description Keyboard Tone Enable or disable Default value: Disabled the keyboard tone. KISS Pump Enable or disable If this setting is enabled, the power supply to the KISS this setting.
  • Page 263 Configure Settings Configure the fields as per the information in the table. Table 91: Configure Standby Modes Field Action Description Wireless Enable or disable If this setting is enabled: Standby this setting. • The wireless connection is put in standby when the device is in standby mode.
  • Page 264 Configure Settings Field Action Description Auto Enter the duration This field is enabled when the Auto Shutdown setting is Shutdown of inactivity, in enabled. Timeout (min) minutes. After this duration of inactivity, the device is automatically shutdown. The shutdown timeout duration must be greater than the standby timeout duration.
  • Page 265: 11: Maintenance

    Store Thermal Paper When imaged and stored properly, ECG tracings resist fading for several years. If your retention requirements exceed five years, consider using GE Archivist paper. To make sure the tracing is imaged properly, the device must be maintained in accordance with its service and technical manuals.
  • Page 266: Clean The Printhead

    Re-insert the paper and close the printer door when the heating element is completely dry. NOTE: Use only original GE Healthcare writer paper. This paper has a special coating that prevents electrostatic buildup and contamination and debris collection on the printhead. Using other paper may result in recordings of poor quality.
  • Page 267: Replace The Battery

    Maintenance • To make sure a fully charged battery in between acquisitions, power off the system and connect it to an AC wall outlet until you use the system again. This prolongs battery runtime. The battery status indicator in the upper-right corner of the Acquisition screen shows how much charge the battery has available, and when the device is charging the battery.
  • Page 268 Maintenance MAC 5 A4 MAC 5 A5 MAC 5 Lite Press the latch beside the battery slot and pull the battery handle in horizontal direction to remove the battery. MAC 5 A4 MAC 5 A5 MAC 5 Lite Insert the new battery. See Insert the Battery on page  ...
  • Page 269: 12: Cleaning And Disinfection

    Clean and Disinfect Guidelines Observe the guidelines while cleaning and disinfecting the device. • Follow cleaning instructions and observe hazards exactly as issued by GE Healthcare or other suppliers listed. • Avoid exposure to hypochlorite solutions and solutions containing iodine or high chlorine content, as these will promote corrosion.
  • Page 270: Visual Inspection, Cleaning And Disinfection Frequency

    Cleaning and Disinfection • Avoid exposure to highly alkaline conditions (pH > 11), as this can damage products (for example, aluminum parts). • Never use conductive solutions or solutions that contain wax or wax compounds to clean the equipment. • Do not immerse the device in any liquid as this may corrode metal contacts and affect signal quality.
  • Page 271: Clean And Disinfect The Device And Trolley

    Cleaning and Disinfection Clean and Disinfect the Device and Trolley If you purchase a trolley, the device and trolley are designed to require regular inspection and cleaning to function properly. The cleaning instructions for the device includes the touchscreen. WARNING: ELECTRICAL HAZARD - Improper handling during inspection or cleaning could result in electrical shock.
  • Page 272: Post-Clean Inspection

    Discard wipes to clinical waste. Do not reuse wipes. Post-Clean Inspection GE Healthcare devices should be visually inspected and functionally tested after cleaning and prior to disinfection for below items: • Cleanliness. • Damage, including but not limited to corrosion (rust, pitting), discoloration, excessive scratches, flaking, cracks, and wear.
  • Page 273: Clean And Disinfect Leadwires And Reusable Electrodes

    Cleaning and Disinfection Clean and Disinfect Leadwires and Reusable Electrodes CAUTION: IMPROPER FUNCTIONING - Leadwires and electrodes that are not functioning properly could result in ECG distortion or failure. Carefully inspect instruments between uses to verify proper functioning Refer to the supplier's instructions for leadwire cleaning and disinfection. Refer to the supplier's instructions for reusable electrode cleaning, disinfection, and sterilization.
  • Page 274: Additional Information

    • The cleaning and disinfection information is provided in accordance with ANSI/ AAMIST81, ISO 17664. The recommendations provided above have been validated ™ as capable of preparing non-sterile GE Healthcare MAC 5 medical devices. It remains the responsibility of the user to make sure that the cleaning and disinfection are performed using appropriate equipment, materials, and personnel and achieves the desired result.
  • Page 275: 13: Troubleshooting

    Battery error. Attach power • Power sensor failure Replace the battery. cord. Contact Service. • Battery capacity sensor Contact your GE Healthcare failure Service Support representative if the error persists. Battery unknown error An unexpected battery error Replace the battery.
  • Page 276: Ecg Acquisition Errors

    Date and Time on page 255e . Touchscreen failure The touchscreen is not working. Contact your GE Healthcare Service Support representative if the error persists. Cannot perform action while You have tried to perform Perform only allowed actions.
  • Page 277: Printing Errors

    If the error persists, power Cannot open report off and power on the device. ECG recording failed If the error persists, contact your GE Healthcare Service Support representative. Printing Errors Table 92: Printer Errors Encountered During ECG Patient Report Printing Error Message...
  • Page 278 Troubleshooting Error Message Error Condition How to troubleshoot: Printer error. Door is open. The printer door is open. Close the printer door. Select Start Rhythm to restart rhythm printing. Table 94: Printing Errors Encountered During Printing of the List of Stored Records Error Message Error Condition...
  • Page 279 Network printer unknown Unknown error in printer Restart the system to check error if the error is resolved. If the error persists, contact your GE Healthcare Service Support representative. Table 96: Common Printer Errors Error Message Error Condition How to troubleshoot: Low Battery.
  • Page 280: Report Transmission Errors

    Printer error. Restart system. Unknown error or hardware Restart the system to check Contact Service. failure in printer if the error is resolved. If the error persists, contact your GE Healthcare Service Support representative. Incompatible firmware. Incompatible printer firmware Contact your GE Healthcare...
  • Page 281 USB port. the USB flash drive. Hilltop generation unsuccessful The file generation Retry transmission. is unsuccessful. Contact your GE Healthcare Service PDF generation unsuccessful Support representative if the error persists. Sapphire generation unsuccessful Unknown error...
  • Page 282: Configuration File Errors

    Troubleshooting Error Message Error Condition How to troubleshoot: Unknown server version The server version is unknown. Server is not accepting the test. The server is not accepting the transmission. No network connection The network Reconnect to the network. connection is lost. Configuration File Errors Table 98: Configuration File Errors Error Message...
  • Page 283: Shared Network Connection Errors

    Troubleshooting Shared Network Connection Errors Table 100: Shared Network Connection Errors Error Message Error Condition How to troubleshoot: Network shared path not User-specified shared Enter a valid path name and select found network path is invalid. Test Connection. Invalid shared network User-specified credentials to Enter valid credentials and select credentials...
  • Page 284: Wireless Network Connectivity Errors

    Troubleshooting Table 102: Client Certificate Installation Errors Cause for Error Error Condition How to troubleshoot: Not in PEM format The client certificate is Convert the client certificate to PEM format. not in PEM format. Unrecognized public key The client certificate Check that the client certificate public key algorithm - RSA, DSA, public key algorithm is...
  • Page 285 Troubleshooting Table 104: Client Certificate Errors Error Message Error Condition How to troubleshoot: Client Public Key The client certificate Obtain a PEM-encoded client certificate. Certificate PEM Check format is invalid. Failed Client Certificate has The client certificate has Obtain a PEM-encoded client certificate. expired expired.
  • Page 286: Ldap Configuration Errors

    Troubleshooting Error Message Error Condition How to troubleshoot: Invalid subnet mask The user entered an Enter the correct subnet mask. invalid subnet mask. Invalid default gateway The user entered an Enter the correct default gateway. invalid default gateway. Invalid primary DNS The user entered an Enter the correct primary DNS.
  • Page 287: A: Report Formats

    Report Formats Report Formats ECG Report Formats Table 108: Supported 12-Lead ECG Report Formats Report Format Name Description One Page or Multiple Page Report 1 by 10s @25mm/s Shows one column of 12 rows of waveforms. Each column One page is 10 seconds wide and printed at 25 mm/s.
  • Page 288 Report Formats Report Format Name Description One Page or Multiple Page Report 4 by 2.5s + 1 Rhythm Shows two parts: One page report • The upper part shows four columns of three rows of waveforms. Each column is 2.5 seconds wide and printed at 25 mm/s.
  • Page 289 Report Formats Report Format Name Description One Page or Multiple Page Report Swedish Format 1 Shows two columns of six rows of medians at 50 mm/s on One page the left side and six rows of waveforms printed at 12.5 mm/ report s on the right side (resulting in 10 seconds of rhythm).
  • Page 290 Report Formats Table 110: Standard Report Layout Item Name Description Patient Displays information about the patient, such as: Demographics • First Name and Last Name • Age and/or Date of Birth • Gender • Race • Height and Weight • Room •...
  • Page 291: Rhythm Report Format

    Report Formats Item Name Description Pace Annotations Displays pace annotaions for patients with a pacemaker. The pace annotations represent pacemaker pulses. Available only when HD Pace option is enabled. See Enable HD Pace on for detailed information. page 67 NOTE: When two pace annotations are detected so close to each other that they cannot be uniquely shown on the report, a single pace flag with two flag tips is printed to indicate this condition.
  • Page 292 Report Formats or in print. A continuous rhythm recording is done for a patient so cardiac events are not missed. This section describes the information contained in a rhythm report and explains where in the report that the information is located. After generating a rhythm report, it is a recommended best practice to review the report before allowing the patient to leave.
  • Page 293 Report Formats Item Description Pace channel. Pace annotations display in this channel for patients with a pacemaker. The pace annotations show pacemaker pulses. Available only when HD Pace option is enabled. See Enable HD Pace on page 67 detailed information. NOTE: When 2 pacemaker pulses are sensed so near each other that they cannot be uniquely shown on the report, a one pace spike with two flag tips is printed to show...
  • Page 294: Full Disclosure (Fd) Report Format

    Report Formats Item Description The Speed of the ECG waveform (measured in mm/s). NOTE: You can change the speed before or during the printing of a rhythm. For the printed rhythm report, the printing stops and restarts at the newly selected speed.
  • Page 295 Report Formats Table 112: FD Report Layout Item Description Prints the patient name. Prints the patient ID and name of the institution. Prints the date and time of acquisition for the report. 5864335-001-1   MAC ™ 5 A4/MAC ™ 5 A5/MAC ™...
  • Page 296 Report Formats Item Description Prints the waveform. The FD report contains waveform data for a single lead selected in Full Disclosure mode. NOTE: A gap is shown on the printed or transmitted FD report when the acquisition module is disconnected. NOTE: A square waves is shown on the printed or transmitted FD report when the lead is disconnected.
  • Page 297 Report Formats Item Description Prints the Filter of the ECG waveform (measured in Hz), indicated with ZPD (for High Pass filter). NOTE: You can change the filter after recording and/or printing of a rhythm. For the printed FD report, the recording stops and restarts at the newly selected filter.
  • Page 298: B: Patient Preparation

    Check the Hookup Advisor for any indication of lead problems. NOTE: Use only electrodes and contact agents recommended by GE Healthcare. The signal quality on the Hookup Advisor is not indicated until the RA/R electrode is applied. If RA/R becomes disconnected, the system reports that all electrodes are off the patient.
  • Page 299: Electrode Placement

    Patient Preparation Electrode Placement This section describes various methods for placing electrodes for resting ECGs on a patient. WARNING: INACCURATE DIAGNOSIS - Improper connection of the leadwires to the electrodes will cause inaccuracies in the ECG. Make sure the leadwires are connected properly to the electrodes. Trace each leadwire to its colored connector to make sure that it is matched to the correct label leadwire connection location.
  • Page 300 Patient Preparation Item AHA Label IEC Label Description LL red F green Above the left ankle (alternate placement— upper leg as close to the torso as possible). RL green N black Above the right ankle (alternate placement—upper leg as close to the torso as possible). RA white R red Right deltoid.
  • Page 301: C: Patient Data Fields

    Patient Data Fields Patient Data Fields Patient Information Text Box Names When an order is attached to a patient test, all Patient Information text boxes are read-only. The text box names in the table with an asterisk (*) are not. 5864335-001-1  ...
  • Page 302 Patient Data Fields Table 114: Patient Information text boxs Name Description Length Accepted Values Patient ID Identification number given to the Standard Patient ID: patient. 1 to 16 • A to Z The Patient ID (PID) can be characters • a to z configured by the administrator for a specified country...
  • Page 303 Patient Data Fields Name Description Length Accepted Values 10 (Short) Valid values: '0 to 9' and '-' or '+'. to 12 (Long) The PID must be in one of the characters below short formats: • yymmdd+xxgc • yymmdd-xxgc • yymmddxxgc or in the long formats as follows: •...
  • Page 304 Patient Data Fields Name Description Length Accepted Values Valid values: '0 to 9' and '-'. characters The PID must be in the format ddmmyy-efgxx or ddmmyyefgxx, where: • dd = patient day of birth • mm = patient month of birth •...
  • Page 305 Patient Data Fields Name Description Length Accepted Values First Name Patient first name 1 to 20 • A to Z characters • a to z • 0 to 9 • All characters are supported. Last Name Patient last name 1 to 40 •...
  • Page 306 Patient Data Fields Name Description Length Accepted Values Patient age If the Age text box is on the Applicable Patient Information screen, the Date of Birth text box is not on the screen. 0 to 127 Enter the patient age and select the applicable unit of measurement (hours, days, weeks, months, years).
  • Page 307 Patient Data Fields Name Description Length Accepted Values Blood High and Low blood pressures of Maximum 3 0 to 999 Pressure* the patient measured in mmHg. characters Location Description of where the ECG is Maximum 5 0 to 65534 to be done. For each patient test, characters this text box is filled in from the Location ID configured in the...
  • Page 308 Patient Data Fields Name Description Length Accepted Values Ordering Physician first name who ordered Maximum • A to Z MD First the ECG. • a to z Name characters • 0 to 9 • All characters are supported. Ordering Physician ID who ordered the ECG Maximum 5 0 to 65534 MD ID characters...
  • Page 309 Patient Data Fields Name Description Length Accepted Values Patient The patient's medical history • Hypertension History* Applicable • • Cardiac Surgery • Unknown Visit Visit number given to this patient. Maximum • A to Z Number • a to z characters •...
  • Page 310: Clinical Trial Text Box Names

    Patient Data Fields Name Description Length Accepted Values Attending Attending physician first name Maximum • A to Z MD First • a to z Name* characters • 0 to 9 • All characters are supported. Attending Attending physician ID Maximum 5 0 to 65534 MD ID* characters...
  • Page 311 Patient Data Fields Name Action Length Allowed Values Visit Type Select a value from the dropdown • Scheduled list Applicable • Unscheduled • Follow Up • Repeat • Early Termination • Unknown • The type you configured in the Clinical Trial settings Dose Type Select a value from the dropdown The type you configured in the...
  • Page 312: D: Configure The Muse System For Network Communication

    Configure the MUSE System for Network Communication Configure the MUSE System for Network Communication MUSEAPI3 Installation This section describes how to install MUSEAPI3 on MUSE v8 or v9 servers. MUSE v8 ships with MUSEAPI v3.0. MUSE v9 ships with MUSEAPI v3.1. For the purposes of this documentation, all references to MUSEAPI3 refer to MUSEAPI v3.0 or v3.1.
  • Page 313: Install Museapi3 On Muse V8 Server

    Configure the MUSE System for Network Communication Action Description Determining the You can configure MUSEAPI3 to communicate with MUSEAPI3 communication protocol clients using http, https, or net.tcp protocols. It is possible to MUSEAPI3 uses configure MUSEAPI3 for more than one protocol. •...
  • Page 314 Configure the MUSE System for Network Communication The MUSEAPI3 v3.0 window opens. Click Install next to MUSEAPI3 v3.0. The installer will check for the Microsoft .NET Framework 4.0 to complete the installation and install them if necessary. If it is already installed this window will be skipped.
  • Page 315 Configure the MUSE System for Network Communication Click Next. The License Agreement window opens. Read and accept the License Agreement. Click Next. The Select Features window opens. Make sure MUSEAPI3 is selected and click Next. The Choose Destination Location window opens. 5864335-001-1  ...
  • Page 316 Configure the MUSE System for Network Communication 10. Make sure that the destination folder for MUSEAPI3 is the same folder in which the MUSE program files are installed, then click Next. The Login Credentials for MUSE API 3.0 window opens. 11.
  • Page 317 Configure the MUSE System for Network Communication 12. Click Next. The MUSE API Configuration Tool window opens. 13. In the End Point Configuration area of the window, select the protocol(s) you are using to communicate with MUSEAPI3 and enter the port value(s). You must have at least one protocol enabled, and you may have more than one.
  • Page 318 Configure the MUSE System for Network Communication 15. Click Finish to end the installation of MUSEAPI3. 16. Open the install log located in C:\MUSEAPI3_Installer_Log_xxx.log and verify that the installation completed successfully without any errors. A new log is created each time the installer is launched. Look at the log file with the highest number in the sequence to make sure you are looking at the most recent installation.
  • Page 319: Install Museapi3 On Muse V9 Server

    Configure the MUSE System for Network Communication Install MUSEAPI3 on MUSE v9 Server Log into the MUSE application server using an account that has administrator privileges. Have the customer disable any antivirus software during the installation. Re- enable the antivirus software after the installation is complete. Insert the MUSE v9 installation media into the optical drive of the system.
  • Page 320 Configure the MUSE System for Network Communication The MUSE v9.0 Installation Options window opens. Click Install next to MUSEAPI v3.1. If a User Account Control dialog opens, choose Yes or Allow. The MUSE API 3.1 – InstallShield Wizard window opens. Click Next.
  • Page 321 Configure the MUSE System for Network Communication The Choose Destination Location window opens. 10. Make sure that the destination folder for MUSEAPI3 is the same folder in which the MUSE program files are installed, then click Next. The Login Credentials for MUSE API 3.1 window opens. 11.
  • Page 322 Configure the MUSE System for Network Communication 13. In the End Point Configuration area of the window, select the protocol(s) you are using to communicate with MUSEAPI3 and enter the port value(s). You must have at least one protocol enabled, and you may have more than one. If any protocols are selected that you do not want, remove the check mark.
  • Page 323: Change The Museapi3 Service Protocol Configuration

    Configure the MUSE System for Network Communication patient conflicts if there is a Patient ID / Last Name mismatch, and that conflict response can be disabled by enabling this option. MUSEAPI v3.1 handles patient ID conflicts across different servers or at different sites the same as MUSEAPI v3.0.
  • Page 324: Uninstall Museapi3

    Configure the MUSE System for Network Communication NOTE: To make changes to the configuration you may need to use Run as Administrator. Review the protocol(s) that you are using to communicate with MUSEAPI3 and modify as appropriate. You can select more than one protocol. You are advised to use the port values below: Protocol Recommended Port Values...
  • Page 325: Restore The Museapi3 Configuration

    Configure the MUSE System for Network Communication the current settings for MUSEAPI3 and you can use it as reference during the reinstallation or to restore the MUSEAPI3 settings to their original values. Uninstalling MUSEAPI3 removes the MUSEAPI3 service and MUSEAPI files from the MUSE installation folder.
  • Page 326: Obtain The Thumbprint Of The Ssl Certificate For The Museapi3 Port

    Enter the password of the MUSE user. The default is maclink. License Key Enter the license key to access MUSEAPI3. A unique key is provided to MUSEAPI3 licensees. GE Healthcare Service has their own license key that they can use here. NOTE: GE Healthcare Service must not permanently save the license key in the config file.
  • Page 327 Configure the MUSE System for Network Communication When the Microsoft Management Console (MMC) opens, press Ctrl+M to add a snap-in. In the Add or Remove Snap-ins dialog box, do the steps below: In the Available snap-ins list, select Certificates. Click Add. In the Certificates snap-in dialog box do the steps below: Select Computer account.
  • Page 328: Set Up Dcp Inbound Communication For Muse V8.X Or V9.X

    Configure the MUSE System for Network Communication netsh http show sslcert NOTE: IF the SSL Certificate bindings were entered incorrectly, the SSL Certificate bindings must be deleted and recreated using the commands below: netsh http delete sslcert ipport=0.0.0.0:(port assigned for MUSEAPI3 HTTPS protocol) netsh http delete sslcert ipport=[::]:(port assigned for MUSEAPI3 HTTPS protocol) After deleting the bindings they can be re-created using the information in...
  • Page 329: Set Up The Dcp Server Configuration In The Muse System

    • If you added the DCP communication option in the previous step, you need to enter the Options Configuration Password. • If you do not know the password, contact GE Healthcare Technical Support. 10. Click Next through the remaining screens until your changes are applied and the Maintenance Complete window opens.
  • Page 330 Configure the MUSE System for Network Communication Field Description/Action Device Friendly Name This is the name the compatible device will see when searching for the DCP server. The default is MUSE. Change this if desired. Server Port This is the port on which the DCP Inbound service is listening for inbound connections.
  • Page 331: E: Configure The Cardiosoft System For Network Communication

    Configure the CardioSoft System for Network Communication Configure the CardioSoft System for Network Communication CardioSoft V7 Installation For CardioSoft installation instructions, refer to the Cardiosoft Software Installation and Upgrade Guide. Set Up DCP Port in CardioSoft V7.0 Set up a CardioSoft v7.0 server for DCP communication. Configure the port in connectivity server tab of server computer and then configure the same port in the client computer to establish DCP connection from the client computer.
  • Page 332: F: System Checkout

    System Checkout System Checkout Complete these verification procedures to make sure that the device can successfully transmit tests to the MUSE system and CardioSoft system and download orders from the MUSE system. DCP Transmission to the MUSE System Transmit an ECG test from the MAC 5 to the MUSE system using the DCP protocol.
  • Page 333: G: Technical Specifications

    Technical Specifications Technical Specifications System Specifications Table 117: Device Physical Specifications Item Description Device type Microprocessor augmented automatic electrocardiograph; 12- leadwire acquisition with programmable lead configuration A4: Integrated unit with display and printer A5: Integrated unit with display and printer Lite: Integrated unit with display Height A4: 12.4 in (31.5 cm)
  • Page 334 Technical Specifications Table 118: Display Specifications Item Description Display 22.6 cm (8.9 in) diagonal graphics LED backlit full HD Touchscreen Projected Capacitative (PCAP) multipoint touch input that works while wearing medical exam gloves Resolution 892 X 558 pixels, with waveform enhancement Data Heart rate, patient name, patient ID, date and time, battery power indicator, scrolling waveforms, lead labels, speed, gain and filter...
  • Page 335: Ecg Specifications

    Technical Specifications Item Description Input current range A @100V to 625mA @240V 780 mA @100V AC to 110 mA @240V AC Input frequency 50/60 Hz ± 3 Hz Table 121: Battery Specifications Item Description Type Replaceable and rechargeable internal battery Charge time Approximately 240 minutes from total discharge when device is off (standby).
  • Page 336: Environmental Specifications

    30 to 300 beats per minute (BPM) with an accuracy of ±10% or 5 BPM, whichever is greater. Heart rates outside this range will not display. ECG data formats GE Hi-Fidelity ECG, XML Pre-acquisition Provides 10 seconds of instantaneous ECG acquisition Digital rhythm...
  • Page 337: Safety Specifications

    Technical Specifications Item Description Atmospheric Pressure 70 to 106kPa Transport/Storage Conditions Temperature -20ºC to +60ºC (–4° F to 140° F) Relative Humidity (RH) 15% to 95% (non-condensing) Atmospheric Pressure 50kPa to 106kPa Safety Specifications Table 126: Safety Specifications Item Description Certification marks The medical device has a lifetime of 7 years with respect to the Council Regulation EU 2017/745 Annex I, Requirement 6.
  • Page 338: Network Specifications

    Technical Specifications Network Specifications Table 127: Network Specifications Item Description Frequency bands of transmission 2.401 – 2.461 GHz 5.180 – 5.825 GHz Maximum radiated power in 2.4 GHz: 18.5 dBm frequency bands 5 GHz: 18.0 dBm Antenna Support 2.4G and 5G Modulation DSSS, CCK, OFDM, BPSK, QPSK, QAM Supported certificate key lengths...
  • Page 339: H: Regulatory And Safety Information

    Regulatory and Safety Information Regulatory and Safety Information This section provides information about the safe use and regulatory compliance of this system. The system software is considered medical software. As such, it was designed and manufactured to the appropriate medical regulations and controls. Intended Use The MAC 5 ECG Analysis System is intended to acquire, analyze, display, and record electrocardiographic information from adult or pediatric populations.
  • Page 340: Contraindications

    Regulatory and Safety Information Contraindications This MAC 5 Resting ECG Analysis System is not intended in the manners below: • During patient transport • With high-frequency surgical units • As an intra-cardiac application • As a sole means of diagnosis •...
  • Page 341: Safety Hazards

    Regulatory and Safety Information Safety Convention Description NOTICE Indicates a potential hazard or unsafe practice, which, if not avoided, could result in the loss or destruction of property or data. Safety Hazards The safety messages below alert you to potentially hazardous conditions that could arise during the normal use of this product and recommend steps that can be taken to avoid those conditions.
  • Page 342 Do not contact patients during defibrillation. Patient signal inputs labeled with the CF symbols with paddles are protected against damage resulting from defibrillation voltages. To ensure proper defibrillator protection, use only GE Healthcare recommended cables and leadwires. Proper placement of defibrillator paddles in relation to the electrodes is required to ensure successful defibrillation.
  • Page 343 CAUTION: ACCESSORIES (SUPPLIES) - To ensure patient safety, use only parts and accessories manufactured or recommended by GE Medical Systems Information Technologies, Inc. Parts and accessories used must meet the requirements of the applicable IEC 60601 series safety standards and essential performance standards, and/or the system configuration must meet the requirements of the IEC 60601-1-1 medical electrical systems standard.
  • Page 344: Classification Of Medical Device

    If you have questions concerning disposal of the product, please contact GE or its representatives. CAUTION:...
  • Page 345: Certification Information

    DC offset voltage when subjected to a DC current. If you use polarizing electrodes, GE Healthcare recommends disconnecting the leadwires from the patient before delivering the shock. 5864335-001-1  ...
  • Page 346: Modulating Effects In Digital Systems

    If you observe this phenomenon, be aware that the origin of amplitude variations is not entirely physiological. For measuring voltages of Q, R, and S waves, GE Healthcare advises using the QRS complexes with the largest deflection of the particular waves.
  • Page 347: Guidance And Manufacturer's Declaration-Electromagnetic Emissions

    Regulatory and Safety Information WARNING: PATIENT SAFETY/EQUIPMENT FAILURE - Use of accessories, transducers and cables other than those specified or provided by the manufacturer of this equipment could result in increased electromagnetic emissions or decreased electromagnetic immunity of this equipment and result in improper operation. Guidance and Manufacturer’s Declaration—Electromagnetic Emissions The system described in this document is intended for use in the specified electromagnetic environment below.
  • Page 348: Essential Performance

    Regulatory and Safety Information Immunity Test EN60601 Test Level Compliance Level Voltage dips, short < 5% Ut (> 95% dip in Ut) for 0.5 < 5% Ut (> 95% dip in Ut) for 0.5 interruptions, and voltage cycles cycles variations on power supply <...
  • Page 349: Biocompatibility

    GE Healthcare representative. Legal Notice GE Healthcare software contains several fields that can be populated before performing an ECG. Some of these fields are required, others are optional and left to the user to assess whether they are needed to perform the exam. The field Race is one of these optional fields.
  • Page 350: Supplies And Accessories

    This section is in regard to the supplies and accessories you may purchase for your product. You should use only supplies and accessories recommended by GE Healthcare. For a list of recommendations, refer to the supplies and accessories guide for this system.
  • Page 351: Product And Packaging Information

    Regulatory and Safety Information repair equipment under warranty voids that warranty. It is the user’s responsibility to report the need for service to GE Healthcare or to one of their authorized agents. Product and Packaging Information The illustrations and tables in this section describe the labels and their location on your device and its packaging.
  • Page 352 Regulatory and Safety Information Table 134: Label Descriptions on the Back Side of the Device Item Label Description TUV and IFU Symbol Certification Information on page 345 Symbol Label for a description of the label contents. Descriptions on page 366 Product and Rating Regulatory and cautionary information.
  • Page 353 Regulatory and Safety Information Table 135: Label Descriptions on the Bottom of the Device Item Label Description Option Code and The MAC address of the wired network card. MAC Address Label Use the option codes to set up the purchased options in your system.
  • Page 354 Regulatory and Safety Information Table 136: Label Descriptions on the Shipping Package of the Device Item Label Description Battery Shipping Lithium Ion battery damaged caution label. Label Shipping Label Regulatory and safety shipping information. Radio Equipment The Radio Equipment Directive registration information. Directive (RED) Label  ...
  • Page 355: Mac 5 A5 Hardware Label Locations

    Regulatory and Safety Information Item Label Description Battery The battery transportation information. Transportation Label Radio Equipment The Radio Equipment Directive (RED) European Union Declaration Directive (RED) of Conformity Guidance. European Union Declaration of Conformity Guidance Environmental Safety indicators required for shipping. For a full description of Symbols symbols, see Symbol Descriptions on page...
  • Page 356 Regulatory and Safety Information Item Label Description Product and Rating Regulatory and cautionary information. See Device Address Label Label and Rating Plate on page 365 for an explanation of the label. Serial Number Label Device identification. See Serial Number Label on page 364 for a description of the label contents.
  • Page 357 Regulatory and Safety Information Table 139: Label Descriptions on the Bottom of the Device Item Label Description Option Code and The MAC device address of the device. MAC Address Label Use the option codes to set up the purchased options in your system.
  • Page 358 Regulatory and Safety Information Item Label Description Wireless Label The wireless registration information. Table 140: Label Descriptions on the Shipping Package of the Device Item Label Description Battery Shipping FRAGILE—Lithium Ion batteries can cause fire if damaged. Label   MAC ™...
  • Page 359 Regulatory and Safety Information Item Label Description Shipping Label Regulatory and safety shipping information. Radio Equipment The Radio Equipment Directive registration information. Directive (RED) Label Battery The battery transportation information. Transportation Label Radio Equipment Radio Equipment Directive (RED) European Union Declaration of Directive (RED) Conformity Guidance.
  • Page 360: Mac 5 Lite Hardware Label Locations

    Regulatory and Safety Information Item Label Description Environmental Safety indicators required for shipping. For a full description of Symbols symbols, see Symbol Descriptions on page 366. MAC 5 Lite Hardware Label Locations Table 141: Label Descriptions on the Right Side of the Device Item Label Description...
  • Page 361 Regulatory and Safety Information Table 143: Label Descriptions on the Left Side of the Device Item Label Description Country Specific Country registration information. Label 5864335-001-1   MAC ™ 5 A4/MAC ™ 5 A5/MAC ™ 5 Lite  361...
  • Page 362 Regulatory and Safety Information Table 144: Label Descriptions on the Bottom of the Device Item Label Description Option Code and The MAC device address of the device. MAC Address Label Use the option codes to set up the purchased options in your system.
  • Page 363 Regulatory and Safety Information Table 145: Label Descriptions on the Shipping Package of the Device Item Label Description Battery Shipping FRAGILE—Lithium Ion batteries can cause fire if damaged. Label Shipping Label Regulatory and safety shipping information. Radio Equipment The Radio Equipment Directive registration information. Directive (RED) Label Battery The battery transportation information.
  • Page 364: Serial Number Label

    Regulatory and Safety Information Item Label Description Radio Equipment Radio Equipment Directive (RED) European Union Declaration of Directive (RED) Conformity Guidance. European Union Declaration of Conformity Guidance Environmental Safety indicators required for shipping. For a full description of Symbols symbols, see Symbol Descriptions on page 366.
  • Page 365: Device Address Label And Rating Plate

    Regulatory and Safety Information Table 146: Serial Number Label Format Item Description Product Part Number Product Mode Date of Manufacture in YYYY-MM-DD Format Device Serial Number UDI Barcode Device Address Label and Rating Plate The device address label and rating plate is in the format as follows: 5864335-001-1  ...
  • Page 366: Symbol Descriptions

    Regulatory and Safety Information Table 147: Device Address Label and Rating Plate Format Item Description Product Mode Manufacturer Name and Address Symbols for a description of the symbols used on this Symbol Descriptions on page 366 label. Authorized European Representative Information Electrical Rating of the Device Symbol Descriptions For equipment symbols not shown, refer to the original equipment manufacturer...
  • Page 367 Regulatory and Safety Information Table 148: Symbols, Icons, and Descriptions on the device or packaging Symbol Description Catalog or Orderable Part Number The manufacturer’s catalog or part number. Serial Number The manufacturer's serial number. Batch Code or Lot Number The manufacturer's batch code or lot number. Medical Device The device is used for medical purpose.
  • Page 368 General Warning Sign Protection of the ME EQUIPMENT against the effects of the discharge of a cardiac defibrillator is dependent upon the use of GE recommended ECG cables. This Way Up The correct upright position of the package.
  • Page 369 Regulatory and Safety Information Symbol Description Can Be Recycled You may recycle this material or device. Recycle or dispose of in accordance with local, state, or country laws. The upper and lower temperature limits for the transportation and handling of this package. They are indicated next to the upper and lower horizontal lines.
  • Page 370: Serial Number Format

    Regulatory and Safety Information Symbol Description Environmental Friendly Use Period (EFUP) Per Chinese standard SJ/T11364–2014, the number of years from the date of manufacture during which you can use the product before any restricted substances are likely to leak, causing a possible environmental or health hazard.
  • Page 371: Unique Device Identifier

    Wireless Regulations The wireless and wired LAN functionality of the MAC 5 A4/MAC 5 A5/MAC 5 Lite is used to retrieve ECG orders and send ECG reports to an ECG Management System. In...
  • Page 372: Fcc Compliance

    Regulatory and Safety Information FCC Compliance This device complies with part 15 of the FCC Rules. Operation is subject to the two conditions below: (1) This device may not cause harmful interference, and (2) this device must accept any interference received, including interference that may cause undesired operation.
  • Page 373: Red Information

    Regulatory and Safety Information This equipment complies with radio frequency exposure limits set forth by the Innovation, Science and Economic Development Canada for an uncontrolled environment. This equipment should be installed and operated with a minimum distance of 20 cm between the device and the user or bystanders.
  • Page 374: Glossary

    Glossary Acute Coronary Syndrome Admission, Discharge, Transfer A filter sets the upper frequency limit for the ECG waveform displayed on the Filter Acquisition screen and the printout. Selecting a filter eliminates signals that exceed that frequency. The smaller the filter selected, the more signal is filtered out. For example, a filter of 40 Hz displays only signals less than 40 Hz;...
  • Page 375 GE Medical Systems GE Medical Systems S.C.S. Information Technologies, Inc. 283 rue de la Minière 9900 Innovation Drive 78530 BUC,  France Wauwatosa, WI  53226  USA GE Medical Systems Information Technologies, Inc., a General Electric Company, going to market as GE Healthcare. www.gehealthcare.com...

This manual is also suitable for:

Mac 5 a5Mac 5 lite

Table of Contents