
Related Manuals for Ametek 241CE II


Summary of Contents for Ametek 241CE II
- Page 1 USER MANUAL 241CE II Hydrocarbon Dewpoint Analyzer PROCESS INSTRUMENTS REFERENCE: CERTIFICATION NO: CSA CERTIFICATE: 1108925 (LR 48179-30) KEMA 02ATEX2121 X PN 903-8797, Rev A...
- Page 2 AMETEK Process Instruments assumes no responsibility or liability for any errors or inaccuracies that may appear in this document. AMETEK Process Instruments is not responsible for any infringement of patents or other rights of third parties that may result from the use of this document. The content of this document is furnished for informational purposes only, is subject to change without notice, and does not represent a commitment or guaranty by AMETEK Process Instruments.
-
Page 3: Table Of Contents
Contents Safety Notes ..............................vii Electrical Safety ............................vii Grounding ..............................vii Personnel and Equipment Safety Information................viii Environmental Information – WEEE ....................xi Special Warnings and Information .....................xii Equipment Used in Hazardous Locations ................xii Electromagnetic Compatibility (EMC) ..................... xiii OVERVIEW ..........................1-1 Application ..............................1-2 About the Analyzer Sample System and Electronics ..............1-3 Sample Path ............................1-4 Working in This Manual ........................1-9... - Page 4 Requesting Technical Support ....................4-3 Requesting Authorization to Return Equipment ..............4-3 Requesting Analyzer Training.....................4-3 Spare Parts Lists ............................4-4 241CE II Analyzer (120 / 240 VAC) Spare Parts ..............4-4 Spare Analyzer Fuses ........................4-5 Replacement Boards ........................4-5 Diagnostic Flowcharts ..........................4-6 Checking Flamepaths and Gaps ....................4-7 Checking and Recording Operating Temperatures ............4-7...
- Page 5 Viewing Historical Alarm Messages .................4-46 Status Code (SCode), Alarm Conditions, and Corrective Action .......4-47 Extended Status Code (XSCode), Alarm Conditions, and Corrective Action ..4-51 Resetting the 241CE II Analyzer ...................... 4-56 SPECIFICATIONS ........................5-1 241CE II Analyzer Approvals and Certifications ................5-4 241CE II Analyzer ATEX/IECEx Marking ...................5-5...
- Page 6 Remote Start Option ..........................A-6 APPENDIX B – DRAWINGS ....................B-1 Analyzer Block Diagram (WX-241CE II-1) ..................B-2 Digital Communications Wiring Diagram (WX-241CE II-5) ............. B-3 Interconnection Diagram (100-2091-13) ..................B-4 Electrical Block Diagram (100-2091-15) ..................B-5 Optional I/O Wiring (100-2091-14) ....................B-6 Probe Mounting (WX-241CE II-6) .....................
-
Page 7: Safety Notes
Safety Notes WARNINGS, CAUTIONS, and NOTES contained in this manual emphasize critical instructions as follows: Important information that should not be overlooked. An operating procedure which, if not strictly observed, may result in personal injury or environmental contamination. Essential Health and Safety Re- quirements are also included in –... -
Page 8: Personnel And Equipment Safety Information
All personnel involved with the installation, start-up, operation, maintenance, service, or troubleshooting of must review and follow these Warnings and Cautions. Before working on the 241CE II Hydrocarbon Dewpoint Analyzer, read and understand the following Warnings and Cautions, regarding safety and other required information. - Page 9 See “Examining and Caring for the Flamepaths” in Chapter 4. Replace parts immediately if damage or wear is apparent. Contact AMETEK if there is any doubt about the integrity of any flamepath.
- Page 10 Electronics Enclosure. All unused cable entry ports must be plugged with a certified Ex d plug. PN 903-8797, Rev A x | 241CE II Hydrocarbon Dewpoint Analyzer...
-
Page 11: Environmental Information - Weee
Achtung – Heiße Oberfläche Environmental Information – WEEE This AMETEK product contains materials that can be reclaimed and recycled. In some cases, the product may contain materials known to be hazardous to the environ- ment or human health. In order to prevent the release of harmful substances into the environment and to conserve our natural resources, AMETEK recommends that you arrange to recycle this product when it reaches its “end of life. -
Page 12: Special Warnings And Information
All input and output wiring must be in accordance with wiring methods authorized for the area classification by the authority having jurisdiction. Ex d glands or stopping boxes (seals) must be installed on flameproof enclosures. PN 903-8797, Rev A xii | 241CE II Hydrocarbon Dewpoint Analyzer... -
Page 13: Electromagnetic Compatibility (Emc)
The various configurations of the 241CE II Analyzer should not produce, or fall victim to, electromagnetic disturbances as specified in the European Union’s EMC Directive. Strict compliance to the EMC Directive requires that certain installation techniques and wiring practices are used to prevent or minimize erratic behavior of the Analyzer or its electronic neighbors. - Page 14 This page intentionally left blank. PN 903-8797, Rev A xiv | 241CE II Hydrocarbon Dewpoint Analyzer...
-
Page 15: Overview
Overview The 241CE II Analyzer, which is well-suited for unattended operation at remote locations, has been designed to comply with electrical classification require- ments for general purpose and hazardous locations specific to this analyzer’s intended application. The 241CE II Analyzer is based upon a patented technique (chilled-mirror tech- nique) for detecting and differentiating between hydrocarbon and water con- densates. -
Page 16: Application
User Interface. The external signal does not affect the internal operations of the analyzer, nor does it trigger alarms from the analyzer. The 241CE II Analyzer is able to measure, internally, a water dewpoint tempera- ture, but this measurement is used primarily for compensation in the calcula- tion of HCDP measurements (to differentiate between hydrocarbon and water condensate);... -
Page 17: About The Analyzer Sample System And Electronics
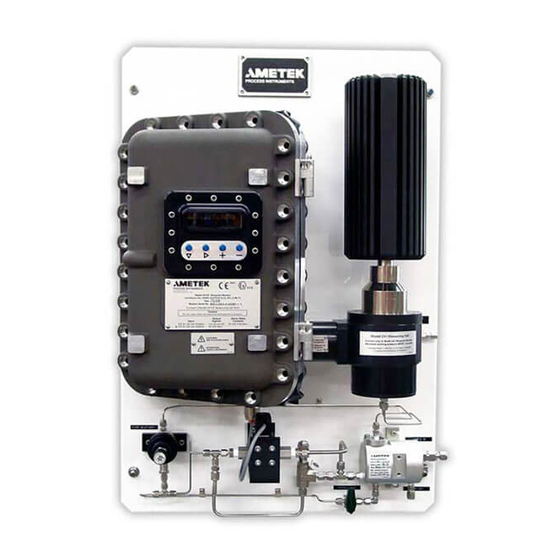
Vent Lines are all provided on the backpan (Figure 1-1). The remaining com- ponents of the sample system – Sample Line, Sample Probe, Vent Line to a low pressure flare header (or vent to atmosphere) – can be supplied by AMETEK or by the customer. -
Page 18: Sample Path
Probe. In the Sample Probe (Figure 1-2), the sample gas passes through an isolation valve and into the Sample Line which carries it to the Filterblock As- sembly. PROCESS INSTRUMENTS FILTERBLOCK ASSEMBLY SCHEMATIC Figure 1-2. Gas flow schematic. 1-4 | 241CE II Hydrocarbon Dewpoint Analyzer PN 903-8797, Rev A... - Page 19 Figure 1-3. Measuring Cell Assembly, cutaway view. Overview PN 903-8797, Rev A...
- Page 20 ELECTRONICS ENCLOSURE DISPLAY & PUSH-BUTTONS ANALOG OUTPUTS MICROCONTROLLER LOGIC POWER POWER SUPPLY SUPPLY ASSEMBLY MIRROR SAMPLING VALVE PHOTO- LEDS TRANSISTOR Figure 1-4. Logic diagram. MEASURING CELL ASSEMBLY 1-6 | 241CE II Hydrocarbon Dewpoint Analyzer PN 903-8797, Rev A...
- Page 21 From the Filterblock Assembly, the gas passes through a Flow Restrictor and then through a flame arrestor before entering the Measuring Cell, where the sample is measured using the chilled-mirror technique. It then leaves the Cell and passes through another flame arrestor, a pressure regulator, and a 1 PSIG check valve on its way back to the Filterblock Assembly and then to the Vent Line, which vents the used sample gas to atmosphere or to an approved low pressure (<50 PSIG) flare header.
- Page 22 Optical Systems The 241CE II Analyzer employs two Optical Systems in its Measuring Cell: • One detects hydrocarbon condensation on the rough, black surface. • One detects water condensation on the smooth, reflective surface. (This water dewpoint measurement is for internal use only, used for compensa- tion in the calculation of HCDP measurements.)
-
Page 23: Working In This Manual
These reminders indicate related information about the topic, certain actions that See also “Troubleshooting and are necessary before continuing with the current procedure, or information that is Diagnostics” in Chapter 4. recommended by AMETEK. User Interface Navigation icon: ... - Page 24 This page intentionally left blank. 1-10 | 241CE II Hydrocarbon Dewpoint Analyzer PN 903-8797, Rev A...
-
Page 25: Installation And Start-Up
Installation and Start-Up This chapter describes how to install and safely start up the 241CE II Hydrocarbon Dewpoint Analyzer. Safety Considerations Read this entire section before beginning installation of the 241CE II Analyzer. Failure to do so, and/or use of the analyzer in a manner not specified in this manual, may impair the protection against fire, elec- trical shock, and personal injury originally provided by this equipment. -
Page 26: Pre-Installation Requirements
Recommend- ed storage conditions include: Temperature: -20 °C–60 °C (-4 °F–140 °F) Relative Humidity: maximum 95 %, non-condensing Failure to comply with these storage conditions will void your warranty. 2-2 | 241CE II Hydrocarbon Dewpoint Analyzer PN 903-8797, Rev A... -
Page 27: Uncrating And Inspecting The Analyzer
Uncrating and Inspecting the Analyzer The analyzer and its sample system is shipped pre-mounted on a backpan, either alone in a crate or in a crated weatherproof shelter. Upon receiving the analyzer, remove the shipping crate and check the exterior of the shelter and/ or analyzer for damage. -
Page 28: General Installation Information
(breaker) must be connected to and mounted near the analyzer, in an easily accessible area. The switch (breaker) must be clearly labeled (e.g., “AMETEK 241CE II Analyzer Main AC Power Disconnect Switch”). For safety reasons during maintenance, this switch allows the main AC power to be disconnected from the analyzer prior to performing service on the ana- lyzer. - Page 29 • Rotameter, to set the sample gas flow rate that will be used during the Purge Stage. This flow rate measuring device can be a permanent instal- lation if the rotameter is rated and approved for the pressure it will be exposed to if the Vent Line is closed off.
-
Page 30: Installing The Mechanical Components
Location and Environment The 241CE II Analyzer is designed for indoor operation (Pollution Degree 2). In all cases, the analyzer system must be installed indoors to ensure it is shielded from harsh environmental elements. The entire ana lyzer system (and its backpan) can be mounted directly on a wall inside a building, in a specially designed cabinet, or in a custom-built shelter. - Page 31 In a suitable location as close as possible to the sample point, install the ana- lyzer in a vibration-free location. For each installation method, AMETEK recommends mounting the analyzer higher than the process pipe, since liquids can occasionally appear in the process stream and in the Sample Line. This will allow these liquids in the Sample Line to drain back into the process pipe.
- Page 32 Figure 2-1. Analyzer backpan mounting details. 2-8 | 241CE II Hydrocarbon Dewpoint Analyzer PN 903-8797, Rev A...
-
Page 33: Installing The Heatsink/Measuring Cell Assembly
Installing the Heatsink/Measuring Cell Assembly Ensure there is no power being supplied to the analyzer during the installation of the Heatsink/Measuring Cell Assembly. While installing the Heatsink/Measuring Cell Assembly, take care not to damage the joining surfaces (flamepath) of the Housing Seal on the Ex Housing and Heatsink/Measuring Cell Assemblies. - Page 34 SCREWS (4 PLACES) TORQUE M6 SCREWS TO 36IN-LBS ±9IN-LBS TO PRESSURE REGULATOR Figure 2-2. Heatsink/Measuring Cell Assembly mounting TO FILTERBLOCK instructions. REFERENCE: KEMA 02ATEX2121X REFERENCE: CSA 1108925 (LR 48179-30) 2-10 | 241CE II Hydrocarbon Dewpoint Analyzer PN 903-8797, Rev A...
-
Page 35: Installing The Sample System
Installing the Sample System The analyzer is shipped complete with a Filterblock Assembly, Pressure Regula- tor, and a Solenoid Valve. Unless specified, the Sample and Vent Line Connec- ® tion Fittings on the Filterblock Assembly are 1/4" Swagelok tubing fittings. Flow restrictors used to control the flow rate of the sample gas and balance the pressure drops within the sample system and Measuring Cell are integrated within the sample system. -
Page 36: Sample System Prerequisites
Sample System Prerequisites The 241CE II Analyzer is designed, primarily, to monitor the hydrocarbon dew- point (HCDP) temperature in sweet (H S <50 PPM) natural gas streams. The analyzer also monitors the dewpoint temperature of water internally, but this internal water dewpoint (WDP) temperature is used primarily for compen- sation purposes in the calculation of HCDP measurements. -
Page 37: Installing The Sample Probe
The sample gas pressure must be less than the maximum working pressure (MWP) rating of each sample system component. The MWP of the 241CE II An- alyzer is 13 790 KPA (2000 PSI). Although the analyzer is supplied with a filter to remove particulate and liquid aerosols, the sample gas should not contain more than trace quantities of solid particles, liquid droplets, or waxes. -
Page 38: Installing The Sample And Vent Lines
Flow Restrictors in the Filterblock Assembly may be insufficient to remove all liquid. 2-14 | 241CE II Hydrocarbon Dewpoint Analyzer PN 903-8797, Rev A... - Page 39 If your system will be operating at these low pressures, AMETEK recom- mends installing an additional coalescing filter or knock-out pot with an isolation valve or Flow Restrictor (typically supplied by the customer/end user) upstream of the analyzer to provide a constant drain. Install this filter on the Sample Line between the Sample Probe and the analyzer.
-
Page 40: Installing And Connecting The Purge Gas Line
Connect the other end to the fitting on the vent to atmosphere (or low pressure flare header). The standard regulator used on the 241CE II Analyzer has an outlet pressure range of 0–690 KPAG (0–100 PSIG or 0–7 BARG). Adjust the Vent Line pressure close to atmospheric pressure. -
Page 41: Checking The Fuses
Checking the Fuses Verify that the installed fuses are correct for the operating voltage, and com- pare them to the fuse holders within the Electronics Enclosure (individually See Fuse Ratings table in Figure 2-3. labeled). At the front of each fuse holder on the upper side is a tab that proj- ects upwards. -
Page 42: Connecting I/O Signals, Alarm Relay Contacts, And Ac Power
AC POWER ANALOG CUSTOMER CONNECTIONS SUPPLY MAINS FUSE RATINGS SELF-POWERED LOOP POWERED Figure 2-3. Customer connections, REFERENCE: CERTIFICATION NO: Termination board. CSA CERTIFICATE: 1108925 (LR 48179-30) KEMA 02ATEX2121 X 2-18 | 241CE II Hydrocarbon Dewpoint Analyzer PN 903-8797, Rev A... -
Page 43: Analog Input Terminals
Analog Input Terminals An external water signal (a 4–20 mA input) can be brought in to the analyzer and then displayed as water dewpoint temperature (WDP) or water content (WCT) on the User Interface or designated V/I outputs. To configure the analyzer to accept an external water signal and display it on its User Interface, additional equipment must be installed on the Microcon- troller and Termination boards (typically done at the factory). -
Page 44: Analog Output Terminals
Analog Output Terminals Typically, AMETEK provides two (2) self-powered analog outputs which do not require a loop-power supply and are compatible with loop impedances of up to 1000 ohms. Additional outputs can be included if specified by the customer (for external Water Dewpoint or Water Content). The two (2) self-powered analog outputs are used for Hydrocarbon Dewpoint (HCDP) Temperature and Operational Status Code. - Page 45 The results presented on the analog output signal channels (displayed on the User Interface) are held constant until new values are determined. Since it is not possible to represent the ‘<’ (less than) symbol on the analog signal chan- nels, check the following for clues to determine whether the HCDP tempera- ture is ‘equal to’...
-
Page 46: Alarm Relay Terminals
* Applicable only if H2O DP:INT option is enabled from the MonitorCFG menu. ** Applicable only if H2O DP:INT (with water content) option is enabled from the Figure 2-6. MonitorCFG menu. Analog relays, terminals. 2-22 | 241CE II Hydrocarbon Dewpoint Analyzer PN 903-8797, Rev A... -
Page 47: Configuring The Hardware For Digital Communication
RS-485 connections. The various serial port configurations and cabling requirements between a computer or Distributed Control System (DCS) and the analyzer are detailed in a supporting docu- ment, the 241CE II Analyzer Serial Communication Interface (Modbus) Manual Supplement. Installation and Start-Up... - Page 48 D-connector and terminal strip. Only one type of serial port configuration can be functional at any given time. Serial Communications Configuration Communication Type JP800 JP801 RS-422 NONE RS-485 Line Termination RS-485 Biased High RS-485 Biased Low 2-24 | 241CE II Hydrocarbon Dewpoint Analyzer PN 903-8797, Rev A...
-
Page 49: Digital Communication Protocol
From the “Serial Communications Configuration” table, choose the serial interface type from the Communication Type column, then use settings in that row to configure the jumpers and software, and to terminate the com- munication lines. If you choose RS-485, consider the location of the analyzer on the line. When the analyzer is used on the end of the communication line, use the End-of-Line (Line Termination) serial interface type. -
Page 50: Ac Power Connections
(breaker) must be connected to and mounted near the analyzer, in an easily accessible area. The switch (breaker) must be clearly labeled (e.g., “AMETEK 241CE II Analyzer Main AC Power Disconnect Switch”). For safety reasons during maintenance, this switch allows the main AC power to be disconnected from the analyzer prior to performing service on the analyzer. -
Page 51: North American Installation
Power Cable Entry on the top of the Electronics Enclosure (Figure 2-1). Each unused cable entry port must be plugged with a certified Ex d plug. The plugs are supplied by AMETEK. Do not replace these plugs with uncertified plugs. -
Page 52: Start-Up And Verification
AMETEK if there is any doubt about the integrity of any flamepath. Powering Up the 241CE II Analyzer When the 241CE II Analyzer is turned on, the hardware is initialized and the configuration data is retrieved from the EEPROM. This information is pre-pro- grammed at the factory, according to pre-arranged customer requirements. -
Page 53: Displayed Signals (Run Menu Scroll Sequence - Quick Reference)
Displayed Signals (RUN Menu Scroll Sequence – Quick Reference) Detailed information about the signals that are displayed on the User Interface can be found in Chapter 3 (see “Working in the RUN Menu”). The RUN menu scrolls automatically and displays, continually, in the following order: Displayed Abbreviation Description... -
Page 54: About The Measuring Cycle
FRate and SRate. This dewpoint is also the switch-point between the Warming and Purging/Hold Stages. If you change the temperature parameter, carefully consider the stability of the HCDP in the process gas line. 2-30 | 241CE II Hydrocarbon Dewpoint Analyzer PN 903-8797, Rev A... -
Page 55: Purging/Hold Stage
Purging/Hold Stage The measuring cycle begins with the Purging/Hold Stage. The Purging opera- tion occurs first, followed by the Hold portion of this stage. While Purging, the solenoid valve is opened to allow sample gas to flow through the Sample Line and Measuring Cell. While sample gas is flowing, the mirror temperature stabilizes at its High setpoint temperature. -
Page 56: Cooling Stage
Slow Cooling Rate [SRate, default = 2 °C (3.6 °F)] per minute – to its Low set- point temperature, typically -30 °C (-22 °F). AMETEK does not recommend changing the Slow Cooling Rate (SRate). This rate was tested at the factory for optimum HCDP dew- point sensitivity. - Page 57 The instantaneous intensities of light impinging on both phototransistors are monitored simultaneously. At 0.25 °C intervals, the light-intensity values and mirror temperatures are stored into memory. After each data set is stored, the array of temperature and light-intensity values are analyzed to determine if a persistent increase in light intensity has occurred at either phototransistor.
-
Page 58: Warming Stage
However, if the Warming Stage terminates because the mirror temperature has not increased after 2 minutes, the Stage-Time-Out (“w TimeOut”) SCode and Warning-Stage-Time-Out (“w Warm TimeOut”) XSCode are generated. 2-34 | 241CE II Hydrocarbon Dewpoint Analyzer PN 903-8797, Rev A... -
Page 59: Sample System Leak Check
Flamepaths” in Chapter 4. Replace parts immediately if damage or wear is apparent. Contact AMETEK if there is any doubt about the integrity of any flamepath. Do not exceed the maximum working pressure rating of the sample system – 13.8 MPa (2000 PSIG) – under any circumstances. - Page 60 8. Open the Sample Line isolation valve(s). 9. Adjust the pressure regulator to achieve proper flow rates as described under “Adjusting the Sample Gas Flow Rate. ” The procedure is complete. 2-36 | 241CE II Hydrocarbon Dewpoint Analyzer PN 903-8797, Rev A...
-
Page 61: Adjusting The Sample Gas Flow Rate
Adjusting the Sample Gas Flow Rate The gas sample flow rate needs to be properly adjusted for your application. During each measurement cycle, the solenoid is closed. The main purge flow through the solenoid is also shut off. During the Purging/Hold Stage, the solenoid opens and the sample gas flows through the sample system and Measuring Cell. - Page 62 For most applications, AMETEK recommends that the analyzer be operated with the Bypass Valve open, although applications with measurements at pipe- line pressures of 700 KPAG (100 PSIG) or less should be made with the Bypass Valve closed. During the measuring cycle, the lower flow will create pres- sure decreases throughout the sample system.
-
Page 63: Sample System Volume And Flow Rates
Sample System Volume and Flow Rates The sample gas flow rate during the Purging/Hold Stage is controlled by the pressure regulator. The regulator may be set for the desired gas flow rate by temporarily installing a flow metering device (e.g., a rotameter – supplied by the customer/end user) on the Vent Line between the Filterblock Assembly and the used gas disposal location. -
Page 64: Normal Operation
Warning or Fault alarms. This can be done from the Stat\History menu (“Clear Alarm?” prompt). 2-40 | 241CE II Hydrocarbon Dewpoint Analyzer PN 903-8797, Rev A... -
Page 65: Analyzer Configuration
If necessary, see the original configuration sheets to revert the analyzer back to its original settings. The 241CE II Analyzer is pre-configured at the factory, according to predetermined and agreed upon customer requirements. However, if changes are required, most parameters can be changed. - Page 66 This page intentionally left blank. 2-42 | 241CE II Hydrocarbon Dewpoint Analyzer PN 903-8797, Rev A...
-
Page 67: User Interface
User Interface Before working from the User Interface, read the entire section titled “Introduction to the User Interface” to learn how to navigate through the screens to work on the analyzer. Introduction to the User Interface Figure 3-1 illustrates the layout of the analyzer User Interface. Figure 3-1. - Page 68 Status Code (SCode). To change an operating parameter, it must be active on the display. The display line flashes when the 241CE II Analyzer is in Standby Mode (a Fault alarm is present).
- Page 69 Keypad • The four push-buttons allow you to navigate throughout the software to view previous results, change operating parameters, and disable, enable, and reset alarms. Each button uses an automatic-repeat action. For any operation that re- quires you to press the button more than once, press and hold the button to repeat the function.
-
Page 70: Navigating From The User Interface
EEPROM. To permanently save any configuration changes, press to scroll to the “Save AppCFG?” (or “Save AppCFG?”) prompt and then press the ‘+’ button to answer Yes. 3-4 | 241CE II Hydrocarbon Dewpoint Analyzer PN 903-8797, Rev A... -
Page 71: About Appliccfg And Monitorcfg Passwords
About ApplicCFG and MonitorCFG Passwords Access to the ApplicCFG and MonitorCFG menus is protected by a password (passcode). The password prompt for the ApplicCFG menu is “Passcode1?”. The password prompt for the MonitorCFG menu is “Passcode2?”. The factory-default password is ‘– – – –’ for both menus, but it can be changed for each menu. -
Page 72: Working In The Different Menus
Upon power-up or a system reset, the User Interface will revert to the RUN menu and begin scrolling the parameters. The first parameter that will be seen after a power-up or following a reset is the system’s firmware version (M241 Vx.xx). 3-6 | 241CE II Hydrocarbon Dewpoint Analyzer PN 903-8797, Rev A... -
Page 73: Run Menu Parameters Defined
RUN Menu Parameters Defined Since data from a previous measuring cycle does not exist immedi- ately following power-up or a system reset, the initialization routine sets the HCDP temperature to < -40 °C (< -40 °F). The descriptions of the parameters that continually scroll by on the User Inter- face, and the order in which they are displayed are: Displayed Abbreviation... - Page 74 The factory-set default configuration settings for your analyzer can be found in the Documentation Package shipped with the analyzer. 3-8 | 241CE II Hydrocarbon Dewpoint Analyzer PN 903-8797, Rev A...
-
Page 75: Interpreting The Parameter Results And Symbols Displayed On The User Interface
Interpreting the Parameter Results and Symbols Displayed on the User Interface Interpreting the results displayed on the User Interface is relatively easy. How- ever, the appearance of the ‘=’ and ‘<’ symbols preceding the HCDP tempera- ture must be observed carefully. •... -
Page 76: Validating The Current Results
(‘1’ = most recent entry; ‘9’ = oldest entry). On subsequent measuring cycles, the oldest entry is removed from the buffer and the latest entry is stored. 3-10 | 241CE II Hydrocarbon Dewpoint Analyzer PN 903-8797, Rev A... -
Page 77: Working In The Status\History Menu
Working in the Status\History Menu The Stat\History menu displays the current analyzer status and historical information. Stat\History mode allows you to view information only. To change information To view the Stat\History menu, press until Stat\History appears. To view (ApplicCFG or MonitorCFG), the sub-menu items within this menu, press . - Page 78 EEP Warn [End-Of-EEPROM-Life] Hold TimeOut [Purging/Hold-Stage-Time-Out] Cool TimeOut [Cooling-Stage-Time-Out] Warm TimeOut [Warming-Stage-Time-Out] Cross Talk [Excessive-Mirror-Cross-Talk] High DP [Hydrocarbon-Dewpoint-Temperature-Too-High] High Temp [Mirror-RTD-Temperature-Is-Too-High] Low Temp [Mirror RTD-Temperature-Is-Too-Low] H2O Dim [Light-Intensity-On-Water-Side-Is-Too-Low] HC Dim [Light-Intensity-On-Hydrocarbon-Side-Is-Too-Low] 3-12 | 241CE II Hydrocarbon Dewpoint Analyzer PN 903-8797, Rev A...
- Page 79 EEPROM (changes to the system configuration settings). 000000000-1 This system status parameter displays the Serial Number of the analyzer. M241 Vx-xx This system status parameter displays the current Firmware Version running the 241CE II Analyzer. User Interface 3-13...
-
Page 80: Working In The Application Configuration Menu
LED #5 on the User Interface is turned On. Note: This signal will only be displayed if the H2O DP:INT option (plus water content) is enabled from the MonitorCFG menu. AMETEK does not recommend enabling this except for diagnostic purposes only. Purge This parameter displays the current setting for the Measuring Cell Purge duration (minutes). - Page 81 (Register 1072); however, this parameter is not accessible using System 200 Configurator Software communication. If your system uses the optional Modbus communication function, refer to the 241CE II Analyzer Serial Communication Interface (Modbus) Manual Supplement shipped with your system.
- Page 82 This parameter allows you to select the Network communications type. Options include: • S2K = System 2000 (Communicating via System 200 Configurator Software). For details about using this software to communicate with the analyzer, refer to the 241CE II Analyzer System 200 Configurator Software User Manual shipped with your system.
- Page 83 Sub-Menu Item Description On the first analog output – V/I #1 – this is the full-scale (maximum) WDP temperature (°C or °F) corresponding to the 20.00 mA output. Note: This parameter will be displayed only if an external water signal is provided and if the H2O DP:EXT option is enabled from the MonitorCFG menu.
-
Page 84: Working In The Configuration Menu
The MonitorCFG sub-menu items (listed in their viewing order) and their descriptions are: Do not change parameters marked ‘*’ (under “Description”) unless instructed to do so by an AMETEK service representative. Doing so will result in incorrect measurements and readings. Sub-Menu Item... - Page 85 Sub-Menu Item Description Water Measurement (Continued) Option • If H2O DP:INT is enabled, select an option from the Options code sub-menu: - DP&m (dewpoint, metric units). - DP&i (dewpoint, imperial units). - WC&m (water content, metric units). - WC&i (water content, imperial units). •...
- Page 86 Measuring Cell, where ‘n’ = the current trigger level threshold. This variable allows you to specify the low threshold of the increasing water phototransistor signal. Do not adjust this value unless instructed to do so by an AMETEK Service Representative.
- Page 87 Sub-Menu Item Description This parameter displays the duration each signal will pause on the RUN menu screen during Scroll the auto-scroll (factory default = 4 seconds). V/I Analog output #1 Zero calibration value, WDP (4.00 mA). Note: This parameter will be displayed only if an external water signal is provided and if the H2O DP:EXT option is enabled from the MonitorCFG menu.
-
Page 88: Current Output Zero/Span Calibration
Fault Alarm relay. During this condition, the diagnostics function places the analyzer in Standby Mode; the analyzer requires immediate service. For more information about this condition, refer to Chapter 4. 3-22 | 241CE II Hydrocarbon Dewpoint Analyzer PN 903-8797, Rev A... -
Page 89: Maintenance And Troubleshooting
Maintenance and Troubleshooting This chapter describes how to request technical support and authorization on returning equipment, and lists spare parts required for start-up and one-year maintenance, plus general spare parts. This chapter also includes Diagnostic Flowcharts which can be used to check for possible problems with the analyz- er, information about how to clean and replace analyzer parts, and information about how to troubleshoot problems with the analyzer when system alarms are triggered. -
Page 90: Aftermarket Excellence And Long-Term Commitment To Safety And Quality
Aftermarket Excellence and Long-Term Commitment to Safety and Quality Safety is a core value at AMETEK Process Instruments and is our primary consideration in every decision. We believe all accidents, injuries, and occupa- tional illnesses are preventable. We adhere to the highest design and safety... -
Page 91: Requesting Technical Support
Requesting Technical Support To request service support, a call back, or product information we encour- age you to use our Web-to-Case online tool, so we are instantly aware of your request no matter the time zone or day of the week. To do this, follow the link below. -
Page 92: Spare Parts Lists
Spare Parts Lists This section lists the recommended spare parts to have readily available for the 241CE II Analyzer to ensure the analyzer and its sample system operate at peak efficiency. Figure No.” in the Spare Parts Lists refers to Figure numbers in this manual that show the location of the part. -
Page 93: Spare Analyzer Fuses
Fuses located on terminal strip (on Termination board) near the top of the Electronics Enclosure (see Figure 4-4 for fuse ratings/locations). Replacement Boards If you require replacement boards for the 241CE II Analyzer, use the following part numbers. Printed Wiring Boards... -
Page 94: Diagnostic Flowcharts
Diagnostic Flowcharts If problems with the analyzer are detected, AMETEK recommends that you fol- low the Diagnostic Flowcharts. Since the Measuring Cell is the component that is most susceptible to problems, such as contamination, the primary objective is to ensure proper care of the Measuring Cell Assembly and proper operation of the analyzer’s sample system. -
Page 95: Checking Flamepaths And Gaps
(discoloration) or damage (bent or scratched push-buttons). For information on what to do if these flamepaths appear worn or damaged, contact AMETEK Service. See “Examining and Caring For the Flamepaths” in this chapter. Other Flamepaths For information on the required dimensions of other flamepath joints, contact AMETEK Service. -
Page 96: Checking And Recording The Baseline Settings
Maintenance” in this chapter. Fault or Warning Status Conditions If the analyzer is repeatedly generating alarms that may indicate a faulty Peltier Cooler or RTD, AMETEK suggests returning the assembly to the factory for repair. Possible Cause/ Condition Corrective Action View the SCode or XSCode screen for alarm messages. -
Page 97: Incorrect Information Is Displayed On The User Interface
Incorrect Information is Displayed on the User Interface If the User Interface displays information that is incorrect, it may be due to incorrectly set units of measurement. You can change the Options code parameter at any time, but do so only with careful consideration of what the displayed results will be. -
Page 98: Sheltered Systems
De- pending on the location of the site and its environmental conditions, it may be necessary to check and replace these filters more frequently. 4-10 | 241CE II Hydrocarbon Dewpoint Analyzer PN 903-8797, Rev A... -
Page 99: Maintenance
Maintenance Generally, there is limited maintenance required to ensure the analyzer re- mains operating at peak efficiency, other than that described in this section. This maintenance, which includes parts that require replacement and cleaning, is intended to ensure continued and proper operation of the analyzer. The following sections discuss parts that can be replaced in the analyzer”... - Page 100 Using two wrenches, use one to rotate the nut to the original position (an increase in resistance will be encountered at the original position), then tighten it slightly with the wrench. Repeat for the other fitting. 4-12 | 241CE II Hydrocarbon Dewpoint Analyzer PN 903-8797, Rev A...
- Page 101 6. After ensuring that all connections are made and secure, perform a leak check on all of the Filterblock’s tubing connections and a high pressure flow rate test on the Filterblock Assembly to ensure there are no leaks. See “Sample System Leak Check” in Chapter 2. If a gas leak is detected, repair and retest the fittings until all leaks have been eliminated.
-
Page 102: Measuring Cell Maintenance
Replace the Measuring Cell o-ring: See “Spare Part Lists” • If the o-ring is found to be damaged (nicks, cuts, scratches) while cleaning in this chapter for ordering the Measuring Cell. numbers. 4-14 | 241CE II Hydrocarbon Dewpoint Analyzer PN 903-8797, Rev A... - Page 103 HEATSINK ASSEMBLY (100-2083) HEAT SINK SLEEVE (PART OF: 100-2083) APPLY THERMALCOTE (300-4477) PELTIER COOLER ASSEMBLY (100-1578) M6 X 20 HEX SOCKET SCREW (300-4492)(24 PLACES) LOCATING PIN (300-4508) COOLER HOUSING (300-6062) DO NOT REMOVE COOLER PCB FLAME ARRESTOR LABEL (100-0666) FLAME ARRESTOR (301-1821) DOWEL PIN INDEXED MIRROR ASSEMBLY...
- Page 104 Shut down main AC power to the analyzer before disassembling the Measuring Cell Assembly or removing the entire Cooler Housing/ Heatsink/Measuring Cell Assemblies. Also, the joining surfaces of these assemblies are flamepaths. 4-16 | 241CE II Hydrocarbon Dewpoint Analyzer PN 903-8797, Rev A...
- Page 105 Do not separate the Heatsink from the Cooler Housing unless it is nec- essary to inspect the Peltier Cooler or RTD in the Cooler Housing, and only if instructed to do so by your AMETEK representative. Maintenance and Troubleshooting | 4-17...
- Page 106 Mounting Sleeve are flamepath areas. Take special care to avoid scratching, indenting, or otherwise damaging these joining surfaces. If unsure about the integrity of these flamepaths see “Examining and Caring For the Flamepaths” in this chapter. 4-18 | 241CE II Hydrocarbon Dewpoint Analyzer PN 903-8797, Rev A...
- Page 107 Inspect the o-ring for damage, such as nicks, cuts, or scratches. Typically, AMETEK recommends replacing the o-ring any time the Measuring Cell is disassembled. The mirror support is an epoxy resin, the optic-path windows are made of polycarbonate, and the Measuring Cell and mirror are made of aluminum.
- Page 108 Carefully clean these areas with a cotton swab or soft, non-abrasive cloth soaked in Isopropanol and allow them to dry thoroughly before reassembly. 4-20 | 241CE II Hydrocarbon Dewpoint Analyzer PN 903-8797, Rev A...
- Page 109 11. Using the alignment pins as guides, make sure that the electrical con- nectors are properly aligned and then push the Cooler Housing directly toward the Electronics Enclosure. While holding the Measuring Cell/Heat- sink Assembly firmly in place with one hand, fully thread in one (1) of the upper screws.
-
Page 110: Filterblock Maintenance
If, while cleaning the Filterblock, the Membrane Filters are found to be in this chapter for ordering numbers. damaged (are creased, have holes, or are transparent) or severely contami- nated (with liquids, oils, or waxes). 4-22 | 241CE II Hydrocarbon Dewpoint Analyzer PN 903-8797, Rev A... - Page 111 Figure 4-2. Filterblock Assembly. Maintenance and Troubleshooting | 4-23 PN 903-8797, Rev A...
- Page 112 4. Loosen – but do not remove – the two (2) mounting screws from the slots on the Filterblock mounting bracket (to the backpan) and remove the Filterblock. Move the Filterblock to a work bench. 4-24 | 241CE II Hydrocarbon Dewpoint Analyzer PN 903-8797, Rev A...
- Page 113 5. Remove the six (6) M6 x 50 screws and carefully separate the Filterblock into three sections. 6. Inspect both Membrane Filters for damage, particulate, and liquid, oils, or waxes. The High-Flow Membrane Filter is bonded to its o-ring – do not at- tempt to separate them.
- Page 114 Back Filterblock section. Replace and tighten the three (3) M6 x 20 screws using a torque screwdriver (4.0 Nm, ±0.7 Nm (36 in.-lb, ±9 in.-lb)). 4-26 | 241CE II Hydrocarbon Dewpoint Analyzer PN 903-8797, Rev A...
- Page 115 13. Replace parts in the Filterblock sections: The Membrane Filters, o-rings, Sintered Disks, and Flow Restrictors can be re-used, unless they are damaged (are creased, have holes, or are transparent) or contaminated (with liquids, oils, or waxes); in this case, replace with new parts.
- Page 116 Typically, five measuring cycles will be sufficient to remove the water or air contaminants after the sample system has been exposed to water or the atmosphere. 4-28 | 241CE II Hydrocarbon Dewpoint Analyzer PN 903-8797, Rev A...
-
Page 117: Examining And Caring For The Flamepaths
Replace the parts immediately if damage or wear is apparent. Contact AMETEK immediately if there is any doubt about the integrity of any flamepath. Maintenance and Troubleshooting | 4-29... -
Page 118: Electronics Enclosure Flamepaths (Joining Surfaces)
When performing equipment maintenance in hazardous locations, all safety standards and procedures must be followed, as specified by the Owner Company, local electrical-inspection authority, and National/ EU regulations. 4-30 | 241CE II Hydrocarbon Dewpoint Analyzer PN 903-8797, Rev A... -
Page 119: Push-Button And Window Housing Flamepaths
If the push-buttons show signs of wear or become damaged, contact your AMETEK Service Representative. If the push-buttons become stuck, do not attempt to dislodge them using pliers or any other tools. - Page 120 Figure 4-3. Window/Push-button assembly details. 4-32 | 241CE II Hydrocarbon Dewpoint Analyzer PN 903-8797, Rev A...
- Page 121 To examine the push-buttons, their holes, and the Window Housing assem- bly for damage and signs of wear, and to change out damaged or worn parts (Figure 4-3): 1. Take appropriate safety precautions to safely power down the analyzer. Before opening the Ex d Electronics Enclosure, follow all necessary safety procedures to ensure the area is non-hazardous (main AC power to the analyzer is off, explosive gas atmosphere is not present, etc.).
- Page 122 Close the enclosure door and replace all of the M10 screws that secure the door to the Electronics Enclosure. The torque specification to fasten M10 screws is 9.0 Nm, ±0.7 Nm (80 in.-lb, ±9 in.-lb). 4-34 | 241CE II Hydrocarbon Dewpoint Analyzer PN 903-8797, Rev A...
-
Page 123: Window (User Interface)
5. If a lubricant was used to help dislodge the Window Housing during removal, clean the lubricant off the Analyzer Housing before replacing the Window Housing. Align the push-button holes in the Window Housing (original part, if it is not damaged, or new part if the original part is being replaced) with the push-buttons and carefully place it over the buttons, being careful not to damage the housing or buttons. -
Page 124: Troubleshooting And Diagnostics
Troubleshooting and Diagnostics This section describes how the 241CE II Analyzer detects and displays alarms associated with its operation, what the alarms mean, and action to take to correct the alarms. This section also discusses how to view the alarms from the User Interface and how to reset the analyzer if a system reset is required. -
Page 125: Types Of Alarms
Types of Alarms When alarms are triggered, an LED on the User Interface will be turned On to notify the operator of this condition. If the alarm is of a serious nature (i.e., a Fault alarm), the alphanumeric display will flash to alert the operator that im- mediate attention is required. -
Page 126: Fault Alarms
User Interface turns On, but only if the Off-Spec Alarm is enabled (Stat\ History : En\Dis Alrm?). If triggered, this alarm will be also be displayed on the User Interface if the Off-Spec Alarm is enabled. 4-38 | 241CE II Hydrocarbon Dewpoint Analyzer PN 903-8797, Rev A... -
Page 127: Alarm Led Status
(Stat\History : En\Dis Alrm?). Diagnostics Fault Alarm: Analyzer in Standby Mode – Immediate Service Required (review SCode and XSCode in the Stat\History menu to gather information before contacting AMETEK). The alphanumeric display will also flash to alert the operator to this condition. Diagnostics Warning Alarm: Analyzer reporting an abnormal condition –... -
Page 128: Operating In Standby Mode (Fault Alarm)
and ‘–’ buttons simultaneously). If yet another Fault Alarm occurs during the first measuring cycle after the system reset, the analyzer requires service. See “Requesting Technical Support” in this chapter for information about how to receive customer support. 4-40 | 241CE II Hydrocarbon Dewpoint Analyzer PN 903-8797, Rev A... -
Page 129: Clearing (Resetting) Alarms
Clearing (Resetting) Alarms Active alarms can be cleared (reset) from the Stat\History menu. Clearing the alarms removes any active alarms from the User Interface display and stores them (up to a maximum of nine) in the History Buffer (^SC or ^XSC), also in the Stat\History menu. -
Page 130: Types Of Status Codes
If the ambient temperature is too low, the heating of the area around the analyzer may require adjustment, service, or an upgrade. 4-42 | 241CE II Hydrocarbon Dewpoint Analyzer PN 903-8797, Rev A... - Page 131 To resolve XSCode into its constituent primary codes, subtract the largest possible primary code (as seen in the “Extended Status Code” troubleshooting chart) from the displayed code (which is the total sum of all primary XSCodes found) and then subtract the next largest possible primary code, etc., until the remaining value is the smallest possible primary XSCode.
-
Page 132: Suggested Corrective Actions
SCodes and XSCodes troubleshooting charts. A fault alarm always requires corrective action, even if it is only to reset the alarms. If the problem persists after following these suggestions, contact AMETEK Service. 4-44 | 241CE II Hydrocarbon Dewpoint Analyzer... -
Page 133: Viewing Current Alarm Messages
Viewing Current Alarm Messages If any alarms have been detected by the analyzer, the corresponding LED on the User Interface will be On. Any current alarm messages can be viewed from the SCode or XSCode sub-menus. To view the current status of alarm messages (SCode or XSCode) detected by the diagnostics function: 1. -
Page 134: Viewing Historical Alarm Messages
To view the primary codes from either screen, press the ‘+’ or ‘–’ buttons. 3. To back out of either of these screens, press if you wish to view other Stat\History sub-menus, or press to go to another main menu. 4-46 | 241CE II Hydrocarbon Dewpoint Analyzer PN 903-8797, Rev A... -
Page 135: Status Code (Scode), Alarm Conditions, And Corrective Action
Status Code (SCode), Alarm Conditions, and Corrective Action This section lists the primary code, error code, alarm type, condition/descrip- tion, and suggested corrective action associated with each type of SCode alarm. If no alarms are present, the primary SCode ‘0’ is displayed. The ‘w’... - Page 136 • Review and interpret the current XSCode (Stat\History menu) to determine the cur- rent alarm conditions. Attempt to correct any alarm conditions. If necessary, contact AMETEK Service for assistance. 4-48 | 241CE II Hydrocarbon Dewpoint Analyzer PN 903-8797, Rev A...
- Page 137 “f High Temp” or “f Low Temp”. Attempt to correct any alarm conditions. If these alarms are also present, the RTD may have failed and you may have to replace If necessary, contact AMETEK Service for assistance. Maintenance and Troubleshooting | 4-49 PN 903-8797, Rev A...
- Page 138 SUPPLY MAINS ANALOG CUSTOMER CONNECTIONS FUSE RATINGS SELF-POWERED LOOP POWERED Figure 4-4. Fuse ratings/locations, Termination board REFERENCE: CERTIFICATION NO: (Electronics Enclosure). CSA CERTIFICATE: 1108925 (LR 48179-30) KEMA 02ATEX2121 X 4-50 | 241CE II Hydrocarbon Dewpoint Analyzer PN 903-8797, Rev A...
-
Page 139: Extended Status Code (Xscode), Alarm Conditions, And Corrective Action
Alternatively, you can send the configuration values and P.O. number for the EEPROM to AMETEK at the same time. At the factory, AMETEK will program the customer-specif- ic parameters in the EEPROM. In this case, you will only have to install the EEPROM; the parameters will take effect immediately upon power-up. - Page 140 HCDP temperature. Increase the ambient temperature if necessary. The surrounding ambient temperature should be at least 15 °C (27 °F) above the highest expected HCDP temperature. 4-52 | 241CE II Hydrocarbon Dewpoint Analyzer PN 903-8797, Rev A...
- Page 141 These alarms indicate problems with the RTD (inside the Cooler Housing). Corrective Action: • The RTD may have failed and may need to be replaced. If necessary, contact AMETEK Service for assistance. Maintenance and Troubleshooting | 4-53 PN 903-8797, Rev A...
- Page 142 Refer to Figures 4-1 and 4-5 for locations of internal components. With the Measuring Cell removed, observe the Opto-Ring to check if both LEDs are on. If necessary, contact AMETEK Service for assistance. Figure 4-5. Measuring Cell Assembly, cutaway view. 4-54 | 241CE II Hydrocarbon Dewpoint Analyzer PN 903-8797, Rev A...
- Page 143 Figure 4-6. Measuring Cell Assembly components. Maintenance and Troubleshooting | 4-55 PN 903-8797, Rev A...
-
Page 144: Resetting The 241Ce Ii Analyzer
If the Microcon- troller board has been replaced, it is necessary to power down the analyzer. The analyzer will reset upon normal power-up. 4-56 | 241CE II Hydrocarbon Dewpoint Analyzer PN 903-8797, Rev A... -
Page 145: Specifications
Specifications These performance characteristics are based on operation with factory-set configuration parameters. Specification Description Standard Ranges For application of sweet (H S <50 PPM) natural gas. The composition of the gas must be above the upper explosive limit. Methodology Chilled-mirror technique. Speed of Response 2 °C per minute (typical cooling rate), with cycle time typically 20–30 minutes. - Page 146 Note: 60 °C is achieved at a 20 °C ambient temperature. The achievable temperature difference will be slightly higher as the ambient temperature increases above 20 °C. 5-2 | 241CE II Hydrocarbon Dewpoint Analyzer PN 903-8797, Rev A...
- Page 147 Fitting must be installed on the Cooler Housing (to a dry gas supply). This fitting and an associated Flow Restrictor is supplied by AMETEK. Failure to install a dry gas supply meeting these specifications voids the warranty of the Peltier Cooler.
-
Page 148: 241Ce Ii Analyzer Approvals And Certifications
LVD: Low Voltage Directive: 2014/35/EU Using the following standard: EN 61010-1 PED: Pressure Equipment Directive: 2014/68/EU, Article 4, Paragraph 3 RoHS: Restriction of Hazardous Substances Directive: 2011/65/EU (RoHS 2) 5-4 | 241CE II Hydrocarbon Dewpoint Analyzer PN 903-8797, Rev A... -
Page 149: 241Ce Ii Analyzer Atex/Iecex Marking
275 W; 240 VAC 50/60 Hz 301-1391-D 241CE II Analyzer CSA-Certified Marking PROCESS INSTRUMENTS Western Research Analyzer Model: 241CE II SN: ________________________ ___120Vac ___240Vac, 50/60 Hz, 275W CLASS I, DIVISION 1 GROUPS C & D CLASS I ZONE 1 Ex d IIB T3C, Tamb. +40°C Output signals: 4-20mA (30VDC Max) Relay Contacts 24VDC 0.5A Max... - Page 150 This page intentionally left blank. 5-6 | 241CE II Hydrocarbon Dewpoint Analyzer PN 903-8797, Rev A...
-
Page 151: Functional Verification
Functional Verification Since the analyzer operation is based on first principles, analyzer calibration is not required. This is fortunate because the preparation of a high-pressure gas mixture with a known and stable dewpoint temperature is extremely difficult. If a mixture is prepared and stored in a tank, the dewpoint temperature can change as the gas is consumed. - Page 152 Propane tables (Figures 6-1 and 6-2). The pressure on the gauge must be set at “gauge” pressure not “abso- lute” pressure. To determine gauge pressure, subtract the barometric pressure from the absolute pressure. 6-2 | 241CE II Hydrocarbon Dewpoint Analyzer PN 903-8797, Rev A...
- Page 153 6. When the flushing is complete, reset the MTLo to a temperature below the propane’s dewpoint temperature. This allows the analyzer to proceed through a proper measuring cycle. Once the purging time (Purge) has elapsed and the solenoid valve has closed – prior to the beginning of the RUN Mode...
-
Page 154: Propane Vapor Pressure
Pv is the vapor pressure propane (mm Hg) and T is the absolute tem- perature (K). Equation 2 was based upon 105 data points in the range -128.9 to 96.8 °C and fitted the data with an average deviation of 0.46 percent. 6-4 | 241CE II Hydrocarbon Dewpoint Analyzer PN 903-8797, Rev A... - Page 155 Vapor Pressure (KPA) Vapor Pressure (PSIA) Average Average Ref. (°C) Ref. 1 Ref. 2 Ref. 3 Ref. 2 & 3 (°F) Ref. 2 Ref. 3 2 & 3 -56.6 50.662 50.78 51.01 50.89 -69.9 7.37 7.40 7.38 -55.6 53.329 53.46 53.69 53.57 -68.1...
-
Page 156: References
Norman Adolph Lange and Gordon M. Forker (eds.), Handbook of Chemistry (Revised tenth edition), (New York, N.Y.: McGraw-Hill, Inc., 1967). Carl C. Yaws, “Physical & Thermodynamic Properties – Part 24: Correlation constants for chemical compounds, ” Chemical Engineering, November 22 (1976)153-62. 6-6 | 241CE II Hydrocarbon Dewpoint Analyzer PN 903-8797, Rev A... -
Page 157: Appendix A - System Options
Appendix A – System Options Available options for the 241CE II Hydrocarbon Dewpoint Analyzer are: • External Water Dewpoint • External Water Content with Customer Pressure Signal • Self-Powered V/I Outputs • Remote Start When the analyzer is configured to use the External Water Signal op- tion, the Remote Start option is not available. -
Page 158: External Water Dewpoint/Content Option
(U702) on the Microcontroller board. • A 1 %, 249 ohm resistor must be installed across the voltage input Termi- nals (12+) and (13-) on connector J101 of the Termination board. A-2 | 241CE II Hydrocarbon Dewpoint Analyzer PN 903-8797, Rev A... -
Page 159: Electrical Connections
Electrical Connections The external water signal to the analyzer must be a 4–20 mA input. To display this signal on the User Interface, connect a 4–20 mA external water signal to the spare analog input Terminals 12+ and 13- on connector J101 on the Termination board in the Ex d Electronics Enclosure. - Page 160 (WCT) reading. Press to refresh the reading by scrolling through the readings until the WDP or WCT reading is displayed again. Record this value for future reference. A-4 | 241CE II Hydrocarbon Dewpoint Analyzer PN 903-8797, Rev A...
- Page 161 d. Use the following formulas to calculate a new ExLo and ExHi to com- pensate for the differences between the input value and the displayed value: A = Range Lo (ExLo range [low output from the external water dewpoint/ water content source]) B = Range Hi (ExHi range [high output from the external water dewpoint/ water content source]) C = Reading Lo (external water dewpoint/water content reading on the...
-
Page 162: Remote Start Option
180 minute period by turning off the purge solenoid using the ap- propriate Modbus register. For details about the Modbus registers, refer to the 241CE II Analyzer Serial Communication Interface (Modbus) Manual Supple- ment. A-6 | 241CE II Hydrocarbon Dewpoint Analyzer... -
Page 163: Appendix B - Drawings
Appendix B – Drawings This appendix contains drawings that are not included in the main body of this manual. If your Documentation Package includes optional Final “As-Built” (job-specifi c) drawings, use those for installation and maintenance/ diagnostic purposes in place of the corresponding drawings in this manual. -
Page 164: Analyzer Block Diagram (Wx-241Ce
Analyzer Block Diagram (WX-241CE II-1) B-2 | 241CE II Hydrocarbon Dewpoint Analyzer PN 903-8797, Rev A... -
Page 165: Digital Communications Wiring Diagram (Wx-241Ce
Digital Communications Wiring Diagram (WX-241CE II-5) Appendix B PN 903-8797, Rev A... -
Page 166: Interconnection Diagram (100-2091-13
Interconnection Diagram (100-2091-13) B-4 | 241CE II Hydrocarbon Dewpoint Analyzer PN 903-8797, Rev A... -
Page 167: Electrical Block Diagram (100-2091-15
Electrical Block Diagram (100-2091-15) Appendix B PN 903-8797, Rev A... -
Page 168: Optional I/O Wiring (100-2091-14
Optional I/O Wiring (100-2091-14) B-6 | 241CE II Hydrocarbon Dewpoint Analyzer PN 903-8797, Rev A... -
Page 169: Probe Mounting (Wx-241Ce
Probe Mounting (WX-241CE II-6) Appendix B PN 903-8797, Rev A... - Page 170 This page intentionally left blank. B-8 | 241CE II Hydrocarbon Dewpoint Analyzer PN 903-8797, Rev A...
- Page 171 AMETEK Process Instruments delivers worldwide sales and service support through a network of direct and factory-trained global distribution channels. AMETEK Service Assistance Program plans offer coverage up to 24 hours a day, 365 days of the year. As worldwide experts in the manufacture of process analyzers and instrumentation, we have supplied solutions to industry since 1962, providing the widest range of analysis technology available.
Need help?
Do you have a question about the 241CE II and is the answer not in the manual?
Questions and answers