Sign In
Upload
Download
Table of Contents
Contents
Add to my manuals
Delete from my manuals
Share
URL of this page:
HTML Link:
Bookmark this page
Add
Manual will be automatically added to "My Manuals"
Print this page
×
Bookmark added
×
Added to my manuals
Manuals
Brands
Ametek Manuals
Measuring Instruments
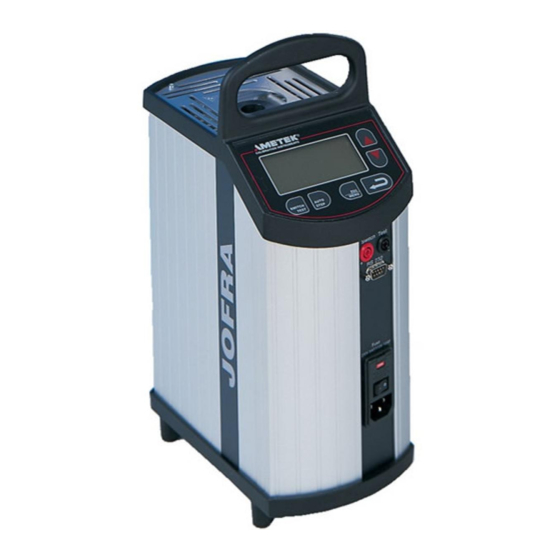
JOFRA ATC-125
Service manual
Ametek JOFRA ATC-125 Service Manual
Hide thumbs
1
2
Table Of Contents
3
4
5
6
7
8
9
10
11
12
13
14
15
16
17
18
19
20
21
22
23
24
25
26
27
28
29
30
31
32
33
34
35
36
37
38
39
40
41
42
43
44
45
46
47
48
49
50
51
52
53
54
55
56
57
58
59
60
61
62
63
64
65
66
67
68
69
70
71
72
73
74
75
76
77
78
79
80
81
82
83
84
85
86
87
88
89
page
of
89
Go
/
89
Contents
Table of Contents
Troubleshooting
Bookmarks
Table of Contents
Service Manual
Table of Contents
1 General
Introduction
Technical Assistance
Safety Instructions
Adjusting and Calibrating the Instrument
2 Repairs
Service Menu
Service Main Menu
Service Power Menu
Service Input Menu
Service Output Menu
Service Keyboard Menu
Service Display Menu
Trouble Shooting
Supplies
Oil Problems
Replacement of Spare Parts
DIP-Switch Settings
Configuring the Power PCB for ATC-320 A/B (Version 1)
Configuring the Power PCB for ATC-320 A/B (Version 2)
Configuring the Power PCB for ATC-650 A/B (Version 1)
Adjusting and Testing Pcb's
Current Limiter for ATC-140/155/156/157 A/B
MVI Circuit for ATC-250/320/650 A/B
3 Spare Parts and Drawings
Spare Parts
Exploded View - ATC-125 A/B
Exploded View - ATC-140 A/B
Exploded View - ATC-155 A/B
Exploded View - ATC-156 A/B
Exploded View - ATC-157 A/B
Exploded View - ATC-250 A/B
Exploded View - ATC-320/650 A/B
Wiring Diagram - ATC-125 a
Wiring Diagram - ATC-125 B
Wiring Diagram - ATC-155 a
Wiring Diagram - ATC-155 B
Wiring Diagram - ATC-140/156 a
Wiring Diagram - ATC-140/156 B
Wiring Diagram - ATC-157 a
Wiring Diagram - ATC-157 B
Wiring Diagram - ATC-250/320/650 a
Wiring Diagram - ATC-250/320/650 B
Advertisement
Quick Links
1
Service Manual
2
Introduction
3
Adjusting and Calibrating the Instrument
Download this manual
Service Manual
Temperature Calibrator
JOFRA ATC-125/140/155/156/157/250/320/650 A/B
Copyright 2007 AMETEK Denmark A/S
Table of
Contents
Previous
Page
Next
Page
1
2
3
4
5
Advertisement
Table of Contents
Need help?
Do you have a question about the JOFRA ATC-125 and is the answer not in the manual?
Ask a question
Questions and answers
Related Manuals for Ametek JOFRA ATC-125
Measuring Instruments Ametek JOFRA ATC-125 A Reference Manual
(124 pages)
Measuring Instruments Ametek JOFRA ATC-140 Service Manual
(89 pages)
Measuring Instruments Ametek JOFRA ATC-320 Service Manual
(89 pages)
Measuring Instruments Ametek JOFRA ATC-155 Service Manual
(89 pages)
Measuring Instruments Ametek JOFRA ATC-156 Service Manual
(89 pages)
Measuring Instruments Ametek JOFRA ATC-157 Service Manual
(89 pages)
Measuring Instruments Ametek DNC-PS700-A10 Operation And Installation Manual
Differential pressure control meter (6 pages)
Measuring Instruments Ametek HAG Installation And Maintenance Manual
Heater assembly gas probe; heated acid gas probe; (92 pages)
Measuring Instruments Ametek Reichert AR5 User Manual
(40 pages)
Measuring Instruments Ametek AMEVision 3050 Series Manual
(25 pages)
Measuring Instruments Ametek AMEVision 3050 Series User Manual
Moisture analyzer (46 pages)
Measuring Instruments Ametek CHATILLON DFIS Series Operating Instructions Manual
Digital force gauges (20 pages)
Measuring Instruments Ametek Jofra CTC-1205 A Reference Manual
Compact temperature calibrator (66 pages)
Measuring Instruments Ametek JOFRA CTC-140 A User Manual
(29 pages)
Measuring Instruments Ametek JOFRA CTC-1200 A User Manual
(29 pages)
Measuring Instruments Ametek JOFRA DLC-155 User Manual
Dynamic load compensation (23 pages)
This manual is also suitable for:
Jofra atc-140
Jofra atc-320
Jofra atc-250
Jofra atc-650 a
Jofra atc-650 b
Jofra atc-155
...
Show all
Jofra atc-156
Jofra atc-157
Jofra atc-125 a
Jofra atc-140 a
Jofra atc-155 a
Jofra atc-156 a
Jofra atc-157 a
Jofra atc-250 a
Jofra atc-320 a
Jofra atc-125 b
Jofra atc-140 b
Jofra atc-155 b
Jofra atc-156 b
Jofra atc-157 b
Jofra atc-250 b
Jofra atc-320 b
Table of Contents
Print
Rename the bookmark
Delete bookmark?
Delete from my manuals?
Login
Sign In
OR
Sign in with Facebook
Sign in with Google
Upload manual
Upload from disk
Upload from URL


Need help?
Do you have a question about the JOFRA ATC-125 and is the answer not in the manual?
Questions and answers