
Subscribe to Our Youtube Channel
Related Manuals for Webasto PosiCharge SVS100N


Summary of Contents for Webasto PosiCharge SVS100N
- Page 1 Operation and Maintenance Manual GSE Intelligent Fast Charging Systems SVS100N 12876-W-03-01...
- Page 2 © 2019 Webasto Charging Systems, Inc. All rights reserved. PosiCharge™ systems is a product line of Webasto Charging Systems, Inc. Webasto and the Webasto logo are trademarks of Webasto Charging Systems, Inc. Corporate names, trademarks, registered trademarks, service marks, symbols, and logos stated herein are property of their respective companies.
-
Page 3: Table Of Contents
Data Logs, Configuration, and Advanced Programming Features ........ 17 4.11 Programming Menus ....................18 4.12 Charger Configuration ....................19 Maintenance........................35 General Maintenance ....................35 External Interface Specifications (Diagnostic Port) ............36 Technical Specifications ....................38 12876-W-03-01 Webasto Charging Systems, Inc. - Page 4 Figure 5-1 DC Output Connections ....................35 Figure 5-2 Diagnostic port pinout ....................... 36 List of Tables Table 4-1 LED Labels and Meanings ....................11 Table 5-1 Fault Codes ..........................37 Table 5-2 Warning Codes ........................38 12876-W-03-01 Webasto Charging Systems, Inc.
- Page 5 SVS100N Operation/Maintenance Manual This Page Left Intentionally Blank 12876-W-03-01 Webasto Charging Systems, Inc.
-
Page 6: Getting Started
5. If your BMID does not come pre-configured, you will need to initialize and program the new BMID. (Refer to BMID programming Manual, document #06701-W-03) 6. Once the BMID has been programmed, the battery pack is ready to begin charging. 12876-W-03-01 Webasto Charging Systems, Inc. -
Page 7: Safety Precautions
Contains information to prevent shock hazard or possible damage to CAUTION the equipment during installation and service. NOTE: Offers helpful information for installation or usage, but does not contain personnel or equipment safety related information. 12876-W-03-01 Webasto Charging Systems, Inc. -
Page 8: Safety Instruction
The SVS100N battery connector is subject to normal wear and tear, and may be damaged by misuse or abuse. Frequently inspect the connector for cracking, pitting of contacts, fraying of wires or signs of connector fatigue. A damaged charging connector should be replaced immediately. 12876-W-03-01 Webasto Charging Systems, Inc. - Page 9 Follow the National Electrical Code (NEC) and local codes. NEC and local codes take precedence. If any instructions in this manual conflict with NEC or local codes, contact Webasto Charging Systems, Inc. for further information. 12876-W-03-01 Webasto Charging Systems, Inc.
-
Page 10: Technical Support
Electronic circuits are sensitive to damage from electrostatic Discharge. Persons servicing this equipment should be trained in proper techniques for avoiding ESD damage to electronic circuits. As a minimum, when handling circuit boards, wear an appropriate ESD wrist strap connected to the equipment chassis. 12876-W-03-01 Webasto Charging Systems, Inc. -
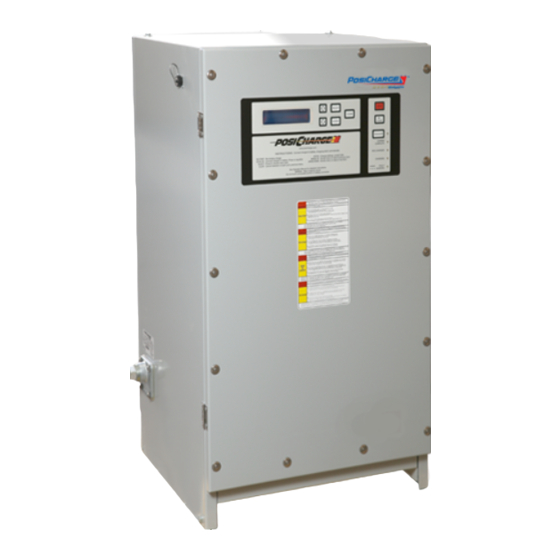
Page 11: System Description
(see the “BMID Programming Manual”). Many different sizes and types of industrial battery packs may be charged with the SVS100N. Choose the correct BMID for the nominal voltage of your pack. 12876-W-03-01 Webasto Charging Systems, Inc. -
Page 12: Operation
230VAC input power to the control board logic power supply. Before restarting the system after any emergency, be sure the system has been returned to a safe, operable condition before Pulling EPO and pressing the ON button to restart the system. 12876-W-03-01 Webasto Charging Systems, Inc. -
Page 13: Language Selection
Press and Hold UP arrow to select language Chargeur Prêt preference and ENTER to accept the selection Relier le Véhicule made. ENTER Ladegerät bereit Fahrzg anschließen ENTER Cargador Listo Conecte el Vehículo Figure 4-2 Language Selection Screens 12876-W-03-01 Webasto Charging Systems, Inc. -
Page 14: Battle Mode
When the charger is in Battle Mode the display will alternately flash “Battle Mode” and the normal display every second during “Battle Mode” activation. WARNING NORMAL BATTLE MODE MODE Figure 4-3 Battle Mode Manual Switch 12876-W-03-01 Webasto Charging Systems, Inc. -
Page 15: Charging
The display screen will periodically update the charging data as the charge progresses. In addition, the front panel has several status LEDs which indicate the current status of the battery under charge, and whether it is scheduled for an equalization charge. Figure 4-5 Front Panel Layout 12876-W-03-01 Webasto Charging Systems, Inc. -
Page 16: Figure 4-6 Charge Complete Screens
5 0 F Figure 4-6 Charge Complete Screens Step 3: Disconnect battery cables from charger NOTE: If the operator disconnects the cables without pressing STOP, the charger will immediately stop charging and prevent any arcing. 12876-W-03-01 Webasto Charging Systems, Inc. -
Page 17: Equalization
Note: The charger EQ button may be configured to only work under certain conditions (day of week, etc.). Please review the advanced features manual for details. 12876-W-03-01 Webasto Charging Systems, Inc. -
Page 18: Viewing Charge Data Screens
Beg 10:32 02/06/07 46.5V 38%SOC Charge Time 02:32 125 Ah Returned Type Exide flooded Batt0000000K 24Cel 1000Ah Capacity SVS100N 250A Version 03.00.00.37 Time 10:35 02/06/07 Tuesday Fault Code:: Tbat Too High Figure 4-7 Charging Data Screens 12876-W-03-01 Webasto Charging Systems, Inc. -
Page 19: Fault And Warning Screens
3. Clearance Date - Shows the date and time that the fault was cleared. 4. Pre-fault State - Shows the state of the charger when the fault or warning occurred. Either “Charging battery XXXXXXXX” or “Idle”. 12876-W-03-01 Webasto Charging Systems, Inc. -
Page 20: Charge Event Log
7. Cumulative charge data screen - Shows the elapsed time and cumulative Ah returned to the battery during the selected charge event. 8. Charge Start Code – Numerical code that tells the user the reason of the start of a charge during the selected charge event. 12876-W-03-01 Webasto Charging Systems, Inc. -
Page 21: Figure 4-10 Charge Event Log Data Screens
Log entry blank Charge type Fast charge Charge time 00:03 3 Ah Returned Charge Start Code: Chg term reason Stopped by user Type Exide flooded Batt0000000K 24Cel 1000Ah Capacity 48V Figure 4-10 Charge Event Log Data Screens 12876-W-03-01 Webasto Charging Systems, Inc. -
Page 22: Data Logs, Configuration, And Advanced Programming Features
Change BMID Configuration: BMID Requires Access Code Configuration SELECT ENTER Display Application Review Application Version and Version Information SELECT Software Version ENTER CLEAR SVS100N 250 Amps Version 03.00.00.37 Figure 4-11 Top Menu Items for the Advanced Features 12876-W-03-01 Webasto Charging Systems, Inc. -
Page 23: Programming Menus
If a programming menu is entered while a vehicle is charging, the charger will prompt for termination of the charge before allowing programming to continue. The process for entering either programming mode is shown in Figure 4-12. Figure 4-12 Programming Menu Entry 12876-W-03-01 Webasto Charging Systems, Inc. -
Page 24: 4.12 Charger Configuration
The default setting is “OFF”. 9. Temperature Readout Selection allows the user to select Fahrenheit or Celsius for the temperature display. The default setting is “Fahrenheit”. 12876-W-03-01 Webasto Charging Systems, Inc. - Page 25 IVECs can select “Standard Mode”. The default setting is “Standard Mode”. This Menu is only available in the English US Language option. 17. Battery Cool Down Time allows the user to set a selectable time delay for cool-down of a hot battery. 12876-W-03-01 Webasto Charging Systems, Inc.
-
Page 26: Figure 4-13 Charger Configuration Options
SELECT Fast Charge SOC Watering System Limit Configuration SELECT SELECT Full Charge Air Circulation Setup Control SELECT SELECT Ventilation System Reduce Charge Rate Configuration Setup SELECT Temperature Readout Selection SELECT Figure 4-13 Charger Configuration Options 12876-W-03-01 Webasto Charging Systems, Inc. -
Page 27: Figure 4-14 Clear Backup Memory Menu
In the “Clear RAM Data?” screen, use the UP and DOWN arrows to choose “OK” or “Cancel”. Press ENTER while “OK” is displayed to clear the memory; Press ENTER while “CANCEL” is displayed or press “CLEAR” to cancel clearing the memory. 12876-W-03-01 Webasto Charging Systems, Inc. -
Page 28: Figure 4-15 Clear Backup Memory Menu
Press <enter> to display the Selector Mode setting. (Default is set to Disable) Press <enter> to select Enable / Disable Selector Mode setting. Use the <up> and <down> buttons to choose the selector mode setting. Press <clear> to exit 12876-W-03-01 Webasto Charging Systems, Inc. -
Page 29: Figure 4-16 External Light Configuration Menu
Light 3 On When: Conn & Stop Charging Figure 4-16 External Light Configuration Menu Note: The Selector Mode shall be mutually exclusive of the External Light function. If Selector Mode is enabled, External Light settings shall be ignored. 12876-W-03-01 Webasto Charging Systems, Inc. -
Page 30: Figure 4-17 Eq Button Action
ALWAYS ACTIVE - This is the default setting and causes the EQ button to be active at all times. WORKS ON EQ DAY ONLY - This setting causes the EQ button to function only on the day of the week programmed in the BMID for equalization. 12876-W-03-01 Webasto Charging Systems, Inc. -
Page 31: Figure 4-18 Auto Eq Menu
Limit setting. Press <enter> again and the adjustable parameter will flash. Use the <up> and <down> buttons to adjust the SOC limit. Once the desired limit is displayed, press <enter> to store the edited value and the display will stop flashing. Press <clear> to exit. 12876-W-03-01 Webasto Charging Systems, Inc. -
Page 32: Figure 4-20 Full Charge Setup Screens
Full Chrg End time ENTER 06:00 Press ENTER again to accept the selection made. SELECT Press CLEAR to retain the original ENTER Low Current Period: value 0.50 Hours SELECT Figure 4-20 Full Charge Setup Screens 12876-W-03-01 Webasto Charging Systems, Inc. -
Page 33: Figure 4-21 Reduced Charge Rate Setup Screens
Reduced Chr End time 05:00 Press ENTER again to accept the selection made. SELECT Press CLEAR to retain the original Reduced Charge Cur Lim ENTER value 020 Amps/100Amphrs SELECT Figure 4-21 Reduced Charge Rate Setup Screens 12876-W-03-01 Webasto Charging Systems, Inc. -
Page 34: Figure 4-22 Temperature Readout Selection Screens
CLEAR Ventilation System Configuration ENTER CLEAR Ventilation System CLEAR ENTER Ventilation System Verify Ventilation ENTER ON When Charging Connection CLEAR Ventilation System Verify Ventilation ENTER ON When EQing Connection CLEAR Figure 4-23 Ventilation System Setup 12876-W-03-01 Webasto Charging Systems, Inc. -
Page 35: Figure 4-24 Air Circulation Control Setup
”Water System Test” screen. From this screen press <enter> to run the water test. There will be a 30 second count down and then watering will begin. Press the <stop> button to end the test. Press the <clear> button to exit. 12876-W-03-01 Webasto Charging Systems, Inc. -
Page 36: Figure 4-25 Watering System Standard Screens
From the “Charger ID” screen Press <enter> and the Charger ID will flash. Use the <up> and <down> buttons to set the Charger ID. Press <enter> to accept the new value and press <clear> to return to higher level menus. 12876-W-03-01 Webasto Charging Systems, Inc. -
Page 37: Figure 4-26 Charger Id Screens
3. Month - Displays and edits the charger internal clock month (valid values 1-12) 4. Day - Displays and edits the charger internal clock day (valid values 1-31). 5. Year - Displays and edits the charger internal clock year (valid values 2000-2099) 12876-W-03-01 Webasto Charging Systems, Inc. -
Page 38: Figure 4-27 Date And Time Setting Menus
DOWN arrow buttons to set the CLEAR parameter to the appropriate value. ENTER Auto Charge Restart 6 Hours Press ENTER again to accept the selection made. Press CLEAR to retain the original value Figure 4-28 Charger Time Control Menu 12876-W-03-01 Webasto Charging Systems, Inc. -
Page 39: Figure 4-29 Output Format Selection Menu
00.0 Hours DOWN arrow buttons to set the parameter to the appropriate value. Press ENTER again to accept the selection made. Press CLEAR to retain the original value Figure 4-30 Battery Cool Down Time Menu 12876-W-03-01 Webasto Charging Systems, Inc. -
Page 40: Maintenance
1. Remove the screws and open the front door of the SVS100N. 2. Locate the BMID Communication Terminal Blocks and DC Output Studs. Refer to Figure 5-1. 3. Disconnect the Communication Wires from their terminal block. 12876-W-03-01 Webasto Charging Systems, Inc. -
Page 41: External Interface Specifications (Diagnostic Port)
Signal Signal port pin Description Characteristics Source Destination Serial data ground Common Common reference Serial data Charger Diagnostic transmit from tool charger Serial data receive Diagnostic Charger to charger tool Figure 5-2 Diagnostic port pinout 12876-W-03-01 Webasto Charging Systems, Inc. -
Page 42: Table 5-1 Fault Codes
Control Bd Supply Control board logic supply failure Current Too Low Powerstage not producing desired current ADC Ref Invalid A to D Converter inputs invalid HW Overvolt Overvoltage detected in hardware HW Overcurrent Overcurrent detected in hardware 12876-W-03-01 Webasto Charging Systems, Inc. -
Page 43: Technical Specifications
Current Voltage Rating Current of Phases AMPS AMPS SVS100N 50/60 16-120 10.0 Part number: 11287 12 to 48V: 250A+ 72 to 80V: 125A 12 to 40 cells Flooded or Sealed battery Up to 2500 Ah 12876-W-03-01 Webasto Charging Systems, Inc.
Need help?
Do you have a question about the PosiCharge SVS100N and is the answer not in the manual?
Questions and answers