
Related Manuals for Webasto SVS80


Summary of Contents for Webasto SVS80
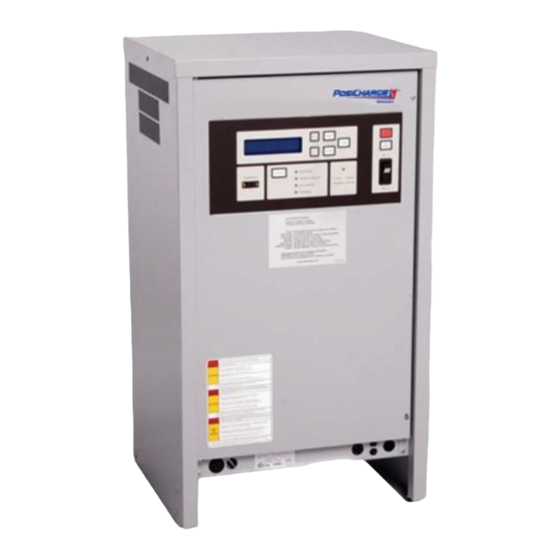
- Page 1 Installation, Operation and Maintenance Manual MHE Intelligent Fast Charging Systems SVS80 440VAC/60Hz English 20148-W-03-01...
- Page 2 Webasto Charging Systems, Inc. Disclaimer: this manual includes the latest information available at the time of printing. Webasto Charging Systems, Inc. Reserves the right to make changes to this manual and/or product without further notice.
- Page 3 SVS-80 440VAC/60Hz Installation, Operation and Maintenance IMPORTANT INFORMATION – SAVE THESE INSTRUCTIONS 20148-W-03-01 Webasto Charging Systems, Inc.
-
Page 4: Table Of Contents
5.10.7.1 Setting the Reduced Rate Charge Configuration ........... 36 5.10.8 Temperature Readout Selection ................ 37 5.10.9 Ventilation System ..................... 37 5.10.10 Air Circulation Control ..................38 5.10.11 Watering System ....................38 5.10.12 Charger ID ......................40 5.10.13 Date and Time ....................40 20148-W-03-01 Webasto Charging Systems, Inc. - Page 5 Figure 5- 22 Watering System Standard Screens ..............39 Figure 5- 23 Charger ID Screens ....................40 Figure 5- 24 Date and Time setting menus ................41 Figure 5- 25 Charger Time Control Menu .................. 41 20148-W-03-01.docx Webasto Charging Systems, Inc.
- Page 6 SVS-80 440VAC/60Hz Installation, Operation and Maintenance IMPORTANT INFORMATION – SAVE THESE INSTRUCTIONS Figure 5- 26 Output Format Selection Menu ................42 Figure 6-1 DC Output connections ..................... 43 Figure 6- 3 Diagnostic port pinout ....................45 20148-W-03-01.docx Webasto Charging Systems, Inc.
-
Page 7: Getting Started
5. If your BMID does not come pre-configured, you will need to initialize the new BMID. (Refer to BMID programming, document #06701-W-03) Once the BMID has been properly programmed, the battery pack is ready to begin charging. 20148-W-03-01.docx Webasto Charging Systems, Inc. -
Page 8: Safety Precautions - Read Before Using
Only qualified service personnel may remove the front or back panels on the SVS-80. There are no user serviceable parts inside. Refer all servicing to qualified service personnel. Opening the system or attempted installation or repair by other than qualified service personnel voids the warranty. 20148-W-03-01.docx Webasto Charging Systems, Inc. - Page 9 Follow the National Electrical Code (NEC) and local codes. NEC and local codes take precedence. If any instructions in this manual conflict with NEC or local codes, contact Webasto Charging Systems, Inc. for further information. 20148-W-03-01.docx Webasto Charging Systems, Inc.
-
Page 10: Technical Support
Electronic circuits are sensitive to damage from electrostatic Discharge. Persons servicing this equipment should be trained in proper techniques for avoiding ESD damage to electronic circuits. As a minimum, when handling circuit boards, wear an appropriate ESD wrist strap connected to the equipment chassis. 20148-W-03-01.docx Webasto Charging Systems, Inc. -
Page 11: System Description
(see the “BMID Programming Manual”). Many different sizes and types of industrial battery packs may be charged with the SVS-80. Choose the correct BMID and BMID programming for the nominal voltage and size of your pack. 20148-W-03-01.docx Webasto Charging Systems, Inc. -
Page 12: Installation
The following equipment is shipped to truck retrofit location One BMID system with related connectors One BMID thermistor kit The “BMID Programming” Manual NOTE: Additional connector sets and BMID kits may be purchased from your authorized SVS-80 Dealer. 20148-W-03-01.docx Webasto Charging Systems, Inc. -
Page 13: Wiring
The SVS-80 must be grounded in accordance with the Facilities Utility grounding method. See Table 4-1 for minimum ground wire size. 4.2.6 Hardware Manufacturer does not supply all external mounting hardware. User-supplied hardware may be needed to complete the installation. 20148-W-03-01.docx Webasto Charging Systems, Inc. -
Page 14: Physical Installation
Maintain a minimum of 18” of clearance on the sides of the unit for proper ventilation. Maintain 36” minimum clearance on Front and Back for servicing as required by local codes. Do not install unit where it will be exposed to direct sunlight. 20148-W-03-01.docx Webasto Charging Systems, Inc. -
Page 15: Figure 4- 1 Svs-80 Installation
C. PAD SIZE MINIMUM FOR A SINGLE CHARGER 69.9 cm (27.5 in) X 61 cm (24 in) CONCRETE 3000 PSI MIN D. CONCRETE PAD REQUIRED ONLY FOR WATER FLOOD CONTROL Figure 4- 1 SVS-80 Installation 20148-W-03-01.docx Webasto Charging Systems, Inc. -
Page 16: Connecting Ac (Utility) Power
CAUTION down of the unit. Incorrect power wire installation, or failure to properly ground unit may result in a severe shock hazard. DANGER Use Copper conductors only. CAUTION 20148-W-03-01.docx Webasto Charging Systems, Inc. -
Page 17: Table 4-1 Utility And Wiring Information
Max Output Power 8 kW Max Output DC Range 8-70 V Max Output DC Current 200 A Minimum Output Wire Size (DC BUS +) 1x 70 mm² Minimum Output Wire Size (DC BUS -) 1x 70 mm² 20148-W-03-01.docx Webasto Charging Systems, Inc. -
Page 18: Figure 4- 3 Ac Input Terminal Block
4. Ensure good electrical connection by tightening all the screws properly. 5. Close the front door prior to switching on the utility power. Figure 4- 3 AC Input Terminal Block Figure 4- 4 Location of Chassis Ground Connector 20148-W-03-01.docx Webasto Charging Systems, Inc. -
Page 19: Operation
Press and Hold UP arrow to select language Chargeur Prêt preference and ENTER to accept the selection Relier le Véhicule made. ENTER Ladegerät bereit Fahrzg anschließen ENTER Cargador Listo Conecte el Vehículo Figure 5- 1 Language Selection Screens 20148-W-03-01.docx Webasto Charging Systems, Inc. -
Page 20: Charging
LEDs which indicate the current status of the battery under charge, and whether it is scheduled for an equalization charge. Figure 5- 3 Front Panel Layout Table 5- 1 LED Labels and Meanings 20148-W-03-01.docx Webasto Charging Systems, Inc. -
Page 21: Figure 5- 4 Charge Complete Screens
1 0 C Figure 5- 4 Charge Complete Screens Step 3: Disconnect battery cables from charger NOTE: If the operator disconnects the cables without pressing STOP, the charger will immediately stop charging and prevent any arcing. 20148-W-03-01.docx Webasto Charging Systems, Inc. -
Page 22: Equalization
Note: The charger EQ button may be configured to only work under certain conditions (EQ day of week, etc.). Please review the advanced features manual for details. 20148-W-03-01.docx Webasto Charging Systems, Inc. -
Page 23: Viewing Charge Data Screens
During charging, this data is updated periodically. After a charge is complete or stopped by the user, this screen retains the final charge time and amp-hour values. 20148-W-03-01.docx Webasto Charging Systems, Inc. -
Page 24: Fault And Warning Screens
3. Clearance Date - Shows the date and time that the fault was cleared. Pre-fault State - Shows the state of the charger when the fault or warning occurred. Either “Charging battery XXXXXXXX” or “Idle”. 20148-W-03-01.docx Webasto Charging Systems, Inc. -
Page 25: Charge Event Log
6. Charge Type- Shows the type of charge that was in progress during the selected charge event. 7. Cumulative charge data screen - Shows the elapsed time and cumulative Ah returned to the battery during the selected charge event. 20148-W-03-01.docx Webasto Charging Systems, Inc. -
Page 26: Figure 5- 8 Charge Event Log Data Screens
Charge type Fast charge Charge time 00:03 3 Ah Returned Charge Start Code: Chg term reason Stopped by user Type Exide flooded Batt0000000K 24Cel 1000Ah Capacity 48V Figure 5- 8 Charge Event Log Data Screens 20148-W-03-01.docx Webasto Charging Systems, Inc. -
Page 27: Data Logs, Configuration, And Advanced Programming Features
(Figure 5-11). 4. BMID Data Review - Lists all of the BMID parameters along with all of the stored charge history and equalization data for the battery currently connected to the charger. 20148-W-03-01.docx Webasto Charging Systems, Inc. -
Page 28: Programming Menus
DOWN arrow keys to toggle between OK and Cancel, and press ENTER to choose the desired option or CLEAR to Cancel. If a vehicle is not connected, this step will be skipped. 5. After authorization, the selected programming mode is now active. 20148-W-03-01.docx Webasto Charging Systems, Inc. -
Page 29: Charger Configuration
15. Output Format Selection allows the user to configure the format of their output data. The customers using the IVECs system can select the “IDS Mode” while customers that are not using IVECs can select “Standard Mode”. The default setting is “Standard Mode”. 20148-W-03-01.docx Webasto Charging Systems, Inc. -
Page 30: Figure 5- 11 Charger Configuration Options
Watering System Fast Charge SOC Configuration Limit SELECT SELECT Full Charge Air Circulation Setup Control SELECT SELECT Reduce Charge Rate Ventilation System Setup Configuration SELECT SELECT Temperature Readout Selection SELECT Figure 5- 11 Charger Configuration Options 20148-W-03-01.docx Webasto Charging Systems, Inc. -
Page 31: Clear Backup Memory
Press <enter> to display the Selector Mode setting. (Default is set to Disable) Press <enter> to change Selector Mode setting. Use the <up> and <down> buttons to choose the selector mode setting followed by pressing <enter>. Press <clear> to exit 20148-W-03-01.docx Webasto Charging Systems, Inc. -
Page 32: Figure 5- 13 External Light Configuration Menu
Fault or Warning Port Available SELECT Light 3 On When: Conn & Charging CLEAR Light 3 On When: Conn & Equalizing Light 3 On When: Conn & Stop Charging Figure 5- 13 External Light Configuration Menu 20148-W-03-01.docx Webasto Charging Systems, Inc. -
Page 33: External Lights 1, 2 And 3
ALWAYS ACTIVE - This is the default setting and causes the EQ button to be active at all times. WORKS ON EQ DAY ONLY - This setting causes the EQ button to function only on the day of the week programmed in the BMID for equalization. 20148-W-03-01.docx Webasto Charging Systems, Inc. -
Page 34: Auto Eq
Use the UP and DOWN arrow buttons to set the parameter to the appropriate value. Press ENTER again to accept the selection made. Press CLEAR to retain the original value Figure 5- 16 Fast Charge SOC Limit Screens 20148-W-03-01.docx Webasto Charging Systems, Inc. -
Page 35: Setting The Fast Charge Soc Limit
Full Chrg End time ENTER 06:00 Press ENTER again to accept the selection made. SELECT Press CLEAR to retain the original Low Current Period: ENTER value 0.50 Hours SELECT Figure 5- 17 Full Charge Setup Screens 20148-W-03-01.docx Webasto Charging Systems, Inc. -
Page 36: Reduced Rate Charge Feature Configuration
Reduced Chr End time ENTER 05:00 Press ENTER again to accept the selection made. SELECT Press CLEAR to retain the original Reduced Charge Cur Lim ENTER value 020 Amps/100Amphrs SELECT Figure 5- 18 Reduced Charge Rate Setup Screens 20148-W-03-01.docx Webasto Charging Systems, Inc. -
Page 37: Temperature Readout Selection
Ventilation System Configuration ENTER CLEAR Ventilation System CLEAR ENTER Ventilation System Verify Ventilation ENTER ON When Charging Connection CLEAR Ventilation System Verify Ventilation ENTER ON When EQing Connection CLEAR Figure 5- 20 Ventilation System Setup 20148-W-03-01.docx Webasto Charging Systems, Inc. -
Page 38: Air Circulation Control
”Water System Test” screen. From this screen press <enter> to run the water test. There will be a 30 second count down and then watering will begin. Press the <stop> button to end the test. Press the <clear> button to exit. 20148-W-03-01.docx Webasto Charging Systems, Inc. -
Page 39: Figure 5- 22 Watering System Standard Screens
Water System Test ENTER New Water Sys Type: Philadelphia Low Prs Watering....CLEAR Please wait 30 sec. after 30s countdown Watering....Press STOP to end STOP Valve On Time out Figure 5- 22 Watering System Standard Screens 20148-W-03-01.docx Webasto Charging Systems, Inc. -
Page 40: Charger Id
3. Month - Displays and edits the charger internal clock month (valid values 1-12) 4. Day - Displays and edits the charger internal clock day (valid values 1-31). 5. Year - Displays and edits the charger internal clock year (valid values 2000-2099) 20148-W-03-01.docx Webasto Charging Systems, Inc. -
Page 41: Charge Time Control
DOWN arrow buttons to set the CLEAR parameter to the appropriate value. ENTER Auto Charge Restart 6 Hours Press ENTER again to accept the selection made. Press CLEAR to retain the original value Figure 5- 25 Charger Time Control Menu 20148-W-03-01.docx Webasto Charging Systems, Inc. -
Page 42: Output Format Selection Menu
Output Format display and press <enter> to save your configuration. Press <clear> to exit. Charger Configuration CLEAR Output Format Selection ENTER CLEAR Output Format is: CLEAR Standard Mode Output Format is: IDS Mode Figure 5- 26 Output Format Selection Menu 20148-W-03-01.docx Webasto Charging Systems, Inc. -
Page 43: Maintenance
Use only connectors and cable that are rated for the full continuous WARNING current rating of the unit unless the output current of the unit has been adjusted to a lower value. Minimum Bend Radii 3.5 in Figure 6-1 DC Output connections 20148-W-03-01.docx Webasto Charging Systems, Inc. - Page 44 Proper Cable management system is required to relieve stress concentration from output connector mounting hardware areas Note: 1) Do not remove connector key(s) from Connector 2) Minimum bend radii (3.5 inch) are required for output cables 20148-W-03-01.docx Webasto Charging Systems, Inc.
-
Page 45: External Interface Specifications (Diagnostic Port)
Signal Signal port pin Description Source Destination Serial data transmit Charger Diagnostic tool from charger Serial data receive to Diagnostic Charger charger tool Serial data ground Common Common reference Figure 6- 2 Diagnostic port pinout 20148-W-03-01.docx Webasto Charging Systems, Inc. -
Page 46: Table 6- 1 Fault Codes
ADC Ref Invalid A to D Converter inputs invalid Overvoltage detected in HW Overvolt hardware Overcurrent detected in HW Overcurrent hardware Connector temperature over Connector Over Temp 100 degC. Applies only to Connect Rx configured systems 20148-W-03-01.docx Webasto Charging Systems, Inc. -
Page 47: Technical Specifications
Model INPUT OUTPUT number Number Freq Voltage Current AMPS Voltage Rating Curren Phases AMPS SVS-80 50/60 8-70 12 to 36V: 200A 48V: 150A 12 to 24 cells Flooded or Sealed battery Up to 2500 Ah 20148-W-03-01.docx Webasto Charging Systems, Inc.
Need help?
Do you have a question about the SVS80 and is the answer not in the manual?
Questions and answers