
Related Manuals for Webasto SVS100


Summary of Contents for Webasto SVS100
- Page 1 Installation, Operation and Maintenance Manual GSE Intelligent Fast Charging Systems SVS100 23435-W-03-01...
- Page 2 Charging Systems, Inc. Disclaimer: this manual includes the latest information available at the time of printing. Webasto Charging Systems, Inc. Reserves the right to make changes to this manual and/or product without further notice. Changes or modifications to this product not completed by an authorized service provider could void the product warranty.
-
Page 3: Table Of Contents
SVS100 Installation, Operation and Maintenance Manual Table of Contents Getting Started ............................. 6 Safety Precautions – Read before using ....................7 Symbol usage ..........................7 Technical Support ........................... 9 List of Provided Equipment ......................9 Non-StandardTools ......................... 9 ESD Precautions ..........................9 System Description ........................... - Page 4 SVS100 Installation, Operation and Maintenance Manual 5.10.6.1 Setting the Reduced Rate Charge Configuration ............39 5.10.7 Temperature Readout Selection ..................40 5.10.8 Ventilation System ......................40 5.10.9 Air Circulation Control ....................... 41 5.10.10 Watering System ......................41 5.10.11 Charger ID ........................43 5.10.12...
- Page 5 SVS100 Installation, Operation and Maintenance Manual Figure 5- 11 Clear Backup Memory Menu ................. 34 Figure 5- 12 External Light Configuration Menu ................. 35 Figure 5- 13 EQ Button Action ....................36 Figure 5- 14 Auto EQ Menu ....................... 37 Figure 5- 15 Fast Charge SOC Limit Screens ................
-
Page 6: Getting Started
SVS100 Installation, Operation and Maintenance Manual 1 Getting Started Before you begin, take the time to familiarize yourself with the Cautions in Section 2, and read the installation instructions in Section 4 completely before you install your new GSE SVS-100. -
Page 7: Safety Precautions - Read Before Using
SVS100 Installation, Operation and Maintenance Manual Safety Precautions – Read before using The GSE SVS100 is designed with the safety of the user as the highest priority. However, installation must comply with all local codes, and the following safety precautions must be read and observed. - Page 8 Do not subject the cable or coupler to damage or stress. Do not step on the coupler cable. Do not hang from the coupler cable. Do not disassemble the GSE SVS100. Only use metal conduit above ground.
-
Page 9: Technical Support
All non-standard tools are listed in 2.4. If parts or tools are needed in addition to those listed in this manual to perform service, this service is outside the scope of this manual and Webasto should be contacted directly for further assistance. -
Page 10: System Description
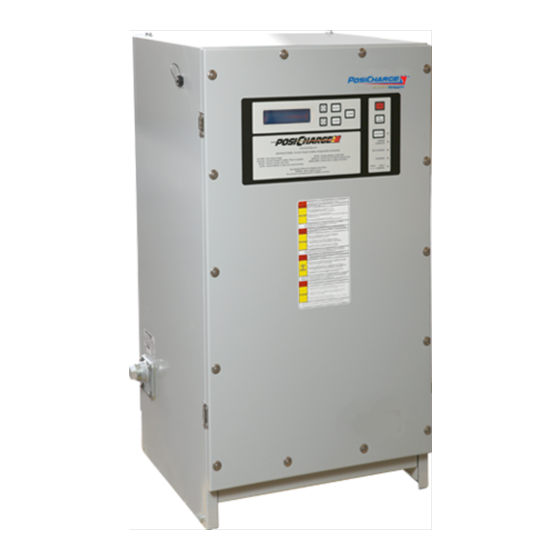
SVS100 Installation, Operation and Maintenance Manual System Description The keypad and display provide the user interface to the charger. The display constantly updates the charger and battery status, and allows access to the programming menus through the keypad. Four status LEDs indicate when a charge is in progress, at 80% complete, fully charged, or in equalization. -
Page 11: Installation
SVS100 Installation, Operation and Maintenance Manual Installation This section outlines the requirements and procedures for installing the GSE SVS-100. Read the entire section before proceeding with installation, and make sure you have read and understood the warnings in Section 2. Installation should be completed by an experienced electrician and should conform to all relevant electrical codes. -
Page 12: Cable Management System Installation
Note that concrete anchors are provided with installation kit. Wiring 4.5.1 General Guidelines Check utility configuration tag on GSE SVS100 to make sure that rated input voltage matches local utility voltage. See Table 4-1 for details. See Table 4-1 for Input/Output parameters. -
Page 13: Physical Installation
control, see Figure 4- 1 Bolt pattern for a GSE SVS100, see Figure 4- 2. Maintain a minimum of 18” of clearance on the sides of the unit for proper ventilation. Maintain 36” minimum clearance on Front and Back including top for servicing as required by ... -
Page 14: Figure 4- 1 Proper Gse Svs-100 Installation
SVS100 Installation, Operation and Maintenance Manual 36 IN MIN. 18 IN MIN. 18 IN 36 IN MIN. MIN. 36 IN MIN. 30 IN 27 IN MIN. MIN. CONCRETE BOLT ANCHOR 1/4 DIA X 5.0" LG A . 36 IN MINIMUM WORKING CLEARANCE ON FRONT AND BACK, INCLUDING TOP. -
Page 15: Converting To 600Vac Input
Figure 4- 2 Bolt Pattern for GSE SVS-100 Installation (Dimensions in Inches) Converting to 600VAC input The GSE SVS100 charger is shipped configured for 480VAC utility input. If you have 600VAC utility voltage, then the charger needs to be reconfigured to use the 600VAC inputs in three places: 4.7.1 Main Power Transformer T1... -
Page 16: Controlpower Transformer T2
SVS100 Installation, Operation and Maintenance Manual 4.7.2 ControlPower Transformer T2 Figure 4-4 Dual Voltage Systems (480/600VAC) - Location of Auxiliary Transformer Terminal Block Note: If the Charger has an ADK transformer blue input wire stays on the 480V. 4.7.3 Idle Power Supervisory Board (IPSB) -
Page 17: Connecting Ac (Utility) Power
SVS100 Installation, Operation and Maintenance Manual Connecting AC (Utility) Power Prior to connecting the unit to the utility ensure that: The available grounding connection meets all state and local codes and the National Electrical Code (NEC). The main circuit breaker or other “line disconnect” device is within sight of ... -
Page 18: Table 4-2 Output Characteristics For Gse Sv100
SVS100 Installation, Operation and Maintenance Manual Table 4-2 Output Characteristics for GSE SV100 Configuration Max Output Power (kW) Max Output DC Range (Volts) 16-120 Max Output DC Current (Amps) Minimum Output Wire Size (DC BUS +, AWG) Minimum Output Wire Size (DC BUS -, AWG) Installation 1. -
Page 19: Figure 4- 6 Location Of Ac Input Terminal Block
SVS100 Installation, Operation and Maintenance Manual Figure 4- 6 Location of AC Input Terminal Block 23435-W-03-01 Webasto Charging Systems, Inc. -
Page 20: Figure 4- 7 Location Of Chassis Ground Connector
SVS100 Installation, Operation and Maintenance Manual Figure 4- 7 Location of Chassis Ground Connector 23435-W-03-01 Webasto Charging Systems, Inc. -
Page 21: Checklist
SVS100 Installation, Operation and Maintenance Manual Checklist GSE SVS100 - INSTALLATION AND OPERATIONAL CHECKOUT SVS100 SVS100 SVS100 SVS100 Serial # Serial # Serial # Serial # _ _ _ _ _ _ _ _ _ _ _ _ _ _ _ _ _ ... -
Page 22: Operation
SVS100 Installation, Operation and Maintenance Manual 5 Operation Start Up When you first power up your Industrial PosiCharge, it will perform a lighting sequence test. The display will then show the initial Status Screen containing the model number, the software version and the output current capability. -
Page 23: Table 5- 1 Led Labels And Meanings
SVS100 Installation, Operation and Maintenance Manual Figure 5- 2 Front Panel Layout Table 5- 1 LED Labels and Meanings LED Label Color When Steady Lit When Flashing Equalizing green Battery undergoing Equalization equalization scheduled Charge green Charge Complete and stopped... -
Page 24: Equalization
SVS100 Installation, Operation and Maintenance Manual Equalization Always run a full equalization charge prior to a fast charge on any battery CAUTION pack that has had a cell replaced to ensure the pack is balanced. Proper equalization is necessary for the health of the pack. Too little equalizing may lead to sulfation and decreased capacity, whereas excessive equalizing may lead to high water loss and more maintenance. -
Page 25: Viewing Charge Data Screens
SVS100 Installation, Operation and Maintenance Manual Viewing Charge Data Screens While charging, the display screen is periodically updated with the latest charging data including voltage, current, and battery state of charge. During and after charging, the following additional data display screens may be viewed by scrolling between them using the UP and DOWN arrow keys (see Figure 5- 4). -
Page 26: Fault And Warning Screens
SVS100 Installation, Operation and Maintenance Manual Charging data. This screen displays the voltage, current, state-of-charge, and temperature of the battery. During a charge, the screen will say "Charging" and the data will be updated periodically. Charge start data. This screen shows the charge start date & time, as well as the voltage, state of charge, and temperature of the battery when charging started. -
Page 27: Charge Event Log
SVS100 Installation, Operation and Maintenance Manual Fault/Warning Log To top level screens CLEAR ENTER CLEAR Fault Event 1 12:29 02/06/07 ENTER Fault Event 2 Fault Code: 119 CLEAR 12:20 02/06/07 BMID TempSensr Fail Fault Event 3 Cleared 23:23 02/04/07 12:30 02/06/07... -
Page 28: Figure 5- 7 Charge Event Log Data Screens
SVS100 Installation, Operation and Maintenance Manual 8. Charge Start Code – Numerical code that tells the user the reason of the start of a charge during the selected charge event. 9. Charge Termination Reason - Shows the reason for terminating the charge during the charge event. -
Page 29: Data Logs, Configuration, And Advanced Programming Features
SVS100 Installation, Operation and Maintenance Manual Data Logs, Configuration, and Advanced Programming Features The Industrial PosiCharge user interface allows a trained user to configure many of the charge parameters and review recorded data. All configurations are done through menus accessible directly through the front panel display and keypad. -
Page 30: Programming Menus
SVS100 Installation, Operation and Maintenance Manual 1. Charge Event Log - Allows the user to scroll through the data from the last 250 charge events (Figure 5.6.1). 2. Fault/Warning Log - Allows the user to scroll through the last 50 fault or warning events (Figure 5.5.2). -
Page 31: Charger Configuration
2. You will be prompted enter the access code. Contact your Authorized PosiCharge dealer for the code, or call Webasto customer service at (866) 767-4242 or (626) 357-9983, ext. 211. 3. Once the access code has been accepted the screen will change and hold for five (5) seconds to indicate you have entered programming mode. - Page 32 SVS100 Installation, Operation and Maintenance Manual and connected to the charger. The watering system is always set to turn on two hours into the EQ. The default setting is “OFF” 12. Charger ID allows the user to enter the charger ID (5 character numeric). The default setting is “00000”.
-
Page 33: Figure 5- 10 Charger Configuration Optionsclear Backup Memory
SVS100 Installation, Operation and Maintenance Manual Charger Configuration CLEAR ENTER CLEAR To top level screens Enter key code now to continue Key code accepted No charge in progress ENTER OK to Stop Charger? OK to Stop Charger? CLEAR CLEAR Cancel... -
Page 34: External Light Configuration
SVS100 Installation, Operation and Maintenance Manual 5.10.1 Clear Backup Memory The clear battery backed RAM Data screens (See Figure 5- 11) allow the user to clear the battery-backed charger memory. This memory contains the charge event log, the fault event log, and the charger configuration parameters. -
Page 35: Figure 5- 12 External Light Configuration Menu
SVS100 Installation, Operation and Maintenance Manual Charger Configuration CLEAR External Light Configuration ENTER Selector Mode: Selector Mode: ENTER CLEAR CLEAR Disable Enable SELECT When Selector Mode is enabled, all remaining submenus under both External Light Port Control menus are unavailable &... -
Page 36: External Lights 1, 2 And 3
SVS100 Installation, Operation and Maintenance Manual 5.10.2.2 External Lights 1, 2 and 3 Press <enter> to display the Light 1 setting. Figure 5- 12) Press <enter> again to select from the 5 Charger states of operation. Use the <up> and <down> buttons to choose the charger state you wish to monitor. -
Page 37: Auto Eq
SVS100 Installation, Operation and Maintenance Manual 5.10.4 Auto EQ Charger Configuration CLEAR ENTER Auto EQ: Auto EQ: Press ENTER to accept the selection made. Press CLEAR to retain the original value. Figure 5- 14 Auto EQ Menu 5.10.5 Fast Charge SOC Limit The charger can be configured to allow fast charging of batteries only up to a fixed percentage. -
Page 38: Full Charge Feature Configuration
SVS100 Installation, Operation and Maintenance Manual 5.10.6 Full Charge Feature Configuration The charger can be configured to allow a window of time per day to fully charge the battery. This is useful if there is a period of time when the batteries can be left on the charger without limiting other batteries from charging (after-hours, lunch breaks, etc.) If the feature is enabled,... -
Page 39: Reduced Rate Charge Feature Configuration
SVS100 Installation, Operation and Maintenance Manual 5.10.7 Reduced Rate Charge Feature Configuration The charger can be configured to allow a window of time per day to reduce the charge rate to the connected battery. This is useful if there is a period of time when the batteries left on the charger should charge at a slower rate to prevent heating issues. -
Page 40: Temperature Readout Selection
SVS100 Installation, Operation and Maintenance Manual 5.10.8 Temperature Readout Selection Allows the user to set the battery temperature display format to either degrees Fahrenheit or Celsius. From the “Temperature Readout Selection” screen, press <enter> to display the current format. Press <enter>... -
Page 41: Air Circulation Control
SVS100 Installation, Operation and Maintenance Manual 5.10.10 Air Circulation Control NOTE: This section is only applicable if an Air Pump System has been installed and connected to the charger. The Air Circulation Control menus allow the user to set the Air Circulation control parameters. -
Page 42: Figure 5- 21 Watering System Standard Screens
SVS100 Installation, Operation and Maintenance Manual Charger Configuration Watering System CLEAR Configuration ENTER CLEAR New Water System Config Water System Config Water System Config SELECT SELECT Water System Type: New Water Sys Type: ENTER/CLEAR Custom Mode BFS HIGH PRESSURE ENTER... -
Page 43: Charger Id
SVS100 Installation, Operation and Maintenance Manual 5.10.12 Charger ID Allows the user to enter the 5-character numeric charger ID. From the “Charger ID” screen Press <enter> and the Charger ID will flash. Use the <up> and <down> buttons to set the Charger ID. Press <enter> to accept the new value and press <clear>... -
Page 44: Charge Time Control
SVS100 Installation, Operation and Maintenance Manual Set Date and Time Charger Configuration CLEAR ENTER Hours ENTER CLEAR Press ENTER and ENTER use the UP and Minutes ENTER DOWN arrow buttons to set the parameter to the ENTER appropriate value. Month... -
Page 45: Output Format Selection Menu
SVS100 Installation, Operation and Maintenance Manual 5.10.15 Output Format Selection Menu The Output Format feature allows the user to select the format of their output data. The customers using the IVECs system can select the “IDS Mode” while customers that are not using IVECs can select “Standard Mode”. -
Page 46: Maintenance
SVS100 Installation, Operation and Maintenance Manual 6 Maintenance General Maintenance Always disconnect and lockout/tagout power to the unit before performing CAUTION any maintenance. Under most conditions, the GSE SVS-100 requires very little maintenance. The air inlet must be kept free from debris. Blow out or vacuum out dust accumulation periodically. - Page 47 SVS100 Installation, Operation and Maintenance Manual To replace cables: 1. Remove the screws and open the front door of the GSE SVS-100. 2. Locate the BMID Communication Terminal Blocks and DC Output Studs. Refer to Figure 6- 1 3. Disconnect the Communication Wires from their terminal block.
-
Page 48: External Interface Specifications (Diagnostic Port)
SVS100 Installation, Operation and Maintenance Manual External Interface Specifications (Diagnostic Port) Located on the charger side panel is a 4-pin RS232 connector that will allow devices such as laptops to monitor the charger activity, data stream and charge history. As soon as the application software is up and running communications can begin. -
Page 49: Table 6- 1 Fault Codes
SVS100 Installation, Operation and Maintenance Manual Table 6- 1 Fault Codes Code Fault Messages Meaning OS System Failure Power on self test/OS failure Pilot Int. Failure Pilot interrupts stopped occurring ADC Failure A to D Converter failure Invalid Pilot Battery connected with invalid... -
Page 50: Technical Specifications
Up to 2500 Ah 9 California Energy Commission (CEC) Appliance Efficiency Compliance GSE SVS100 systems with the “circled BC” logo on the nameplate have been certified to comply with CEC Appliance Efficiency Regulations (CEC–400–2012–019–CMF for large battery chargers when used to charge 80VDC/300Ah batteries or larger.
Need help?
Do you have a question about the SVS100 and is the answer not in the manual?
Questions and answers