
Related Manuals for Innomed Medical HeartScreen 80G-L1


Summary of Contents for Innomed Medical HeartScreen 80G-L1
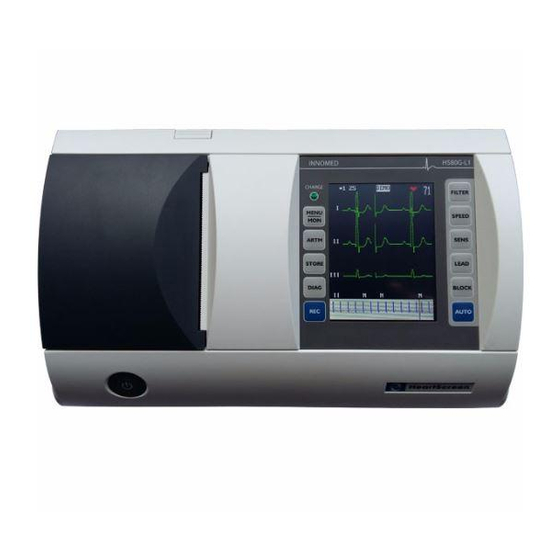
- Page 1 INNOMED MEDICAL HeartScreen 80G-L1 Simultaneous 12-channel ECG device with 80 mm, 3-channel built in printer and color LCD display Users’ manual R-7317-2-B...
-
Page 3: Table Of Contents
2.4. Device identification ....................9 2.5. Shipping and storage requirements ................. 9 2.6. Packaging ........................ 9 Maintenance of HeartScreen 80G-L1 device ............10 3.1. Regular and periodical maintenance ..............10 3.2. Cleaning, disinfection .................... 10 3.3. Battery related tasks ....................10 3.4. - Page 4 Filters ........................50 13.8. HR Warning ......................50 13.9. Other50 Computer connection .................... 51 The HeartScreen 80G-L1 accessories ..............52 Device construction ....................53 Technical data of the device .................. 54 17.1. General features ..................... 54 17.2. Mains and power supply ..................54 17.3.
- Page 5 HS80G-L1 Users’ Manual 17.9. Printing and display features ................. 57 17.10. PC connection ......................57 17.11. Mechanical (informative) data ................57 17.12. Pacemaker pulse detection ..................57 17.13. Checking the operation of electrode and amplifier ..........57 R-7317-2-B 5/61...
- Page 6 This Users’ Manual can be applied for devices with software version number 1.00 and above. Innomed Medical Inc. reserves the right for unannounced modifications regarding product improvement. Partial or complete copying of this Manual can only be made with Innomed’s written authorization.
-
Page 7: Introduction, Warnings
Only the fuse specified in the documentation can be used in the device. Device can only be used with the charger supplied by Innomed Medical Inc.! In case of completely discharged battery, the device must be charged for at least 10 minutes, safe record making is only possible afterwards. -
Page 8: Recommended Field Of Application, Handling
PC screen. Besides the date and exact time, the automatically generated identification code or the user entered patient code and patient name serve as identifiers for the records stored in the HeartScreen 80G-L1 . Archiving tasks are performed by the PC-based cardiological database management program (Innobase for Windows), which runs under Windows. -
Page 9: Areas Of Use
2.3. Areas of use HeartScreen 80G-L1 ECG device is dedicated to indoor applications, it can be used in GP practices, in hospitals, clinics and in all the fields, where monitoring of patients’ ECG signal is needed. Application of HeartScreen 80G-L1 ECG device has no any contraindications. -
Page 10: Maintenance Of Heartscreen 80G-L1 Device
HS80G-L1 Users’ Manual Maintenance of HeartScreen 80G-L1 device 3.1. Regular and periodical maintenance HeartScreen80G-L1 device requires little maintenance, number of moving parts, thus the chance for any breakdown is minimal. You should continuously make sure that the device and its accessories are clean and undamaged. -
Page 11: Environmental Protection
3.5. Classifications The classification of the HeartScreen 80G-L1 electrocardiograph, according to rule no. 10 described in point III./3.2 of Supplement no. IX. of the council directive no. 93/42/EEC, modified by the directive no. 2007/47/EC is as follows: II.a. Regarding the aspect of electromagnetic compatibility, the HeartScreen 80G-L1 electrocardiograph’s classification according to Section no. -
Page 12: Installation Instructions
‘Settings/Other’ menu, the device will automatically turn off after 5 minutes. However, battery charging still continues! The “charge” indicator is located in the top left corner of HeartScreen 80G-L1 keyboard. To preserve battery capacity it is recommended to format the battery semi-annually. -
Page 13: Printer Installation, Paper Loading
HS80G-L1 Users’ Manual 4.2. Printer installation, paper loading Before first use, or if the printer has run out of paper, a new roll of recording paper should be placed into the printer. Its steps are as follows: 1. After pushing the button indicated by the arrow, open the paper bin cover. 2. -
Page 14: Symbols, Controls And Their Functions
HS80G-L1 Users’ Manual Symbols, controls and their functions 5.1. Symbols applied on the device WiFi connection is Name of manufacturer working User manual must be Warning! Check in the user’s manual read Do not treat the product as Expiry time domestic waste high Keep it dry... -
Page 15: Device Controls And Their Functions
HS80G-L1 Users’ Manual 5.2. Device controls and their functions Key for turning the device on and off Menu and monitoring selection key Arrhythmia program selection key Storage program selection key Diagnosis program selection key Start and stop manual printing key Filters on and off key Setting of the speed of curves to be displayed and printed key Setting of the sensitivity of curves to be displayed and printed key... -
Page 16: Operation Of The Device
HS80G-L1 Users’ Manual Operation of the device HeartScreen 80G-L1 device can be operated by device keys or by touching the respective area of the screen. 6.1. How to use the touch-screen By touching the screen, we can give instructions to the device. The information referring to the instruction appears on the display (e.g. -
Page 17: Role Of The Touch-Screen During Monitoring, Freeze
HS80G-L1 Users’ Manual Touching the last two crosses is already for the checking of the calibration. If the calibration is faulty, namely the device detects as if it was not the cross that was touched on the display, it will not step forward. In such case, calibration can be re-started by touching the zone of different color. -
Page 18: Limb Electrode Placement
HS80G-L1 Users’ Manual Electrodes should not be placed over muscles, because muscle trembling causes too much noise on the record. Patient must remain still during record creation, he should not move or talk. In case you are using disposable electrodes, you should check the expiry date of the electrodes. -
Page 19: Monitoring Mode
HS80G-L1 Users’ Manual Monitoring mode After being switched on by the (1) ON/OFF key, in case of existing stored records, the device performs a memory test, which is indicated by the Checking stored records... message, the displayed Innomed logo and the version number. In case of several stored records, it might even take10-15 seconds. -
Page 20: Automatic Blocking
HS80G-L1 Users’ Manual 8.1. Automatic blocking The fault (inadequate contact) of any lead (even if not indicated on the display) is resulted in automatic blocking, which causes the termination of monitoring, and the BLOCK message appears in the middle of the display. In such case it is advisable to check the ECG electrodes. If there is too much noise, the amplifier input stage over-controls due to high input electrode potential or defibrillator use, in this case as well, automatic blocking happens, indicated by the “BLOCK”... -
Page 21: Heart Rate Indication
This function can be enabled or disabled in the menu Settings/Others/Shutdown line. If the HeartScreen 80G-L1 is operating connected to a computer, and there is data flow towards the computer (monitoring data transfer etc.), the automatic shutdown is disabled by all means. -
Page 22: Changing Sensitivity
HS80G-L1 Users’ Manual Use the ‘Settings / Other / Leads’ menu point to switch between Standard and Cabrera lead groups. In case of Cabrera the following groups are available: aVL, I, -aVR II, aVF, III V1, V2, V3 ... -
Page 23: Starting Manual Printing
HS80G-L1 Users’ Manual Blocking, together with initialization, takes 6 seconds if pre-start is enabled and 4 seconds if it is disabled. More details on pre-start can be found in the section describing manual and automatic printing. While the „ ” message appears in inverse form in the middle of the display, and the BLOCK “Wait…”... - Page 24 HS80G-L1 Users’ Manual V1, V2, V3 V4, V5, V6 Selected leads within the Spec. group If pre-start (Settings / Printing / Pre-start) is enabled, the 2-second signal section prior to the button push is printed. This makes it possible to print the already displayed. During printing you can change the followings: ...
-
Page 25: Starting Automatic Printing
HS80G-L1 Users’ Manual During printing the current heart rate appears at the bottom of the paper in every 10 seconds. (HR). Warning! The printed heart rate is the average for the 10 seconds prior to printing, so it may differ slightly from what is measured on the printout. -
Page 26: Program Selection
HS80G-L1 Users’ Manual Leads are printed in 3 groups, but obviously the record is made at the same time, of all groups. Length of records can be set in the ‘Settings/Printing/Auto length’ menu point, to 2, 4 or 6 second length. If pre-start (Settings / Printing / Pre-start) is enabled, the signal section prior to the button push is also printed. -
Page 27: Setting Of Device And Patient Data, Access To Stored Records
HS80G-L1 Users’ Manual Programs are detailed in the following section. 8.6.9. Setting of device and patient data, access to stored records We can enter the stored records, device settings and patient identification menu by pressing key. Guidelines about the handling of stored records, device settings and the patient identification code and name settings can be found in the posterior sections. -
Page 28: Running The Program
HS80G-L1 Users’ Manual KPAC4 4-lead cable, in which case the V1-V6 channels operate with shorted inputs and preparation for the measurement is also simple –place the limb clips only. Warning! When using the 10-lead cable, noisy signal similar to ECG signal is visible on channels V1-V6, which is to be disregarded, so this signal cannot be associated with any standard lead! The device automatically recognizes the type KPAC4 cable and leads V1…V6 do not appear when used. -
Page 29: Aborting The Program
HS80G-L1 Users’ Manual Now you can view the record and the related data, according to the descriptions of the Section, titled Handling of stored data, or you can return to monitoring. 9.1.3. Aborting the program Program operation can be aborted by pressing the key, or repeatedly pressing the key, but in such case no storage is made. -
Page 30: Starting The Program
HS80G-L1 Users’ Manual Analysis data: heart rate; QRS length in ms; P-Q distance in ms; Q-T distance in ms; Q-Tc distance in ms; P-wave angle in degrees; QRS angle in degrees; T-wave angle in degrees; ... -
Page 31: Running The Program
HS80G-L1 Users’ Manual 9.2.2. Running the program When starting the program, the program name appears on the display, together with a counter, indicating the time needed for the program until the end of the data acquisition. When starting the program, the device turns the mains and muscle filters off – if they were on. The baseline filter state remains unchanged. -
Page 32: Making Rhythm Analysis - The Artm Program
HS80G-L1 Users’ Manual Making rhythm analysis – the ARTM program 9.3. The arrhythmia program provides the following services After a short learning period (a few beats) the QRS complexes are classified based on rhythm and speed. These groups are as follows: Rhythmically narrow QRS (N) Rhythmically wide QRS (B) Rhythmically extra wide (W) -
Page 33: Starting The Program
HS80G-L1 Users’ Manual Regarding long beats the program does not make difference between beat widths, but indicates in all three cases that there is some change at the stimulus source (for example sinus arrhythmia or escape beat). Possible events belonging to different classes ... -
Page 34: Running The Program
HS80G-L1 Users’ Manual When using the KPAC4 type, 4-lead cable, the V1–V6 channels operate with shorted inputs, and measurement preparation is also simple, only the limb clips need to be placed. For monitored lead, select a limb lead, e.g. the II. lead. Warning! Warning! When using shorted, 10-lead cable with chest electrodes connected to the N lead, noisy signal similar to ECG signal is visible on channels V1-V6, which is to be... -
Page 35: Calculated Parameters During Arrhythmia Analysis
HS80G-L1 Users’ Manual After 5 minutes or after the QRS detector has recognized at least 40 beats, the program also prints a summary table, which contains the parameters calculated during arrhythmia analysis and the statistics based on the results. 9.3.3. Calculated parameters during arrhythmia analysis ... -
Page 36: Aborting The Program
HS80G-L1 Users’ Manual 9.3.3.1. Statistics based on the results RR duration frequency Gives the number of RR distances during the measurement, and plots the result in a duration – number graph. Extra beats frequency Gives the number and occurrence of each beat-type during the measurement, and plots the result in a time –... -
Page 37: Using The Menu System Of The Device
HS80G-L1 Users’ Manual Using the menu system of the device 10.1. Entering the menu system Press the key to enter the menu system. Now you get to the main menu. The main menu has three menu points: ’Catalog’, ’Settings’ and ’Patient ID’. By touching the colored rectangles, on the bottom of the display, indicated by letters and numbers, the pre-defined color profiles of the display can be selected. -
Page 38: Submenu Management
HS80G-L1 Users’ Manual 10.2. Submenu management Touch arrows up/down or push the buttons next to them ( ) in order to move from one menu item to another. Escape by touching ESC or by pushing the button next to it. Enter the menu by touching Enter ( ) or pushing the button next to it. -
Page 39: Changing Patient Name And Identification
HS80G-L1 Users’ Manual Catalog is displayed as follows: Displaying name or ID no. Number of records Serial number of record Patient name or ID Buttons on touchscreen Date and time of record Details of selected record Maximum 5 records can be displayed. If there are more than 5 records you can move with up/down arrows. -
Page 40: Printing All Data Belonging To The Record
HS80G-L1 Users’ Manual you can return to the catalog without deleting the record. You can use the buttons instead of DEL and ESC. 11.3. Printing all data belonging to the record Pressing the button in the Catalog main menu, all stored data of the recorder will be printed in the following order: 1. -
Page 41: Managing Ecg Record
HS80G-L1 Users’ Manual 11.4.1. Managing ECG record After selecting the stored record ( , followed by it is displayed as follows. You have the following options: to set the speed (with the button ) and sensitivity of the record (with the button ... -
Page 42: Managing Spec. Group
HS80G-L1 Users’ Manual 11.4.2. Managing Spec. group followed by ’ ’), it is displayed and managed After selecting the stored Spec. group ( as described in the previous section. The only exception is that this is 1 group, so the button is disabled. - Page 43 HS80G-L1 Users’ Manual Display shows the following data: R-7317-2-B 43/61...
-
Page 44: Managing Analysis - Diagnosis Results
HS80G-L1 Users’ Manual The rhythm curve can be printed with the ‘REC’ button in the following format: The sensitivity of the printout is the same as the one of the rhythm curve display. If he QRS detector recognizes at least 40 beats in the stored rhythm curve, the device also makes a rhythm analysis. - Page 45 HS80G-L1 Users’ Manual Figures show ECG average curves, data and diagnosis, lead selection (with the button ) in case of ECG average curves and data. You can display average curves, analysis results and diagnosis by pressing the buttons Press the button to print.
-
Page 46: Entering Identifier (Patient Code And Name)
HS80G-L1 Users’ Manual The amplitude and time parameters, and the diagnosis result printed: Entering identifier (patient code and name) After selecting Patient ID submenu in the main menu ( followed by or by pressing ) the following appears on the screen: ’. -
Page 47: Configuring The Device (Settings)
HS80G-L1 Users’ Manual If touching the keyboard icon, the following appears: On the top of the screen the Name: label can be seen, where the patient name can be entered. Under it can be found the keyboard with standard arrangement. In the bottom line you can find the aA button with which you can switch between lower case and capitals, beside can be seen the space ( symbol, which enables to enter space, next to it is the delete... -
Page 48: Spec. Lead
HS80G-L1 Users’ Manual The following figure shows a typical submenu (for Storage): The following section details the settings in the submenus. ) and the (’ ’) button to usual, use the up and down arrows select. Press ’ESC’ to return to the previous menu level. Use the previously described method to move among the menu items. -
Page 49: Storage
HS80G-L1 Users’ Manual 13.4. Storage Here, you can set the storing program (STORE) parameters: The length of the stored ECG record can be 0, 4, 6 or 8 s (4 s). (The length of the ECG, spec. group and rhythm cannot be 0 at the same time, at least one has to differ from 0). The length of the Spec. -
Page 50: Filters
HS80G-L1 Users’ Manual year, month, day month, day, year day, month, year. (Default: month, day, year) The adjustments can be saved with the ESC or the button with that returning to the previous menu level 13.7. Filters Here you can set the mains frequency for the mains filter. -
Page 51: Computer Connection
Computer connection The Innobase for Windows PC-based cardiological database management program can be purchased for the HeartScreen 80G-L1. The program is responsible for patient database management, measurement result storage, monitoring on 12 channels, measurement result display, evaluation, and size A4 printing. Use of the program can be learned from its own manual. -
Page 52: The Heartscreen 80G-L1 Accessories
HS80G-L1 Users’ Manual The HeartScreen 80G-L1 accessories The device kit can include the followings, in its full configuration: 1 pc HeartScreen 80G-L1 device 1 pc Mains charger: PSS-22U-150 or HES22-150160LF 1 pc User’s manual 1 pc... -
Page 53: Device Construction
HS80G-L1 Users’ Manual Device construction The HeartScreen 80G-L1 ’s electronics and printer unit are based on a base-plate. A designed lower and upper plastic cover ensures the device’s aesthetic appearance. The device contains the following parts: Amplifier unit with isolated input ... -
Page 54: Technical Data Of The Device
HS80G-L1 Users’ Manual Technical data of the device Classification according to 93/42/EEC directive: Applied standards: EN 601-2-25:2012 functional EN 60601-1:2006/AC:2010 safety technology EN 60601-1-2:2007 EMC EN 60068-2-6:2008 mechanical vibration EN 60068-2-29:1993 mechanical dropping 93/42/EEC medical device directive 17.1. General features 0... -
Page 55: Operating Modes
HS80G-L1 Users’ Manual 17.4. Operating modes Monitoring 3-channel ECG monitoring on the LCD from any lead, including SPEC group, plus 1 rhythm channel. Possibilities within this: Manual printing: Manual recording from any lead group on 3 channels, including SPEC group. Automatic printing: Adjustable length automatic printing from the 12 standard leads in 4 x 3 channel groups. -
Page 56: Ekg Amplifier
HS80G-L1 Users’ Manual 17.7. EKG amplifier 8 mVp Input signal range 0,05 Hz…150 Hz +0,-3 dB Frequency run Voltage measurements relative error 3 % 0,5 - 10 mV Sensitivity 2,5, 5, 10, 20 mm/mV max. 20 Vpp Noise referring to input Input impedance min. - Page 57 HS80G-L1 Users’ Manual 17.9. Printing and display features Effective recording width per channel 40 mm, overlapping allowed Printer head resolution In amplitude direction: 8 points / mm On the time axis: 8 or 16 points / mm Printing speed 5, 25, 50 mm/s Max.
- Page 58 HS80G-L1 Users’ Manual Guideline and manufacturer’s statements – electromagnetic compatibility Guideline and manufacturer’s statement – electromagnetic noise emission HeartScreen80G-L1 was manufactured for use within the electromagnetic environment stated below. Buyer or user of HeartScreen80G-L1 must ensure that the unit is operated within this environment. Noise emission test Conformity Electromagnetic environment - guideline...
- Page 59 HS80G-L1 Users’ Manual <5% U (>95% voltage drop (>95% voltage compared to U ) for drop compared to 5 s. ) for 5 s. Mains frequency 3 A/m 3 A/m Level of mains frequency (50/60 Hz) magnetic magnetic field must field comply with average IEC 61000-4-8...
- Page 60 HS80G-L1 Users’ Manual Guidelines and manufacturer’s statement – electromagnetic noise tolerance HeartScreen80G-L1 was manufactured for use within the electromagnetic environment stated below. Buyer or user of HeartScreen80G-L1 must ensure that the unit is operated within this environment. Test for disturbance IEC 60601 Conformity Electromagnetic environment -...
- Page 61 HS80G-L1 Users’ Manual Suggested defense distance between the portable and mobile RF telecommunication equipment and HeartScreen80G-L1 was designed for being operated within the electromagnetic environment HeartScreen80G-L1 where RF disturbances are under control. Buyer or user of HeartScreen80G-L1 can avoid electromagnetic disturbance between portable and mobile RF telecommunication systems (transmitters) and HeartScreen80G-L1 by defining the smallest possible defense distance depending on the maximum output of the telecommunication transmitter which can be calculated as follows: Maximum output...
Need help?
Do you have a question about the HeartScreen 80G-L1 and is the answer not in the manual?
Questions and answers