Barco DP2K SLP Series Service Manual
Hide thumbs
Also See for DP2K SLP Series:
- User and installation manual (175 pages) ,
- Safety & environmental information (13 pages)
Table of Contents
Advertisement
Quick Links
Advertisement
Table of Contents
Troubleshooting

Related Manuals for Barco DP2K SLP Series


Summary of Contents for Barco DP2K SLP Series
- Page 1 DP2K SLP Series Service Manual ENABLING BRIGHT OUTCOMES...
- Page 2 Barco NV President Kennedypark 35, 8500 Kortrijk, Belgium www.barco.com/en/support www.barco.com Barco Visual (Beijing) Electronics Co., Ltd 地址:北京市 昌平区 中关村科技园 昌平园 昌盛路 16号 www.barco.com/en/support www.barco.com...
- Page 3 Changes Barco provides this manual 'as is' without warranty of any kind, either expressed or implied, including but not limited to the implied warranties or merchantability and fitness for a particular purpose. Barco may make improvements and/or changes to the product(s) and/or the program(s) described in this publication at any time without notice.
-
Page 5: Table Of Contents
Installing a new fan onto an LDM.............................53 Replacing a Laser Drive Module ..............................56 7 Laser Phosphor Light Source ................................59 Overview........................................60 Removing the Light Source.................................61 Removal of the Controller assembly ............................62 Replacing the Laser Control Board (LCB) ..........................64 R5906848 /04 DP2K SLP Series... - Page 6 10.17 Adjusting the Fold Mirror................................133 10.18 Cleaning the Fold Mirrors................................134 10.19 Replacing the High Contrast plate............................135 10.20 Replacing the Light Sensor module (CLO)........................135 10.21 Replacement of the Light Pipe fan ............................136 R5906848 /04 DP2K SLP Series...
- Page 7 13.1 Introduction to SCC file................................152 13.2 Obtain the Serial Number of the installed Light Processor..................152 13.3 Download the LUT-SCC file from the Barco website ....................153 13.4 Upload Spatial Color Calibration file ........................... 155 13.5 Activate Spatial Color Calibration file ..........................156 14 Convergence .........................................
- Page 8 22.8 Installation of the top cover plate of the Light Processor compartment............278 22.9 Installation of the left side cover ............................279 22.10 Installation of the top cover............................... 280 22.11 Installation of the rear cover..............................281 R5906848 /04 DP2K SLP Series...
- Page 9 26.2 General cleaning procedure for optical components ....................384 26.3 Cleaning process for the optical path ..........................385 26.4 Cleaning procedures optical components........................386 26.5 Cleaning procedures non optical components......................392 A Appendix........................................... 395 Hazards ....................................... 396 Index............................................397 R5906848 /04 DP2K SLP Series...
- Page 10 R5906848 /04 DP2K SLP Series...
-
Page 11: Safety
• DP2K-10SLP, DP2K-8SLP Barco provides a guarantee relating to perfect manufacturing as part of the legally stipulated terms of guarantee. Observing the specification mentioned in this chapter is critical for projector performance. Neglecting this can result in loss of warranty. -
Page 12: Safety Instructions
BARCO service data parts list might create shock, fire, and/or other hazards. Product Safety is under review continuously and new instructions are issued whenever appropriate. For the latest information, always consult the appropriate current BARCO service literature. - Page 13 Minimize bodily motions when handling unpacked replacement ES devices (Otherwise harmless motion such as the brushing together of your clothes fabric or the lifting of your foot from a carpeted floor can generate static electricity sufficient to damage an ES device). R5906848 /04 DP2K SLP Series...
- Page 14 Safety R5906848 /04 DP2K SLP Series...
-
Page 15: General
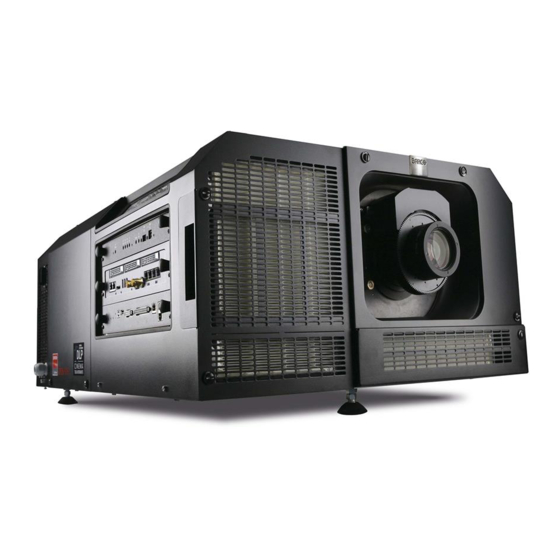
This chapter contains some general information on projector level such as the location of the main components, projector status, spare parts list, etc. Overview • Convention projector orientation • Location of the main components of the projector • Projector Status • Spare parts for DP2K-SLP Series • Projector block diagrams R5906848 /04 DP2K SLP Series... -
Page 16: Convention Projector Orientation
Image 2-1 Top of the projector. Right side of the projector (Light Source side & Left side of the projector (Light Processor side). Input side). Front of the projector. Back side of the projector. R5906848 /04 DP2K SLP Series... -
Page 17: Location Of The Main Components Of The Projector
Top cover plate Light Processor compartment Small dust filter cover plate. Side cover plate Light Processor compartment Large dust filter. Left side cover Large dust filter cover plate. ON/OFF cover Front cover (Lens Holder cover). R5906848 /04 DP2K SLP Series... - Page 18 Switch Mode Power Supply (SMPS). Fan of Light Processor compartment. Cover plate SMPS compartment. Image 2-4 Cathode Fan assembly. Mains Input Filter. Projector Status Light. 3-slot terminal block. ON/OFF switch. Cold Mirror Fan assembly. Solid State Relay. R5906848 /04 DP2K SLP Series...
- Page 19 Light Pipe Corner Block (contains Fold Mirror). Fan Green DMD. Light Pipe (contains Light Pipe Lenses and Rod Fan Blue DMD. assembly). Image 2-6 Anode Fan assembly. Fan Card Cage compartment. Fan ICP top. Fans SMPS compartment. Fan ICP board. R5906848 /04 DP2K SLP Series...
-
Page 20: Projector Status
Router and external switch fully functional • USB IN port type “B” (Virtual comport RS232) • USB OUT port type “A” (To power handheld devices [500mA MAX]. No other functionality supported) • GPIO port on the Cinema Controller R5906848 /04 DP2K SLP Series... -
Page 21: Spare Parts For Dp2K-Slp Series
Up to date information regarding spare parts, and much more, is available on Barco's web site http://www.barco.com. Go to myBarco log in and enter your credentials. Select your market and product and click on the product page on Technical support. The Spare parts tab becomes available. - Page 22 R7681224 - R7860158 PH-2 WARNING LIGHT1 J409 J700 PH-2 WARNING LIGHT2 J410 COOLER COMM uFIT-12 SAFETY INPUTS J701 J200 J408 LCB CONTROL LCB 3DSYNC XAD-8 PH-3 XAD-8 J800 LCB CONTROL Signal Backplane R7681040 - R7860036 Image 2-9 R5906848 /04 DP2K SLP Series...
- Page 23 R7681224 - R7860158 PH-2 WARNING LIGHT1 J409 J700 PH-2 WARNING LIGHT2 J410 COOLER COMM uFIT-12 SAFETY INPUTS J701 J200 J408 LCB CONTROL LCB 3DSYNC XAD-8 PH-3 XAD-8 J800 LCB CONTROL Signal Backplane R7681040 - R7860036 Image 2-10 R5906848 /04 DP2K SLP Series...
- Page 24 General R5906848 /04 DP2K SLP Series...
-
Page 25: Preventative Maintenance Actions
Contact your service partner for more information about maintenance services. Overview • 1 month maintenance actions • 3 month maintenance actions • 1 year maintenance actions • 4 year maintenance actions R5906848 /04 DP2K SLP Series... -
Page 26: Month Maintenance Actions
Verify the internal clock of the ICMP with real time clock. Correct if ICMP version 1.2.1 is required. needed. Communicator version 5.0 is required. See user guide of Communicator for detailed instructions. R5906848 /04 DP2K SLP Series... -
Page 27: Year Maintenance Actions
Check and save TI and projector log/history Note any irregularities and follow up. tics files. See user guide of the Communicator software. 10 Diagnos- Verify projector date and time and correct if See Communicator software. tics required. R5906848 /04 DP2K SLP Series... - Page 28 Compo- Maintenance action Remarks nent 11 Software Check for the latest version of Barco and TI Upgrade the projector software with the version software. See user guide of the latest version. See user guide of the Communicator software. The latest projector toolset.
-
Page 29: Year Maintenance Actions
The 4 year maintenance actions, listed below, may ONLY be performed by certified service personnel who are familiar with potential hazards of the product and all product safety checks. Maintenance action Remarks Check all fans: vibrations, noise, speed, etc. (speeds: via Replace if needed. diagnostics) R5906848 /04 DP2K SLP Series... - Page 30 Preventative maintenance actions R5906848 /04 DP2K SLP Series...
-
Page 31: Mains Input
This chapter describes the several parts of the projector mains input. Overview • Introduction DP2K-SLP Series Mains Input • Accessing the Mains Input compartment • Replacing the ON/OFF Switch • Replacing the Mains Filter • Replacing the Solid State relay R5906848 /04 DP2K SLP Series... -
Page 32: Introduction Dp2K-Slp Series Mains Input
The purpose of the solid state relay is to switch off the Light Source when the projector is in Sleep mode. Component identification Mains Input Image 4-1 ON/OFF switch. Solid state relay. Mains filter. Terminal block. R5906848 /04 DP2K SLP Series... -
Page 33: Accessing The Mains Input Compartment
Remove the rear cover of the projector. See procedure “Removal of the rear cover”, page 272. Remove the cover of the Mains Input compartment by releasing the two captive thumb screws (reference 1 Image 4-3) . Image 4-3 R5906848 /04 DP2K SLP Series... -
Page 34: Replacing The On/Off Switch
Terminal Block. Fasten the screws with a torque of 2.6Nm (1.92 lbf*ft). Install the new ON/OFF switch into the Mains Input compartment. Use a 2.5mm Allen wrench to fasten the two screws (reference 1 Image 4-5) as illustrated. R5906848 /04 DP2K SLP Series... -
Page 35: Replacing The Mains Filter
Connect the gray wire (LPS) and thin white wire (SMPS) with the upper pin of the LOAD side (reference 3 Image 4-6) of the new Mains Filter. Fasten the nut with a torque of 2.7Nm (2.0 lbf*ft). R5906848 /04 DP2K SLP Series... -
Page 36: Replacing The Solid State Relay
Image 4-7. Use a 3mm Allen wrench. Note: An insulation sheet and heat sink (reference 7 & 8 Image 4-7) fits between the Solid State relay and the projector chassis. These two parts come loose together with the Solid State relay. R5906848 /04 DP2K SLP Series... - Page 37 Connect the thin black wire with pin 4 of the Solid State relay (reference 4 Image 4-7) Close the Mains Input compartment and install the rear cover of the projector. See procedure “Accessing the Mains Input compartment”, page 33. R5906848 /04 DP2K SLP Series...
- Page 38 Mains Input R5906848 /04 DP2K SLP Series...
-
Page 39: Switch Mode Power Supply (Smps)
More in detail is explained how to replace the SMPS. Overview • Introduction DP2K-SLP Series SMPS board • Removing the SMPS board • Installing the SMPS board • Replacing the fans of the SMPS compartment R5906848 /04 DP2K SLP Series... -
Page 40: Introduction Dp2K-Slp Series Smps Board
3mm Allen wrench. How to remove the SMPS board from the projector? Remove the cover of the SMPS compartment. Use a 3mm Allen wrench to loosen the two screws (reference 1 Image 5-2) of the cover. R5906848 /04 DP2K SLP Series... - Page 41 Power out connector 1 (reference 1 Image 5-3) • Control connector (reference 3 Image 5-3) • Ground wire (reference 4 Image 5-3) • Mains input (reference 5 Image 5-3) Image 5-3 Pull the SMPS board completely out of its compartment. Image 5-4 R5906848 /04 DP2K SLP Series...
-
Page 42: Installing The Smps Board
Power out connector 2 (reference 2 Image 5-6) • Control connector (reference 3 Image 5-6) • Ground wire (reference 4 Image 5-6) • Mains input (reference 5 Image 5-6) Caution: Support the SMPS board while plugging in the wires. Image 5-6 R5906848 /04 DP2K SLP Series... -
Page 43: Replacing The Fans Of The Smps Compartment
Disconnect the wire of both SMPS fans (reference 1 & 2 Image 5-8). Image 5-8 Remove the fans from the projector chassis. Use a 2.5mm Allen wrench to loosen the screws (reference 3 Image 5-9) of the fans. R5906848 /04 DP2K SLP Series... - Page 44 Connect the wire of both fans with the projector: • The wire of the left fan with the left socket (reference 1 Image 5-8). • The wire of the right fan with the right socket (reference 2 Image 5-8). R5906848 /04 DP2K SLP Series...
-
Page 45: Laser Driver Module (Ldm)
Removing the LDM • Installing the LDM • Replacing a driver board in an LDM unit • Removing a fan from an LDM • Installing a new fan onto an LDM • Replacing a Laser Drive Module R5906848 /04 DP2K SLP Series... -
Page 46: Removing The Ldm
Disconnect all other wire units from the LDM. Remove the fixation bracket as illustrated. Use a flat screwdriver to loosen the captive screw (reference 7) of the fixation bracket. Image 6-2 Pull out the LDM from its compartment. R5906848 /04 DP2K SLP Series... -
Page 47: Installing The Ldm
How to install the LDM of the projector? Gently slide the LDM in its compartment as illustrated. Image 6-4 Install the fixation bracket as illustrated. Use a Flat screwdriver to fasten the captive screw (reference 7) of the bracket. R5906848 /04 DP2K SLP Series... -
Page 48: Replacing A Driver Board In An Ldm Unit
CAUTION: This procedure assumes the Laser Driver Module is removed from the projector chassis. This procedure follows the example of one specific driver board. This procedure is identical for every other driver board and power module in both LDM units. Required tools 2.5 mm Allen wrench R5906848 /04 DP2K SLP Series... - Page 49 Image 6-7: Removing the screws, washers and tabs from an LDM Remove the bottom plate, insulation and the fixation rails as illustrated. Image 6-8: Removing the bottom plate and rails Unplug and remove the desired driver board. R5906848 /04 DP2K SLP Series...
- Page 50 Image 6-11: Example of mounting a driver board Caution: Make sure the new Laser Driver Board is properly clicked in the board connection. Place both fixation rails back on top of the laser driver boards. R5906848 /04 DP2K SLP Series...
-
Page 51: Removing A Fan From An Ldm
How to replace a fan from an LDM Flip the Module upside down. Remove all screws, washers and tabs holding the bottom plate to the module. Use a 2.5 mm Allen wrench. Image 6-13 Remove the bottom plate. R5906848 /04 DP2K SLP Series... - Page 52 Remove the five screws, holding the fan assembly onto the module. Use a 2.5 mm Allen wrench. Image 6-15 Unplug the fan cable of the desired fan. Image 6-16 Fan 1 Fan 2 Remove the fan assembly. R5906848 /04 DP2K SLP Series...
-
Page 53: Installing A New Fan Onto An Ldm
Refer to “Removing a fan from an LDM”, page 51. Required tools Allen wrench 2.5 mm How to install a new fan onto the LDM Plug the new fan onto the snap rivets of the fan assembly as illustrated. R5906848 /04 DP2K SLP Series... - Page 54 Check if the mounting pin is set at its correct position. Image 6-20: Mounting pin Position for the Driver Module Position for the Power Module Place the fan assembly back into the LDM. Image 6-21 R5906848 /04 DP2K SLP Series...
- Page 55 Tip: There are three screws on the top plate and two screws on the back plate. Image 6-23 Flip the module and place the bottom plate back in its place. Image 6-24 Tighten all five screws back onto the top of the bottom plate. R5906848 /04 DP2K SLP Series...
-
Page 56: Replacing A Laser Drive Module
Remove all LDM boards from the old Laser Drive Module. Refer to “Replacing a driver board in an LDM unit”, page 48. Remove all screws, washers and tabs holding the bottom plate to the module. Use a 2.5 mm Allen wrench. Image 6-26 Remove the bottom plate and the fixation rails as illustrated. R5906848 /04 DP2K SLP Series... - Page 57 Laser Driver Module (LDM) Image 6-27 Install all LDM boards into the new module. Image 6-28 Place both fixation rails back on top of the Laser Driver Boards. Place the bottom plate back on the Module. Image 6-29 R5906848 /04 DP2K SLP Series...
- Page 58 Tighten all five screws back onto the top of the bottom plate. Tighten all three screws back on the front side of the Module. Caution: Make sure not to forget the two washers and rivet mounts on the outer side of the Module. Image 6-30 R5906848 /04 DP2K SLP Series...
-
Page 59: Laser Phosphor Light Source
Replacing a fan from the Light Source • Replacing the combiner of the Light Source • Replacing the phosphor wheel • Replacement of the Anode Fan • Replacement of the Cathode Fan • Replacement of the Cold Mirror fan R5906848 /04 DP2K SLP Series... -
Page 60: Overview
Light Source Fan Interconnection Board Controller Assembly Cooling Liquid reservoir Blue Laser Interconnection Board Image 7-2 Fan assembly Light Sensor Interconnection Board Phosphor Wheel Monitoring Interconnection Combiner unit Board Phosphor wheel Phosphor Wheel Interconnection Board R5906848 /04 DP2K SLP Series... -
Page 61: Removing The Light Source
Release the LCB Control cable connector (reference 5, Image 7-4), located on the Phosphor wheel side of the Light Source. Image 7-4 Loosen the set screws, holding the Light Source onto the projector frame (reference 6, Image 7-5). Use a flat screwdriver to loosen the screws. R5906848 /04 DP2K SLP Series... -
Page 62: Removal Of The Controller Assembly
Allen wrench 3 mm • Flat screwdriver 7 mm • Side cutter How to remove the Controller assembly Remove the Light Source Cover. Cut the cable ties holding the Light Source wiring to the Controller assembly. R5906848 /04 DP2K SLP Series... - Page 63 Loosen the 2 set screws, holding the Controller assembly onto the light source, but do not remove them (reference 1,Image 7-8 ). Image 7-8 Remove the Controller assembly from the light source as illustrated. Use a 3 mm Allen wrench to release the two hex screws (reference 2, Image 7-9). R5906848 /04 DP2K SLP Series...
-
Page 64: Replacing The Laser Control Board (Lcb)
Mount the Controller assembly back onto the Light Source. 7.5 Replacing the Peltier Controller How to replace the Peltier Controller? Remove the Controller assembly from the projector. See “Removal of the Controller assembly”, page 62. R5906848 /04 DP2K SLP Series... -
Page 65: Replacing The 24V Filter Board
Replace the Filter board as illustrated. Use a T10 Torx screwdriver to release the 2 Torx screws. Image 7-12 Reconnect the wiring between LCB and the filter board. Mount the Controller assembly back onto the Light Source. R5906848 /04 DP2K SLP Series... -
Page 66: Mounting Of The Controller Assembly
Tighten the 2 set screws on the topside of the Controller assembly (reference 1,Image 7-14 ). Image 7-14 Reconnect the wiring onto the Controller assembly. Place cable binders to hold the light source wiring onto the controller assembly. Do this as illustrated (reference 1, Image 7-15). R5906848 /04 DP2K SLP Series... -
Page 67: Installing The Light Source
Tip: Use tie binders or tape that can be easily removed after the light source has been mounted. Do not make it too difficult for yourself to release the cable trees after the light source has been mounted. R5906848 /04 DP2K SLP Series... - Page 68 Carefully move the tubing to the left side of the Light source, so that it's not touching either of the two mechanical brackets. Guide the Driver cables through the hole on the right, to the LDM compartment. R5906848 /04 DP2K SLP Series...
- Page 69 Tighten the set screws, holding the Light Source onto the projector frame (reference 6, Image 7-21). Use a flat screwdriver. Image 7-21 Connect the LDM driver cables (reference 3, Image 7-22) and the data driver control cable (reference 4) from the LDM. R5906848 /04 DP2K SLP Series...
-
Page 70: Replacing The Phosphor Wheel Interconnection Board
7.9 Replacing the Phosphor Wheel Interconnection Board Required tools • Phillips screwdriver PH1 • Side cutter Required parts • Phosphor Wheel Interconnection Board • Cable binders How to replace the Interconnection Board? Remove the Left side cover. R5906848 /04 DP2K SLP Series... - Page 71 Release the Phosphor Wheel Interconnection Board Cover. Use a PH1 Phillips screwdriver to loosen the 4 screws. Image 7-25 Disconnect all wiring from the Interconnection Board. Replace the Interconnection Board as illustrated. Use a PH1 Phillips screwdriver to loosen and tighten the screws. Image 7-26 R5906848 /04 DP2K SLP Series...
-
Page 72: Replacing The Phosphor Wheel Monitoring Interconnection Board
Allen wrench 2.5 mm How to replace the interconnection board? Remove the top cover and the Light Source top cover, so you can access the Fan Interconnection Board. Remove the wire units connected to the interconnection board. R5906848 /04 DP2K SLP Series... - Page 73 Replace the Fan Interconnection Board as illustrated. Use a 2.5 mm Allen wrench to loosen and tighten the screws. Image 7-29 Reconnect all wire units to the Fan Interconnection board as illustrated. Image 7-30 Caution: Pay attention to the labels on the fan wires and the fan connector numbers. R5906848 /04 DP2K SLP Series...
-
Page 74: Replacing The Light Sensor Interconnection Board
Reconnect the wire unit to the Light Sensor Interconnection board. Place the protective cover back over the interconnection board. Use a 1.5 mm Allen wrench to tighten the two hex screws. Carefully flip the light source back in its original position. R5906848 /04 DP2K SLP Series... -
Page 75: Replacing The Blue Laser Interconnection Board
Install the light source back into the projector. See “Installing the Light Source”, page 67. 7.14 Replacing a fan from the Light Source Required tools • Allen wrench 3 mm • Phillips screwdriver PH1 R5906848 /04 DP2K SLP Series... - Page 76 Remove the Fan assembly from the Light Source assembly. Use a 3 mm Allen wrench to loosen all six Allen screws. Image 7-36 Spot and remove the desired fan from the assembly as illustrated. Use a PH1 Phillips screwdriver to loosen / tighten the 4 screws. R5906848 /04 DP2K SLP Series...
-
Page 77: Replacing The Combiner Of The Light Source
CAUTION: This procedure assumes the light source is already removed from the projector. For more info, see “Removing the Light Source”, page 61. Required tools • Allen wrench 1.5 mm • Allen wrench 4 mm • Torx screwdriver T20 R5906848 /04 DP2K SLP Series... - Page 78 Four Torx screws holding the combiner to the phosphor wheel (reference 3). Use a T20 Torx screwdriver to loosen these screws. • Four hex screws holding the combiner to the rest of the light source unit (reference 4). Use a 4 mm Allen wrench to loosen these screws. Image 7-40 R5906848 /04 DP2K SLP Series...
- Page 79 Carefully move away the combiner from the rest of the light source. Image 7-42 How to install the new combiner unit Check the status of the O-rings on the light source and the phosphor wheel. Remove the protective covers from the new combiner unit. R5906848 /04 DP2K SLP Series...
- Page 80 Four Torx screws that will lock the combiner to the phosphor wheel (reference 3). Use a T20 Torx screwdriver to tighten these screws. • Four hex screws that will lock the combiner to the rest of the light source unit (reference 4). Use a 4 mm Allen wrench to tighten these screws. R5906848 /04 DP2K SLP Series...
- Page 81 Reconnect the wiring back to the Light Source interconnection board. For more info, see “Replacing the Light Sensor Interconnection Board”, page 74. Place the tubing into the protective holder of the combiner unit (reference 2). R5906848 /04 DP2K SLP Series...
-
Page 82: Replacing The Phosphor Wheel
Remove the combiner unit. See “Replacing the combiner of the Light Source”, page 77. Remove the four hex screws, holding the phosphor wheel onto the rest of the light source. Use a 4 mm Allen wrench. R5906848 /04 DP2K SLP Series... - Page 83 Laser Phosphor Light Source Image 7-48 Remove the old phosphor wheel as illustrated. Image 7-49 Carefully remove the protective covers from the new phosphor wheel. Use a T20 Torx screwdriver to loosen the screws of the protective covers. R5906848 /04 DP2K SLP Series...
-
Page 84: Replacement Of The Anode Fan
Disconnect the wire of the Anode Fan (reference 1 Image 7-51) and remove the wire from the wire clamp (reference 2 Image 7-51). Remove the Convergence flex cable from the cable clamp (reference 3 Image 7-51) which is attached to the Anode Fan assembly. Image 7-51 R5906848 /04 DP2K SLP Series... - Page 85 Install the cover of the Anode Fan. Fasten the cover with four screws (reference 6 Image 7-53). Use a 2.5mm Allen wrench. Note: Ensure that the wire of the Anode Fan fits in the cut out of the cover (reference 8 Image 7-53) R5906848 /04 DP2K SLP Series...
-
Page 86: Replacement Of The Cathode Fan
Remove the two fixation screws at the top of the Cathode Fan assembly (reference 1 Image 7-54). Use a 3 mm Allen wrench. Gently remove the Cathode Fan assembly from the projector chassis. Note: The Cathode Fan assembly is still connected with its wire. R5906848 /04 DP2K SLP Series... - Page 87 Remove the mounting plate from the Cathode Fan by loosing the four screws (reference 5 Image 7-56) as illustrated. Use a 3mm Allen wrench. Install a new Cathode Fan on the mounting plate. Fasten the Cathode Fan with four screws (reference 5 Image 7-56). Use a 3mm Allen wrench. R5906848 /04 DP2K SLP Series...
-
Page 88: Replacement Of The Cold Mirror Fan
Pull the Cold Mirror fan assembly a few centimeters out of its compartment. Disconnect the wire (reference 2 Image 7-57) of the Cold Mirror fan. Remove the Cold Mirror fan assembly completely from the projector. R5906848 /04 DP2K SLP Series... - Page 89 Connect the wire (reference 2 Image 7-57) of the Cold Mirror fan. Insert the Cold Mirror fan assembly completely in its compartment. Fixate the Cold Mirror fan assembly with two screws (reference 1 Image 7-57). Use a 2.5mm Allen wrench. R5906848 /04 DP2K SLP Series...
- Page 90 Laser Phosphor Light Source R5906848 /04 DP2K SLP Series...
-
Page 91: Liquid Cooling Circuit
Avoid contact with eyes, skin and clothing. Avoid inhalation of the noxious fumes. WARNING: Only use Barco approved cooling liquid to refill the liquid cooling circuit of the projector. Neglecting this may lead to irreversible damage of the projector. -
Page 92: Check Cooling Liquid Level & Cooling Integrity
CAUTION: Be careful when refilling the reservoir. Make sure not to spill any cooling liquid on the control boards located next to the reservoir. If any liquid is spilled, make sure to clean it up immediately by using a dry cloth. R5906848 /04 DP2K SLP Series... - Page 93 Liquid cooling circuit Required parts • Cooling liquid provided by Barco • A clean funnel • Dry cloth How to refill Remove all side covers and back cover. Loosen the set screws, holding the Light Source onto the projector frame (reference 1, Image 8-2). Use a flat screwdriver to loosen the screws.
- Page 94 Liquid cooling circuit Reinstall all covers. R5906848 /04 DP2K SLP Series...
-
Page 95: Light Processor
Integration Rod is grouped in a separate chapters in this manual, see chapter “Convergence”, page 157, and “Integration Rod”, page 139. WARNING: The procedures below may only be performed by Barco trained and qualified technicians. WARNING: Disconnect the power cord of the projector from the power net and wait a few minutes (to discharge the capacitors) prior to starting this procedure. -
Page 96: Introduction Light Processor
Troubleshooting of the Light Processor There are several potential reasons why removal or replacing of the Light Processor could be required. Nevertheless, try to avoid unnecessary removal of the Light Processor. The list below gives an overview of the R5906848 /04 DP2K SLP Series... -
Page 97: Light Processor Replacement Process
Install the new Light Processor. See detailed procedure “Installing the Light Processor”, page 100. Obtain serial number of the installed Light Processor. See included procedure on page 152. Check on the secured Barco website if a LUT-SCC file exists for the installed Light Processor serial. If file exists: •... - Page 98 Neglecting this will result in irreversible damage of the socket. Image 9-4 Disconnect the other four orange wires of the Light Processor from the Signal Distribution board (reference 5, 6, 7 & 8 of Image 9-5). R5906848 /04 DP2K SLP Series...
- Page 99 Do not keep turning the captive screws as this will dismantle the screws' captive system. Image 9-6 Gently remove the Light Processor from the projector chassis. Take the Light Processor by the black bracket (reference 10 Image 9-6) which serves as a handle. Image 9-7 R5906848 /04 DP2K SLP Series...
-
Page 100: Installing The Light Processor
Gently place the Light Processor in its place on the optical base of the projector as illustrated. Ensure that the positioning pins (reference 12 Image 9-9) of the Light Processor matches the positioning holes (reference 13 Image 9-9) in the optical base. R5906848 /04 DP2K SLP Series... - Page 101 Reference 6 - connector with two red cable tie. • Reference 7 - connector with one blue cable tie. • Reference 8 - connector with one green cable tie. • Reference 9 - connector with one red cable tie. R5906848 /04 DP2K SLP Series...
- Page 102 (reference 1 & 2 Image 9-13). Image 9-13 Place the top fan of the Light Processor in the lower position. Ensure that the four mounting pins (reference 1 Image 9-14) of the fan assembly are engaged. R5906848 /04 DP2K SLP Series...
-
Page 103: Cleaning The Prism Exit Side
This procedure requires that the lens is removed from the projector. Required tools • Compressed air. • Clean Toraysee® cloth or any micro fiber lens cleaning cloth. Required parts Lens cleaner (e.g. Carl Zeiss lens cleaner or Purasol® or any water based lens cleaner) R5906848 /04 DP2K SLP Series... -
Page 104: Replacement Of The Fan Of The Light Processor Compartment
Remove the fan assembly from the projector chassis. Note that the fan assembly is engaged with four mounting pins (reference 8 Image 9-15).. Pull the fan assembly a few mm upwards and then away from the projector chassis. R5906848 /04 DP2K SLP Series... - Page 105 Image 9-16 Remove the fan from the assembly. Use a 3mm Allen wrench to release the four screws (reference 3 Image 9- 17). While remove the fan guide the wire through the grommet (reference 4Image 9-17). R5906848 /04 DP2K SLP Series...
- Page 106 Place the wire of the fan and the wire of the temperature sensor in the cable clamp (reference 7 Image 9-16). Install the fan assembly. Ensure that the four mounting pins (reference 1 Image 9-18) of the fan assembly are engaged. R5906848 /04 DP2K SLP Series...
-
Page 107: Replacement Of The Fan Of The Red Channel
This procedure assumes that the Light Processor unit is already removed from the projector. Required tools 3mm Allen wrench. How to replace the fan of the Red channel? Disconnect the wire (reference 3 Image 9-19) of the fan from the Signal Backplane. R5906848 /04 DP2K SLP Series... - Page 108 Fixate fan and fan guard with four long screws (reference 5 Image 9-21) using a 3mm Allen wrench. Caution: Ensure that the airflow of the fan is towards the heatsink of the Red channel. R5906848 /04 DP2K SLP Series...
-
Page 109: Replacement Of The Fan Of The Green Channel
Disconnect the wire (reference 2 Image 9-22) of the fan from the Signal Backplane. Image 9-22 Remove the fan assembly from the chassis. Use a 3mm Allen wrench to loosen the three fixation screws of the assembly (reference 4 Image 9-23). Image 9-23 R5906848 /04 DP2K SLP Series... -
Page 110: Replacement Of The Fan Of The Blue Channel
Required tools 3mm Allen wrench. How to replace the fan of the Blue channel? Disconnect the wire (reference 1 Image 9-25) of the fan from the Signal Backplane. R5906848 /04 DP2K SLP Series... - Page 111 (reference 5 Image 9-27) using a 3mm Allen wrench. Caution: Ensure that the airflow of the fan is towards the heatsink of the Blue channel. R5906848 /04 DP2K SLP Series...
-
Page 112: Authorization To Clear Security Warning On The Projector
In case of a correct code entry, the color of the backlight of the Numeric keys 1 to 6 changes to green for 1 second and then back to blue. Each attempt to clear the security warning and its result (successfully or unsuccessfully) is logged inside the projector. R5906848 /04 DP2K SLP Series... -
Page 113: Light Pipe
Replacing the Fold Mirror set • Adjusting the Fold Mirror • Cleaning the Fold Mirrors • Replacing the High Contrast plate • Replacing the Light Sensor module (CLO) • Replacement of the Light Pipe fan R5906848 /04 DP2K SLP Series... -
Page 114: Introduction Light Pipe
Lens No1 (Light Pipe focus lens). Adjustable Fold Mirror. Lens No2 (diverging fixed lens). Notch Filter. Lens No3 (Light Pipe zoom lens). Integration Rod. Lens No4 (converging fixed lens). Light Pipe housing (removable). Fixed Fold Mirror. Corner Block housing. R5906848 /04 DP2K SLP Series... -
Page 115: Removal Of The Light Pipe
3mm Allen wrench. How to remove the Light Pipe from the corner block? Disconnect the wire (reference 1 Image 10-3) of the temperature sensor on the Light Pipe heatsink and release it from the cable clamp. R5906848 /04 DP2K SLP Series... - Page 116 Carefully move the Light Pipe one centimeter to the right and then move it gently away from the projector. Place the Light Pipe on a clean surface. Caution: Do not bump (accidentally) with the lens (reference 3 ) of the Light Pipe against the projector chassis. R5906848 /04 DP2K SLP Series...
-
Page 117: Removal Of The Light Pipe Cover Plate
How to remove the cover plate of the Light Pipe? Remove the 10 screws (reference 1 Image 10-6) from the cover plate. Use a 2.5mm Allen wrench. Remove the cover plate from the Light Pipe housing. R5906848 /04 DP2K SLP Series... -
Page 118: Replacing Light Pipe Lens No1 (Focus Lens)
Use a 1.5mm Allen wrench. Ensure that the concave side of the lens faces the Integration Rod (convex side towards Folding Mirror). Caution: Wear cotton gloves. Do not touch the glass with bare hands. Furthermore, ensure that the lens remains clean. R5906848 /04 DP2K SLP Series... -
Page 119: Replacing Light Pipe Lens No2
Wear cotton gloves. Do not touch the glass with bare hands. Furthermore, ensure that the lens remains clean. Note: Light Pipe lens No2 is larger than lens No1 but smaller than Lens No3 and lens No4. . Lens No2 has a diameter of 54mm. R5906848 /04 DP2K SLP Series... -
Page 120: Replacing Light Pipe Lens No3 (Zoom Lens)
Remove the adjustment screw (reference 5 Image 10-10) of the Light Pipe zoom lens. Note that a spring and plain washer (reference 4 & 3 Image 10-10) comes loose together with the adjustment screw. Use a 5.5mm nut driver. Remove the lens container from the Light Pipe (reference 5 Image 10-10). Image 10-10 R5906848 /04 DP2K SLP Series... -
Page 121: Replacing Light Pipe Lens No4
How to replace the Light Pipe lens No4? Remove the three fixation screws (reference 1 Image 10-12) of the lens container. Use a 2.5mm Allen wrench. Remove the lens container from the Corner Block as illustrated in Image 10-12. R5906848 /04 DP2K SLP Series... -
Page 122: Cleaning The Light Pipe Lenses
Only clean the Light Pipe lenses in case it is really necessary. This means in case dust is clearly visible upon the surface of the Light Pipe Lenses. This procedure requires that the Light Pipe lenses are removed from the Light Pipe. R5906848 /04 DP2K SLP Series... -
Page 123: Installing The Light Pipe Cover Plate
Place the cover plate on the Light Pipe housing. Fasten the cover plate with 10 screws (reference 1 Image 10-14) as illustrated. Use a 2.5mm Allen wrench. Image 10-14 10.10 Installing the Light Pipe Required tools 3mm Allen wrench. R5906848 /04 DP2K SLP Series... - Page 124 Do not bump (accidentally) with the lens (reference 3 Image 10-15) of the Light Pipe against the projector chassis. Image 10-15 Fixate the Light Pipe with five screws (reference 2 Image 10-16). Use a 3mm Allen wrench. Image 10-16 Connect the wire (reference 1 Image 10-17) of the temperature sensor. R5906848 /04 DP2K SLP Series...
-
Page 125: Adjusting The Light Pipe Lens No1 (Focus Lens)
This allows a more precise adjustment. Warning: The adjustment screw of the Light Pipe focus lens is hot. To prevent burn injuries use 5.5mm nut driver for moving the Integration Rod. R5906848 /04 DP2K SLP Series... -
Page 126: Adjusting The Light Pipe Lens No3 (Zoom Lens)
Adjust the position of the Light Pipe zoom lens by moving the adjustment screw (reference 5) UP or DOWN into a position where the light spot (reference 2) matches the projected outline (reference 3) of the DMDs upon R5906848 /04 DP2K SLP Series... -
Page 127: Replacing The Notch Filter
The Notch Filter has only a Green or a Red colored dot. Light Processor Matching Notch Filter → GREEN → GREEN → YELLOW → GREEN or No colored dot. → GREEN Required tools 2.5mm Allen wrench. R5906848 /04 DP2K SLP Series... -
Page 128: Adjusting The Notch Filter
Filter can slightly turn, with respect to the light path, which allows a small adjustment of the native colors. Note that, next to the pure optical color calibration by the Notch Filter there is also a software color calibration. R5906848 /04 DP2K SLP Series... - Page 129 How to adjust the Notch Filter? Release the adjustment screw (reference 2 Image 10-22) of the Notch Filter a few turns. Use for that a 2.5mm Allen wrench. Image 10-22 Start up the projector. Display an uncorrected RED test pattern. R5906848 /04 DP2K SLP Series...
-
Page 130: Cleaning The Notch Filter
If there are still fingerprints on the surface, wipe them off with lens cleaner together with a clean lens cleaning cloth. Polish again with a dry one. 10.16 Replacing the Fold Mirror set This procedure assumes that the Light Processor and the Light Pipe lens No4 are already removed. R5906848 /04 DP2K SLP Series... - Page 131 Carefully remove the Light Sensor assembly from the Corner Block. Use a 2.5mm Allen wrench to loosen the four screws (reference 2 Image 10-26). Caution: The adjustable Fold Mirror is attached on the bottom side of the assembly. R5906848 /04 DP2K SLP Series...
- Page 132 Image 10-28) and the three plain washers (reference 6 Image 10-28) on the threaded rods of the new adjustable Fold Mirror. Caution: Do not touch the surface of the Fold Mirror. Use cotton gloves to handle the Fold Mirror. Ensure that the Fold Mirror remains clean. R5906848 /04 DP2K SLP Series...
-
Page 133: Adjusting The Fold Mirror
To access all three adjustment screws of the Fold Mirror the left side projector cover and the side plate of the Light Processor compartment have to be removed. This adjustment procedure assumes that these components are already removed. Required tools 5.5 mm nut driver. R5906848 /04 DP2K SLP Series... -
Page 134: Cleaning The Fold Mirrors
Clean cotton cloth. Required parts Lens cleaner (e.g. Carl Zeiss lens cleaner or Purasol® or any waterbased lens cleaner) How to clean the Fold Mirror? Blow off dust with clean compressed air (or pressurized air cans). R5906848 /04 DP2K SLP Series... -
Page 135: Replacing The High Contrast Plate
Required tools • 5.5mm nut driver. • 5.5mm open-end wrench. How to replace the Light Sensor of the Light Pipe? Disconnect the wire unit (reference 1 Image 10-31 or Image 10-32) of the Light Sensor module. R5906848 /04 DP2K SLP Series... -
Page 136: Replacement Of The Light Pipe Fan
To access the fan of the Light Pipe in the Light Processor compartment the left side projector cover and the side cover plate of the Light Processor compartment has to be removed. This procedure assumes that these components are already removed from the projector. R5906848 /04 DP2K SLP Series... - Page 137 Ensure that the airflow of the fan is towards the Light Pipe. Image 10-35 Connect the wire of the fan. (reference 1 Image 10-34) Guide wire of the fan through the cable clamp (reference 6 Image 10-34). R5906848 /04 DP2K SLP Series...
- Page 138 Light Pipe R5906848 /04 DP2K SLP Series...
-
Page 139: Integration Rod
Introduction of the Integration Rod • Integration Rod diagnostic • Removal of the Mask plate and Rod heatsink • Replacing the Integration Rod • Installing the Mask plate and Rod heatsink • Adjusting the Integration Rod R5906848 /04 DP2K SLP Series... -
Page 140: Introduction Of The Integration Rod
To confirm that these spots are caused by a damages to the rod please diagnose the rod as described in the following procedure. Required tools • 7mm flat screw driver. R5906848 /04 DP2K SLP Series... -
Page 141: Removal Of The Mask Plate And Rod Heatsink
How to remove the Mask plate and Rod heatsink from the Light Pipe entrance? Remove the two fixation screws (reference 4 Image 11-4) of the Mask plate (reference 5 Image 11-4). Hold the Mask plate into position. Use a TX10 Torx driver. R5906848 /04 DP2K SLP Series... -
Page 142: Replacing The Integration Rod
Cotton gloves. • 2.5mm Allen wrench. • 5.5mm nut driver. How to replace the Integration Rod? Remove the Mask plate and Rod heatsink. See procedure “Removal of the Mask plate and Rod heatsink”, page 141. R5906848 /04 DP2K SLP Series... - Page 143 Insert the adjustment screw (reference 4 Image 11-5) of the Integration Rod. Place a spring and a plain washer (reference 5 & 6 Image 11-5) on the adjustment screw. Use a 5.5mm nut driver. Carefully remove the protective cap from the Integration Rod entrance. Use a 2.5mm Allen wrench. R5906848 /04 DP2K SLP Series...
-
Page 144: Installing The Mask Plate And Rod Heatsink
Mask plate with engraved number R8761960.. Fasten with two Torx countersunk head screws (reference 6 Image 11-7). Use a TX10 Torx driver. Caution: Ensure that the Mask plate does NOT touches the Rod! Tip: Wear cotton gloves to prevent fingerprints on the Mask plate. R5906848 /04 DP2K SLP Series... -
Page 145: Adjusting The Integration Rod
Set up the projector to display a full white internal pattern with a maximum contrast and a maximum dimming. Do not activate the light source yet. Make sure that you have a 5.5 mm nut driver within reach for the next steps. R5906848 /04 DP2K SLP Series... - Page 146 Fasten the adjustment screw (reference 1 Image 11-9) which you released in step 1. Use a 5.5 mm Allen wrench. It's recommended to check the Light Pipe focus (Lens No1) and the Light Pipe zoom (Lens No3) after adjusting the Integration Rod. R5906848 /04 DP2K SLP Series...
-
Page 147: Optical Alignment
Optical alignment R5906848 /04 DP2K SLP Series... -
Page 148: Aligning The Optical Path
Loosen the two wing nuts (reference 2), but do not remove them. Image 12-3 Manipulate the phosphor wheel to maximize the light output. Use a small flat screwdriver to turn the two position screws either clockwise or counterclockwise. R5906848 /04 DP2K SLP Series... - Page 149 Ignore the direction arrows underneath each screw. These arrows only reflect internal mechanics and do not reflect the impact on the projected image. R5906848 /04 DP2K SLP Series...
- Page 150 Optical alignment R5906848 /04 DP2K SLP Series...
-
Page 151: Spatial Color Calibration (Lut-Scc)
Overview • Introduction to SCC file • Obtain the Serial Number of the installed Light Processor • Download the LUT-SCC file from the Barco website • Upload Spatial Color Calibration file • Activate Spatial Color Calibration file R5906848 /04 DP2K SLP Series... -
Page 152: Introduction To Scc File
13.1 Introduction to SCC file Introduction Barco has introduced the Spatial Color Calibration (SCC) file on the DP2K-SLP Series digital projectors. The SCC file contains information to improve the color uniformity of the image. The uniformity is measured in the factory and stored in a LUT-SCC file on the ICP board. -
Page 153: Download The Lut-Scc File From The Barco Website
13.3 Download the LUT-SCC file from the Barco website A logon ID is required to access the secured zone myBarco on the Barco website https://www.barco.com. A logon ID for the secured zone can be requested at the portal page of the Barco website. Required parts Serial Number of the installed Light Processor. - Page 154 In case no LUT-SCC file is found end this procedure and use the default LUT-SCC file which is already installed on the ICP board. For 2K projectors this is “ones2K_LE”, for 4K projectors this is “ones4K_LE”. Click on the download link to download the LUT-SCC file. Image 13-5 R5906848 /04 DP2K SLP Series...
-
Page 155: Upload Spatial Color Calibration File
When replacing the ICP board the LUT-SCC file should be available if the projector files were backed up properly. If not, the LUT-SCC file can also be downloaded from the secured Barco website using the serial number of the installed Light Processor. -
Page 156: Activate Spatial Color Calibration File
In case no Light Processor serial LUT-SCC file is available use the default LUT-SCC file which is factory installed on the ICP board and thus displayed in the list. For 2K projectors this is “ones2K_ LE”, for 4K projectors this is “ones4K_LE”. R5906848 /04 DP2K SLP Series... -
Page 157: Convergence
Overview • Convergence controls • Preparing for convergence adjustment • Converging the blue pattern onto the red pattern • Converging the green pattern onto the red pattern • Closing off the Light Processor compartment R5906848 /04 DP2K SLP Series... -
Page 158: Convergence Controls
Image 14-1 Blue channel, knob number 1. Green channel, knob number 4. Blue channel, knob number 2. Green channel, knob number 5. Blue channel, knob number 3. Green channel, knob number 6. R5906848 /04 DP2K SLP Series... -
Page 159: Preparing For Convergence Adjustment
The knob should now have become tighter in the final position and therefore resists turning due to vibrations and such. Repeat the procedure if you feel the knob is still loose. 14.2 Preparing for convergence adjustment Required tools • 7mm flat screwdriver. R5906848 /04 DP2K SLP Series... - Page 160 Select the convergence test pattern, which is illustrated below (Image 14-4). Use the communicator to activate the convergence test pattern. Note: The convergence test pattern can NOT be activated via the PATTERN button on the Local Keypad. R5906848 /04 DP2K SLP Series...
-
Page 161: Converging The Blue Pattern Onto The Red Pattern
Slightly turn the blue colored control knob number 2 until the blue pattern in the lower left of the projected image converges with the red pattern. Image 14-6 Slightly turn the blue colored control knob number 3 until the blue pattern in the upper right of the projected image converges with the red pattern. R5906848 /04 DP2K SLP Series... -
Page 162: Converging The Green Pattern Onto The Red Pattern
Image 14-8 Slightly turn the green colored control knob number 5 until the green pattern in the lower left of the projected image converges with the red pattern. Image 14-9 R5906848 /04 DP2K SLP Series... -
Page 163: Closing Off The Light Processor Compartment
Place the fan on top of the Light Processor in the lower position . Ensure that the four mounting pins (reference 1 Image 14-11) of the fan assembly are engaged. Caution: Take care of the wire. R5906848 /04 DP2K SLP Series... - Page 164 Install the side cover plate of the Light Processor compartment. Install the top cover of the projector. Install the left side cover of the projector. Switch on the projector. Clear the security warning. See procedure page 112. R5906848 /04 DP2K SLP Series...
-
Page 165: Color Calibration & Light Measurements
Color calibration & Light measurements Overview • Color calibration • Light measurements for SmartCare contracts R5906848 /04 DP2K SLP Series... -
Page 166: Color Calibration
For detailed instructions on how to create a macro see Communicator's user guide. 15.1.2 White point calibration About white point calibration White point calibration should be executed to correct a color shift during dimming. The white point will be stabilized over the full dimming range. R5906848 /04 DP2K SLP Series... -
Page 167: Color Gamut Calibration
R5906848 /04 DP2K SLP Series... - Page 168 Tip: When using the wizard for white point calibration you can immediately proceed with the electronic correction. Once all xy coordinates are measured and entered proceed by saving all measured values into a MCGD file. R5906848 /04 DP2K SLP Series...
-
Page 169: Light Measurements For Smartcare Contracts
‘follows the viewer’ as people walk around. Every viewer has his or her own hospot position. In Image 15-4 reference B you see the impression of the hotspot if you have moved to the left of the center. R5906848 /04 DP2K SLP Series... - Page 170 Take a luminance reading (L2) from the reference white sheet. Calculate the Screen Reflectance Gain = (L1 x Reference Gain)/L2. Note: Reference Gain is that of the white cartridge paper (if not mentioned, take 0.9). R5906848 /04 DP2K SLP Series...
-
Page 171: Measuring The Light Output
Calibrated White value. Enter this value in the SmartCare user interface. Target luminance 2D scope While running a corrected white test pattern, measure the light output while reducing the dimming to obtain Target lumuninance 2D scope. Enter the dimming value in the SmartCare user interface. R5906848 /04 DP2K SLP Series... - Page 172 The projector must be set in 3D mode (in Communicator, select Configuration ➙ 3D ➙ Activate 3D file and select the corresponding 3D file for your 3D system). • All measurements must be done with a light meter looking through a 3D glass towards the screen. R5906848 /04 DP2K SLP Series...
-
Page 173: Lens Holder
Replacement of the motor assembly for 0.69" DC2K lenses (Type 'M') • Replacement of the motor assembly for 0.69" DC2K lenses (Type 'F') • Replacement of the motor assembly for 0.69" DC2K lenses (Type 'B') • Replacement of the Inner Dust Rubber R5906848 /04 DP2K SLP Series... -
Page 174: Introduction Lens Holder
For the DP2K-SLP Series the 0.69” DC2K lens family is used. The table below is subject to changes and was last updated on 09 January 2018. Consult https://my.barco.com for the most recent information about available lenses for the DP2K-SLP Series. R5906848 /04 DP2K SLP Series... -
Page 175: Lens Selection
2.55 (R9856523) 3.9 (R9856524) 16.3 Lens selection Which lens do I need? Go to Barco's website on www.barco.com and click on myBarco Login on. If you are not yet registered create a login and password. With the created login and password, it is possible to enter myBarco. -
Page 176: Lens Installation
Ensure that the Lens Holder stands in the On-Axis position (horizontal and vertical mid position). Place the Lens Holder in the “locked” position by moving the lens lock handle (reference 1 Image 16-8) downwards, away from the lens power supply socket (reference 2 Image 16-8). R5906848 /04 DP2K SLP Series... - Page 177 Perform a lens HOME & RETURN operation. (See user guide of the “Communicator” chapter Installation > Advanced > Lens parameters) Note: The HOME & RETURN operation enables the projector to determine the reference positions of the motorized ZOOM and FOCUS barrels of the installed lens. R5906848 /04 DP2K SLP Series...
-
Page 178: Lens Removal
All lenses have a shift range of 50% up, 50% down, 30% left, and 30% right. This range is valid for all throw ratios. Within these shift ranges the projector and lens perform excellently. Configuring the projector outside these shift ranges will result in a slight decline of image quality. R5906848 /04 DP2K SLP Series... - Page 179 The operation temperature of the lens is reached after approximately 30 minutes projection of average video. Button backlight colors • BLUE : The default backlight color of the Shift, Zoom and Focus buttons is blue which indicates that the button is enabled. R5906848 /04 DP2K SLP Series...
-
Page 180: Removal Of The Lens Holder Cover Plate
Remove the screw (reference 1 Image 16-16) at the lower left side of the cover plate (seen from the front of the projector). Use a Phillips screwdriver PH2. Remove the three screws (reference 2 Image 16-16) of the cover plate. Use a Phillips screwdriver PH2. Remove the Lens Holder cover plate from the projector. R5906848 /04 DP2K SLP Series... -
Page 181: Removal Of The Lens Holder
Disconnect the wire unit (reference 3 Image 16-17) of the vertical shift motor and the wire unit (reference 4 Image 16-17) of the horizontal shift motor. Image 16-17 Disconnect the 5 wires (reference 5, 6, 7, 8 & 9 Image 16-18) at the left side from the Lens Holder. R5906848 /04 DP2K SLP Series... - Page 182 Remove the Lens Holder from the projector chassis by loosening the 4 screws (reference 1 Image 16-20) as illustrated. Use a 5mm Allen wrench. Note that each screws contains a plain washer (reference 2 Image 16- 20). R5906848 /04 DP2K SLP Series...
-
Page 183: Installing The Lens Holder
Place the Lens Holder on the projector chassis as illustrated and fasten with the 4 screws (reference 1 Image 16-21). Use a 5mm Allen wrench. Ensure to place a plain washer onto each screws (reference 2 Image 16-21). R5906848 /04 DP2K SLP Series... - Page 184 6 in Image 16-23: Horizontal-Left end loop wires (yellow/black). • reference 7 in Image 16-23: Vertical-Top end loop wires (red/black). • reference 8 in Image 16-23: Vertical-Bottom end loop wires (brown/black). • reference 9 in Image 16-23: Horizontal-Right end loop wires (orange/black). R5906848 /04 DP2K SLP Series...
-
Page 185: Installation Of The Lens Holder Cover Plate
Fasten the cover plate with three screws (reference 2 Image 16-25). Use a Phillips screwdriver PH2. Insert the screw (reference 1 Image 16-25) at the lower left side of the cover plate (seen from the front of the projector). Use a Phillips screwdriver PH2. R5906848 /04 DP2K SLP Series... -
Page 186: Replacement Of The Vertical Shift Stepper Motor
(reference 3 Image 16-27) as illustrated. It's not necessary to disconnect the ground wire from the front plate. Just turn the front plate away for accessing the stepper motor. Caution: Do not loose the three large springs of the Scheimpflug adjustment mechanism (reference 4 Image 16-27). R5906848 /04 DP2K SLP Series... - Page 187 (reference 7 Image 16-29) and a 10mm open end wrench for the small bracket (reference 9 Image 16-29). Note: The big bracket (reference 6 Image 16-29) used with the Vertical Shift stepper motor has two cuts (reference 10 Image 16-29). R5906848 /04 DP2K SLP Series...
-
Page 188: Replacement Of The Horizontal Shift Stepper Motor
(reference 3 Image 16-30) as illustrated. It's not necessary to disconnect the ground wire from the front plate. Just turn the front plate away for accessing the stepper motor. Caution: Do not loosen the three big springs of the Scheimpflug adjustment mechanism (reference 4 Image 16-30). R5906848 /04 DP2K SLP Series... - Page 189 (reference 7 Image 16-32) and a 10mm open end wrench for the small bracket (reference 9 Image 16-32). Note: The big bracket (reference 6 Image 16-32) used with the Horizontal Shift stepper motor has one cut (reference 11 Image 16-32). R5906848 /04 DP2K SLP Series...
-
Page 190: Replacement Of The Motor Assembly For 0.69" Dc2K Lenses (Type 'M')
Two hex socket screw M3x8. How to replace the lens motor assembly? Remove the lens from the projector. Release the connector plate from the lens by loosening the two screws (reference 1 Image 16-33). Use 2.5mm Allen wrench. R5906848 /04 DP2K SLP Series... - Page 191 Note: DO NOT set the lens gears at the terminal position (Focus and Zoom lens gears, respectively) Tip: Because of limited accessibility, it is recommendable to use the 2.5mm Allen wrench with ball end. Ball end for fastening easily screws and another end for securing tightly screws. R5906848 /04 DP2K SLP Series...
-
Page 192: Replacement Of The Motor Assembly For 0.69" Dc2K Lenses (Type 'F')
Remove the top cover (reference 4 Image 16-37) of the lens motor assembly by releasing the two screws (reference 3 Image 16-37) as illustrated. Image 16-37 Detach the lens motor assembly from the projection lens by releasing the three screws (reference 5 Image 16- 38) as illustrated. R5906848 /04 DP2K SLP Series... -
Page 193: Replacement Of The Motor Assembly For 0.69" Dc2K Lenses (Type 'B')
Remove the lens from the projector. Place the lens in vertical position as illustrated and remove the cover of the motor block. Use an Allen wrench to loosen the three screws (reference 1 Image 16-40). R5906848 /04 DP2K SLP Series... - Page 194 (reference 3 Image 16-42) of the motor block. Image 16-42 Place the new motor block into position and secure with two screws (reference 3 Use an Allen wrench to fasten the two screws (reference 1 Image 16-42). R5906848 /04 DP2K SLP Series...
-
Page 195: Replacement Of The Inner Dust Rubber
13 mm nut driver or open-end wrench • 5.5 mm nut driver or box-end wrench • PH1 Phillips screwdriver Required parts • Lens holder cover • Dust rubber frame • Inner dust rubber • 6 M3 hex nuts R5906848 /04 DP2K SLP Series... - Page 196 (reference 8) over the top of the inner dust rubber and over the pins of the new cover. Then use a 5.5 mm nut driver to tighten the dust rubber and seal with the six nuts (reference 7). R5906848 /04 DP2K SLP Series...
- Page 197 (reference 3 Image 16-45). Fasten the big nuts crosswise bit by bit. Ensure that the upper two rods and the lower left rod contain a big spring (reference 4). Proceed with reinstalling the Lens Holder. See procedure “Installation of the Lens Holder cover plate”, page 185. R5906848 /04 DP2K SLP Series...
- Page 198 Lens Holder The Lens Holder has to be adjusted after installation. See chapter “Scheimpflug”, page 199. R5906848 /04 DP2K SLP Series...
-
Page 199: Scheimpflug
Overview • Scheimpflug introduction • Scheimpflug adjustment • Fixation of the Lens Holder front plate • Back Focal Length adjustment R5906848 /04 DP2K SLP Series... -
Page 200: Scheimpflug Introduction
Scheimpflug adjustment points The front plate of the Lens holder is equipped with four bronze (Scheimpflug) nuts and four set screws with lock nut. These screws and nuts are used for Scheimpflug adjustment. R5906848 /04 DP2K SLP Series... -
Page 201: Scheimpflug Adjustment
Ensure that the throw ratio of the installed lens matches the requirements of the application (projection distance and screen size). Ensure that the correct lens parameters are activated. (See user guide of the “Communicator” chapter Installation > Advanced > Lens parameters) R5906848 /04 DP2K SLP Series... - Page 202 Fully loosen the Scheimpflug nut at the lower left of the Lens Holder (reference 4 Image 17-5). Use a 13mm nut driver. Optimize the focus of the projected image in the center of the screen (F) using the motorized focus control (Local Keypad). Image 17-5 R5906848 /04 DP2K SLP Series...
- Page 203 Optimize the focus of the projected image in the center of the screen using the motorized focus control (Local Keypad). Image 17-9 Repeat from step 1 until the projected focus pattern is as sharp as possible in the center, left, right, top and bottom of the screen. R5906848 /04 DP2K SLP Series...
-
Page 204: Fixation Of The Lens Holder Front Plate
Note: Ensure that the edges of the projected test pattern remain in place on the screen. Any movement of the image will affect the Scheimpflug adjustment. Fasten the lock nut (reference 21 Image 17-11) of the three set screws. Use a 10mm nut driver. Ensure the image doesn't move. Image 17-11 R5906848 /04 DP2K SLP Series... -
Page 205: Back Focal Length Adjustment
Do not abuse the Back Focal Length adjustment of the Lens Holder. Neglecting this will result in loss of image quality because of the lens design. Cases requiring Back Focal Length adjustment normally indicate incorrect lens choice (throw ratio). R5906848 /04 DP2K SLP Series... - Page 206 Unlock and loosen the 4 set screws (reference 11 Image 17-15) of the Lens Holder by 1 centimeter. Use a 10mm nut driver for the lock nuts (reference 21 Image 17-15) and use a 3mm Allen wrench for the set screws. Image 17-15 R5906848 /04 DP2K SLP Series...
- Page 207 Scheimpflug adjustment nuts, reference 1, 2 and 3 Image 17-19, equally in or out until the center of the projected image is sharp. Attention: Keep in mind the turning direction of the Scheimpflug adjustment nuts for further adjustment instructions in this procedure. R5906848 /04 DP2K SLP Series...
- Page 208 Lens Holder front plate. CAUTION: Skip the action, in the Scheimpflug adjustment procedure, to turn the three Scheimpflug adjustment nuts until the front of the nut is equally aligned with the front of the threaded rod! R5906848 /04 DP2K SLP Series...
-
Page 209: Card Cage
Card Case and these boards. Futhermore, the board replacement and fan replacement procedures are included as well. WARNING: The procedures below may only be performed by Barco trained and qualified technicians. WARNING: Disconnect the power cord of the projector from the power net and wait a few minutes (to discharge the capacitors) prior to starting this procedure. - Page 210 Card Cage • Connecting the Card Cage wires • Installation of the Card Cage cover • Removal of the Card Cage partition plate • Replacement of the Status Light R5906848 /04 DP2K SLP Series...
-
Page 211: Introduction Card Cage
Card Cage parts 18.2 Integrated Cinema Processor (ICP) In case the projector is equipped with a Barco ICMP no ICP board is inserted. All ICP functionality is integrated in the Barco ICMP. LEDs and ports on the Integrated Cinema Processor... -
Page 212: Cinema Controller
USB spec (MAX 500mA/5V]. No other functionality supported (Future expansion). 3D INTERFACE 3D interface port can be used to connect external 3D devices to the projector. All signals necessary for 3D projection can be provided via this connector. R5906848 /04 DP2K SLP Series... - Page 213 RS-232 standard, and is functionally identical to the CCITT V.24 standard. Logical '0' is > + 3V, Logical '1' is < - 3V. The range between -3V and +3V is the transition zone. R5906848 /04 DP2K SLP Series...
-
Page 214: Replacement Of The Icp Board
All parts are included in kit R8766526K (battery cover, coin cell battery BR2330 and a pair of gloves). How to replace Put on the gloves. Remove the ICP board from the card cage. See chapter “Removing a board in the card cage”. Carefully put the ICP board on a table. R5906848 /04 DP2K SLP Series... - Page 215 Clear the projector error 5800 “ti-icp - system status = fail” with error message “ICP real time clock error” by configuring the RTC (Real Time Clock) of the ICP. See user manual Communicator chapter “Set up of the ICP clock”, choose the option UTC/GMT time calculated from current PC time as current time. R5906848 /04 DP2K SLP Series...
-
Page 216: Replacement Of The Hdsdi Board
Fasten the two screws at the front side of the HDSDI board (reference 1). Use a PH2 Phillips screwdriver. Reconnect the power cord and switch on the projector. Clear the tamper event. See procedure “Authorization to clear security warning on the projector”, page 112. R5906848 /04 DP2K SLP Series... -
Page 217: Replacement Of The Link Decryptor
WARNING: Disconnect the power cord of the projector from the power net and wait a few minutes (to discharge the capacitors) prior to starting this procedure. CAUTION: Wear a wrist band which is connected to the ground while handling the electrostatic discharge sensitive parts. Required tools PH2 Phillips screwdriver. R5906848 /04 DP2K SLP Series... -
Page 218: Battery Replacement On The Cinema Controller Board
If NOT available install the base clone package for DP2K-SLP Series and modify the Cinema Controller configuration files as desired. The base clone package can be downloaded from the secured Barco website. Make a projector clone package (full backup) after the files are modified and saved. See Communicator User Guide. - Page 219 Ensure that the both sides of the Cinema Controller are captured by the guides inside the Cinema Controller compartment, as shown in the detail of the illustration. Fasten the two screws at the front side of the Cinema Controller (reference 1). R5906848 /04 DP2K SLP Series...
-
Page 220: Replacement Of The Card Cage Small Fan
Replace the small fan as illustrated. Use a 3mm Allen wrench to loosen/fasten the four fixation screws (reference 5 Image 18-11). Caution: Ensure to place the fan guard in front of the fan and that the airflow of the fan is towards the Card Cage. R5906848 /04 DP2K SLP Series... -
Page 221: Replacement Of The Card Cage Large Fan
How to replace the large fan of the Card Cage? Disconnect the wire with the yellow cable tie (reference 4 Image 18-12) of the large fan (reference 2Image 18- 12) and release the wire from the cable clamps. Image 18-12 R5906848 /04 DP2K SLP Series... -
Page 222: Replacement Of The Icp Fan
How to replace the ICP fan of the Card Cage? Disconnect the wire with the red cable tie (reference 1 Image 18-14) from the Signal Backplane and release the wire from the cable clamp (reference 2Image 18-14). R5906848 /04 DP2K SLP Series... -
Page 223: Replacement Of The Button Module
(reference 2 Image 18-14). 18.13 Replacement of the Button Module This procedure assumes that the Card Cage cover, projector top cover, (top) fan of the Light Processor compartment, and top cover plate are already removed from the projector. R5906848 /04 DP2K SLP Series... - Page 224 Remove the 6 fixation screws (reference 3 Image 18-17) of the projector top frame. Use a 3mm Allen wrench. Caution: Take care not to drop the screws inside the projector. Image 18-17 Remove the top frame from the projector chassis. R5906848 /04 DP2K SLP Series...
- Page 225 Remove the nut (reference 3 Image 18-19) from the circular connector (reference 4 Image 18-19) . Use a 15mm nut driver. Image 18-19 Replace the Button Module. Use a 2.5mm Allen wrench to loosen/fasten the four screws (reference 5 Image 18-20). R5906848 /04 DP2K SLP Series...
- Page 226 Place the top frame in its position on top of the projector. Image 18-21 Secure the top frame with 6 fixation screws (reference 3 Image 18-22) as illustrated. Use a 3mm Allen wrench. Caution: Take care not to drop the screws inside the projector. R5906848 /04 DP2K SLP Series...
-
Page 227: Signal Backplane Replacement Process
Switch off the projector and disconnect the power cord of the projector from the power net. Wait a few minutes (to discharge the capacitors) prior to proceed with the next stage of this process. Remove the large dust filter from the projector front. See page 284. R5906848 /04 DP2K SLP Series... -
Page 228: Removal Of The Card Cage Cover
How to remove the Card Cage cover from the projector? Remove the four fixation screws (reference 1 Image 18-24) of the Card Cage cover as illustrated. Use a PH2 Phillips screwdriver. Remove the Card Cage cover from the projector. R5906848 /04 DP2K SLP Series... -
Page 229: Disconnecting The Card Cage Wires
Disconnect the wire of both SMPS fans (reference 1 & 2 Image 18-25). Image 18-25 Disconnect the 5 wires of the lens motors (reference 5, 6, 7, 8 & 9 Image 18-26) from the sockets at the left side of the Lens Holder compartment. R5906848 /04 DP2K SLP Series... - Page 230 (reference 4 Image 18-27) from the projector chassis as illustrated. Image 18-27 Disconnect all seven wires from the left side of the Signal Backplane. Image 18-28 Disconnect the CLO wire (reference 10 Image 18-29) from the Signal Backplane. R5906848 /04 DP2K SLP Series...
- Page 231 (reference 4, 5, 6, 7 and 8), • and finally the three remaining wires at the bottom (reference 9, 10 & 11). Image 18-31 R5906848 /04 DP2K SLP Series...
-
Page 232: Removal Of The Card Cage
Remove the 6 fixation screws (reference 3 Image 18-33) of the projector top frame. Use a 3mm Allen wrench. Caution: Take care not to drop the screws inside the projector. Image 18-33 Remove the top frame from the projector chassis. R5906848 /04 DP2K SLP Series... - Page 233 The right side of the Card Cage contains two cable clamps (reference 1 Image 18-36) which capture two wires from the Lens Holder. First remove the Card Cage a few centimeters and release the wires from the clamps prior to remove the Card Cage completely away from the projector chassis. R5906848 /04 DP2K SLP Series...
-
Page 234: Removal Of The Signal Backplane
Disconnect the black PE wire (reference 15 Image 18-38) from the Signal Backplane. Use a T10 Torx screw driver. Disconnect the wire plug of the front fans (reference 16 Image 18-38) from the Signal Backplane. R5906848 /04 DP2K SLP Series... - Page 235 Remove the Signal Backplane board from the sub-assembly. Use a T10 Torx driver to loosen the 14 screws (reference 6 Image 18-40) and use a 5.5 mm nut driver to loosen the plastic spacer (reference 7 Image 18-40) R5906848 /04 DP2K SLP Series...
-
Page 236: Installing The Signal Backplane
Install the SIM card (reference 8 Image 18-42) in SIM card socket on the Signal Backplane. Note: The Projector ID is stored on the SIM card. For that, the SIM card has to be reused and inserted into the new Signal Backplane. R5906848 /04 DP2K SLP Series... - Page 237 Image 18-43 Assemble the Card Cage as illustrated. Use a 2.5mm Allen wrench to fasten all twelve screws (reference 1, 2, 3, 4 and 5 Image 18-44) as indicated on the drawing. R5906848 /04 DP2K SLP Series...
- Page 238 Connect the black PE wire (reference 15 Image 18-45) with the Signal Backplane as illustrated. Use a T10 Torx screw driver. Connect the wire plug of the front fans (reference 16 Image 18-45) with the Signal Backplane. Image 18-45 R5906848 /04 DP2K SLP Series...
-
Page 239: Installing The Card Cage
Card Cage and the projector chassis, lower the Card Cage completely, ensure that both front slots (B1) are engaged. Then push the Card Cage with its rear side against the projector chassis to engage the three slots at the bottom rear (A1). R5906848 /04 DP2K SLP Series... - Page 240 Place the top frame in its position on top of the projector. Image 18-49 Secure the top frame with 6 fixation screws (reference 3 Image 18-50) as illustrated. Use a 3mm Allen wrench. Caution: Take care not to drop the screws inside the projector. R5906848 /04 DP2K SLP Series...
-
Page 241: Connecting The Card Cage Wires
Reference 8 - two pins plug with orange wires and red cable tie from temperature sensor red channel. • Reference 7 - two pins plug with orange wires and green cable tie from temperature sensor green channel. R5906848 /04 DP2K SLP Series... - Page 242 Reference 7 - connector with one blue cable tie. • Reference 8 - connector with one green cable tie. • Reference 9 - connector with one red cable tie. Image 18-53 Connect the CLO wire (reference 10 ) with the Signal Backplane. R5906848 /04 DP2K SLP Series...
- Page 243 • Reference 7 - TAIL LIGHT plug (4 pins, different colored wires) • Reference 8 - LIGHT SOURCE SWITCH plug (2 pins, red wires) • Reference 9 - TEMP OUTLET plug (2 pins, yellow wires) R5906848 /04 DP2K SLP Series...
- Page 244 Reference 6 - Horizontal-Left end loop wires (yellow/black). • Reference 7 - Vertical-Top end loop wires (red/black). • Reference 8 - Vertical-Bottom end loop wires (brown/black). • Reference 9 - Horizontal-Right end loop wires (orange/black). R5906848 /04 DP2K SLP Series...
-
Page 245: Installation Of The Card Cage Cover
How to Install the Card Cage cover onto the projector? Place the Card Cage cover in its place. Fasten the four fixation screws (reference 1 Image 18-60) of the Card Cage cover as illustrated. Use a PH2 Phillips screwdriver. R5906848 /04 DP2K SLP Series... -
Page 246: Removal Of The Card Cage Partition Plate
The Card Cage partition plate is located inside the Card Cage just under the ICP board. This partition plate needs to be removed in case the projector has to be upgraded with the Barco ICMP module. This procedure assumes that the ICP board and the board below the ICP board (IMB board, IMS board, HDSDI board or others) are removed from the Card Cage. -
Page 247: Replacement Of The Status Light
Disconnect the wire (reference 1 Image 18-62) from the Status Light board. Image 18-62 Replace the Status Light board. Use a 2.5mm Allen wrench to release/fasten the two screws (reference 2 Image 18-63). Image 18-63 R5906848 /04 DP2K SLP Series... - Page 248 Card Cage R5906848 /04 DP2K SLP Series...
-
Page 249: Software Update Via Communicator (Dc Update Companion)
Link decryptor software update • Update logging During an upgrade, certificate (code 5815) and key errors (code 5816) are possible. Restarting the projector will resolve these errors. If these errors remain after a restart, replace the ICP board. R5906848 /04 DP2K SLP Series... -
Page 250: Software Upgrade, Launch Dc Update Companion
• Integrated Cinema Processor (ICP) software • ICMP software Download the corresponding update package from Barco's web site, http://www.barco.com on your PC. Select via the product name. For Enigma link decrypor and ICP update package, unzip the package file into a new directory. - Page 251 Image 19-2: Launch DC update companion Click on Launch DC update companion (2). The DC update companion window starts up (3). Click Next to continue (4). Read the licence agreement and check accept. Click Next to continue. R5906848 /04 DP2K SLP Series...
-
Page 252: Software Upgrade, Projector, Icmp Or Touch Panel
Launch the DC Update Companion as described in “Software upgrade, launch DC update companion”, page 250. Select package type. Click on the drop down box (1) and select Barco DC Package (for projector or touch panel update) or ICMP package (for ICMP update). - Page 253 The correct file type is already filled out (4). Browse for the desired file (5), select the file and click on Open (6). The Package file name line is filled out (7). To read the release notes, click on Show Release Notes (8). R5906848 /04 DP2K SLP Series...
- Page 254 Software update via Communicator (DC update companion) Image 19-5: Barco release notes Enter the device IP address (10) or click on Browse to open a device selection window (11). Note: The IP of the connected projector is already filled out. When using the DC Update Companion as stand alone program, then this field is blank.
- Page 255 Select the desired IP address (12) and click Select (13). The selected IP address is filled out next to Device IP address. Click Next to continue. The necessary information is gathered. The current installed version is shown next to the package version (15). R5906848 /04 DP2K SLP Series...
- Page 256 Select the modules to update (19) and click Next to start the update (20). The update can take a lot of time. Make sure not to interrupt the power during the update process. At the end, an update status will be displayed. R5906848 /04 DP2K SLP Series...
-
Page 257: Icp Software Upgrade
Select package type. Click on the drop down box (1) and select ICP Package . Image 19-8 Browse the package file name. Click on Browse (2) to open the Browser window (3). Note: File has extension release. The correct file type is already filled out (4). R5906848 /04 DP2K SLP Series... - Page 258 Note: The IP of the connected projector is already filled out. When using the DC Update Companion as stand alone program, then this field is blank. Image 19-9: IP selection Click Next to continue. The necessary information is gathered. The current installed version is shown next to the package version (13). R5906848 /04 DP2K SLP Series...
-
Page 259: Link Decryptor Software Update
How to update Launch the DC Update Companion as described in “Software upgrade, launch DC update companion”, page 250. Select package type. Click on the drop down box (1) and select Enigma Link Decryptor Package . R5906848 /04 DP2K SLP Series... - Page 260 Enter the device IP address (10) or click on Browse to open a device selection window (11). Note: The IP of the connected projector is already filled out. When using the DC Update Companion as stand alone program, then this field is blank. R5906848 /04 DP2K SLP Series...
- Page 261 Software update via Communicator (DC update companion) Image 19-12: IP selection Click Next to continue. The necessary information is gathered. The current installed version is shown next to the package version (13). Image 19-13 R5906848 /04 DP2K SLP Series...
-
Page 262: Update Logging
When the software update is finished, a status window is displayed. This window is almost equal for all possible updates. Image 19-14: Status window. To show the log file, click on Show log file. All information about the update process is logged in this log file. R5906848 /04 DP2K SLP Series... -
Page 263: Exhaust System
Exhaust system R5906848 /04 DP2K SLP Series... -
Page 264: Replacement Of The Rear Exhaust
Remove the top cover of the projector. Replace the rear exhaust as illustrated. Use a 3 mm Allen wrench to release or tighten the four screws (reference 2 Image 20-1). Image 20-1 Install the top cover of the projector. R5906848 /04 DP2K SLP Series... -
Page 265: Board Diagnostic Led's
Board Diagnostic LED's R5906848 /04 DP2K SLP Series... -
Page 266: Power Board Diagnostic Leds In The Ldm Module
• temperature of heatsink rectifier is high • error: red led on, 24V supply is turned off (green led off) 4 24V supply 2 ON D480 Lit up when 24V supply 2 is running (green) R5906848 /04 DP2K SLP Series... -
Page 267: Laser Driver Board Diagnostic Leds In The Ldm Module
21.2 Laser Driver Board Diagnostic LEDs in the LDM Module Status LED’s on the Laser Driver Board Laser driver boards are installed in the Laser Driver Module, at the rear of the projector. R5906848 /04 DP2K SLP Series... - Page 268 Laserbank voltage (green led on) • Rectifier voltage of laserbank 2 • error: red led on, • Drain voltage of bank 2 bank is turned off • Drain power overload of bank 2 (green led off) R5906848 /04 DP2K SLP Series...
- Page 269 Drain current overload of bank 1 3 red Leds are on when : • enable line is low (from Laser Control Board) • temperature of heatsink drain is high • temperature of heatsink rectifier is high R5906848 /04 DP2K SLP Series...
- Page 270 Board Diagnostic LED's R5906848 /04 DP2K SLP Series...
-
Page 271: Removal And Installation Of The Projector Covers
Installation of the top cover plate of the Light Processor compartment • Installation of the left side cover • Installation of the top cover • Installation of the rear cover • Installation of the Light Source cover R5906848 /04 DP2K SLP Series... -
Page 272: Removal Of The Light Source Cover
Flat screwdriver 7 mm How to remove the rear cover? Loosen the four captive screws (reference 1 Image 22-2) of the rear cover using a 7 mm flat screwdriver. Remove the rear cover from the projector. R5906848 /04 DP2K SLP Series... -
Page 273: Removal Of The Top Cover
Flat screwdriver 7 mm How to remove the top cover? Loosen the four captive screws (reference 1 Image 22-3) of the top cover using a 7 mm flat screwdriver. Remove the top cover from the projector. Image 22-3 R5906848 /04 DP2K SLP Series... -
Page 274: Removal Of The Left Side Cover
(partially) removed first. Image 22-4 Loosen the five captive screws (reference 2 Image 22-5) of the left side cover using a 7 mm flat screwdriver. Remove the left side cover from the projector. Image 22-5 R5906848 /04 DP2K SLP Series... -
Page 275: Removal Of The Top Cover Plate Of The Light Processor Compartment
Grab the top cover plate by the two handles (reference 2 Image 22-7) and slide it towards the front side (lens side) of the projector. All latches (reference 3 Image 22-7) must become free. Tilt the top cover plate as illustrated. Move the top cover plate away from the projector. R5906848 /04 DP2K SLP Series... -
Page 276: Removal Of The Side Cover Plate Of The Light Processor Compartment
Remove the screw at the top of the cover plate (reference 1 Image 22-8) and the two screws at the bottom of the cover plate (reference 2 Image 22-8). Use a 3mm Allen wrench. Remove the side cover plate left (A) then up (B) then away (C). R5906848 /04 DP2K SLP Series... -
Page 277: Installation Of The Side Cover Plate Of The Light Processor Compartment
How to install the side cover plate from the Light Processor compartment? Place the side cover plate into position as illustrated. Ensure that all 12 slots of the side cover plate are engaged (three at each side). R5906848 /04 DP2K SLP Series... -
Page 278: Installation Of The Top Cover Plate Of The Light Processor Compartment
Grip the two knobs (reference 2 Image 22-10) , slide the top cover plate to the rear side of the projector and ensure that all slots (reference 1 Image 22-10) of the top cover plate are engaged. R5906848 /04 DP2K SLP Series... -
Page 279: Installation Of The Left Side Cover
How to install the left side cover? Place the left side cover on the projector. Fasten the five captive screws (reference 1 Image 22-12) of the left side cover using a 7 mm flat screwdriver. R5906848 /04 DP2K SLP Series... -
Page 280: Installation Of The Top Cover
Flat screwdriver 7 mm How to install the top cover? Install the top cover on the projector. Fasten the four captive screws (reference 1 Image 22-14) of the top cover using a 7 mm flat screwdriver. R5906848 /04 DP2K SLP Series... -
Page 281: Installation Of The Rear Cover
Fasten the four captive screws (reference 1 Image 22-15) of the rear cover using a 7 mm flat screwdriver. Image 22-15 22.12 Installation of the Light Source cover Required tools Flat screwdriver 7 mm How to install the Light Source cover? Install the Light Source cover on the projector. R5906848 /04 DP2K SLP Series... - Page 282 Removal and installation of the projector covers Fasten the four captive screws (reference 1 Image 22-16) of the Light Source cover using a 7 mm flat screwdriver. Image 22-16 R5906848 /04 DP2K SLP Series...
-
Page 283: Dust Filters
This chapter describes how to check, clean, and replace the dust filters of the projector. Overview • Check the large dust filter • Check the small dust filter • Vacuum cleaning of the dust filters • Washing and drying the dust filters R5906848 /04 DP2K SLP Series... -
Page 284: Check The Large Dust Filter
Image 23-2) of the dust filter are engaged. Caution: UNDER NO CIRCUMSTANCES SHOULD WET FILTERS BE INSTALLED BACK INTO THE PROJECTOR. THIS CAN HAVE SERIOUS SAFETY CONSEQUENCES AS WELL AS JEOPARDIZE THE INTERNAL OPTICS OF THE SYSTEM. R5906848 /04 DP2K SLP Series... -
Page 285: Check The Small Dust Filter
Remove the dust filter assembly from the projector by pivoting the assembly away from the projector as illustrated. Note that the other side of the assembly contains a mounting lip (reference 2 Image 23-3) which is engaged in the projector chassis. R5906848 /04 DP2K SLP Series... - Page 286 Attach a clean dust filter to the cover plate. Ensure that both latches (reference 4 Image 23-4) of the dust filter are engaged. Caution: UNDER NO CIRCUMSTANCES SHOULD WET FILTERS BE INSTALLED BACK INTO THE PROJECTOR. THIS CAN HAVE SERIOUS SAFETY CONSEQUENCES AS WELL AS JEOPARDIZE THE INTERNAL OPTICS OF THE SYSTEM. R5906848 /04 DP2K SLP Series...
-
Page 287: Vacuum Cleaning Of The Dust Filters
Tip: Lightly tap the filter on its dusty side to expel heavy dust contamination. Tip: Compressed air is also permitted to clean the filters but take care not to damage them. Caution: Do not damage the dust filter. Replace damaged dust filters immediately. R5906848 /04 DP2K SLP Series... -
Page 288: Washing And Drying The Dust Filters
23.4 Washing and drying the dust filters About filter washing and drying For environments where popcorn grease and such can contaminate the filters, Barco advises the client to purchase one extra set of filters to cover drying time, as well as taking following extra precautions and instructions pertaining to filter cleaning and drying. - Page 289 THE PROJECTOR. THIS CAN HAVE SERIOUS SAFETY CONSEQUENCES AS WELL AS JEOPARDIZE THE INTERNAL OPTICS OF THE SYSTEM. CAUTION: Do not install/use damaged dust filters. Replace damaged dust filters immediately with new dust filters of the same type. See https://my.barco.com for the correct replacement part. R5906848 /04 DP2K SLP Series...
- Page 290 Dust Filters R5906848 /04 DP2K SLP Series...
-
Page 291: Maintenance Procedures
WARNING: All procedures described in this chapter may only be performed by TRAINED PROJECTIONISTS or qualified SERVICE PERSONNEL. About this chapter This chapter describes several maintenance procedures for your DP2K-SLP Series projector. Overview • Cleaning the lens • Cleaning the exterior of the projector R5906848 /04 DP2K SLP Series... -
Page 292: Cleaning The Lens
Clean the housing of the projector with a damp cloth. Stubborn stains may be removed with a cloth lightly dampened with a mild detergent solution. Pressurized air cans are not efficient if there is too much dust on the surface, the pressure is too low R5906848 /04 DP2K SLP Series... -
Page 293: Troubleshooting
Use the block diagram to help visualize this. This visualization may help in setting up a final list of troubleshooting actions and may help in ordering them in a sequential order in which they have to be executed. R5906848 /04 DP2K SLP Series... - Page 294 Troubleshooting R5906848 /04 DP2K SLP Series...
-
Page 295: Ldm
Each Laser Driver Board powers a certain amount of laser banks. Use the following table to figure out which LDM board drives which laser bank: Powered by Laser Bank LDM 1–2 LDM 1–2 LDM 1–2 LDM 1–3 LDM 1–3 LDM 1–3 LDM 1–4 LDM 1–4 LDM 1–5 R5906848 /04 DP2K SLP Series... -
Page 296: Troubleshooting Checklist Cinema Control Board (Ccb)
Card Cage and the partition plate have to be removed. See procedure “Removal of the Card Cage partition plate”, page 246. Corrupt or invalid Projector ID Contact Barco for further actions. card. R5906848 /04 DP2K SLP Series... - Page 297 Replace the fan. See service manual chapter “Replacement of the Cold Mirror fan”, page 88. Malfunction Cinema Controller Replace the Cinema Control board. See service manual chapter “Replacement of the Cinema Controller”, page 217. Image 25-5 Image 25-6 R5906848 /04 DP2K SLP Series...
- Page 298 Processor compartment. 11). Damaged wire of the fan of the Check if the wire unit of the fan is not damaged. Repair if possible, Light Processor compartment. otherwise replace with new one (reference 5 Image 25-12). R5906848 /04 DP2K SLP Series...
- Page 299 Anode Fan end of life Replace the Anode Fan. See service manual chapter “Replacement of the Anode Fan”, page 84. Malfunction Cinema Replace the Cinema Control board. See service manual chapter Controller. “Replacement of the Cinema Controller”, page 217. R5906848 /04 DP2K SLP Series...
- Page 300 Wire of the rear fan units is Remove the Light Source and Cathode fan and check if the wire unit disconnected from the Signal (reference 2 Image 25-17) is inserted in the Signal Backplane. Backplane. R5906848 /04 DP2K SLP Series...
- Page 301 Cathode Fan end of life Replace the Cathode Fan. See service manual chapter “Replacement of the Anode Fan”, page 84. Malfunction Cinema Controller Replace the Cinema Control board. See service manual chapter “Replacement of the Cinema Controller”, page 217. R5906848 /04 DP2K SLP Series...
- Page 302 (nearly) end of live. For that, it's better to replace both fans at once. Malfunction Cinema Controller Replace the Cinema Control board. See service manual chapter “Replacement of the Cinema Controller”, page 217. R5906848 /04 DP2K SLP Series...
- Page 303 (nearly) end of live. For that, it's better to replace both fans at once. Malfunction Cinema Replace the Cinema Control board. See service manual chapter Controller. “Replacement of the Cinema Controller”, page 217. Image 25-24 Image 25-25 R5906848 /04 DP2K SLP Series...
- Page 304 Replace the Card Cage large fan. See service manual chapter “Replacement of the Card Cage large fan”, page 221. Malfunction Cinema Controller Replace the Cinema Control board. See service manual chapter “Replacement of the Cinema Controller”, page 217. R5906848 /04 DP2K SLP Series...
- Page 305 Caution: after replacement of the prism sensor ensure that the wire of the prism sensor is connected with the Signal Backplane! (reference 2 of Image 25-31 and reference 5 of Image 25-32) Image 25-30 Image 25-31 R5906848 /04 DP2K SLP Series...
- Page 306 Holder front plate is not damaged. If damaged replace the socket. See service manual chapter “Lens Holder”, page 173. Malfunction Cinema Control Replace the Cinema Control board. See service manual chapter board. “Replacement of the Cinema Controller”, page 217. R5906848 /04 DP2K SLP Series...
- Page 307 Tip: perform a “Lens Homing” before creating a new lens file. Otherwise, if the lens is removed the existing lens file becomes useless. Setup all new lens files away from the maximum limitation of the lens zoom. It is possible R5906848 /04 DP2K SLP Series...
- Page 308 “Replacement of the motor assembly for 0.69" DC2K lenses (Type 'M')”, page 190. Malfunction Signal Backplane Replace the Signal Backplane. See service procedure “Card Cage”, page (bad connection). 209. Image 25-36 Image 25-37 R5906848 /04 DP2K SLP Series...
- Page 309 Lens Holder. See service manual chapter “Replacement of the Horizontal Shift stepper motor”, page 188. Malfunction Signal Backplane Replace the Signal Backplane. See service manual chapter “Card Cage”, (bad connection). page 209. R5906848 /04 DP2K SLP Series...
- Page 310 Remove the Lens Holder cover from the projector and check if the red/ switches for vertical shift. black and brown/black wires (reference 7 & 8Image 25-43) are connected with the sockets at the right side of the Lens Holder compartment. R5906848 /04 DP2K SLP Series...
- Page 311 Unblock the fan. Ensure that the fan can turn freely. The DMD fan of the Red channel is located underneath the Light Processor. See reference 13 Image 25-46. Light Processor has to be removed to access the fan. R5906848 /04 DP2K SLP Series...
- Page 312 Other fans are also not Replace the SMPS Board. See service manual chapter “Switch Mode spinning Power Supply (SMPS)”, page 39. Defect Signal Backplane Replace the Signal Backplane. See service manual chapter “Card Cage”, page 209. R5906848 /04 DP2K SLP Series...
- Page 313 Replace the SMPS Board. See service manual chapter “Switch Mode spinning. Power Supply (SMPS)”, page 39. Defect Signal Backplane Replace the Signal Backplane. See service manual chapter “Card Cage”, page 209. Image 25-49 Image 25-50 R5906848 /04 DP2K SLP Series...
- Page 314 Malfunction Cinema Control Replace the Cinema Control board. See service manual chapter board. “Replacement of the Cinema Controller”, page 217. Malfunction Signal Backplane. Replace the Signal Backplane. See service manual chapter “Card Cage”, page 209. R5906848 /04 DP2K SLP Series...
- Page 315 35°C (95°F). Malfunction air extraction Check the condition of the air extraction system. The air extraction system system. must be capable of removing minimum 4 m³/min (140 CFM) per installed DP2K-SLP Series digital projector. R5906848 /04 DP2K SLP Series...
- Page 316 “Replacement of the Cinema Controller”, page 217. Malfunction Light Processor. Replace the whole Light Processor Unit. See service manual chapter “Light Processor replacement process”, page 97. Contact Barco for further instructions to repair the malfunction Light Processor Unit. Image 25-54 Code 5293: “DMD blue - Temperature low”...
- Page 317 Clean the small dust filter or replace with new one. See service manual chapter “Check the small dust filter”, page 285. Ambient temperature too high. Check the ambient temperature at the air inlets of the projector. Make sure that the ambient temperature does not exceed 35°C (95°F). R5906848 /04 DP2K SLP Series...
- Page 318 “Replacement of the Cinema Controller”, page 217. Malfunction Light Processor. Replace the whole Light Processor Unit. See service manual chapter “Light Processor replacement process”, page 97. Contact Barco for further instructions to repair the malfunction Light Processor Unit. Image 25-57 Code 5303: “DMD green - Temperature low”...
- Page 319 Check the ambient temperature at the air inlets of the projector. Make sure that the ambient temperature does not exceed 35°C (95°F). Blocked filters. Check the projector filters. Clean filthy filters or replace with new ones. R5906848 /04 DP2K SLP Series...
- Page 320 “Replacement of the Cinema Controller”, page 217. Code 5340: “dmd red - temperature too high” (Error) This error code is probably preceded by the warning code 5341: “dmd red - temperature high”. The same troubleshooting table can be applied to. R5906848 /04 DP2K SLP Series...
- Page 321 “Replacement of the Cinema Controller”, page 217. Malfunction Light Processor. Replace the whole Light Processor Unit. See service manual chapter “Light Processor replacement process”, page 97. Contact Barco for further instructions to repair the malfunction Light Processor Unit. Image 25-60 Code 5343: “dmd red - temperature low”...
- Page 322 When disconnecting the wire unit of the temperature sensor from the Signal Backplane (reference 8 Image 25-75 the error code is changed to “dmd red - temperature sensor open”. R5906848 /04 DP2K SLP Series...
- Page 323 Power Supply (SMPS)”, page 39. Code 5365: “smps secundary heatsink - temperature sensor short” (Error) Situation Solution Malfunction SMPS board. Replace the SMPS board. See service manual chapter “Switch Mode Power Supply (SMPS)”, page 39. R5906848 /04 DP2K SLP Series...
- Page 324 Replace the ICP board. See service manual chapter “Replacement of the Error ICP board”, page 214. 1.20V Supply out of range Replace the ICP board. See service manual chapter “Replacement of the ICP board”, page 214. R5906848 /04 DP2K SLP Series...
- Page 325 If problem remains, replace the ICP board. See “Replacement of the ICP board”, page 214 Satellite Hardware Mismatch Replace the Light Processor assembly. See service manual chapter “Light Processor replacement process”, page 97. Other possible causes of this error code: R5906848 /04 DP2K SLP Series...
- Page 326 Replace DCI security switches of the Light Processor compartment (reference 1 Image 25-63 & 2 Image 25-64) Malfunction Signal Backplane If switch replacement cures nothing then replace Signal Backplane. See service manual chapter “Card Cage”, page 209. Image 25-63 Image 25-64 R5906848 /04 DP2K SLP Series...
- Page 327 Troubleshooting Code 5807: “TI-ICP - read system status failed” The Barco controller can not read the status of the ICP. Situation Solution Malfunction software. Reboot the projector. ICP board is not correctly Reseat the ICP board. See service manual chapter “Replacement of the seated.
- Page 328 The wires with reference 4, 5 & 6 are marked with two cable ties. Note: To access the three wires on the RED Satellite board the Light Processor has to be removed from the projector. R5906848 /04 DP2K SLP Series...
- Page 329 Link Decryptor”, page 217. If problem remains, replace the link decryptor. Code 5831: “TI-link-decryptor - system error” With the Communicator, go to Diagnostics → Actual → Link Decryptor status → Error messages The following errors can occur: R5906848 /04 DP2K SLP Series...
- Page 330 Replace SMPS. See service manual chapter “Switch Mode Power Supply out of range (SMPS)”, page 39. Replace Signal backplane. See service manual chapter “Card Cage”, page 209. Replace link decryptor. See service manual chapter “Replacement of the Link Decryptor”, page 217. R5906848 /04 DP2K SLP Series...
- Page 331 Server reads enough log entries to create room for 512 log entries. This can take some time. Playback will be prohibited (black image) as long as this error is active. R5906848 /04 DP2K SLP Series...
- Page 332 Ensure that all modules are properly installed into the Card Cage. Start up the projector. Initiate authorization by pushing the Key button on the Local Keypad. Enter the pin code within 5 seconds. R5906848 /04 DP2K SLP Series...
- Page 333 If problem remains, replace Link Decryptor. Code 5850: “imb - no communication” Situation Solution Exceptional software failure. Reboot the projector. No communication with media Check if the media block is well seated. block Replace the media block. R5906848 /04 DP2K SLP Series...
- Page 334 Ensure that all modules are properly installed into the Card Cage. Start up the projector. Initiate authorization by pushing the Key button on the Local Keypad. Enter the pin code within 5 seconds. R5906848 /04 DP2K SLP Series...
- Page 335 Excessive air extraction can dramatically speed-up contamination of the projector air inlet filters, hence requiring more regular filter cleaning interventions. Defect temperature sensor. Replace the temperature sensor (reference 3 Image 25-71) on the heatsink of the Light Pipe entrance. Image 25-71 Image 25-72 R5906848 /04 DP2K SLP Series...
- Page 336 Replace the temperature sensor which measures the heat sink temperature of the Light Pipe (reference 3 Image 25-71). Malfunction Cinema Control Replace the Cinema Control board. See service manual chapter board. “Replacement of the Cinema Controller”, page 217. Image 25-73 Image 25-74 R5906848 /04 DP2K SLP Series...
- Page 337 When disconnecting the wire unit of the temperature sensor from the Signal Backplane (reference 8 Image 25-75 the error code is changed to “light pipe - temperature sensor open”. Image 25-75 Image 25-76 Image 25-77 R5906848 /04 DP2K SLP Series...
- Page 338 Light Processor Unit. (reference 16 Image 25-78). If not repairable, replace the temperature sensor. Defect temperature sensor. Replace the temperature sensor (reference 16 Image 25-78) which measures the ambient temperature inside the Light Processor compartment. R5906848 /04 DP2K SLP Series...
- Page 339 Processor compartment. When disconnecting the wire unit of the temperature sensor from the Signal Backplane (reference 6 Image 25-80 the error code is changed to “engine air - temperature sensor open”. Image 25-80 Image 25-81 R5906848 /04 DP2K SLP Series...
- Page 340 SMPS board. ++12V +VTEC +24V Image 25-82 Code 6062: “+24v - voltage too low” This error code is probably preceded by the warning code 6063: “+24v - voltage low”. The same troubleshooting table can be applied. R5906848 /04 DP2K SLP Series...
- Page 341 Note: To access the SMPS connections with the Signal Backplane the Lamp House and Lamp Cathode Fan assembly (reference 1 Image 25-84) has to be removed from the projector. Image 25-83 Image 25-84 R5906848 /04 DP2K SLP Series...
- Page 342 Check the Signal Backplane for bad connections. connection. Note: To access the SMPS connections with the Signal Backplane the Lamp House and Lamp Cathode Fan assembly (reference 1 Image 25-84) has to be removed from the projector. R5906848 /04 DP2K SLP Series...
- Page 343 Remove the projector top cover and top cover plate. Look inside the compartment above the Card Cage to check if the ICP fan is not blocked (reference 2 Image 25-87). Unblock the fan. Ensure that the fan can turn freely. R5906848 /04 DP2K SLP Series...
- Page 344 Replace the fan. See service manual chapter “Replacement of the Light Pipe fan”, page 136. Malfunction Cinema Control Replace the Cinema Control board. See service manual chapter board. “Replacement of the Cinema Controller”, page 217. R5906848 /04 DP2K SLP Series...
-
Page 345: Troubleshooting Checklist Laser Control Board (Lcb)
See procedure “Liquid cooling circuit”, page 91. • Clean the front filter or replace with new one. See “Maintenance procedures”, page 291. • If error persists, replace the light source. See “Laser Phosphor Light Source”, page 59. R5906848 /04 DP2K SLP Series... - Page 346 +24V errors: Defective +24V “Replacing a Laser Drive Module”, page 56. module LDM This error alone: Malfunction Replace the Laser Control Board (LCB). See service procedure “Replacing LCB. the Laser Control Board (LCB)”, page 64. R5906848 /04 DP2K SLP Series...
- Page 347 While this warning message appears, the projector can keep on playing with a noticeable color/ brightness difference. However: If no timely actions are taken, this warning will eventually increase in severity and the light source can shut down (if more laser banks start to fail). R5906848 /04 DP2K SLP Series...
- Page 348 Image 25-90: Location of the Fuse. Code 20102: “LLS – Bank 2 is off” For this error the same troubleshooting table can be applied to as for code 20101: “LLS – Bank 1 is off”. R5906848 /04 DP2K SLP Series...
- Page 349 Check / reseat the power connection to the LDM. not be switched on during the • If problem persists, replace the LDM. See service procedure startup process of the “Replacing a Laser Drive Module”, page 56. projector. R5906848 /04 DP2K SLP Series...
- Page 350 “Laser Phosphor Light Source”, page 59. Code 20146: “LCM 1 – Fan 2 speed too low” For this error the same troubleshooting table can be applied to as for code 20142: “LCM1 – Fan 1 speed too low”. R5906848 /04 DP2K SLP Series...
- Page 351 See procedure “Liquid cooling circuit”, page 91. Defective LCB Replace the Laser Control Board (LCB). See service procedure “Replacing the Laser Control Board (LCB)”, page 64. Malfunction temperature Replace the Light Source. See procedure “Laser Phosphor Light Source”, sensor page 59. R5906848 /04 DP2K SLP Series...
- Page 352 Source”, page 59. Code 20174: “LCM 1 – Coolant liquid in temperature sensor short” For this error the same troubleshooting table can be applied to as for code 20168: “LCM1 – Coolant liquid out temperature short”. R5906848 /04 DP2K SLP Series...
- Page 353 291. Code 20186: “LCM 1 – Air drawn in temperature sensor short” For this error the same troubleshooting table can be applied to as for code 20168: “LCM1 – Coolant liquid out temperature short”. R5906848 /04 DP2K SLP Series...
- Page 354 Replace the LDM. See service procedure “Replacing a Laser Drive Module Module”, page 56. Code 20251: “LDM 1 – 380 vma voltage too high” Situation Solution Malfunction Laser Driver Replace the LDM. See service procedure “Replacing a Laser Drive Module Module”, page 56. R5906848 /04 DP2K SLP Series...
- Page 355 Code 20272: “LDM 1 – heatsink rectifier temperature sensor short” For this error the same troubleshooting table can be applied to as for code 20260: “LDM 1 — heatsink pfc temperature sensor short”. R5906848 /04 DP2K SLP Series...
- Page 356 Laser Driver Module (DC update companion)”, page 249. Wiring issue Check communication wiring between LDM and Laser Control Board (connector J500). Make sure it is properly inserted. If problem persists, replace the communication cable. R5906848 /04 DP2K SLP Series...
- Page 357 If problem persist replace the LDM. See service procedure “Replacing a Laser Drive Module”, page 56. Fan speed error on both fans Replace the LDM. See service procedure “Replacing a Laser Drive of the LDM. Malfunction LDM. Module”, page 56. R5906848 /04 DP2K SLP Series...
- Page 358 For removing and replacing the fan, see procedure “Removing a fan from an LDM”, page 51. Code 20295: “LDM 1 – +24V voltage too high” Situation Solution Malfunction LDM Replace the LDM. See service procedure “Replacing a Laser Drive Module”, page 56. R5906848 /04 DP2K SLP Series...
- Page 359 If problem persists after replacing the LDM, the laser banks are defective. Replace the light source. Note: Do not forget to place the swapped LDM boards back in their original position after the check has been completed. R5906848 /04 DP2K SLP Series...
- Page 360 Code 20360: “LDM 1-2 – LLS bank 1 temperature sensor shorted” Situation Solution Wiring issue Check / reseat the cable between the LDM board and the LLS. If problem persists, replace the cable. R5906848 /04 DP2K SLP Series...
- Page 361 LDM unit”, page 48. Code 20378: “LDM 1-2 – heatsink rectifier temperature sensor short” Situation Solution Malfunction LDM board Replace the LDM board. See service procedure “Replacing a driver board in an LDM unit”, page 48. R5906848 /04 DP2K SLP Series...
- Page 362 For this error the same troubleshooting table can be applied to as for code 20386: “LDM 1 – Bad Communication”. Code 20392: “LDM 1-2 – No Communication” For this error the same troubleshooting table can be applied to as for code 20387: “LDM 1 – No Communication”. R5906848 /04 DP2K SLP Series...
- Page 363 For this error the same troubleshooting table can be applied to as for code 20278: “LDM 1 – Not configured (invalid module type)”. Code 20413: “LDM 1-6 – Not configured (no communication)” Situation Solution Mismatch in Laser Power Check if the +36 V module is in the correct slot (LDM slot 6). Modules R5906848 /04 DP2K SLP Series...
- Page 364 Code 20527: “LDM 1-3 – LLS bank 5 drain voltage too high” For this error the same troubleshooting table can be applied to as for code 20323: “LDM 1 – LLS bank 1 drain voltage too high”. R5906848 /04 DP2K SLP Series...
- Page 365 Code 20573: “LDM 1-3 – LLS bank 6 temperature sensor open” For this error the same troubleshooting table can be applied to as for code 20361: “LDM 1 – LLS bank 1 temperature sensor open”. R5906848 /04 DP2K SLP Series...
- Page 366 Code 20647: “LDM 1-4 – LLS bank 7 temperature sensor open” For this error the same troubleshooting table can be applied to as for code 20361: “LDM 1-2 – LLS bank 1 temperature sensor open”. R5906848 /04 DP2K SLP Series...
- Page 367 Code 20671: “LDM 1-4 – Heatsink drain temperature sensor open” For this error the same troubleshooting table can be applied to as for code 20379: “LDM 1-2 – Heatsink rectifier temperature sensor open”. R5906848 /04 DP2K SLP Series...
- Page 368 Code 21141: “LDM 1-4 – LLS bank 8 drain power too high” For this error the same troubleshooting table can be applied to as for code 21129: “LDM 1-3 – LLS bank 5 drain power too high”. R5906848 /04 DP2K SLP Series...
- Page 369 Code 21221: “LLS – Bank 2 is off” For this error the same troubleshooting table can be applied to as for code 21220: “LLS – Bank 1 is off”. R5906848 /04 DP2K SLP Series...
- Page 370 Also check the optical alignment to maximize light output. Bad / No connection between Check / reseat the cabling between the LDM board and LLS. Check the LLS and LDM board connector on the laser subassembly PCB. R5906848 /04 DP2K SLP Series...
- Page 371 Code 21268: “LDM 1 – 380 vm pfc voltage too low” Situation Solution Bad wiring connection Check the power cable between the LDM and the Mains power. Make sure the cable is properly seated. Replace if necessary. R5906848 /04 DP2K SLP Series...
- Page 372 Source”, page 59. Code 21309: “LDM 1-2 – lls bank 1 not white point calibrated” Situation Solution laser bank white point not Perform the color calibration as instructed in the installation and user calibrated manual. R5906848 /04 DP2K SLP Series...
- Page 373 Source”, page 59. Code 21336: “lpt 1 - lls bank 9 cold side temperature sensor shorted” Situation Solution Malfunction temperature Replace the Peltier Control Board. See “Replacing the Peltier Controller”, sensor on Peltier Control page 64. Board. R5906848 /04 DP2K SLP Series...
- Page 374 “Replacing the Laser Control Board (LCB)”, page 64 Code 21352: “lpt 1 - 24V input 2 voltage too high” Situation Solution malfunction Peltier Control Replace the Peltier Control Board. See “Replacing the Peltier Controller”, Board page 64. R5906848 /04 DP2K SLP Series...
- Page 375 Check / reseat all the wiring of the Light Source Fan Interconnection Board Interconnection Board on top of the light source. First install of Light Source Upgrade the software. See procedure “Software update via Communicator (DC update companion)”, page 249. R5906848 /04 DP2K SLP Series...
- Page 376 Overcurrent detected on wiring Check and reseat wiring between Peltier Control Board and the Light Source. If problem persists, replace the wiring malfunction Peltier Control Replace the Peltier Control Board. See “Replacing the Peltier Controller”, Board page 64. R5906848 /04 DP2K SLP Series...
- Page 377 Laser Control Board (LCB)”, page 64 Code 21385: “LCM 1 – Fan 3 speed too low” For this error the same troubleshooting table can be applied to as for code 20142: “LCM1 – Fan 1 speed too low”. R5906848 /04 DP2K SLP Series...
-
Page 378: Log Files
Detection of TI boards • Log on details of users • Detection of Barco modules (LPS, FCB, etc.) DP2K Log file analysis Example of log file content Dec 31 17:00:17 localhost local0.info license-manager[221]: main - starting ... Dec 31 17:00:17 localhost local0.info router[224]: main - starting ...) Dec 31 17:00:17 localhost local0.info router[231]: network - wan ip-address ... - Page 379 ‘message’ = The actual error message. The Barco controller inserts every hour an unique entry in the Barco log file and in the TI log file. This is done to be able to synchronize events in both log files, when the clocks are not aligned. It will also be used for a tool, that is still to be implemented, that will merge both log files, to make better analysis.
- Page 380 Apr 6 14:09:07 localhost local0.info dp60[233]: system - load fcb file "lamp-on“ → on fan controller board, lamp-on state is set. External commands received by the Barco controller are preceded with the command (port = xxx) string Where xxx can be : •...
- Page 381 512 <= APPL <= TPPL <= 8191 • 288 <= ALPF <= TLPF <= 4095 In this example ALPF = 128 which is less than the minimum of 288. When this happens, auto timing will attempt to blank the image. R5906848 /04 DP2K SLP Series...
- Page 382 Troubleshooting R5906848 /04 DP2K SLP Series...
-
Page 383: Projector Cleaning
The inside cleaning of the light path must be done by a trained and certified service engineer. Overview • Necessary tools, products and tips • General cleaning procedure for optical components • Cleaning process for the optical path • Cleaning procedures optical components • Cleaning procedures non optical components R5906848 /04 DP2K SLP Series... -
Page 384: Necessary Tools, Products And Tips
Use a dry micro fiber lens cleaning cloth to remove left liquid or stripes. Polish using small circles. Pressurized air cans is not efficient if there is too much dust on the surface, the pressure is too low R5906848 /04 DP2K SLP Series... -
Page 385: Cleaning Process For The Optical Path
Normally the optics of the Light Pipe (3) and Light Processor (4) require less frequent cleaning than the optics of the Light Source (1), Light Source compartment (2), Projection lens and porthole (5). Take this into account to avoid unnecessary opening of the Light Pipe and removing of the Light Processor. R5906848 /04 DP2K SLP Series... -
Page 386: Cleaning Procedures Optical Components
Remove all dust from the complete compartment with a vacuum cleaner and a brush. Image 26-2 Compartment window (Light Source side) Follow the general cleaning procedure for optical parts, see “General cleaning procedure for optical components”, page 384. R5906848 /04 DP2K SLP Series... - Page 387 Follow the general cleaning procedure for optical parts, see “General cleaning procedure for optical components”, page 384. Caution: Be careful not to push to hard on the Rod inlet as this is a very fragile glass. Especially the edges of the Rod inlet. R5906848 /04 DP2K SLP Series...
- Page 388 Opening and cleaning the Light Pipe may only be done by a trained service engineer and in a clean room. Remove the Light Pipe Lenses No1, No2 and No3 from the Light Pipe. See procedures: • “Replacing Light Pipe lens No1 (focus lens)”, page 118. R5906848 /04 DP2K SLP Series...
- Page 389 Note: There are two Fold Mirrors: one fixed inside the corner block and one adjustable on the rear side of the Light Sensor assembly. Caution: Do not push too hard to avoid a crack of the Folding Mirror. Image 26-10 R5906848 /04 DP2K SLP Series...
- Page 390 Install the Light Pipe Lens No4. See “Replacing Light Pipe lens No4”, page 121. Image 26-12 Light Processor Prism inlet and outlet Remove overall dust from the outside of the Light Processor with compressed air. R5906848 /04 DP2K SLP Series...
- Page 391 384, or see “Cleaning the lens”, page 292. Porthole Follow the general cleaning procedure for optical parts, see “General cleaning procedure for optical components”, page 384. Tip: Ensure to clean both sides (booth side and audience side) of the Porthole. R5906848 /04 DP2K SLP Series...
-
Page 392: Cleaning Procedures Non Optical Components
Clean the mesh grid and fan grid inside the SMPS compartment with a vacuum cleaner and brush. Install the SMPS board and the cover of the SMPS compartment. See “Installing the SMPS board”, page 42. Install the Card Cage cover. See “Installation of the Card Cage cover”, page 245. R5906848 /04 DP2K SLP Series... - Page 393 Clean the housing of the projector with a damp cloth. Stubborn stains may be removed with a cloth lightly dampened with a mild detergent solution. Projector dust filters Clean the small and large dust filters as described in the chapter “Dust Filters”, page 283. R5906848 /04 DP2K SLP Series...
- Page 394 Projector cleaning R5906848 /04 DP2K SLP Series...
-
Page 395: A Appendix
Appendix Overview • Hazards R5906848 /04 DP2K SLP Series... -
Page 396: Hazards
Potential Chronic Health Effects: Slightly hazardous in case of skin contact (sensitizer). The substance may be toxic to upper respiratory tract, skin, eyes. Repeated or prolonged exposure to the substance can produce target organ damage. R5906848 /04 DP2K SLP Series... -
Page 397: Index
Prism 103 Fan 107, 110 Cleaning Blue Laser Compartment window 386–387 Interconnection Board Exterior 292 Replace 75 Filters 287 Board Diagnostic LED's 265 Filters (wet) 288 Button Module Lens 292 Card Cage 223 Light Pipe R5906848 /04 DP2K SLP Series... - Page 398 20133 349 Test pattern 159 20135 350 Cooling liquid 20136 350 Integrity 20137 350 Check 92 20142 350 Level 20146 350 Check 92 20150 351 Refill 92 20153 351 Cover 20164 351 Left side 274, 279 R5906848 /04 DP2K SLP Series...
- Page 399 20361 361 20646 366 20365 361 20647 366 20366 361 20651 367 20367 361 20652 367 20371 361 20653 367 20372 361 20663 367 20373 361 20664 367 20377 361 20665 367 20378 361 20669 367 R5906848 /04 DP2K SLP Series...
- Page 400 - temperature high 321 21376 377 dmd red - temperature low 321 21380 377 dmd red - temperature sensor open 322 21384 377 dmd red - temperature sensor short 322 error code name R5906848 /04 DP2K SLP Series...
- Page 401 1-2 – no communication 362 ldm 1 - heatsink pfc aux temperature sensor ldm 1-3 - lls bank 4 not white point calibrated 373 short 355 ldm 1-3 - lls bank 5 not white point calibrated 373 R5906848 /04 DP2K SLP Series...
- Page 402 1-4 – lls bank 8 drain voltage too high 366 lls – bank 6 is off 349, 370–371 lls – bank 7 is off 349, 370–371 lls – bank 8 is off 349, 370–371 R5906848 /04 DP2K SLP Series...
- Page 403 - self test = fail 328 5320 320 ti-link-decryptor - logical marriage tamper 5340 320 event 332 5341 321 ti-link-decryptor - no communication 329 5343 321 ti-link-decryptor - physical marriage tamper 5344 322 event 332 5345 322 5351 323 R5906848 /04 DP2K SLP Series...
- Page 404 Cold Mirror 88 Light Processor compartment 104 Green channel 109 Red channel 107 Install Fold Mirror 130 LDM 53 Integration Rod 142 Light Pipe 136 Laser Driver Module 47 Light Processor compartment 104 LDM 47 R5906848 /04 DP2K SLP Series...
- Page 405 Light Pipe lens Laser Control Board Clean 122 Remove 64 Light Processor 18, 95 Laser Driver Board Diagnostic 96 Diagnostic LED 267 Install 100 Laser Driver Module 45 Introduction 96 Install 47 Remove 97 Remove 46 R5906848 /04 DP2K SLP Series...
- Page 406 Projector software 252 Projector software update 252 Touch panel software 252 Projector status 20 Maintenance procedures 291 Maintenance program 25 1 Month 26 Mask plate Rear cover Install 144 Install 281 Remove 141 Remove 272 Motor assembly R5906848 /04 DP2K SLP Series...
- Page 407 Stepper motor 186 Cathode Fan 86 Replace Notch Filter 127 Cinema Controller Card Cage 217 Adjust 145 Cold Mirror fan 88 Diagnostic 140 Combiner 77 Rod heatsink Contrast plate 135 Install 144 Dust filter Remove 141 R5906848 /04 DP2K SLP Series...
- Page 408 Launch 250 Solid State relay Replace 36 Spare parts 21 SPG 18 Status light 20 Status Light Replace 247 Stepper motor Horizontal Shift Replace 188 Vertical Shift Replace 186 Switch Mode 39 Tail light 20 R5906848 /04 DP2K SLP Series...
- Page 409 R5906848 /04 DP2K SLP Series...
- Page 410 R5906848 /04 | 2019-02-11 Barco NV | President Kennedypark 35, 8500 Kortrijk, Belgium Barco Visual (Beijing) Electronics Co., Ltd | 地址:北京市 昌平区 中关村科技园 昌平园 昌盛路 16号 www.barco.com...
Need help?
Do you have a question about the DP2K SLP Series and is the answer not in the manual?
Questions and answers