Table of Contents
Advertisement
Quick Links
www.cembre.com
Cembre S.p.A.
Cembre Ltd.
Via Serenissima, 9
Dunton Park
25135 Brescia (Italia)
Kingsbury Road, Curdworth - Sutton Coldfield
Telefono: 030 36921
West Midlands B76 9EB (Great Britain)
Telefax: 030 3365766
Tel.: 01675 470440 - Fax: 01675 470220
E-mail: sales@cembre.co.uk
E-mail: sales@cembre.com
www.cembre.it
www.cembre.co.uk
Cembre España S.L.
Cembre AS
Calle Verano, 6 y 8 - P.I. Las Monjas
Fossnes Senter
28850 Torrejón de Ardoz - Madrid (España)
N-3160 Stokke (Norway)
Teléfono: 91 4852580
Phone: (47) 33361765
Telefax: 91 4852581
Telefax: (47) 33361766
E-mail: sales@cembre.es
E-mail: sales@cembre.no
www.cembre.es
www.cembre.no
Cembre S.a.r.l.
22 Avenue Ferdinand de Lesseps
91420 Morangis (France)
Tél.: 01 60 49 11 90 - Fax: 01 60 49 29 10
B.P. 37 - 91421 Morangis Cédex
E-mail: info@cembre.fr
www.cembre.fr
Cembre GmbH
Cembre Inc.
Heidemannstraße 166
Raritan Center Business Park
80939 München (Deutschland)
181 Fieldcrest Avenue
Telefon: 089/3580676
Edison, New Jersey 08837 (USA)
Telefax: 089/35806777
Tel.: (732) 225-7415 - Fax: (732) 225-7414
E-mail: sales@cembre.de
E-mail: sales.US@cembreinc.com
www.cembre.de
www.cembreinc.com
Certified Quality
Certified Environmental
Management System
Management System
IMPACT WRENCH
BOULONNEUSE TIREFONNEUSE A PERCUSSIONS
SCHLAGSCHRAUBER
ATORNILLADOR DE IMPACTO
AVVITATORE AD IMPULSI
OPERATION AND MAINTENANCE MANUAL
NOTICE D'UTILISATION ET ENTRETIEN
BEDIENUNGSANLEITUNG
MANUAL DE USO Y MANTENIMIENTO
MANUALE D'USO E MANUTENZIONE
09 M 077
ENGLISH
FRANÇAIS
DEUTSCH
ESPAÑOL
ITALIANO
Certified Occupational
Health & Safety
Management System
NR-11P
Advertisement
Table of Contents

Related Manuals for Cembre NR-11P


Summary of Contents for Cembre NR-11P
- Page 1 E-mail: sales@cembre.co.uk E-mail: info@cembre.fr E-mail: sales@cembre.com www.cembre.it www.cembre.co.uk www.cembre.fr MANUAL DE USO Y MANTENIMIENTO Cembre España S.L. Cembre AS Cembre GmbH Cembre Inc. MANUALE D'USO E MANUTENZIONE Calle Verano, 6 y 8 - P.I. Las Monjas Fossnes Senter Heidemannstraße 166 Raritan Center Business Park 28850 Torrejón de Ardoz - Madrid (España)
-
Page 2: Table Of Contents
4. Fuel mixture preparation ..................7 5. Starting the engine ....................8 6. Maintenance ..................... 10 7. Troubleshootting guide..................12 8. Optional accessories ..................13 9. Return to Cembre for overhaul ............... 73 FRANÇAIS INDEX 1. Recommandations / Caracteristiques generales .........15-16 2. Description ......................17 3. -
Page 3: Attention / General Characteristics
Do not run the engine in enclosed or unventilated areas. nuestro centro de servicio más cercano. En tal caso, adjuntar de ser posible una copia del Certificado de Ensayo entregado en su día por Cembre con la máquina; a falta de otro ... - Page 4 ENGLISH 1. GENERAL CHARACTERISTICS – Application range: suitable for tightening and loosening operations using an impact system, for railway and industrial applications. – Capacity: (max. bolt diameter) ............33 mm (1.3 inches) – Max. torque developed: .............2500 Nm (1844 ft.lbs) –...
-
Page 5: Description
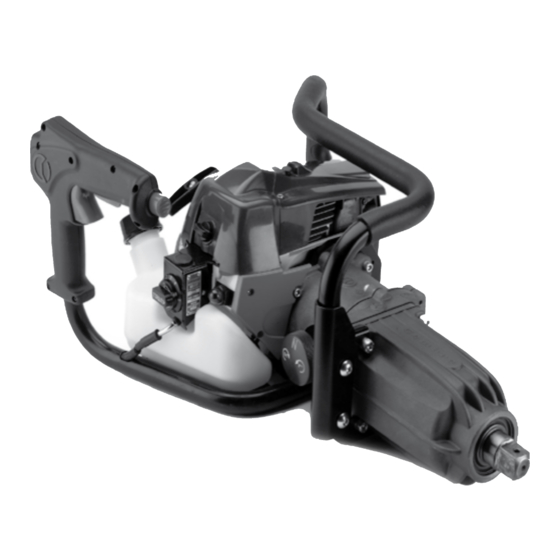
ENGLISH 2. DESCRIPTION (Ref. to Fig. 1) 01 – CONTROL GRIP 02 – ACCELERATOR 03 – TRANSPORT HANDLE 04 – HANDGRIP 05 – EXHAUST MUFFLER 06 – TRANSPARENT OIL LEVEL PORT 07 – IMPACT UNIT 08 – SQUARE DRIVE SHAFT 09 –... -
Page 6: Instructions For Use
ENGLISH 3. INSTRUCTIONS FOR USE Air filter - Filtre à air - Luftfilter - Filtro del aire - Filtro aria 3.1) Control grip The control grip has been designed to provide easy and comfortable access to the operating buttons both in vertical and horizontal positions (Ref. to fig. 8, 9). Refer to Fig. - Page 7 ENGLISH To assemble the socket (Ref. to Fig. 7 page 67): 1 Slide the socket onto the square shaft (08) lining up the bores of the socket and the shaft (Ref. to Fig. 7a). 2 Fully insert the central split pin of “CLIP-NR” into the through bore, ensuring the sprung arms are correctly located in the slot around the socket (Ref.
-
Page 8: Fuel Mixture Preparation
– On finishing the operation, release the accelerator. The impact wrench can be used independently or in conjuntion with the Cembre sup- port trolley (Ref. to Figs. 10, 11) and appropriate interface device (see § 8) . -
Page 9: Starting The Engine
ENGLISH “CLIP” 5. STARTING THE ENGINE – Move rotation selector (12) to position “ ” (see § 3.4). PRELIMINARY PHASE: – Press the easy start button (D) (Fig. a). – Draw mixture into the carburettor by pressing primer (P) 5- 6 times (Fig. - Page 10 – Remove the cover and air filter (see § 6.1.1) placing the cover (C) in view. – Loosen screw (X) and turn the position the inlet cap (C), tighten screw (X). Contattare la Cembre per – On completion, replace the air filter and cover.
-
Page 11: Maintenance
ITALIANO ENGLISH 8. ACCESSORI FORNIBILI A RICHIESTA 6. MAINTENANCE Before servicing or removing any parts, stop the engine and allow it to cool. – Chiavi a bussola standard e lunghe Always remove the spark plug cap from the spark plug when servicing the di varie tipologie e dimensioni: engine to prevent accidental starting. - Page 12 ENGLISH ITALIANO 7. SOLUZIONE DEI PROBLEMI – Remove the grommet from the tank and extract the filter (Ref. to Fig. 12b). – Clean the filter with a non-flammable solvent or one with a high inflammability level. SINTOMO CAUSA RIMEDIO – Carefully dry the filter before reassembling. –...
-
Page 13: Troubleshootting Guide
Le operazioni di manutenzione descritte ai § 6.2.1 e 6.2.2 richiedono l'intervento di per- - Engine stops while No fuel. Add fuel to tank. sonale qualificato, per questo consigliamo di contattare la Cembre . in use: Bad fuel mixture. Prepare fuel mixture correctly (see § 4). -
Page 14: Optional Accessories
ENGLISH ITALIANO 8. OPTIONAL ACCESSORIES AVAILABLE ON REQUEST 6. MANUTENZIONE Per qualsiasi intervento di manutenzione spegnere il motore e aspettare il suo raffreddamento. – Standard and long socket wrenches of different Per evitare avviamenti accidentali rimuovere sempre il cavetto della candela types and sizes (hexagonal, square, rectangular) prima di qualsiasi intervento di manutenzione. - Page 15 Per far questo sarà sufficiente: – Togliere il coperchio e il filtro aria (vedi § 6.1.1) mettendo in evidenza il coperchio (C). Contact Cembre f or further – Allentare la vite (X) e ruotare il coperchio in modo da liberare l'apertura quindi, bloccare information.
- Page 16 FRANÇAIS ITALIANO RECOMMANDATIONS ! 5. AVVIAMENTO DEL MOTORE – Portare il selettore marcia/folle (12) in posizione "N". (vedi § 3.4) FASI PRELIMINARI: – Premere il pulsante di decompressione (D) (Fig. a). – Richiamare miscela nel carburatore agendo 5-6 volte sulla ...
-
Page 17: 04 1. Recommandations / Caracteristiques Generales
– Dimensions: .................voir Fig. 16, page 71 – A fine operazione, rilasciare l'acceleratore. All'occorrenza l'avvitatore può essere reso "carrellabile" (Rif. a Fig. 10, 11) richiedendo separatamente il carrello di supporto Cembre ed il relativo dispositivo di interfacciamento – Poids: (sans carburant) ..................18,5 kg (vedi § 8). -
Page 18: Description
FRANÇAIS ITALIANO Per il montaggio della bussola sarà sufficiente (Rif. a Fig. 7 pag. 67): 2. DESCRIPTION (Voir Fig. 1) 1 Infilare la bussola sul quadro dell’albero (08) allineando i fori della bussola e dell'albero (vedi Fig. 7 a). 2 Introdurre completamente la molla di ritenuta “CLIP-NR” (fornita in dotazione all’avvi- 01 –... -
Page 19: Instructions D'utilisation
ITALIANO FRANÇAIS 3. ISTRUZIONI PER L'USO 3. INSTRUCTIONS D’UTILISATION 3.1) Poignée de commande 3.1) Manopola comandi La manopola che raggruppa i comandi è stata studiata per permettere un agevole e comodo La poignée de commande double a été spécialement étudiée afin de permettre une utili- sation pratique et confortable de la boulonneuse, tant en position verticale que horizontale utilizzo dell’avvitatore sia in posizione verticale che orizzontale (Rif. - Page 20 FRANÇAIS ITALIANO Pour le montage de la douille, il suffit (Voir Fig. 7 pag. 67): 2. DESCRIZIONE (Rif. a Fig. 1) 1 D’enfiler la douille sur le carré entraîneur (08) en alignant les orifices de la douille et du carré (voir Fig. 7 a). 2 Insérer complètement le ressort “CLIP-NR”...
-
Page 21: Preparation Du Melange
– À la fin de l’opération, lâcher l’accélérateur. – Dimensioni: ..................rif. Fig. 16, pag. 71 En l’occurrence, il est possible de travailler sur le chariot support de Cembre (voir Fig. 10, 11); il suffit d’acquérir séparément le chariot support avec le dispositif d’assemblage –... -
Page 22: Mise En Marche Du Moteur Thermique
FRANÇAIS ITALIANO ATTENZIONE ! 5. MISE EN MARCHE DU MOTEUR THERMIQUE – Placer le sélecteur (12) dans la position “N” (voir § 3.4) PHASES PRÉLIMINAIRES: – Appuyer sur le bouton de décompression (D) (Fig. a). – Amener du mélange dans le carburateur en agissant 5-6 fois Prima di utilizzare questa macchina, leggere attentamente sur la pompe (P) (Fig. - Page 23 – Desserrer la vis (X) et tourner le couvercle de façon à dégager l’ouverture, puis bloquer Para más información la vis (X). contactar con Cembre . – Une fois l’opération terminée, remonter le tout. Verificar que el carro esté provis- to de pistón a gas calibrado...
-
Page 24: Entretien
FRANÇAIS ESPAÑOL 6. ENTRETIEN 8. ACCESORIOS SUMINISTRADOS BAJO DEMANDA – Llaves de vaso standard y largos de varias tipologías y dimensiones: Pour toute opération d’entretien, arrêter le moteur et attendre qu’il se refroidisse. (hexagonales, cuadradas y rectangulares) Pour éviter des démarrages accidentels, enlever toujours le câble de la bougie avant toute opération d’entretien. - Page 25 ESPAÑOL FRANÇAIS – Enlever la capsule en caoutchouc noire du réservoir et extraire le filtre (voir Fig. 12b). 7. SOLUCIÓN DE LOS PROBLEMAS – Nettoyer le filtre avec un solvant non inflammable ou à point d’inflammabilité élevé. – Sécher complètement le filtre avant de le remonter. SINTOMA CAUSA REMEDIO...
-
Page 26: Anomalies Possibles
FRANÇAIS ESPAÑOL 7. ANOMALIES POSSIBLES – Quitar la parte de goma negra del depósito y extraer el filtro (Ref. a Fig. 12b). – Limpiar el filtro con un disolvente no inflamable o con alto punto de inflamabilidad. – Secar completamente el filtro antes de volver a montarlo. SYMPTOMES: CAUSES POSSIBLES: SOLUTIONS:... -
Page 27: Accessoires En Option
ESPAÑOL FRANÇAIS 6. MANTENIMIENTO 8. ACCESSOIRES EN OPTION Para cualquier intervención de mantenimiento detener el motor y esperar a que – Douilles standards et longues de se enfríe. différents types et dimensions: Para evitar puestas en marcha accidentales quitar siempre el cable de la bujía (hexagonales, carrées, rectangulaires) antes de cualquier intervención de mantenimiento. - Page 28 10 cm est conseillé. – Aflojar el tornillo (X) y girar la pequeña tapa para liberar la apertura entonces, bloquear el tornillo (X). Contacter Cembre pour tout – Terminada la operación volver a montar todos los componentes. renseignement complémentaire.
- Page 29 ESPAÑOL DEUTSCH ACHTUNG! 5. PUESTA EN MARCHA DEL MOTOR – Portar el selector (12) en la posición “N” (ver § 3.4). FASES PRELIMINARES: – Presionar el pulsador de descompresión (D) (Fig. a). – Hacer llegar la mezcla al carburador operando 5-6 vece so- ...
-
Page 30: Achtung / Allgemeine Eigenschaften
– Abmessungen: ................siehe Bild 16, Seite 71 – Al final de la operación soltar el acelerador. Si es necesario el atornillador puede ser utilizado con el carro de soporte Cembre (Ref. – Gewicht: (mit leerem Benzintank) ..............18,5 kg a Fig. 10, 11) pidiendo esto por separado con el correspondiente dispositivo de interco- nexión (ver §... -
Page 31: Beschreibung
ESPAÑOL DEUTSCH Para el montaje del vaso será suficiente (Ver Fig. 7, pág. 67): 2. BESCHREIBUNG (Siehe Bild 1) 1 Introducir el vaso sobre el eje del cuadro (08) alineando los orificios del vaso y del cuadro (ver Fig. 7 a). 2 Introducir completamente el muelle “CLIP-NR”(suministrado con el atornillador) en el 01 –... -
Page 32: Bedienungshinweise
DEUTSCH ESPAÑOL 3. BEDIENUNGSHINWEISE 3. INSTRUCCIONES DE USO 3.1) Funktionsgriff 3.1) Empuñadura de mandos Der Griff ist mit zwei Funktionen ausgestattet, so dass ein einfaches Bedienen in waage- La empuñadura que reúne los mandos ha sido estudiada para permitir un uso ágil y cómodo rechter und senkrechter Position möglich ist (siehe Bild 8, 9). - Page 33 ESPAÑOL DEUTSCH Für die Montage des Steckschlüssels folgendes beachten (Siehe Bild 7, Seite 67): 2. DESCRIPCIÓN (Ref. Fig. 1) 1 Den Steckschlüssel auf die Steckschlüsselaufnahme (08) stecken, wobei die Bohrung in der Steckschlüsselaufnahme und im Steckschlüssel in der Flucht sein muss (siehe Bild 7a).
-
Page 34: Benzingemisch Vorbereitung
DEUTSCH ESPAÑOL – Kontrollieren Sie, dass der Wählschalter (12) sich in der Position “N” Leerlauf befindet. 1. CARACTERÍSTICAS GENERALES – Lassen Sie den Motor an, indem Sie die in § 5 beschriebenen Punkte befolgen. – Stellen Sie das notwendige Drehmoment an der Drehmomenteneinstellung (13) ein (siehe §... -
Page 35: Starten Des Motors
ESPAÑOL DEUTSCH ¡ATENCION! 5. STARTEN DES MOTORS – Den Wählschalter (12) auf Position “ ” bringen (Siehe § 3.4). VORBEREITUNG: – Den Dekompressionsknopf (D) drücken (Bild a). – Erneut Gemisch in den Vergaser leiten, indem 5-6 Mal die Pumpe (P) betätigt wird (Bild b). Antes de utilizar la máquina leer atentamente las instruc- ciones contenidas en este manual. - Page 36 – Den Deckel und den Luftfilter abnehmen (siehe § 6.1.1), wobei der Deckel (C) hervortritt. Für weitere Informationen, – Die Schraube (X) lockern und den kleinen Deckel so drehen, dass die Öffnung frei wird, bitte mit Cembre Kontakt anschliessend die Schraube (X) arretieren. aufnehmen.
-
Page 37: Wartung
DEUTSCH DEUTSCH 8. ZUBEHÖR AUF ANFRAGE 6. WARTUNG Bei Reparaturen oder Wartung an der Maschine ist die Maschine abzustellen – Steckschlüssel verschiedener Art und Grösse: und abkühlen zu lassen. Um ein versehentliches Starten der Maschine zu ver- (Sechs- und Vierkant; Rechteck) hindern, ist der Zündkerzenstecker von der Zündkerze zu entfernen. - Page 38 DEUTSCH DEUTSCH 7. PROBLEMLÖSUNG – Entfernen Sie die schwarze Gummidichtung vom Tank und ziehen Sie den Filter heraus (Bild 12b). – Reinigen Sie den Filter mit einem nicht entzündbaren Lösungsmittel oder einem ERSCHEINUNG URSACHE LÖSUNG Lösungsmittel mit hohem Flammpunkt. – Trocknen Sie den Filter vollständig, bevor Sie diesen erneut montieren. - Anlass-Schwierigkeiten Schalter (14) in Position “STOP”.
Need help?
Do you have a question about the NR-11P and is the answer not in the manual?
Questions and answers