Table of Contents
Advertisement
Quick Links
PREFACE
SPLENDOR iSMART PROGRAMMED FI
Thank you for selecting a
.
Hero MotoCorp
We wish you many miles of continued riding pleasure in the years ahead.
We at
are committed to demonstrate excellence in our environment
Hero MotoCorp,
performance on a continual basis, as an intrinsic element of our corporate philosophy. To
achieve this we commit ourselves to continue product innovations to improve environment
compatibility, comply with all applicable legislation including environment legislation and
strengthen the green supply chain.
Your vehicle is conforming to latest (Bharat stage-VI norms) regulation for emission, safety &
noise levels. We are also using non asbestos brake shoes/pads and engine gaskets which are
environment friendly in nature.
This vehicle is fitted with a lighting feature known as "Automatic Headlamp ON". The feature
is mandated for all 2 Wheelers by Ministry of Road Transport & Highways (Government of
India) vide notification GSR 188 (E) dated 22nd February 2016. This feature helps in
conspicuity for improving rider safety. The headlamp of this vehicle will always be lit ON when
the engine gets ON.
This booklet is your guide to the basic operation and maintenance of your new
SPLENDOR iSMART PROGRAMMED FI
. Please take time to read it
Hero MotoCorp
carefully. As with any fine machine, proper care and maintenance are essential for trouble-free
operation and optimum performance.
Your Authorised
dealer will be glad to provide further information or
Hero MotoCorp
assistance and is equipped to handle your future service needs.
Let us make this world a safer, healthier and more environment friendly place.
Advertisement
Table of Contents

Related Manuals for HERO SPLENDOR iSMART PROGRAMMED FI


Summary of Contents for HERO SPLENDOR iSMART PROGRAMMED FI
- Page 1 PREFACE SPLENDOR iSMART PROGRAMMED FI Thank you for selecting a Hero MotoCorp We wish you many miles of continued riding pleasure in the years ahead. We at are committed to demonstrate excellence in our environment Hero MotoCorp, performance on a continual basis, as an intrinsic element of our corporate philosophy. To...
- Page 2 ACCESSORIES SHOWN MAY NOT BE THE PART OF STANDARD FITMENT. IT IS OUR ENDEAVOUR TO CONSTANTLY IMPROVE OUR PRODUCTS. THIS COULD LEAD TO CHANGE IN PRODUCT SPECIFICATIONS WITHOUT NOTICE. Hero ‘SPLENDOR iSMART PROGRAMMED FI’ COMPLIES WITH THE MotoCorp Ltd LATEST EMISSION NORMS.
- Page 3 ADDENDUM As per Ministry of Road Transport & Highways (Government of India) vide Notification G.S.R. 540(E), Hemostatic agent is excluded from first aid kit in reduction from existing kit effective from 31st August 2020.
-
Page 4: Table Of Contents
PRE-RIDE INSPECTION CATALYTIC CONVERTER STARTING THE ENGINE EVAPORATIVE EMISSION CONTROL SYSTEM RIDING POLISHING OF VEHICLE BRAKING BASIC TROUBLESHOOTING PARKING ROAD SIGNS TOOL KIT/FIRST AID KIT WARRANTY CLEANING AND WASHING OF VEHICLE HERO GENUINE PARTS MAINTENANCE ZONAL/REGIONAL/AREA OFFICES SAFETY PRECAUTION MAINTENANCE SCHEDULE... -
Page 5: Vehicle Identification
##### Engine Year of Month of Assembly Plant Serial Number Description Manufacturing Manufacturing Model: SPLENDOR iSMART PROGRAMMED FI Engine Variants Electric start/Front Disc/Rear Drum/Cast wheel JAW04 JA07AA Electric start/Front Drum/Rear Drum/Cast wheel JAW05 JA07AA VIN and Engine No. may be required: 1. -
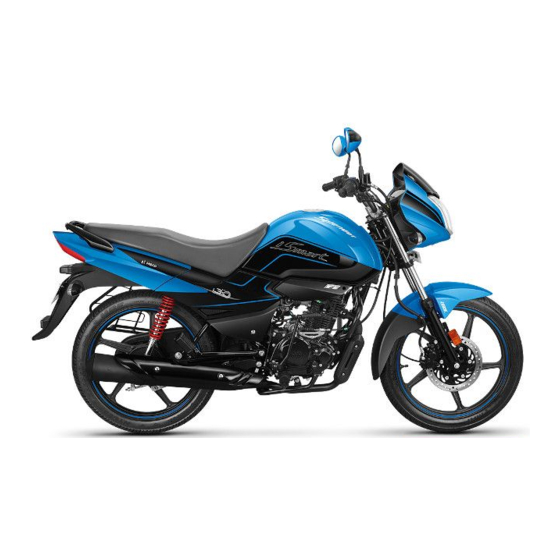
Page 6: Vehicle Views
VEHICLE VIEWS TOP VIEW (1) Turn signal switch (14) Programmed FI malfunction indicator lamp (MIL) (2) Horn switch (15) Odometer (3) Dimmer switch (16) Tripmeter (4) Clutch lever (17) Service reminder indicator (5) Passing switch (18) Master cylinder (6) Rear view mirror (19) i3s switch (7) Neutral indicator (20) Front brake lever... - Page 7 LEFT SIDE VIEW (1) Side reflex reflector (7) Saree guard with women (12) Rear grip pillion step (2) Gearshift pedal (13) Seat lock (8) Rear turn signal lamp (3) Rider footrest (14) USB charger (inside) (9) Rear reflex reflector (optional) (4) Main stand (10) Licence plate lamp (15) Side stand switch...
- Page 8 RIGHT SIDE VIEW 9 10 (1) Pillion foot rest (7) Leg guard ( ) Headlamp (2) Kick starter pedal (8) CCB valve (inside) (1 ) Front visor (3) Rider footrest (9) Caliper assembly (14) Throttle body/ECU (inside) (4) Rear brake pedal (10) Front disc (1 ) ear shock absorber...
-
Page 9: Vehicle Specification
VEHICLE SPECIFICATION ITEM SPECIFICATIONS Dimensions Overall length 2048 mm Disc-Drum 726 mm Overall width Drum-Drum 714 mm Overall height 1110 mm Wheelbase 1270 mm Saddle height 799 mm 180 mm Ground clearance Weight 116.7 kg Disc-Drum Kerb weight 116 kg Drum-Drum Payload 130 kg... - Page 10 VEHICLE SPECIFICATION ITEM SPECIFICATIONS Caster angle 26.1° Trail length 92.3 mm Front 80/100-18-47P (Tubeless tyre) Tyre size Rear 80/100-18-54P (Tubeless tyre) Front (Disc type) Dia. 240 mm Front (Drum type) Brakes Dia. 130 mm Rear (Drum type) Dia. 130 mm Front wheel Cast wheel Rear wheel...
-
Page 11: Accessories & Modifications
ACCESSORIES & MODIFICATIONS operation. Such changes could seriously impair your vehicle's handling, stability and Modifying your vehicle or using non- Hero braking, making it unsafe to ride. Removing or accessories can make your vehicle MotoCorp modifying your lamps, mufflers, emission unsafe. -
Page 12: Vehicle Safety
Hero MotoCorp vehicle. vehicle's size and weight. -
Page 13: Protective Apparel
WARNING If you are involved in a crash Personal safety is your first priority. If you or Not wearing a helmet increases the chance of • anyone else has been injured, take time to serious injury or death in a crash. assess the severity of the injuries and whether Be sure you and your pillion always wear a •... -
Page 14: Safe Riding Tips
Tightly wrap loose/hanging clothes & avoid • entangling with moving parts. Get your vehicle serviced regularly by the • Authorised workshop. Hero MotoCorp Before riding make sure in which mode you • are riding whether with i3s switch “ON’ or “OFF”. -
Page 15: Tips For Healthy Environment
Hero MotoCorp incompatible spares and accessories can upset or deteriorate your vehicle’s running condition. Genuine engine oil: Hero 4T Plus SAE 10W 30 SL grade (JASO MA2) engine oil • recommended by and make sure you change it every 6000 km. (with Hero MotoCorp top up every 3000 kilometres) to keep the engine fit and environment healthy. -
Page 16: Parts Function
PARTS FUNCTION Ignition switch “ON” ( ) position “OFF”( ) position/ Lock open (1) Ignition switch (2) Ignition key (3) Steering lock position “LOCK” position Key position Function Key removal The engine can be started, turn signal lamps, horn, tail/stop lamp and passing switch can be Key cannot be removed operated. -
Page 17: Instruments And Indicators
OK. If it glows continuously there is an abnormality in the programmed FI system, it is recommended to reduce the speed and drive to the Authorised workshop for check-up. Hero MotoCorp Tripmeter Shows the distance travelled during a trip. - Page 18 Description Function Sl. No. (page 15). Service reminder indicator Displays when the next service is due Reset button To reset the tripmeter to zero before starting a new trip. High beam indicator Light glows when headlamp is in Hi beam. “...
-
Page 19: Handlebar Switches Control
Authorised workshop for the handle bar towards left or right & push the Hero MotoCorp service. The indicator shall start blinking when key downwards & turn towards "LOCK” the vehicle covers kilometers as specified in position. - Page 20 2. Clutch switch There is a clutch switch (2) provided for the safety of the rider. The vehicle cannot be started by electric starter switch until the clutch lever is operated when the vehicle is engaged in gear. (3) Headlamp dimmer switch (4) Turn signal lamp switch (5) Horn switch 5.
-
Page 21: I3S (Idle Stop Start System)
The i3s indicator (2) will glow on the speedometer console for 2 seconds and turn “OFF”. For the activation of i3s system, start the engine and let it idle till the engine gets warmed up or temperature reaches more than 75°C. (1) Electric starter switch (2) i3s switch 2. - Page 22 5 secs before the recommended to visit your Authorised engine cuts-off. Hero workshop. MotoCorp Driving with i3s switch in “OFF” position: i3s system will not function properly if the •...
-
Page 23: Side Stand Indicator/Switch 19
SIDE STAND INDICATOR/SWITCH FUEL TANK For the safety of the customer a side stand Fuel tank capacity is 9.5 litres (Be sure to fill indicator (1) is provided. the fuel tank when fuel gauge needle enters A side stand switch (2) is provided in the side red band). -
Page 24: Seat Lock/Helmet Holder
Do not overfill the tank. There should be no • fuel (4) in the filler neck (5). For locking, position the cap with “ ” • ▲ mark facing towards the front, back on the opening and press gently. The key springs back to the normal position and the cap gets locked. -
Page 25: Usb Charger (Optional)
• damage to the mobile phones. prone to damage, while using this feature will not be responsible for Hero MotoCorp necessary precaution should be taken. damages caused due to use of non standard Keep hard materials away from mobile •... -
Page 26: Pre-Ride Inspection
Fuel level-Ensure sufficient fuel is available • NOTE in your fuel tank for journey. Fuel level Do not apply any soap solution, oil or grease • gauge needle should be above red band inside the USB charger. (page 19). Check for leaks. Any personal belongings have to be removed •... -
Page 27: Starting The Engine
Authorised continuously and engine does not start, workshop for check-up cranking of engine will stop after 5 secs. Hero MotoCorp After that rider again needs to press the Find neutral position & check neutral Ÿ... - Page 28 Starting Procedure This vehicle has a Fuel-Injected engine with an Idle Air Control Valve (IACV). Follow the procedure mentioned below : At any ambient temperature : • Press the starter switch with the throttle • completely closed. Any air temperature With the throttle completely closed, press the starter switch.
-
Page 29: Riding
Running in throttle and clutch lever will assure a smooth positive start. Help assure your vehicle's future reliability and When the vehicle attains a moderate speed, performance by paying extra attention to how • close the throttle, press the clutch lever and you ride during the first 500 km. -
Page 30: Parking
brake simultaneously, keeping the throttle in CAUTION closed position. Park the vehicle on firm level ground to • prevent overturning. WARNING While parking vehicle on side stand engage • When riding in wet or rainy conditions, or on • the first gear. loose surfaces, apply front brake carefully TOOL KIT/FIRST AID KIT after applying rear brake to avoid wheel slip. -
Page 31: Cleaning And Washing Of Vehicle
Wet the vehicle with light water spray. Avoid • the maintenance schedule. directing water meter console, muffler Consult your Authorised Hero MotoCorp outlets and electrical parts. d ealer for recommendation applicable to Clean the headlamp lens and other plastic •... -
Page 32: Safety Precaution
Remember that your Authorised Hero workshop knows your vehicle best MotoCorp and is fully equipped to maintain and repair it. To ensure best quality and reliability, it is recommended to use Hero MotoCorp genuine parts for repair and replacement. -
Page 33: Maintenance Schedule
Maintenance work should be performed in accordance with standards and specifications of by properly trained and equipped Hero MotoCorp technicians. Your Authorised workshop meets all of these requirements. Hero MotoCorp Ensure that each paid service is availed within 90 days or 3000 km from the date of previous service, whichever is earlier. - Page 34 Give a missed call to +91 8367796950 MAINTENANCE SCHEDULE Dear Customer, or Scan QR code We would strongly recommend the following schedule, to keep your vehicle in perfect running condition and healthy environment. Vehicle subjected to severe use or ridden in dusty area will require more frequent servicing.
- Page 35 WHICHEVER DURING FREE SERVICE PERIOD COMES FIRST AFTER FREE SERVICE ONCE IN EVERY SERVICE ITEMS Next Next Next Next DAYS 1st 60 KM Note-1 500- 3000- 6000- 9000- 12000- 3000 6000 9000 12000 15000 3500 6500 9500 12500 Note-5 Brake Fluid I, T I, T I, T...
-
Page 36: Spark Plug Inspection
If you are reusing a plug, it should only take 1/8-1/4 turn after the plug seats. ENGINE OIL Use hero genuine engine oil or recommended grade oil. BRAND: Hero 4T plus (1) Noise suppressor cap... - Page 37 Savita Oil Technologies Limited. Slightly loosen the engine oil check bolt (4) • • and check the engine oil entry into the Bharat Petroleum Corporation Limited. • cylinder head. OIL CAPACITY: 0.95 litre Engine oil level inspection/Top up process Check engine oil level each day before operating the vehicle.
-
Page 38: Engine Oil Filter Element
Engine oil replacement process/ vehicle in an upright position and that there Oil circulation inspection are no oil leaks. Drain engine oil with the engine warm and the CAUTION vehicle on its main stand. Running the engine with insufficient oil can •... -
Page 39: Oil Filter Screen
Remove the engine oil filter element cover • NOTE (2) with O-ring (3). When the engine oil filter element replaced • Remove the engine oil filter element (4) • always replace the O-ring with the new one. from the cover. Make sure that O-ring is properly seated. -
Page 40: Air Cleaner
NOTE Remove the gasket (7) and dowel pins (8). • Remove the oil filter screen (9) and wash it Ensure to replace gasket with new one once • removed. in clean non flammable or high flash point solvent (kerosene). AIR CLEANER Air cleaner element inspection The air cleaner is viscous paper pleated type filter which has enhances filtering efficiency. - Page 41 Remove the air cleaner cover screws ( ) 1 • Never wash or clean the wet, paper pleated • and the cover ( ). 2 type filter. Replace filter element once in Remove the air cleaner element (3). every 15000 km. •...
-
Page 42: Valve Clearance Adjustment
Remove the fuel tank. Ÿ Remove the cylinder head cover (1) by Ÿ removing the bolts (2). (1) Drain tube VALVE CLEARANCE ADJUSTMENT Excessive valve clearance will cause noise, and little or no clearance will prevent the valve (1) Cylinder head cover from closing and cause valve damage and (2) Bolts power loss. - Page 43 piston is in compression stroke. If they are tight, the valves are open, rotate the cam sprocket (6) 360 clockwise and realign the 'T' mark with the index mark. (3) Timing hole cap (4) 'T' mark (5) Index mark (8) Feeler gauge (9) Adjusting screw (10) Valve stem (11) Lock nut...
-
Page 44: Clutch Lever Free Play
NOTE (3). Turn the adjusting nut (4) to obtain the If proper adjustment cannot be obtained or the specified free play. Tighten the lock nut and clutch does not work correctly, visit your check the adjustment. Authorised workshop. Hero MotoCorp... -
Page 45: Throttle Operation
THROTTLE OPERATION Cable inspection Check for smooth rotation of the throttle grip from the fully open to the fully closed position. Check at full left and full right steering positions. Inspect the condition of the throttle cable from the throttle grip down to the throttle body. - Page 46 Turn the chain to view chain lock plate (4) • inside the hole. Ensure that the chain lock plate open end (5) is installed in the opposite direction of the chain rotation. (1) Drive chain (2) Hole cap (3) Drive chain slack : 30 mm Rotate the wheel and check drive chain slack as the wheel rotates.
- Page 47 (2) Sleeve nut (3) Drive chain lock nut NOTE (4) Drive chain adjusting nut (5) Index mark Visit Authorised workshop (6) Scale graduation Hero MotoCorp for inspection, cleaning, lubrication and adjustment of drive chain at every 2000 km...
-
Page 48: Drive Chain Slider Inspection
Authorised bottom of the cutout or wear limit (2) is workshop. Hero MotoCorp reached. For replacement, visit your Authorised workshop. Hero MotoCorp CUTOUT (1) "MIN"... - Page 49 Always replace both the pads as a set. • between the brake pads (2), caliper (3) and Visit your Authorised • Hero MoroCorp the disc (4) by using a water jet. workshop for the brake pad replacement. Always contact your Authorised •...
- Page 50 Check the free play of front brake lever. Ÿ FREE PLAY: 10-20 mm If the free play is out specification turn the Ÿ adjuster nut to obtain desired free play. Integrated brake cable (B) on “C” side Adjustment Push the integrated brake arm (4) by hand Ÿ...
- Page 51 NOTE the final adjustment has been made. If proper adjustment cannot be obtained by Apply the brake several times and check for • this method, visit your Authorised Hero free wheel rotation when released. workshop. MotoCorp CW- Clockwise, ACW- Anticlockwise...
-
Page 52: Suspension
the arrow aligns with the reference mark on (e) Brake wear indicators full application of the brake, the brake shoes Front brake wear indication (Drum type) must be replaced. SUSPENSION Front and rear suspension inspection Check the front forks by locking the front •... -
Page 53: Wheel
(1) Rear shock absorber (2) Pin spanner (1) Speedometer cable (2) Tab (3) Axle nut (A) Stiffer (B) Softer (4) Axle (5) Side collar In direction A: Stiffer • CAUTION In direction B: Softer • Do not operate front brake lever when the NOTE wheel is removed. - Page 54 (1) Side collar (2) Speedometer drive gear (1) Speedometer cable (2) Tab (3) Front brake cable (4) Integrated brake cable After installing the wheel apply the brake • (5) Brake arm (6) Brake panel several times and then check if the wheel (7) Front brake adjusting nut rotates freely.
- Page 55 (1) Rear brake adjusting nut (2) Brake rod (12) Lug (13) Slot (3) Brake arm (4) Brake stopper arm Adjust the front brake free play and integrated • (5) Brake panel (6) Split pin (7) Lock nut brake free play (page 46). After installing wheel, apply the brake •...
-
Page 56: Main/Side Stand Lubrication
Adjust the rear brake free play (page 47) TUBELESS TYRES • and drive chain slackness (page 41). The tyres fitted on your vehicle are of TUBELESS type. After installing the wheel, apply the brake • several times and check for free wheel To safely operate your vehicle, your tyres must rotation when released. - Page 57 Over-inflated tyres make your vehicle ride harshly, are more prone to damage from road hazards, and wear unevenly. We recommend that you visually check your tyres before every ride and use a gauge to measure air pressure at least once a month or any time you think the tyres pressure might be low.
- Page 58 Repairing a puncture or removing a wheel requires special tools and technical expertise. If a tyre is punctured or damaged, it is advised to visit nearest tyre manufacture, Hero authorised dealer/workshop or the MotoCorp Carefully inspect the tyres for any damage, •...
-
Page 59: Nuts, Bolts & Fasteners
• recommended in this owner's manual. NOTE For repair and replacement of tyre it is advised to visit your Authorised Hero MotoCorp workshop. NOTE The imported tyre(s) if fitted without ISI mark; are in compliance of BIS standard and Central... - Page 60 Authorised workshop Hero MotoCorp Always ensure the battery is fully charged as it must be treated as recyclable • before installation.
-
Page 61: Fuse Replacement
Remove the battery clamp (5). • Disconnect the negative (-)ve terminal lead • (6) from the battery first, then disconnect the positive (+)ve terminal lead (7). (1) Fuse box (2) Air cleaner assembly (3) In circuit fuse: 15A, 10A, 10A & 10A (4) Spare fuse: 15A &... -
Page 62: Stop Lamp Switch
Turn the adjusting nut (2) to position stop • CAUTION lamp switch at a point where the stop lamp Do not attempt to start or ride the vehicle • will glow just before the brake pedal is without a charged battery, it can cause depressed to the limit of its free play. -
Page 63: Catalytic Converter Evaporative Emission Control System
If your engine is misfiring, backfiring, • WARNING stalling, or otherwise not running properly, An improperly adjust headlamp may blind stop riding and turn “OFF” the engine. oncoming rider/driver or it may fail to light the Have your vehicle serviced as soon as road for a safe distance. -
Page 64: Polishing Of Vehicle
(1) Canister POLISHING OF VEHICLE After washing your vehicle, wax all painted surfaces (except matte painted surfaces) using a commercially available polish/quality liquid or paste wax to finish the job. Use only a non abrasive polish or wax made specifically for automobiles. -
Page 65: Basic Troubleshooting
Refill the fuel tank Fuel gauge needle at red band Key “ON” Position Consult Authorised Workshop Refill Check fuel lines Hero MotoCorp Leakage Check for operating sound of fuel pump Broken fuel pump wire connector Secure connections Consult Authorised Workshop Hero MotoCorp B. - Page 66 Readjust free play of rear brake pedal Improper adjustment Correct tyre pressure Check tyre inflation pressure Under inflated Consult Authorised Workshop Hero MotoCorp 4. ELECTRICAL SYSTEM Feeble horn sound or no light Replace fuse Check fuse Fused Consult Authorised Workshop...
-
Page 67: Road Signs
ROAD SIGNS Mandatory signs: These road signs inform drivers/riders of the traffic rules that apply on a certain stretch of road, thereby instructing them on how to drive/ride. Mandatory signs are distinguished by the bright red circle with black and blue markings. It is imperative that all riders follow these signs as they help avoid accidents. - Page 68 ROAD SIGNS Cautionary signs: These signs inform the driver/rider of the road conditions ahead. Cautionary signs therefore serve as a warning. They are usually in a red triangle with black pictures on a white background. Illustrations, diagrams and symbols are used to forewarn about dangers ahead.
-
Page 69: Warranty
& conditions. Terms & conditions a) SPLENDOR iSMART PROGRAMMED FI vehicle is warranted for a period of 5 years or 70000 Km, whichever is earlier, from the date of purchase, emission warranty is separately covered under the head of “Emission Warranty”. - Page 70 (4) If additional wheel(s) is/are fitted and/or any other modification carried out/unauthorized accessories fitted which shall be responsible for malfunction/detoriation of the vehicle. SPLENDOR iSMART PROGRAMMED FI (5) If vehicle has been used in any competitive events like races or rallies or for any commercial purposes as taxi etc.
- Page 71 Hero MotoCorp Ltd. BATTERY WARRANTY PERIOD 1. 18 months from date of sale of vehicle or 20000 km. or 2. 21 months from the date of charging (whichever is earlier). 3. 3 months idle period is allowed from the date of charging to date of sale on vehicle.
- Page 72 Hero MotoCorp Ltd. EMISSION WARRANTY Scope of warranty Warrants all its vehicles, assembled/manufactured at its various Plants and sold through its channel Hero MotoCorp Ltd. partners, to comply with emission standards as specified in sub rule (2) of Rule 115 of Central Motor Vehicles Rules, 1989, subject to following terms &...
- Page 73 Hero MotoCorp Ltd. EMISSION WARRANTY j) It is mandatory to obtain a PUC certificate from the Authorised PUC center. In case of non-compliance with the emission standards please contact the channel partner /authorised workshop immediately along with the previous OK certificate, for the necessary rectification.
- Page 74 WHAT ARE THE BENEFITS OF Hero MotoCorp GENUINE SPARE PARTS ? Assures long life • Ensures economy for a long time • Safety of vehicle and rider • Peace of mind • Value for money • Assured quality • CONSEQUENTIAL DAMAGES ON USING NON-GENUINE PARTS Material used is inferior •...
- Page 75 CONSEQUENTIAL DAMAGES ON USING NON-GENUINE PARTS Improper air filtration resulting in premature engine failure • Element air cleaner Affects fuel efficiency • Poor engine performance • Frequent stalling of engine • Higher emission level • Spark plug Poor engine performance •...
-
Page 76: Zonal/Regional/Area Offices
Hero MotoCorp Ltd., 3rd Floor, Tower-A, DLF Centre Court, Sector-42, Golf Course Road, DLF Phase 5, Gurgaon -122002, Haryana, India. Tel: 0124-4754800, E-mail: delhi@heromotocorp.com Hero MotoCorp Ltd., 602, 6th Floor, Office Tower-1, Plot No BW58, Logix City Center, Sector-32, Noida – 201301. Tel: 0120-4631000, E-mail: noida@heromotocorp.com Hero MotoCorp Ltd., S.C.O-367-368, First Floor, Sector-34A, Chandigarh-160022, India. - Page 77 ZONAL/REGIONAL/AREA OFFICES NORTH ZONE Hero MotoCorp Ltd., Summit Building (10th Floor) Plot No TCG 3/3 Vibhuti Khand, Gomti Nagar Lucknow – 226010, India. Tel: 0522-4006594, E-mail: lucknow@heromotocorp.com Hero MotoCorp Ltd., C-19/134-B ,Third Floor I .P Grand, Lallapura, Sigra , Varanasi, Uttar Pradesh - 221010, India.
Need help?
Do you have a question about the SPLENDOR iSMART PROGRAMMED FI and is the answer not in the manual?
Questions and answers