
Related Manuals for ScreenBeam 1100 Plus


Summary of Contents for ScreenBeam 1100 Plus
- Page 1 ScreenBeam 1100 Plus Wireless Display Receiver Firmware 11.1.8.0 User Manual V1.1 For Catalog # SBWD1100P...
-
Page 2: Table Of Contents
Network Requirements ..................2 I.3.3 Setup Requirements ....................3 Part II Installing the Receiver ......................4 II.1 Setting up ScreenBeam 1100 Plus Receiver ..............4 II.2 Connecting the Receiver to a Network ................. 6 II.2.1 Wired Connection ....................6 II.2.2 Wireless Connection ..................... - Page 3 Local Wi-Fi Settings ..................... 76 V.3.10 Receiver Management Access Settings ............... 77 V.3.10.1 Specifying ScreenBeam CMS for the Receiver ........77 V.3.10.2 Specifying a Port for the Receiver’s LMI ..........78 V.3.10.3 Setting up Local Management Interface Access ........79 Part VI Updating Firmware for the Receiver ...................
- Page 4 VI.1.1 Updating Firmware from a Local PC ..............81 VI.1.2 Updating Firmware from the Internet ..............83 VI.2 Firmware Update using a USB Flash Drive ..............85 Part VII Receiver Maintenance ....................86 VII.1 Setting up Receiver Logging ..................86 VII.2 Exporting Receiver Log with LMI .................
-
Page 5: Part I Getting Started
Windows, Android, Apple, and Chromebook devices - without apps or wires. ScreenBeam 1100 Plus lets you wirelessly stream what’s on your wireless display capable device to your HDTV, including movies, videos, photos, music, and more. The receiver frees your eyes from a tiny screen. -
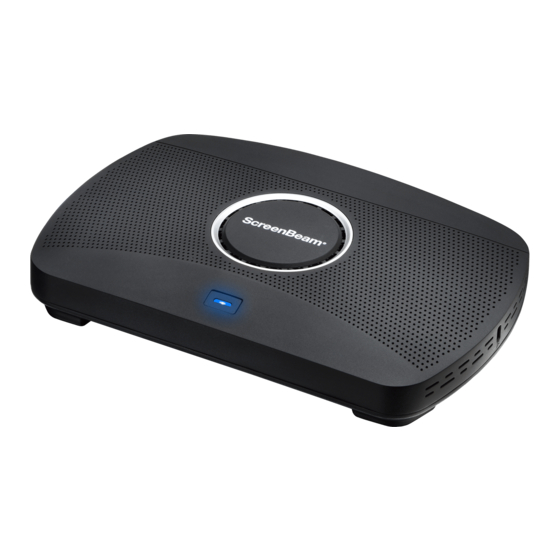
Page 6: Screenbeam 1100 Plus
USB ports, (two USB 2.0 ports and one USB 3.0 port), for provisioning CMS connection data, firmware update, connecting to touch display, and USB over network control (UIBC) Ethernet Port (ETHERNET), for receiver management with ScreenBeam Central Management System (CMS) / Local Management Interface (LMI) or for multi-media streaming over infrastructure network ... -
Page 7: Setup Requirements
Multicast DNS (mDNS) support is required for auto-discovery of ScreenBeam Required ports 5353 (UDP) for Multicast DNS (mDNS) discovery • 7100 (TCP) for macOS, iOS and Windows 10 mirroring • 7250 (TCP) for Miracast over LAN data stream •... -
Page 8: Part Ii Installing The Receiver
Part II Installing the Receiver This chapter explains how to connect ScreenBeam 1100 Plus to a display such as an HDTV or projector. Make sure you have all the contents from the receiver’s package available before starting. II.1 Setting up ScreenBeam 1100 Plus Receiver It is quite easy and fast to set up the receiver. - Page 9 ScreenBeam 1100 Plus receiver includes an HDMI Input to accommodate either wireless or wired connection. If there is an existing HDMI cable connected to the display for wired projection, it can be used in conjunction with ScreenBeam in case the client device cannot connect wirelessly.
-
Page 10: Ii.2 Connecting The Receiver To A Network
II.2 Connecting the Receiver to a Network ScreenBeam 1100 Plus receiver supports both wired and wireless connections. You can deploy ScreenBeam 1100 Plus receivers based on your network requirements. Note: The setups in this section are optional. II.2.1 Wired Connection ScreenBeam 1100 Plus receiver provides a built-in Ethernet port, allowing direct connection to an Ethernet network. - Page 11 Note: ScreenBeam receiver is set to obtain an IP address automatically by default. If you want to set the receiver’s IP address or DNS server to static, consult your network administrator. Refer to Section V.2 Using Local Management on ScreenBeam for detail on how to log...
-
Page 12: Ii.2.2 Wireless Connection
If you want to set the receiver’s IP address or DNS server to static, consult your network administrator. Refer to Section V.2 Using Local Management on ScreenBeam for detail on how to log into the receiver’s LMI. Refer to Section V.3.8.5 Setting up the Receiver’s IP Address for detail on how to set ... - Page 13 Connection Settings, and configure the parameters according to specific requirements. Network Name: The SSID of the wireless router (AP). Security Type: Select a security type, the one you have selected on your wireless router. Available security types are Open, Shared, WPA-PSK[TKIP], WPA2- PSK[AES], WPA-PSK[TKIP]+WPA2-PSK[AES], PEAP/MSCHAPV2, and EAP- TLS.
- Page 14 CA Certificate: It is the root certificate. Click the Browse button to browse and add the certificate. User Certificate: It is the user certificate. Click the Browse button to browse and add the certificate. Private Key: It is the user’s private key. Click the Browse button to browse and add the certificate.
-
Page 15: Ii.2.3 Dual-Network Connection
(on guest network). Plan your network in advance. For example, one for internal use, and one for guest use. Connect ScreenBeam 1100 Plus to the internal network via Ethernet, and verify that an IP address is assigned. -
Page 16: Part Iii Connecting Client Device
In this mode, user needs to connect the client device Wi-Fi to the ScreenBeam Wi-Fi and then select the receiver to mirror. This mode is ideal for guest client devices that need wireless display and/or Internet access. Internet is available if the ScreenBeam receiver is connected to the existing network, wired or wireless, and the receiver’s local Wi-Fi is set to NAT or Bridge. -
Page 17: Iii.1.2 Wi-Fi Miracast
Wi-Fi. III.1.3 Wireless Display over existing LAN ScreenBeam 1100 Plus can be connected to the existing wireless and wired network and supports wireless display for client devices on either network. This is a common setup to support client devices that need access to network resources. Additional port and network configurations may be required for this mode to work seamlessly. -
Page 18: Iii.2 Connect Using Local Wi-Fi
III.2 Connect using Local Wi-Fi This section explains how to connect a client device to ScreenBeam 1100 Plus using the local AP on ScreenBeam 1100 Plus. Make sure that the Wireless display over LAN feature is enabled for Windows 10, macOS/iOS AirPlay and/or Google Cast screen mirroring. - Page 19 Select the ScreenBeam receiver name as shown on the TV display. For Windows 10 Select Connect from the Action Center by swiping from right or simultaneously pressing the Windows key and K. Figure: Selecting receiver on Windows 10 device...
- Page 20 For iOS or macOS Connect with AirPlay from the menu bar or control center. Figure: Selecting receiver on iOS device Figure: Selecting receiver on macOS device...
- Page 21 For Chrome OS or Chrome browser Connect with Cast from the status area on Chrome OS or Chrome browser menu. Figure: Selecting receiver on Chrome OS Figure: Selecting receiver on Chrome Browser...
- Page 22 Note: On Chrome browser, you can define a source to cast before connecting to ScreenBeam. Enter in the PIN if required. If the PIN code is not displayed, try the hidden PIN 1234 (default). Note: You should consult your network administrator if no PIN is displayed on the...
- Page 23 Windows 10 macOS Select duplicate or extended screen mode if prompted.
-
Page 24: Iii.3 Connect Using Wi-Fi Miracast
Note: To disconnect, follow instructions in step 3 to return to the screen mirroring menu and select mirroring off. III.3 Connect using Wi-Fi Miracast This section explains how to connect a client device to ScreenBeam 1100 Plus using Wi-Fi Miracast. Select the ScreenBeam receiver name as shown on the TV display. - Page 25 For Windows 10 Select Connect from the Action Center by swiping from right or simultaneously pressing the Windows key and K. For Android Select the Screen Mirroring option from the quick access menu and follow the connection instructions. Note: Different Android device manufacturers may have different names for their wireless display apps.
- Page 26 connected display device. Windows 10 Android...
- Page 27 To disconnect, follow instructions in step 1 to return to the screen mirroring menu and select mirroring off. Some Android devices do not support PIN and will fail to connect. Refer to section V.3.5.1 Setting up PIN Pairing Method below for instructions on how to configure ScreenBeam and disable PIN enforcement.
-
Page 28: Iii.4 Connect Using Existing Wireless Network Or Lan
III.4 Connect using Existing Wireless Network or LAN This section explains how to connect a client device to ScreenBeam 1100 Plus using existing wireless network or LAN. Make sure that the Wireless display over LAN feature is enabled for Windows 10, macOS/iOS AirPlay and/or Google Cast screen mirroring. - Page 29 Select the ScreenBeam receiver name as shown on the TV display. For Windows 10 Select Connect from the Action Center by swiping from right or simultaneously pressing the Windows key and K. Figure: Selecting receiver on Windows 10 device...
- Page 30 For iOS or macOS Connect with AirPlay from the menu bar or control center. Figure: Selecting receiver on iOS device Figure: Selecting receiver on macOS device...
- Page 31 For Chrome OS or Chrome browser Connect with Cast from the status area on Chrome OS or Chrome browser menu. Figure: Selecting receiver on Chrome OS Figure: Selecting receiver on Chrome Browser...
- Page 32 Note: On Chrome browser, you can define a source to cast before connecting to ScreenBeam. Enter in the PIN if required. If the PIN code is not displayed, try the hidden PIN 1234 (default). Note: You should consult your network administrator if no PIN is displayed on the...
- Page 33 Windows 10 macOS Select duplicate or extended screen mode if prompted.
-
Page 34: Iii.5 Displaying With A Connected Hdmi Cable
III.5 Displaying with a connected HDMI cable While most users will be able to connect to ScreenBeam wirelessly using their native application, there may be the occasional user that will prefer to use a wired HDMI connection and ScreenBeam can even support those users. -
Page 35: Part Iv Display And Control Options
Part IV Display and Control Options This chapter describes the projection modes and control options that are supported by the receiver. IV.1 Projection Mode The receiver supports three projection modes when connected with a compatible wireless display application. On Windows, press the Windows logo + P keys simultaneously ( + P) to launch the display options and select a desired display mode from the options. -
Page 36: Iv.2 Hdmi Output Behaviors
HDMI output. Its input and output follow the rules as discussed below: IV.2.1 Single Mode When ScreenBeam 1100 Plus is in Single mode, it’s input and output follow these rules: When an HDMI source is the first connection, ... -
Page 37: Iv.2.2 Quick Switch Mode
ScreenBeam 1100 Plus will switch to display the wireless display source again if the HDMI source disconnects from the receiver. IV.2.2 Quick Switch Mode When ScreenBeam 1100 Plus is in Quick Switch mode, it’s input and output follow these rules: When the first connection is an HDMI source, ... -
Page 38: Iv.2.3 Multiview Mode
IV.2.3 Multiview Mode When ScreenBeam 1100 Plus is in Multiview mode, it’s input and output follow these rules: When the first connection is an HDMI source, ScreenBeam 1100 Plus will display the HDMI source in full screen with audio. -
Page 39: Iv.4 Using Interactive Touch Display
Use the USB keyboard, mouse, or trackpad to control the source device. IV.4 Using Interactive Touch Display ScreenBeam 1100 Plus supports wireless inking and touch with Windows 10 Miracast for collaboration using a touchscreen display. Users can project their preferred Windows 10 application and take notes on the touchscreen;... -
Page 40: Iv.4.3 Supported Features
Prepare the touch display and the USB touch cable supplied with the touch display. Connect the USB Type-A end to the ScreenBeam 1100 Plus receiver’s USB port. Connect the USB Type-B/A end to the USB Touch input on the display or projector. -
Page 41: Iv.4.5 Ghost Inking
The Ghost Inking feature is enabled by default on the ScreenBeam products that support this feature. Users are allowed to configure or disable this feature on the Advanced settings page... -
Page 42: Part V Device Management For It Administrator
Part V Device Management for IT Administrator ScreenBeam 1100 Plus can be configured by using the ScreenBeam CMS software or accessing the ScreenBeam’s Local Management Interface (LMI). V.1 Using ScreenBeam CMS Software ScreenBeam Central Management System (CMS) is a highly recommended complimentary tool for multi-unit deployment, configuration and administration. -
Page 43: Method 1: Screenbeam Local Wi-Fi Network
Connect the client device’s Wi-Fi to the wireless network (AP SSID) as shown on the TV display. Enter the password for the wireless network. By default, the password is screenbeam (case-sensitive). The Ready to Connect screen on the display will show the IP address assigned to the ScreenBeam. - Page 44 If the receiver is connected a network, the IP address can be identified on the Ready to Connect screen. Enter the assigned IP address into the web browser on a device. The browser may give an error stating “The connection or site is not secure or private.” Manually accept the connection as follows: ...
-
Page 45: Method 2: Network Connection Via Dhcp
ScreenBeam Ethernet port to a DHCP enabled network. The Ready to Connect screen on the display will show the IP address assigned to the ScreenBeam. Enter this address into the web browser on a device on the same network as the ScreenBeam. -
Page 46: Method 3: Wireless P2P Direct Connection
Follow the directions from Method 1 from Step 5 on. V.2.3 Method 3: Wireless P2P Direct Connection Using a Windows 10/8.1 device, connect the device to the ScreenBeam per section III.3 Connect using Wi-Fi Miracast above. Once connected, enter https://192.168.16.1 into a web browser to access the LMI. -
Page 47: Setting Up The Login Username And Password
The receiver’s Device Name supports the characters listed below: ~!@#$%^&*()_+{}|:?\-=[];',./ Japanese characters with Unicode in the following range: \u3040-\u30FF, \u31F0- \u31FF, and \u4E00-\u9FBF. Simplified and Traditional Chinese characters 3. Click the Apply button, and then click OK on the pop-up message box to confirm. Note: New settings take effect immediately. -
Page 48: Setting Up The Receiver's Display Language
3. Click the Apply button, and then click OK on the pop-up message box to confirm. V.3.1.3 Setting up the Receiver’s Display Language To set up the receiver’s display language, follow this procedure: 1. Go to the Device Configuration tab page by clicking the Device Configuration tab. 2. -
Page 49: Modifying The Receiver's Host Name
V.3.1.4 Modifying the Receiver’s Host Name The host name is used to identify the receiver in a network. To modify your receiver’s host name, follow this procedure: 1. Go to the Device Configuration tab page by clicking the Device Configuration tab. 2. -
Page 50: Setting Up Wireless Display Mode
3. Click the Apply button, and then click OK on the pop-up message box to confirm. V.3.2 Setting up Wireless Display Mode ScreenBeam 1100 Plus supports standard Wireless Display mode and Classroom Commander mode. To select a wireless display mode for your receiver, follow this procedure: 1. -
Page 51: Wireless Display Over Lan
100M/1000M Ethernet adapter (optional, but recommended) and Wi-Fi adapter are available Stable local area network Windows 10 device and ScreenBeam 1100 Plus receiver are connected to the same Required ports: TCP 7250, TCP 7236 TCP 7250, for Miracast over LAN data stream •... -
Page 52: Setting Up Native Screen Mirroring For Macos/Ios Devices
available Stable local area network MacOS/iOS device and ScreenBeam 1100 Plus receiver are connected to the same LAN Required ports: UDP 5353, TCP 47000, TCP 7000, TCP 7100, TCP 18000-18009 UDP 5353, for Multicast DNS (mDNS) discovery... - Page 53 TCP 47000, for Airtune in AirPlay • TCP 7000, for AirPlay by passing URL • TCP 7100, for AirPlay mirroring • TCP 18000-18009, for macOS and iOS AV data • To set up native screen mirroring for macOS/iOS devices, follow this procedure: 1.
-
Page 54: With Chrome Browser
V.3.3.3 Setting up Wireless Display over LAN for Chrome OS Device and Device with Chrome Browser Your device can connect to ScreenBeam for wireless display, as long as the following requirements are met: Operating system: Chrome OS 74.0.3729.159 (and later) with Cast, or Chrome Browser ... -
Page 55: P2P Wireless Settings
V.3.4.1 Setting up Miracast Connection ScreenBeam 1100 Plus allows users to disable or enable Miracast connection. To set up the receiver’s Miracast connection, follow this procedure: 1. Go to the Features tab page by clicking the Features tab. -
Page 56: Setting Up P2P Operating Channel
V.3.4.2 Setting up P2P Operating Channel ScreenBeam 1100 Plus allows you to define an operating channel for communication between the wireless display receiver and the source device. To set up the receiver’s operating channel, follow this procedure: 1. Go to the Features tab page by clicking the Features tab. -
Page 57: Setting Up Transmit Power
Note: New setting takes effect on the next connection. V.3.4.3 Setting up Transmit Power ScreenBeam 1100 Plus allows users to tune down or up the transmission power of the Wi-Fi adapter for Miracast connection. To set up the receiver’s transmission power, follow this procedure: 1. - Page 58 4. The receiver reboots, and new setting takes effect after the reboot.
-
Page 59: Security Settings
Note: Some wireless display source device may not support PIN entry and may not be able to connect with the ScreenBeam receiver if this mode is enabled. Refer to the device’s user manual for detail about enabling the PIN connection. - Page 60 3. Select a PIN pairing method. Each connection: It is required to provide PIN every time when a device connects to the receiver. First connection: It is required to provide PIN the first time when a device connects to the receiver.
- Page 61 (7) digits in the Static PIN box, and the system generates the eighth (8th) digit. Random: A PIN code is generated randomly by ScreenBeam and displayed on the connected HDTV/projector. 6. Define the period for showing the PIN on the connected display. The PIN Display Period...
-
Page 62: Display Settings
Display Settings This section introduces display related features. V.3.6.1 Setting up Display Sharing Mode ScreenBeam 1100 Plus supports three display sharing modes: Single mode, Quick Switch mode, and Multi-view mode. To select a display sharing mode, follow this procedure: Go to the Features tab page by clicking the Features tab. -
Page 63: Setting Up Receiver Name Display For Quick Switch
Click the Apply button, and then click OK on the pop-up message box to confirm. V.3.6.2 Setting up Receiver Name Display for Quick Switch ScreenBeam 1100 Plus allows customizing the display of receiver name in the Quick Switch mode. To set up the placement of the receiver’s name, follow this procedure: Go to the Features tab page by clicking the Features tab. -
Page 64: Setting Up Information Display On Rtc Screen
To set up the receiver’s information display on RTC screen, follow this procedure: Go to the Features tab page by clicking the Features tab. Go to the Display Setting section, and select a desired option from the ScreenBeam network and status information menu. Available options are: Display all, Display minimal, and Display none. - Page 65 Display minimal: The receiver displays local Wi-Fi information on the connected display. Display none: The receiver displays none of the network and status information on the connected display. Set Connection instructions to Show or Hide. Show: The Wi-Fi connection and receiver connection instructions will be displayed on RTC screen.
- Page 66 Set Show “Help URL” instructions to Show or Hide. Show: The help URL info will be displayed on RTC screen. Hide: The help URL info will not be displayed on RTC screen. Click the Apply button, and then click OK on the pop-up message box to confirm. Here is an example after all these info are set to be hidden.
-
Page 67: Managing Hdmi/Vga Port Output
V.3.6.4 Managing HDMI/VGA Port Output To set up HDMI/VGA port output, follow this procedure: 1. Go to the Features tab page by clicking the Features tab. 2. Go to the Display Setting section, and select a desired option in the HDMI/VGA Port Power management drop-down box. -
Page 68: Waking Up The Receiver
3. Click the Apply button, and then click OK on the pop-up message box to confirm. V.3.6.5 Waking up the Receiver When the receiver runs screen saver or when its HDMI/VGA port output is turned off, it can be waked up by any one of two events: scanning and connecting. Note: The Wake Up feature is available when HDMI/VGA Port Power management is set to Screensaver or Display Off. -
Page 69: Adjusting Tv Screen Size
3. Click the Apply button, and then click OK on the pop-up message box to confirm. V.3.6.6 Adjusting TV Screen Size To adjust the size of your TV screen, follow this procedure: 1. Go to the Features tab page by clicking the Features tab. 2. -
Page 70: Updating The Receiver's Background Image
3. Click the Apply button, and then click OK on the pop-up message box to confirm. V.3.6.7 Updating the Receiver’s Background Image To update the receiver’s background, follow this procedure: 1. Go to the Features tab page by clicking the Features tab. 2. -
Page 71: Updating The Receiver's Screen Saver Image
4. Click the Apply button to upload the background image to the receiver. 5. A confirmation message appears. Click OK to continue. 6. After a while, the background image will be updated. You can check it on the connected display. V.3.6.8 Updating the Receiver’s Screen Saver Image To update the receiver’s screen saver, follow this procedure: 1. - Page 72 3. The Open window appears. Select an image for the screen saver and click the Open button to confirm. The image must be in .png format. The file size must not exceed 200 KB. The best image size is 300*60 pixels. ...
-
Page 73: Digital Signage Settings
V.3.7 Digital Signage Settings ScreenBeam receiver’s Digital Signage mode can turn your display into a digital signage player. To set up the receiver’s digital signage mode, follow this procedure: Go to the Digital Signage tab page by clicking the Digital Signage tab. -
Page 74: Network Settings
Click the Apply button, and then click OK on the pop-up message box to confirm. V.3.8 Network Settings This section introduces settings about network connection, such as local Wi-Fi networking mode, CMS interface/Internet WAN interface assignment, connection and TCP/IP settings for Ethernet/Wireless interface, etc. -
Page 75: Setting Up An Interface For Cms Connection
Click the Apply button, and then click OK on the pop-up message box to confirm. V.3.8.2 Setting up an Interface for CMS Connection ScreenBeam 1100 Plus allows customizing an interface for connecting to CMS. To define an interface for connecting to CMS, follow this procedure: Go to the Network Settings tab page by clicking the Network Settings tab. -
Page 76: Setting Up An Internet Wan Interface
Click the Apply button, and then click OK on the pop-up message box to confirm. V.3.8.3 Setting up an Internet WAN Interface The receiver’s local Wi-Fi can be routed to the receiver’s wired or wireless interface for Internet access. To define an interface for connecting to Internet, follow this procedure: Go to the Network Settings tab page by clicking the Network Settings tab. -
Page 77: Renaming Ethernet Interface's Network Name
V.3.8.4 Renaming Ethernet Interface’s Network Name Ethernet interface’s network name can remind users which Ethernet network the receiver is connecting to. To rename the Ethernet interface’s network name, follow this procedure: Go to the Network Settings tab page by clicking the Network Settings tab. Go to Network Interface Settings >... -
Page 78: Specifying A Dns Server For The Receiver
gateway for the receiver. Click the Apply button, and then click OK on the pop-up message box to confirm. V.3.8.6 Specifying a DNS Server for the Receiver The receiver provides both Ethernet and wireless interfaces for connecting to networks. Separate DNS configuration is required for these interfaces. By default, the receiver is set to obtain DNS configuration automatically. - Page 79 Go to Network Interface Settings > TCP/IP Setting, and set DNS Assignment to Auto or Static. Auto: The receiver will be assigned a DNS server automatically. Static: Users are allowed to define a DNS server for the receiver. If Static is ...
-
Page 80: Local Wi-Fi Settings
V.3.9 Local Wi-Fi Settings ScreenBeam 1100 Plus provides a local Wi-Fi network for wireless display over LAN (such as Windows 10 Infracast, Apple AirPlay, and Google Cast) and receiver management. To set up the receiver’s local Wi-Fi, follow this procedure: Go to the Local Wi-Fi tab page by clicking the Local Wi-Fi tab. -
Page 81: Receiver Management Access Settings
ScreenBeam CMS. It supports a domain with six labels at most. Note: It is recommended to use DNS configuration for CMS Server. CMS Communication Port: It is the communication port of the ScreenBeam CMS. The port range is from 5000 to 65535. By default, 7237 is used. -
Page 82: Specifying A Port For The Receiver's Lmi
Click the Apply button, and then click OK on the pop-up message box to confirm. V.3.10.2 Specifying a Port for the Receiver’s LMI To specify a communication port for the receiver’s local management interface, follow this procedure: Go to the Management Access tab page by clicking the Management Access tab. Go to the Central Management System Settings section, and define a port for Web Communication Port. -
Page 83: Setting Up Local Management Interface Access
Click the Apply button, and then click OK on the pop-up message box to confirm. V.3.10.3 Setting up Local Management Interface Access The receiver’s Local Management Interface (LMI) is used to manage the receiver locally. To set up the receiver’s LMI access, follow this procedure: Go to the Management Access tab page by clicking the Management Access tab. - Page 84 Click the Apply button, and then click OK on the pop-up message box to confirm. The receiver reboots, and new setting takes effect after the reboot.
-
Page 85: Part Vi Updating Firmware For The Receiver
1. Download the latest firmware from ScreenBeam’s website: https://support.screenbeam.com. 2. Log into Local Management Interface on ScreenBeam 1100 Plus, and go to the Firmware Upgrade tab page by clicking the Firmware Upgrade tab. On the Firmware Upgrade tab page, users can check the current firmware version in the Firmware Version section. - Page 86 4. The Open window appears. Navigate to the extracted firmware file folder. Select the firmware file (“install.img”) and click the “Open” button to continue. 5. Click the Apply button, and then click OK on the pop-up message box to continue. 6.
-
Page 87: Vi.1.2 Updating Firmware From The Internet
To upgrade your receiver from the Internet, follow this procedure: 1. Ensure the receiver is connected to a network that has access to the Internet. 2. Log into Local Management Interface on ScreenBeam 1100 Plus, and go to the Firmware Upgrade tab page by clicking the Firmware Upgrade tab. - Page 88 version is available”. 4. Click the Update Now button to start firmware update for the receiver. 5. The receiver downloads firmware from the Internet update server. 6. The receiver reboots and upgrades itself after the file is downloaded successfully. Firmware upgrade status is displayed on the connected display. 7.
-
Page 89: Vi.2 Firmware Update Using A Usb Flash Drive
VI.2 Firmware Update using a USB Flash Drive To update the receiver’s firmware with a USB flash drive, follow this procedure: 1. Download the latest firmware from ScreenBeam’s website: https://support.screenbeam.com. 2. Extract the downloaded file and copy the “install.img” file and the “autorun” file folder to the root directory of a USB flash drive. -
Page 90: Part Vii Receiver Maintenance
This section introduces setups for receiver maintenance. VII.1 Setting up Receiver Logging ScreenBeam receiver can save events in logs, and these logs can be retrieved by the receiver’s LMI or ScreenBeam CMS. Refer to the ScreenBeam CMS user guide for detail. -
Page 91: Vii.2 Exporting Receiver Log With Lmi
VII.2 Exporting Receiver Log with LMI To export logs from the receiver, follow this procedure: 1. Ensure receiver logging is enabled. Refer to Section VII.1 Setting up Receiver Logging for details. 2. Log into the receiver’s LMI, and go to the Maintenance tab page. 3. -
Page 92: Vii.3 Disabling The Reset Button
VII.3 Disabling the Reset Button ScreenBeam 1100 Plus provides a button to reset the receiver to default settings. It is the reset button. ScreenBeam 1100 Plus also allows users to disable all functions of this button. To disable functions of the reset button, follow this procedure: 1. -
Page 93: Vii.5 Rebooting The Receiver
VII.5 Rebooting the Receiver To reboot your receiver, unplug the power adapter from the power outlet, wait 5 seconds and then plug it in. If you can’t access the receiver locally, you can reboot the receiver through the receiver’s LMI. To reboot the receiver with LMI, follow this procedure: 1. - Page 94 To reset the receiver with LMI, follow this procedure: 1. Log into the receiver’s LMI and go to the Maintenance tab page. 2. Go to the Device Utilities section and click the Reset button next to “Reset”. This button works the same as the physical button on the receiver. 3.
-
Page 95: Vii.7 Tips For Optimal Performance
VII.7 Tips for Optimal Performance For optimal performance, you can try these tips: Keep the receiver within line-of-sight of the source device. Doing this will help ensure • the receiver receives the best possible signal. The receiver's optimal wireless range is within 30 feet from the source device. However, •... -
Page 96: Appendix I Troubleshooting And Faqs
Appendix I Troubleshooting and FAQs This chapter describes some problems you may encounter using ScreenBeam 1100 Plus, and possible solutions to those problems. Also included are frequently asked questions (FAQs), and answers to those questions. Troubleshooting I'm not seeing anything on my HDTV screen after powering on the receiver. - Page 97 If you are using a Windows 8.1 operating system, go to Change PC settings > PC and Devices > Devices > Projectors, remove the profile of the ScreenBeam 1100 Plus from your device (PC/laptop/Ultrabook), and try connection again. If you are using a Windows 10 operating system, go to Settings > Devices > Wireless ...
-
Page 98: Faqs
In the ScreenBeam Central Management System, double click the receiver to open the receiver configuration page, and then adjust the TV screen size in the Features section. How to set the ScreenBeam video output to fit a display with aspect ratio other than... - Page 99 Can I extend my Windows desktop to the HDTV or Projector from my Miracast device? Yes. After the connection to ScreenBeam 1100 Plus receiver is established, by default you should see the laptop screen mirrored to the HDTV or Projector.
- Page 100 Can ScreenBeam 1100 Plus support wireless touch and inking? Yes. ScreenBeam 1100 Plus supports UIBC. The source device must install a Window 10 system and meet the following hardware requirements: 4th Gen Intel Core (Haswell or better) processor ...
-
Page 101: Appendix Ii Notices
Warranty Statement may not apply to the customer. GPL Info For GNU General Public License (GPL) related information, go to https://opensource.screenbeam.com. Technical Support For FAQs, troubleshooting tips, documentation, firmware update and support, visit: https://support.screenbeam.com To open a ticket for support, visit: https://support.screenbeam.com/ticket... -
Page 102: Fcc Warning
FCC Warning This device complies with part 15 of the FCC Rules. Operation is subject to the condition that (1) this device may not cause harmful interference, and (2) this device must accept any interference received, including interference that may cause undesired operation. Changes or modifications not expressly approved by the party responsible for compliance could void the user's authority to operate the equipment. -
Page 103: Ce Statement
CE Statement Manufacturer's Name: Actiontec Electronics, Inc. Product Name: ScreenBeam 1100 Plus Trademark: ScreenBeam Model number: SBWD1100 Operating Temperature: 0° C to 40° C This device is in compliance with the essential requirements and other relevant provisions of Directive 2014/53/EU. All essential radio test suites have been carried out. - Page 104 RF Specification: WiFi Module 802C2447 Function Operation Frequency Max RF output power Limit 802.11a: ANT 0: 22.20dBm; ANT 1: 23 dBm. 22.40dBm; ANT 2: 22.60dBm 802.11n20: ANT 0: 22.80dBm; ANT 1: 22.90dBm; ANT 2: 22.80dBm 5.2G WIFI 802.11a/n20/ ac20: 802.11n20: ANT 0: 22.80dBm; ANT 1: 5180~5240MHz;...
- Page 105 WiFi Module 802R8822 Function Operation Frequency Max RF output power Limit 802.11b: ANT A: 18.20dBm; ANT B: 18.30dBm 20 dBm. 2.4G WIFI 802.11b/g/n(20MHz): 802.11g: ANT A: 19.90dBm; ANT B: 19.90dBm 2412~2472MHz; 802.11b/g/n 802.11n20MIMO:19.96dBm; (HT20,HT40) 802.11n(40MHz): 2422~2462MHz 802.11n40MIMO:19.98dBm; 802.11a: ANT A: 22.50dBm; ANT B: 21.80dBm 23 dBm.
- Page 106 Restrictions in the 5 GHz band: According to Article 10 (10) of Directive 2014/53/EU, the packaging shows that this radio equipment will be subject to some restrictions when placed on the market in Belgium (BE), Bulgaria(BG), the Czech Republic (CZ),Denmark (DK), Germany (DE), Estonia (EE), Ireland (IE), Greece (EL), Spain(ES), France (FR), Croatia (HR), Italy (IT), Cyprus (CY), Latvia (LV), Lithuania(LT), Luxembourg (LU), Hungary (HU), Malta (MT), Netherlands (NL), Austria(AT), Poland (PL), Portugal (PT), Romania (RO), Slovenia (SI), Slovakia...
-
Page 107: Telec Statement
TELEC Statement Indoor use only (except when communicating with 5.2 GHz high power base stations or relay stations).
Need help?
Do you have a question about the 1100 Plus and is the answer not in the manual?
Questions and answers