
Related Manuals for ScreenBeam 960


Summary of Contents for ScreenBeam 960
- Page 1 ScreenBeam 960 Wireless Display Receiver Firmware 9.15.44.0 User Manual V0.08 For Catalog # SBWD960A...
-
Page 3: Table Of Contents
Wireless Display over existing LAN..............11 Connect using Wi-Fi Miracast..................12 Connect using Existing Wireless Network or LAN ............15 Connecting using ScreenBeam Cast on Windows 7 ............ 21 Connecting using ScreenBeam Cast on Mac OSX ............25 Tips for Optimal Performance ..................27 Part IV Display and Control Options .................... - Page 4 Setting up the Receiver’s IP Address ............79 5.3.7.3 Specifying a DNS Server for the Receiver ............ 80 5.3.7.4 Specifying ScreenBeam CMS for the Receiver ..........81 5.3.7.5 Setting up UPnP Discovery ................82 Updating Firmware for the Receiver ................83 5.4.1...
- Page 5 5.5.3 Exporting Receiver Log with LMI ................. 89 5.5.4 Rebooting the Receiver ..................90 5.5.5 Resetting the Receiver to Default................ 90 Appendix I Troubleshooting and FAQs ..................92 Troubleshooting .......................... 92 FAQs ............................94 Appendix II Notices ........................100 Warranty ........................... 100 GPL Info .............................
-
Page 6: Part I Getting Started
“ScreenBeam 960”). ScreenBeam 960 wireless display receiver enables native screen mirroring from your Windows, Android, and Apple devices - without apps or wires. ScreenBeam 960 lets you wirelessly stream what’s on your Wi-Fi Certified Miracast™ compatible device to your HDTV, including movies, videos, photos, music, and more. -
Page 7: Screenbeam 960
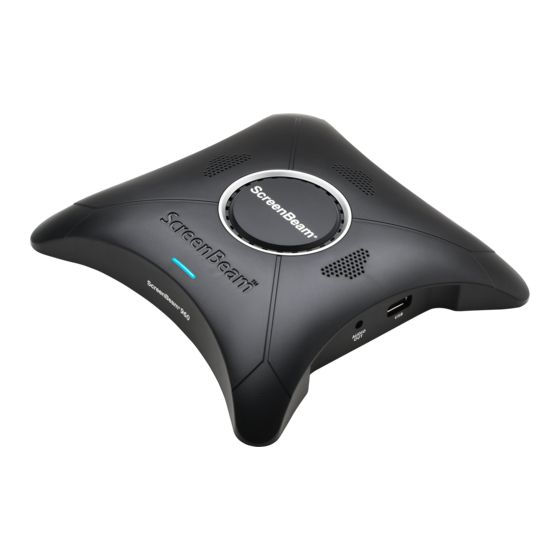
1.2.1 ScreenBeam 960 ETHERNET, for connecting to ScreenBeam Central Management System via Ethernet for receiver management HDMI OUT, for connecting to HDTV/projector with an HDMI port for video and audio output POWER, for power supply RESET, for resetting the receiver to default settings ... -
Page 8: Network Requirements
Note: This is used for wireless display over LAN and management. 1.3.4 Legacy Device Support The receiver is also compatible with the following devices: Non-Miracast ready laptops and PCs (Windows 7) with ScreenBeam USB Transmitter 2 (SBT200DI) or ScreenBeam USB Transmitter (SBT100U) Windows 7 devices with ScreenBeam SBCast software ... -
Page 9: Part Ii Installing The Receiver
(Optional) If the display has USB HID touch capability, insert the HID USB connector into a USB port on the ScreenBeam receiver. (USB cable is not included). (Optional) Connect one end of the Ethernet cable to the receiver’s Ethernet port and connect the other end to the network switch with DHCP IP. - Page 10 Verify that the “Wireless Display Ready to Connect” screen appears on the HDTV. The receiver is connected to the HDTV, and it is ready for use. Note: Connections to other display devices are similar. (Optional) VGA bypass setup is shown below. Refer to Section 4.1 VGA Use Case for details about how the input and outputs work.
-
Page 11: Connecting The Receiver To A Network
If you want to set the receiver’s IP address or DNS server to static, consult your network administrator. Refer to Section 5.2 Using Local Management on ScreenBeam for detail on how to log into the receiver’s Local Management Interface. -
Page 12: Wireless Connection
If you want to set the receiver’s IP address or DNS server to static, consult your network administrator. Refer to Section 5.2 Using Local Management on ScreenBeam for detail on how to log into the receiver’s Local Management Interface. - Page 13 When EAP-TLS is selected, the following items are available: User Name: It is the User Principal Name or RADIUS Identity (if necessary). Note: The User Name supports these characters: a-z, A-Z, 0-9, @, ., and _. Password: It is the password of the Private Key. ...
- Page 14 Note: The CMS WLAN Adapter may take some time to connect to your network, depending on your network environment.
-
Page 15: Part Iii Connecting Client Device
Part III Connecting Client Device This section provides the instructions on how to connect to ScreenBeam using the native screen mirroring from the most common operating systems and using ScreenBeam SBCast app. Refer to www.screenbeam.com/setup for details and instructions for common operating systems. -
Page 16: Wireless Display Over Existing Lan
3.1.2 Wireless Display over existing LAN ScreenBeam 960 can be connected to the existing wireless or wired network and supports wireless display for client devices on either network. This is a common setup to support client devices that need access to network resources. Additional port and network... -
Page 17: Connect Using Wi-Fi Miracast
3.2 Connect using Wi-Fi Miracast This section explains how to connect a client device to ScreenBeam 960 using Wi-Fi Miracast. Select the ScreenBeam receiver name as shown on the TV display. For Windows 10 Select Connect from the Action Center by swiping from right or simultaneously pressing the Windows key and K. - Page 18 For Android Select the Screen Mirroring option from the quick access menu and follow the connection instructions. Note: Different Android device manufacturers may have different names for their wireless display apps. Enter in the PIN if required. If the PIN code is not displayed, try the hidden PIN 1234 (default).
- Page 19 Windows 10 Android Select duplicate or extended screen mode if prompted. If the display has touch functionality, Windows 10 devices can take advantage of the touch and inking feature by selecting Allow mouse…. (Refer to section 4.3 USB over Network Control for more details.)
-
Page 20: Connect Using Existing Wireless Network Or Lan
ScreenBeam and disable PIN enforcement. 3.3 Connect using Existing Wireless Network or LAN This section explains how to connect a client device to ScreenBeam 960 using existing wireless network or LAN. Make sure that the Wireless display over LAN feature is enabled for Windows 10 and/or macOS/iOS AirPlay screen mirroring. - Page 21 Verify the receiver obtains an IP address (shown on the Wireless Display Ready to Connect screen). Connect the client device to the same network as the ScreenBeam receiver. Select the ScreenBeam receiver name as shown on the TV display.
- Page 22 For Windows 10 Select Connect from the Action Center by swiping from right or simultaneously pressing the Windows key and K. Figure: Selecting receiver on Windows 10 device...
- Page 23 For iOS or macOS Connect with AirPlay from the menu bar or control center. Figure: Selecting receiver on iOS device Figure: Selecting receiver on macOS device...
- Page 24 Enter in the PIN if required. If the PIN code is not displayed, try the hidden PIN 1234 (default). Note: You should consult your network administrator if no PIN is displayed on the connected display device. Windows 10...
- Page 25 macOS Select duplicate or extended screen mode if prompted. If the display has touch functionality, Windows 10 devices can take advantage of the touch and inking feature by selecting Allow mouse…. (Refer to section 4.3 USB over Network Control for more details.) Note: To disconnect, follow instructions in step 5 to return to the screen mirroring menu and select mirroring off.
-
Page 26: Connecting Using Screenbeam Cast On Windows 7
3.4 Connecting using ScreenBeam Cast on Windows 7 This section explains how to connect a Windows 7 device to ScreenBeam 960 over the infrastructure network using ScreenBeam SBCast. ScreenBeam SBCast software is available on support.screenbeam.com. To connect a Windows 7 device to ScreenBeam 960 using the ScreenBeam SBCast app, follow this procedure: Ensure a router has been deployed in your network. - Page 27 The ScreenBeam SBCast app starts and scans for available ScreenBeam 960 receivers, and displays them in the receiver list. Select your receiver from the receiver list and click Connect to continue.
- Page 28 A PIN entry box appears on the ScreenBeam SBCast app. Type the PIN displayed on the TV screen in the PIN entry box and click Connect to continue. Note: You should obtain the security PIN from your network administrator if no PIN is displayed on the connected display device.
- Page 29 11. The device has connected to the receiver. And the device’s screen is displayed on the HDTV.
-
Page 30: Connecting Using Screenbeam Cast On Mac Osx
3.5 Connecting using ScreenBeam Cast on Mac OSX This section explains how to connect a Mac OSX device to ScreenBeam 960 over the infrastructure network using ScreenBeam SBCast. ScreenBeam SBCast software is available on support.screenbeam.com. Note: Apple device with Mac OS 10.10 or newer are supported. - Page 31 Select your receiver from the receiver list and click Connect to continue. A PIN entry box appears on the ScreenBeam SBCast app. Type the PIN displayed on the TV screen in the PIN entry box and click Connect to continue.
-
Page 32: Tips For Optimal Performance
11. The device has connected to the receiver. And the device’s screen is displayed on the HDTV. 3.6 Tips for Optimal Performance For optimal performance, you can try these tips: Keep the receiver within line-of-sight of the source device. Doing this will help ensure •... -
Page 33: Part Iv Display And Control Options
If only VGA Out is connected, VGA Out will display video from ScreenBeam; If VGA In and HDMI Out are connected, HDMI Out will display video from ScreenBeam; If VGA In and VGA Out are connected, HDMI Out will display nothing, and VGA Out will display video from VGA In;... - Page 34 Windows 10 Windows 8.1 Windows 7 Duplicate The Duplicate mode is used to display the same content on both the device's screen and the HDTV simultaneously. Note: There may be minor delay between the content displayed on the HDTV screen compared to the device’s screen.
-
Page 35: Usb Over Network Control
4.3 USB over Network Control The ScreenBeam 960 receiver supports User Input Back Channel (UIBC) also known as USB over network control. This feature allows the use of USB HID peripheral devices from the source device to control the client device via ScreenBeam connection. -
Page 36: Part V Device Management For It Administrator
Part V Device Management for IT Administrator ScreenBeam 960 can be configured by using the ScreenBeam CMS software or accessing the ScreenBeam’s Local Management Interface (LMI). 5.1 Using ScreenBeam CMS Software ScreenBeam Central Management System (CMS) is a highly recommended complimentary tool for multi-unit deployment, configuration and administration. -
Page 37: Method 1: Wireless P2P Direct Connection (Ago)
Username Administrator and Password screenbeam (both case-sensitive). By default, the Username is Administrator, and password is screenbeam. Note: The default password is Actiontec for firmware 9.15.43.0 or older. And upgrading firmware to a newer version will not change the default password. The password will... -
Page 38: Method 2: Network Connection Via Dhcp
Note: Access via a wireless LAN connection is also allowed. The Ready to Connect screen on the display will show the IP address assigned to the ScreenBeam. Enter this address into the web browser on a device on the same network as the ScreenBeam. -
Page 39: Method 3: Screenbeam Local Wi-Fi Network (Ngo)
5.2.3 Method 3: ScreenBeam Local Wi-Fi Network (NGO) This method is available when the receiver is in NGO mode. There are two situations: when the receiver’s SSID broadcast is disabled and when it is enabled. By default, the receiver’s SSID broadcast is disabled. - Page 40 2. Go to Network Sharing Center via Control Panel > Network and Internet (or All Control Panel Items) > Network Sharing Center on a wireless-enabled laptop. 3. On the Network and Sharing Center window, click Set up a new connection or network.
- Page 41 4. The Set up a new connection or network window appears. Choose the Manually connect to a wireless network option.
- Page 42 5. The Manually connect to a wireless network window appears. Type in or select the following information. Network name: The SSID of the ScreenBeam 960 receiver Security type: WPA2 Personal Encryption type: AES Security key: 12345678 (default) 6. Check Connect even if the network is not broadcasting. Click Next. The receiver’s SSID will be added to the laptop soon.
- Page 43 8. A URL (it is “https://192.168.51.1”) is displayed on the connected display. Note: This link will be displayed in full screen for a few seconds, and then it is displayed in the lower left corner (if network info display is enabled). 9.
-
Page 44: When Ssid Broadcast Is Enabled
5.2.3.2 When SSID Broadcast is Enabled Connect to the receiver’s SSID from a wireless-enabled laptop (or other devices with Wi-Fi access ability and a web browser), and then access this URL: https://192.168.51.1 with a web browser. To log into the LMI when the SSID broadcast is enabled, follow this procedure: 1. -
Page 45: Log Out
3. A URL (it is “https://192.168.51.1”) is displayed on the connected display. Note: This link will be displayed in full screen for a few seconds, and then it is displayed in the lower left corner (if network info display is enabled). 4. -
Page 46: Configuring Screenbeam
5.3 Configuring ScreenBeam After you have logged into the Local Management Interface, you can configure ScreenBeam 960 on the Local Management Interface. 5.3.1 General Settings This section introduces some general settings for the receiver. 5.3.1.1 Changing Local Management Interface’s Display Language To change the LMI’s display language, follow this procedure:... -
Page 47: Renaming The Receiver
5.3.1.2 Renaming the Receiver To rename your receiver, follow this procedure: 1. Go to the Device Configuration tab page by clicking the Device Configuration tab. 2. Go to the Device Name Access line and set the Device Name Access to Enable. 3. -
Page 48: Setting Up The Login Username And Password
4. Click the Apply button, and then click OK on the pop-up message box to confirm. Note: New settings take effect immediately. 5.3.1.3 Setting up the Login Username and Password To modify the username and password for user login, follow this procedure: 1. -
Page 49: Setting Up The Receiver's Display Language
5.3.1.4 Setting up the Receiver’s Display Language To set up the receiver’s display language, follow this procedure: 1. Go to the Device Configuration tab page by clicking the Device Configuration tab. 2. Go to the Display Language line, and choose a desired language from the Display Language drop-down box. -
Page 50: Setting Up Time Zone
5.3.1.5 Setting up Time Zone To select your time zone, follow this procedure: 1. Go to the Device Configuration tab page by clicking the Device Configuration tab. 2. Go to the Time zone lines, and select your time zone in the drop-down box. Note: The receiver will synchronize its time with the CMS server it connects to, or with an NTP server. -
Page 51: Wireless Display Over Lan
Stable local area network Windows 10 device and ScreenBeam 960 receiver are connected to the same LAN To set up wireless display over LAN for Windows 10 devices, follow this procedure: 1. Go to the Features tab page by clicking the Features tab. -
Page 52: Setting Up Wireless Display Over Lan For Mac Os Or Windows 7 Devices
Mac/Windows 7 device and ScreenBeam 960 receiver are connected to the same LAN ScreenBeam SBCast app is installed and it is not block by any firewall or AV software To set up wireless display over LAN for Mac OSX or Windows 7 devices, follow this procedure: 1. -
Page 53: Setting Up Native Screen Mirroring For Macos/Ios Devices
Stable local area network MacOS/iOS device and ScreenBeam 960 receiver are connected to the same LAN Required ports: UDP 5353, TCP 47000, TCP 7000, TCP 7100, TCP 18000-18009 UDP 5353, for Multicast DNS (mDNS) discovery •... - Page 54 To set up native screen mirroring for macOS/iOS devices, follow this procedure: 1. Go to the Features tab page by clicking the Features tab. 2. Go to the Wireless display over LAN section, and set macOS/iOS native screen mirroring to Enable or Disable. ...
-
Page 55: P2P Wireless Settings
Method to access the local management interface webpage. Refer to section 5.2 Using Local Management on ScreenBeam for detail. Previous Miracast device(s) connected to this ScreenBeam receiver needs to have its existing connection profile removed, in order to reconnect. Refer to the Troubleshooting section for detail on how to remove a receiver’s connection profile. -
Page 56: Setting Up P2P Operating Channel (Ago Mode Only)
(where less devices work) will provide better performance. You can use Wi-Fi Analyzer to help you identify a clean channel. Note: ScreenBeam receivers do not support Dynamic Frequency Selection (DFS) channels, 50 through 144, because it's prohibited in a direct Wi-Fi usage model. You should... -
Page 57: Setting Up Transmit Power
Note: New setting takes effect on the next connection. 5.3.3.3 Setting up Transmit Power ScreenBeam 960 allows users to tune down or up the transmission power of the Wi-Fi adapter for Miracast connection. To set up the receiver’s transmission power, follow this procedure: 1. -
Page 58: Security Settings
Note: Some wireless display source device may not support PIN entry and may not be able to connect with the ScreenBeam receiver if this mode is enabled. Refer to the device’s user manual for detail about enabling the PIN connection. - Page 59 8-digit PIN with that seven digits included. Enter seven (7) digits in the Static PIN box, and the system generates the eighth (8th) digit. Random: A PIN code is generated randomly by ScreenBeam and displayed on the ...
-
Page 60: Display Settings
Display Settings This section introduces display related features. 5.3.5.1 Setting up Display Sharing Mode ScreenBeam 960 supports two display sharing modes: Single mode and Quick Switch mode. To select a display sharing mode, follow this procedure: Go to the Features tab page by clicking the Features tab. -
Page 61: Setting Up Receiver Name Display For Quick Switch
Click the Apply button, and then click OK on the pop-up message box to confirm. 5.3.5.2 Setting up Receiver Name Display for Quick Switch ScreenBeam 960 allows customizing the display of receiver name in the Quick Switch mode. To set up the placement of the receiver’s name, follow this procedure: Go to the Features tab page by clicking the Features tab. - Page 62 Select an option from the Receiver Name Placement drop-down box. Click the Apply button, and then click OK on the pop-up message box to confirm.
-
Page 63: Managing Hdmi/Vga Port Output
5.3.5.3 Managing HDMI/VGA Port Output To set up HDMI/VGA port output, follow this procedure: 1. Go to the Features tab page by clicking the Features tab. 2. Go to the Display Setting section, and select a desired option in the HDMI/VGA Port Power management drop-down box. -
Page 64: Waking Up The Receiver
3. Click the Apply button, and then click OK on the pop-up message box to confirm. 5.3.5.4 Waking up the Receiver When the receiver runs screen saver or turns off its HDMI output, it can be waked up by any one of two events: scanning and connecting. -
Page 65: Setting Up Vga Compatibility Mode
3. Click the Apply button, and then click OK on the pop-up message box to confirm. 5.3.5.5 Setting up VGA Compatibility Mode The VGA Compatibility Mode feature applies to ScreenBeam HDMI-to-VGA Adapter only. To select a VGA compatibility mode, follow this procedure: 1. -
Page 66: Setting Up Default Vga Format
4. The receiver reboots, and new setting takes effect after the reboot. 5.3.5.6 Setting up Default VGA Format The Default VGA Format feature applies to ScreenBeam 960’s VGA output only. To set up a default output resolution for the receiver’s VGA output, follow this procedure: 1. - Page 67 not get the EDID information from the display device, or the display device provides no EDID information, or you want to set a resolution that is different from the EDID, you can try the resolution options below. Resolution options: There are five resolutions available: 800×600, 1024×768, 1280×800, 1280×1024, and 1366×768.
-
Page 68: Adjusting Tv Screen Size
5.3.5.7 Adjusting TV Screen Size To adjust the size of your TV screen, follow this procedure: 1. Go to the Features tab page by clicking the Features tab. 2. Go to the Display Setting section, and select a desired option in the Adjust TV Screen Size drop-down box. -
Page 69: Setting Up Hdmi-Cec
5.3.5.8 Setting up HDMI-CEC To set up the HDMI-CEC function, follow this procedure: 1. Go to the Features tab page by clicking the Features tab. 2. Go to the Display Setting section, and set the HDMI-CEC feature to On or Off. There are two options: On, and Off. -
Page 70: Updating The Receiver's Background Image
5.3.5.9 Updating the Receiver’s Background Image To update the receiver’s background, follow this procedure: 1. Go to the Features tab page by clicking the Features tab. 2. Go to the Display Setting section, and click the Browse button next to the Background Image box. - Page 71 3. The Open window appears. Select an image for the background and click the Open button to confirm. Note: The images must be in .png and .jpeg/.jpg formats. The file size must not exceed 2.5 MB. The best image size is 1280*720 pixels (width x height). 4.
-
Page 72: Updating The Receiver's Screen Saver Image
5.3.5.10 Updating the Receiver’s Screen Saver Image To update the receiver’s screen saver, follow this procedure: 1. Go to the Features tab page by clicking the Features tab. 2. Go to the Display Setting section, and click the Browse button next to the Screen Saver Image box. - Page 73 3. The Open window appears. Select an image for the screen saver and click the Open button to confirm. Note: The image must be in .png format. The file size must not exceed 200 KB. The best image size is 300*60 pixels. 4.
-
Page 74: Setting Up Network Information Display On Tv Screen
5.3.5.11 Setting up Network Information Display on TV Screen To set up the receiver’s network information display, follow this procedure: Go to the Local Management tab page by clicking the Local Management tab. Go to the Show network information on TV screen line, and select a desired option from the drop-down box. -
Page 75: Hiding Ready To Connect Information
The figure below shows the RTC screen with all information displayed. 5.3.5.12 Hiding Ready to Connect Information To hide or shown the receiver’s Wireless Display Ready to Connect information, follow this procedure: Go to the Local Management tab page by clicking the Local Management tab. Set the Hide Ready Info feature to Enable or Disable. - Page 76 Click the Apply button, and then click OK on the pop-up message box to confirm. The Wireless Display Ready to Connect information will not be displayed after this feature is enabled (Ready info is hidden).
-
Page 77: Local Management Settings
5.3.6 Local Management Settings This section introduces local management related settings, such as local management interface access, local management communication port, network information display, receiver’s SSID. 5.3.6.1 Setting up Local Management Interface Access The receiver’s Local Management Interface (LMI) is used to manage the receiver locally. To set up the receiver’s LMI access, follow this procedure: Go to the Local Management tab page by clicking the Local Management tab. -
Page 78: Setting Up Allow Access Via Lan
Click the Apply button, and then click OK on the pop-up message box to confirm. The receiver reboots, and new setting takes effect after the reboot. 5.3.6.2 Setting up Allow Access via LAN Users are allowed to access the receiver’s LMI via a LAN connection. To set up the Allow access via LAN feature, follow this procedure: Go to the Local Management tab page by clicking the Local Management tab. -
Page 79: Modifying The Receiver's Local Wi-Fi Settings
5.3.6.3 Modifying the Receiver’s Local Wi-Fi Settings ScreenBeam 960’s local Wi-Fi is used to manage the receiver only. Note: The receiver’s local Wi-Fi settings are available when the receiver is in NGO mode. Users are allowed to set up the receiver’s wireless network name (SSID) and password. -
Page 80: Setting Up Broadcast Network Name
5.3.6.4 Setting up Broadcast Network Name Note: This feature is available when the receiver is in NGO mode. To set up Broadcast Network Name, follow this procedure: Go to the Local Management tab page by clicking the Local Management tab. Go to the Local Management Access section, and set the Broadcast Network Name feature to Enable/Disable. -
Page 81: Specifying A Local Management Communication Port For The Receiver
5.3.6.5 Specifying a Local Management Communication Port for the Receiver To specify a local management communication port for the receiver, follow this procedure: Go to the Remote Management tab page by clicking the Remote Management tab. Go to the Central Management System Setting section, and define a port for Web Communication Port. -
Page 82: Setting Up Usb Auto Configuration
5.3.6.6 Setting up USB Auto Configuration The receiver provides one USB port, which can be used to configure the receiver with a USB flash drive. Refer to the CMS user manual for detail on how to configure a receiver using a USB flash drive. To set up the receiver’s USB configuration, follow this procedure: Go to the Features tab page by clicking the Features tab. -
Page 83: Remote Management Settings
5.3.7 Remote Management Settings This section introduces the receiver’s remote management related settings, such as the receiver’s host name, IP address, DNS server, CMS server, and UPnP discovery. 5.3.7.1 Modifying the Receiver’s Host Name The host name is used to identify the receiver in a network. To modify your receiver’s host name, follow this procedure: 1. -
Page 84: Setting Up The Receiver's Ip Address
5.3.7.2 Setting up the Receiver’s IP Address To set up the receiver’s IP address, follow this procedure: Go to the Remote Management tab page by clicking the Remote Management tab. Go to the TCP/IP Setting section, and set the IP Assignment to Auto or Static. ... -
Page 85: Specifying A Dns Server For The Receiver
5.3.7.3 Specifying a DNS Server for the Receiver To specify a DNS server for the receiver, follow this procedure: Go to the Remote Management tab page by clicking the Remote Management tab. Go to the TCP/IP Setting section, and set the DNS Assignment to Auto or Static. ... -
Page 86: Specifying Screenbeam Cms For The Receiver
Note: It is recommended to use DNS configuration for CMS Server . CMS Communication Port: It is the communication port of the ScreenBeam CMS. Click the Apply button, and then click OK on the pop-up message box to confirm. -
Page 87: Setting Up Upnp Discovery
5.3.7.5 Setting up UPnP Discovery The UPnP discovery feature is used to discover ScreenBeam 960 on the network. ScreenBeam 960 can connect to CMS automatically with the UPnP Discovery method. Refer to the CMS user manual for details on how to connect a receiver to CMS using the UPnP Discovery method. -
Page 88: Updating Firmware For The Receiver
1. Download the latest firmware from ScreenBeam’s website: https://support.screenbeam.com. 2. Log into ScreenBeam 960’s Local Management Interface, and go to the Firmware Upgrade tab page by clicking the Firmware Upgrade tab. Note: Refer to Section 5.2 Using Local Management on ScreenBeam for details on how to use the receiver’s Local Management Interface. - Page 89 4. Navigate to the extracted firmware file folder. Select the firmware file (“install.img”) and click the “Open” button to continue. 5. Click the Apply button, and then click OK on the pop-up message box to continue.
-
Page 90: Updating Firmware Locally
Updating Firmware Locally To update the receiver’s firmware with a USB flash drive, follow this procedure: 1. Download the latest firmware from ScreenBeam’s website: https://support.screenbeam.com. 2. Extract the downloaded file and copy the “install.img” file and the “autorun” file folder to the root directory of a USB flash drive. - Page 91 Do not make any change to the extracted files. 3. Make sure the "Wireless Display Ready To connect" screen appears on your TV. Note: You must disconnect your device (laptop, ultrabook, smartphone or tablet) from the receiver before upgrading your receiver. 4.
-
Page 92: Receiver Maintenance
5.5 Receiver Maintenance 5.5.1 Setting up Receiver Auto Reboot After a long period of continuous running, the receiver may not react as responsively as it should be. We can restart the device to restore its responsiveness. To set the receiver to reboot automatically, follow this procedure: 1. -
Page 93: Setting Up Receiver Logging
5.5.2 Setting up Receiver Logging ScreenBeam receiver can save events in logs, and these logs can be retrieved by the receiver’s LMI or ScreenBeam CMS. Refer to the ScreenBeam CMS user guide for detail. To set up the receiver’s logging, follow this procedure: 1. -
Page 94: Exporting Receiver Log With Lmi
5.5.3 Exporting Receiver Log with LMI To export logs from the receiver, follow this procedure: 1. Ensure receiver logging is enabled. Refer to Section 5.5.2 Setting up Receiver Logging for details. 2. Log into the receiver’s LMI, and go to the Maintenance tab page. 3. -
Page 95: Rebooting The Receiver
5.5.4 Rebooting the Receiver To reboot your receiver, remove the power adapter from the power outlet, wait 5 seconds and then plug it in. If you can’t access the receiver locally, you can reboot the receiver through the receiver’s LMI. To reboot the receiver with LMI, follow this procedure: 1. - Page 96 If you can’t access the receiver locally, you can reset the receiver through the receiver’s LMI. Follow the procedure below: 1. Log into the receiver’s LMI, and go to the Maintenance tab page. 2. Click the Yes button next to “Reset Settings to Factory”. 3.
-
Page 97: Appendix I Troubleshooting And Faqs
Appendix I Troubleshooting and FAQs This chapter describes some problems you may encounter using ScreenBeam 960, and possible solutions to those problems. Also included are frequently asked questions (FAQs), and answers to those questions. Troubleshooting I tried to access the URL (https://192.168.51.1), but failed. Why? Connect to the receiver’s SSID, and then access the URL again. - Page 98 The solution is that you should connect your device to the wireless network before connecting it to ScreenBeam 960. In this way, ScreenBeam 960 works on the same channel with the source device and the wireless network, and no connection interruption will occur.
-
Page 99: Faqs
FAQs Can I view protected content if ScreenBeam 960 receiver is connected a display through the VGA port? No. The VGA port does not support playback of protected content such as blue-ray. Can my device connect to ScreenBeam 960? To connect to ScreenBeam 960, your device must be Wi-Fi Miracast-capable. - Page 100 Cast screen Visit ScreenBeam 960 compatibility page for the recommended Miracast devices. Do I need to install drivers/apps to use the ScreenBeam 960 Receiver? For Windows 7/8, you need to install ScreenBeam USB Transmitter and ScreenBeam wireless display software.
- Page 101 TV screen size in the Features section. How to set the ScreenBeam video output to fit a display with aspect ratio other than 16:9? ScreenBeam receiver's HDMI output supports 16:9 resolutions only. So if we connect ...
- Page 102 Can I extend my Windows desktop to the HDTV or Projector from my Miracast device? Yes. After the connection to ScreenBeam 960 receiver is established, by default you should see the laptop screen mirrored to the HDTV or Projector. To extend your Windows desktop to an HDTV or a Projector, press the Windows key and P key together, and select the "Duplicate", “Extend”...
- Page 103 Surface 2 and Surface Pro 2 with Windows 8.1 can support wireless display. Can I use the ScreenBeam 960 to access online content directly? No. ScreenBeam 960 does not directly connect to the Internet. You must use a source device (laptop/Ultrabook/tablet/smartphone) to wirelessly stream the online content to your Receiver.
- Page 104 My laptop screen is not displayed, only a black screen is shown, when I connect my laptop to a big screen through my ScreenBeam receiver's pass through VGA ports. We have been reported that some Dell laptop computers could have this problem. You can...
-
Page 105: Appendix Ii Notices
Statement shall be deemed modified to be consistent with such local law. Under such local law, certain disclaimers and limitations of this Warranty Statement may not apply to the customer. Go to https://www.screenbeam.com/warranty-commercial for more information. GPL Info For GNU General Public License (GPL) related information, go to https://opensource.screenbeam.com. -
Page 106: Technical Support
Technical Support Go to https://support.screenbeam.com for product support, updates, and more information including: Documentation • Firmware updates • Troubleshooting • Registration • FAQs •...
Need help?
Do you have a question about the 960 and is the answer not in the manual?
Questions and answers