Advertisement
Quick Links
ScreenBeam
|
1100 Plus
®
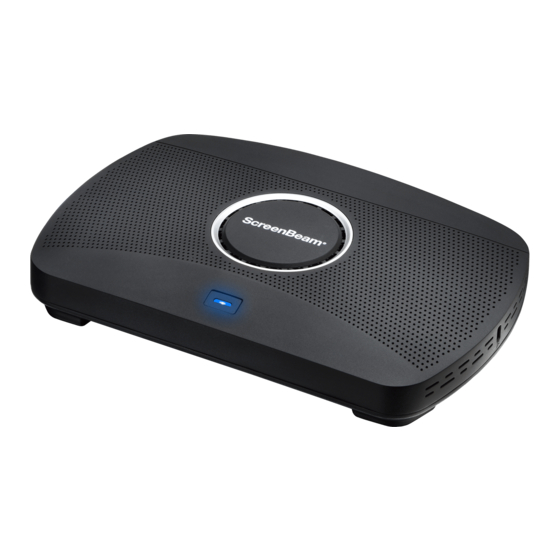
ScreenBeam 1100 Plus
Wireless
Display
Receiver
Quick Start Guide
Congratulations on your purchase of ScreenBeam! You are on
your way to the best in class wireless display experience available.
The ScreenBeam 1100 Plus is a powerful tool to enable more
productive and collaborative meetings using the native screen
mirroring built-in to Windows 10/8.1, macOS, iOS, ChromeOS,
and Android devices. It's multinetwork capabilities provide you
with a flexible device designed to meet your requirements while
maintaining security and providing an enhanced experience for your
users.
This Quick Start Guide provides the instructions on how to install
the ScreenBeam 1100 Plus receiver and get your client devices
connected for wireless display and collaboration.
Before Beginning Deployment
We know you are eager to start using your ScreenBeam, however,
we recommend checking our support site for the latest firmware,
support documentation and tech tips to get the most out of your
new ScreenBeam device. This is where you will find complete
documentation for your new ScreenBeam.
1 |
screenbeam.com
Advertisement

Related Manuals for ScreenBeam 1100 Plus


Summary of Contents for ScreenBeam 1100 Plus
- Page 1 Congratulations on your purchase of ScreenBeam! You are on your way to the best in class wireless display experience available. The ScreenBeam 1100 Plus is a powerful tool to enable more productive and collaborative meetings using the native screen mirroring built-in to Windows 10/8.1, macOS, iOS, ChromeOS, and Android devices.
- Page 2 We also have tutorials and videos that can help you learn more about your new ScreenBeam receiver. For Miracast™ or native macOS/iOS wireless display connection tutorial, go to: https://www.screenbeam.com/setup For ScreenBeam Central Management System (CMS) software, go to: https://support.screenbeam.com/cms If you need more help, please contact us at: https://support.screenbeam.com/ticket...
- Page 3 ScreenBeam 1100 Plus ® Setting up your ScreenBeam Settup is easy. All you need is your ScreenBeam , power cable, HDMIcable along with your display and laptop or tablet. So, let’s get started. Place the receiver next to the display.
- Page 4 USB port of the ScreenBeam receiver. (USB cable not included) If you want to put your ScreenBeam on your local network (not shown in diagram), connect one end of the Ethernet cable to the receiver’s Ethernet port and connect the other end to the network switch with DHCP IP.
-
Page 5: Connection Modes
1100 Plus ® Connection Modes ScreenBeam 1100 Plus offers multiple types of connections for client devices, including Miracast P2P, Infrastructure mode, or Local Wi-Fi mode. Two or more modes can operate concurrently to support various connection options allowing both internal employees and external guests to easily connect and project. -
Page 6: How To Connect
How to Connect Wi-Fi Miracast Connection The Wi-Fi Miracast mode allows compatible Miracast devices to connect directly to ScreenBeam, even when simultaneously connected to an infrastructure wireless network. Miracast is commonly available on Windows 10/8.1 and Android 4.4 (and later) devices. - Page 7 ScreenBeam and disable PIN enforcement. Local Wi-Fi Connection The ScreenBeam Wi-Fi mode is similar to Miracast but uses the ScreenBeam device as a local Wi-Fi hotspot or network, providing a simple way for client devices to connect and project. In this mode, users need to connect their client devices to the ScreenBeam Wi-Fi network.
- Page 8 Connect the client device’s Wi-Fi to the wireless network (AP SSID) as shown on the TV display.. Enter the password for the wireless network. “screenbeam” is the default password. To display wirelessly, you need to find the receiver on the local network connection (i.e.
- Page 9 1100 Plus ® Wireless Display over existing LAN Connection ScreenBeam 1100 Plus can also be connected to existing wireless and wired networks and supports wireless display for client devices connected to the same network. In this mode, the ScreenBeam device will connect directly to the organization’s networks (wired...
- Page 10 Wi-Fi. Verify the receiver obtained an IP address (shown on the Ready to Connect screen). Connect the client device to the same network as ScreenBeam receiver To display wirelessly, you need to find the receiver on the network connection (i.e.
- Page 11 ® Displaying with a connected HDMI cable While most users will be able to connect to ScreenBeam wirelessly using their native application, there may be the occasional user that will prefer to use a wired HDMI connection and ScreenBeam can even support those users.
-
Page 12: Device Management
Device Management Configuring and Managing your new receiver is an important part of getting the most out of ScreenBeam. There are a number of security settings, network settings and more that allow you to configure and optimize ScreenBeam for your specific needs. To that end, we have provided you two different ways to setup, configure and manage your ScreenBeam receiver. - Page 13 Ethernet cable, connect the ScreenBeam Ethernet port to a DHCPenabled network. The Ready to Connect screen on the display will show the assigned IP address of the ScreenBeam. Enter this address into the web browser of a PC or Apple device on the same network as the ScreenBeam.
- Page 14 Using a Windows 10/8.1 device, start a wireless display session listed above. Once connected, use a web browser and enter https://192.168.16.1 to access the LMI. Follow the directions from Method 1, steps 5 and 6 if you get a browser error. 14 | screenbeam.com...
-
Page 15: Using Cms
To learn how to setup CMS and manage your deployment, please download our CMS Deployment Guide from our website at: https://support.screenbeam.com/cms Note: Access to the LMI is prohibited by default if ScreenBeam 1100 is connected to ScreenBeam CMS for management. This option can be changed in the receiver’s settings. - Page 16 PN: 0530-0850-000 © 2020 All rights reserved. ScreenBeam and the ScreenBeam logo are registered trademarks owned by ScreenBeam Inc. All other names are properties of their respective owners. Specifications subject to change without notice. 032720...
Need help?
Do you have a question about the 1100 Plus and is the answer not in the manual?
Questions and answers