Table of Contents
Advertisement
Quick Links
IQ3X Metal Detection System
Designed for Food & Packaging Industries
Operating Instructions
Commercial in Confidence
XXXXXX-1.0-ENG
Designed to Survive®
PROPRIETARY RIGHTS NOTICE: THIS DOCUMENT AND THE INFORMATION THAT IT CONTAINS ARE THE PROPERTY OF ILLINOIS TOOL WORKS INC. (ITW). RIGHTS TO DUPLICATE OR OTHERWISE COPY THIS
DOCUMENT AND RIGHTS TO DISCLOSE THE DOCUMENT AND THE INFORMATION THAT IT CONTAINS TO OTHERS AND THE RIGHT TO USE THE INFORMATION CONTAINED THEREIN MAY BE ACQUIRED ONLY BY
WRITTEN PERMISSION SIGNED BY A DULY AUTHORIZED OFFICER OF ITW. SPECIFICATIONS SUBJECT TO CHANGE WITHOUT NOTICE. COPYRIGHT 2018 ITW INC.
Loma Systems, Summit Avenue, Southwood, Farnborough, Hampshire, GU14 0NY UK
Advertisement
Table of Contents

Related Manuals for Loma IQ3X


Summary of Contents for Loma IQ3X
- Page 1 DOCUMENT AND RIGHTS TO DISCLOSE THE DOCUMENT AND THE INFORMATION THAT IT CONTAINS TO OTHERS AND THE RIGHT TO USE THE INFORMATION CONTAINED THEREIN MAY BE ACQUIRED ONLY BY WRITTEN PERMISSION SIGNED BY A DULY AUTHORIZED OFFICER OF ITW. SPECIFICATIONS SUBJECT TO CHANGE WITHOUT NOTICE. COPYRIGHT 2018 ITW INC. Loma Systems, Summit Avenue, Southwood, Farnborough, Hampshire, GU14 0NY UK...
- Page 2 Version Number Date Reason 29/07/2019 Initial Release...
-
Page 3: Table Of Contents
2.8 Intended Use of the Machine 2.9 Noise Levels 2.10 End of Life Treatment 2.11 Emergency Procedures 2.12 Quality Assurance 2.13 ISO9000 2.14 End User Licence Agreement 2: Introduction to the IQ3X Metal Detection System Original Document Copyright © Loma Systems... - Page 4 3.4 Displays 3.5 Using the Menus 3.6 Editing a Menu Option 3.7 Editing a Text Field 3.8 Electrical Services Box 3.9 IQ3X Display Menu Map 3.10 User Access 3.11 Logging In and Out 3.12 Logging In 3.13 Logged Out 3.14 Starting and Stopping 3.15 Starting the Machine...
- Page 5 4.21 Learn Setup 4.22 Learn Limits 4.23 Using Performance Validation 4.24 Setting Up PV Testing 4.25 Running a Performance Validation Test 5: Maintenance 5.1 Maintenance Warnings 5.2 Inspection and Cleaning 5.3 Cleaning Materials Required Original Document Copyright © Loma Systems...
- Page 6 5.9 Belt Conveyor Versions 5.10 Plastic Modular Belt Section Replacement 5.11 Setting the Belt Tension and Tracking 5.12 Adjusting the Drive Chain Tension 5.13 Adjusting the Reject Devices 5.14 UCB (Universal Control Board) Software Upgrade Original Document Copyright © Loma Systems...
-
Page 7: 1: Introduction
This guide is copyright to Loma Systems. No part of this document may be reproduced, transmitted, transcribed, stored in a retrieval system, translated into any language, or computer language in any form or by any means without the prior written permission of Loma Systems. Loma Systems Loma has offices around the world that can provide you with sales and support services. -
Page 8: About This Guide
1.1 About this guide General This guide explains how to use the IQ3X Metal Detection System. It walks through the process required to operate the machine. This guide does not cover the advanced features of the IQ3X Metal Detection System. For more information on the advanced features please refer to the IQ3X Reference Guide. -
Page 9: Organisation
Instructions are provided describing how to set up and configure the machine, including adding new products for inspection. Maintenance Instructions are provided describing the correct procedure for the inspection and cleaning of the IQ3X Metal Detection System. Original Document Copyright © Loma Systems... -
Page 10: Document Change Control
Indicates an email hyperlink, so tapping on the text will open a new message window in your email system. http://www.loma.com:- Indicates a web hyperlink, so tapping on the text will open the page in your default web browser. Notes and Warnings... -
Page 11: Copyright And Acknowledgements
Loma Systems. IQ3X Metal Detection System is a trademark of Loma Systems. All other product names are trademarks or registered trademarks of their respective owners systems. -
Page 12: Loma Systems
Tel:+48 22 575 70 25 Fax:+55 (0) 11 98455 1356 Fax:+48 22 575 70 01 E-mail: comercial@brapenta.com.br E-mail: pl.sales@loma.com Web: http://www.loma.com www.brapenta.com Web: http://www.loma.com For details of other Loma offices and the worldwide distributor, please visit www.loma.com. Original Document Copyright © Loma Systems... -
Page 13: 2: Safety First
This section provides some guidance. Responsibilities and Disclaimer The IQ3X Metal Detection System warranty provided by Loma Systems is subject to it being used and maintained in accordance with a set of guidelines which are included in this section. Safety Measures Before attempting to use the system a number of basic checks should be carried out to ensure that it is in a safe condition and ready to be used. -
Page 14: Safety Awareness
Generally in an industrial environment some background noise is present due to the operation of electrical equipment and mechanical movements of machinery such as conveyors and electrical noise. In general operation, Loma Metal Detection Systems do not emit a level of noise that is hazardous. -
Page 15: Ec Declaration Of Conformity
2.3 Safety Warnings Listed below are the safety warnings that are applicable when using a Loma IQ3X Metal Detection System. It is strongly recommended that personnel who are, or will be, responsible for installing, maintaining or operating the equipment described in this guide should read and understand these warnings. - Page 16 LIFTING THE MACHINE. Use only the correct slings and lifting tackle to move Loma Metal Detection Systems. Visually inspect all slings and lifting tackle prior to lifting the machine to ensure that: a. The safe working load will not be exceeded.
- Page 17 Hence Loma cannot be held responsible for meeting full requirements of OSHA or OHSA with regards to any equipment supplied, nor can Loma be held liable for penalty which may be assessed for failure to meet the requirements of the acts as interpreted by an authorised inspector.
-
Page 18: Safety Labels
Power supply data Date of manufacture Serial Number Model Mandatory Safety Label on all Loma Products Must read Operator's Manual prior to use. Caution: Electric Shocks Includes voltage and phase details which will vary dependant on the available supply. - Page 19 Operating Instructions Label Message Mandatory 'Check Guards' label on all Loma products Guards are fitted to protect the operator, they must be checked regularly for any damage or replacement work. Caution: Crush Hazard Moving parts of the system provide a risk of crushing hands if due care is not taken.
-
Page 20: Safety Guards
2.6 Responsibilities and Disclaimer Unless agreed otherwise in writing by Loma Systems, any warranty claims are subject to the following: No unapproved changes or additions to the electrical wiring system have been carried out. -
Page 21: Safety Measures
In addition, the following points should be observed for safe operation of the system: Installation, commissioning, operation and maintenance of the system should only be carried out by Loma trained personnel, following the applicable safety measures. Any attempts at servicing and/or repair of the system by unqualified personnel may result in damage which could result in the introduction of a safety hazard and the loss of warranty cover. -
Page 22: Intended Use Of The Machine
Operating Instructions 2.8 Intended Use of the Machine Permitted Use Loma metal detectors are designed to be used for detecting metal contaminants in products presented in packets, pouches or loose. Loma metal detectors ensure product safety, equipment protection and regulatory compliance by automatically removing contaminated products from the production line, stopping the line, alerting the operator or a combination of these. -
Page 23: End Of Life Treatment
Stop button. See Getting Started for further details. DEALING WITH FIRE. In the unlikely event of fire occurring in an item of equipment manufactured by Loma Systems, it is important that a fire extinguisher containing the correct type of extinguishing material is used. -
Page 24: Quality Assurance
Operating Instructions 2.12 Quality Assurance By your selection of a Loma IQ3X Metal Detection System you have demonstrated your intention to assure the quality of your products, and thereby protect your customers. The following points are recommended: Once your Loma IQ3X Metal Detection System is installed you should contact your local Loma Service Department to have it commissioned. -
Page 25: Iso9000
It is recommended that any suspect test pucks are destroyed and replaced. Loma can supply a vast range of test puck types / sizes at-stock. Specials can also be made to order. Please email teststicks@loma.com for further details. -
Page 26: End User Licence Agreement
1. Grant of Licence: Loma Systems shall at all times have and retain title and full ownership of all software, firmware programming routines, documentation supplied for use with the equipment and of all copies thereof made by Buyer (collectively “software”). -
Page 27: 2: Introduction To The Iq3X Metal Detection System
Even more robust and reliable, the latest products continue to lead the way in tackling key industry challenges and standards, notably food inspection Codes of Practice and user traceability. To provide solutions for a wide range of applications, a number of IQ3X Metal Detection System models are available. - Page 28 This page intentionally left blank...
-
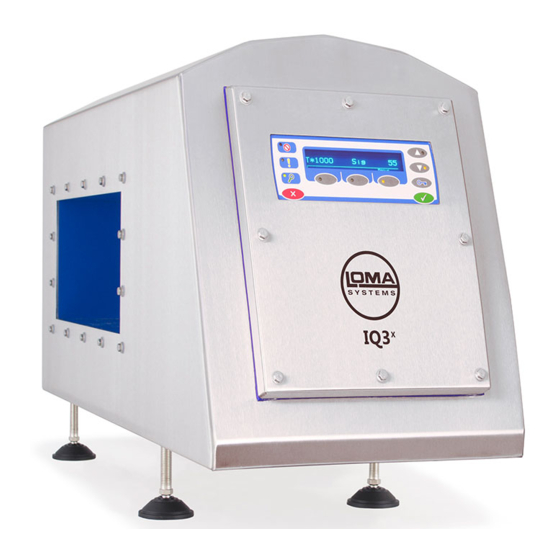
Page 29: 3: Getting Started
3.1 User Interface The IQ3X Metal Detection System provides a two line display user interface shown below, in conjunction with a number of buttons that enable you to navigate to system options and make changes as required. -
Page 30: Indicators
It also shows the top level Menus option. Bargraph Display The bargraph display shows the signal in bargraph form, with the threshold point represented by a fixed vertical bar approximately three-quarters of the way along the display. Original Document Copyright © Loma Systems... -
Page 31: Using The Menus
OK / Enter Key until the asterisk (*) appears at the beginning of the option display to indicate that all characters have been selected. Original Document Copyright © Loma Systems... -
Page 32: Electrical Services Box
Operating Instructions 3.8 Electrical Services Box When the IQ3X Metal Detector head is supplied fitted to a Loma conveyor, the following switches and buttons are also provided, mounted on the Electrical Services Box: The Isolator Switch is located on the front of the Electrical Services Box and is shown here in the ON position. -
Page 33: Iq3X Display Menu Map
Operating Instructions 3.9 IQ3X Display Menu Map Original Document Copyright © Loma Systems... -
Page 34: User Access
Operating Instructions 3.10 User Access User access to the features and functionality of the IQ3X Metal Detection System is managed through four password protected levels, listed and described below, with each level providing access based on the user function. Some customers do not want to have levels of restricted access for their machines. So through the Service menu the access levels may be disabled, providing full access to all users without having to log in at a specific user level. -
Page 35: Logging In And Out
3.11 Logging In and Out This section provides guidance for logging in and out of the IQ3X Metal Detection System. 3.12 Logging In The following procedures assume that the machine is switched on and working normally and that machine access has been 'Locked'. -
Page 36: Logged Out
4. You have now logged out and 'Locked' the machine. 3.14 Starting and Stopping This section provides guidance for starting and stopping the IQ3X Metal Detector, including stopping the machine in an emergency. The following procedures should only be carried out once all installation and commissioning activities have been completed and operators trained in the use of the machine. -
Page 37: Stopping The Machine
The power supply to the conveyor is now restored. 3. Push the green Start button to restart the conveyor. 4. The machine is now ready to start inspecting the selected product. Original Document Copyright © Loma Systems... - Page 38 This page intentionally left blank...
-
Page 39: 4: Operating Instructions
Setting User Access Levels and Passwords Use accounts are created at one of four access levels from 1 to 4. Level 1 provides basic operator access whilst level 4 provides access to all of the detector’s features and functionality. Original Document Copyright © Loma Systems... -
Page 40: Setting The Time And Date
Language option and press the OK / Enter Key to enable the current value to be edited. 3. Use the Navigation Keys to select the required Language and then press the OK / Enter Key to confirm the selection. Original Document Copyright © Loma Systems... -
Page 41: Setting The Machine Id
4. Repeat step 3 until you have selected and confirmed each character required for the Machine ID. Up to six characters may be used. 5. Once you have entered the required Machine ID, press the Cancel Key to exit the Machine menu. Original Document Copyright © Loma Systems... -
Page 42: Setting User Access Levels And Passwords
Enter Key to enable the current value to be edited. 3. Use the Navigation Keys to select either the ON or OFF option and then press the OK / Enter Key to confirm the selection. Original Document Copyright © Loma Systems... -
Page 43: Configuring The Metal Detector
Wherever possible, configuration of the metal detector will be carried out by Loma Systems before the machine is dispatched, or by a Loma Service Engineer during a commissioning visit. Primarily, the commissioning visit is required as part of the installation process so that the engineer can optimise machine performance in its actual working environment and for the products that are to be inspected. -
Page 44: Setting Up The Search Head
The Head menu options available are as follows: Type The 'Conveyor' option should be selected for the IQ3X search head. Coil Gap The coil gap required can be found on the serial number plate located within the control box of the detector head. - Page 45 Therefore it is advised not to revisit this entry unless necessary. Ferrite Frequency The IQ3X uses a product called "Ferrite" to provide a pre-set compensation value that the detector can recall to use with any product that when learnt exhibits no signals when passed through the detector aperture.
-
Page 46: Setting Up The Conveyor
Menus > Service > Configuration > General menu. It is calculated as follows: 1. Measure the distance from the Product Registration Photo-eye to the face of the detector (L). 2. Measure the depth of the detector case (D). Original Document Copyright © Loma Systems... - Page 47 CTB constant field, use either the following metric or imperial formula: Metric systems CTB = Encoder pulses per revolution x 100 x π x d Where: d = the diameter of the roller to which the encoder is fitted in millimetres. Original Document Copyright © Loma Systems...
- Page 48 Options are provided to Energise or De-Energise the audible alarm. Lamp Type Options of Dome and Stack are provided. The IQ3X Metal Detection System is generally supplied with an LED Lamp Stack so the Stack option should be selected.
- Page 49 The control board type that is currently fitted to the detector head is displayed. This is not editable. RX TX Board The RX TX board type that is currently fitted to the detector head is displayed. This is not editable. Original Document Copyright © Loma Systems...
-
Page 50: Setting Up The Service Options
Dry products, access should be disabled to avoid incorrect use. Access is generally enabled by a Loma Service Engineer when the Ferrite product needs to be re-learnt following replacement of a circuit board or upgrading of the detector software. - Page 51 Note that a Product Registration Photo-eye must be fitted to use this option. Access Filter If this option is selected then the Detection Filter option is included for selection in the Menus > Learn > Set Up menu. Original Document Copyright © Loma Systems...
-
Page 52: Setting The Vf Balance
The Balance Setup menu contains the following options: Frequency The IQ3X has seventy (70) different operating frequencies ranging from 31kHz up to 937kHz. Each of the available frequencies can be selected by scrolling through the list. Note that the frequency selected in this menu is independent of the frequency for the currently running product. - Page 53 When the detector has been configured correctly, the measured balance will generally be lower than the balance setpoint. If in doubt contact your local Loma service centre for assistance. Auto configure Enabling this option starts the AutoBalance process for all operating frequencies. The process commences by resetting the potentiometer positions for the I and Q channels for each frequency to 50.
-
Page 54: Setting The Vf Drive
The Drive Settings menu contains the following options: Frequency The IQ3X has seventy (70) different operating frequencies ranging from 31kHz up to 937kHz. Each of the available frequencies can be selected from the drop down list. Note that the frequency selected in this menu is independent of the frequency for the currently running product. - Page 55 In this case, try lowering the on time value a little more and perform another restore drive. If the red LED stays on then contact your local Loma service centre for assistance. Auto Configure Select this option to start the full setup process for all operating frequencies. The process commences by resetting the on time values for each frequency to zero.
-
Page 56: Setting Up The User Options
Bar Graph Options are provided to change the display so that the product signal is shown as a bar graph rather than a number or a combination of the two displayed at the same time. Original Document Copyright © Loma Systems... -
Page 57: Performing A Ferrite Tune
Access Ferrite option and press the OK / Enter Key to select it. 3. Use the Navigation Keys to display the YES option and then press the OK / Enter to select it. Original Document Copyright © Loma Systems... -
Page 58: Setting Up The Reject Options
This could typically be used with an air blast or retracting band reject device, but not a pusher type device. This reject mode is always available. Toggle (only available if a photo-eye is fitted) Original Document Copyright © Loma Systems... - Page 59 Reject Confirm Enable this option if a Reject Confirmation Photo-eye is fitted to your system. This photo-eye is fitted across the entrance to the reject bin to confirm that the contaminated product has Original Document Copyright © Loma Systems...
- Page 60 In addition to the above, the following option is available for selection in the Menus > Service > Reject > Control menu: Disable Rejects Selecting this option temporarily disables the reject device. This feature is intended for Loma Service Engineer use only. Original Document...
-
Page 61: Adding A New Product
If during the product Learn process a product effect is exhibited, the detector will advise that the Learn process has failed. You should then set the Product type to Unknown and repeat the learn process. Metal film Select this option if the product to be inspected is foil packed. Original Document Copyright © Loma Systems... - Page 62 Reject timings may also be set in the Menus > Service > Reject > Set Up menu. Enter the reject dwell time in seconds, or for variable speed systems, enter the distance in metres. Original Document Copyright © Loma Systems...
-
Page 63: Learning Products
4.17 Learning Products An essential part of inspecting products is to set up the metal detector parameters specifically for each product to optimise the detectors performance for each one. Loma metal detectors provide a Learn feature which automates this process. -
Page 64: Full Learn
Photo-eye is fitted. 7. Once the Learn process is finished a 'Learn Complete' message is displayed. Additional messages may be displayed during the Learn process which are listed and explained in the Learn Messages section. Original Document Copyright © Loma Systems... -
Page 65: Update Learn
Photo-eye is fitted. 7. Once the Learn process is finished a 'Learn Complete' message is displayed. Additional messages may be displayed during the Learn process which are listed and explained in the Learn Messages section. Original Document Copyright © Loma Systems... -
Page 66: Learn Messages
A product not specified for use with the machine is being used. The product packaging is highly conductive. If in doubt, contact your local Loma Service Centre. This message indicates that the product has so little moisture that it produces no product signal. The... -
Page 67: Learn Setup
The product Learn parameters for optimum detector performance are automatically selected during a Full Learn process so no manual adjustment of the parameters is normally required. If adjustments are required then you should contact your local Loma Service Centre in the first instance. - Page 68 For difficult products such as metal film or products with a high or non-uniform level of conductivity, a lower drive setting may achieve a better result. Head Enabling this option locks the Head drive setting, thus preventing the detector from changing it during a Full Learn process. Original Document Copyright © Loma Systems...
- Page 69 Manual adjustment is not recommended unless absolutely necessary. Options of MAX, MED, LOW and MIN are available for selection. Head Gain Enabling this option locks the Head Gain settings, thus preventing the detector from changing them during a Full Learn process. Original Document Copyright © Loma Systems...
-
Page 70: Learn Limits
This option is used to set the maximum signal value to be used during a Full Learn process. If the signal exceeds this threshold then the frequency is automatically reduced. The default value is 5000. Original Document Copyright © Loma Systems... - Page 71 IQ Span Enabling this option displays the I span threshold and Q span threshold options in the Menus > Learn > Set Up menu. This option requires a Product Registration Photo-eye to be fitted. Original Document Copyright © Loma Systems...
- Page 72 This option is used to set the I,Q signal value below which the Product type option value is automatically set to Dry in the Menus > Set Up > Product menu. The default value is 20. Original Document Copyright © Loma Systems...
-
Page 73: Using Performance Validation
OK / Enter Key to confirm the selection. 4. Repeat step 2 and 3 until you have selected and confirmed values for each option. Original Document Copyright © Loma Systems... - Page 74 6 minutes. Batch Selecting this option means that the user will be automatically prompted to initiate a PV test when a new batch is started or when a batch ends. Original Document Copyright © Loma Systems...
- Page 75 In this option you can enter the stainless steel (normally 304 annealed) test piece size in mm to be used for PV testing. Leave the option value blank if this test piece should not be used as part of the PV test. Original Document Copyright © Loma Systems...
- Page 76 Note that PVS test pieces are not recorded in the Contaminants Log or included within the reject count. Original Document Copyright © Loma Systems...
-
Page 77: Running A Performance Validation Test
1. To cancel the PV test, just press the Cancel Key at any time to return to the Run PV Test ? menu. If the test was initiated manually, no error is generated. If the test was initiated automatically, a non-action error is recorded and a report is generated. Original Document Copyright © Loma Systems... - Page 78 This page intentionally left blank...
-
Page 79: 5: Maintenance
This warranty statement is in addition to the terms of sale. The following sections provide more information: Maintenance Warnings A list of applicable safety warnings to be observed when maintaining the IQ3X Metal Detection System is provided. Inspection and Cleaning This section provides guidance for cleaning the system. -
Page 80: Maintenance Warnings
Operating Instructions 5.1 Maintenance Warnings The following safety warnings apply when carrying out maintenance operations on a Loma IQ3X Metal Detection System: 1. LETHAL HAZARD - ELECTRICAL SUPPLIES 2. LETHAL HAZARD - COMPRESSED AIR SUPPLIES 3. NON-IONIZING RADIATION 4. WORKING ON EQUIPMENT 5. -
Page 81: Inspection And Cleaning
5.2 Inspection and Cleaning 5.3 Cleaning Materials Required Loma recommend that the system is washed down (using only an open water hose) using a mild detergent and then thoroughly rinsed with clean water. A non-abrasive damp cloth must be used to clean the screen. -
Page 82: Cleaning Regime
Information about IP69K rating relates ONLY to an IQ3X Rectangular Head, NOT the conveyor system. Both the Standard and Harsh versions of the metal detector have been designed and tested to meet IP69K water pressure between 1160 - 1450 psi @between 3.69 - 4.2 gallons per minute @ 80... -
Page 83: Air Regulator Unit Maintenance
Either way the control will be located at the bottom of the water trap bottle. Water should be removed regularly. The correct setting of the air pressure can be found in the individual system specifications in the Technical Specifications chapter. Original Document Copyright © Loma Systems... -
Page 84: Conveyor Belt Maintenance
'floating' sprockets. 5. Carefully slide the plastic hinge rods through the interlocked sections of belt. 6. If product guides were removed from the conveyor, refit them in position and tighten the securing screws. Original Document Copyright © Loma Systems... -
Page 85: Setting The Belt Tension And Tracking
Rejects Setup screen. There is no air regulator supplied as standard with the air blast reject. However, the air supply pressure should be approximately 100 psi (6.9 bar). Original Document Copyright © Loma Systems... -
Page 86: Ucb (Universal Control Board) Software Upgrade
Operating Instructions 5.14 UCB (Universal Control Board) Software Upgrade This section provides details for upgrading the IQ3X Metal Detection System software. The following files are required and are available from Loma Systems. UCB_MBDL_V5_RC.srec - This file contains the operating software for the metal detector. The s in the file name signifies that it can be installed on systems that only have 2 x 2 MB (4 MB) flash ROMs fitted in positions U1 and U2 on the Control Board. - Page 87 13. Switch machine ON and wait for configuration menu 14. Switch OFF “C” switch on UCB DIP switch (red) 15. Begin with configuration If LED is not blinking slowly, repeat upload procedure from beginning Original Document Copyright © Loma Systems...
- Page 88 This page intentionally left blank...
Need help?
Do you have a question about the IQ3X and is the answer not in the manual?
Questions and answers