Table of Contents
Advertisement
Quick Links
EN
The instruction manual is an integral part of the product
Pellet Stove
LIA
PRODUCT INFORMATION,
INSTALLATION AND MAINTENANCE
Please read this entire manual before installation and use of
this pellet fuel-burning room heater.
Failure to follow these instructions could result in property
damage, bodily injury or even death.
Contact local building or fire officials about restrictions and
installation inspection requirements in your area.
Contact local building autorithy (such as municipal
building department, fire department, fire prevention,
bureau. etc.) before installation to determine if a permit
and/or inspection is required.
Save these Instructions.
Advertisement
Table of Contents

Related Manuals for Piazzetta LIA


Summary of Contents for Piazzetta LIA
- Page 1 The instruction manual is an integral part of the product Pellet Stove Please read this entire manual before installation and use of this pellet fuel-burning room heater. Failure to follow these instructions could result in property damage, bodily injury or even death. Contact local building or fire officials about restrictions and installation inspection requirements in your area.
-
Page 2: Table Of Contents
The images shown in this manual are for explanatory purposes and at times may not accurately depict the product. This document is the property of Gruppo Piazzetta S.r.l. and no part of it may be reproduced or disclosed to third parties, wholly or in part, without written permission All rights reserved by Gruppo Piazzetta S.r.l.. -
Page 3: General Information
T.A.C. (authorized technical assistance centre). cidental, may cause burns or fires. Only touch - Gruppo Piazzetta S.r.l. cannot be held liable for situations of these parts during operation if wearing the risk, defects, damage, product malfunctioning or for damage... - Page 4 PRODUCT INFORMATION, INSTALLATION AND MAINTENANCE This appliance is not for use by persons (in- Do not stand or place objects which are not cluding children) with reduced physical, sen- heat-resistant within the prescribed minimum sory, mental capacity or with a lack of experi- safety distance.
-
Page 5: Product Information
PRODUCT INFORMATION, INSTALLATION AND MAINTENANCE Other requirements for compliance may be necessary in relation to specifications required by the appropriate Authorities. Warning against overfiring: pellets must not be fed manually into the ■ ■ grate DO NOT USE MAKESHIFT COMPROMISES never add additional fuel by hand ■... -
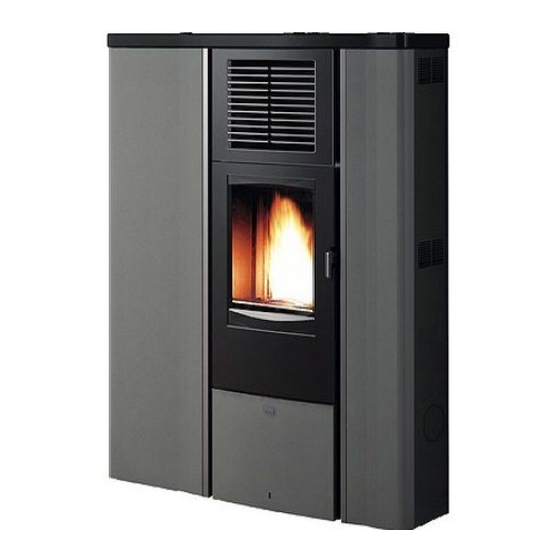
Page 6: Part Identification
PRODUCT INFORMATION, INSTALLATION AND MAINTENANCE PART IDENTIFICATION 15 Metal structure Pellet hopper cover 16 Appliance control panel Pellet hopper grille 17 Pellet hopper Door 18 Pellet indicator Ceramic glass Door handle 19 Auger motor Smoke intake/Extractor fan 20 Pressure switch Environment fan/s 21 Electronic control unit Smoke outlet... -
Page 7: Safety Devices
PRODUCT INFORMATION, INSTALLATION AND MAINTENANCE Electrical safety: SAFETY DEVICES the appliance is protected by fuses in the event of a power surge. The appliance is equipped with the following safety and check Electronic control unit: devices which stop the stove from operating if any faults occur the electronic control unit signals and controls a series of events (against over-firing and ensuring heaters is operating properly, including power and ignition failure. -
Page 8: Product Identification Data
PRODUCT INFORMATION, INSTALLATION AND MAINTENANCE PRODUCT IDENTIFICATION DATA CHARACTERISTICS Each product is identified in the following way: Cladding: - IDENTIFICATION DATA PLATE (1) with the model (A) and ap- - in painted steel pliance performance specifications Top surface: - SERIAL NUMBER PLATE (2) with the serial number of the ap- - majolica pliance (B) Structure:... -
Page 9: Technical Data
PRODUCT INFORMATION, INSTALLATION AND MAINTENANCE TECHNICAL DATA Model Unit of meas- Medium burn Overall burn Description High burn rate Low burn rate urement rate rate Power Setting Fuel natural pure wood pellets Btu/hr 37258 17383 10827 17417 Heat Input KJ/hr 39277 18325 11413... -
Page 10: Sizes
PRODUCT INFORMATION, INSTALLATION AND MAINTENANCE (values in cm) SIZES Fig. 6 44.28" 112,5 cm 15.83" 15.83" 40,2 cm 40,2 cm 8.69" 8.69" 8.69" 22,1 cm 22,1 cm 22,1 cm 3.57" 2.78" 9,1 cm 7,1 cm 3.06" 9.25" 1.97" 4.86" 7,8 cm 3.41"... -
Page 11: Fuel
Contains no demolition or construction waste tance centre) or by specially qualified personnel au- Trace metals ≤ 100 mg/kg thorised by Gruppo Piazzetta S.r.l.. Using pellets that are out of date or not in conformity ■ ■ with the manufacturer's recommendations not only... -
Page 12: Information Regarding Pellet Loading
PRODUCT INFORMATION, INSTALLATION AND MAINTENANCE Prohibited Fuel Types: 3.2.1 Pellet indicator - Residential or commercial garbage When the red reload indicator can be seen inside the hopper, it is - Lawn clippings or yard waste possible that the auger is not perfectly loaded which would cause - Materials containing rubber, including tires irregular pellet unloading in the grate and start-up failure. -
Page 13: General Information Regarding The System
PRODUCT INFORMATION, INSTALLATION AND MAINTENANCE GENERAL INFORMATION REGARDING The appliance must not be used simultaneously with THE SYSTEM collective type ventilation ducts with or without ex- tractor fan, other devices or other appliances such as: Below is some general information regarding the system, appli- forced ventilation systems or other heating systems ance installation and products manufactured by Gruppo Piazzet- using ventilation to change the air. -
Page 14: Chimney
PRODUCT INFORMATION, INSTALLATION AND MAINTENANCE The connecting pipe for the combustion air inlet of the appliance FLUE PIPE must comply with the following requirements: - have a diameter equal to or greater than the diameter of the inlet on the appliance - be of a suitable, non-flammable material The stove requires a UL listed pellet vent. - Page 15 For installations more than Required 4000’ (1200 m) above sea level Gruppo Piazzetta S.r.l. assumes no responsibility for, Maximum number of elbows nor does the warranty cover, smoke damage caused Length of horizontal sections by reverse drafting of pellet stoves under power failure 10’...
-
Page 16: Interior Vent Installation
PRODUCT INFORMATION, INSTALLATION AND MAINTENANCE INTERIOR VENT INSTALLATION RAIN CAP This kind of installation provides the natural draft that results from a vertical rise avoiding smoke being released into the house STORM COLLAR when electricity to the unit is interrupted while burning or smold- ering pellets remains in the burn grate. -
Page 17: Connecting To A Conventional Chimney
PRODUCT INFORMATION, INSTALLATION AND MAINTENANCE If you wish to use an existing chimney it is strongly recommend- RAIN CAP ed that you have it checked by a professional chimneysweep to ensure that it is completely airtight. The reason for this is that the 12"... -
Page 18: Installing Into An Existing Fireplace Chimney
PRODUCT INFORMATION, INSTALLATION AND MAINTENANCE When chimneys are relined, a chimney chase cap that reduces the INSTALLING INTO AN EXISTING FIREPLACE outlet of the chimney to the size of the liner is required. Extend CHIMNEY the exhaust vent above the chimney chase cap and finish it off with a rain cap. -
Page 19: Short Rise Installation - Wall Outlet
PRODUCT INFORMATION, INSTALLATION AND MAINTENANCE This configuration will help prevent blockage of vent by snow drifts. Also the minimum vertical run of 5 feet (1.5 m) ensures the A chimney system with known drafting problems may ventilation of the exhaust in the event of a power failure, and al- require a liner, which may also need to be insulated to low for easier cleaning through cleanout on tee. -
Page 20: Venting: Termination Requirements
PRODUCT INFORMATION, INSTALLATION AND MAINTENANCE The type of installation must first be considered before determin- ing the exact location of the venting termination in relation ship This Installation may cause problems during adverse to doors, window, cavities or air vents. weather or power failure. -
Page 21: Prevention Of Domestic Fires
PRODUCT INFORMATION, INSTALLATION AND MAINTENANCE The clearance to a door, window or cavity must be at least: - 1.5’ (458 mm) below The exhaust gases from the combustion of pellets fuel - 4’ (1.2 m) horizontally may dirty the outside of the walls. To avoid such possi- - 1’... - Page 22 PRODUCT INFORMATION, INSTALLATION AND MAINTENANCE - Chimney must meet requirements of CAN/ULC-S629, Standard for 650°C Factory Built Chimneys. CAUTION: THE STRUCTURAL INTEGRITY OF THE - Follow Manufacturer’s guidelines concerning height and clear- FLOORS, WALLS, CEILING AND ROOF MUST BE MAIN- ances to combustibles.
-
Page 23: Preparation For Installing
PRODUCT INFORMATION, INSTALLATION AND MAINTENANCE After having removed the material protecting the appliance, re- PREPARATION FOR INSTALLING move all the retainers securing the appliance to the pallet and then remove it from the pallet. HANDLING In order to prevent any accidents or damage to the product, please follow the recommendations below. -
Page 24: Minimum Safety Distances
PRODUCT INFORMATION, INSTALLATION AND MAINTENANCE - remove the screws (3) which secure the front panel (4), lift it slightly and remove it by pulling it towards the front The lower front panel is pressurised. To fit, insert one side first, then press it slightly and slot in the other side. MINIMUM SAFETY DISTANCES When selecting a location for the appliance it is important to con- sider the required clearances to walls. - Page 25 PRODUCT INFORMATION, INSTALLATION AND MAINTENANCE Connection to the flue must respect minimum safety distances from heat-sensitive structural components 0" to BRAKET or inflammable materials (wood panelling, beams or see chapter "SECURING TO A WALL" ceilings, etc) shown in figures. Due to high temperatures, this stove should be placed SEE VENT out of traffic and away from furniture and draperies.
-
Page 26: Installation Kit And Accessories
PRODUCT INFORMATION, INSTALLATION AND MAINTENANCE To install outside air use any 2” (6 cm) I.D. flexible metal hose or 0" to BRAKET rigid metal pipe (conduit). see chapter "SECURING TO A WALL" It must be connected around (NOT INSIDE) the combustion air inlet tube. -
Page 27: Connection To The Smoke Outlet
PRODUCT INFORMATION, INSTALLATION AND MAINTENANCE - remove the knockout (2) from the panel ensuring that it is not CONNECTION TO THE SMOKE OUTLET scratched or misshapen in the process Please refer to and carefully read sections " FLUE PIPE " and "... - Page 28 PRODUCT INFORMATION, INSTALLATION AND MAINTENANCE - remove the knockout (2) from the panel ensuring that it is not - reposition the top ceramic panel, slotting it over the 3'' (8 cm) Ø scratched or misshapen in the process pipe you have just installed - reposition the hole cover Fig.
-
Page 29: Electrical Connections
PRODUCT INFORMATION, INSTALLATION AND MAINTENANCE - turn the smoke outlet by 90° upwards ELECTRICAL CONNECTIONS - remove the plug (2) from the smoke outlet by unscrewing the screws (3) - check that the seal is not worn and seals correctly - secure the plug and the seal to the other smoke outlet in the same way Fig. -
Page 30: N.pel Contact
- insert the terminal (5) into its own seat on the board (4). DT2035104-0 Fig. 47 Only connect devices approved by Gruppo Piazzetta S.r.l.. For more information on installation and opera- tion, please contact a T.A.C. (Technical Assistance Cen- tre) or qualified technician. -
Page 31: Securing To A Wall
PRODUCT INFORMATION, INSTALLATION AND MAINTENANCE - reposition the appliance SECURING TO A WALL - fix the bracket to the appliance using the screws removed pre- viously Anchor the appliance to a fixed support, for example a wall, re- - install the left side panel. specting the safety distances (refer to the section "... -
Page 32: Use
PRODUCT INFORMATION, INSTALLATION AND MAINTENANCE Majolica panel - Position the tiled panel (1) in the relevant slots (2) 6.8 oz (20 cl) - make sure that the top surface panel is level and if necessary shim the parts which rest on the fibreglass tape provided - position the hole covers (3). -
Page 33: Scheduled Maintenance
PRODUCT INFORMATION, INSTALLATION AND MAINTENANCE Recommended interval Cleaning must be carried out with suitable equipment Interventions which may be carried out by the user and in full compliance with all health and safety regu- Glass 1 day lations. The materials and equipment used for cleaning must ■... -
Page 34: Opening The Door
PRODUCT INFORMATION, INSTALLATION AND MAINTENANCE 10.5 CLEANING THE GLASS Do not clean metal parts using alcohol, solvents, pet- During start-up it is possible that tar may accumulate on the glass rol-based products, acetones or other degreasing or which will disappear when optimal combustion is reached. If this abrasive substances. -
Page 35: Cleaning The Grate And Grate Support
PRODUCT INFORMATION, INSTALLATION AND MAINTENANCE 10.8 CLEANING THE GRATE AND GRATE 10.9 CLEANING THE COMBUSTION CHAMBER SUPPORT The grate area must be cleaned. Recommended cleaning frequency: refer to the section " SCHEDULED MAINTENANCE ". Recommended cleaning frequency: refer to the section "SCHEDULED MAINTENANCE". -
Page 36: Cleaning The Smoke Chamber
PRODUCT INFORMATION, INSTALLATION AND MAINTENANCE - using a vacuum cleaner suitable for cleaning ash, remove all the residue which has deposited on the side walls and in the upper part of the firebox - clean the slots (8) Fig. 59 - lift the element slightly and remove it by pulling it towards you - use a vacuum cleaner to remove any ash and carbon deposits which may have accumulated in the smoke chamber, taking... -
Page 37: Cleaning The Room Fan
PRODUCT INFORMATION, INSTALLATION AND MAINTENANCE 10.13 CLEANING THE SMOKE OUTLET The fan must be cleaned with the fire out, the appliance Soot and Flyash: formation and need for removal. completely cold and with the power cable disconnect- The products of combustion will contain small particles of flyash. The flyash will collect in the exhaust venting system and restrict The extractor fan is only to be cleaned by a T.A.C. -
Page 38: Replacing The Fuses
PRODUCT INFORMATION, INSTALLATION AND MAINTENANCE Smoke outlets 1-3-4 ELECTRONIC BOARD FUSE Refer to the section " CONNECTION TO THE SMOKE OUTLET ". Unscrew the fuse box plug (1) located on the electronic board Proceed as follows: and replace the fuse with a similar one. - remove the plugs (D) and (B) by unscrewing the screws (C) Type of fuse: F6.3AL205V - clean the flue pipe. -
Page 39: When Not In Use
PRODUCT INFORMATION, INSTALLATION AND MAINTENANCE - remove the door 11 WHEN NOT IN USE - place the door on a flate surface without damaging it - replace the gasket (2) When shutting the appliance down at the end of the season or if a - it is recommended that the gasket is blocked with a few drops long period of inactivity is anticipated, proceed as follows: of silicone which may be used at high temperatures... -
Page 40: Electrical Connections
PRODUCT INFORMATION, INSTALLATION AND MAINTENANCE 12 ELECTRICAL CONNECTIONS Capacitor Extractor fan YELLOW 1 2 3 GREEN BLACK BLACK WHITE WHITE BLUE WHITE Motherboard Fuse BLACK WHITE WHITE BLACK BLUE BLUE N. PEL. N. H2O N. AMB. TERM. -TC1+ GREY Remote BLUE control receiver BROWN... -
Page 41: Reference Standards
PRODUCT INFORMATION, INSTALLATION AND MAINTENANCE 13 REFERENCE STANDARDS ASTM E1509-12 Standard Specification for Room Heaters, Pellet Fuel-Burning Type ASTM E2515-11 Standard Test Method for Determination of Particulate Matter Emissions Collected by a Dilution Tunnel ASTM E2779-10 Standard Test Method for Determining Particulate Matter Emissions from Pellet Heaters ULC S627-00 Standard for Space Heaters for Use With Solid Fuels CSA B415.1-10... -
Page 42: Overall Warranty
Parts and Labour Piazzetta (North America) will repair or replace any part found to be defective (parts and labour) for two (2) years from the date of purchase, including glass for thermal breakage only (not impact) and exterior cladding for gloss retention. - Page 43 PRODUCT INFORMATION, INSTALLATION AND MAINTENANCE DT2003165_H072218EN0_00...
- Page 44 PLEASE CONTACT YOUR DEALER FIRST. Distribuite by: Pacific Energy Fireplace Products Ltd. 2975 Allenby Rd. Duncan, BC, Canada V9L 6V8 Tel: 1-250-748-1184 email: support@pacificenergy.net Via Montello, 22 31011 Casella d’Asolo (TV) - ITALY Tel. +39.04235271 - Fax +39.042355178 www.piazzetta.it e-mail:infopiazzetta@piazzetta.it...
Need help?
Do you have a question about the LIA and is the answer not in the manual?
Questions and answers