Table of Contents
Advertisement
Available languages
Available languages
Quick Links
Advertisement
Chapters
Table of Contents

Related Manuals for Speck pumpen Normblock


Summary of Contents for Speck pumpen Normblock
- Page 1 Blockpumpe Normblock Betriebs-/ Montageanleitung...
- Page 2 Impressum Betriebs-/ Montageanleitung Normblock Originalbetriebsanleitung Alle Rechte vorbehalten. Inhalte dürfen ohne schriftliche Zustimmung des Herstellers weder verbreitet, vervielfältigt, bearbeitet noch an Dritte weitergegeben werden. Generell gilt: Technische Änderungen vorbehalten. © SPECK Pumpen Verkaufsgesellschaft GmbH, Neunkirchen a. Sand 06.06.2016...
-
Page 3: Table Of Contents
150 kW) zur Richtlinie 2009/125/EG "Öko-Design-Richtlinie" ...........15 Benennung ..............................15 Typenschild ..............................16 Konstruktiver Aufbau ...........................16 Aufstellungsarten ............................18 Aufbau und Wirkungsweise ........................20 Geräuscherwartungswerte ...........................21 Lieferumfang ..............................21 4.10 Abmessungen ...............................21 Aufstellung/Einbau ........................22 Sicherheitsbestimmungen ..........................22 Überprüfung vor Aufstellungsbeginn ......................22 Normblock 3 von 58... - Page 4 Sicherheitsbestimmungen ..........................35 Wartung/Inspektion .............................36 Entleeren/Reinigen ............................38 Pumpenaggregat demontieren ........................38 Pumpenaggregat montieren ........................41 Anzugsdrehmomente ...........................45 Ersatzteilhaltung ............................46 Störungen: Ursachen und Beseitigung ..................47 Zugehörige Unterlagen ......................49 Gesamtzeichnungen .............................49 EG-Konformitätserklärung ......................55 Unbedenklichkeitserklärung ...................... 56 Stichwortverzeichnis ........................57 Normblock 4 von 58...
-
Page 5: Glossar
Hersteller, dass das Produkt ordnungs- gemäß entleert wurde, so dass von fördermedi- Poolpumpen umsberührten Teilen keine Gefahr für Umwelt Pumpen des Kunden/ Betreibers, die unabhän- und Gesundheit mehr ausgeht. gig von ihrem späteren Einsatz, eingekauft und eingelagert werden Normblock 5 von 58... -
Page 6: Allgemeines
Speck Pumpen zu benachrichtigen. Geräuscherwartungswerte (⇨ Kapitel 4.8 Seite 21) 1.2 Einbau von unvollständigen Maschinen Für den Einbau von Speck Pumpen gelieferten unvollständigen Maschinen sind die je- weiligen Unterkapitel von Wartung/Instandhaltung zu beachten. 1.3 Zielgruppe Zielgruppe dieser Betriebsanleitung ist technisch geschultes Fachpersonal. (⇨ Kapitel 2.4 Seite 8) -
Page 7: Sicherheit
Für die Einhaltung von in der Betriebsanleitung nicht berücksichtigten ortsbezoge- nen Bestimmungen ist der Betreiber verantwortlich. 2.3 Bestimmungsgemäße Verwendung ▪ Die Pumpe/Pumpenaggregat darf nur in solchen Einsatzbereichen betrieben wer- den, die in den mitgeltenden Dokumenten beschrieben sind. Normblock 7 von 58... -
Page 8: Personalqualifikation Und Personalschulung
– Gefährdung der Umwelt durch Leckage von gefährlichen Stoffen 2.6 Sicherheitsbewusstes Arbeiten Neben den in dieser Anleitung aufgeführten Sicherheitshinweisen sowie der bestim- mungsgemäßen Verwendung gelten folgende Sicherheitsbestimmungen: ▪ Unfallverhütungsvorschriften, Sicherheits- und Betriebsbestimmungen ▪ Explosionsschutzvorschriften ▪ Sicherheitsbestimmungen im Umgang mit gefährlichen Stoffen Normblock 8 von 58... -
Page 9: Sicherheitshinweise Für Den Betreiber/Bediener
Für den Betrieb explosionsgeschützter Pumpenaggregate gemäß der EU-Richtlinie 2014/34/EU (ATEX) gelten besondere Bedingungen. Hierzu die mit nebenstehendem Symbol gekennzeichneten Abschnitte dieser Be- triebsanleitung und die nachfolgenden Kapitel besonders beachten, (⇨ Kapitel 2.10.1 Normblock 9 von 58... - Page 10 Der Motor verfügt über eine eigene Kennzeichnung. Voraussetzung für die Aufrecht- erhaltung der Kennzeichnung ist, dass der Motorhersteller die durch die Pumpe an Motorflansch und Motorwelle entstehenden Temperaturen zulässt. Für die von Speck Pumpen an Pumpen mit ATEX-Zertifizierung angebauten Motoren ist diese Bedingung erfüllt. 2.10.2 Temperaturgrenzen Im normalen Betriebszustand sind die höchsten Temperaturen an der Oberfläche des...
- Page 11 2 Sicherheit sicherstellen, so sind entsprechende Überwachungseinrichtungen vorzusehen. Die Notwendigkeit von Überwachungseinrichtungen zur Sicherstellung der Funktion überprüfen. Weitere Informationen zu Überwachungseinrichtungen sind bei Speck Pumpen zu er- fragen. 2.10.4 Grenzen des Betriebsbereichs Die unter (⇨ Kapitel 6.2.3.1 Seite 32) angegebenen Mindestmengen beziehen sich auf Wasser und wasserähnliche Fördermedien.
-
Page 12: Transport/Zwischenlagerung/Entsorgung
3 Transport/Zwischenlagerung/Entsorgung 3.1 Lieferzustand kontrollieren Bei Warenübergabe jede Verpackungseinheit auf Beschädigungen prüfen. Bei Transportschäden den genauen Schaden feststellen, dokumentieren und umgehend schriftlich an Speck Pumpen bzw. den liefernden Händler und den Versicherer melden. 3.2 Transportieren GEFAHR Herausrutschen von Pumpe/Pumpenaggregat aus der Aufhängung Lebensgefahr durch herabfallende Teile! ▷... -
Page 13: Lagerung/Konservierung
Außerbetriebnahme zu beachten. (⇨ Kapitel 6.3.1 Seite 33) 3.4 Rücksendung Die Pumpe ordnungsgemäß entleeren. (⇨ Kapitel 7.3 Seite 38) Die Pumpe grundsätzlich spülen und reinigen, besonders bei schädlichen, explo- siven, heißen oder anderen risikoreichen Fördermedien. Normblock 13 von 58... -
Page 14: Entsorgung
Medien beachten. Pumpe/Pumpenaggregat demontieren. Fette und Schmierflüssigkeiten bei der Demontage sammeln. Pumpenwerkstoffe trennen z. B. nach: - Metall - Kunststoff - Elektronikschrott - Fette und Schmierflüssigkeiten Nach örtlichen Vorschriften entsorgen bzw. einer geregelten Entsorgung zufüh- ren. Normblock 14 von 58... -
Page 15: Beschreibung Pumpe/Pumpenaggregat
▪ Informationen zum Effizienzreferenzwert bzw. Referenzwertdarstellung für MEI = 0,70 (0,40) für die Pumpe auf der Grundlage des Musters in der Abbildung sind abrufbar unter: http://www.europump.org/efficiencycharts 4.3 Benennung Beispiel: Normblock 32/160 W12 Tabelle 5: Erklärung zur Benennung Abkürzung Bedeutung Normblock... -
Page 16: Typenschild
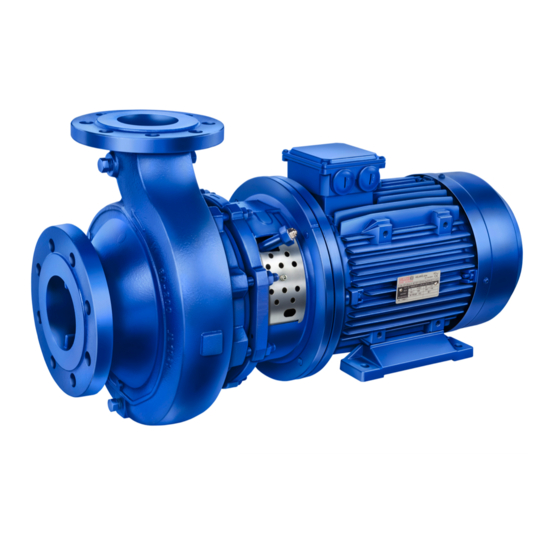
4 Beschreibung Pumpe/Pumpenaggregat 4.4 Typenschild SPECK Pumpen Verkaufsgesellschaft GmbH Hauptstraße 3 91233 Neunkirchen am Sand, Germany S-Nr. Type Ø Abb. 4: Typenschild (Beispiel) Normpumpe Seriennummer Baureihe, Baugröße Werkstoffausführung Förderstrom Drehzahl Sonstiges Laufraddurchmesser Förderhöhe Baujahr 4.5 Konstruktiver Aufbau Bauart ▪ Spiralgehäusepumpe ▪... - Page 17 ▪ Wicklung 50 Hz, 380-420 V / 660-725 V ≥ 2,50 kW ▪ Bauart IM V1 ≤ 3,30 kW ▪ Bauart IM V15 ≥ 4,60 kW ▪ Schutzart IP55 oder IP54 ▪ Betriebsart Dauerbetrieb S1 ▪ Zündschutzart EExe ll ▪ Temperaturklasse T3 Normblock 17 von 58...
-
Page 18: Aufstellungsarten
Pumpenaggregate mit Spiralgehäuse- fuß bis Motorbaugröße 112 fuß, Motorbaugröße 132 bis 180 Pumpenaggregate, Motorbaugröße Pumpenaggregate, Motorbaugröße 200 bis 250, 2-polig 200 bis 250, 4-polig Horizontaler Einbau, Befestigung oben Pumpenaggregate bis Motorbaugrö- Pumpenaggregate, Motorbaugröße ße 112 132 bis 180 Normblock 18 von 58... - Page 19 4 Beschreibung Pumpe/Pumpenaggregat Vertikaler Einbau Pumpenaggregate bis Motorbaugrö- Pumpenaggregate, Motorbaugröße ße 112 132 bis 180 Pumpenaggregate, Motorbaugröße Pumpenaggregate, Motorbaugröße 200 bis 250, 2-polig 200 bis 250, 4-polig Normblock 19 von 58...
-
Page 20: Aufbau Und Wirkungsweise
Wellendichtung (8) abgedichtet. Die Welle ist in Wälzlagern (10 und 11) gelagert, die von einem Motorgehäuse (5) aufgenommen werden, das mit dem Pumpengehäuse und/oder dem Gehäusedeckel (3) über die Antriebslaterne (9) verbunden ist. Abdichtung Die Pumpe wird mit einer Normgleitringdichtung abgedichtet. Normblock 20 von 58... -
Page 21: Geräuscherwartungswerte
Angaben über Maße dem Maßblatt der Pumpe/Pumpenaggregat entnehmen. räumlicher Mittelwert; gemäß ISO 3744 und EN 12639. Gilt im Betriebsbereich der Pumpe von Q/Qopt = 0,8 - 1,1 und kavi- tationsfreiem Betrieb. Bei Gewährleistung gilt für Messtoleranz und Bauspiel ein Zuschlag von +3 dB. Normblock 21 von 58... -
Page 22: Aufstellung/Einbau
Bei Fundamentaufstellung mit Motorbaugrößen 132 oder 160 den Motorfuß 20 mm unterbauen. Bei Fundamentaufstellung ist es bei manchen Pumpe-Motor-Kombinationen not- wendig, den Stützfuß / die Motorfüße zu unterbauen. Pumpenaggregat auf das Fundament aufstellen und befestigen (siehe Tabelle "Befestigung") Normblock 22 von 58... -
Page 23: Rohrleitungen
Die Rohrleitungen sind unmittelbar vor der Pumpe abgefangen und spannungs- frei angeschlossen. Behälter, Rohrleitungen und Anschlüsse gründlich reinigen, durchspülen und durchblasen (vor allem bei neuen Anlagen). Flanschabdeckungen an Saug- und Druckstutzen der Pumpe vor dem Einbau in die Rohrleitung entfernen. G = ISO 228/1 Normblock 23 von 58... - Page 24 Bei Förderung aus unter Vakuum stehenden Behältern ist die Anordnung einer Va- kuumausgleichsleitung empfehlenswert. Für eine Vakuumausgleichsleitung gelten folgende Regeln: ▪ Die Mindestnennweite der Rohrleitung beträgt 25 mm. ▪ Die Rohrleitung mündet über dem höchsten im Behälter zulässigen Flüssigkeits- stand. Normblock 24 von 58...
- Page 25 Nicht oder falsch verwendete Zusatzanschlüsse (z. B. Sperrflüssigkeit, Spülflüssigkeit usw.) Verletzungsgefahr durch austretendes Fördermedium! Verbrennungsgefahr! Funktionsstörung der Pumpe! ▷ Anzahl, Abmessungen und Lage der Zusatzanschlüsse, wenn vorhanden, Be- schilderung an der Pumpe beachten. ▷ Vorgesehene Zusatzanschlüsse verwenden. Normblock 25 von 58...
-
Page 26: Einhausung/Isolierung
▷ Vorschriften IEC 60364 und bei Explosionsschutz EN 60079 beachten. WARNUNG Fehlerhafter Netzanschluss Beschädigung des Stromnetzes, Kurzschluss! ▷ Technische Anschlussbedingungen örtlicher Energieversorgungsunternehmen beachten. Vorhandene Netzspannung mit den Angaben auf dem Typenschild des Motors vergleichen. Geeignete Schaltung wählen. HINWEIS Der Einbau einer Motorschutzeinrichtung ist empfehlenswert. Normblock 26 von 58... -
Page 27: Drehrichtung Prüfen
▷ Niemals die Drehrichtung bei trockener Pumpe prüfen. WARNUNG Hände im Pumpengehäuse Verletzungen, Beschädigung der Pumpe! ▷ Niemals Hände oder Gegenstände in die Pumpe halten solange der elektrische Anschluss des Pumpenaggregats nicht entfernt und gegen Wiedereinschalten gesichert wurde. Normblock 27 von 58... - Page 28 Durch Ein- und sofortiges Ausschalten den Motor kurz anlaufen lassen und da- bei die Drehrichtung des Motors beachten. Drehrichtung kontrollieren. Die Drehrichtung des Motors muss mit dem Drehrichtungspfeil an der Pumpe übereinstimmen. Bei falscher Drehrichtung den elektrischen Anschluss des Motors und ggf. die Schaltanlage überprüfen. Normblock 28 von 58...
-
Page 29: Inbetriebnahme/Außerbetriebnahme
Aus konstruktiven Gründen ist es nicht auszuschließen, dass nach der Befüllung zur Inbetriebnahme ein nicht mit Fördermedium gefülltes Restvolumen übrigbleibt. Dieses Volumen wird nach dem Einschalten des Motors durch die einsetzende Pumpwirkung umgehend mit Fördermedium gefüllt. Normblock 29 von 58... - Page 30 Sofort nach Erreichen der Drehzahl Absperrorgan in der Druckleitung langsam öffnen und auf Betriebspunkt einregeln. 6.1.4 Wellendichtung kontrollieren Gleitringdichtung Die Gleitringdichtung hat während des Betriebes nur geringe oder nicht sichtbare Le- ckageverluste (Dampfform). Gleitringdichtungen sind wartungsfrei. Normblock 30 von 58...
-
Page 31: Grenzen Des Betriebsbereichs
Typenschild genannten Temperaturen, Drücken oder Drehzahlen betrei- ben außer mit schriftlicher Zustimmung des Herstellers. 6.2.1 Umgebungstemperatur ACHTUNG Betrieb außerhalb der zulässigen Umgebungstemperatur Beschädigung der Pumpe/des Pumpenaggregats! ▷ Angegebene Grenzwerte für zulässige Umgebungstemperaturen einhalten. Folgende Parameter und Werte während des Betriebs einhalten: Normblock 31 von 58... - Page 32 > 70 bis +140 °C ≈ 25 % von Q Mit Hilfe der nachgenannten Berechnungsformel kann ermittelt werden, ob durch zusätzliche Erwärmung eine gefährliche Erhöhung der Temperatur an der Pumpen- oberfläche auftreten kann. Betriebspunkt mit größtem Wirkungsgrad Normblock 32 von 58...
-
Page 33: Außerbetriebnahme/Konservieren/Einlagern
Es empfiehlt sich, die Stutzen zu verschließen (z. B. mit Kunststoffkappen o. Ä.). Zum Schutz vor Korrosion alle blanken Teile und Flächen der Pumpe einölen bzw. einfetten (Öl und Fett silikonfrei, ggf. lebensmittelgerecht). Zusätzliche Angaben (⇨ Kapitel 3.3 Seite 13) beachten. Normblock 33 von 58... -
Page 34: Wiederinbetriebnahme
Verletzungsgefahr durch bewegliche Teile oder austretendes Fördermedium! ▷ Unmittelbar nach Abschluss der Arbeiten alle Sicherheits- und Schutzeinrichtun- gen wieder fachgerecht anbringen bzw. in Funktion setzen. HINWEIS Bei Außerbetriebnahme länger als ein Jahr sind die Elastomere zu erneuern. Normblock 34 von 58... -
Page 35: Wartung/Instandhaltung
Pumpe, Pumpenaggregat und Pumpenteilen erreichen. HINWEIS Für sämtliche Wartungs-, Instandhaltungs- und Montagearbeiten steht Speck Pum- pen oder autorisierte Werkstätten zur Verfügung. Bei Bedarf unsere Vertriebsmitar- beiter kontaktieren. Jegliche Gewaltanwendung im Zusammenhang mit der Demontage und Montage des Pumpenaggregats vermeiden. Normblock 35 von 58... -
Page 36: Wartung/Inspektion
▷ Sperrdruckanlage regelmäßig warten. ▷ Sperrdruck überwachen. ACHTUNG Erhöhter Verschleiß durch Trockenlauf Beschädigung des Pumpenaggregats! ▷ Niemals das Pumpenaggregat in unbefülltem Zustand betreiben. ▷ Niemals während des Betriebs Absperrorgan in der Saugleitung und/oder Ver- sorgungsleitung schließen. Normblock 36 von 58... - Page 37 Spaltspiele prüfen Zur Überprüfung der Spaltspiele muss die Einschubeinheit ausgebaut werden. Wenn das zulässige Spaltspiel überschritten ist (siehe nachfolgende Tabelle), muss ein neuer Spaltring 502.1 und/oder 502.2 eingebaut werden. Die angegebenen Spaltspiele beziehen sich auf den Laufraddurchmesser. Normblock 37 von 58...
-
Page 38: Entleeren/Reinigen
Verletzungsgefahr! ▷ Das Pumpenaggregat ordnungsgemäß ausschalten. (⇨ Kapitel 6.1.5 Seite 31) ▷ Absperrorgane in Saug- und Druckleitung schließen. ▷ Die Pumpe entleeren und drucklos setzen. ▷ Eventuell vorhandene Zusatzanschlüsse schließen. ▷ Pumpenaggregat auf Umgebungstemperatur abkühlen lassen. Normblock 38 von 58... - Page 39 Schritte und Hinweise (⇨ Kapitel 7.4.1 Seite 38) bis (⇨ Kapitel 7.4.2 Seite 39) be- achtet bzw. durchgeführt. Druck- und Saugstutzen von Rohrleitung lösen. Je nach Pumpen-/Motorbaugröße Befestigungsschrauben des Stützfußes bzw. des Motorfußes zum Fundament lösen. Komplettes Pumpenaggregat aus Rohrleitung herausnehmen. Normblock 39 von 58...
- Page 40 Schritte und Hinweise (⇨ Kapitel 7.4.1 Seite 38) bis (⇨ Kapitel 7.4.6 Seite 40) be- achtet bzw. durchgeführt. ✓ Einschubeinheit befindet sich an sauberem und ebenem Montageplatz. Wellenhülse 523 mit rotierenden Teil der Gleitringdichtung (Gleitring) von der Welle 210 abziehen. Normblock 40 von 58...
-
Page 41: Pumpenaggregat Montieren
Dichtungsmittel (z. B. HYLOMAR oder Epple 33) verwenden. Kleber nur punktuell und dünnschichtig auftragen. Niemals Sekundenkleber (Cyanacrylatkleber) verwenden. Passstellen der einzelnen Teile vor dem Zusammenbau mit Grafit oder ähnlichen Mit- teln einstreichen. Anzugsmomente Alle Schrauben bei der Montage vorschriftsmäßig anziehen. Normblock 41 von 58... - Page 42 Sitz des stationären Rings der Gleitringdichtung mit Wasser benetzen. Rotierenden Teil der Gleitringdichtung (Gleitring) auf die Wellenhülse 523 mon- tieren. Bei Gleitringdichtungen mit Einbaulänge L nach EN 12756 (Bauform KU) folgendes Einbaumaß b beachten: Abb. 8: Gleitringdichtung Einbaumaß b Laufrad Wellenhülse Gleitringdichtung Gehäusedeckel Normblock 42 von 58...
- Page 43 Sechskantmutter 920.15 (bei angeschraubtem Gehäusedeckel) bzw. 920.01 (bei geklemmten Gehäusedeckel) am Spiralgehäuse 102 anziehen. 7.5.5 Motor anbauen GEFAHR Unsachgemäße Wellenverbindung Explosionsgefahr! ▷ Wellenverbindung zwischen Pumpe und Motor nach den Angaben in der Be- triebsanleitung herstellen. zutreffende Welleneinheit siehe Auftrag Normblock 43 von 58...
- Page 44 Welle montieren). Innensechskantschrauben 914.24 anziehen. Sechskantschrauben 901.50 lösen. 901.50 931.95 Abb. 10: Sicherungsbleche entfernen 901.50 Sechskantschrauben 931.95 Sicherungsblech Beide Sicherungsbleche 931.95 aus Nut der Welle 210 ziehen. Sechskantschrauben 901.50 anziehen. Sechskantmuttern 920.11 aufsetzen und anziehen. Normblock 44 von 58...
-
Page 45: Anzugsdrehmomente
Tabelle 16: Schraubenanzugsstellen Ausführung mit geschraubtem Gehäuse- Ausführung mit geklemmtem Gehäuse- deckel deckel Ausführung mit Grundplatte Tabelle 17: Anzugsdrehmomente der Schraubverbindungen an der Pumpe Position Gewinde Anzugsdrehmoment [Nm] M12 × 1,5 M24 × 1,5 M30 × 1,5 Normblock 45 von 58... -
Page 46: Ersatzteilhaltung
Anzahl der Pumpen (einschließlich Reservepumpen) 6 und 7 8 und 9 10 und mehr Welle 20 % Laufrad 20 % Flachdichtungen (Satz) 100 % Gleitringdichtung 25 % 502.1 Spaltring 50 % 502.2 Spaltring 50 % Wellenhülse 50 % Normblock 46 von 58... -
Page 47: Störungen: Ursachen Und Beseitigung
- Gegendruck der Pumpe ist geringer als Betriebspunkt genau einregeln in der Bestellung angegeben bei ständiger Überlastung eventuell Laufrad abdrehen Für die Behebung von Störungen an unter Druck stehenden Teilen ist die Pumpe drucklos zu setzen. Hersteller kontaktieren Normblock 47 von 58... - Page 48 - Fehler in der Zuführung der Zirkulations- freien Querschnitt vergrößern flüssigkeit ✘ ✘ - Transportsicherung nicht aus der Wel- Transportsicherung aus der Wellennut ziehen lennut gezogen Für die Behebung von Störungen an unter Druck stehenden Teilen ist die Pumpe drucklos zu setzen. Normblock 48 von 58...
-
Page 49: Zugehörige Unterlagen
Abb. 11: Ausführung mit Einzelgleitringdichtung und geschraubtem Gehäusedeckel Tabelle 21: Einzelteilverzeichnis Teile-Nr. Teile-Benennung Teile-Nr. Teile-Benennung Spiralgehäuse 68-3.01/.02 Abdeckplatte Zwischenlaterne Flanschmotor Gehäusedeckel 901.30/.31/.50 Sechskantschraube Stützfuß 902.01/.06/.11/.15/.50/.51 Stiftschraube Welle 903.01/.02/.03/.04/.08 Verschlussschraube Laufrad 914.24 Zylinderschraube Antriebslaterne 920.01/.06/.11/.15/.95 Sechskantmutter Baugrößen- /werkstoffabhängig können einzelne Teile entfallen. Normblock 49 von 58... - Page 50 9 Zugehörige Unterlagen Teile-Nr. Teile-Benennung Teile-Nr. Teile-Benennung 400.10/.75 Flachdichtung 930.95 Federscheibe 411.01/.02/.03/.04/.08 Dichtring 931.95 Sicherungsblech Gleitringdichtung 940.01 Passfeder 502.01/.02 Spaltring Anschlüsse: Spannring Druckmessgerät Anschluss Wellenhülse Förderflüssigkeit Ablass 550.95 Scheibe Förderflüssigkeit Auffüllen und Entlüften Normblock 50 von 58...
- Page 51 Flanschmotor Gehäusedeckel 901.30/.31/.50 Sechskantschraube Stützfuß 902.01/.06/.11/.15/.50/.51 Stiftschraube Welle 903.01/.02/.03/.04/.08 Verschlussschraube Welle 914.22/.24 Zylinderschraube Antriebslaterne 920.01/.06/.11/.15/.95 Sechskantmutter 400.10/.75 Flachdichtung 930.95 Federscheibe 411.01/.02/.03/.04/.08 Dichtring 931.95 Sicherungsblech Gleitringdichtung 940.01 Passfeder 502.01/.02 Spaltring Anschlüsse: Baugrößen- /werkstoffabhängig können einzelne Teile entfallen. Normblock 51 von 58...
- Page 52 9 Zugehörige Unterlagen Teile-Nr. Teile-Benennung Teile-Nr. Teile-Benennung Spaltring Druckmessgerät Anschluss Wellenhülse Förderflüssigkeit Ablass 550.95 Scheibe Förderflüssigkeit Auffüllen und Entlüften Normblock 52 von 58...
- Page 53 400.15/.75 Flachdichtung 901.24/.50 Sechskantschraube 411.15/.16 Dichtring 902.02 Stiftschraube 433.01/.02 Gleitringdichtung 920.02 Sechskantmutter Dichtungsdeckel 931.95 Sicherungsblech Wellenhülse 932.05 Sicherungsring 550.96 Scheibe Zusatzanschlüsse: 562.02 Zylinderstift externe Sperrflüssigkeit Austritt Lasche externe Sperrflüssigkeit Eintritt Baugrößen- /werkstoffabhängig können einzelne Teile entfallen. Normblock 53 von 58...
- Page 54 562.25 Zylinderstift 400.75 Flachdichtung 720.32 Formstück 411.35 Dichtring 901.50 Sechskantschraube 412.15 O-Ring 902.02 Stiftschraube 433.01/.02 Gleitringdichtung 920.02 Sechskantmutter Dichtungsdeckel 931.95 Sicherungsblech Zwischenring Zusatzanschlüsse: Wellenhülse Quenchflüssigkeit Austritt 550.96 Scheibe Quenchflüssigkeit Eintritt Baugrößen- /werkstoffabhängig können einzelne Teile entfallen. Normblock 54 von 58...
-
Page 55: Eg-Konformitätserklärung
Ort, Datum / Fait à, le / Place, date / Località, data / Plaats, Datum / Paikka, Päiväys / Lugar, Fecha / Miejscowość, Data / Místo, datum / Miesto, dátum / Sted, dato / Ort, datum / Yer, Tarih SPECK Pumpen Verkaufsgesellschaft GmbH A. Herger, Geschäftsführer i.V. S. Watolla, Techn. Leiter Hauptstraße 3, 91233 Neunkirchen am Sand, Germany... -
Page 56: Unbedenklichkeitserklärung
Folgende Sicherheitsvorkehrungen hinsichtlich Spülmedien, Restflüssigkeiten und Entsorgung sind erforderlich: ................................................................Wir versichern, dass die vorstehenden Angaben korrekt und vollständig sind und der Versand gemäß den gesetzlichen Bestim- mungen erfolgt....................................Ort, Datum und Unterschrift Adresse Firmenstempel Pflichtfelder Normblock 56 von 58... -
Page 57: Stichwortverzeichnis
Unvollständige Maschinen 6 Geräuscherwartungswerte 21 Gesamtzeichnung 49, 51, 53, 54 Wartung 35 Gleitringdichtung 30 Wellendichtung 16 Grenzen des Betriebsbereiches 31 Wiederinbetriebnahme 34 Wirkungsweise 20 Inbetriebnahme 29 Zulässige Kräfte an den Pumpenstutzen 24 Zusatzanschlüsse 25 Konservieren 34 Konservierung 13 Normblock 57 von 58... - Page 60 SPECK Pumpen Verkaufsgesellschaft GmbH Hauptstraße 3 91233 Neunkirchen am Sand, Germany Telefon 09123 949-0 Telefax 09123 949-260 info@speck-pumps.com speck-pumps.com...
- Page 61 Closed-coupled Pump Normblock Installation/Operating Manual...
- Page 62 All rights reserved. The contents provided herein must neither be distributed, copied, reproduced, edited or processed for any other purpose, nor otherwise transmitted, published or made available to a third party without the manufacturer's express written consent. Subject to technical modification without prior notice. © SPECK Pumpen Verkaufsgesellschaft GmbH, Neunkirchen a. Sand 16.08.2016...
- Page 63 Design details ..............................16 Installation types ............................18 Configuration and function .........................20 Noise characteristics .............................21 Scope of supply .............................21 4.10 Dimensions ..............................21 Installation at Site ........................22 Safety regulations ............................22 Checks to be carried out prior to installation .....................22 Normblock 3 of 58...
- Page 64 Reassembling the pump set .........................41 Tightening torques ............................45 Spare parts stock ............................46 Trouble-shooting ........................47 Related Documents ........................49 General assembly drawings .........................49 EC Declaration of Conformity ....................55 Certificate of Decontamination ....................56 Index ............................57 Normblock 4 of 58...
-
Page 65: Glossary
The pipeline which is connected to the suction nozzle Hydraulic system The part of the pump in which the kinetic energy is converted into pressure energy Efficiency class to IEC 60034-30: 3 = Premium Efficiency (IE = International Efficiency) Normblock 5 of 58... -
Page 66: General
The series number uniquely identifies the pump (set) and serves as identification for all further business processes. In the event of damage, immediately contact Speck Pumpen to maintain the right to claim under warranty. Noise characteristics (⇨ Section 4.8 Page 21) 1.2 Installation of partly completed machinery... -
Page 67: Safety
▪ Only operate pumps/pump sets which are in perfect technical condition. ▪ Do not operate the pump (set) in partially assembled condition. ▪ Only use the pump to handle the fluids described in the order or product literature of the pump model or variant. Normblock 7 of 58... -
Page 68: Personnel Qualification And Training
In addition to the safety information contained in this manual and the intended use, the following safety regulations shall be complied with: ▪ Accident prevention, health and safety regulations ▪ Explosion protection regulations ▪ Safety regulations for handling hazardous substances ▪ Applicable standards, directives and laws Normblock 8 of 58... -
Page 69: Safety Information For The Operator/User
The explosion-proof status of the pump set is only assured if the pump set is used in accordance with its intended use. Never operate the pump set outside the limits stated in the data sheet and on the name plate. Prevent impermissible modes of operation at all times. Normblock 9 of 58... - Page 70 The motor has its own marking. The marking is maintained on the condition that the temperatures the pump causes to develop at the motor flange and motor shaft are permitted by the motor manufacturer. The motors used by Speck Pumpen on pumps with ATEX certification meet this condition. Also see ●...
- Page 71 The calculation formula in (⇨ Section 6.2.3.1 Page 32) can be used to check whether additional heat build-up may lead to a dangerous temperature increase at the pump surface. Normblock 11 of 58...
-
Page 72: Transport/Temporary Storage/Disposal
On transfer of goods, check each packaging unit for damage. In the event of in-transit damage, assess the exact damage, document it and notify Speck Pumpen or the supplying dealer (as applicable) and the insurer about the damage in writing immediately. -
Page 73: Storage/Preservation
Always complete and enclose a certificate of decontamination when returning the pump (set). Always indicate any safety and decontamination measures taken. (⇨ Section 11 Page 56) Normblock 13 of 58... -
Page 74: Disposal
Collect greases and other lubricants during dismantling. Separate and sort the pump materials, e.g. by: - Metals - Plastics - Electronic waste - Greases and other lubricants Dispose of materials in accordance with local regulations or in another controlled manner. Normblock 14 of 58... -
Page 75: Description Of The Pump (Set)
▪ Information on benchmark efficiency or benchmark efficiency graph for MEI = 0.70 (0.40) for the pump based on the model shown in the Figure are available at: http://www.europump.org/efficiencycharts 4.3 Designation Example: Normblock 32/160 W12 Table 5: Key to the designation Code Description Normblock... -
Page 76: Name Plate
4 Description of the Pump (Set) 4.4 Name plate SPECK Pumpen Verkaufsgesellschaft GmbH Hauptstraße 3 91233 Neunkirchen am Sand, Germany S-Nr. Type Ø Fig. 4: Name plate (example) Normpumpe Series code Type series, size Material variant Flow rate Speed Other... - Page 77 ▪ Type of construction IM V1 ≤ 3.30 kW ▪ Type of construction IM V15 ≥ 4.60 kW ▪ Enclosure IP55 or IP54 ▪ Mode of operation: continuous operation S1 ▪ Type of protection EExe ll ▪ Temperature class T3 Normblock 17 of 58...
-
Page 78: Installation Types
Pump sets, motor sizes 200 to 250, 2- Pump sets, motor sizes 200 to 250, 4- pole pole Horizontal installation, fastened above Pump sets up to motor size 112 Pump sets, motor sizes 132 to 180 Normblock 18 of 58... - Page 79 4 Description of the Pump (Set) Vertical installation Pump sets up to motor size 112 Pump sets, motor sizes 132 to 180 Pump sets, motor sizes 200 to 250, 2- Pump sets, motor sizes 200 to 250, 4- pole pole Normblock 19 of 58...
-
Page 80: Configuration And Function
(10 and 11), which are supported by a motor housing (5) linked with the pump casing and/or casing cover (3) via the drive lantern (9). Sealing The pump is sealed by a standardised mechanical seal. Normblock 20 of 58... -
Page 81: Noise Characteristics
Spatial average; as per ISO 3744 and EN 12639; valid for pump operation in the Q/Qopt = 0.80 - 1.1 range and for non- cavitating operation. If noise levels are to be warranted: add +3 dB for measuring and constructional tolerance. Normblock 21 of 58... -
Page 82: Installation At Site
For motor sizes 132 or 160, the motor foot must be shimmed (20 mm shim height) for installation on a foundation. On some pump/motor combinations, the support foot/motor feet need to be shimmed for installation on a foundation. Normblock 22 of 58... -
Page 83: Piping
Thoroughly clean, flush and blow through all vessels, pipelines and connections (especially of new installations). Before installing the pump in the piping, remove the flange covers on the suction and discharge nozzles of the pump. G = ISO 228/1 Normblock 23 of 58... - Page 84 Where fluid has to be pumped out of a vessel under vacuum, installing a vacuum balance line is recommended. The following rules apply to vacuum balance lines: ▪ Minimum nominal line diameter 25 mm. ▪ The line extends above the highest permissible fluid level in the vessel. Normblock 24 of 58...
- Page 85 Risk of injuries by escaping fluid! Risk of burns! Malfunction of the pump! ▷ Refer to the pump markings for the number, dimensions and locations of auxiliary connections (if any). ▷ Use the auxiliary connections provided. Normblock 25 of 58...
-
Page 86: Casing/Insulation
▷ Observe the technical specifications of the local energy supply companies. Check the available mains voltage against the data on the motor name plate. Select an appropriate start-up method. NOTE A motor protection device is recommended. Normblock 26 of 58... -
Page 87: Checking The Direction Of Rotation
Hands inside the pump casing Risk of injuries, damage to the pump! ▷ Always disconnect the pump set from the power supply and secure it against unintentional start-up before inserting your hands or other objects into the pump. Normblock 27 of 58... - Page 88 The motor's direction of rotation must match the arrow indicating the direction of rotation on the pump. If the motor runs in the wrong direction of rotation, check the electrical connection of the motor and the control system, if applicable. Normblock 28 of 58...
-
Page 89: Commissioning/Start-Up/Shutdown
For design-inherent reasons some unfilled volume in the hydraulic system cannot be excluded after the pump has been primed for commissioning/start-up. However, once the motor is started up the pumping effect will immediately fill this volume with the fluid handled. Normblock 29 of 58... - Page 90 6.1.4 Checking the shaft seal Mechanical seal The mechanical seal only leaks slightly or invisibly (as vapour) during operation. Mechanical seals are maintenance-free. Normblock 30 of 58...
-
Page 91: Operating Limits
6.2.1 Ambient temperature CAUTION Operation outside the permissible ambient temperature Damage to the pump (set)! ▷ Observe the specified limits for permissible ambient temperatures. Observe the following parameters and values during operation: Normblock 31 of 58... - Page 92 The calculation formula below can be used to check if an additional heat build-up could lead to a dangerous temperature increase at the pump surface. × × × Table 13: Key Symbol Description Unit Specific heat capacity J/kg K Gravitational constant m/s² Pump discharge head Best efficiency point Normblock 32 of 58...
-
Page 93: Shutdown/Storage/Preservation
For returning the pump to service, observe the sections on commissioning/start-up (⇨ Section 6.1 Page 29) and the operating limits (⇨ Section 6.2 Page 31) . In addition, carry out all servicing/maintenance operations before returning the pump (set) to service. (⇨ Section 7 Page 35) Normblock 33 of 58... - Page 94 Risk of personal injury from moving parts or escaping fluid! ▷ As soon as the work is complete, re-install and/or re-activate any safety-relevant and protective devices. NOTE If the pump has been out of service for more than one year, replace all elastomer seals. Normblock 34 of 58...
-
Page 95: Servicing/Maintenance
NOTE All maintenance, service and installation work can be carried out by Speck Pumpen or authorised workshops. Contact our sales staff to discuss your requirements. Never use force when dismantling and reassembling the pump set. -
Page 96: Servicing/Inspection
Increased wear due to dry running Damage to the pump set! ▷ Never operate the pump set without liquid fill. ▷ Never close the shut-off element in the suction line and/or supply line during pump operation. Normblock 36 of 58... - Page 97 To check the clearances, remove the back pull-out unit. If the clearance is larger than permitted (see the following table), fit a new casing wear ring 502.1 and/or 502.2. The clearances specified refer to the impeller diameter. Normblock 37 of 58...
-
Page 98: Drainage/Cleaning
▷ Properly shut down the pump set. (⇨ Section 6.1.5 Page 31) ▷ Close the shut-off elements in suction and discharge line. ▷ Drain the pump and release the pump pressure. ▷ Close any auxiliary connections. ▷ Allow the pump set to cool down to ambient temperature. Normblock 38 of 58... - Page 99 (⇨ Section 9.1 Page 49) In case of damage you can always contact our service staff. NOTE All maintenance, service and installation work can be carried out by Speck Pumpen or authorised workshops. Contact our sales staff to discuss your requirements. NOTE After a prolonged period of operation the individual components may be hard to pull off the shaft.
- Page 100 40) have been observed/carried out. ✓ The back pull-out unit is kept in a clean and level assembly area. Remove shaft sleeve 523 with the rotating assembly of the mechanical seal (primary ring) from shaft 210. Normblock 40 of 58...
-
Page 101: Reassembling The Pump Set
For reassembly, tighten all screws and bolts as specified in this manual. 7.5.2 Installing the mechanical seal Installing the The following rules must be observed when installing the mechanical seal: mechanical seal ▪ Work cleanly and accurately. Normblock 41 of 58... - Page 102 EN 12756 (design KU): Fig. 8: Installation dimension b of mechanical seal Impeller Shaft sleeve Mechanical seal Casing cover Table 15: Installation dimensions of the mechanical seal Installation dimension b Shaft unit 7.5 mm 10 mm 15 mm Normblock 42 of 58...
- Page 103 (on variant with a clamped casing cover) at volute casing 102. 7.5.5 Mounting the motor DANGER Incorrect shaft connection Explosion hazard! ▷ Connect the shafts between pump and motor as described in this manual. Shaft unit see order. Normblock 43 of 58...
- Page 104 Fig. 10: Removing the lock washers 901.50 Hexagon head bolts 931.95 Lock washer Pull both lock washers 931.95 out of the groove in shaft 210. Tighten hexagon head bolts 901.50. Fit and tighten hexagon nuts 920.11. Normblock 44 of 58...
-
Page 105: Tightening Torques
Model with bolted casing cover Model with clamped casing cover Model with baseplate Table 17: Tightening torques for screwed connections at the pump Position Thread Tightening torque [Nm] M12 × 1,5 M24 × 1,5 M30 × 1,5 Normblock 45 of 58... -
Page 106: Spare Parts Stock
8 and 9 10 and more Shaft 20 % Impeller 20 % Gaskets (set) 100 % Mechanical seal 25 % 502.1 Casing wear ring 50 % 502.2 Casing wear ring 50 % Shaft sleeve 50 % Normblock 46 of 58... -
Page 107: Trouble-Shooting
✘ - Use of unsuitable shaft seal materials Change the material combination. Pump pressure must be released before attempting to remedy faults on parts which are subjected to pressure. Contact the manufacturer. Normblock 47 of 58... - Page 108 ✘ ✘ - Transport lock has not been removed Remove transport lock from the shaft groove. from the shaft groove. Pump pressure must be released before attempting to remedy faults on parts which are subjected to pressure. Normblock 48 of 58...
-
Page 109: Related Documents
Hexagon head bolt Support foot 902.01/.06/.11/.15/.50/.51 Stud Shaft 903.01/.02/.03/.04/.08 Screw plug Impeller 914.24 Hexagon socket head cap screw Drive lantern 920.01/.06/.11/.15/.95 Hexagon nut Some individual components might not be applicable, depending on the size and material. Normblock 49 of 58... - Page 110 Description 400.10/.75 Gasket 930.95 Spring washer 411.01/.02/.03/.04/.08 Joint ring 931.95 Lock washer Mechanical seal 940.01 502.01/.02 Casing wear ring Connections: Taper lock ring Pressure gauge connection Shaft sleeve Fluid drain 550.95 Disc Fluid priming and venting Normblock 50 of 58...
- Page 111 Drive lantern 920.01/.06/.11/.15/.95 Hexagon nut 400.10/.75 Gasket 930.95 Spring washer 411.01/.02/.03/.04/.08 Joint ring 931.95 Lock washer Mechanical seal 940.01 502.01/.02 Casing wear ring Connections: Some individual components might not be applicable, depending on the size and material. Normblock 51 of 58...
- Page 112 9 Related Documents Part No. Description Part No. Description Casing wear ring Pressure gauge connection Shaft sleeve Fluid drain 550.95 Disc Fluid priming and venting Normblock 52 of 58...
- Page 113 931.95 Lock washer Shaft sleeve 932.05 Circlip 550.96 Disc Auxiliary connections 562.02 Parallel pin External barrier fluid outlet Strip External barrier fluid inlet Some individual components might not be applicable, depending on the size and material. Normblock 53 of 58...
- Page 114 Mechanical seal 920.02 Hexagon nut Seal cover 931.95 Lock washer Intermediate ring Auxiliary connections Shaft sleeve Quench liquid outlet 550.96 Disc Quench liquid inlet Some individual components might not be applicable, depending on the size and material. Normblock 54 of 58...
-
Page 115: Ec Declaration Of Conformity
Ort, Datum / Fait à, le / Place, date / Località, data / Plaats, Datum / Paikka, Päiväys / Lugar, Fecha / Miejscowość, Data / Místo, datum / Miesto, dátum / Sted, dato / Ort, datum / Yer, Tarih SPECK Pumpen Verkaufsgesellschaft GmbH A. Herger, Geschäftsführer i.V. S. Watolla, Techn. Leiter Hauptstraße 3, 91233 Neunkirchen am Sand, Germany... -
Page 116: Certificate Of Decontamination
We confirm that the above data and information are correct and complete and that dispatch is effected in accordance with the relevant legal provisions....................................Place, date and signature Address Company stamp Required fields Normblock 56 of 58... -
Page 117: Index
Spare parts stock 46 General assembly drawing 49, 51, 53, 54 Start-up 30 Storage 13, 33 Impeller type 16 Installation 22 Temperature limits 10 Installation on a foundation 23 Tightening torques 45 Installation at site 22 Transport 12 Normblock 57 of 58... - Page 118 SPECK Pumpen Verkaufsgesellschaft GmbH Hauptstraße 3 91233 Neunkirchen am Sand, Germany Telefon 09123 949-0 Telefax 09123 949-260 info@speck-pumps.com speck-pumps.com...
Need help?
Do you have a question about the Normblock and is the answer not in the manual?
Questions and answers