
Subscribe to Our Youtube Channel
Related Manuals for Doosan DE08TS


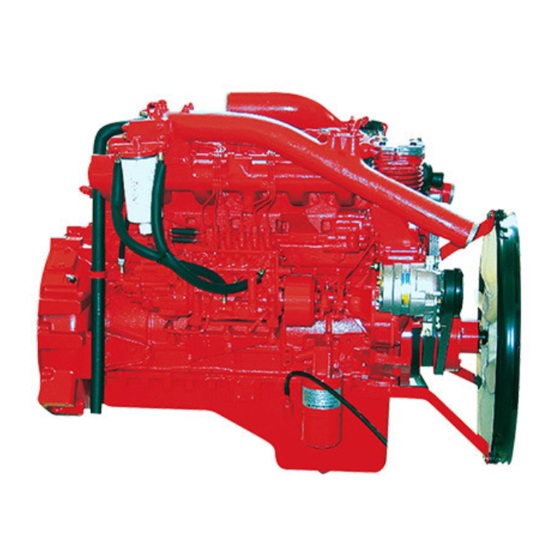
Summary of Contents for Doosan DE08TS
- Page 1 SB2088E02 Sep. 2011 DE 08 TS Diesel Engine Disassembly & Assembly D100, D120, D150 D110S-5, D130S-5, D160S-5...
- Page 3 If a tool, procedure, work method or operating technique not specifically recommended by DOOSAN is used, you must satisfy yourself that it is safe for you and others. You should also ensure that the product will not be damaged or made unsafe by the operation, Iubrication, maintenance or repair procedures you choose.
-
Page 5: Table Of Contents
Index Intake Manifold............31 Air Cleaner Assembly ...........24 Air Cleaner Elements ..........25 Air Compressor (if equipped) .........72 Muffler ..............22 Alternator ...............12 OIl Cooler ...............39 Oil Filter..............38 Camshaft And Camshaft Bearing ......61 Oil Pan ..............34 Connecting Rod Bearings ........48 Cooling Water Pipe ..........41 Oil Pump ..............42 Crankshaft..............69 Pistons ..............53... -
Page 7: Engine And Transmission
(3). IEED004P 4. Remove bolt and washer that hold bonnet assembly. Remove bonnet assembly (3) from the frame. 8. Remove tube (8) from the tube of air compressor (if equipped). DE08TS Diesel Engine 5 of 76 Disassembly and Assembly... - Page 8 IEED007P IEED010P 11. Disconnect transmission neutral switch connector (12). 14. Remove bolts (15) and washers that hold the muffler expansion on exhanst manifold of the engine. DE08TS Diesel Engine 6 of 76 Disassembly and Assembly...
- Page 9 22. Put the engine and transmission on an acceptable engine stand. Remove tool (A). IEED013P 18. Remove bolts (19), washers, nuts from the two engine support (20), one on both side of the engine. DE08TS Diesel Engine 7 of 76 Disassembly and Assembly...
- Page 10 2. Install bolts (23) and washers that hold transmission to the engine. Tighten bolts (23) to torque of 55 ± ± 10 N � � m (40 ± ± 7 lb � � ft). DE08TS Diesel Engine 8 of 76 Disassembly and Assembly...
- Page 11 11. Install bolts (15) and washers that hold the muffler expansion to exhaust manifold of the engine. IEED009P 12. Connect three hydraulic hoses (14) to the hydraulic pump. DE08TS Diesel Engine 9 of 76 Disassembly and Assembly...
- Page 12 IEED006P IEED003P 15. Connect battery cable(11) to the starting motor. 18. Connect wiring harness (7) to the fuel sender. 19. Connect two fuel hoses (6) and tighten the hose clamp. DE08TS Diesel Engine 10 of 76 Disassembly and Assembly...
-
Page 13: Electric Starting Motor
Install universal joint. b. Install air cleaner. 2. Remove mounting nuts (3) and then remove starting motor (4) from the lift truck. c. Install hood. d. Install floorplate. e. Install overhead guard. DE08TS Diesel Engine 11 of 76 Disassembly and Assembly... -
Page 14: Alternator
Connect battery positive cable (1). IEED021P 3. Loosen nuts (4) and then remove belt (3) from the alternator. 4. Remove bolts (5) from the alternator’s bracket to remove alternator (6). DE08TS Diesel Engine 12 of 76 Disassembly and Assembly... -
Page 15: Fuel Injection Pump
3. Remove bolts (5) and washers that hold the tension adjusting bracket on the timing gear case. 4. Remove the idle pulley and V-belt tension adjusting bracket assembly (6) and gasket. Discard the gasket. DE08TS Diesel Engine 13 of 76 Disassembly and Assembly... - Page 16 (13). installation. IEED026P IEED117P 10. Disconnect five hoses (14) and tubes (15) from 7. Remove nut (10) from the injection pump coupling. the injection pump. DE08TS Diesel Engine 14 of 76 Disassembly and Assembly...
- Page 17 (9) and the idle gear are in alignment. IEED027P 3. Install four nuts (16) and washers that hold the fuel injection pump on the timing gear case. DE08TS Diesel Engine 15 of 76 Disassembly and Assembly...
- Page 18 6. Install nut (10) into the injection pump coupling. IEED025P 10. Connect accel cable (12) and engine stop cable (13) to the injection pump. IEED023P 7. Install cover (8), bolts (7) and washers. DE08TS Diesel Engine 16 of 76 Disassembly and Assembly...
-
Page 19: Fuel Injection Lines
2. Connect fuel injection lines (1) to the fuel injection pump and the fuel injection nozzle assemblies. Tighten the fuel line nuts to a torque of 16 to 20 N � � m (12 to 15 lb � � ft). DE08TS Diesel Engine 17 of 76 Disassembly and Assembly... -
Page 20: Fuel Filter
1. Install a new gasket in the filter bowl. 2. Put a new fuel filter element in position. 3. Put filter bowl (2) in position and tighten bolt (1) that holds the bowl in position. DE08TS Diesel Engine 18 of 76 Disassembly and Assembly... -
Page 21: Fuel Pump
2. Connect fuel outlet line (2) and fuel inlet line (1) to IEED033P the fuel pump. 2. Remove three nuts (3) that hold fuel pump (4) to the injection pump. Remove fuel pump (4). DE08TS Diesel Engine 19 of 76 Disassembly and Assembly... -
Page 22: Fuel Injection Nozzle Assembly
30 N � � m (22 lb � � ft). 2. Remove nuts (3) and then remove fuel injection nozzles (2). 3. Remove the seals from the nozzle holders of the cylinder head and discard it. DE08TS Diesel Engine 20 of 76 Disassembly and Assembly... - Page 23 (7) from the nozzle holder. 3. Check all parts for damage. If damaged, use new parts for replacement. NOTE : The following steps are for assembling the fuel injection nozzle assembly. DE08TS Diesel Engine 21 of 76 Disassembly and Assembly...
-
Page 24: Muffler
IEED038P assembly (15) on the frame. Remove muffler assembly (15). 3. Remove five bolts (6), washers and cover (7) from the frame. DE08TS Diesel Engine 22 of 76 Disassembly and Assembly... - Page 25 (5) to the frame. Tighten bolt (9) to a torque of 75 � � 90 N � � m (55 � � 65 lb � � ft). DE08TS Diesel Engine 23 of 76 Disassembly and Assembly...
-
Page 26: Air Cleaner Assembly
1. Loosen hose clamps (1) and disconnect hoses (2) from air cleaner (4). IEED041P IEED042P 2. Install hoses (2) and tighten all hose clamps (1). 2. Remove bolts (3) and nuts, and then remove air cleaner assembly (4). DE08TS Diesel Engine 24 of 76 Disassembly and Assembly... -
Page 27: Air Cleaner Elements
3. Install element cover (3) with the clamp (2) that hold it and tighten the bolt (1). 3. Remove nuts (6) and then remove inner filter element (7) from the cleaner assembly. DE08TS Diesel Engine 25 of 76 Disassembly and Assembly... -
Page 28: Fan Assembly
Tighten bolts (1) and nuts (2). See Specifications for the correct belt tension. IEED046P 1. Put the fan assembly (1) in position and install the six bolts (2) that hold it. End By : a. Install radiator DE08TS Diesel Engine 26 of 76 Disassembly and Assembly... -
Page 29: Water Temperature Regulator
(2). 3. Tighten the hose clamps (1). IEED049P 4. Fill the cooling system. See Maintenance Guide for the correct level. 3. Loosen clamp (3) and remove water temperature regulator (4). DE08TS Diesel Engine 27 of 76 Disassembly and Assembly... -
Page 30: Radiator
4. Remove four bolts (4) and washers that hold top cover (5) on the frame. Remove top cover (5) from the frame. IEED055P 9. Disconnect transmission cooling hose (12) from the radiator. DE08TS Diesel Engine 28 of 76 Disassembly and Assembly... - Page 31 (13) that hold the radiator on the frame. Tighten nuts (13) and bolt to a torque of 75 � � 90 N � � m (55 � � 65 lb � � ft). DE08TS Diesel Engine 29 of 76 Disassembly and Assembly...
- Page 32 12. Fill the cooling system. See the Maintenance Guide for the correct level. End By : a. Install hood. IEED053P 7. Connect top radiator hose (8) and tight hose clamp (7). 8. Connect radiator overflow hose (6). DE08TS Diesel Engine 30 of 76 Disassembly and Assembly...
-
Page 33: Intake Manifold
8. Remove the intake manifold gasket and discard it. 2. Remove four bolts (3), washers and mount bracket and fuel filter assembly (4) from the intake manifold. Set the mount bracket and fuel filter assembly aside to theframe. DE08TS Diesel Engine 31 of 76 Disassembly and Assembly... - Page 34 4. Connect cooling temperature harness (9). IEED059P 7. Install air cleaner outlet hose (2) and tighten hose clamps (1). IEED061P 5. Connect hose (6) to the air compressor (if equipped) and tighten clamp (5). DE08TS Diesel Engine 32 of 76 Disassembly and Assembly...
-
Page 35: Exhaust Manifold
2. Remove twelve nuts (2) and washers that hold the IEED010P exhaust manifold on the cylinder head. Remove exhaust manifold (3), heat screens (4) and (5) and 3. Install eight bolts (1) and washers. gaskets from the cylinder head. DE08TS Diesel Engine 33 of 76 Disassembly and Assembly... -
Page 36: Cylinder Head Cover
(1) to a torque of 20 N � � m (15 lb � � ft). 4. Fill the engine with oil to the correct level. See the operation And Maintenance Manual for further information. 5. Remove the lift truck from the blocks. DE08TS Diesel Engine 34 of 76 Disassembly and Assembly... -
Page 37: Water Pump
(3) on the engine. 3. Remove water pump (3) from the engine. 4. Remove the gasket and discard it. NOTE : Use the following steps to install the water pump. DE08TS Diesel Engine 35 of 76 Disassembly and Assembly... - Page 38 6. Remove seals (7) from the water pump housing if connection. they are damaged. 3. Remove pump cover (3) and gasket (4) and discard it. DE08TS Diesel Engine 36 of 76 Disassembly and Assembly...
- Page 39 1. Put shaft bearing (9) in position in a press. Make sure there is support for the inner race of the bearing. Push shaft into bearing (9). IEED070P 4. Install snap ring (5) over the bearings with tool (A). DE08TS Diesel Engine 37 of 76 Disassembly and Assembly...
-
Page 40: Oil Filter
Tighten the screws (2) to a torque of 22 N m (16 lb ft). IEED068P 8. Install flange (1) on the shaft with tool (B) and a press. End By : a. Install water pump. DE08TS Diesel Engine 38 of 76 Disassembly and Assembly... -
Page 41: Oil Cooler
(6) from the filter head. IEED078P 2. Remove PCV valve (3) and O-ring from the cooler housing. IEED167P 3. Remove relief valve assembly (7) with seal ring from the filter head. DE08TS Diesel Engine 39 of 76 Disassembly and Assembly... - Page 42 1. Remove eight bolts (1) and washers that hold IEED083P cover (2) on the oil cooler housing. 2. Remove cover (2) from the oil cooler housing. 6. Remove two gaskets (6) from the oil cooler housing and discard it. DE08TS Diesel Engine 40 of 76 Disassembly and Assembly...
-
Page 43: Cooling Water Pipe
4. Remove cooling water pipe (5). 5. Remove gasket and discard it. 6. Install the cooling water pipe (5) in reverse order of removal. IEED085P 1. Disconnect two wirings (1) from the cooling water pipe. DE08TS Diesel Engine 41 of 76 Disassembly and Assembly... -
Page 44: Oil Pump
7. Remove two bolts (7) and washers that hold oil pump (8) in place. 8. Remove oil pump assembly (8) from the engine. IEED089P 3. Remove bolts (3), washers and tube assembly (4). 4. Remove the gasket and discard it. DE08TS Diesel Engine 42 of 76 Disassembly and Assembly... - Page 45 (1). IEED090P End By : 4. Put suction tube assembly (6) in place and install a. Install oil pan. new gasket, bolts (5) and washers that hold suction tube assembly (6). DE08TS Diesel Engine 43 of 76 Disassembly and Assembly...
- Page 46 8. Remove two pump gears (10) from the pump NOTE : For the purpose of reassembly, tighten bolts housing. (4) and nuts to a torque of 22 N m (16 lb ft). 5. Remove rear cover (5). DE08TS Diesel Engine 44 of 76 Disassembly and Assembly...
- Page 47 2. Install rocker arm shaft assembly (1) and align the end of the rocker arm adjust screw with the push rod, then tighten bracket bolts (2). 3. Adjust valve clearance as following procedure ; DE08TS Diesel Engine 45 of 76 Disassembly and Assembly...
-
Page 48: Rocker Shaft
2. Remove rocker arms (2), brackets (3) and springs ◎' cylinder is held at the top dead center on (4) from both side of the rocker shaft. compression stroke. End By : a. Install head cover. DE08TS Diesel Engine 46 of 76 Disassembly and Assembly... - Page 49 The diameter must be 23.959 to 23.978 mm (.9432 to .9440 in). NOTE : The maximum permissible clearance between the rocker arm bearings and shaft is 0.25 mm (.0099 in.). DE08TS Diesel Engine 47 of 76 Disassembly and Assembly...
-
Page 50: Connecting Rod Bearings
3. Push the connecting rod away from the crankshaft End By : and remove the upper bearing half. a. Install rocker shaft and push rods. 4. Do Steps 1 through 4 for the other connecting rod bearings. DE08TS Diesel Engine 48 of 76 Disassembly and Assembly... -
Page 51: Cylinder Head
Remove rocker shaft and push rods 8. Remove the connecting rod cap and measure the Plastigage. The bearing clearance for new rod bearings must be 0.035 to 0.075 mm (.0010 to .0029 in.). DE08TS Diesel Engine 49 of 76 Disassembly and Assembly... - Page 52 2. Install tool (A) on the cylinder head. Fasten a hoist and put cylinder head (2) in position on the cylinder IEED104P block. 3. Remove cylinder head gasket (3) and discard it. DE08TS Diesel Engine 50 of 76 Disassembly and Assembly...
- Page 53 Install rocker shaft and push rods. b. Install cylinder head cover. c. Install exhaust manifold. d. Install intake manifold. e. Install air cleaner. IEED106P 4. Remove valve (4), stem seal and spring seat. DE08TS Diesel Engine 51 of 76 Disassembly and Assembly...
- Page 54 Description Nominal Limit for use Intake Valve 8.95�8.97 8.93 Exhaust Valve 8.935�8.955 8.91 IEED003S 1. Install valve guide (5) with tool (C) in the cylinder head. DE08TS Diesel Engine 52 of 76 Disassembly and Assembly...
-
Page 55: Pistons
The close coil of spring (3) must be mext to the head. 6. Use tool (A) and put springs (3) under compression. Use tool (B) and install valve cotters (1) that hold the springs (3) in place. DE08TS Diesel Engine 53 of 76 Disassembly and Assembly... - Page 56 90� apart. NOTICE Never install the ring compressor on the piston unless the cylinder liner is used as a guide. Damage to the piston rings can be the result. DE08TS Diesel Engine 54 of 76 Disassembly and Assembly...
- Page 57 2. Remove retaining ring (3) from both side of the the correct size with one. piston with tool (B). See SPECIFICATIONS. 3. Remove pin (4) and connecting rod (5) from piston (2). DE08TS Diesel Engine 55 of 76 Disassembly and Assembly...
- Page 58 Install pistons. IEED111P 3. Slide connecting rod (5) inside the piston. Install pin (4) in the piston and the connecting rod. DE08TS Diesel Engine 56 of 76 Disassembly and Assembly...
-
Page 59: Cylinder Liners
4. Install the cylinder liners (1) in reverse order of removal. End By : a. Install pistons. b. Install crankshaft. IEED115P 2. Remove lip type seal (3) from timing gear case cover (2). DE08TS Diesel Engine 57 of 76 Disassembly and Assembly... -
Page 60: Timing Gear Case Cover
(1) that hold it to the case. End By : a. Install crankshaft pulley. IEED117P b. Install oil pan. 2. Remove nut (4) from injection pump coupling. DE08TS Diesel Engine 58 of 76 Disassembly and Assembly... - Page 61 (7). 3. Spread the end of bolts (7). IEED120P 5. Remove four bolts (9), washers that hold camshaft gear in place. 6. Remove camshaft gear (10) from camshaft. DE08TS Diesel Engine 59 of 76 Disassembly and Assembly...
-
Page 62: Timing Gear Case
2. Remove gasket from the timing gear case. the injection pump gear respectively. DE08TS Diesel Engine 60 of 76 Disassembly and Assembly... - Page 63 1. Remove four bolts (1), washers that hold camshaft gear (2) in place. 2. Remove camshaft gear (2) from the camshaft. IEED124P 3. Remove bolts (3), washers and flange (4) from the camshaft. DE08TS Diesel Engine 61 of 76 Disassembly and Assembly...
- Page 64 6. Remove camshaft bushes (7) from the block if IEED165P necessary. 2. Install thrust washer (6). Make an alignment of the hole in the washer and the dowel in the camshaft. DE08TS Diesel Engine 62 of 76 Disassembly and Assembly...
-
Page 65: Crankshaft Pulley
5. Put camshaft gear (2) in position on the camshaft and install washers and bolt (1) that hold camshaft gear (2) in the camshaft. End By : a. Install timing gears. b. Install rocker shaft and push rods. DE08TS Diesel Engine 63 of 76 Disassembly and Assembly... -
Page 66: Flywheel
130 N � � m (96 lb � � ft). IEED130P 3. Remove eight bolts (3) and washers that hold adapter and ring gear assembly (4) on the flywheel. 4. Remove adapter and ring gear assembly (4) from the flywheel. DE08TS Diesel Engine 64 of 76 Disassembly and Assembly... - Page 67 IEED133P 9. Remove two bolts opposite each other and install two M14x1.5 guide bolts in the flywheel. 10. Remove the remainder of bolts (9) and then remove flywheel (10). DE08TS Diesel Engine 65 of 76 Disassembly and Assembly...
- Page 68 The difference between the lower and higher measurements taken at all four points must not be more than 0.30 mm (.012 in.) which is the maximum permissible outside diameter runout (eccentricity) of the flywheel. DE08TS Diesel Engine 66 of 76 Disassembly and Assembly...
- Page 69 (1) to a torque of 55 ± ± 10 N � � m (40 ± ± 7 lb � � ft). Tighten bolts (5) to a torque of 55± ± 10 N� � m (40 ± ± 7 lb � � ft). End By : a. Connection engine and transmission. DE08TS Diesel Engine 67 of 76 Disassembly and Assembly...
-
Page 70: Flywheel Housing
Install bolts (2) that hold it in position. Tighten bolts (2) to a torque of 80 N � � m (60 lb � � ft). IEED008S 2. Remove lip type seal (3) from flywheel housing (1) and discard it. DE08TS Diesel Engine 68 of 76 Disassembly and Assembly... -
Page 71: Crankshaft
2. Remove bolts (3). Remove connecting rod caps (4). IEED141P 7. Remove gear (8) from the crankshaft with tool (A). Remove the dowel. DE08TS Diesel Engine 69 of 76 Disassembly and Assembly... - Page 72 8. Put the plastigage in position on the lower main in the center main housing. The steel side of the bearing half. thrust washers must be next to or toward the engine block and the cap. DE08TS Diesel Engine 70 of 76 Disassembly and Assembly...
- Page 73 9. Put the bearing cap in position and tighten the bolts to a torque of 300 N � � m (220 lb � � ft). 10. Remove the main bearing cap and measure the Plastigage. The bearing clearance for new bearings must be 0.025 to 0.075 mm (.001 to .003 in.).
-
Page 74: Air Compressor (If Equipped)
3. Connect oil supply tube (3) and air supply hose (4) on the air compressor.Tighten the hose clamp. 5. Remove four bolts (5) and washers that hold the air compressor assembly in place. Remove air compressor assembly (6). DE08TS Diesel Engine 72 of 76 Disassembly and Assembly... - Page 75 1. Remove plug (1) and drain oil from the crankcase. NOTE : For the purpose of reassembly, put Loctite No.572 on plug (1). IEED151P 6. Remove two bolts (6), washers, pressure catcher (7) and disc if needed. DE08TS Diesel Engine 73 of 76 Disassembly and Assembly...
- Page 76 NOTE : For the purpose of reassembly, tighten bolts (12) to a torque of 27 � � 32 N � � m (20 � � 24 lb � � ft) DE08TS Diesel Engine 74 of 76 Disassembly and Assembly...
- Page 77 (33). 21. Remove the crankshaft assembly and bearing cover (25) as a unit. IEED163P 26. Remove bearing (30) from crankshaft (31). IEED160P 22. Remove O-ring (26) from the bearing cover. DE08TS Diesel Engine 75 of 76 Disassembly and Assembly...
- Page 78 27. Inspect bushing (32) in the crankcase (33). If the bushing has a large amount wear, replace with new one. 28. Assemble the air compressor assembly in reverse order of disassembly. End By : a. Install air compressor. DE08TS Diesel Engine 76 of 76 Disassembly and Assembly...
Need help?
Do you have a question about the DE08TS and is the answer not in the manual?
Questions and answers