Sign In
Upload
Download
Table of Contents
Contents
Add to my manuals
Delete from my manuals
Share
URL of this page:
HTML Link:
Bookmark this page
Add
Manual will be automatically added to "My Manuals"
Print this page
×
Bookmark added
×
Added to my manuals
Manuals
Brands
Doosan Manuals
Engine
DP158LCF
Operation & maintenance manual
Doosan DP158LCF Operation & Maintenance Manual
Generator diesel engine
Hide thumbs
Also See for DP158LCF
:
Operation & maintenance manual
(262 pages)
1
2
3
4
5
6
7
8
9
10
11
12
13
14
15
16
17
18
19
20
21
22
23
24
25
26
27
28
29
30
31
32
33
34
35
36
37
38
39
40
41
42
43
44
45
46
47
48
49
50
51
52
53
54
55
56
57
58
59
60
61
62
63
64
65
66
67
68
69
70
71
72
73
74
75
76
77
78
79
80
81
82
83
84
85
86
87
88
89
90
91
92
93
94
95
96
97
98
99
100
101
102
103
104
105
106
107
108
109
110
111
112
113
114
115
116
117
118
119
120
121
122
123
124
125
126
127
128
129
130
131
132
133
134
135
136
137
138
139
140
141
142
143
144
145
146
147
148
149
150
151
152
153
154
155
156
157
158
159
160
page
of
160
Go
/
160
Contents
Table of Contents
Troubleshooting
Bookmarks
Table of Contents
4. Regular Inspection
Type
Type
Type
Table of Contents
General Information
Routine Inspection
Regular Inspection Table
General Conditions
Use of Genuine Parts
Cooling System
General Information
Coolant Standards
Capacity of Coolant
Checking the Coolant
Type
Measurement of Coolant Concentration
Discharging the Coolant
Charging the Coolant
Cleaning the Cooling Circuit
Inter Cooler
Lubrication System
General Information
Engine Oil Standards
Engine Oil Capacity
Checking the Engine Oil
Replacement of Engine Oil
Replacement of Engine Filter
Fuel System
Water Draining from Fuel Filter
Replacing Fuel Filter
Preventing Fuel Contamination
Fuel Injection Pump
Cleaning the Fuel Pre-Filter
Air Bleeding in the Fuel Circuit
Injector Maintenance
Fuel Injection Nozzle
Removal of Nozzle
Installation Nozzle
Note for Cleaning Nozzle
Checking the Injection Timing
Adjusting Injection Timing
Intake/Exhaust System
General Information
Air Filter
Disassembly of Air Filter
Cleaning of the Air Filter Element
Changing the Air Filter Element
Turbocharger
Routine Check and Serving the Turbocharger
Disassembly and Cleaning a Turbocharger
Cylinder Block/Head
Valve Clearance
Adjusting the Valve Clearance
Tightening Cylinder Head Bolt
Cylinder Compression Pressure
Electric System
Battery
Starter
Others/Driving System
V-Belt
5. about the Engine
Marking System of Units
Unit Conversion Methods
About the Engine
Tightening Torque
Tightening Torque of Main Parts
Tightening Torque of General Bolts
Tightening Torque of Plug Screw
Hollow Screw (4-Hole) Tightening Torque
Special Tool
Engine Disassembly
Procedure of Disassembling an Engine
Engine Assembly
Procedure of Assembling Engine
6. Cooling System
General Information
Specifications
Failure Diagnosis
Thermostat
General Information
Check of the Thermostat
8. Fuel System
General Information
High Sulfur Content in Diesel Fuel
Water (Moisture) in Diesel Fuel
Specifications
Failure Diagnosis
Fuel Injection Pump
General Information
Actuator
Actuator Component Parts Function
Controller System
DGC-2013 Governor Controller System
Description
Mounting & Warning
EMC (Electromagnetic Compatibility)
Functions
Adjustments
External Wiring
Magnetic Speed Sensor Connections
Remote Speed Adjustment
Droop Parallel Operation Mode (Manual Paralleling)
Accessory Input (Automatic Paralleling)
Controller LAMP Display (Diagnosis)
System Troubleshooting (Instability)
System Inoperative
Adjustment Fuel Injection Pump
9. Intake/Exhaust System
General Information
Specifications
General Information
Construction
Function
Failure Diagnosis
How to Maintain Turbocharger
Special Inspection of Turbocharger
10. Cylinder Block/Head
General Information
Specifications
Cylinder Block
Check of Cylinder Block
Measurement of Cylinder Liner
Cylinder Head
Measurement of Cylinder Liner
Assembly of Cylinder Head
Check of Cylinder Head
Valve
General Information
Check of Valve
Check of Valve Guide
Valve Seat
Valve Spring
Rocker Arm
Disassembly Rocker Arm
Assembly Rocker Arm
Check of Rocker Arm
Tappet and Push Rod
Tappet Clearance
Visual Inspection of Tappet
Warpage of Push Rod
Camshaft
Camshaft End Play
Check of Cam
Check of Camshaft
11. Electric System
General Information
Specification
Electrical Wiring Diagram
Switches and Sensors
Temperature Switch
Temperature Sensor
Pressure Sensor & Switch
Magnetic Pick-Up
Starter
General Information
Specification
Views
Wiring Diagram
Resistance
Alternator
General Information
Views
Wiring Diagram
Specification
Performance
Abnormally Charging
12. Others/Driving System
12. Others/Driving System
General Information
Crankshaft
Measurement of Crankshaft
Measurement of Crankshaft Bearing and Connecting Rod Bearing
Piston
Disassembly of Piston
Assembly of Piston
Piston Inspection
Piston Ring and Ring Groove
Piston Pin
Connecting Rod
Inspecting the Connecting Rod
Others
Engine Timing
Advertisement
Quick Links
Download this manual
Operation &
Maintenance Manual
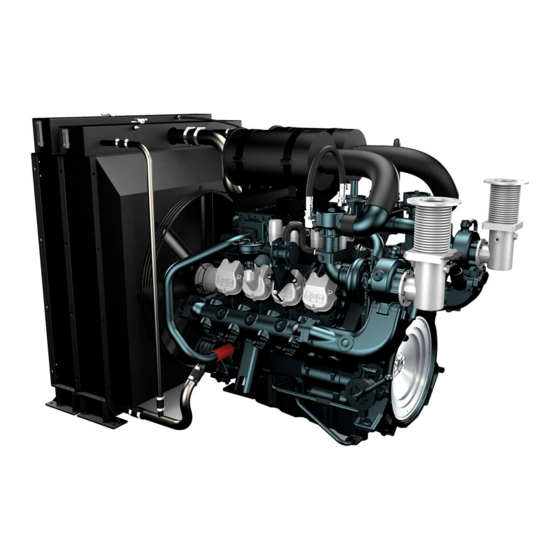
GENERATOR DIESEL ENGINE
DP158LCF/LCS/LDF/LDS
DP180LBS/LAS/LBF/LAF
DP222LAS/LBF/LBS/LCF/LCS
Doosan lnfracore
950106-01352
Table of
Contents
Previous
Page
Next
Page
1
2
3
4
5
Advertisement
Chapters
4. Regular Inspection
10
5. about the Engine
39
6. Cooling System
82
8. Fuel System
92
9. Intake/Exhaust System
115
10. Cylinder Block/Head
127
11. Electric System
140
12. Others/Driving System
151
Table of Contents
Need help?
Do you have a question about the DP158LCF and is the answer not in the manual?
Ask a question
Questions and answers
Related Manuals for Doosan DP158LCF
Engine Doosan DP158L Series Operation & Maintenance Manual
Diesel generator engine (262 pages)
Engine Doosan DP158LDF Operation & Maintenance Manual
Generator diesel engine (160 pages)
Engine Doosan DP180L Series Operation & Maintenance Manual
Diesel generator engine (262 pages)
Engine Doosan DP222L Series Operation & Maintenance Manual
Diesel generator engine (262 pages)
Engine Doosan DV11 Operation And Maintenance Manual
(221 pages)
Engine Doosan D35S-5 Service Manual
(152 pages)
Engine Doosan D35S-5 Service Manual
(366 pages)
Engine Doosan DE12T Operation & Maintenance Manual
(176 pages)
Engine Doosan DE12 Series Operation & Maintenance Manual
Diesel vehicle engine (158 pages)
Engine Doosan DL06 Operation Manual
Interim tier iv (211 pages)
Engine Doosan DL06 Manual
(207 pages)
Engine Doosan A2300 Service Manual
(242 pages)
Engine Doosan DE08TS Manual
For d100, d120, d150, d110s-5, d130s-5, d160s-5 (108 pages)
Engine Doosan DE08TIS Series Operation & Maintenance Manual
Diesel industrial engine (144 pages)
Engine Doosan D1146 Installation Operation & Maintenance
(179 pages)
Engine Doosan D24NAP Operation & Maintenance Manual
(19 pages)
This manual is also suitable for:
Dp158lcs
Dp180las
Dp158lds
Dp158ldf
Dp180lbs
Dp180lbf
...
Show all
Dp180laf
Dp222las
Dp222lbf
Dp222lbs
Dp222lcf
Dp222lcs
Table of Contents
Save PDF
Print
Rename the bookmark
Delete bookmark?
Delete from my manuals?
Login
Sign In
OR
Sign in with Facebook
Sign in with Google
Upload manual
Upload from disk
Upload from URL


Need help?
Do you have a question about the DP158LCF and is the answer not in the manual?
Questions and answers