Table of Contents
Advertisement
Quick Links
Advertisement
Table of Contents

Related Manuals for Hypercom M4230


Summary of Contents for Hypercom M4230
- Page 1 EFTPOS Professional Hypercom Mobile User Guide.
- Page 2 Phone Numbers Westpac Merchant Business Solutions Help Desk 1800 029 749 • Service, Sales and Support (24 hours a day, 7 days a week) • Terminal Difficulties • Stationery Orders Manual Credit Card Authorisations 132 415 (MasterCard, Visa) (24 hours a day, 7 days a week) American Express Authorisations 1300 363 614 Diners Club Authorisations...
-
Page 3: Table Of Contents
Contents Introduction ........2 How to Process a Completion ..43 Merchant Responsibility for 5.9.1 Using the Invoice/ROC Number ..43 Equipment and Materials Provided .. 2 5.9.2 Using the Authorisation ID ..... 45 Cancellation of Facility ..... 2 Reporting Functions ..... 48 Damaged, Lost or Stolen How to Print a Subtotal Report .. -
Page 4: Introduction
1.0 Introduction The EFTPOS Professional Mobile terminal allows online transactions to be processed for Debit Cards (Savings and Cheque accounts), Credit Cards (Visa and MasterCard) and Charge Cards (American Express, Diners Club and JCB). To accept Charge Card transactions please contact the Charge Card provider. -
Page 5: Getting Started
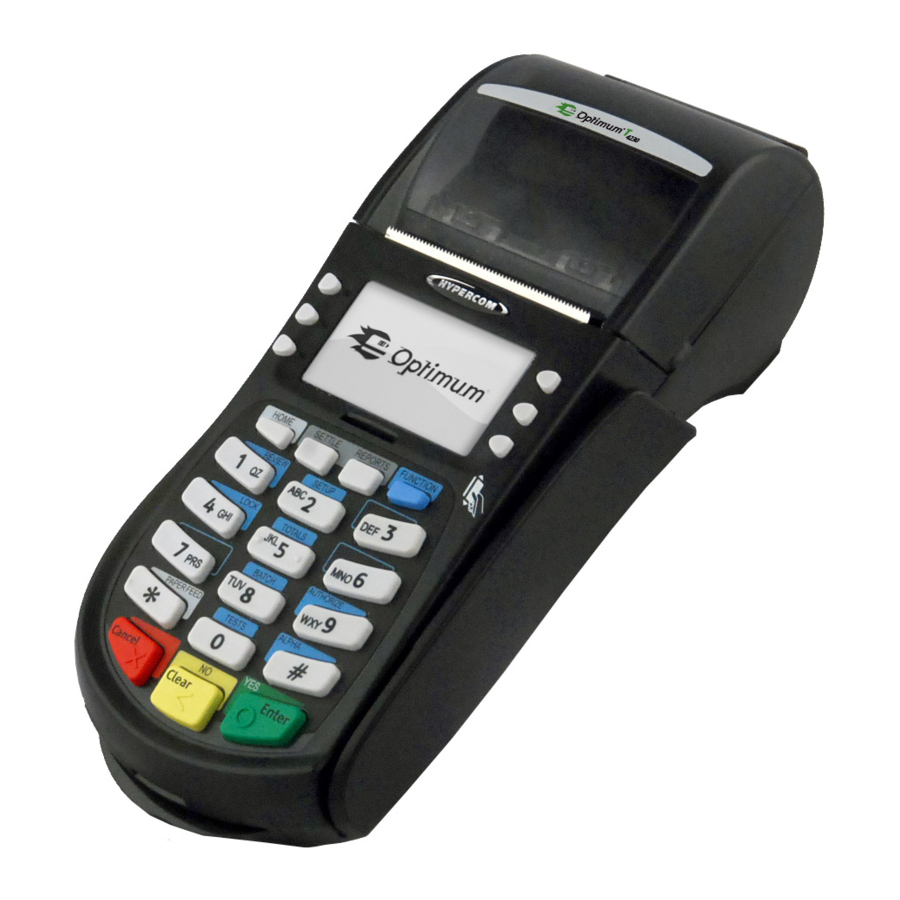
2.0 Getting Started EFTPOS Professional Mobile Terminal The EFTPOS Professional Mobile terminal is a complete unit. The terminal also operates as a PIN Pad for the customer and has an internal thermal printer for fast, quiet printing. 2.2 Keyboard Layout Soft Keys Reports Key Function Key... -
Page 6: Terminal Display
2.3 Terminal Display Signal Strength – Number of bars indicates strength of the GPRS signal. When no signal is detected just the Y will appear. Three bars indicate good signal strength. Battery - Internal battery power level displayed when terminal is not connected to mains power. -
Page 7: Communications
2.5 Communications 2.5.1 Terminal Communications The terminal utilises the Telstra GPRS network. An authorised SIM card is required to process transactions on the terminal via the GPRS network. Westpac will provide data only SIM cards with the terminal. 2.5.2 GPRS Coverage The GPRS network provides coverage to 96% of Australia’s population. - Page 8 (b) Drop the paper roll into the compartment with the end of the roll protruding from underneath the roll. Drop Paper Roll Pull Receipt Paper (c) Pull the paper out slightly and close the cover. (d) Test the operation of the printer by pressing the paper feed ( ) button.
-
Page 9: Terminal Maintenance
2.7 Terminal Maintenance In order to keep your terminal’s software up to date the bank will automatically download any updates to your terminal on a regular basis (usually monthly). It is important that you allow the downloads to be completed so that your terminal will always have the latest configuration and software available. -
Page 10: Passwords
2.8 Passwords Your terminal is programmed with a password which is required for both refund and void transactions. This password is a security measure to ensure only those personnel who are authorised by you (as the authorised signatory) can process refunds through your terminal. You are responsible for protecting this password against unauthorised use. -
Page 11: Terminal Users
3.0 Terminal Users Your terminal is capable of being enabled for up to 50 user IDs. This allows you to keep a record of users who have operated the terminal. You will have a choice as to the ‘title’ you would like to assign to the users. - Page 12 TERMINAL DISPLAY PROCEDURE USER ID Enter USER ID Key in the name which you wish to assign to the user, up to 10 characters (incl. spaces). Pressing the soft key next to ‘SEL’, or the Alpha (#) key, will change the number keys to alpha keys. Keep pressing for more character options.
- Page 13 In order to ensure the latest information about the terminal’s configuration is stored at Westpac, you should complete the following upload when you add any Users to the terminal. This will allow the terminal users to carry over into any swap over of your terminal without the need for you to re-enter the details into the terminal.
-
Page 14: Procedures
4.0 Procedures Inserting a Chip Card When your terminal is enabled for chip card acceptance, chip cards are inserted into the terminal and left there for the duration of the transaction. The chip card reader is located at the bottom of the terminal below the keypad. Chip Card Reader Chip Card... -
Page 15: Swiping A Magnetic Stripe Card
4.2 Swiping a Magnetic Stripe Card The magnetic stripe reader is located on the right hand side of the terminal. Magnetic Stripe Card Bi-directional Card Reader 1. Check the terminal is displaying the message INSERT/SWIPE CARD. 2. Hold the card upside-down with the magnetic stripe facing inwards. 3. - Page 16 To start Training Mode: TERMINAL DISPLAY PROCEDURE Press MENU. DATE TIME Press FUNCTION. ENTER AMOUNT The next step depends on whether you pressed MENU or FUNCTION key. MAIN MENU 1. LOGON 2. BATCH 1. If you pressed MENU, press 3 and then ENTER to select TERMINAL.
- Page 17 Process transactions as per procedures in Section 5.0. Receipts will display TRAINING/VOID on them. After three minutes of inactivity the terminal will exit training mode and return to the idle prompt. To exit Training Mode: TERMINAL DISPLAY PROCEDURE Press MENU. DATE TIME *TRAINING MODE*...
- Page 18 TERMINAL DISPLAY PROCEDURE DATE TIME The idle screen will no longer display TRAINING MODE. ENTER AMOUNT At the end of Training Mode all transactions are reset and previous values are restored to batch and ROC (Record of Charge) number. Receipt in Training Mode EFTPOS PROFESSIONAL MOBILE GPRS USER GUIDE PROCEDURES...
-
Page 19: Locking/Unlocking Terminal Keyboard
4.4 Locking/Unlocking Terminal Keyboard This function locks the terminal keyboard and prevents any unauthorised transactions taking place. The terminal remains locked even if powered off and on. You can use any four digit password to lock the terminal. This same password will then be used to unlock the terminal. Alternatively, your merchant password can be used to unlock the terminal also. -
Page 20: Transaction Procedures
5.0 Transaction Procedures How to Process a Sale TERMINAL DISPLAY PROCEDURE DATE TIME Key in the PURCHASE AMOUNT. ENTER AMOUNT SALE ENTER SALE AMOUNT This screen will appear as a value is keyed in. $0.00 Press ENTER to continue. CLEAR If ‘Purchase with Cash’... - Page 21 TERMINAL DISPLAY PROCEDURE CONFIRM AMOUNT SALE $25.00 If prompted, confirm the amount by pressing the Cash $5.00 soft key next to YES or pressing ENTER, otherwise -------- select NO or press CANCEL. TOTAL AUD $30.00 CARD TOTAL $30.00 Where prompted, have the cardholder key in their PIN and press ENTER, or just press ENTER.
- Page 22 Before completing the sale, check that the transaction was approved. If the transaction is declined, the terminal will beep for two seconds and display an error message giving the reason. An explanation of the error code is available in Section 10.2, Response Codes.
-
Page 23: How To Process A Cash Only Transaction
5.2 How to Process a Cash Only Transaction If ‘Cash’ is enabled on the terminal, customers can be given cash out. Cash is available from cheque and savings accounts only. TERMINAL DISPLAY PROCEDURE DATE TIME Press ENTER. ENTER AMOUNT TRANSACTIONS 1. - Page 24 TERMINAL DISPLAY PROCEDURE COMMS The terminal is connecting to the bank and processing the transaction. Sending Req RECEIPT Print a customer copy by pressing the soft key next DO YOU REQUIRE A to YES or pressing ENTER, otherwise select NO or CUSTOMER COPY? press CANCEL.
-
Page 25: How To Process A Refund
5.3 How to Process a Refund Refunds may only be processed where there was an initial valid transaction on the same card. If a customer returns a purchase, or if an incorrect amount was charged, process a refund as follows: TERMINAL DISPLAY PROCEDURE DATE TIME... - Page 26 TERMINAL DISPLAY PROCEDURE SELECT ACCOUNT CHEQUE Press the soft key beside the account type needed. SAVINGS CREDIT CARD REFUND TOTAL $50.00 Where prompted, have the cardholder key in their PIN and press ENTER, or just press ENTER. KEY PIN &/OR ENTER COMMS The terminal is connecting to the bank and processing the refund.
- Page 27 Before completing the refund, check that the initial transaction was approved. If the transaction is declined, the terminal will beep for two seconds and display an error message giving the reason. An explanation of the error code is available in Section 10.2, Response Codes.
-
Page 28: How To Void A Transaction
5.4 How to Void a Transaction The Void function can be carried out on credit or charge cards to reverse a transaction that has not yet settled. Note: Debit cards and pre-authorisation transactions cannot be voided. ● TERMINAL DISPLAY PROCEDURE DATE TIME Press FUNCTION. - Page 29 TERMINAL DISPLAY PROCEDURE CARD VOID Confirm the VOID by pressing the soft key next to CONFIRM YES or pressing ENTER. Otherwise select NO or VOID TXN INV: 123456 press CANCEL. If cardholder is present: Have the customer sign the receipt. If the signature matches the signature on SIGNATURE the card, press ENTER, otherwise press CANCEL.
- Page 30 Void Receipt EFTPOS PROFESSIONAL MOBILE GPRS USER GUIDE TRANSACTION PROCEDURES...
-
Page 31: How To Process A Sale With Tip
5.5 How to Process a Sale with Tip This process is a sale with tip enabled. It is most commonly used by restaurants. Note: The Tip feature needs to be enabled for your terminal. Contact Merchant Business ● Solutions to enable this feature on your terminal. TERMINAL DISPLAY PROCEDURE DATE... - Page 32 TERMINAL DISPLAY PROCEDURE CONFIRM AMOUNT SALE $25.00 Confirm the total amount by pressing the soft key $5.00 next to YES or ENTER, otherwise select NO -------- or press CANCEL. TOTAL AUD $30.00 $5.00 TOTAL $30.00 Where prompted, have the cardholder key in their PIN and press ENTER, or just press ENTER.
- Page 33 Before completing the sale, check that the transaction was approved. If the transaction is declined, the terminal will beep for two seconds and display an error message giving the reason. An explanation of the error code is available in Section 10.2, Response Codes.
-
Page 34: How To Process A Tip Addition
5.6 How to Process a Tip Addition A tip addition is performed after the original transaction has been processed. The customer verifies the base amount of the sale, offers a tip and signs the receipt. The adjustment transaction is then processed. Note: Tip Addition applies to credit and charge cards only. - Page 35 Receipt for tip addition Receipt for tip addition to be performed – 1 to be performed – 2 If tip is added, Base amount A signature is required a signature is approved regardless of whether a is required. without a tip is added or not.
- Page 36 TERMINAL DISPLAY PROCEDURE DATE TIME Press FUNCTION. ENTER AMOUNT MERCHANT FUNCTION ENTER FUNCTION Press 9 and then ENTER for TIP ADDITION. CLEAR TIP ADDITION ENTER INV/ROC NO. Key in the INV/ROC number printed on the receipt of AND PRESS ENTER the original transaction and press ENTER.
- Page 37 TERMINAL DISPLAY PROCEDURE CONFIRM AMOUNT SALE $25.00 Confirm the total amount by pressing the soft key $5.00 next to YES or ENTER, otherwise select NO -------- or press CANCEL. TOTAL AUD $30.00 RECEIPT Print a receipt by pressing the soft key next to PRINT RECEIPT? YES or pressing ENTER, otherwise select NO or press CANCEL.
- Page 38 Tip Addition Receipt EFTPOS PROFESSIONAL MOBILE GPRS USER GUIDE TRANSACTION PROCEDURES...
-
Page 39: How To Process A Mail/Telephone Order/E-Commerce Transaction
5.7 How to Process a Mail/Telephone Order/e-Commerce Transaction Transactions initiated by mail or telephone are known as MOTO (Mail Order or Telephone Order) transactions. ECOM (Electronic Commerce) transactions are those initiated over the Internet. MOTO and ECOM transactions can be processed on credit and charge cards only, as the cardholder is not present. - Page 40 TERMINAL DISPLAY PROCEDURE MOTO EXPIRY DATE Key in the CARD EXPIRY DATE (MMYY) and press ENTER. MM/YY CLEAR MOTO Key in the CCV and press ENTER. ENTER CCV Or, if CCV is not available, just press ENTER. Note: CCV is described in the Minimising Fraud Section.
- Page 41 Before completing the sale, check that the transaction was approved. If the transaction is declined, the terminal will beep for two seconds and display an error message giving the reason. An explanation of the error code is available in Section 10.2, Response Codes.
-
Page 42: How To Process A Pre-Authorisation
5.8 How to Process a Pre-Authorisation This function is used to reserve funds on a card for a sale to be processed at a later time. Car rentals and hotels/motels most commonly use this function. Note: Pre-Authorisation transactions can only be performed on credit cards and charge ●... -
Page 43: Eftpos Professional Mobile Gprs User Guide
TERMINAL DISPLAY PROCEDURE CARD TOTAL $56.00 Where prompted, have the cardholder key in their PIN and press ENTER, or just press ENTER. KEY PIN OR ENTER COMMS The terminal is connecting to the bank and processing the pre-authorisation. Sending Req If signature is required, remove the card from the SIGNATURE terminal: Have the customer sign the receipt. -
Page 44: Eftpos Professional Mobile Gprs User Guide
Approved PreAuth Receipt (approved with PIN, Approved PreAuth Receipt no signature required) (signature required) EFTPOS PROFESSIONAL MOBILE GPRS USER GUIDE TRANSACTION PROCEDURES... -
Page 45: How To Process A Completion
How to Process a Completion A completion is used to complete an earlier pre-authorisation and charge the cardholder. You can process a completion in one of two ways: 1. Using the Invoice/ROC number from the Pre-Authorisation transaction. 2. Using the Authorisation ID of the Pre-Authorisation transaction. Note: The terminal retains pre-authorisations for seven calendar days only. - Page 46 TERMINAL DISPLAY PROCEDURE CARD COMPLETION PRE-AUTH AMT $56.00 ENTER COMPLETION AMT Key in the completion amount and press ENTER. $0.00 CLEAR CARD COMPLETION If your terminal is enabled for tips, this screen may ENTER TIP AMOUNT appear. Key in the tip amount and press ENTER or, $0.00 just press ENTER.
-
Page 47: Using The Authorisation Id
5.9.2 Using the Authorisation ID TERMINAL DISPLAY PROCEDURE DATE TIME Press FUNCTION. ENTER AMOUNT MERCHANT FUNCTION ENTER FUNCTION Press 3 and then ENTER for COMPLETION. CLEAR COMPLETION ENTER INV/ROC NO. AND PRESS ENTER Press ENTER. CLEAR COMPLETION ENTER COMPLETION AMT Key in the COMPLETION AMOUNT and press ENTER. - Page 48 TERMINAL DISPLAY PROCEDURE CARD COMPLETION ENTER TIP AMOUNT If enabled, enter a tip at this prompt or just press $0.00 ENTER. CLEAR CONFIRM AMOUNT COMPLETION $56.00 If prompted, press the soft key next to YES, or press $4.00 ENTER, to confirm COMPLETION amount. --------- TOTAL AUD $60.00...
- Page 49 Completion Receipt EFTPOS PROFESSIONAL MOBILE GPRS USER GUIDE TRANSACTION PROCEDURES...
-
Page 50: Reporting Functions
6.0 Reporting Functions How to Print a Subtotal Report This function will print a report of all transactions performed since the last settlement, without resetting the totals in the terminal. TERMINAL DISPLAY PROCEDURE DATE TIME Press REPORTS. ENTER AMOUNT REPORTS 1. -
Page 51: Terminal Settlement
Subtotals Report 6.2 Terminal Settlement Settlement for the EFTPOS Professional Mobile device can occur via a programmed terminal settlement (automatic settlement) or a manual settlement. Failure to perform a settlement may result in split deposits for settlements in your bank account. The terminal must be powered on and be able to communicate for settlement to occur at the programmed time. - Page 52 Note: A settlement can only be performed once in a 24-hour period. ● You cannot settle between 21:30 and 23:00 (Sydney time). ● A password is required for a manual settlement on a multi-merchant terminal. ● To process a manual settlement: TERMINAL DISPLAY PROCEDURE DATE...
- Page 53 Settlement Report EFTPOS PROFESSIONAL MOBILE GPRS USER GUIDE REPORTING FUNCTIONS...
-
Page 54: How To Reprint Previous Settlements
6.3 How to Reprint Previous Settlements This function will allow you to reprint the last seven days settlements which have occurred. TERMINAL DISPLAY PROCEDURE DATE TIME Press FUNCTION. ENTER AMOUNT MERCHANT FUNCTION ENTER FUNCTION Press 8 and then ENTER for SETTLEMENT options. CLEAR SETTLEMENT 1. -
Page 55: How To Reprint Last Transaction
6.4 How to Reprint Last Transaction This function will reprint the receipt of the last transaction performed. The receipt will have ‘Duplicate’ printed on it. Note: This can only be done from the current settlement period. ● TERMINAL DISPLAY PROCEDURE DATE TIME Press FUNCTION. - Page 56 Receipt Reprint EFTPOS PROFESSIONAL MOBILE GPRS USER GUIDE REPORTING FUNCTIONS...
-
Page 57: How To Reprint Specific Transaction
6.5 How to Reprint Specific Transaction This function will allow the operator to reprint a specific transaction. Note: Reprint of a specific transaction can only be done from current settlement period. ● TERMINAL DISPLAY PROCEDURE DATE TIME Press FUNCTION. ENTER AMOUNT MERCHANT FUNCTION ENTER FUNCTION Press 6 and then ENTER for REPRINT options. -
Page 58: How To View Transactions
6.6 How to View Transactions This function allows the operator to view all the transactions that have not been settled. TERMINAL DISPLAY PROCEDURE DATE TIME Press MENU. ENTER AMOUNT MAIN MENU 1. LOGON 2. BATCH Press 2 to select BATCH and press ENTER. 3. -
Page 59: How To Print Transaction Log
6.7 How to Print Transaction Log This function will print out a summary of each transaction performed in the day’s batch period. It will print, in one list, transactions done on all card types (MasterCard, American Express etc). Note: The Transaction log will only show transactions done since the last settlement. ●... - Page 60 Transaction Log EFTPOS PROFESSIONAL MOBILE GPRS USER GUIDE REPORTING FUNCTIONS...
-
Page 61: How To Print Tip Report
6.8 How to Print Tip Report This report can be printed many times during the settlement period. Once the terminal settles, the tip report will be reset. Printing a tip report does not cause a terminal settlement. Note: The tip report can only be printed from current settlement period. ●... - Page 62 Tip Report EFTPOS PROFESSIONAL MOBILE GPRS USER GUIDE REPORTING FUNCTIONS...
-
Page 63: Shifts
Shifts The terminal’s shift facility is useful when you need separate reports for each work shift. It is independent of the settlement times. This function allows you to keep a record of users who have operated the terminal in a shift period. Note: Shift totals are independent from settlement times. -
Page 64: How To Print A Shift Report
6.9.2 How to Print a Shift Report This function will allow you to print the current shift totals. This can be done either by User (if enabled) or for all transactions. TERMINAL DISPLAY PROCEDURE DATE TIME Press REPORTS. ENTER AMOUNT REPORTS 1. - Page 65 Shift Report EFTPOS PROFESSIONAL MOBILE GPRS USER GUIDE REPORTING FUNCTIONS...
-
Page 66: Additional Terminal Features/Options
7.0 Additional Terminal Features/Options Multi Merchant Facilities A multi merchant facility is one whereby a terminal is loaded with more than one merchant. This allows more than one business to transact via the one terminal. This is ideal for businesses who trade from the one location but require separate accounts, for example, doctors surgeries. - Page 67 TERMINAL DISPLAY PROCEDURE CONFIRM AMOUNT SALE $25.00 Press the soft key next to YES, or ENTER to confirm. Merch Surcharge $0.38 If incorrect press the soft key next to NO, or -------- press CANCEL. TOTAL AUD $25.38 To enable this feature you will need to contact our Merchant Helpdesk. Note: You must make your customer aware at, or prior to, the time of purchase of the percentage surcharge which will apply to the transaction.
- Page 68 Receipt with Surcharging Enabled EFTPOS PROFESSIONAL MOBILE GPRS USER GUIDE ADDITIONAL TERMINAL FEATURES/OPTIONS...
-
Page 69: Merchant Logo
Merchant Logo You have an option to have your Business or Company Logo displayed on your terminal(s). To display your logo on the terminal you will need to provide the Bank with a copy of the logo in the following format: Bitmap file ●... - Page 70 TERMINAL DISPLAY PROCEDURE EDIT PRESET AMOUNTS 1. $0.00 2. $0.00 3. $0.00 Press the number of the soft key to which you wish to allocate the amount and press Enter. 4. $0.00 5. $0.00 6. $0.00 PRESET AMOUNTS ENTER PRESET AMOUNT Key in the amount for the soft key selected and $0.00 press Enter.
- Page 71 To use the preset amounts: TERMINAL DISPLAY PROCEDURE DATE TIME Press the soft key next to the amount you wish $1.50 $8.00 to charge. $3.20 (You can enter different amounts using the normal $5.00 procedure, refer to section 5.1). SELECT/ENTER AMOUNT SALE You can also enter a base amount and then add pre-set values to this.
- Page 72 To cancel the preset amounts: TERMINAL DISPLAY PROCEDURE DATE TIME $1.50 $8.00 $3.20 Press Function. $5.00 SELECT/ENTER AMOUNT MERCHANT FUNCTION ENTER FUNCTION Press 45 and then ENTER for pre-set input function. CLEAR PRESET INPUT FUNCTION DISABLE PRE-SET AMOUNTS Select YES or press Enter to disable preset amounts. DATE TIME The regular idle screen will display.
-
Page 73: Dynamic Currency Conversion
Dynamic Currency Conversion 7.5.1 Introduction If your terminal is enabled for Dynamic Currency Conversion (DCC), you are able to process transactions in the cardholder’s home currency. This is only offered on credit transactions on MasterCard and Visa for the following currencies: United States Dollar (USD), Canadian Dollar (CAD), Euros (EUR), Pounds Sterling (GBP), Japanese Yen (JPY), Singapore Dollars (SGD), Hong Kong Dollars (HKD), and New Zealand Dollars (NZD). - Page 74 7.5.2 MOTO DCC Transactions DCC Mail Orders: If you are approved to process MOTO transactions then you are able to process DCC transactions via the MOTO function on your terminal for orders that are received via the mail. If you would like to offer your customers the opportunity to pay in their home currency you must include the following information on the form where they provide their card details: a list of the currencies that are available to DCC...
- Page 75 7.5.3 Processing DCC Transactions If you insert/swipe an overseas MasterCard or Visa credit card, from one of the available currencies, you will see the following screen. This will appear after the account selection screen of the allowable transaction types. SALE in NZD? SALE AUD $5.00 EXCHANGE RATE...
- Page 76 Approved DCC Sales Receipt Approved DCC Sales Receipt (approved with PIN) (approved with signature) If the terminal cannot complete the transaction, you may be asked if you would like to continue the transaction in Australian Dollars (AUD) as follows: DCC FAILED Ensure the cardholder is happy to proceed in PROCESS IN AUD? Australian Dollars.
- Page 77 7.5.4 DCC Subtotals You can print a subtotal of all the DCC transactions processed since the last terminal settlement. This function will print a report of all DCC transactions by currency performed since the last settlement, without resetting the totals in the terminal. TERMINAL DISPLAY PROCEDURE DATE...
- Page 78 7.5.5 DCC Settlement As per Section 6.2, settlement for the Eftpos Professional device can occur via a programmed terminal settlement (automatic settlement) or a manual settlement. If your terminal is set up for an automatic settlement, your DCC transactions will settle immediately after your AUD transactions.
- Page 79 DCC Settlement Report EFTPOS PROFESSIONAL MOBILE GPRS USER GUIDE ADDITIONAL TERMINAL FEATURES/OPTIONS...
- Page 80 7.5.6 DCC Currency Rates The exchange rates in the terminal will update automatically at the time of the DCC settlement. However, you are able to update the rates manually at any time. You can also print a report of the current rates. To manually update the rates: TERMINAL DISPLAY PROCEDURE...
- Page 81 DCC Currency Rates Report EFTPOS PROFESSIONAL MOBILE GPRS USER GUIDE FALL BACK SALES PROCEDURES...
-
Page 82: Fall Back Sales Procedures
8.0 Fall Back Sales Procedures Electronic Fall Back The Electronic Fall Back (EFB) facility is available only when enabled on the terminal, and only for certain card types. Electronic Fall Back is the ability to continue performing transactions on the terminal, even when communication with the Westpac host system for on-line approval has been lost or the Issuer is unavailable. -
Page 83: Sending Offline Transactions
8.1.1 Sending Offline Transactions Once communication with the bank is restored the terminal will send any stored transactions to Westpac for processing. The terminal will attempt to send these transactions after a transaction is processed online or after a period of inactivity. If there are transactions to upload to Westpac the following screen will display: TERMINAL DISPLAY PROCEDURE... -
Page 84: Manual Fall Back
8.2 Manual Fall Back The EFTPOS Professional Mobile terminal supplied to you is very reliable and Westpac is committed to ensuring its smooth operation is maintained. Any problems should be promptly reported to our helpdesk. If your terminal fails to function correctly you may revert to manual fall back. Before Performing a Fall Back Transaction: For credit cards, if the transaction is over your Floor Limit, call 132 415 for authorisation. -
Page 85: Minimising Fraud
9.0 Minimising Fraud At Westpac, we take fraud seriously, and you should too. Fraud can cost your business significant amounts of money, and certain types of merchants – based on the types of goods sold – are more prone to fraudulent transactions than others. We believe it is essential for you to have a sound understanding of credit card fraud, how it can be detected and how it can be prevented. - Page 86 Where Can I Find the CCV Security Code? Some cards, for example MasterCard and Visa, have a three-digit CCV printed on the signature strip on the reverse side of the card. Other numbers may precede AUTHORISED SIGNATURE the CCV. The last three digits on the signature strip 4000 0012 3456 7890 123 are the CCV.
-
Page 87: Trouble Shooting
10.0 Trouble Shooting 10.1 Hardware Faults Hardware Faults Action 1. Ensure that the power cable is securely connected to the terminal. 2. Power off the terminal for 10 seconds. No response from the terminal 3. Power on the terminal. 4. Retry the transaction. 5. -
Page 88: Response Codes
10.2 Response Codes Below is a copy of a receipt, which indicates the location of the Response Codes. Response Code Location Where your terminal displays a response code not listed on your guide, and you use an electronic terminal supplied by us, you should phone us on 1800 029 749 for clarification. EFTPOS PROFESSIONAL MOBILE GPRS USER GUIDE TROUBLE SHOOTING... - Page 89 Code Display Cause/Action APPROVED The transaction has been approved. ● CALL FOR AUTH Unable to obtain electronic authorisation. ● Call for authorisation from credit card ● authorisations then complete manual sales voucher if approved. CALL FOR AUTH Unable to obtain electronic authorisation. ●...
- Page 90 Code Display Cause/Action FORMAT ERROR CALL Power the terminal off and on and retry the ● HELPDESK transaction. Contact Merchant Business Solutions whilst ● the cardholder is present to confirm if the transaction has been processed correctly. WRONG ACCOUNT Retry the transaction, selecting a different ●...
- Page 91 Code Display Cause/Action INVALID TRANSACTION Obtain another form of payment. ● Advise cardholder to contact card issuer. ● DECLINED Obtain another form of payment. ● Advise cardholder to contact card issuer. ● CANNOT PAY Obtain another form of payment. ● Advise cardholder to contact card issuer.
- Page 92 Code Display Cause/Action ISSUER NOT AVAILABLE Bank is unavailable; retry the transaction. ● If the transaction is declined again follow ● manual fallback procedures as explained in Section 8.2. CANNOT PAY Obtain another form of payment. ● Advise cardholder to contact card issuer. ●...
- Page 93 Code Display Cause/Action LOST CARRIER Turn terminal off, then back on, and retry ● the transaction. Contact Merchant Business Solutions if the ● problem persists. DECLINED ND Press the Function key and then 23 and ● Enter. Contact Merchant Business Solutions if the ●...
- Page 94 Notes EFTPOS PROFESSIONAL MOBILE GPRS USER GUIDE...
- Page 95 © 2012 Westpac Banking Corporation ABN 33 007 457 141. MBB041 (07/12) 281949...
Need help?
Do you have a question about the M4230 and is the answer not in the manual?
Questions and answers