Table of Contents
Advertisement
Advertisement
Table of Contents

Related Manuals for EDAN SE-601A


Summary of Contents for EDAN SE-601A
- Page 2 This manual will help you understand the operation and maintenance of the product better. It is reminded that the product shall be used strictly complying with this manual. User’s operation failing to comply with this manual may result in malfunction or accident for which EDAN INSTRUMENTS, INC. (hereinafter called EDAN) can not be held liable.
- Page 3 Terms Used in this Manual This guide is designed to give key concepts on safety precautions. WARNING A WARNING label advises against certain actions or situations that could result in personal injury or death. CAUTION A CAUTION label advises against actions or situations that could damage equipment, produce inaccurate data, or invalidate a procedure.
-
Page 4: Table Of Contents
Table of Contents Chapter 1 Safety Guidance ......................1 1.1 Intended Use ........................... 1 1.2 Warnings and Cautions ......................1 1.2.1 Safety Warnings ....................... 1 1.2.2 Li-ion Battery Care Warnings ..................4 1.2.3 General Cautions......................5 1.3 List of Symbols........................6 Chapter 2 Introduction........................ - Page 5 7.6 Copy Printing........................51 7.7 ECG Reports......................... 52 7.7.1 ECG Reports in the Auto Mode ..................52 7.7.2 ECG Reports in the Rhythm Mode ................54 7.7.3 ECG Reports in the Manual Mode................. 55 7.7.4 ECG Reports in the R-R Mode ..................56 7.7.5 ECG Reports Printed by the USB Printer ..............
- Page 6 9.6.3 Selecting Antialising (Only for SE-601B/C)..............89 9.6.4 Setting Key Volume ....................... 89 9.6.5 Setting Hint Volume ....................... 90 9.6.6 Setting QRS Volume ...................... 90 9.6.7 Setting Notification Volume................... 90 9.7 Patient Question........................90 9.7.1 Specifying ID Mode....................... 91 9.7.2 Selecting ID Hint......................91 9.7.3 Selecting Gender/Height/Weight/BP/Race/Medication/Ward NO/Doctor/Technician..
- Page 7 A1.1 Safety Specifications ....................... 115 A1.2 Environment Specifications..................... 116 A1.3 Physical Specifications ....................116 A1.4 Power Supply Specifications ................... 116 A1.5 Performance Specifications ..................... 117 Appendix 2 EMC Information....................119 Appendix 3 Abbreviation......................124...
-
Page 8: Chapter 1 Safety Guidance
SE-601 Series Electrocardiograph User Manual Safety Guidance Chapter 1 Safety Guidance This chapter provides important safety information related to the use of SE-601 series electrocardiograph (hereinafter called SE-601). 1.1 Intended Use The intended use of SE-601 is to acquire ECG signals from adult and pediatric patients through body surface ECG electrodes. - Page 9 SE-601 Series Electrocardiograph User Manual Safety Guidance WARNING 3. EXPLOSION HAZARD - Do not use the electrocardiograph in the presence of flammable anesthetic mixtures with oxygen or other flammable agents. 4. SHOCK HAZARD - The power receptacle must be a hospital grade grounded outlet. Never try to adapt the three-prong plug to fit a two-slot outlet.
- Page 10 SE-601 Series Electrocardiograph User Manual Safety Guidance WARNING 18. If the wireless AP technology is used, the minimum distance between the radiator and the human body should be not less than 20cm. Use the supplied antenna only. There should be no shield in or around the room where the wireless AP is used. 19.
-
Page 11: Li-Ion Battery Care Warnings
SE-601 Series Electrocardiograph User Manual Safety Guidance WARNING 28. Parts and accessories used must meet the requirements of the applicable IEC/EN 601 series safety standards, and/or the system configuration must meet the requirements of the IEC/EN 60601-1-1 medical electrical systems standard. 29. -
Page 12: General Cautions
SE-601 Series Electrocardiograph User Manual Safety Guidance WARNING 6. When leakage or foul smell is found, stop using the battery immediately. If your skin or cloth comes into contact with the leakage liquid, cleanse it with clean water at once. If the leakage liquid splashes into your eyes, do not wipe them. -
Page 13: List Of Symbols
SE-601 Series Electrocardiograph User Manual Safety Guidance 1.3 List of Symbols External output External input Equipment or part of CF type with defibrillator proof Caution Consult Instructions for Use Potential equalization Mains Supply Battery indicator Battery recharging indicator Delete key Enter key Esc key Space key/Feed paper key... - Page 14 SE-601 Series Electrocardiograph User Manual Safety Guidance Fn key Power On/Off key MODE key RESET key 1mV/COPY key START/STOP key Tab key Recycle Part Number Serial Number Manufacturer Date of Manufacture The symbol indicates that the device complies with the European Council Directive...
- Page 15 SE-601 Series Electrocardiograph User Manual Safety Guidance Authorized Representative in the European Community With respect to electrical shock, fire and mechanical hazards only in accordance with UL 60601-1and CAN/CSA C22.2 No. 601.1 It indicates that the device should be sent to the special agencies according to local regulations for separate collection after its useful life Federal (U.S.) Law restricts this device to sale by or on the...
-
Page 16: Chapter 2 Introduction
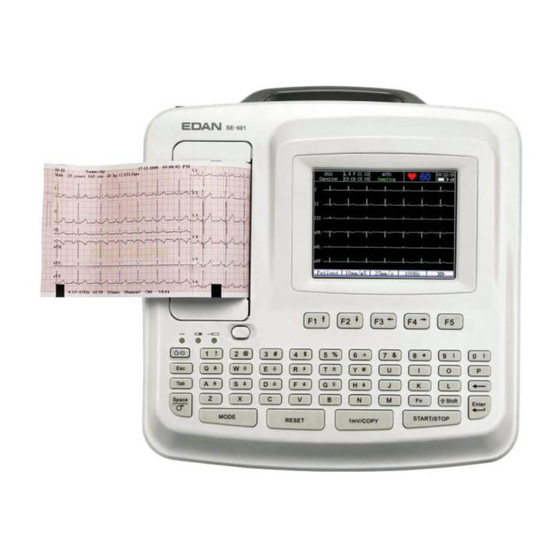
The 6-channel electrocardiograph has three models: SE-601A, SE-601B and SE-601C. SE-601A adopts 192×64 dot single color LCD screen; SE-601B adopts 320×240 dot single color LCD screen; SE-601C adopts 640×480 dot multicolor TFT LCD screen. -
Page 17: Top Panel
Introduction 2.1 Top Panel Recorder LCD Screen Indicators From left to right on the Keyboard top panel: A, B, C. Figure 2-1 SE-601A LCD Screen Recorder Indicators From left to right on Keyboard the top panel: A, B, C. ... -
Page 18: Keyboard And Keys
SE-601 Series Electrocardiograph User Manual Introduction 2.2 Keyboard and Keys B (1, 2, 3) Figure 2-3 SE-601A / SE-601B / SE-601C Keyboard Name Explanation Selecting menu functions on the screen (Pressing F1, F2, F3 or F4 Function Key can move the cursor) -
Page 19: Rear Panel
Inputting a capital letter. Press Shift + p to type a capital P. Enter Confirming operation Delete Deleting characters 2.3 Rear Panel Figure 2-4 SE-601A / SE-601B / SE-601C Rear Panel Name Explanation Potential equalization conductor provides a connection between the unit and the potential equalization bus bar Potential Equalization of the electrical installation. -
Page 20: Right Panel
SE-601 Series Electrocardiograph User Manual Introduction 2.4 Right Panel Figure 2-5 SE-601A / SE-601B / SE-601C Right Panel Name Explanation Patient Cable Socket Connecting to the patient cable Serial Port Connecting to a PC USB Socket 1 (Optional) Standard USB socket, connecting to a PC... - Page 21 SE-601 Series Electrocardiograph User Manual Introduction C4 / V4 C1 / V1 RF (N) /RL C5 / V5 R / RA or NC C6 / V6 L / LA RF (N) / RL NOTE: The left side of “/” is European standard; and the right side is American standard. 2) Serial Port WARNING The isolated intensity of serial port is 1500V AC and the maximum voltage applied should...
- Page 22 SE-601 Series Electrocardiograph User Manual Introduction 4) USB Socket 1 / USB Socket 2 (Optional) WARNING Only the USB equipment recommended by the manufacturer can be connected to the USB interface. Definitions of corresponding pins: Signal Signal VBUS WARNING 1. Accessory equipment connected to the analog and digital interfaces must be certified according to the respective IEC/EN standards (e.g.
-
Page 23: Bottom Panel
SE-601 Series Electrocardiograph User Manual Introduction 2.5 Bottom Panel Figure 2-6 SE-601 A / SE-601B / SE-601C Bottom Panel Name Explanation Speaker Hole Path for sound from speaker (Only for SE-601B/C) Battery Compartment Compartment for battery Heat Emission Hole Path for internal heat emission Label Position for product information label Fuse... -
Page 24: Function Features
SE-601 Series Electrocardiograph User Manual Introduction WARNING 3. Only qualified service engineers authorized by the manufacturer can open the battery compartment and replace the battery, and batteries of the same model and specification must be used. 4. Only when the device is off can the battery be installed or removed. NOTE: If the battery has not been used for two months or more, you should recharge it before using it again. -
Page 25: Chapter 3 About Se-601 Application
SE-601 Series Electrocardiograph User Manual About SE-601 Application Chapter 3 About SE-601 Application The following sections provide an overview of the main operations and functions in the SE-601 application. 3.1 Selecting Menu Functions To select Patient, press the function key F1 below Patient. To select , press the function key F5 below - 18 -... -
Page 26: Entering Data
SE-601 Series Electrocardiograph User Manual About SE-601 Application 3.2 Entering Data 1. When the main screen1 is displayed, press the function key F1 below Patient to open the Patient Information window. 2. Press Tab or Shift + Tab to move the cursor to the Name textbox. 3. -
Page 27: Selecting An Option From A List
4. Press Esc to cancel the operation, or press Tab or Shift + Tab to move the cursor to the Cancel button, and then press Enter to cancel the operation. For SE-601A 1. Press F1, F2, Tab or Shift + Tab to move the cursor to the Work Mode item. - Page 28 SE-601 Series Electrocardiograph User Manual About SE-601 Application Figure 3-1 SE-601B / SE-601C Main Screen1 Figure 3-2 SE-601B / SE-601C Main Screen2 Figure 3-3 SE-601A Main Screen1 - 21 -...
- Page 29 SE-601 Series Electrocardiograph User Manual About SE-601 Application Figure 3-4 SE-601A Main Screen2 Name Explanation Patient Name: within 12 characters (for SE-601B/C) Name within 10 characters (for SE-601A) When ID Mode is set to Auto or Time, the patient ID is within 10 characters.
- Page 30 Figure 3-5 SE-601B / SE-601C Main Screen3 Figure 3-6 SE-601A Main Screen3 On the main screen3, pressing the function key F1 below Same can return to the main screen1, and all the patient information will keep the same; pressing the function key F2 below Next can return to the main screen1, all the patient information will be cleared, and patient ID will be refreshed.
-
Page 31: About The System Setup Screen
For SE-601B/C, press Tab or Shift + Tab to move the cursor to the Next Patient item, and then press F1 or F2 to select On. For SE-601A, press F1, F2, Tab or Shift + Tab to move the cursor to the Next Patient item, and then press F3 or F4 to select On. - Page 32 Item Option Figure 3-9 SE-601B / SE-601C Work Mode Setup Window Figure 3-10 SE-601A Work Mode Setup Window For SE-601B/C 1. in the Work Mode Setup window, press Tab or Shift + Tab to move the cursor among different setup menus.
-
Page 33: About The File Manage Screen
2. Or press F1, F2, Shift + F1 or Shift + F2 to highlight a file on the File Manage screen1, and then press the function key F4 below Select to select the file and display the File Manage screen3. For SE-601B/C, press Esc to return to the File Manage screen1. For SE-601A, press Esc or the function key F5 below to return to the File Manage screen1. - Page 34 SE-601 Series Electrocardiograph User Manual About SE-601 Application Figure 3-13 SE-601B / SE-601C File Manage Screen3 Figure 3-14 SE-601A File Manage Screen1 Figure 3-15 SE-601A File Manage Screen2 Figure 3-16 SE-601A File Manage Screen3 Name Explanation Press the function key F1 below to highlight a file.
- Page 35 Press the function key F4 below Trans to transmit the selected file Trans to the PC. For SE-601B/C, press the function key F5 below Preview to Preview preview the selected file. For SE-601A, press the function key F5 below to return to the File Manage screen1. - 28 -...
-
Page 36: Chapter 4 Operation Preparations
SE-601 Series Electrocardiograph User Manual Operation Preparations Chapter 4 Operation Preparations WARNING Before use, the equipment, patient cable and electrodes should be checked. Replace them if there is any evident defectiveness or aging which may impair the safety or the performance, and make sure that the equipment is in proper working condition. -
Page 37: Loading/Replacing Recorder Paper
SE-601 Series Electrocardiograph User Manual Operation Preparations Please refer to the maintenance section for how to recharge the battery. When the battery is being recharged, the electrocardiograph can be powered by the mains supply. WARNING Potential equalization bar of the unit should be connected to the potential equalization terminal of the electrical installation when necessary. - Page 38 SE-601 Series Electrocardiograph User Manual Operation Preparations Casing Paper Tray Casing Button Loading/Replacing Process of Folded Paper: 1. Press the casing button downwards with one hand and pull the casing upwards with the other hand to open the recorder. 2. Remove remainder paper from the paper tray if necessary. 3.
- Page 39 Record Setup window, and then press F1 or F2 to select an option. 5) For SE-601A, press F1, F2, Tab or Shift + Tab to move the cursor to the Paper Marker item in the Record Setup window, and then press F3 or F4 to select an option.
-
Page 40: Preparing The Patient
SE-601 Series Electrocardiograph User Manual Operation Preparations 4.3 Preparing the Patient 4.3.1 Instructing the Patient Before attaching the electrodes, greet the patient and explain the procedure. Explaining the procedure decreases the patient’s anxiety. Reassure the patient that the procedure is painless. Privacy is important for relaxation. -
Page 41: Attaching Electrodes To The Patient
SE-601 Series Electrocardiograph User Manual Operation Preparations Main Cable Lead Wires Screw Connecting to Connecting to Electrocardiograph Electrodes 1. Connecting the Patient Cable to the Electrocardiograph Connect the patient cable to the patient cable socket on the right side of the main unit, and then secure them with two screws. -
Page 42: Reusable Electrodes
SE-601 Series Electrocardiograph User Manual Operation Preparations Two types of electrode can be used, one is the reusable electrodes, and the other is the disposable electrodes. 4.5.1 Reusable Electrodes Reusable electrodes include limb electrodes and chest electrodes, as the following figures show. Suction Bulb Electrode Metal Cup... - Page 43 SE-601 Series Electrocardiograph User Manual Operation Preparations Chest Electrode Connection: Ensure that the electrodes are clean; Align all lead wires of the patient cable to avoid twisting, and connect the lead wires to the corresponding electrodes according to the colors and identifiers; Clean the electrode area on the chest surface with 75% alcohol;...
-
Page 44: Disposable Electrodes
SE-601 Series Electrocardiograph User Manual Operation Preparations 4.5.2 Disposable Electrodes Disposable Electrode Alligator Clip Disposable electrodes must be used together with alligator clips. The electrodes’ positions on the body surface are shown in the following table and figures. American European Electrode Placement Label Label... -
Page 45: Inspection Before Power-On
SE-601 Series Electrocardiograph User Manual Operation Preparations Disposable Electrode Connection Align all lead wires of the patient cable to avoid twisting, and connect the alligator clips to the lead wires. Clean the electrode areas on the body surface with 75% alcohol. Attach the disposable electrodes to the electrode positions on the body surface. - Page 46 SE-601 Series Electrocardiograph User Manual Operation Preparations 1) Environment: ♦ Make sure that there is no electromagnetic interference source around the equipment, especially large medical electrical equipment such as electrosurgical equipment, radiological equipment, magnetic resonance imaging equipment etc. Switch off these devices when necessary.
-
Page 47: Chapter 5 Switching On The Electrocardiograph
SE-601 Series Electrocardiograph User Manual Switching On the Electrocardiograph Chapter Switching Electrocardiograph ♦ When the mains supply is used, connect the power cord, and the mains supply indicator ( ) is lit. Then press on the keyboard to turn on the unit. The equipment information such as the device name, the version number will be displayed on the LCD screen after self-test. -
Page 48: Chapter 6 Entering Patient Information
Question, press Enter to open the Patient Question window. The cursor is on the ID Mode item. 4) For SE-601B/C, press F1 or F2 to select Time. For SE-601A, press F3 or F4 to select Time. 5) Press Enter to confirm. -
Page 49: Entering Other Information
1. Press Tab or Shift + Tab to move the cursor to a textbox. 2. Fill in the selected textbox. 3. For SE-601A, press Tab or Shift + Tab to move the cursor to the Next or Prev button, and then press Enter to turn the page. -
Page 50: Chapter 7 Printing Ecg Reports
2) For SE-601B/C, press Tab or Shift + Tab to move the cursor to the Auto Style item, and then press F1 or F2 to select a style. For SE-601A, press F1, F2, Tab or Shift + Tab to move the cursor to the Auto Style item, and then press F3 or F4 to select a style. - Page 51 Lead1/2/3 item, and then press F1 or F2 to select a lead. For SE-601A, press F1, F2, Tab or Shift + Tab to move the cursor to the Rhythm Lead1/2/3 item, and then press F3 or F4 to select a lead.
-
Page 52: Manual Mode
Press the function key F1 below Setup to display the System Setup screen and the cursor is on Work Mode. Press Enter to open the Work Mode Setup window. 1) For SE-601B/C, press F1 or F2 to select MANU. For SE-601A, press F3 or F4 to select MANU. - Page 53 F1 or F2 to select a sequence. For SE-601A, press F1, F2, Tab or Shift + Tab to move the cursor to the Lead Sequence item, and then press F3 or F4 to select a sequence.
-
Page 54: Rhythm Mode
Press the function key F1 below Setup to display the System Setup screen and the cursor is on Work Mode. Press Enter to open the Work Mode Setup window. 1) For SE-601B/C, press F1 or F2 to select RHYT. For SE-601A, press F3 or F4 to select RHYT. - Page 55 Lead1/2/3 item, and then press F1 or F2 to select a lead. For SE-601A, press F1, F2, Tab or Shift + Tab to move the cursor to the Rhythm Lead1/2/3 item, and then press F3 or F4 to select a lead.
-
Page 56: R-R Mode
Press the function key F1 below Setup to display the System Setup screen and the cursor is on Work Mode. Press Enter to open the Work Mode Setup window. 1) For SE-601B/C, press F1 or F2 to select R-R. For SE-601A, press F3 or F4 to select R-R. -
Page 57: Transmitting Ecg Data To The Pc
SE-601 Series Electrocardiograph User Manual Printing ECG Reports SE-601B / SE-601C Lead Setup Window SE-601A Lead Setup Window After setup, press Esc or the function key F5 below to exit the System Setup screen. 2. When the main screen1 is displayed, press F2 to switch the gain. Press F4 to set the EMG filter and the Lowpass filter. -
Page 58: Transmitting Ecg Data Through The Net Port
SE-601 Series Electrocardiograph User Manual Printing ECG Reports 3. Select the transmission mode. For details on selecting the transmission mode, please see Section 8.2.1, “Transmitting Files Through the Serial Port”. 4. Log into the Smart ECG Viewer software. 5. In the AUTO or RHYT mode, ECG data will be transmitted through the serial port automatically after an ECG report is printed out. -
Page 59: Ecg Reports
SE-601 Series Electrocardiograph User Manual Printing ECG Reports 7.7 ECG Reports 7.7.1 ECG Reports in the Auto Mode 7.7.1.1 Examples of 6×2+1rhy The above figures (a) and (b) show the ECG reports in the AUTO mode. Template is set to On, and Auto Style is set to 6×2+1rhy. - Page 60 SE-601 Series Electrocardiograph User Manual Printing ECG Reports 25mm/s (Paper Speed) 10mm/mV (Gain) 60 (Heart Rate) V1.0 (Version number) NOTE: The version number in the ECG reports is just for reference. The real version number can be found on the screen of the electrocardiograph when you turn on the device.
-
Page 61: Ecg Reports In The Rhythm Mode
SE-601 Series Electrocardiograph User Manual Printing ECG Reports 7.7.1.2 Example of 3×4+1rhy The above figure shows the ECG report in the AUTO mode. Auto Style is set to 3×4+1rhy. The ECG report includes: 10-10-2008 15: 55: 25 (Current Date and Current Time) 3×4+1rhy ECG wave 0.15~100Hz (0.15Hz DFT Filter, 100Hz Lowpass Filter) AC50 (50Hz AC Filter) -
Page 62: Ecg Reports In The Manual Mode
SE-601 Series Electrocardiograph User Manual Printing ECG Reports Gender: Male, Age: 25 years, Height: 167cm, Weight: 64kg, BP: 112/78mmHg 00:00, 00:10 (Timer) 60 (Heart Rate) (1mV calibration mark) II、V1、V5 (Rhythm Lead name) 20s rhythm waveform of lead II / V1 / V5 0.15~100Hz (0.15Hz DFT Filter, 100Hz Lowpass Filter) AC50 (50Hz AC Filter) 25mm/s (Paper Speed) -
Page 63: Ecg Reports In The R-R Mode
SE-601 Series Electrocardiograph User Manual Printing ECG Reports 7.7.4 ECG Reports in the R-R Mode The above figures (a) and (b) show the ECG reports in the R-R mode. Figure (a) shows: Current Date & Current Time Patient Information (Name, ID, Gender, Age, Height, Weight, BP, Ward NO, Race, Medications, Technician) Measure Time Total R Num (Total R-wave number) - Page 64 SE-601 Series Electrocardiograph User Manual Printing ECG Reports RR Histogram RR Trend Chart Figure (b) shows: Current Date & Current Time Patient Information (Name, ID, Gender, Age, Height, Weight, BP) Gain, Speed, Filter (1mV calibration mark) II (Lead name) 180s ECG wave of Rhythm Lead 1 - 57 -...
-
Page 65: Ecg Reports Printed By The Usb Printer
SE-601 Series Electrocardiograph User Manual Printing ECG Reports 7.7.5 ECG Reports Printed by the USB Printer - 58 -... - Page 66 SE-601 Series Electrocardiograph User Manual Printing ECG Reports As the above figure shows, the ECG report printed by the USB printer includes: ID, Paper Speed, Gain, Date and Time; Name, BP, Age, Gender, Weight, Height, Race, Medications, Ward No, Technician; Heart Rate, P duration, PR interval, QRS duration, QT/QTC interval, P/QRS/T axis, RV5/SV1 amplitude, RV5+SV1 amplitude, RV6/SV2 amplitude;...
-
Page 67: Chapter 8 Managing Files
3. Press Tab or Shift + Tab to move the cursor to the Save Option item. 4. For SE-601B/C, press F1 or F2 to select On. For SE-601A, press F3 or F4 to select On. 5. Press Enter to confirm. - Page 68 SE-601 Series Electrocardiograph User Manual Managing Files Figure 8-1 SE-601B / SE-601C File Manage Screen1 Figure 8-2 SE-601B / SE-601C File Manage Screen2 Figure 8-3 SE-601B / SE-601C File Manage Screen3 Figure 8-4 SE-601A File Manage Screen1 - 61 -...
-
Page 69: Storage Upgrade Function
8.1 Storage Upgrade Function SE-601A can accommodate 50 files, SE-601B can accommodate 100 files, and SE-601C can accommodate 200 files. For SE-601A/B, you can input special password to enable the storage upgrade function, which can extend the storage to 200. -
Page 70: Transmitting Files Through The Serial Port
SE-601 Series Electrocardiograph User Manual Managing Files CAUTION It is forbidden to connect or disconnect a U disk or a USB printer during the transmission course. 8.2.1 Transmitting Files through the Serial Port 1. Connect the RS232 socket of the PC to the RS232 socket of the electrocardiograph with an RS232 cable. -
Page 71: Transmitting Files Through The Net Port
3) Press F1, F2, F3, F4, Tab or Shift + Tab to move the cursor. When the cursor is on Transmission, press Enter to open the Transmission Setup window. 4) For SE-601B/C, press F1 or F2 to select UART. For SE-601A, press F3 or F4 to select UART. - Page 72 3) Press F1, F2, F3, F4, Tab or Shift + Tab to move the cursor. When the cursor is on Transmission, press Enter to open the Transmission Setup window. 4) For SE-601B/C, press F1 or F2 to select Ethernet. For SE-601A, press F3 or F4 to select Ethernet.
-
Page 73: Copying Files Between Se-601 And The U Disk
SE-601 Series Electrocardiograph User Manual Managing Files SE-601B/C Transmission Setup Window SE-601A Transmission Setup Window 8) Press Enter to confirm. 9) Press Esc or the function key F5 below to return to the main screen1. NOTE: 1. For details on configuring the wireless AP, please refer to the user manual delivered with the wireless AP. - Page 74 SE-601 Series Electrocardiograph User Manual Managing Files 2) Press the function key F2 below File to open the File Manage screen1. Press the function key F5 below to display the File Manage screen2. 3) Press the function key F2 below AllToUSB to copy files from SE-601 to the ECGDATA folder of the U disk.
-
Page 75: Editing Patient Information
2. Press Tab or Shift + Tab to move the cursor to an item, and then press F1 or F2 to select an option. 3. For SE-601A, press Tab or Shift + Tab to move the cursor to the Next or Prev button, and then press Enter to turn the page. -
Page 76: Deleting Files
SE-601 Series Electrocardiograph User Manual Managing Files 4. Press Enter to confirm, or press Tab or Shift + Tab to move the cursor to the OK button, and then press Enter to confirm. 5. Press Esc to cancel the operation, or press Tab or Shift + Tab to move the cursor to the Cancel button, and then press Enter to cancel the operation. -
Page 77: Previewing A File (Only For Se-601B/C)
SE-601 Series Electrocardiograph User Manual Managing Files 8.6 Previewing a File (Only for SE-601B/C) When the main screen1 is displayed, press the function key F5 below to open the main screen2. Press the function key F2 below File to open the File Manage screen1. Press F1, F2, Shift + F1 or Shift + F2 to highlight a file, and then press the function key F4 below Select to select the file and open the File Manage screen3. - Page 78 SE-601 Series Electrocardiograph User Manual Managing Files If you want to view the measure information of the selected file, press the function key F3 below Measure to open the measure preview screen, as the following figure shows. Figure 8-10 Measure Preview Screen The measure preview screen shows patient name, patient ID, and measure information including heart rate, P duration, PR interval, QRS duration, QT/QTC interval, P/QRS/T axis, RV5/SV1 amplitude, RV5+SV1 amplitude, and RV6/SV2 amplitude.
-
Page 79: File Printing
SE-601 Series Electrocardiograph User Manual Managing Files 8.7 File Printing When the main screen1 is displayed, press the function key F5 below to open the main screen 2. Press the function key F2 below File to open the File Manage screen 1. Press F1, F2, Shift + F1 or Shift + F2 to highlight a file, and then press the function key F4 below Select to select the file and open the File Manage screen3. -
Page 80: Chapter 9 System Setup
Then press the function key F1 below Setup to open the System Setup screen. Figure 9-1 SE-601B / SE-601C System Setup Screen Figure 9-2 SE-601A System Setup Screen After setup, press Esc or the function key F5 below to return to the main screen1. -
Page 81: Specifying Work Mode
Work Mode Setup window, and then press F1 or F2 to select an option. For SE-601A, press F1, F2, Tab or Shift + Tab to move the cursor to the Work Mode item in the Work Mode Setup window, and then press F3 or F4 to select an option. -
Page 82: Specifying Manual Style
Mode Setup window, and then press F1 or F2 to select an option. For SE-601A, press F1, F2, Tab or Shift + Tab to move the cursor to the Auto Style item in the Work Mode Setup window, and then press F3 or F4 to select an option. -
Page 83: Specifying Sampling Mode
Work Mode Setup window, and then press F1 or F2 to select an option. For SE-601A, press F1, F2, Tab or Shift + Tab to move the cursor to the Sample Mode item in the Work Mode Setup window, and then press F3 or F4 to select an option. -
Page 84: Specifying Recording Sequence
Work Mode Setup window, and then press F1 or F2 to select Sequential or Simultaneous. For SE-601A, press F1, F2, Tab or Shift + Tab to move the cursor to the Record Sequence item in the Work Mode Setup window, and then press F3 or F4 to select Sequential or Simultaneous. -
Page 85: Filter Setup
Setup window. Press F1 or F2 to select Off or On. For SE-601A, press F1, F2, Tab or Shift + Tab to move the cursor to the AC Filter item in the Filter Setup window. Press F3 or F4 to select Off or On. -
Page 86: Setting Dft Filter
Setup window. Press F1 or F2 to select an option. For SE-601A, press F1, F2, Tab or Shift + Tab to move the cursor to the DFT Filter item in the Filter Setup window. Press F3 or F4 to select an option. -
Page 87: Specifying Recording Device
Figure 9-8 SE-601A Record Setup Window After setup, press Enter to confirm. Then the System Setup screen appears. For SE-601A, if you press Esc to exit the Record Setup window after setup, a hint will pop up to prompt you to save these modifications. -
Page 88: Setting Paper Marker
Record Setup window, and then press F1 or F2 to select an option. For SE-601A, press F1, F2, Tab or Shift + Tab to move the cursor to the Paper Marker item in the Record Setup window, and then press F3 or F4 to select an option. - Page 89 SE-601 Series Electrocardiograph User Manual System Setup NOTE: The side with black markers should be on the bottom. When Paper Marker is set to Style2, only the paper with black markers in the bottom right corner of each page can be used, which is shown in the following figure. NOTE: The style of the loaded thermal paper should consist with the set paper style;...
-
Page 90: Selecting Patient Information
Record Setup window, and then press F1 or F2 to select Off or On. For SE-601A, press F1, F2, Tab or Shift + Tab to move the cursor to the Patient Info item in the Record Setup window, and then press F3 or F4 to select Off or On. -
Page 91: Selecting Template
Setup window, and then press F1 or F2 to select Off or On. For SE-601A, press F1, F2, Tab or Shift + Tab to move the cursor to the Template item in the Record Setup window, and then press F3 or F4 to select Off or On. -
Page 92: Selecting Position Marker
Record Setup window, and then press F1 or F2 to select Off or On. For SE-601A, press F1, F2, Tab or Shift + Tab to move the cursor to the Position Marker item in the Record Setup window, and then press F3 or F4 to select Off or On. -
Page 93: Setting Rhythm Lead1/2/3
Figure 9-10 SE-601A Lead Setup Window After setup, press Enter to confirm. Then the System Setup screen appears. For SE-601A, if you press Esc to exit the Lead Setup window after setup, a hint will pop up to prompt you to save these modifications. -
Page 94: Transmission Setup
F1 or F2 to select Off, Ethernet or UART. For SE-601A, press F1, F2, Tab or Shift + Tab to move the cursor to the Transmission Mode item, and then press F3 or F4 to select Off, Ethernet or UART. -
Page 95: Display & Sound Setup
255.255.255.000. After setup, press Enter to confirm. Then the System Setup screen appears. For SE-601A, if you press Esc to exit the Transmission Setup window after setup, a hint will pop up to prompt you to save these modifications. 9.6 Display & Sound Setup Press F1, F2, F3, F4, Tab or Shift + Tab to move the cursor to Display&Sound on the System... -
Page 96: Setting Brightness (Only For Se-601B)
Figure 9-15 SE-601A Sound Setup Window After setup, press Enter to confirm. Then the System Setup screen appears. For SE-601A, if you press Esc to exit the Display&Sound Setup window after setup, a hint will pop up to prompt you to save these modifications. -
Page 97: Setting Hint Volume
SE-601 Series Electrocardiograph User Manual System Setup For SE-601A, press F1, F2, Tab or Shift + Tab to move the cursor to the Key Volume item in the Sound Setup Window, and then press F3 or F4 to select On or Off. -
Page 98: Specifying Id Mode
Question window, and then press F1 or F2 to select a mode. For SE-601A, press F1, F2, Tab or Shift + Tab to move the cursor to the ID Mode item in the Patient Question window, and then press F3 or F4 to select a mode. -
Page 99: Selecting Gender/Height/Weight/Bp/Race/Medication/Ward No/Doctor/Technician
SE-601 Series Electrocardiograph User Manual System Setup For SE-601A, press F1, F2, Tab or Shift + Tab to move the cursor to the ID Hint item in the Patient Question window, and then press F3 or F4 to select On or Off. -
Page 100: Selecting Next Patient
Patient Question window, and then press F1 or F2 to select Off or On. For SE-601A, press F1, F2, Tab or Shift + Tab to move the cursor to the Next Patient item in the Patient Question window, and then press F3 or F4 to select Off or On. -
Page 101: Inputting Extra Question
In the Date&Time Setup window, you can set Current Date, Current Time, Date Mode, Time Mode, Period Interval, Period Duration, Power Off and LCD Off. Figure 9-20 SE-601B / SE-601C Date&Time Setup Window Figure 9-21 SE-601A Date&Time Setup Window After setup, press Enter to confirm. Then the System Setup screen appears. - 94 -... -
Page 102: Setting Current Date/Current Time
Date&Time Setup window, and then press F1 or F2 to select DD-MM-YYYY, MM-DD-YYYY or YYYY-MM-DD. For SE-601A, press F1, F2, Tab or Shift + Tab to move the cursor to the Date Mode item in the Date&Time Setup window, and then press F3 or F4 to select DD-MM-YYYY, MM-DD-YYYY or YYYY-MM-DD. -
Page 103: Setting Power-Off Time
SE-601 Series Electrocardiograph User Manual System Setup 9.8.5 Setting Power-Off Time Press Tab or Shift + Tab to move the cursor to the Power Off textbox in the Date&Time Setup window, and then input the power-off time manually. When Power Off is set to 000 Minutes, this function will not be effective. NOTE: 1. -
Page 104: Choosing A Language
Figure 9-23 SE-601A More Setup Window After setup, press Enter to confirm. Then the System Setup screen appears. For SE-601A, if you press Esc to exit the More Setup window after setup, a hint will pop up to prompt you to save these modifications. -
Page 105: Entering Institution
Setup window, and then press F1 or F2 to select No or Yes. For SE-601A, press F1, F2, Tab or Shift + Tab to move the cursor to the Default item in the More Setup window, and then press F3 or F4 to select No or Yes. -
Page 106: Setting Extern Input/Extern Output
Output item in the More Setup window, and then press F1 or F2 to select Off or On. For SE-601A, press F1, F2, Tab or Shift + Tab to move the cursor to the Extern Input or Extern Output item in the More Setup window, and then press F3 or F4 to select Off or On. -
Page 107: Chapter 10 Switching Off The Electrocardiograph
SE-601 Series Electrocardiograph User Manual Switching Off the Electrocardiograph Chapter Switching Electrocardiograph When the battery is used, press the key for 1 second or more to display the hint System is shutting down… on the screen. Then the device will be off a few seconds later. When the mains supply is used, press the key for 1second or more to display the hint System is shutting down…... -
Page 108: Chapter 11 Hint Information
(SE-601A can accommodate 50 files, SE-601B can Memory Full accommodate 100 files, and SE-601C can accommodate 200 files. For SE-601A/B, you can input special password to enable the storage upgrade function, which can extend the storage to 200.) Testing The period sampling is running. -
Page 109: Chapter 12 Troubleshooting
SE-601 Series Electrocardiograph User Manual Troubleshooting Chapter 12 Troubleshooting 1. Operating Problems Q1: I was trying to select a file from the file list on the File Manage screen, but the file was in the middle of the long list. Is there any way to make the selection faster? A1: Actually, the system provides a method for fast moving: pressing Shift + F1 or Shift + F2 can move the cursor up or down in the file list very fast. - Page 110 SE-601 Series Electrocardiograph User Manual Troubleshooting 2. Printing Problems Q1: I was encountered with paper-jam, what was I supposed to do? A1: If it happened for the first time, it might be the result of an inappropriate placement of the paper.
- Page 111 SE-601 Series Electrocardiograph User Manual Troubleshooting Q4: I want to print the hospital name in the report, but I can’t find the place to enter it, where is A4: Please open the More Setup window, and move the cursor to the Institution textbox, and then input the hospital name.
- Page 112 SE-601 Series Electrocardiograph User Manual Troubleshooting 4. Main Unit Problems Q1: After power-on, the ECG stays on the logo screen and doesn’t open the main screen. I have restarted the machine several times, but there is no better change. A1: The reason for this problem might be: there is a key pressed down, without springing up. Find that key, and make it spring up, the problem should be solved.
-
Page 113: Chapter 13 Cleaning, Care And Maintenance
SE-601 Series Electrocardiograph User Manual Cleaning, Care and Maintenance Chapter 13 Cleaning, Care and Maintenance 13.1 Cleaning CAUTION Turn off the power before cleaning and disinfection. The mains supply must be switched off if it is in use. 13.1.1 Cleaning the Main Unit and the Patient Cable To clean the electrocardiograph: 1. -
Page 114: Disinfection
SE-601 Series Electrocardiograph User Manual Cleaning, Care and Maintenance Dirty and soiled thermal print head will deteriorate the printing definition. So it should be cleaned at least once a month regularly. CAUTION Prevent the detergent from seeping into the main unit while cleaning. Do not immerse the unit or the patient cable into liquid under any circumstances. - Page 115 SE-601 Series Electrocardiograph User Manual Cleaning, Care and Maintenance 2) Recharge The 6-channel electrocardiograph is equipped with the recharge control circuit together with the battery. When the unit is connected to the mains supply, the battery will be recharged automatically. Then the battery recharging indicator ( ) and the mains supply indicator ( will be lit at the same time.
-
Page 116: Recorder Paper
SE-601 Series Electrocardiograph User Manual Cleaning, Care and Maintenance 13.3.2 Recorder Paper NOTE: Recorder paper provided by the manufacturer should be used. Other paper may shorten the life of the thermal print head. The deteriorated print head may lead to illegible ECG reports and block the advance of the paper. - Page 117 SE-601 Series Electrocardiograph User Manual Cleaning, Care and Maintenance g) Test the enclosure leakage current according to IEC/EN/UL 60601-1: Limit: NC 100μA, SFC 300μA. h) Test the patient leakage current according to IEC/EN 60601-1: Limit: NC a.c. 10μA, d.c. 10μA; SFC a.c. 50μA, d.c. 50μA. i) Test the patient auxiliary current according to IEC/EN 60601-1: Limit: NC a.c.
- Page 118 SE-601 Series Electrocardiograph User Manual Cleaning, Care and Maintenance ♦ After long-term use, the surfaces of electrodes will be oxidized because of erosion and other causes. By this time, electrodes should be replaced to achieve high-quality ECG records. CAUTION The device and accessories are to be disposed of according to local regulations after their useful lives.
-
Page 119: Chapter 14 Accessories
SE-601 Series Electrocardiograph User Manual Accessories Chapter 14 Accessories WARNING Only the patient cable and other accessories supplied by the manufacturer can be used. Or else, the performance and electric shock protection can not be guaranteed. Accessory Part Number 01.57.107581 (Snap Style) ECG Cable (European) 01.57.107583 (Grabber Style) 01.57.107582 (Snap Style) - Page 120 SE-601 Series Electrocardiograph User Manual Accessories 03.24.38952 Smart ECG Viewer 03.24.38953 11.18.47116 (TINY-SPRO) Smart ECG Viewer Software Key 12.01.47194 (USB) RS232 download Cable 11.13.20117 Ethernet download cable 11.13.20096 Wireless AP 11.17.047338 External Ink-jet Printer (HP Deskjet 11.18.052215 D2668) U disk 11.18.078204 SD Card (1G) 11.18.052199...
-
Page 121: Chapter 15 Warranty & Service
EDAN will, at its discretion, repair or replace the defective part(s) free of charge. EDAN will not provide a substitute product for use when the defective product is being repaired. -
Page 122: Appendix 1 Technical Specifications
SE-601 Series Electrocardiograph User Manual Technical Specifications Appendix 1 Technical Specifications A1.1 Safety Specifications IEC/EN 60601-1+A1+A2, IEC/EN 60601-1-2+A1, Comply with: IEC/EN60601-2-25, ANSI/AAMI EC11, IEC/EN 60601-2-51, UL 60601-1, CAN/CSA C22.2 No.601.1 Anti-electric-shock type: Class І with internal power supply Anti-electric-shock degree: CF type with defibrillation-proof Degree of protection against Ordinary equipment (Sealed equipment without liquid proof) -
Page 123: A1.2 Environment Specifications
A1.3 Physical Specifications Dimensions 310mm×322mm×101mm (12.2in×12.7in×3.98in) Weight Approx. 2.6kg (5.7lbs) (excluding recorder paper and battery) SE-601A: 3.5 inch STN LCD 192*64dot Display SE-601B: 5.7 inch STN LCD 320*240 dot SE-601C: 5.7 inch TFT color LCD 640*480 dot A1.4 Power Supply Specifications... -
Page 124: A1.5 Performance Specifications
SE-601 Series Electrocardiograph User Manual Technical Specifications A1.5 Performance Specifications Recording Recorder: Thermal dot-matrix recorder 8 dots per mm / 200 dots per inch (amplitude axes) 40 dots per mm / 1000 dots per inch (time axes, @ 25 Printing Density mm/s) Folded thermal paper: 110mm×140mm×144pages Recorder Paper:... - Page 125 SE-601 Series Electrocardiograph User Manual Technical Specifications Multichannel crosstalk ≤0.5mm AC Filter: On/Off DFT Filter: 0.05Hz / 0.15Hz / 0.25Hz / 0.32Hz / 0.5Hz / 0.67Hz Filter EMG Filter: 25Hz/35Hz/45Hz/OFF LOWPASS Filter:150Hz/100Hz/75Hz CMRR ≥115dB Sampling Frequency 1000 Hz Pacemaker Detection Amplitude ±2 to ±700 mV Width...
-
Page 126: Appendix 2 Emc Information
SE-601 Series Electrocardiograph User Manual EMC Information Appendix 2 EMC Information Guidance and manufacture’s declaration - electromagnetic emissions- for all EQUIPMENT and SYSTEMS Guidance and manufacture’s declaration - electromagnetic emission The SE-601 Electrocardiograph is intended for use in the electromagnetic environment specified below. - Page 127 SE-601 Series Electrocardiograph User Manual EMC Information Guidance and manufacture’s declaration - electromagnetic immunity - for all EQUIPMENT and SYSTEMS Guidance and manufacture’s declaration - electromagnetic immunity The SE-601 Electrocardiograph is intended for use in the electromagnetic environment specified below. The customer or the user of SE-601 Electrocardiograph should assure that it is used in such an environment.
- Page 128 SE-601 Series Electrocardiograph User Manual EMC Information Guidance and manufacture’s declaration - electromagnetic immunity - for EQUIPMENT and SYSTEMS that are not LIFE-SUPPORTING Guidance and manufacture’s declaration - electromagnetic immunity The SE-601 Electrocardiograph is intended for use in the electromagnetic environment specified below.
- Page 129 SE-601 Series Electrocardiograph User Manual EMC Information NOTE 2 These guidelines may not apply in all situations. Electromagnetic propagation is affected by absorption and reflection from structures, objects and people. Field strengths from fixed transmitters, such as base stations for radio (cellular/cordless) telephones and land mobile radios, amateur radio, AM and FM radio broadcast and TV broadcast cannot be predicted theoretically with accuracy.
- Page 130 SE-601 Series Electrocardiograph User Manual EMC Information Recommended separation distances between portable and mobile RF communications equipment and the EQUIPMENT or SYSTEM - for EQUIPMENT or SYSTEM that are not LIFE-SUPPORTING Recommended separation distances between portable and mobile RF communications equipment and the SE-601 Electrocardiograph The SE-601 Electrocardiograph is intended for use in an electromagnetic environment in which radiated RF disturbances are controlled.
-
Page 131: Appendix 3 Abbreviation
SE-601 Series Electrocardiograph User Manual Abbreviation Appendix 3 Abbreviation Abbr English Liquid Crystal Display Blood Pressure Electrocardiogram/Electrocardiograph Heart Rate Left Foot Augmented Lead Left Arm Augmented Lead Right Arm Augmented Lead Left Arm Left Leg Right Arm Right Leg Identification Alternating Current Universal Serial Bus Auto Gain Control...
Need help?
Do you have a question about the SE-601A and is the answer not in the manual?
Questions and answers
we have had 2 episodes of no trace whilst doing an ecg with the leads all correctly attached - both persons were obese - is this a factor we applied different electrodes still no trace. machine is a SE 601 series thank you