VERITAS Velocity 7330 Hardware Installation Manual
Hide thumbs
Also See for Velocity 7330:
- Hardware service procedure (11 pages) ,
- Hardware service procedure (9 pages) ,
- Hardware service procedure (6 pages)
Table of Contents
Advertisement
Quick Links
Advertisement
Table of Contents

Related Manuals for VERITAS Velocity 7330


Summary of Contents for VERITAS Velocity 7330
- Page 1 Veritas Velocity 7330 Appliance Hardware Installation Guide Release 1.2.6...
-
Page 2: Legal Notice
Copyright © 2017 Veritas Technologies LLC. All rights reserved. Veritas, the Veritas Logo, Veritas Velocity, and NetBackup are trademarks or registered trademarks of Veritas Technologies LLC or its affiliates in the U.S. and other countries. Other names may be trademarks of their respective owners. -
Page 3: Technical Support
Japan CustomerCare_Japan@veritas.com Documentation Make sure that you have the current version of the documentation. Each document displays the date of the last update on page 2. The latest documentation is available on the Veritas website: https://sort.veritas.com/documents Documentation feedback Your feedback is important to us. Suggest improvements or report errors or omissions to the documentation. -
Page 4: Table Of Contents
..................11 Velocity 7330 compute node Ethernet port configurations ....12 About the Velocity 7330 Appliance Primary Storage Shelf ..... 13 Velocity 7330 Appliance Primary Storage Shelf front panel ....13 Velocity 7330 Appliance Primary Storage Shelf rear panel ....15 Power cables ................ -
Page 5: Contents
Contents Chapter 4 Veritas Remote Management (IPMI) configuration ................... 50 About the Veritas Remote Management Console on the Velocity physical appliance ..............50 Prerequisites for IPMI port configuration ..........52 Configuring the IPMI port ............... 52 Index ........................54... -
Page 6: Hardware Overview
Hardware overview This chapter includes the following topics: About the Veritas Velocity 7330 Appliance ■ Velocity 7330 Appliance compute node disk drive configurations ■ Velocity 7330 Appliance compute node rear panel ■ About the Velocity 7330 Appliance Primary Storage Shelf ■... -
Page 7: About The Veritas Velocity 7330 Appliance
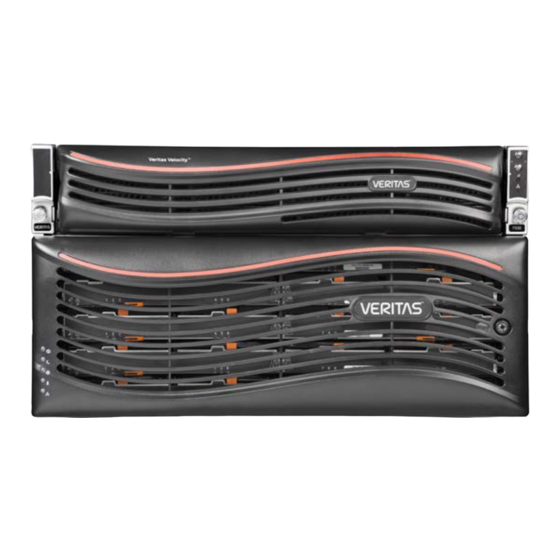
About the Veritas Velocity 7330 Appliance The Veritas Velocity 7330 Appliance is a hardware and software storage system that provides 229TB of available storage capacity. It consists of a 2U Velocity 7330 Appliance compute node and one externally attached 4U Primary Storage Shelf. - Page 8 Hardware overview About the Veritas Velocity 7330 Appliance Velocity 7330 Appliance system features Table 1-1 Feature Description Performance and capacity Processor - two Intel Xeon 10-core 3.0 ■ GHz E5-2690 v2 CPUs. Supports the high-performance ■ processors with low-power consumption.
-
Page 9: Velocity 7330 Appliance Compute Node Disk Drive Configurations
Velocity 7330 Appliance compute node disk drive configurations The Velocity 7330 Appliance compute node contains eight 3TB SAS disk drives. Individual disk drive carriers hold each of the disk drives, and each disk drive carrier resides in a front panel disk drive slot. The disk drives are assigned numbers, which are based on the drive slot they occupy. -
Page 10: Velocity 7330 Appliance Compute Node Rear Panel
Note: Slots 8, 9, 10, and 11 are intentionally empty for compute node cooling purposes. Velocity 7330 Appliance compute node rear panel The rear panel of a Veritas Velocity 7330 Appliance compute node has several access ports and other features, which are displayed in the following diagram and table. -
Page 11: Velocity 7330 Appliance Compute Node Pcie Slot Configurations
11. Velocity 7330 Appliance compute node PCIe slot configurations The rear panel of the Veritas Velocity 7330 Appliance compute node contains six PCIe slots that are numbered 1 to 6. Slots 1, 2, and 3 are located in PCIe Riser... -
Page 12: Velocity 7330 Compute Node Ethernet Port Configurations
“Velocity 7330 compute node Ethernet port configurations” on page 12. Velocity 7330 compute node Ethernet port configurations Veritas Velocity 7330 Appliances include the following Ethernet ports, which are built in along the base of the rear panel: 1-GbE ports: eth0, eth1, eth2, and eth3 ■... -
Page 13: About The Velocity 7330 Appliance Primary Storage Shelf
It provides 229TB of available storage capacity. Because the Velocity 7330 Appliance compute node does not contain internal storage, the Primary Storage Shelf is a required component of the Velocity 7330 Appliance system. The storage shelf uses RAID6 technology and connects to the compute node using Fibre Channel cables. - Page 14 Hardware overview About the Velocity 7330 Appliance Primary Storage Shelf Primary Storage Shelf front panel Figure 1-6 The following illustration shows the front panel LEDs in detail. Disk system front panel LEDs Figure 1-7 The following table describes LEDs available on the disk system front panel.
-
Page 15: Velocity 7330 Appliance Primary Storage Shelf Rear Panel
“ Velocity 7330 Appliance Primary Storage Shelf rear panel” on page 15. Velocity 7330 Appliance Primary Storage Shelf rear panel The Veritas Velocity 7330 Appliance Primary Storage Shelf includes two power cords that should be plugged into the appropriate external power source within a rack. - Page 16 Hardware overview About the Velocity 7330 Appliance Primary Storage Shelf to the compute node with fiber optic cables. The device must have at least one functioning RAID canister, one functioning power supply, and one functioning fan. The following figure shows the Primary Storage Shelf rear panel.
- Page 17 ID, once the device is turned on and recognized. The following diagram shows the location of this display on the rear panel of the Primary Storage Shelf, which is circled in red. Primary Storage Shelf system ID locations Figure 1-11 “ Velocity 7330 Appliance Primary Storage Shelf front panel” on page 13.
-
Page 18: Power Cables
AC power connector (IEC-60320-C13) to an appliance or a storage device. Note: If your power distribution unit is not compatible with the IEC-60320-C13 plug, then Veritas recommends that you purchase your power cable locally. Make sure the power cable meets or exceeds the indicated power rating. -
Page 19: Multi-Mode Fiber Cable
18. Multi-Mode fiber cable The Velocity 7330 Appliance communicates with the fibre channel switch through a multi-mode fiber optic cable. One end of the multi-mode fibre optic cable connects to the 10GE service network port or the fibre channel port. The other end of the cable connects to the fibre channel switch or other devices. - Page 20 Hardware overview Multi-Mode fiber cable Fiber optic cables require Small Form-factor Pluggable (SFP+) transceivers, which are provided with each device having Fibre Channel ports. The diagram shows the SFP, labeled 1, and the fiber optic cable which is attached to it, labeled 2. Supported SFPs are listed: Finisar ■...
-
Page 21: Preinstallation Requirements
Chapter Preinstallation requirements This chapter includes the following topics: Preparing to install the Velocity 7330 Appliance hardware ■ Required personnel and equipment for appliance hardware installation ■ Package contents ■ Determining the rack location ■ Preparing to install the Velocity 7330 Appliance hardware You need to carry out the following steps to prepare for the hardware installation. -
Page 22: Required Personnel And Equipment For Appliance Hardware Installation
220VAC power supply for the Primary Storage Shelf ■ Package contents The Velocity 7330 Appliance compute node and storage shelf are shipped in separate containers that each contain the necessary installation equipment and other materials. The disk drives for the storage shelves are shipped in additional containers. -
Page 23: Determining The Rack Location
■ Determining the rack location The height of the Veritas Velocity 7330 Appliance compute node and storage shelf each require a different number of rack unit (RU) spaces. The compute node requires 2 RU and the storage shelf requires 4 RU. To help you identify RU spacing, many rack manufacturers typically use a system of lines and sequential numbers starting at the bottom of the rack. - Page 24 Preinstallation requirements Determining the rack location Use the following best practices when determining the rack location for the appliance: Be sure to use complete RUs for the appliance. Do not use holes that span ■ different RUs when you install the rails. The storage shelves are much heavier than the compute node and should be ■...
-
Page 25: Installation Procedures
Turning on the hardware and verifying operation ■ How to install the Velocity 7330 Appliance hardware You need to carry out the following steps to install the Veritas Velocity 7330 Appliance hardware. Velocity 7330 Appliance hardware installation procedures Table 3-1... -
Page 26: Installing The Primary Storage Shelf
There must be a minimum depth of 76 cm (30 in.) between the front of the rack and the rear of the rack. Veritas recommends that two people install the rails; one person at the back of the rack and one at the front. Veritas also recommends that three people lift and place... - Page 27 Installation procedures Installing the Primary Storage Shelf Warning: To avoid potential equipment damage and personal injury, do not install disk drives into the storage shelves before mounting them into the rack. The added weight of the disk drives hinders the ability to safely install the storage shelves. To install the storage shelf into the rack Locate the left and the right rails.
- Page 28 Installation procedures Installing the Primary Storage Shelf Identify the front, taller end of each rail. Rear Front, Front, Left Right Note the ledge that is perpendicular to the main part of the rail. The storage shelf sits on this ledge. Locate the spacers and place them near the rail screws.
- Page 29 Installation procedures Installing the Primary Storage Shelf Note: The rear of the rack only uses the two lower RUs for installation. The front of the rack uses three RUs. Use a flathead screwdriver to loosen the inside screws of the rail. ■...
- Page 30 Installation procedures Installing the Primary Storage Shelf Insert the guide pin on the rear of the rail into the top hole of the lowest rear ■ RU that you plan to use. You can use the flathead screws on the inside of the rail to extend or shorten it to fit into the rack.
- Page 31 Installation procedures Installing the Primary Storage Shelf You can also use an expansion bracket if you need to reinforce the rear of the rack. Use the UP arrow to determine whether the bracket should be attached to the rear of the left or the right rail. To secure the rail to the rack, do the following: Place one spacer, each, on two screws.
- Page 32 Installation procedures Installing the Primary Storage Shelf Position the rail behind the rack holes. ■ On the front of the rack, install one spacer and one screw in the lowest hole ■ in the rack. Then install another spacer and a screw in the middle of the third RU in the rack.
- Page 33 Installation procedures Installing the Primary Storage Shelf Repeat the previous steps to install the right-hand rail. Front, right Rear, right To prepare for storage shelf installation, attach the four metal handles to the sides of the storage shelf as follows: Push the top tabs on the handles into the slots on the shelf (1).
-
Page 34: Installing Disk Drives Into The Primary Storage Shelf
Each storage shelf has 5 disk drawers, and each drawer holds 12 disks. All 60 disk drives must be installed. To help reduce the installation time, Veritas recommends that two people perform the disk installation. One person should unwrap the disk drive and lift the handle, then hand it to the other person to install it into the drawer. - Page 35 Installation procedures Installing disk drives into the Primary Storage Shelf Starting with the bottom drawer (5), use your thumbs to pull out the two orange latches towards the sides of the rack. Then, grasp the latches and pull out the drawer until you can see all of the disk slots.
- Page 36 Installation procedures Installing disk drives into the Primary Storage Shelf Make sure that the bottom of the disk is seated completely. ■ Push down slightly and start to pull the disk latch towards you. This action ■ moves the disk backwards. The connector on the right, rear, of the disk fits into the pins in the rear of the slot.
-
Page 37: Installing The Velocity 7330 Compute Node
Installing the Velocity 7330 compute node Installing the Velocity 7330 compute node The Veritas Velocity 7330 requires two RU rack spaces. Veritas recommends that you install the compute node in the space directly above the Primary Storage Shelf. The rails require one RU rack space and must be installed in the upper RU of the two required for the compute node. - Page 38 Installation procedures Installing the Velocity 7330 compute node At the rear upper RU of the rack, insert the rear of the rail into the top and the bottom holes of the RU. Extend the rail toward the front of the rack and insert it into the top and the bottom holes of the RU.
-
Page 39: Installing The Sfps Into The Fibre Channel (Fc) Ports
Installation procedures Installing the SFPs into the Fibre Channel (FC) ports Insert the two rear standoff pegs that extend from the side of the compute node into the last rail slots. Lower the front of the compute node into the rail slots at the front of the rail extenders. - Page 40 Installation procedures Installing the SFPs into the Fibre Channel (FC) ports To install the SFPs Locate the SFPs. Identify the FC ports in slots 1 and 4. Slot 1 Slot 4 Insert an SFP partially into a port. Be sure that the metal handle on the end of the SFP is on the top. You do not need to lift up the handle.
-
Page 41: Connecting The Velocity 7330 Compute Node To The Primary Storage Shelf
Installation procedures Connecting the Velocity 7330 compute node to the Primary Storage Shelf Verify that the SFP is seated properly. Remove any endcaps from the ports. To remove an SFP end cap: Grasp the top and bottom of an end cap. - Page 42 Installation procedures Connecting the Velocity 7330 compute node to the Primary Storage Shelf Compute node FC ports Table 3-2 Compute node FC ports Slot 1; ports 1 and 2 Slot 4; ports 1 and 2 Ch1 Ch2 Ch1 Ch2 Primary Shelf FC ports...
-
Page 43: Connecting The Power Cords To The Hardware
Installation procedures Connecting the power cords to the hardware Connect compute node slot 4, port 1 to Primary Shelf canister A, FC Ch2 ■ Verify that the connections match the ports in the following diagram. Compute node Primary Storage Shelf Connecting the power cords to the hardware The compute node and the Primary Storage Shelf each contain two AC power supplies. - Page 44 Installation procedures Connecting the power cords to the hardware To connect the power cables Refer to the following section for a description of C-13/C-14 and C-19/C-20 power cable connectors as needed. “Power cables” on page 18. Verify that the AC power supply input for the compute node is within one of these ranges: 100 - 127 VAC at 50/60 Hz, 8.2 A ■...
-
Page 45: Turning On The Hardware And Verifying Operation
Installation procedures Turning on the hardware and verifying operation Turning on the hardware and verifying operation The hardware components must be turned on in a specific sequence to ensure correct communication between them. To turn on the components and verify operation Check and verify that the following cables are connected properly and securely: Data and network cables on the compute node ■... - Page 46 Installation procedures Turning on the hardware and verifying operation Verify that the Power LED on the front, left, of the shelf is green. Power Standby power Locate Temperature Service action required After approximately 5 to 10 minutes, verify that the shelf has fully initialized as follows: The 12 disk LEDs on the front of each drawer are green.
- Page 47 Installation procedures Turning on the hardware and verifying operation The amber Service Action Required LED is not lit. ■ The two seven-segment numbers on the rear of the shelf show the shelf ID. For the Primary Storage Shelf, this number should be 99.
- Page 48 Installation procedures Turning on the hardware and verifying operation On the front right panel of the compute node, press the power button to turn on the compute node. After a few minutes, verify that the compute node has fully initialized as follows: On the right front panel of the compute node, locate the triangular Status ■...
- Page 49 The LED blinks green when the disk spins up. ■ The LED blinks green occasionally when commands are processed. ■ Proceed to configuring the IPMI port and enabling access to the Veritas Remote Management Console. “About the Veritas Remote Management Console on the Velocity physical appliance”...
-
Page 50: Veritas Remote Management (Ipmi) Configuration
CPU, firmware, and operating system. This console is accessible through the Intelligent Platform Manageme nt Interface (IPMI) network port on the back of each Veritas Velocity appliance. For the best support and initial configuration experience, Veritas recommends that you configure the IPMI port and make it accessible on your network. -
Page 51: Supported Browsers
Veritas Remote Management (IPMI) configuration About the Veritas Remote Management Console on the Velocity physical appliance monitor the appliance even if it is powered off, unresponsive, or without any operating system. Diagram of how IPMI works Figure 4-1 How does IPMI work? -
Page 52: Prerequisites For Ipmi Port Configuration
Veritas Remote Management (IPMI) configuration Prerequisites for IPMI port configuration Prerequisites for IPMI port configuration Verify the following configuration prerequisites: Ensure that you have a dedicated network infrastructure. The remote ■ management port can auto-negotiate its link speed up to 1 Gbps. - Page 53 Enter to log out of the Velocity shell menu. Exit Use a Cat5 cable to connect the IPMI port to your network. Make sure you can reach the Veritas Remote Management Console over the network using the new address in a web browser.
-
Page 54: Index
Index appliance Ethernet ports Fibre Channel HBA support 8 Velocity 7330 configurations 12 performance and capacity 8 Primary Storage Shelf storage capacities 8 RAID cache specification 8 hardware RAID specifications 8 correct turn on sequence 45 rear panel 10 verifying operation 45... - Page 55 50 required personnel and equipment 22 shipping container contents 22 storage shelf drawer disk layout 15 storage shelves disk drives installing 34 layout 34 slot numbers 34 Veritas Remote Management Console about 50 configuration prerequisites 52 configure access 52...
Need help?
Do you have a question about the Velocity 7330 and is the answer not in the manual?
Questions and answers