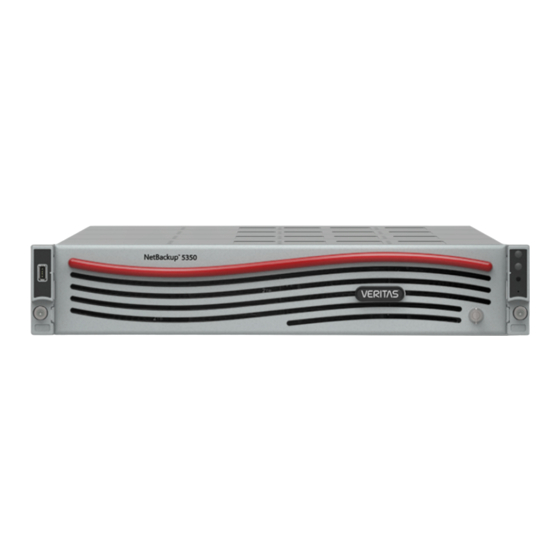
VERITAS 5350 Hardware Installation Manual
Hide thumbs
Also See for 5350:
- Product description manual (78 pages) ,
- Quick start manual (3 pages) ,
- Hardware service procedure (32 pages)
Table of Contents
Advertisement
Advertisement
Table of Contents

Related Manuals for VERITAS 5350


Summary of Contents for VERITAS 5350
- Page 1 Veritas™ 5350 Appliance Hardware Installation Guide...
- Page 2 Technologies LLC or its affiliates in the U.S. and other countries. Other names may be trademarks of their respective owners. This product may contain third-party software for which Veritas is required to provide attribution to the third party (“Third-party Programs”). Some of the Third-party Programs are available under open source or free software licenses.
- Page 3 Japan CustomerCare_Japan@veritas.com Documentation Make sure that you have the current version of the documentation. Each document displays the date of the last update on page 2. The latest documentation is available on the Veritas website: https://www.veritas.com/content/support/en_US/dpp.Appliances.html Documentation feedback Your feedback is important to us. Suggest improvements or report errors or omissions to the documentation.
-
Page 4: Table Of Contents
Contents Chapter 1 Hardware overview ............. 7 About the appliance and the storage shelves ........7 Compute node disk drives ..............9 Compute node rear panel ..............9 Compute node control panel ............10 5U84 storage shelf drawers and disk drives ........12 5U84 storage shelf control panel ............. - Page 5 Configuring the IPMI port from the NetBackup Appliance Shell Menu ................... 81 Configuring the Veritas Remote Management Interface from a Flex Appliance ................83 Accessing and using the Veritas Remote Management interface .... 87 Appendix A Adding Expansion Storage Shelves to an operating appliance that does not have any Expansion shelves ............
- Page 6 Contents Appendix D Configuring the disk space for new Flex Expansion Storage Shelves ........119 Adding the disk space of an Expansion Storage Shelf from the Flex Appliance Console ..............119...
-
Page 7: Hardware Overview
About IPMI configuration ■ About the appliance and the storage shelves The Veritas 5350 Appliance is a media server solution designed for large workloads. It provides high performance with multiple service offerings and gets deployed in less than 60 minutes. - Page 8 Hardware overview About the appliance and the storage shelves The Veritas 5350 appliance is available as a single-node or a two-node appliance. The Veritas 5350 appliance and storage shelves provide storage capacity in several configurations. The 5350 compute node does not provide any storage. The 5U84 storage shelves provide storage capacity for the appliance system.
-
Page 9: Compute Node Disk Drives
The Expansion shelves contain two I/O modules for connectivity to the Primary shelf and to other Expansion shelves. Half capacity storage shelves are also available for the 5350 appliances. Refer to the Veritas 5350 Product Description at the following site for details about usable storage capacity. Veritas Appliance documentation... -
Page 10: Compute Node Control Panel
Hardware overview Compute node control panel Veritas 5350 Appliance rear panel overview Figure 1-2 Back panel layout of the Veritas 5350 Appliance Redundant 1100 W power modules VGA port Serial port (not used) USB 3.0 ports IPMI port OCP 1 Gbs Ports... - Page 11 System Cold Reset Button When you depress the System Cold Reset button (recessed, tool required) it restarts and re-initializes the appliance. Veritas recommends that you do not use this button. NIC-1 Activity LED The NIC LEDs represent a network interface controller.
-
Page 12: 5U84 Storage Shelf Drawers And Disk Drives
Hardware overview 5U84 storage shelf drawers and disk drives 5U84 storage shelf drawers and disk drives Each storage shelf includes 2 drawers with 42 disk drive slots each for a total of 84 slots. The following diagrams describe the disk layout for the top drawer and the bottom drawer. - Page 13 Hardware overview 5U84 storage shelf drawers and disk drives The bottom drawer contains slots 42 through 83.
- Page 14 Hardware overview 5U84 storage shelf drawers and disk drives Disk drives are not preconfigured before they ship from the factory. During the initial installation any drive can be placed into any slot for a full storage shelf. After the compute nodes and storage shelves are configured and operational, you cannot rearrange the drives.
-
Page 15: 5U84 Storage Shelf Control Panel
Hardware overview 5U84 storage shelf control panel 5U84 storage shelf control panel The following table explains the components in the storage shelf control panel. Number Component Description Unit identification A numerical enclosure display that helps when setting up and maintaining multiple storage (ID) display shelves. -
Page 16: 5U84 Storage Shelf Rear Panel
Hardware overview 5U84 storage shelf rear panel Number Component Description Module fault LED Amber when there is a system hardware fault. An LED may be lit on a power supply, drawer, disk carrier, cooling module, or I/O module to identify which component is at fault. Logical status LED Shows a change of status or a fault. -
Page 17: 5U84 Storage Shelf Raid Controller
Hardware overview 5U84 storage shelf RAID controller Each cooling module contains two fans. Cooling modules can be individually replaced but cannot be taken apart to replace only one fan. Refer to the following sections for information about the I/O modules. “5U84 storage shelf RAID controller”... -
Page 18: 5U84 Storage Shelf Expansion Module
A yellow label states that port B is for attachment to a server only. You cannot use this port without permission and assistance from Veritas Technical Support. The SAS-3 ports connect to the SAS port on each RAID controller on the Primary shelf and to other Expansion shelves. -
Page 19: About Ipmi Configuration
IPMI sub-system. The following figure shows the remote management port (or the IPMI port) on the rear panel of a 5350 Appliance: The IPMI is beneficial after an unexpected power outage shuts down the connected system. In case the appliance is not accessible after the power is restored, you can... - Page 20 Hardware overview About IPMI configuration How does IPMI work? When an appliance is powered off or cannot be accessed using the Remote Management Port Out of band management using IPMI Remote Management Console The following are some of the main uses of IPMI: Manage an appliance that is powered off or unresponsive.
-
Page 21: Preinstallation Requirements
Chapter Preinstallation requirements This chapter includes the following topics: Customer-provided environment and supplies ■ Appliance shipping container contents ■ Storage shelf shipping container contents ■ Dimensions and determining rack locations ■ Best practices for rack installation ■ Storage shelf rack requirements ■... -
Page 22: Appliance Shipping Container Contents
Preinstallation requirements Appliance shipping container contents “Heat dissipation” on page 26. The following describes the necessary personnel and equipment that are needed at the installation site: At least two people or a mechanical lift to move the appliance and the storage ■... -
Page 23: Storage Shelf Shipping Container Contents
Preinstallation requirements Storage shelf shipping container contents Storage shelf shipping container contents The appliance and each storage shelf are shipped in separate containers. Each container includes other boxes and contents. The disk drives ship separately from the storage shelves. Each disk drive shipping container includes 42 disk drive slots. - Page 24 Preinstallation requirements Dimensions and determining rack locations Height: 22.23cm (8.75") ■ Width: 48.26cm (19") ■ Length/depth: 93.35cm (36.75") from the rear of the front flanges to the ■ extreme rear of the storage shelf chassis. Note: The 5U84 storage shelf is longer than a standard IEC-compliant rack. Be sure that your rack cabinet and Power Distribution Units accommodate the length of the storage shelves.
-
Page 25: Best Practices For Rack Installation
Preinstallation requirements Best practices for rack installation To determine rack locations for the hardware Determine the total number of rack units (RUs) that you need as follows: Use the rack templates to determine RU locations. Fold the compute node templates at the horizontal yellow lines. Use the following graphics to determine where pins and screws for the storage shelves fit into the rack. -
Page 26: Storage Shelf Rack Requirements
Preinstallation requirements Storage shelf rack requirements Storage shelf rack requirements For best ventilation, the rack cabinet: Should be at least 100 cm (4 feet) from walls. ■ Should have at least 100 cm (4 feet) from other cabinets on the front and back ■... -
Page 27: Cable Length Verification
Preinstallation requirements Cable length verification Veritas provides the following requirements to ensure sufficient cooling. Veritas requires that you install the system in a National Engineering ■ Manufacturer's Association (NEMA)-certified or equivalent rack. A minimum of 3 inches (7.6 cm) of space must be between the front of an ■... - Page 28 Preinstallation requirements Prerequisites for IPMI configuration Note: If the IPMI port is connected to a managed switch port, it is recommended that you configure the switch port to auto-negotiation If a firewall exists between the appliance and the remote devices that manage ■...
-
Page 29: Hardware Installation Procedures
■ Turning on the hardware and verifying operation ■ Configuring the IPMI port from the NetBackup Appliance Shell Menu ■ Configuring the Veritas Remote Management Interface from a Flex Appliance ■ Accessing and using the Veritas Remote Management interface ■... -
Page 30: Overview
The rear of the shelf is heavier than the front of the shelf. To install the storage shelf rails Veritas recommends that two people install the rails. One person works at the back of the rack and one person is at the front of the rack. - Page 31 Hardware installation procedures Installing a storage shelf The storage shelf rails are extended to full length in the shipping container. It is easier to install the rails when they are at their shortest length. Use the four adjuster screws on the inside of the rail to increase or decrease the rail length.
- Page 32 Hardware installation procedures Installing a storage shelf Use the printed rack templates that are provided with the hardware. One side of the template shows the front of the rail. The other side of the template shows the rear of the rail. The template shows the five rack units (RUs) to scale.
- Page 33 Hardware installation procedures Installing a storage shelf Start with the left rail. Place the rail pins inside the front of the rack.
- Page 34 Hardware installation procedures Installing a storage shelf Extend the rail assembly to enable the rear rail pins to engage. Verify that the pins are fully seated in the holes in the rack posts. Secure the four adjuster screws as needed. Do not over-torque. Repeat the process for the right rail.
- Page 35 Hardware installation procedures Installing a storage shelf Identify the three different types of screws. Descriptions of the screws are provided in the following table. Number Description Rack location(s) Rail location(s) Long fastening screw with two washers Front: Center holes in first and Front: Top and bottom holes.
- Page 36 Hardware installation procedures Installing a storage shelf Install the medium-sized clamping screws from the outside of the rack posts so that they engage the rails and the rack. The front of the rail requires one clamping screw in the center hole of the center The rear of the rail requires two clamping screws.
- Page 37 Hardware installation procedures Installing a storage shelf Warning: The shelf weighs 61.56kg (135.72lbs) without disk drives. Use a mechanical lift or have at least three people hold the lifting straps. Do not discard the straps in case you need to move the shelf later. Warning: The back end of the storage shelf is heavier than the front end.
- Page 38 Hardware installation procedures Installing a storage shelf Locate the lock tabs on the left and right rear corners of the storage shelf chassis.
- Page 39 Hardware installation procedures Installing a storage shelf Insert a small screw through the lock tab into the hole in the triangular end of the rail. Secure the screw. On the front of the storage shelf reattach the left and the right caps. The left cap contains the control panel.
-
Page 40: Installing Disk Drives Into A Full-Capacity Storage Shelf
Hardware installation procedures Installing disk drives into a full-capacity storage shelf Installing disk drives into a full-capacity storage shelf The 5U84 Primary Storage Shelf and the Expansion Storage Shelf use 4-TB or 8-TB disk drives. You cannot mix the two disk storage capacities in one shelf. You can have different capacities in separate shelves. - Page 41 Hardware installation procedures Installing disk drives into a full-capacity storage shelf To install the disk drives into the storage shelf slots Examine the two anti-tamper locks on the front of each drawer. The red arrows in the locks point to the center of the drawer if the locks are not engaged.
- Page 42 Hardware installation procedures Installing disk drives into a full-capacity storage shelf Before removing the disk drives from a shipping box, prepare each disk drive carrier for drawer installation. Do the following for each carrier: Identify the release latch in the middle of the top of a carrier. ■...
-
Page 43: Installing Disk Drives And Blanks Into A Half-Capacity Storage Shelf
Hardware installation procedures Installing disk drives and blanks into a half-capacity storage shelf The release latch clicks into place. ■ Repeat the process for each carrier in the bottom drawer of the shelf. ■ Verify that all disks are properly seated in the slots. Slide the bottom drawer into the storage shelf. - Page 44 Hardware installation procedures Installing disk drives and blanks into a half-capacity storage shelf Fill the bottom drawer with disks and blanks. Then install disks and blanks into the top drawer. To install disk drives and blanks into the bottom drawer of the storage shelf Examine the two anti-tamper locks on the front of each drawer.
- Page 45 Hardware installation procedures Installing disk drives and blanks into a half-capacity storage shelf Pull the bottom drawer forward as far as possible without damaging the hardware. Press the drawer latches (both sides of the drawer) in towards the middle of the drawer in order to open the drawer. Caution: To provide sufficient airflow for storage shelf cooling, install blank carriers in the empty drive slots of a half-populated drawer.
- Page 46 Hardware installation procedures Installing disk drives and blanks into a half-capacity storage shelf Identify the release latch in the middle of the top of a blank carrier. Push the release latch to the right. A yellow line appears to the left of the latch when the disk is unlocked.
- Page 47 Hardware installation procedures Installing disk drives and blanks into a half-capacity storage shelf Push the carrier forward towards the rear of the slot, in the direction of the circled end of the carrier. The latch clicks into place. The yellow line is no longer visible.
- Page 48 Hardware installation procedures Installing disk drives and blanks into a half-capacity storage shelf To install disk drives and blanks into the top drawer of the storage shelf Pull the top drawer forward as far as possible without damaging the hardware. Install disk drive carriers into slots 0 to 13.
-
Page 49: Installing The Compute Node Rack Rails
Engage the anti-tamper locks as needed. Installing the compute node rack rails Veritas recommends the following. The compute node requires two RUs of space ■ Two people should install the rails; one person at the back of the rack and one ■... - Page 50 Hardware installation procedures Installing the compute node rack rails To install the compute node rails Identify the front and the rear of each rail. The following illustration shows the front of the left-hand and the right-hand rails. The front of the left rail is labeled A.
- Page 51 Hardware installation procedures Installing the compute node rack rails Place one rail inside the rack. The rack holes and the rail pins should match the template. ■ Use the same 1RU space and holes in the front and the rear of the rack. ■...
- Page 52 Hardware installation procedures Installing the compute node rack rails Insert a washer and a screw into the middle hole of the top RU in the rear of the rack. Repeat steps through for the other rail. Identify the three different rails in each rail assembly. Components in this illustration are as follows.
- Page 53 Hardware installation procedures Installing the compute node rack rails 3 - Inner rail ■ Pull the white tab forward to release the inner rail from the outer and the intermediate rail.
-
Page 54: Installing The Compute Node Into A Rack
Hardware installation procedures Installing the compute node into a rack Separate the inner rail from the other rail components in the rack. Attach the inner rail to the left and the right sides of the chassis at the four attachment locations. The rails click into place when properly installed. - Page 55 Hardware installation procedures Installing the compute node into a rack Slide the blue tab forward to unlock the intermediate rail. Pull the intermediate portion of rail the rail forward. Ensure that the ball bearing retainer on the intermediate rail is locked forward. Note: You do not need to extend the rails as far as they can possibly extend.
-
Page 56: Connecting The Hardware To One Compute Node
Secure the captive screws on the compute node ears. Connecting the hardware to one compute node This section provides cabling information for a Veritas 5350 Appliance that includes one compute node, one Primary Storage Shelf, and up to three Expansion Storage Shelves. - Page 57 Hardware installation procedures Connecting the hardware to one compute node Expansion Storage Shelves connect to the Primary Shelf and to other Expansion shelves with two SAS-3 cables. The Primary Shelf has a single SAS-3 port on the left side of each RAID controller I/O module.
- Page 58 Hardware installation procedures Connecting the hardware to one compute node Identify the four SAS-3 ports in each Primary Shelf controller. The left-hand controller is labeled A and the right-hand controller is labeled B. The ports in each controller are labeled 3, 2, 1, and 0 from left to right. Note: The colors of the cables in the following diagrams are for demonstration purposes only.
- Page 59 Hardware installation procedures Connecting the hardware to one compute node Connect slot 7, Port 1 of the compute node to controller A, Port 0 on the ■ Primary Shelf. Use the following procedure to connect Expansion Storage Shelves to the Primary Shelf.
- Page 60 Hardware installation procedures Connecting the hardware to one compute node Connect the other end of the SAS-3 cables to port A in each of the I/O ■ modules in the Expansion Shelf. Note: The blue tab on the cable must face down in the Expansion Shelf.
- Page 61 Hardware installation procedures Connecting the hardware to one compute node Do the following if you have two Expansion shelves. Connect one end of the two SAS-3 cables to the SAS-3 port on the left ■ hand side of each RAID controller in the Primary Shelf. Connect the other end of the SAS-3 cable in RAID controller A to port A in ■...
- Page 62 Hardware installation procedures Connecting the hardware to one compute node Do the following if you have three Expansion shelves. Connect one end of the two SAS-3 cables to the SAS-3 port on the left ■ hand side of each RAID controller in the Primary Shelf. Connect the other end of the SAS-3 cable in RAID controller A to port A in ■...
- Page 63 Hardware installation procedures Connecting the hardware to one compute node Connect port C in I/O module A of the upper Expansion Shelf to port A in ■ I/O module A of the middle Expansion Shelf. Connect port A in I/O module B of the upper Expansion Shelf to port C in ■...
- Page 64 Hardware installation procedures Connecting the hardware to one compute node...
-
Page 65: Connecting The Hardware To Two Compute Nodes
Hardware installation procedures Connecting the hardware to two compute nodes Connecting the hardware to two compute nodes Installation procedures for a two-node or multi-node system is the same as for a single-node system except for the following: The two nodes are connected to each other through the two far-right 1Gb ■... - Page 66 Hardware installation procedures Connecting the hardware to two compute nodes Identify the SAS ports on the compute nodes. Identify the SAS ports on the Primary Storage Shelf. Connect the cables as follows: On the compute node that is located closest to the Primary Storage Shelf, ■...
- Page 67 Hardware installation procedures Connecting the hardware to two compute nodes If you have Expansion Storage Shelves, proceed to the following instructions. “To connect Expansion Storage Shelves to a Primary shelf” on page 67. If you do not have Expansion shelves proceed to connect the power cords. “Connecting the power cords”...
- Page 68 Hardware installation procedures Connecting the hardware to two compute nodes Locate SAS3 ports A and C in both I/O modules of the Expansion shelves. Port B is not used. IMPORTANT - Be sure that the blue tab on each SAS3 connector faces down. The RAID controller does not recognize an incorrectly inserted connector.
- Page 69 Hardware installation procedures Connecting the hardware to two compute nodes If you have one Expansion shelf, connect it to the Primary shelf .
- Page 70 Hardware installation procedures Connecting the hardware to two compute nodes If you have two Expansion shelves, connect them as shown.
- Page 71 Hardware installation procedures Connecting the hardware to two compute nodes If you have three Expansion shelves connect them as shown.
-
Page 72: Connecting Netbackup Nodes To The Network
Physical keyboard and monitor ■ The common tasks that you can perform in the appliance shell menu include: Initial configuration ■ Network configuration ■ Appliance management ■ Veritas recommends using the IPMI port to establish remote access to the appliance. -
Page 73: Connecting Flex Nodes To The Network
Hardware installation procedures Connecting Flex nodes to the network The private network address for the eth0/NIC1 port is reserved to provide a direct connection from a laptop to perform the initial configuration. NIC1 (eth0) is typically not connected to your network environment. After initial configuration you can change the NIC1 (eth0) IP address to repurpose the port. -
Page 74: Connecting The Power Cords
You must use this port and the privnic1 port to connect the copper/RJ45 connector nodes to each other. Labeled ETH3 on the node. IPMI port - copper/RJ45 A 1-GbE port that is used to connect to the Veritas Remote connector Management Interface. NIC ports 0 to 9 Connect these ports on each node before initial configuration to support application instances. - Page 75 Hardware installation procedures Connecting the power cords To connect the power cords Obtain two power cords for each unit. Note that the storage shelf cords have a right-angled connector on the end that connects to the shelf. Connect the right-angled ends to the Expansion shelf. Connect the strain relief bale to each power cord.
- Page 76 Hardware installation procedures Connecting the power cords Connect two power cords between the Expansion shelf and the PDU. Rewrap the plastic ties to secure each power cord. Connect two power cords between the Primary shelf and the PDU.
-
Page 77: Turning On The Hardware And Verifying Operation
Hardware installation procedures Turning on the hardware and verifying operation Connect two power cords between the compute node and the PDU. Verify that the final power cord cabling is consistent with the following diagram. Turning on the hardware and verifying operation You must turn on the hardware in the following order: Expansion shelf ■... - Page 78 Hardware installation procedures Turning on the hardware and verifying operation Compute node or nodes ■ To turn on the hardware Verify that the following cables are connected properly and securely: SAS cables between the Primary Shelf and the Expansion Shelf ■...
- Page 79 Hardware installation procedures Turning on the hardware and verifying operation Verify that the Power OK LEDs on both power supplies are green. Number Description Power supply failure AC failure Power ok...
- Page 80 Hardware installation procedures Turning on the hardware and verifying operation Verify that the Power on (standby) LED on the front, left, of the shelf is green. Turn on the Primary Storage Shelf. Let the shelf initialize for 2 or 3 minutes. ■...
-
Page 81: Configuring The Ipmi Port From The Netbackup Appliance Shell Menu
Hardware installation procedures Configuring the IPMI port from the NetBackup Appliance Shell Menu Turn on the compute node or nodes with the power button on the control panel on the right front side of the unit or units. High availability (HA) appliance compute node and storage shelf service considerations Attention: When you turn on the storage shelves and compute nodes after completing the service, turn on the primary compute node first before you turn... - Page 82 Hardware installation procedures Configuring the IPMI port from the NetBackup Appliance Shell Menu IP Address: 192.168.0.10 ■ Subnet Mask: 255.255.255.0 ■ Also review the following section on the IPMI prerequisites. “Prerequisites for IPMI configuration” on page 27. To configure the IPMI port by using a keyboard and monitor Connect the following components to the appropriate ports on the rear panel of the appliance: A standard video cable between the VGA (Video Graphics Array) port and...
-
Page 83: Configuring The Veritas Remote Management Interface From A Flex Appliance
Connect a standard video cable between the VGA (Video Graphics Array) port and the computer monitor Connect a keyboard to a USB port at the rear of the Flex 5350 appliance. Ensure that the power cords are connected to a power supply and press the... - Page 84 The prompt about accessing the BIOS at the beginning of the startup cycle appears. Wait until the Veritas logo shows up and press F2 to enter the initial BIOS setup screen. The initial setup dialog box appears and prompts you.
- Page 85 Hardware installation procedures Configuring the Veritas Remote Management Interface from a Flex Appliance Use the down key on the keyboard and navigate to the Server Management menu option. Press Enter. Press the up or down key on the keyboard to navigate to BMC LAN Configuration.
- Page 86 Hardware installation procedures Configuring the Veritas Remote Management Interface from a Flex Appliance Navigate to the Dedicated Management LAN Configuration option. Use the information supplied by the customer to fill in the following fields: IP Source, IP address, Subnet mask, Gateway IP.
-
Page 87: Accessing And Using The Veritas Remote Management Interface
Management interface The IPMI web interface is known as Veritas Remote Management interface. You can use Veritas Remote Management interface to log on to the NetBackup Appliance Shell Menu or the Flex Appliance Shell. Note: Alert configuration is not supported using the Veritas Remote Management interface. - Page 88 Hardware installation procedures Accessing and using the Veritas Remote Management interface At least one power cable must be connected to a functioning power source. ■ At least one user must be enabled to use the LAN channel(s). ■ To access and use the IPMI web interface from a remote computer Log on to a remote computer in the network and open a supported Windows browser.
- Page 89 Hardware installation procedures Accessing and using the Veritas Remote Management interface A JViewer application opens that enables you to remotely monitor and control the appliance. This application requires Java Runtime Environment (JRE) version 6.0 or later. Install Java. You can login to the JViewer...
-
Page 90: Adding Expansion Storage Shelves To An Operating Appliance That Does Not Have Any Expansion Shelves
Appendix Adding Expansion Storage Shelves to an operating appliance that does not have any Expansion shelves This appendix includes the following topics: Overview ■ Turning off the existing hardware ■ Installation instructions ■ Connecting one Expansion Shelf to the Primary Shelf ■... -
Page 91: Turning Off The Existing Hardware
Adding Expansion Storage Shelves to an operating appliance that does not have any Expansion shelves Turning off the existing hardware The hardware must be turned off before you add any storage shelves. Turning off the existing hardware You must turn off the existing system before you turn on any Expansion Shelves. Be sure to perform these steps in the order that they are presented. -
Page 92: Installation Instructions
Adding Expansion Storage Shelves to an operating appliance that does not have any Expansion shelves Installation instructions Installation instructions The procedures for installing an Expansion shelf and inserting the disk drive carriers are the same as for a Primary shelf. The installation instructions are the same for NetBackup and Flex appliances. - Page 93 Adding Expansion Storage Shelves to an operating appliance that does not have any Expansion shelves Connecting one Expansion Shelf to the Primary Shelf Identify ports A and C in each I/O module in the Expansion Shelf. Port B is not available for use.
-
Page 94: Connecting Two Expansion Shelves To The Primary Shelf
Adding Expansion Storage Shelves to an operating appliance that does not have any Expansion shelves Connecting two Expansion Shelves to the Primary Shelf Verify the final cable configuration. Connect the power cords of all devices as described in this section. “Connecting the power cords”... - Page 95 Adding Expansion Storage Shelves to an operating appliance that does not have any Expansion shelves Connecting two Expansion Shelves to the Primary Shelf To connect two Expansion Shelves to the Primary Shelf Verify that all compute nodes and the Primary Shelf are off and that the power cords are unplugged.
- Page 96 Adding Expansion Storage Shelves to an operating appliance that does not have any Expansion shelves Connecting two Expansion Shelves to the Primary Shelf Connect the left cable to port A in the left I/O module on the closest ■ Expansion Shelf. Connect the right cable from the Primary Shelf to port A in the right I/O ■...
- Page 97 Adding Expansion Storage Shelves to an operating appliance that does not have any Expansion shelves Connecting two Expansion Shelves to the Primary Shelf Verify the final cable configuration. Connect the power cords of all devices as described in this section. “Connecting the power cords”...
-
Page 98: Connecting Three Expansion Shelves To The Primary Shelf
Adding Expansion Storage Shelves to an operating appliance that does not have any Expansion shelves Connecting three Expansion Shelves to the Primary Shelf Turn on the devices in the proper sequence as described in this section. “Turning on the hardware and verifying operation” on page 77. - Page 99 Adding Expansion Storage Shelves to an operating appliance that does not have any Expansion shelves Connecting three Expansion Shelves to the Primary Shelf IMPORTANT: Note the correct orientation of the blue tab on the ends of the SAS-3 cables. The blue tab must face down in the ports on all shelves. Connect the cables as follows: Connect one cable to each of the SAS-3 ports on the left of each controller ■...
- Page 100 Adding Expansion Storage Shelves to an operating appliance that does not have any Expansion shelves Connecting three Expansion Shelves to the Primary Shelf Verify the final cable configuration.
- Page 101 Adding Expansion Storage Shelves to an operating appliance that does not have any Expansion shelves Connecting three Expansion Shelves to the Primary Shelf Connect the power cords of all devices as described in this section. “Connecting the power cords” on page 74. Turn on the devices in the proper sequence as described in this section.
-
Page 102: Adding Expansion Storage Shelves To An Operating Appliance That Has At Least One Operating Expansion Shelf
Appendix Adding Expansion Storage Shelves to an operating appliance that has at least one operating Expansion shelf This appendix includes the following topics: Overview ■ Turning off the existing hardware ■ Installation instructions ■ Connecting one Expansion Shelf to a system that has one existing Expansion ■... -
Page 103: Turning Off The Existing Hardware
Adding Expansion Storage Shelves to an operating appliance that has at least one operating Expansion shelf Turning off the existing hardware It is possible to already have one or more Expansion Storage Shelves, up to three units. The cable scheme for NetBackup and Flex appliances is the same. The hardware must be turned off before you add any storage shelves. -
Page 104: Installation Instructions
Adding Expansion Storage Shelves to an operating appliance that has at least one operating Expansion shelf Installation instructions Locate the on/off switches on the two power supplies on the rear of the storage shelves. The switches are in the same location for the Primary shelf and for the Expansion shelves. -
Page 105: Connecting One Expansion Shelf To A System That Has One Existing Expansion Shelf
Adding Expansion Storage Shelves to an operating appliance that has at least one operating Expansion shelf Connecting one Expansion Shelf to a system that has one existing Expansion Shelf Connecting one Expansion Shelf to a system that has one existing Expansion Shelf Expansion Shelves connect to the Primary Shelf and to other Expansion Shelves but they do not connect directly to the compute node. - Page 106 Adding Expansion Storage Shelves to an operating appliance that has at least one operating Expansion shelf Connecting one Expansion Shelf to a system that has one existing Expansion Shelf IMPORTANT: Note the correct orientation of the blue tab on the ends of the SAS-3 cables.
-
Page 107: Connecting Two Expansion Shelves To A System That Has One Existing Expansion Shelf
Adding Expansion Storage Shelves to an operating appliance that has at least one operating Expansion shelf Connecting two Expansion Shelves to a system that has one existing Expansion Shelf Verify the final cable configuration. Connect the power cords of all devices as described in this section. “Connecting the power cords”... - Page 108 Adding Expansion Storage Shelves to an operating appliance that has at least one operating Expansion shelf Connecting two Expansion Shelves to a system that has one existing Expansion Shelf To connect two new Expansion Shelves to a Primary Shelf and an existing Expansion Shelf Verify that all compute nodes and the Primary Shelf are off and that the power cords are unplugged.
- Page 109 Adding Expansion Storage Shelves to an operating appliance that has at least one operating Expansion shelf Connecting two Expansion Shelves to a system that has one existing Expansion Shelf Connect the end of the cable to port A in the right I/O module in the third ■...
- Page 110 Adding Expansion Storage Shelves to an operating appliance that has at least one operating Expansion shelf Connecting two Expansion Shelves to a system that has one existing Expansion Shelf Verify the cabling configuration. Connect the power cords of all devices as described in this section. “Connecting the power cords”...
-
Page 111: Connecting One Expansion Shelf To A System That Has Two Existing Expansion Shelves
Adding Expansion Storage Shelves to an operating appliance that has at least one operating Expansion shelf Connecting one Expansion Shelf to a system that has two existing Expansion Shelves Turn on the devices in the proper sequence as described in this section. “Turning on the hardware and verifying operation”... - Page 112 Adding Expansion Storage Shelves to an operating appliance that has at least one operating Expansion shelf Connecting one Expansion Shelf to a system that has two existing Expansion Shelves IMPORTANT: Note the correct orientation of the blue tab on the ends of the SAS-3 cables.
- Page 113 Adding Expansion Storage Shelves to an operating appliance that has at least one operating Expansion shelf Connecting one Expansion Shelf to a system that has two existing Expansion Shelves Verify the cabling configuration.
- Page 114 Adding Expansion Storage Shelves to an operating appliance that has at least one operating Expansion shelf Connecting one Expansion Shelf to a system that has two existing Expansion Shelves Connect the power cords of all devices as described in this section. “Connecting the power cords”...
-
Page 115: Configuring The Disk Space For New Netbackup Expansion Storage Shelves
Appendix Configuring the disk space for new NetBackup Expansion Storage Shelves This appendix includes the following topics: Adding the disk space of an Expansion Storage Shelf from the NetBackup ■ Appliance Web Console Adding the disk space of an Expansion Storage Shelf from the NetBackup ■... - Page 116 Configuring the disk space for new NetBackup Expansion Storage Shelves Adding the disk space of an Expansion Storage Shelf from the NetBackup Appliance Web Console To add the disk space of an expansion shelf from the NetBackup Appliance Web Console Launch the NetBackup Appliance Web Console and verify that the new storage device appears on the Monitor >...
-
Page 117: Adding The Disk Space Of An Expansion Storage Shelf From The Netbackup Appliance Shell Menu
Configuring the disk space for new NetBackup Expansion Storage Shelves Adding the disk space of an Expansion Storage Shelf from the NetBackup Appliance Shell Menu Adding the disk space of an Expansion Storage Shelf from the NetBackup Appliance Shell Menu The following procedure describes how to add new storage shelf disk space to a 53xx appliance by using the NetBackup Appliance Shell Menu. - Page 118 Configuring the disk space for new NetBackup Expansion Storage Shelves Adding the disk space of an Expansion Storage Shelf from the NetBackup Appliance Shell Menu At the prompt, enter add <disk ID> and press . <disk ID> is the disk ID Enter that you copied.
- Page 119 Expansion Shelves. Note: When you configure additional disk space, any current backup operations are stopped until the process is complete. Veritas recommends that you do not start any backup operations before starting this procedure. To configure additional disk space Turn on the new shelf or shelves.
- Page 120 Configuring the disk space for new Flex Expansion Storage Shelves Adding the disk space of an Expansion Storage Shelf from the Flex Appliance Console Click on Add storage. A confirmation window appears. Click Yes. You can monitor the progress from the Activity Monitor. Note: In a multi-node appliance, two tasks are shown in the Activity Monitor.
Need help?
Do you have a question about the 5350 and is the answer not in the manual?
Questions and answers