Table of Contents
Advertisement
Quick Links
Download this manual
See also:
Service Manual
Advertisement
Chapters
Table of Contents
Troubleshooting

Subscribe to Our Youtube Channel
Related Manuals for Oracle sun X4-8


Summary of Contents for Oracle sun X4-8
- Page 1 Sun Server X4-8 Installation Guide Part No: E40305-07 December 2015...
- Page 3 Oracle. Oracle Corporation and its affiliates will not be responsible for any loss, costs, or damages incurred due to your access to or use of third-party content, products, or services, except as set forth in an applicable agreement between you and Oracle.
- Page 4 Oracle Corporation et ses affiliés déclinent toute responsabilité ou garantie expresse quant aux contenus, produits ou services émanant de tiers, sauf mention contraire stipulée dans un contrat entre vous et Oracle. En aucun cas, Oracle Corporation et ses affiliés ne sauraient être tenus pour responsables des pertes subies, des coûts occasionnés ou des dommages causés par l'accès à...
-
Page 5: Table Of Contents
Managing Your Server .................. 25 Multiple Server Management Tools .............. 25 Single Server Management Tools .............. 25 Oracle System Assistant ................. 26 Oracle ILOM .................... 26 Oracle Hardware Management Pack .............. 27 UEFI BIOS .................... 27 Preparing to Install the Server ................ 31 Server Specifications .................. 31 Physical Specifications ................ 31 Electrical Specifications ................ 32 Environmental Requirements .............. - Page 6 ▼ Modify IPv6 Network Settings From the Oracle ILOM CLI ...... 60 ▼ Modify Network Settings From the Oracle ILOM Web Interface ....... 63 ▼ Test IPv4 or IPv6 Network Configuration From the Oracle ILOM CLI .... 65 ▼ Test IPv4 or IPv6 Network Configuration From the Oracle ILOM Web Interface ....................... 66...
- Page 7 Preparing for the Oracle Solaris Configuration .......... 119 Preinstalled Oracle Solaris Operating System RAID Limitations .... 120 Oracle Solaris OS Configuration Worksheet .......... 120 ▼ Configure the Preinstalled Oracle Solaris 11 Operating System ...... 122 Reinstalling the Oracle Solaris Operating System .......... 124 Oracle Solaris 11 Operating System Documentation ........... 125 Configuring the Preinstalled Oracle VM 3.X Software ........
- Page 8 Firmware and Software Updates .............. 139 Firmware and Software Access Options ............ 140 Available Software Release Packages .............. 140 Accessing Firmware and Software .............. 141 ▼ Download Firmware and Software Using My Oracle Support .... 141 Installing Updates .................. 142 Installing Firmware ................ 142 Installing Hardware Drivers and OS Tools .......... 143 Controlling System Power ................ 145...
-
Page 9: Using This Documentation
(blade), and blade chassis are updated periodically. You can obtain the latest version in one of the following ways: Oracle System Assistant – This is a new factory-installed option for Sun Oracle x86 servers. ■ It has all the tools and drivers you need and resides on a USB drive installed in most servers. -
Page 10: Documentation And Feedback
Link All Oracle products https://docs.oracle.com Sun Server X4-8 http://www.oracle.com/goto/X4-8/docs Oracle Integrated Lights Out Manager (ILOM). Refer to http://www.oracle.com/goto/ILOM/docs the documentation for your supported version of Oracle ILOM as listed in the Product Notes. Oracle Hardware Management Pack. Refer to the http://www.oracle.com/goto/ohmp/docs... - Page 11 Management Architecture (FMA), and added issues to Product Notes. December 2014. Added content to Product Notes and made editorial improvements to ■ Installation Guide. August 2015. Added content for updated IPv6 configuration in Oracle ILOM. ■ December 2015. Technical updates. ■...
- Page 12 Sun Server X4-8 Installation Guide • December 2015...
-
Page 13: Installation Procedure Overview
Sun Server X4-8 Installation Guide for Linux systems or virtual machine software. Operating Systems Sun Server X4-8 Installation Guide for Oracle Solaris Operating System Sun Server X4-8 Installation Guide for Oracle VM Server Sun Server X4-8 Installation Guide for Microsoft Windows Installation Procedure Overview... - Page 14 Step Description Links Sun Server X4-8 Installation Guide for VMware ESXi Review procedures for controlling system power. “Controlling System Power” on page 145 Troubleshoot installation issues. “Troubleshooting Installation Issues” on page 149 Sun Server X4-8 Installation Guide • December 2015...
-
Page 15: Server Features And Components
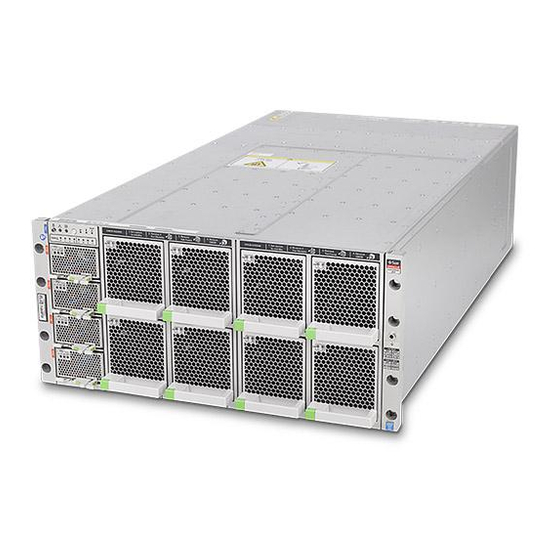
Server Features and Components This section describes Oracle's Sun Server X4-8 hardware. It includes the following topics: Description Links Locate status indicators, connectors, and storage drives ■ “Front Panel Features” on page 15 on the server front and back panels. -
Page 16: Front Indicator Module
Front Panel Features Callout Description Front indicator module Power supplies 0 (bottom) through 3 (top) Fan modules FM 0 through FM 7: ■ Top row: 1, 3, 5, 7 ■ Bottom row: 0, 2, 4, 6 Front Indicator Module The following figure shows the controls and indicators on the front indicator module: Sun Server X4-8 Installation Guide •... -
Page 17: Power Supply Controls And Indicators
Front Panel Features Callout Description Chassis locator button and indicator Chassis fault indicator Power OK indicator Recessed power button Service processor OK indicator Chassis temperature fault indicator Chassis back fault indicator CMOD fault indicators 0 - 7 (from left to right) Note - The server contains either four or eight CMODs (compute modules), located behind the fans, and designated from left to right as CMOD 0 through... -
Page 18: Fan Module Controls And Indicators
Front Panel Features Callout Description PSU fault/locate indicator PSU OK indicator (power to host is OK) PSU AC OK indicator (AC input power is OK) Release latch Fan Module Controls and Indicators The following figure shows the controls and indicators on the fan module: Sun Server X4-8 Installation Guide •... -
Page 19: Back Panel Features
Back Panel Features Callout Description Fault indicator OK indicator Release latch Back Panel Features The following figure shows the Sun Server X4-8 back panel and describes its components. Server Features and Components... - Page 20 Back Panel Features Callout Description DB-15 video port USB 2.0 ports (2) Net management port Serial management port Status indicators HDD/SSD slots 0 through 7: ■ Top row : 7, 5, 3, 1 ■ Bottom row: 6, 4, 2, 0 PCIe card slots 1 through16: ■...
-
Page 21: Back Panel Status Indicators And Buttons
Description Non-maskable interrupt (NMI) button - Used by Oracle service personnel. Reset button - Used by Oracle service personnel. Locate button/indicator - Used to identify the server. For details, see the Oracle ILOM Documentation Library at: http://www.oracle.com/goto/ILOM/docs Chassis Fault indicator - For details, refer to Sun Server X4-8 Service Manual. -
Page 22: Storage Controls And Indicators
Server Supported Components Storage Controls and Indicators The following figure shows the storage controls and indicators: Callout Description OK indicator (Green) Fault indicator (Amber) Ready to remove indicator (Blue) Storage drive release button Storage drive lever Server Supported Components The following table lists and describes the components that are supported in the Sun Server X4- Component Description CPU module (CMOD) - Page 23 Ethernet ports Two 1 Gbps onboard Ethernet ports Service processor Oracle Integrated Lights Out Manager uses an Emulex Pilot 3 baseboard management controller (BMC). It provides: ■ Remote Keyboard, Video, Mouse redirection ■ Full remote management through command-line, IPMI, and browser interfaces ■...
- Page 24 Sun Server X4-8 Installation Guide • December 2015...
-
Page 25: Managing Your Server
If your server is one of many x86 and SPARC servers that you want to manage from a ■ single interface, you can use the Oracle Enterprise Manager Ops Center. For more details, refer to http://www.oracle.com/technetwork/oem/ops-center/index.html. If you want to monitor your enterprise servers, you can take advantage of Sun Management ■... -
Page 26: Oracle System Assistant
BIOS” on page 27 the boot process. Provides a simple graphical of system functionality. user interface. For more details on about these tools, see the Oracle x86 Administration Guide for X4 Series Servers at: http://www.oracle.com/goto/x86AdminDiag/docs Oracle System Assistant Oracle System Assistant is a task-based server provisioning tool that allows you to perform initial server setup and maintenance for Oracle x86 servers. -
Page 27: Oracle Hardware Management Pack
Oracle Hardware Management Pack (HMP) provides a family of command-line interface (CLI) tools for managing your servers, and an SNMP monitoring agent. You can use the Oracle Server CLI tools to configure Oracle servers. The CLI tools work ■ with Oracle Solaris, Oracle Linux, Oracle VM, other variants of Linux, and Windows operating systems. - Page 28 BIOS Save Changes and Reset command. Use the Oracle ILOM BIOS Backup and Restore function to preserve the configuration in case you want to switch back. For information about Oracle ILOM, refer to your Oracle Integrated Lights Out Manager (ILOM) documentation at: http://www.oracle.
- Page 29 Once you choose a boot mode and install an operating system, if you reboot the server and select a different boot mode, the installed image is not accessible and cannot be used. For more details on UEFI BIOS, see the Oracle x86 Administration Guide for X4 Series Servers http://www.oracle.com/goto/x86AdminDiag/docs Managing Your Server...
- Page 30 Sun Server X4-8 Installation Guide • December 2015...
-
Page 31: Preparing To Install The Server
Preparing to Install the Server This section provides the information you need to know before you install the server into a rack. It includes: Description Links Review the server physical, electrical, and environmental “Server Specifications” on page 31 specifications. Review ventilation and cooling requirements for the “Ventilation Guidelines”... -
Page 32: Electrical Specifications
The following table lists the electrical specifications for the Sun Server X4-8. For up-to-date information on power consumption, go to the Sun x86 Servers web site Note - and navigate to the Sun Server X4-8 page: http://www.oracle.com/technetwork/server-storage/sun-x86/overview/index.html Parameter Value Nominal input frequencies... -
Page 33: Ventilation Guidelines
Ensure that ventilation openings such as cabinet doors, for both the inlet and exhaust of ■ the server are not obstructed. For example, Oracle's Sun Rack II has been optimized for cooling. Both the front and back doors have 80 percent perforations that provide a high level of airflow through the rack. -
Page 34: Esd Precautions
(CMOD) or the System Module (SMOD) and to the component service procedures in the Server X4-8 Service Manual. Supported components and their part numbers are subject to change over time and without notice. For the most up-to-date list, go to: https://support.oracle.com/handbook_private/ Sun Server X4-8 Installation Guide • December 2015... -
Page 35: Rack Installation Instructions
Rack Installation Instructions This section provides instructions for placing the server into a rack using the shelf rail assembly in the rack mount kit. Perform these procedures if the rail assembly is purchased. The Sun Server X4-8 does not have slide rails. Once it is installed in the rack, you cannot slide it out without uninstalling it. -
Page 36: Rack Compatibility
Rack Compatibility Component damage. If the server is installed in a closed or multi-unit rack assembly, Caution - the operating ambient temperature of the rack environment might be greater than room ambient temperature. Always install the equipment in an environment compatible with the maximum ambient temperature (Tma) specified for the server. -
Page 37: Unpack The Server And Inventory The Contents
Unpack the Server and Inventory the Contents Item Requirement Structure Four-post rack (mounting at both front and back). Two- post racks are not compatible. Rack horizontal opening and unit vertical pitch Conforms to ANSI/EIA 310-D-1992 or IEC 60927 standards. Only M6 tapped or 9.5 mm square holes are supported. - Page 38 Unpack the Server and Inventory the Contents If a shipping carton appears damaged, request that the carrier's agent be present when the carton is opened. Keep all contents and packing material for the agent's inspection. Open the top of the box. Cut the straps.
- Page 39 Unpack the Server and Inventory the Contents Open the flaps. Rack Installation Instructions...
-
Page 40: Install Shelf Rails And Back Mounting Brackets
Install Shelf Rails and Back Mounting Brackets Remove the rack mounting kit (1) and set it and its contents aside. Remove the tray (2) and set it aside. Lift the box (3) up and away from the server. Remove the foam inserts (4). Fold the corrugated flap down to release the front foam insert. - Page 41 Install Shelf Rails and Back Mounting Brackets Install the two spacers in back rack rails. Studs on the spacers fit into the oval holes on the inside of the back rack rail. Align the bottom of the spacer with the bottom of the system's rack space. For square hole racks, place cage nuts in the locations indicated by the alignment template (2).
- Page 42 Install Shelf Rails and Back Mounting Brackets The server should sit directly above the rack unit below it [3] without any unfilled rack spaces. Place cage nuts in the locations indicated by the template. Sun Server X4-8 Installation Guide • December 2015...
- Page 43 Install Shelf Rails and Back Mounting Brackets Place the cage nuts on the inner-facing side of each rail. There should be two cage nuts in each front rail and three cage nuts in each back rail. Install the left and right shelf rails. The rails are labeled left and right, front and back.
- Page 44 Install Shelf Rails and Back Mounting Brackets Insert the studs [1] into the holes on the rack, and then press the tab [2] to open the latch and fasten it to the rack. Attach the back mounting brackets. Align each bracket so that the flanges will go over the top of the server. Use two screws to fasten each bracket to the rack.
-
Page 45: Install Shipping Bracket (Optional)
Install Shipping Bracket (Optional) Do not tighten the screws all the way. “Install the Server into the Rack” on page 47 See Also “Cable the Server” on page 50 Install Shipping Bracket (Optional) Install the shipping bracket if you are going to ship your server in a rack. You must install the shipping bracket before mounting the server in the rack. - Page 46 Install Shipping Bracket (Optional) Fasten it to the rack using four M6 screws [2]. Sun Server X4-8 Installation Guide • December 2015...
-
Page 47: Install The Server Into The Rack
Install the Server into the Rack Install the Server into the Rack Use a lift to raise the server to its position in the rack. Caution - Personal injury or damage to equipment. Be sure the server is firmly supported by the shelf rails before releasing it from the lift. - Page 48 Install the Server into the Rack The top two screws attach to cage nuts installed previously. The bottom screws attach to threaded holes in the shelf rails. Press the back mounting brackets against the server and tighten the screws. “Install Shelf Rails and Back Mounting Brackets” on page 40 See Also “Cable the Server”...
-
Page 49: Cabling The Server
Cabling the Server This section describes how to connect cables and power on the server for the first time. It includes the following topics: Description Links Review connector port locations. “Back Panel Connectors and Ports” on page 49 Connect data cables to the server. “Cable the Server”... -
Page 50: Cable The Server
Cable the Server Callout Description DB-15 video port USB 2.0 ports (2) Net management port (NET MGT) Serial management port (SER MGT) Net 0 port Net 1 port Power connectors 0 through 3. Connect to 200-240 VAC only. Cable the Server Connect external cables to the server in the following order. - Page 51 When power is connected, the SP boots into standby power mode. The SP OK/Fault indicator [3] flashes while Oracle ILOM is starting, and the main Power/ ■...
- Page 52 Description Main Power /OK indicator Recessed power button SP OK indicator “Controlling System Power” on page 145 See Also “Log In to Oracle ILOM Using a Local Serial Connection” on page 55 Sun Server X4-8 Installation Guide • December 2015...
-
Page 53: Connecting To Oracle Ilom
Connecting to Oracle ILOM Oracle Integrated Lights Out Manager (ILOM) is an embedded tool used to monitor and manage server components. You can perform the following tasks with Oracle ILOM: Manage the server locally or remotely, with the host power on or off ■... -
Page 54: Oracle Ilom Hardware And Interfaces
■ SNMP v3 interface Oracle ILOM Network Defaults The Sun Server X4-8 supports dual-stack IPv4 and IPv6 settings, which enable Oracle ILOM to fully operate in an IPv4 and IPv6 network environment. For IPv4 configurations, DHCP is enabled by default, allowing a DHCP server on the ■... -
Page 55: Log In To Oracle Ilom Using A Local Serial Connection
The default Oracle ILOM administrator account is root and its password is changeme. Note - If this default account has since been changed, contact your system administrator for an Oracle ILOM user account with administrator privileges. Verify that your serial console connection through the server's SER MGT port is secure and operational. - Page 56 The default Oracle ILOM administrator account is root and its password is changeme. Note - If this default account has since been changed, contact your system administrator for an Oracle ILOM user account with administrator privileges. Establish a connection to Oracle ILOM.
-
Page 57: Modify Ipv4 Network Settings From The Oracle Ilom Cli
The Summary screen appears, indicating that you have successfully logged in to Oracle ILOM. For example: Modify IPv4 Network Settings From the Oracle ILOM CLI Use this procedure to modify the server's IPv4 network settings using the Oracle ILOM CLI. Connecting to Oracle ILOM... - Page 58 “Log In to Oracle ILOM Using a Remote Ethernet Connection” on page 55 ■ If you are logged in to Oracle ILOM using an Ethernet connection, your connection is Note - terminated when you set commitpending to true. When this happens, log back in using the new settings.
- Page 59 Type set commitpending=true to commit commitpending set commitpending=true changes. If you are logged in to Oracle ILOM using an Ethernet connection, your connection is Note - terminated when you set commitpending to true. When this happens, log back in using the new settings.
-
Page 60: Modify Ipv6 Network Settings From The Oracle Ilom Cli
CLI” on page Modify IPv6 Network Settings From the Oracle ILOM CLI Use this procedure to modify the server's IPv6 network settings using the Oracle ILOM CLI. To modify IPv4 network settings, see “Modify IPv4 Network Settings From the Oracle ILOM CLI”... - Page 61 Modify IPv6 Network Settings From the Oracle ILOM CLI ipgateway = 2001:db8:211:5dff:febe:5000/128 pending_static_ipaddress = ::/128 pending_static_ipgateway = :: dynamic_ipaddress_1 2001:db8:8:b7:214:4fff:feca:5f7e/64 Commands: show To configure an IPv6 auto-configuration option, use the set command to specify the following auto-configuration property values: Property...
- Page 62 Pending settings remain pending until you commit them. Assigning a new static IP address to the server ends all active Oracle ILOM sessions to the server. To log back in to Oracle ILOM, create a new session using the newly assigned IP address.
-
Page 63: Modify Network Settings From The Oracle Ilom Web Interface
Modify Network Settings From the Oracle ILOM Web Interface If you want to modify the network settings currently configured for the server from the Oracle ILOM web interface, use the following procedure. You can also change network settings using the BIOS Setup Utility. For instructions, see Note - the Sun Server X4-8 Service Manual. - Page 64 Modify Network Settings From the Oracle ILOM Web Interface The Network Settings screen appears. Oracle ILOM displays the settings configured on your device. Perform the network configuration instructions that apply to your network environment: On systems equipped with SW 1.1 or older, there is a single Enabled button in General Note - Settings, and it enables both IPv4 and IPv6.
-
Page 65: Test Ipv4 Or Ipv6 Network Configuration From The Oracle Ilom Cli
DHCPv6 Autoconfig Stateless is enabled or at the same time as the option for DHCPv6 Autoconfig Stateful is enabled. Test the IPv4 or IPv6 network configuration from Oracle ILOM using the Network Test Tools (Ping and Ping 6). For details, see “Test IPv4 or IPv6 Network Configuration From the Oracle ILOM... -
Page 66: Interface
Test IPv4 or IPv6 Network Configuration From the Oracle ILOM Web Interface show Use the set ping or set ping6 command to send a network test from the device to a network destination specified in the following table: Property Set Property Value... -
Page 67: Exit Oracle Ilom
To end an Oracle ILOM session: From the Oracle ILOM CLI, type at the CLI prompt. ■ exit From the Oracle ILOM web interface, click the Log Out button at the top-right ■ corner of the screen. Connecting to Oracle ILOM... -
Page 68: Troubleshooting The Service Processor Connection
Reset the Service Processor Using the SP Reset Switch Use this step if the Oracle ILOM SP hangs and you cannot reset it using the Oracle ILOM web interface or the Oracle ILOM CLI. Use the Oracle ILOM reset switch to manually reset the Oracle ILOM SP. -
Page 69: Recover Root Account Password
Recover Root Account Password If necessary, system administrators can recover the preconfigured Oracle ILOM local root account or the password for the local root account by using the preconfigured Oracle ILOM default password. To recover the root account password you need a local serial management port (SER MGT) connection to Oracle ILOM. - Page 70 Sun Server X4-8 Installation Guide • December 2015...
-
Page 71: Setting Up Software And Firmware Using Oracle System Assistant
Oracle System Assistant is an embedded, task-based server provisioning tool that enables you to perform initial server setup and maintenance for most Oracle x86 servers. Using Oracle System Assistant, you can install a supported Oracle Solaris, Linux, Oracle VM, or Windows operating system, update your server to the latest software release, and configure server hardware. -
Page 72: Launch Oracle System Assistant Using The Oracle Ilom Web Interface
Launch Oracle System Assistant Using the Oracle ILOM Web Interface See Also For additional information about Oracle System Assistant, see: Oracle x86 Administration ■ Guide for X4 Series Servers (http://www.oracle.com/goto/x86AdminDiag/docs) Launch Oracle System Assistant Using the Oracle ILOM Web Interface Ensure that the server is in standby power mode. - Page 73 Click the Oracle System Assistant Launch button in the upper right panel. If you try to launch Oracle System Assistant and the server is not in standby power mode but is fully powered on, it prompts you to shut down the host first. See “Power Host On and Off...
-
Page 74: Launch Oracle System Assistant Locally
■ Launch Oracle System Assistant Locally Before you launch Oracle System Assistant locally, you must be physically present at the server and have access to a VGA monitor, a USB keyboard, and a USB mouse. Ensure that the server is in standby power mode. - Page 75 Press and release the front-panel Power button to power on the server to full power mode. The server boots and POST messages appear on the monitor. After you see the POST message for Oracle System Assistant, press the F9 function key. Setting Up Software and Firmware Using Oracle System Assistant...
-
Page 76: Prepare Oracle System Assistant
See Also ■ Prepare Oracle System Assistant This section describes how to set up a network connection so you can use Oracle System Assistant. When Oracle System Assistant starts, it tries to connect to DHCP on Net 0. If Net 0 is connected to a network that is DHCP enabled, it succeeds. No more configuration ■... -
Page 77: Preparing The Server For Os Installation
If Net 0 is connected to a network that is not DHCP enabled, you must configure a network ■ connection. These settings normally need to be set once, the first time you use Oracle System Assistant. Launch Oracle System Assistant as described in “Launching Oracle System Assistant”... -
Page 78: Prepare The Server For Os Installation
For the list of optional software that can be installed when you use Oracle System Assistant to install operating systems, refer to the Oracle System Assistant ReadMe. - Page 79 Supported operating systems include Oracle Solaris, Linux, Windows, or Oracle VM software. Data loss. Do not use this option Caution - on a disk with a preinstalled OS. Setting Up Software and Firmware Using Oracle System Assistant...
- Page 80 Sun Server X4-8 Installation Guide • December 2015...
-
Page 81: Configure Storage Drives For Os Installation
RAID volumes because the preinstalled operating system does not support RAID configurations. In this case proceed to one of the following sections: “Configuring the Preinstalled Oracle Solaris OS” on page 119 ■ Configure Storage Drives for OS Installation... - Page 82 RAID 0 volume (also called a "virtual disk") and make that volume bootable. RAID Configuration Tools: You can use Oracle System Assistant (recommended) or BIOS RAID configuration utilities to configure RAID on either type of HBA.
-
Page 83: Configuring Raid Using Oracle System Assistant
101. Configure RAID With a Sun Storage 6 Gb SAS PCIe Internal HBA Use Oracle System Assistant to prepare a server hard drive for an OS installation by creating a bootable RAID 0 volume. Launch Oracle System Assistant. “Launching Oracle System Assistant” on page... -
Page 84: Configure Raid With A Sun Storage 6 Gb Sas Pcie Internal Hba
UEFI boot mode. For a list of operating systems that support UEFI boot mode, see “UEFI BIOS” on page To switch between UEFI and legacy boot modes, see the Oracle x86 Administration Guide for X4 Series Servers at http://www.oracle.com/goto/x86AdminDiag/docs. - Page 85 Configure RAID With a Sun Storage 6 Gb SAS PCIe Internal HBA The RAID Configuration screen appears. In the HBA list box, select the SGX-SAS6-R-INT-Z HBA. This is the Sun Storage 6 Gb SAS PCIe RAID Internal HBA. In the Select RAID Level list box, select the desired RAID level. Choose RAID-0.
- Page 86 The Create Volume dialog box appears. In the Create Volume dialog box: (Optional) Enter the volume name. Entering a volume name is optional. If you do not name the volume, Oracle System Assistant creates a volume without a name. Click Create.
- Page 87 Configure RAID With a Sun Storage 6 Gb SAS PCIe Internal HBA The Creating RAID Volume information box appears. Configure Storage Drives for OS Installation...
- Page 88 Configure RAID With a Sun Storage 6 Gb SAS PCIe Internal HBA After the volume is created, it appears in the Created Volumes table. In the Details/Action column of the Created Volumes table, click the Details button. Sun Server X4-8 Installation Guide • December 2015...
- Page 89 If you entered a volume name earlier, you can modify it here; however, you cannot delete the name entirely. Naming the volume is optional. If you do not name the volume, Oracle System Assistant Note - creates a volume without a name.
- Page 90 Configure RAID With a Sun Storage 6 Gb SAS PCIe Internal HBA Click Save & Close. The Set Volume For Boot confirmation dialog appears. Click OK. Sun Server X4-8 Installation Guide • December 2015...
- Page 91 This completes the RAID configuration task. Do one of the following: To select any other Oracle System Assistant task, click the corresponding button in the left ■ panel menu. For example, after configuring RAID, you might want to select the Install OS task and perform an operating system installation.
-
Page 92: Configure Raid With A Sun Storage 6 Gb Sas Pcie Raid Internal Hba
Launch Oracle System Assistant. “Launching Oracle System Assistant” on page The Oracle System Assistant System Overview screen appears. In the System Overview screen, verify that the BIOS Mode is set to the boot mode (UEFI or Legacy BIOS) that you plan to use when you install the operating system. - Page 93 UEFI boot mode. For a list of operating systems that support UEFI boot mode, see “UEFI BIOS” on page To switch between UEFI and legacy boot modes, see the Oracle x86 Administration Guide for X4 Series Servers at http://www.oracle.com/goto/x86AdminDiag/docs.
- Page 94 The Create Volume dialog box appears. In the Create Volume dialog box: (Optional) Enter the volume name. Entering a volume name is optional. If you do not name the volume, Oracle System Assistant creates a volume without a name. Select the volume stripe size.
- Page 95 Configure RAID With a Sun Storage 6 Gb SAS PCIe RAID Internal HBA The Creating RAID Volume information box appears. Configure Storage Drives for OS Installation...
- Page 96 Configure RAID With a Sun Storage 6 Gb SAS PCIe RAID Internal HBA After the volume is created, it appears in the Created Volumes table. In the Details/Action column of the Created Volumes table, click the Details button. Sun Server X4-8 Installation Guide • December 2015...
- Page 97 If you entered a volume name earlier, you can modify it here; however, you cannot delete the name entirely. Naming the volume is optional. If you do not name the volume, Oracle System Assistant Note - creates a volume without a name.
- Page 98 Configure RAID With a Sun Storage 6 Gb SAS PCIe RAID Internal HBA Click Save & Close. The Set Volume For Boot confirmation dialog appears. Click OK. Sun Server X4-8 Installation Guide • December 2015...
- Page 99 Configure RAID With a Sun Storage 6 Gb SAS PCIe RAID Internal HBA The RAID Configuration screen appears and lists the RAID volume as the current boot device. If you want to designate the created volume as a global hot spare, perform the following steps;...
- Page 100 This completes the RAID configuration task. Do one of the following: To select any other Oracle System Assistant task, click the corresponding button in the left ■ panel menu. For example, after configuring RAID, you might want to select the Install OS task and perform an operating system installation.
-
Page 101: Configuring Raid Using The Bios Raid Configuration Utilities
Configuring RAID Using the BIOS RAID Configuration Utilities You can configure RAID using Oracle System Assistant or, if Oracle System Assistant is not available, you can use the BIOS RAID configuration utilities that reside in the HBA firmware. The procedures for configuring RAID differ depending on the type of HBA installed the server. - Page 102 ■ the server to power off the host, then press the Power button again to power it back on. From the Oracle ILOM web interface, select Host Management > Power Control, then ■ select Reset from the Select Action list box.
-
Page 103: See Also ■ "Set Up An Operating System And Drivers
■ the server to power off the host, then press the Power button again to power it back on. From the Oracle ILOM web interface, select Host Management > Power Control, then ■ select Reset from the Select Action list box. -
Page 104: Configuring Raid Using The Bios With The Sun Storage 6 Gb Sas Pcie Raid Internal Hba
Configure RAID in Legacy Boot Mode From the Oracle ILOM CLI, type: ■ reset /System The BIOS screen appears. During the boot process, the BIOS initialization banner lists information about the discovered SAS adapters and devices that are attached to the discovered HBAs in the system. -
Page 105: Mode, See "Uefi Bios" On Page
■ the server to power off the host, then press the Power button again to power it back on. From the Oracle ILOM web interface, select Host Management > Power Control, then ■ select Reset from the Select Action list box. - Page 106 Configure RAID in UEFI Boot Mode The UEFI Driver Control menu appears. Use the up and down arrow keys to navigate to the LSI MegaRAID Configuration Utility menu option, and press Enter. Sun Server X4-8 Installation Guide • December 2015...
- Page 107 Configure RAID in UEFI Boot Mode The LSI MegaRAID Configuration Utility menu appears. Use the Up and Down keys to select the Virtual Drive Management option and press Enter. Configure Storage Drives for OS Installation...
- Page 108 Configure RAID in UEFI Boot Mode The Virtual Drive Management menu screen appears. Use the Up and Down Arrow keys to select the Create Configuration option and press Enter. Sun Server X4-8 Installation Guide • December 2015...
- Page 109 Configure RAID in UEFI Boot Mode The Create Configuration menu screen appears. Use the Up and Down arrow keys to select the Select RAID Level option and press Enter. Configure Storage Drives for OS Installation...
- Page 110 Configure RAID in UEFI Boot Mode The Select RAID Level dialog box appears. Use the Up and Down arrow keys to select the desired RAID level and press Enter. Sun Server X4-8 Installation Guide • December 2015...
- Page 111 Configure RAID in UEFI Boot Mode The Create Configuration menu screen appears. Use the Up and Down arrow keys to select the Select Drives option and press Enter. Configure Storage Drives for OS Installation...
- Page 112 Configure RAID in UEFI Boot Mode The Drive Selection screen appears. In the Drive Selection screen, select the media type, the interface type, and the drives to be included in the RAID configuration, then select the Apply Changes option and press Enter. Sun Server X4-8 Installation Guide •...
-
Page 113: Configure Raid In Legacy Boot Mode
You want to configure RAID on the intended OS installation hard drive and the server does ■ not have Oracle System Assistant or you do not want to use it. You do not want to create a RAID volume, but the intended OS installation hard drive has ■... - Page 114 If you want to create a RAID volume level 5, 6, 50, or 60 using the storage drive on which ■ you plan to install the operating system. Oracle System Assistant only supports RAID 0, 1, and 10 for the SGX-SAS6-R-INT- Note - Z HBA.
- Page 115 Configure RAID in Legacy Boot Mode The Adapter Selection screen appears. In the Adapter Selection screen, click Start. Configure Storage Drives for OS Installation...
- Page 116 Configure RAID in Legacy Boot Mode The LSI MegaRAID BIOS Config Utility Virtual Configuration screen appears. Click Virtual Drives. Sun Server X4-8 Installation Guide • December 2015...
-
Page 117: Set Up An Operating System And Drivers
What do you want to do? Use this tool or documentation Configure a preinstalled OS ■ “Configuring the Preinstalled Oracle Solaris OS” on page 119 ■ “Configuring the Preinstalled Oracle Linux OS” on page 133 Configure Storage Drives for OS Installation... - Page 118 ■ “Configuring the Preinstalled Oracle VM 3.X Software” on page 127 Install an OS and update drivers ■ Sun Server X4-8 Installation Guide for Oracle Solaris Operating System ■ Sun Server X4-8 Installation Guide for Oracle VM Server ■ Sun Server X4-8 Installation Guide for Linux Operating Systems ■...
-
Page 119: Configuring The Preinstalled Oracle Solaris Os
Configuring the Preinstalled Oracle Solaris OS This section provides the steps for configuring the Oracle Solaris Operating System (OS) that is preinstalled on the server, if ordered. For up-to-date information about supported versions of the preinstalled Oracle Solaris Note - Operating System, see the Sun Server X4-8 Product Notes at http://www.oracle.com/goto/... -
Page 120: Preinstalled Oracle Solaris Operating System Raid Limitations
The Oracle Solaris preinstalled image can only be configured in a non-RAID configuration. If a RAID configuration is required, you must configure RAID on the server and then perform a fresh install of the Oracle Solaris OS (or other OS) in the desired RAID configuration. Oracle Solaris OS Configuration Worksheet Before you begin configuring the operating system, use the configuration worksheet in the following table to gather the information that you will need. - Page 121 Preparing for the Oracle Solaris Configuration Information for Description or Example Your Answers: Defaults Installation Administration server: First KDC: (Optional) Additional KDCs: Name service Name service ■ NIS+ ■ NIS If applicable, which name service should this system use? ■ DNS ■...
-
Page 122: Configure The Preinstalled Oracle Solaris 11 Operating System
119, use the following procedure to configure the preinstalled Oracle Solaris 11 operating system. If you are not already logged in to Oracle ILOM, log in either locally from a serial connection, or remotely from an Ethernet connection. “Connecting to Oracle ILOM” on page... - Page 123 - Graphics Adapter From the GRUB menu, you have 10 seconds to make a selection: If you are using the Oracle ILOM CLI, use the up/down arrow keys to select ■ the Serial Port (ttya) option and press Enter.
-
Page 124: Reinstalling The Oracle Solaris Operating System
125. Reinstalling the Oracle Solaris Operating System If you want to reinstall the Oracle Solaris 11 OS or install a different version of the Oracle Solaris OS, refer to the relevant Oracle Solaris installation guide. You can download software for the Oracle Solaris OS from the following sites: To download the Oracle Solaris 11 operating system, go to: ■... -
Page 125: Oracle Solaris 11 Operating System Documentation
Systems: Automated Installations That Boot From Media. Refer to the Sun Server X4-8 Product Notes for patch and other late-breaking information. For patches and patch installation instructions, go to the My Oracle Support web site at: https: //support.oracle.com Configuring the Preinstalled Oracle Solaris OS... - Page 126 Sun Server X4-8 Installation Guide • December 2015...
-
Page 127: Configuring The Preinstalled Oracle Vm 3.X Software
Preinstalled Oracle VM Server Compatiblitiy Requirements If you use the Oracle VM server software that is preinstalled on your system, you must ensure that it is compatible with the version of Oracle VM Manager that you use to manage your Oracle VM infrastructure. -
Page 128: Oracle Vm Configuration Worksheet
Oracle VM Configuration Worksheet Oracle VM Configuration Worksheet Before configuring the Oracle VM server, use the worksheet in this section to gather the information you need. Information for Configuration Description or Example Your Answers Oracle VM server root account Choose a root password; there are... - Page 129 To reset the server, use one of the following methods: ■ From the Oracle ILOM web interface, select Host Management > Power Control in ■ the navigation panel. Then, select Reset from the Select Action list box and click Save.
- Page 130 Oracle VM server-ovs serial console (xen-4.0.0 2.6.32.21-41ovs) As the configuration process continues, the following screen appears. Scroll down the screen and set and confirm the root password and the Oracle VM Agent password. Sun Server X4-8 Installation Guide • December 2015...
- Page 131 Configure the Preinstalled Oracle VM Server The prompts for the root and the Oracle VM Agent passwords are only displayed the Note - first time you boot the Oracle VM server. Follow the prompts to select the onboard network interface controller (NIC) to configure and enter other required configuration information related to the network.
-
Page 132: Oracle Vm Documentation
Oracle VM Documentation When all settings have been entered and saved, the system loads an Oracle VM Server console session as shown below. This completes the configuration of preinstalled Oracle VM Server to create a virtual operating system. Oracle VM Documentation For complete information about using Oracle VM, refer to the Oracle VM documentation at: http://www.oracle.com/technetwork/documentation/vm-096300.html... -
Page 133: Configuring The Preinstalled Oracle Linux Os
Configuring the Preinstalled Oracle Linux OS If you purchased an optional preinstalled Oracle Linux OS image, finish the installation by configuring the preinstalled software. The preinstalled OS image contains all of the necessary drivers for your server. The following table describes the tasks necessary for configuring the preinstalled Oracle Linux... -
Page 134: Configure The Preinstalled Oracle Linux Os
These instructions describe how to configure the preinstalled Oracle Linux on your server. If you are not already logged in to the server's Oracle ILOM, log in either locally from a direct serial connection, or remotely from an Ethernet connection. - Page 135 Are you sure you want to reset /System (y/n)? y Performing hard reset on /System From Oracle ILOM, start the host console using one of the following methods: From the Oracle ILOM web interface, click Remote Control > Launch Remote ■...
- Page 136 The Red Hat Compatible Kernel. For example: ■ Oracle Linux Server (2.6.32-279.el6.x86_64) Oracle recommends the use of Oracle Linux with the Unbreakable Enterprise Kernel for Note - all enterprise applications. Once an installation option has been selected, Linux starts. When done, you will see the Linux system login.
-
Page 137: Register And Update Your Oracle Linux Os
Linux software patches, updates and fixes, along with information on updates and support policies. If you are a licensed Oracle customer with an active Oracle Linux support subscription, you should receive an Oracle Linux CSI (customer support identifier) number. Use this number to register your server on ULN. - Page 138 Sun Server X4-8 Installation Guide • December 2015...
-
Page 139: Getting Server Firmware And Software
“Available Software Release Packages” on page 140 Access the firmware and software packages through “Accessing Firmware and Software” on page 141 Oracle System Assistant or My Oracle Support. Install firmware and software updates. “Installing Updates” on page 142 Firmware and Software Updates Firmware and software, such as hardware drivers and tools for the server, are updated periodically. -
Page 140: Firmware And Software Access Options
Each download contains firmware, drivers, or utilities. My Oracle Support has the same set of download types for this server family as shown in the following table. The same firmware and software can also be downloaded using Oracle System Assistant. -
Page 141: Accessing Firmware And Software
This section covers instructions for downloading or requesting software release files. You can use Oracle System Assistant to easily download and use the latest software release. For further information, see the Oracle x86 Administration Guide for X4 Series Servers at http:// www.oracle.com/goto/x86AdminDiag/docs. -
Page 142: Installing Updates
Installing Updates At the top of the page, click the Patches and Updates tab. The Patches and Updates screen appears. In the Search screen, click Product or Family (Advanced). The screen appears with search fields. In the Product field, select the product from the drop-down list. Alternatively, type a full or partial product name (for example, Sun Server X4-8) until a match appears. -
Page 143: Installing Hardware Drivers And Os Tools
For more information, refer to the Oracle Hardware Management Pack Documentation Library at: http://www.oracle.com/goto/ohmp/docs Oracle ILOM – Oracle ILOM and BIOS firmware are the only firmware that can be ■ updated using either the Oracle ILOM web interface or the command-line interface. - Page 144 Sun Server X4-8 Installation Guide • December 2015...
-
Page 145: Controlling System Power
■ “Power On Host Using the Power Button” on page 146 ■ “Power Host On and Off Using Oracle ILOM” on page 147 ■ Powering the Server On and Off Your server has three power states: power off, standby power, and full power. -
Page 146: Power Off Host Using The Power Button
■ “Power On Host Using the Power Button” on page 146 ■ “Power Host On and Off Using Oracle ILOM” on page 147 ■ Power Off Host Using the Power Button Locate the recessed Power button on the server front panel. -
Page 147: Power Host On And Off Using Oracle Ilom
This procedure provides web and command-line interface (CLI) instructions for a server service processor (SP). You can use Oracle Integrated Lights Out Manager (ILOM) to remotely power on or power off the Host. Data loss. An immediate shutdown abruptly closes all applications and files without Caution - saving changes. - Page 148 Power Host On and Off Using Oracle ILOM stop -f /SYSTEM: Turn off power to the host immediately. ■ start /SYSTEM: Turn on full power ■ Controlling Host Power, Oracle ILOM Configuration and Maintenance Guide. See Also ■ Sun Server X4-8 Installation Guide • December 2015...
-
Page 149: Troubleshooting Installation Issues
The Sun Server X4-8 Service Manual provides product-specific troubleshooting information. The Oracle x86 Server Diagnostics Guide (http://www.oracle.com/goto/x86AdminDiag/ docs) provides information about a wide variety of tools available for Oracle's x86 servers. Knowledge articles, white papers, and product updates are available through the Oracle Support portal: https://support.oracle.com... -
Page 150: Locating The Server Serial Number
Look on the front panel at the bottom left of the bezel. ■ Locate the yellow Customer Information Sheet (CIS) attached to your server Oracle Sun ■ Server X4-8 packaging. This sheet includes the serial number. -
Page 151: Index
145 environmental requirements, 32 standby, 145 Ethernet cables, connecting, 50 anti-static wrist strap, 34 Ethernet connection logging in to Oracle ILOM, 55 external cables, connecting, 50 back panel connectors, 19, 49 features, 19 fan module service action required LED, 18... -
Page 152: Sun Server X4-8 Installation Guide • December
13 power button, 146 full, 145 standby, 145 state, 145 My Oracle Support, using to download software power cables, connecting, 50 release packages, 141 power dissipation numbers meaning of, 32 power supply fail indicator location of, 19... - Page 153 Index electrical, 32 environmental, 32 physical, 31 standby power mode, 145 system status indicators front panel, 15, 15 Unified Extensible Firmware Interface (UEFI) boot mode description, 27 overview, 27 volume, creating with Oracle System Assistant, 83...
- Page 154 Sun Server X4-8 Installation Guide • December 2015...
Need help?
Do you have a question about the sun X4-8 and is the answer not in the manual?
Questions and answers