Table of Contents
Advertisement
Quick Links
Advertisement
Table of Contents

Subscribe to Our Youtube Channel
Related Manuals for Lightware MMX6x2-HT200


Summary of Contents for Lightware MMX6x2-HT200
- Page 1 MMX6x2-HT200 MMX6x2-HT210 MMX6x2-HT220 User’s manual...
-
Page 3: Safety Instructions
MMX6x2-HT User’s Manual SAFETY INSTRUCTIONS Class I apparatus construction. This equipment must be used with a mains power system with a protective earth connection. The third (earth) pin is a safety feature, do not bypass or disable it. The equipment should be operated only from the power source indicated on the product. To disconnect the equipment safely from power, remove the power cord from the rear of the equipment, or from the power source. -
Page 4: Table Of Contents
Automatically launched actions – the Event manager ........... 28 4.5.1. Matrix cloning – how to backup and restore the full configuration ......28 4.5.2. 4.5.3. Remote firmware upgrade of connected Lightware devices ......... 28 INSTALLATION AND OPERATION ................... 29 5.1........................29 OWERING ON 5.2. - Page 5 Outputs menu ......................42 5.4.6. Signal info menu ....................42 5.4.7. Device Presets menu ..................... 43 5.4.8. Info menu ....................... 43 SOFTWARE CONTROL – USING LIGHTWARE DEVICE CONTROLLER ...... 44 6.1...................... 44 NSTALL AND UPGRADE 6.2..................45 STABLISHING THE CONNECTION 6.3.
- Page 6 7.2.1. View product type ....................67 7.2.2. Query control protocol ................... 67 7.2.3. View firmware version of the CPU ................. 68 7.2.4. Connection test ...................... 68 7.2.5. View serial number ....................68 7.2.6. Compile time ......................68 7.2.7. View installed board(s) ..................68 View firmware for all controllers’...
- Page 7 MMX6x2-HT User’s Manual 8.5.13. Unmute an output ....................90 8.5.14. Lock an output ...................... 91 8.5.15. Unlock an output ....................91 8.5.16. HDCP setting (input port) ..................91 8.5.17. HDCP setting (output port) ................... 91 8.5.18. Test pattern generator ..................92 8.5.19.
-
Page 8: Introduction
The matrix is supplied with 2 pcs. rack ears which are mounted on the device. 1.2. Description Lightware’s newest development, the MMX6x2-HT family, responds to a need of a practical standalone matrix switcher specifically designed for meeting room and classroom environments. -
Page 9: Model Comparison
1.4. Model comparison Analog Analog HDMI HDMI Model audio audio input input output output input output MMX6x2-HT200 MMX6x2-HT210 MMX6x2-HT220 Table 1-1. I/O connectors comparison 1.5. Typical application Figure 1-1. Typical application of MMX6x2-HT220 Section 1. Introduction Page 9 / 119... -
Page 10: Features
USB control – Easily accessible front panel USB port in order to have a quick connection to the matrix, and control with Lightware Device Controller Software. Built-in power supply – Accepting AC voltages from 100 to 240 Volts with 50 or 60 Hz line frequency on a standard IEC connector. -
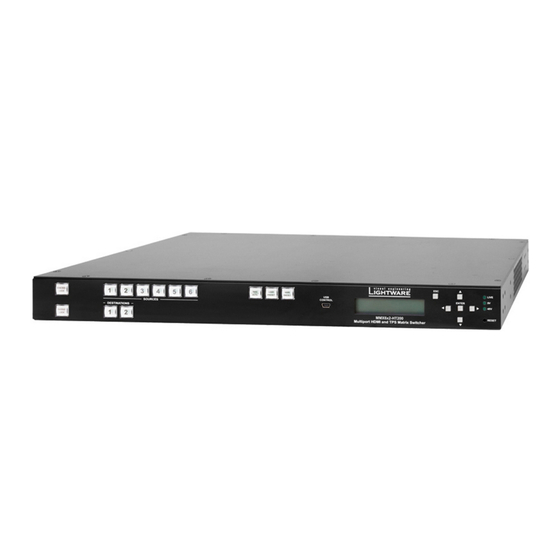
Page 11: Controls And Connections
Source buttons have three functions: to select an input, to select a preset number, and to view the selected input’s state (Take mode). USB control USB mini B-type connection for local control functions (e.g. with Lightware Device Controller software). Display 2x16-character LCD display with backlight for menu operations and settings. -
Page 12: Rear View
2.2. Rear view AC connector TPS inputs Audio inputs Audio outputs On/Off HDMI inputs TPS outputs TPS Ethernet RS-232 port HDMI outputs AC connector Standard IEC power connector. Accepts 100 to 240 Volts, 50 or 60 Hz power sources. On/Off The matrix can be switched on/off by the power switch. -
Page 13: Electrical Connections
MMX6x2-HT User’s Manual 2.3. Electrical connections 2.3.1. HDMI input and output ports HDMI Type A receptacle HDMI Type A Plug Signal Signal TMDS Data2+ TMDS Clock Shield TMDS Data2 Shield TMDS Clock– TMDS Data2– TMDS Data1+ Reserved TMDS Data1 Shield TMDS Data1–... -
Page 14: Tps Input/Output Ports
2.3.4. TPS input/output ports The matrix provides standard RJ45 connectors for TPS input and output ports. RJ45 receptacle RJ45 plug The recommended termination is based on TIA/EIA T 568 A or TIA/EIA T 568 B standards. TIA/EIA T568 A color and name TIA/EIA T568 B color and name white/green stripe... -
Page 15: Technologies
EDID has been changed. You need to restart your source to make it read out the EDID again. „I have an MMX6x2-HT220 and I’m using a Lightware factory preset EDID. I Problem: would like to be able to choose from different resolutions, but my source allows only one resolution.”... -
Page 16: Advanced Edid Management
3.4. HDCP management Lightware Visual Engineering is a legal HDCP adopter. Several functions have been developed which help to solve HDCP related problems. Complex AV systems often have both HDCP and non-HDCP components. The matrix allows transmitting HDCP encrypted and unencrypted signals. -
Page 17: Real Life Examples
MMX6x2-HT User’s Manual 3.4.2. Real life examples HDCP compliant sink Figure 3-2. HDCP-compliant sink All the devices are HDCP-compliant, no manual setting is required, both protected and unprotected content is transmitted and displayed on the sink. Not HDCP-compliant sink 1. Figure 3-3. -
Page 18: Tps Matrix Concept
MMX6x2-HT is the first stand-alone matrix switcher with HDBaseT (TPS) technology in Lightware’s product range. The matrix gives the possibility to route many kinds of signal formats including TPS and other available interfaces. This chapter is about to present the features and limitations of these interfaces. -
Page 19: Power Over Ethernet (Poe)
MMX6x2-HT User’s Manual 4.1.2. Power over Ethernet (PoE) TPS input and output ports are able to supply other HDBase-T compliant devices over the TPS lines which are PoE-compliant as well. In this case, the connected transmitter or receiver does not require a local power supply. ATTENTION! The Ethernet ports do not support PoE. -
Page 20: Audio Interface
4.2. Audio interface 4.2.1. Audio inputs and modes The matrix can receive audio from two type of sources: Embedded (4x HDMI and 2x HDBaseT in) and Analog balanced stereo audio sources (4x). The audio coming from the analog inputs can be assigned to any video input or output. The volume/gain levels of the analog audio input/output ports are adjustable. -
Page 21: Video Interface
MMX6x2-HT220: 2x HDMI out, 2x TPS out (HDMI out1 and out2 mirrored) Figure 4-4. MMX6x2-HT port diagram * Not available on MMX6x2-HT200. ** Available on output 1 on MMX6x2-HT210 and on output 1 & 2 on MMX6x2-HT220. Section 4. TPS matrix concept... -
Page 22: The Autoselect Feature
4.3.2. The Autoselect feature There are three types of Autoselect as follows: First detect mode: Selected input port is kept connected to the output while it has an active signal. Priority detect mode: Always the highest priority active input is selected to transmit. ... - Page 23 MMX6x2-HT User’s Manual Input selection automatically – example The concept If a video signal of the Blu-ray player is present on the HDMI input of the matrix, the source will be automatically switched to the TPS output. If the video signal of the PC is also present on the other HDMI input of the matrix, it will be switched to the TPS output.
-
Page 24: Controlling Features (Matrix Control And Third-Party Devices)
4.4. Controlling features (matrix control and third-party devices) The interfaces of the MMX6x2-HT can be used to install the matrix at any place of a complex A/V system. Besides, the matrix is able to handle controlling functions as well. This chapter is about to present the possibilities through three simple layout examples. System control via local Ethernet (example) The following ways are available for controlling the devices: ... -
Page 25: Ir Interface
MMX6x2-HT User’s Manual 4.4.1. IR interface Technical background The Infrared signal transmission is similar to the serial data communication. However the matrix does not contain dedicated IR I/O connection, the TPS interface can transmit/receive IR signal in pronto HEX format. Figure 4-6. -
Page 26: Serial Interface
4.4.2. Serial interface Technical background Serial data communication can be established via the local RS-232 port (Phoenix connector) or via the TPS lines. The RS-232 ports – which are connected to the microcontroller – can be configured separately (e.g. if the Baud rates are different, the microcontroller does the conversion automatically between the ports). -
Page 27: Usb Control Interface
The device can be controlled over front panel USB mini B-type connector. This interface only supports LW3 protocol. The interface can be used to establish a connection to Lightware Device Controller software. Section 4. TPS matrix concept Page 27 / 119... -
Page 28: Further Built-In Features
The Event manager feature means that the device can sense changes on its ports and is able to react according to the pre-defined settings. Lightware Device Controller contains a user-friendly software tool and allows to create Events by defining a Condition and an Action. -
Page 29: Installation And Operation
MMX6x2-HT User’s Manual 5. Installation and operation 5.1. Powering on Connect the power cord to the IEC standard power input connector. Switch on the matrix by the power switch on the rear panel. During the initial self-test and loading of the latest settings ‘Booting…’ appears on the LCD screen. -
Page 30: Mounting With Mounting Bracket V2
5.2.2. Mounting with Mounting bracket V2 ATTENTION! Two pieces of Mounting bracket V2 will be necessary for this kind of installation which can be purchased separately. The matrix can be easily mounted under the desk with Mounting bracket V2. This mounting option means that the front panel of the matrix is parallel with the surface. -
Page 31: Source And Destination Buttons
MMX6x2-HT User’s Manual 5.3.3. Source and destination buttons Normal I/O ports have dedicated buttons on the front panel. These buttons are labeled with numbers and have a backlight to indicate active or selected ports. These are referred as Source and Destination buttons. 5.3.4. -
Page 32: Switching
5.3.5. Switching Changing connections in TAKE mode Step 1. Press and release the desired source button. The pressed button and all destination buttons which are currently connected to the source will light up. Step 2. Press and release the desired destination button or buttons which have to be connected to the selected source. -
Page 33: Switching Operations Flowchart
MMX6x2-HT User’s Manual 5.3.6. Switching operations flowchart TAKE mode same button all outputs pressed preselected twice viewing select or source button previewing source deselect pressed connections connections destinations nothing pressed for 3 sec idle connections TAKE button TAKE realized pressed mode nothing pressed for 3 sec destination... -
Page 34: Preset Operations
5.3.7. Preset operations The matrix has 6 user programmable presets. Each preset stores a configuration regarding the crosspoint and mute state for all inputs/outputs. All presets are stored in a non-volatile memory; the router keeps presets even in the case of power down. Memory numbers are assigned to source buttons. -
Page 35: Output Lock
MMX6x2-HT User’s Manual 5.3.8. Output lock Locking a destination means, that no input change or muting can be executed on that particular destination. This feature prevents an accidental switching to the locked destination in the case of an important signal. Destinations can be independently locked or unlocked. -
Page 36: Front Panel Operations - Quick Summary
Lock an output in AUTOTAKE mode Step 1. Press and release the desired destination button. Now the selected destination button and the currently configured source button light up (view mode). Step 2. Press and release the Output Lock button; it lights up in red, and lock function is activated at once. -
Page 37: Front Panel Lcd Menu Operation
MMX6x2-HT User’s Manual 5.4. Front panel LCD menu operation The matrix has an LCD menu and navigation buttons which make the possibility to change certain settings and display basic information via the front panel. Navigation Front panel LCD has 2 lines and 16 characters in each line. The name of the menu item is always displayed in the first line. -
Page 38: Settings Menu
5.4.1. Settings menu Control RS-232 settings The local RS-232 port settings are available in the front panel menu. Baud rate Step 1. Navigate to Settings / Control RS232 / Baudrate ¹Control RS232 submenu and press the enter button. »Baudrate º... -
Page 39: Network Settings Menu
MMX6x2-HT User’s Manual Enter bootload mode The firmware of the device can be upgraded in Bootload mode. If the working mode of the device is not switched to bootload mode automatically, the mode can be also switched manually. ¹Settings Step 1. Navigate to Settings / Enter Bootload Mode submenu ½Enter bootloaº... - Page 40 Setting the Subnet mask Step 1. Navigate to Network Settings / Subnet mask submenu ¹Network and press the enter button. ½Subnet mask º Step 2. To change the numbers press the enter button and ¹Subnet mask: use left ◄ and right ► buttons to place the cursor to 255.255.255.0½...
-
Page 41: Health Status
MMX6x2-HT User’s Manual 5.4.3. Health Status INFO The following values are stored in a non-volatile memory and will not be erased during firmware upgrade. Voltages The voltage values are listed measured internally in the matrix. Temperatures The temperature values are listed measured internally in the matrix. Operational time The following time values are measured during operation: ... -
Page 42: Outputs Menu
5.4.5. Outputs menu HDMI outputs (HDMIOUT1 and HDMIOUT2) HDMI Mode: Auto / DVI / HDMI. The setting determines the output signal type. HDCP Mode: Auto / Always Audio Mode: Passthrough / AUX1 / AUX2 / AUX3 / AUX4. The desired audio can be selected to the video on the given HDMI output, thus, the setting will override the input setting. -
Page 43: Device Presets Menu
All presets are stored in a non-volatile memory; the matrix keeps presets even in the case of power down. This is the same as using the backup-restore feature of Lightware Device Controller software (see section 6.10 on page 64), but in this case, the settings are stored in the matrix. -
Page 44: Software Control - Using Lightware Device Controller
The matrix can be controlled by a computer through the USB-, RS-232- or Ethernet port using Lightware Device Controller. The software can be installed on a Windows PC or MAC OS X. The application and the User’s manual can be downloaded from www.lightware.eu. -
Page 45: Establishing The Connection
Connect button. ATTENTION! When the device is connected via the local RS-232 port, make sure that Control mode and LW3 protocol are set on the serial port. Section 6. Software control – Using Lightware Device Controller Page 45 / 119... -
Page 46: Crosspoint Menu
A/V signal (such as HDMIOUT2 and TPSOUT2), the selected input will be switched to both output ports. Advanced view Displaying Advanced view page, showing the Terminal window and the LW3 protocol tree. Section 6. Software control – Using Lightware Device Controller Page 46 / 119... -
Page 47: Port Properties And Settings
ATTENTION! Since the output ports are mirrored, the lock/unlock setting is valid on both outputs; e.g. if HDMIOUT1 is locked, TPSOUT1 is also locked. Section 6. Software control – Using Lightware Device Controller Page 47 / 119... -
Page 48: Autoselect Settings
Frame detector button. Figure 6-2. Frame detector window Lightware’s frame detector function works like a signal analyzer and makes possible to determine the exact video format that is present on the port, thus helps to identify many problems. E.g. actual timing parameters may differ from the expected and this may cause some displays to drop the picture. -
Page 49: Test Pattern Generator (No Sync Screen) (Hdmiout, Tpsout)
The Mode can be set individually on each port, but the Clock source and the Pattern are common for the mirrored output port. E.g. the Clock source and Pattern settings are the same on O1-O3 and O2-O4 output ports. Section 6. Software control – Using Lightware Device Controller Page 49 / 119... -
Page 50: Cable Diagnostics (Tpsin, Tpsout)
1 pixel in every 80 seconds when the transmitted signal is 1920x1080p @ 60 Hz. Section 6. Software control – Using Lightware Device Controller Page 50 / 119... -
Page 51: Tps Mode Settings (Tpsin, Tpsout)
Auto mode is selected. Power 5V: Auto / Always on / Always off The setting lets the source and the sink devices be connected – independently from the transmitted signal. Section 6. Software control – Using Lightware Device Controller Page 51 / 119... -
Page 52: Preset Settings
Rename button. The following characters are allowed when naming: Letters (A-Z) and (a-z) and numbers (0-9). ATTENTION! The max. length of a preset name can be 8 characters. Section 6. Software control – Using Lightware Device Controller Page 52 / 119... -
Page 53: Edid Menu
Opening Advanced Selecting none of the Edit EDID Editor with the memory places in the Select None selected EDID right panel Opening Easy EDID Create Creator Section 6. Software control – Using Lightware Device Controller Page 53 / 119... -
Page 54: Sources And Destinations
Step 3. Browse the file in the opening window then press the Open button. Browsed EDID is imported into the selected User memory. ATTENTION! The imported EDID overwrites the selected memory place even if it is not empty. Section 6. Software control – Using Lightware Device Controller Page 54 / 119... -
Page 55: Deleting Edid(S)
The software resolves the raw EDID and displays it as readable information to the user. The modified EDID can be saved to the User memory. Figure 6-9. Advanced EDID Editor Section 6. Software control – Using Lightware Device Controller Page 55 / 119... -
Page 56: Control Menu
Basic information is shown about the network communication; the port names can be changed and each Ethernet port can be enabled/disabled except the Control Ethernet port. Figure 6-11. Ethernet tab Section 6. Software control – Using Lightware Device Controller Page 56 / 119... -
Page 57: Infra Tab
TPS port to which the given IR port belongs. Each IR port can be enabled/disabled and the Command injection port number can be changed. Figure 6-13. IR ports submenu Section 6. Software control – Using Lightware Device Controller Page 57 / 119... -
Page 58: Event Manager - Improved
There is a grey bar on the left of the Event panel in each line. If a condition and an action are set and the Event is enabled, the bar is displayed in green. Figure 6-14. Event manager tab Section 6. Software control – Using Lightware Device Controller Page 58 / 119... -
Page 59: The Event Editor
The Wizard, the Advanced or the Link tool is available to set the action. The parameters and settings are displayed below the buttons. Action test The set action can be tested to see the working method in the practice. Section 6. Software control – Using Lightware Device Controller Page 59 / 119... -
Page 60: Create Or Modify An Event
Step 4. Select the desired Condition and press the Apply button to store the settings. ATTENTION! The structure of the Action panel is the same as the Condition; see the right panel. Section 6. Software control – Using Lightware Device Controller Page 60 / 119... -
Page 61: Special Tools And Accessories
Show advanced expressions option is a useful tool when you look for the path or value of a property but just the expression is displayed. The option is available in the Event list window or when Link tool is used. Section 6. Software control – Using Lightware Device Controller Page 61 / 119... -
Page 62: Clear One Or More Event(S)
6.9.1. Status tab General information is shown on this tab, such as device label, part number, serial number and hardware health, voltage and temperature values. Figure 6-16. Status tab Section 6. Software control – Using Lightware Device Controller Page 62 / 119... -
Page 63: Network Tab
The connection will be terminated and the device is rebooted. Factory default values are listed in section 10.6 on page 116. Reboot button The device can be restarted; the connection will be terminated Section 6. Software control – Using Lightware Device Controller Page 63 / 119... -
Page 64: Configuration Cloning (Backup Tab)
6.10. Configuration cloning (Backup tab) The configuration cloning of Lightware LW3 devices is a simple method that eliminates the need to repeatedly configure certain devices to have identical (non-factory) settings. If the devices are installed in the same type of system multiple times then it is enough to set up only one device to fit the user’s needs and then copy those settings to the others, thus... -
Page 65: Network Settings
The cloning is successful when the backup file is downloaded from the same type of source device as the destination device. E.g. MMX6x2-HT200 contains fewer ports than HT220. If the backup file is downloaded from the HT220 and uploaded to an HT200 matrix, that would result in errors when checking and uploading. -
Page 66: Advanced View
The button of the Terminal window is available on the bottom of the Device Discovery page. Thus, the terminal can be displayed in a separate window next to the LDC main window. Section 6. Software control – Using Lightware Device Controller Page 66 / 119... -
Page 67: Lw2 Programmers' Reference
User’s Manual 7. LW2 programmers’ reference The device can be controlled through a reduced command set of LW2 protocol commands to ensure the compatibility with other Lightware products. The supported LW2 commands are described in this chapter. 7.1. LW2 protocol description The device accepts commands surrounded by curly brackets - { } - and responds data surrounded by round brackets - ( ) - only if a command was successfully executed. -
Page 68: View Firmware Version Of The Cpu
7.2.3. View firmware version of the CPU Description: View the CPU firmware revision. Format Example → {f} Command {f} ← (FW:1.0.0b1 r2270)CrLf Response (FW:<FW_VER><s>)CrLf Legend: <FW_VER> is the firmware version. It is followed by <s> string which may indicate special versions. <s>=r indicates standard version. 7.2.4. -
Page 69: Restart Matrix Router
MMX6x2-HT User’s Manual 7.2.9. Restart matrix router Description: The device can be restarted without unplugging power. Format Example → {RST} Command {RST} Response Explanation: The device reboots; no response is sent in this case. 7.2.10. Query health status Description: Internal voltages and measured temperature values are shown. Format Example →... -
Page 70: Unmute Specified Output
7.3.3. Unmute specified output Description: Unmute output <out>. Format Example → {+01} Command {+<out>} Response (0MT<out²>)CrLf ← (0MT01)CrLf Explanation: O1 port is unmuted. INFO Unmuting an output makes the previous connection active as the crosspoint’s state has not been changed with the muting command, only the output was disabled. 7.3.4. -
Page 71: View Crosspoint Size
MMX6x2-HT User’s Manual 7.3.7. View crosspoint size Description: Shows the physical crosspoint size. Format Example → {getsize} Command {getsize} ← (SIZE=6x4)CrLf Response (SIZE=<size>)CrLf Explanation: The device reports that it has a video crosspoint with 6 inputs and 4 outputs. 7.3.8. Batch switch outputs Description: The device is capable of switching multiple outputs exactly at the same time. -
Page 72: Change The Video Input Priorities
7.3.10. Change the video input priorities Description: The settings of video input priority can be changed as follows. Format Example1 → {prio_v1=1;0;2;3;4;5} Command {PRIO_V<out>=<in1_prio>; <in2_prio>;…;<in _prio>} ← (PRIO_V1=1;0;2;3;4;5)CrLf Response (PRIO_V<out>=<in1_prio>; <in2_prio>;…;<in _prio>)CrLf Legend: <out>: The output port number: V1/V3 and V2/V4. <in1_prio>…<inn_prio>: Input ports’... -
Page 73: Set The Subnet Mask
MMX6x2-HT User’s Manual 7.4.3. Set the subnet mask Description: Subnet mask can be set as follows. Format Example → {ip_netmask=255.255.255.0} {IP_NETMASK=<subnet_ Command mask>} ← (IP_NETMASK=255.255.255.0)CrLf Response (IP_NETMASK=<subnet_ mask>)CrLf Legend: <subnet_mask>: Four decimal octets separated by dots. INFO The subnet mask can be queried by typing the “ip_netmask=?” command. The response contains the fix IP subnet mask value that is stored in the device even if DHCP is enabled;... -
Page 74: Set The Status Of Ethernet Ports
7.4.7. Set the status of Ethernet ports Description: The Ethernet can be enabled (1) or disabled (0) on each port as follows: Format Example → {eth_enable=1;1;1;1;1;1;0;0)CrLf Command {ETH_ENABLE=<cpu>; <ctrl_tps_link>;<ctrl_lan>; <tps_eth>;<tpsin1_eth>; <tpsin2_eth>;<tpsout1_eth>; <tpsout2_eth>CrLf } ← (ETH_ENABLE=1;1;1;1;1;1;0;0)CrLf Response (ETH_ENABLE=<cpu>; <ctrl_tps_link>;<ctrl_lan>; <tps_eth>;<tpsin1_eth>; <tpsin2_eth>;<tpsout1_eth>; <tpsout2_eth>)CrLf ATTENTION! All ports’... - Page 75 MMX6x2-HT User’s Manual Network configuration See in Operation Command chapter Query the current IP status 7.4.1 {IP_STAT=?} Set the IP address 7.4.2 {IP_ADDRESS=<type>;IP_ADDRESS} Set the subnet mask 7.4.3 {IP_NETMASK=<subnet_mask>} Set the gateway address 7.4.4 {IP_GATEWAY=<gateway_address>} Set the TCP/IP port 7.4.5 {LW2_PORT=<port_nr>} Query the status of Ethernet ports 7.4.6...
-
Page 76: Lw3 Programmers' Reference
8. LW3 Programmers’ reference 8.1. Overview Lightware 3 (LW3) protocol is used by the 25G hybrid matrix, the MODEX family and the new series of Lightware TPS products, including the MMX6x2-HT series matrices. The protocol (LW3) is ASCII-based and all commands are terminated with a carriage return (Cr, ‘\r’) and line feed (Lf, ‘\n’) pair. - Page 77 MMX6x2-HT User’s Manual Following example presents the structure of the tree traversal: Path of the nodes: n-/node1 node1 n-/node1/node11 node11 n-/node1/node12 n-/node2 node12 n-/node2/node21 node2 n-/node2/node21/node211 n-/node3 node21 node211 node3 Figure 8-1. Tree structure of the nodes Property The ‘property’ in the LW3 protocol is basically a leaf, which has a well-defined value. ...
-
Page 78: Escaping
Method The ‘method’ in the LW3 protocol is also a leaf. It cannot have a value, such as the properties, but it can be invoked with a parameter with the help of a special ‘CALL’ command. A method cannot have child nodes or child methods. It is always a leaf. ... -
Page 79: Error Messages
MMX6x2-HT User’s Manual 8.1.3. Error messages There are several error messages defined in the LW3 protocol, all of them have a unique error number. Format: XE[primitive] %EYYY: [Error message] Legend: X can be: ‘-’: syntax error. Cannot parse the command at all. ‘n’: node error. -
Page 80: The Tree Structure Of Mmx6X2-Ht Matrices
8.2. The tree structure of MMX6x2-HT matrices The /MEDIA node is used by the LDC to connect input ports to output ports on different layers. Each subnode of /MEDIA is representing a layer. The layers have their own crosspoint to define connections between the ports associated with the layer, all of them are represented by a specific node (the Audio layer is an exception as... - Page 81 MMX6x2-HT User’s Manual Get all properties and methods of a node Get all properties and methods of a node, with one GET command and asterisk character. Command format: GET[nodePath].* Response format: (for properties) pX[nodePath].[propertyName]=[parameter] Legend: X can be: ‘r’: read-only ‘w’: read-write Response format: (for methods)
-
Page 82: Set Command
8.3.2. Set command The setter command can be used to modify the value of a property. Command format: SET[nodePath].[propertyName]=[newPropertyValue] Response format: The response for setting a property to a new value is the same as the response for the ‘GET’ command. The value in the response is the new value if the execution of the ‘SET’ command was successful, otherwise the unmodified ‘old value’... -
Page 83: Manual
MMX6x2-HT User’s Manual Error response format: If there were errors during the execution, an error message is received, which follows the method name. mE[nodePath]:[methodName]%EXXX:Error message Example: > CALL/EDID:switch(F46:R1) < mE/EDID:switch %E004:Invalid value 8.3.4. Manual For every node, property and method in the tree there is a manual. The manual is a human- readable text that describes the syntax and provides a hint for how to use the primitives. -
Page 84: Subscription
Example: > 1103#GET/MEDIA/UART.* < {1103 < pr/MEDIA/UART.PortCount=5 < pr/MEDIA/UART.PortUI=P1:403;P2:404:P3:404;P4:404;P5:404 < pr/MEDIA/UART.P1=LOCAL < pr/MEDIA/UART.P2=TPSIN1 < pr/MEDIA/UART.P3=TPSIN2 < pr/MEDIA/UART.P4=TPSOUT1 < pr/MEDIA/UART.P5=TPSOUT2 < } INFO The lines of the signature are also Cr and Lf terminated. 8.3.6. Subscription A user can subscribe to any node. Subscribe to a node means that the user will get a notification if any of the properties of the node is changed. -
Page 85: Notifications About The Changes Of The Properties
MMX6x2-HT User’s Manual Unsubscribe from a node Command format: CLOSE[nodePath] Response format: c-[nodePath] Example: > CLOSE/MEDIA/VIDEO < c-/MEDIA/VIDEO Unsubscribe from multiple nodes Command format: CLOSE[nodePath]/* Response format: c-[nodePath]/* Example: > CLOSE/MEDIA/VIDEO/* < c-/MEDIA/VIDEO/* 8.3.7. Notifications about the changes of the properties When the value of a property is changed and the user is subscribed to the node, which the property belongs to, an asynchronous notification is generated. -
Page 86: Formal Definitions
8.4. Formal definitions Method parameters and property values are specified in a modified version of Backus Naur Form (BNF). The syntax is the following: “literal” literals are quoted <expression1>|<expression2> vertical bars denote alternatives [<expression>] expressions in square brackets are optional <number>*[<expression>] expression is repeated at least <number>... -
Page 87: Query The Status Of Source Ports
MMX6x2-HT User’s Manual 8.5.3. Query the status of source ports Command format GET/MEDIA/VIDEO/XP.SourcePortStatus Response format pr/MEDIA/VIDEO/XP.SourcePortStatus=<I1_state>;<I2_state>;…;<In_state> The response contains 4-byte long HEX codes separated by semicolons, which show the state of the input ports. Example > GET/MEDIA/VIDEO/XP.SourcePortStatus < pr/MEDIA/VIDEO/XP.SourcePortStatus=T000A;T000A;T000A;T000A; T000A;T00EF Legend Byte 1 Byte 2... -
Page 88: Query The Video Autoselect Settings
8.5.4. Query the video Autoselect settings Command format GET/MEDIA/VIDEO/XP.DestinationPortAutoselect Response format pr/MEDIA/VIDEO/XP.DestinationPortAutoselect=<O _set>„;”<O _set>„;”…”;”<O _set> The response shows the settings of each output one by one. Legend <O _set> Two-letter code of the Autoselect settings: Letter Explanation Autoselect is enabled letter Autoselect is disabled First detect mode: the first active video input is selected. -
Page 89: Changing The Input Port Priority
MMX6x2-HT User’s Manual Example > GET/MEDIA/VIDEO/XP.PortPriorityList < pr/MEDIA/VIDEO/XP.PortPriorityList= 5,4,3,2,1,0;0,1,2,3,4,5; 5,4,3,2,1,0;0,1,2,3,4,5 Explanation There are four outputs, so there are four groups listed in the response (divided by semicolons) and each group (list) contains six priority numbers. The priority list of O1 and O3 is common, such as the list of O2 and O4. -
Page 90: Unmute An Input Port
8.5.9. Unmute an input port Command format CALL/MEDIA/VIDEO/XP:unmuteSource(<I >) Response format mO/MEDIA/VIDEO/XP:unmuteSource Example > CALL/MEDIA/VIDEO/XP:unmuteSource(I1) < mO/MEDIA/VIDEO/XP:unmuteSource 8.5.10. Lock an input port Command format CALL/MEDIA/VIDEO/XP:lockSource(<I >) Response format mO/MEDIA/VIDEO/XP:lockSource Example > CALL/MEDIA/VIDEO/XP:lockSource(I1) < mO/MEDIA/VIDEO/XP:lockSource 8.5.11. Unlock an input port Command format CALL/MEDIA/VIDEO/XP:unlockSource(<I >) Response format... -
Page 91: Lock An Output
MMX6x2-HT User’s Manual 8.5.14. Lock an output Command format CALL/MEDIA/VIDEO/XP:lockDestination(<O >) Response format mO/MEDIA/VIDEO/XP:lockDestination Example > CALL/MEDIA/VIDEO/XP:lockDestination(O1) < mO/MEDIA/VIDEO/XP:lockDestination 8.5.15. Unlock an output Command format CALL/MEDIA/VIDEO/XP:unlockDestination(<O >) Response format mO/MEDIA/VIDEO/XP:unlockDestination Example > CALL/MEDIA/VIDEO/XP:unlockDestination(O1) < mO/MEDIA/VIDEO/XP:unlockDestination 8.5.16. HDCP setting (input port) HDCP capability can be enabled/disabled on the input ports, thus, non-encrypted content can be seen on a non-HDCP compliant display. -
Page 92: Test Pattern Generator
8.5.18. Test pattern generator The output ports can send a special image towards the sink devices for testing purposes. The setting is available on output ports with the below-listed parameters. ATTENTION! The Mode can be set individually on each port, but the Clock source and the Pattern settings are common on the mirrored output ports (e.g. -
Page 93: Tps Mode Settings On Tps Ports
MMX6x2-HT User’s Manual Test pattern Command format SET/MEDIA/VIDEO/<On>.TpgPattern=<pattern> Response format pw/MEDIA/VIDEO/<On>.TpgPattern=<pattern> Parameters <pattern> GREEN BLUE BLACK WHITE RAMP CHESS CYCLE Cycle setting means all the patterns are changed sequentially approx. in every 2 seconds. Example > SET/MEDIA/VIDEO/O1.TpgPattern=GREEN < pw/MEDIA/VIDEO/O1.TpgPattern=GREEN 8.5.19. TPS mode settings on TPS ports Command format SET/SYS/MB/<TPSINn>|<TPSOUTm>/REMOTE.tpsModeSetting=A|H|L|1|2 Response format... -
Page 94: Audio Port Settings
8.6. Audio port settings 8.6.1. Signal source selection Command format SET/MEDIA/VIDEO/<In>|<On>.AudioMode=0|1|2|3|4 Response format pw/MEDIA/VIDEO/<In>|<On>.AudioMode=0|1|2|3|4 Example > SET/MEDIA/VIDEO/I1.AudioMode=1 < pw/MEDIA/VIDEO/I1.AudioMode=1 Parameters INFO For more information about the audio, capabilities see section 4.2.2 on page 22. INFO The setting is common on the mirrored outputs and available on the HDMI output ports. 8.6.2. -
Page 95: Analog Audio Output Level Settings
MMX6x2-HT User’s Manual Gain Command format SET/MEDIA/AUDIO/<In>.Gain=<level> Response format pw/MEDIA/AUDIO/<In>.Gain=<level> Parameters <level> Sets the input gain between 0 dB and 21 dB in step of 0.75 dB. The value is rounded down if necessary to match the step value. Example >... -
Page 96: Port Configuration
Gain Command format SET/MEDIA/AUDIO/<On>.Gain=<level> Response format pw/MEDIA/AUDIO/<On>.Gain=<level> Parameters <level> Sets the output gain which can be 0, 1, 2 or 3 dB. The value is rounded down if necessary to match with the step value. Example > SET/MEDIA/AUDIO/O5.Gain=2 < pw/MEDIA/AUDIO/O5.Gain=2 Mute / Unmute Command format SET/MEDIA/AUDIO/<On>.MuteSetting=true|false... -
Page 97: Baud Rate Setting
MMX6x2-HT User’s Manual 8.7.2. BAUD rate setting Command format SET/MEDIA/UART/<Pn>.Baudrate=0|1|2|3|4|5|6|7 Response format pw/MEDIA/UART/<Pn>.Baudrate=0|1|2|3|4|5|6|7 Parameters .Baudrate BAUD rate value 4800 7200 9600 14400 19200 38400 57600 115200 Example > SET/MEDIA/UART/P1.Baudrate=2 < pw/MEDIA/UART/P1.Baudrate=2 8.7.3. Databit setting Command format SET/MEDIA/UART/<Pn>.DataBits=8|9 Response format pw/MEDIA/UART/<Pn>.DataBits=8|9 Example >... -
Page 98: Rs232 Operation Mode
8.7.6. RS232 operation mode Command format SET/MEDIA/UART/<Pn>.Rs232Mode=0|1|2 Response format pw/MEDIA/UART/<Pn>.Rs232Mode=0|1|2 Parameters .Rs232Mode RS-232 operation mode Disconnect Control Command injection Example > SET/MEDIA/UART/P2.Rs232Mode=1 < pw/MEDIA/UART/P2.Rs232Mode=1 Command injection mode Command format SET/MEDIA/UART/<Pn>.CommandInjectionEnable=true|false Response format pw/MEDIA/UART/<Pn>.CommandInjectionEnable=true|false Example > SET/MEDIA/UART/P2.CommandInjectionEnable=true < pw/MEDIA/UART/P2.CommandInjectionEnable=true ATTENTION! The Command injection status is stored in another read-only property which is True if both above mentioned properties are set to the proper state;... -
Page 99: Network Configuration
MMX6x2-HT User’s Manual 8.8. Network configuration 8.8.1. Query the DHCP state Command format GET/MANAGEMENT/NETWORK.DhcpEnabled Response format pw/MANAGEMENT/NETWORK.DhcpEnabled=true|false Example > GET/MANAGEMENT/NETWORK.DhcpEnabled < pw/MANAGEMENT/NETWORK.DhcpEnabled=true 8.8.2. Change the DHCP state Command format SET/MANAGEMENT/NETWORK.DhcpEnabled=true|false Response format pw/MANAGEMENT/NETWORK.DhcpEnabled=true|false Example > SET/MANAGEMENT/NETWORK.DhcpEnabled=false < pw/MANAGEMENT/NETWORK.DhcpEnabled=false 8.8.3. Query the IP address Command format GET/MANAGEMENT/NETWORK.IpAddress Response format... -
Page 100: Change The Subnet Mask (Static)
8.8.6. Change the subnet mask (static) Command format SET/MANAGEMENT/NETWORK.StaticNetworkMask=<netmask> Response format pw/MANAGEMENT/NETWORK.StaticNetworkMask=<netmask> Example > SET/MANAGEMENT/NETWORK.StaticNetworkMask=255.255.255.0 < pw/MANAGEMENT/NETWORK.StaticNetworkMask=255.255.255.0 8.8.7. Query the gateway address Command format GET/MANAGEMENT/NETWORK.GatewayAddress Response format pr/MANAGEMENT/NETWORK.GatewayAddress=<gw_address> Example > GET/MANAGEMENT/NETWORK.GatewayAddress < pr/MANAGEMENT/NETWORK.GatewayAddress=192.168.0.1 8.8.8. Change the gateway address (static) Command format SET/MANAGEMENT/NETWORK.StaticGatewayAddress=<gw_address>... -
Page 101: Edid Management
MMX6x2-HT User’s Manual 8.9. EDID management 8.9.1. Query the emulated EDIDs Command format GET/EDID.EdidStatus Response format pr/EDID.EdidStatus=<E_loc>„:”<E >„;”<E_loc>„:”<E >„;”…”;”<E_loc>„:”<E > Example > GET/EDID.EdidStatus < prEDID.EdidStatus=F46:E1;F47:E2;F47:E3;F47:E4;F47:E5;F47:E6 Explanation All emulated EDID memories (inputs) are listed with the EDID number that is currently emulated on the input separated by semicolons. -
Page 102: Emulating An Edid To An Input Port
8.9.4. Emulating an EDID to an input port Command format CALL/EDID:switch(<source>„:”<destination>) Response format mO/EDID:switch Example > CALL/EDID:switch(F49:E2) < mO/EDID:switch Legend <source>: Source EDID memory place: Factory / User / Dynamic. <destination>: The emulated EDID memory of the desired input port. 8.9.5. -
Page 103: Firmware Upgrade
User’s Manual 9. Firmware upgrade The matrix can be upgraded by using Lightware Device Updater (LDU) software via Ethernet. The application can be downloaded from www.lightware.eu. In order to get the firmware pack with the necessary components (*.lfp file) for your specific product, please contact support@lightware.eu. -
Page 104: Detailed Instructions
About window will appear. Click on the Check now button. The program checks the available updates on Lightware website and shows its version. Step 2. Set the desired update settings in the Options section. -
Page 105: Start The Ldu And Follow The Instructions
MMX6x2-HT User’s Manual 9.4.2. Start the LDU and follow the instructions The welcome screen will appear: Pressing the button a list will appear showing the supported devices: Click on the Extender button on the main screen. Step 1. Select the package. Click on the Browse button and select the “.lfp”... - Page 106 TIPS AND TRICKS Files with “.lfp” extension are associated to LDU during installation. If you double click on the “.lfp” file, the application is launched, the package is loaded automatically and above screen is shown. Step 2. Select devices. The following step is to select the desired device(s). The available and supported devices are searched and listed automatically.
- Page 107 MMX6x2-HT User’s Manual Add a device by clicking on the Add device button. The previous screen will be shown; select the desired device(s) and click on OK. Remove a device by selecting it (highlight with yellow) and click on Remove device button, or click on Remove all button to empty the list.
- Page 108 Step 4. Finish. If the upgrade of a device is finished, the log can be opened by the View button on the right. When all the tasks are finished, a window appears. Click OK to close and Next to display the summary page.
-
Page 109: Keeping The Configuration Settings After Firmware Upgrade
9.4.2 on page 105. In case of any question, please contact support@lightware.eu. ATTENTION! In certain cases, the new firmware version requires setting all parameters to set factory defaults. In this case, the “Factory reset” option is enabled by default and not changeable by the user, see details in section 9.4.2... -
Page 110: Remote Firmware Upgrade Of Connected Lightware Devices
9.6. Remote firmware upgrade of connected Lightware devices The upgrade process is the same as above described. The only difference is the package: select the LFP package that suits to the remote device at Step 1. The desired device can be selected at Step 2; remote... -
Page 111: Appendix
MMX6x2-HT User’s Manual 10. Appendix 10.1. Specifications General Compliance ....................CE, UL EMC compliance (emission) ............. EN 55032 Class A EMC compliance (immunity) ............. EN 55024 Class B RoHS compliance .................... Yes Warranty ....................3 years Cooling ........Fan, air flows right to left (as viewed from front) Operating temperature .......... - Page 112 Audio/Video ports Crosspoint ..........6x2 video – any input(s) to any output(s) HDCP compliant ....................Yes TPS input and output ports TPS port connector type ............... RJ45 connector Compliance ..................HDBaseT Transferred signals (TPS) ....Video, Audio, RS-232, Infra-red, Ethernet Max.
-
Page 113: Mechanical Drawings
MMX6x2-HT User’s Manual 10.2. Mechanical drawings Dimensions are in mm. Front view Rear view Top view Side view WARNING! Never block the ventilation holes on any side of the matrix! Ensure the proper ventilation by letting the free airflow. Section 10. Appendix Page 113 / 119... -
Page 114: Content Of The Backup File
10.3. Content of the backup file The backup file contains numerous settings and parameters saved from the device. When the file is uploaded to a device, the followings will be overwritten: Local serial port RS-232 mode, Control protocol, Baud rate, Data bits, Stop bits, Parity Port name and CI* port number Ethernet settings Enable/Disable on Local, and TPS Link lines... -
Page 115: Input And Output Port Numbering
MMX6x2-HT User’s Manual 10.4. Input and output port numbering Video Audio EDID RS-232 Port name port no. port no. memory port no. TPS input #1 TPS input #2 HDMI input #3 HDMI input #4 HDMI input #5 HDMI input #6 HDMI output #1 HDMI output #2 TPS output #1 *... -
Page 116: Factory Default Settings
10.6. Factory default settings Parameter Setting/Value Network settings IP address 192.168.0.100 Subnet mask 255.255.255.0 Static gateway 192.168.0.1 LW2 Port number 10001 LW3 Port number 6107 HTTP Port number DHCP disabled TPS and HDMI port settings HDCP – on input ports Enabled HDCP –... -
Page 117: Factory Edid List
MMX6x2-HT User’s Manual 10.7. Factory EDID list Mem. Resolution Type Mem. Resolution Type 640 x 480 @ 60 1280 x 768 @ 59.92 Hz 848 x 480 @ 60.0 1280 x 768 @ 75.0 800 x 600 @ 60.30 Hz 1360 x 768 @ 60.1 1024 x... -
Page 118: Version Applicability
All products to be returned to Lightware require a return material authorization number (RMA) prior to shipment and this number must be clearly marked on the box. If an RMA number is not obtained or is not clearly marked on the box, Lightware will refuse the shipment. -
Page 119: Document Revision History
MMX6x2-HT User’s Manual 10.10. Document revision history Document Release Date Changes Editor Laszlo Rev. 1.0 12-11-2015 Initial version Zsedenyi Laszlo Rev. 1.1 30-11-2015 Analog audio I/O parameters corrected Zsedenyi LW3 programmers’ reference added, Autoselect Laszlo Rev. 1.2 15-01-2016 feature added, LDC chapter updated, Event Zsedenyi manager extended, Warranty section updated LDC section upgraded (new Event manager and...
Need help?
Do you have a question about the MMX6x2-HT200 and is the answer not in the manual?
Questions and answers