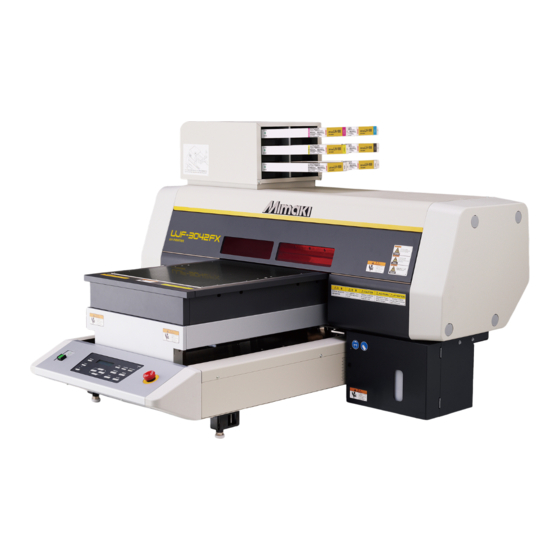
MIMAKI UJF-3042 Maintenance Manual
Uv printer
Hide thumbs
Also See for UJF-3042:
- Original instructions manual (114 pages) ,
- Operation manual (126 pages) ,
- Manual (24 pages)
Table of Contents
Advertisement
Advertisement
Chapters
Table of Contents

Related Manuals for MIMAKI UJF-3042


Summary of Contents for MIMAKI UJF-3042
-
Page 1: Maintenance Manual
Service Documents UJF-3042 / UJF-3042FX MAINTENANCE MANUAL D500552-23... -
Page 2: Maintenance Manual Change Tracking
1.20 Remark Index Status Rev. Changes 3.1.3 Modified Process was added. 3.3.2 Modified Process was added. 4.2.3 Modified Process was Modified. 6.2.3 Modified Process was added. 6.3.6 Added “IMPORTANT“ was added. Maintenance Manual Change Tracking P.1 © 2013 MIMAKI ENGINEERING CO.,LTD. - Page 3 Process was changed. 6.3.8 Added New item was added. 6.5.1 Added New item was added. 6.5.5 6.7.1 Modified Process was changed.(Because the specifications of the LED - UV device were changed.) Maintenance Manual Change Tracking P.2 © 2013 MIMAKI ENGINEERING CO.,LTD.
- Page 4 Operation Flow was changed. (Because F/W was revised) 8.2.5 8.3.1 Modified Operation Flow was changed. (Because F/W was revised) 8.3.3 Date 2010.04.08 Manual Ver. 1.00 Remark Index Status Rev. Changes Released New issued Maintenance Manual Change Tracking P.3 © 2013 MIMAKI ENGINEERING CO.,LTD.
- Page 5 3.1.2 Replacement of Dumper 3.1.3 Replacement of Pump Head 5 Test 3.1.4 Replacement of Cartridge Guide 5.1 Test Items Assy. 3.1.5 Replacement of Cartridge Coupling 5.1.1 CHECK PATTERN Assy. 5.1.2 AGEING 5.1.3 SENSOR TEST Maintenance Manual Contents R.2.2 © 2013 MIMAKI ENGINEERING CO.,LTD.
- Page 6 6.4.3 3042 Slider Relay PCB Assy 6.4.4 3042 Station 3 PCB Assy 6.4.5 Slider PCB 6.4.6 3042 Pump 3 PCB Assy 6.4.7 ID Contact PCB 6.4.8 Keyboard PCB 6.4.9 Linear Encoder PCB Maintenance Manual Contents R.2.2 © 2013 MIMAKI ENGINEERING CO.,LTD.
- Page 7 Maintenance Manual > Operating Principle > Basic Operation Operating Principle Basic Operation Maintenance Function Ink System © 2011 MIMAKI ENGINEERING CO.,LTD.
- Page 8 Maintenance Manual > Operating Principle > Basic Operation > Sequence at POWER ON Rev. Model UJF-3042/FX Issued 2010.08.27 Revised 2011.09.30 F/W ver 1.80 / 1.00 Remark 1.1.1 Sequence at POWER ON Sequence at turning on the power supply The flow after turning on the power supply is as below:...
- Page 9 Maintenance Manual > Operating Principle > Basic Operation > Sequence at POWER OFF Rev. Model UJF-3042/FX Issued 2010.08.27 Revised 2011.09.30 F/W ver 1.80 / 1.00 Remark 1.1.2 Sequence at POWER OFF Sequence at turning OFF the power supply The flow until the power supply is turned OFF is as below:...
- Page 10 Maintenance Manual > Operating Principle > Basic Operation > Work Area Sensor Rev. Model UJF-3042/FX Issued 2010.08.27 Revised 2011.09.30 F/W ver 1.80 / 1.00 Remark 1.1.3 Work Area Sensor Outline This sensor is set to prevent the head from being damaged. It detects the work coming out or warpage etc. on the table to stop the operation before the head hits that part.
- Page 11 Maintenance Manual > Operating Principle > Basic Operation > LED-UV UNIT Rev. Model UJF-3042/FX Issued 2010.08.27 Revised 2011.09.30 F/W ver 1.80 / 1.00 Remark 1.1.4 LED-UV UNIT Outline This UV unit is a lamp using LED and water circulation is adopted for heat release.
- Page 12 Maintenance Manual > Operating Principle > Basic Operation > 600cc Cartridge Rev. Model UJF-3042/FX Issued 2010.08.27 Revised 2011.09.30 F/W ver 1.80 / 1.00 Remark 1.1.5 600cc Cartridge Outline A 600cc-cartridge can be used for this machine. It is not necessary to change the mechanism etc. Only you have to do is to insert it into the ink slot as is the case with the normal cartridge.
- Page 13 Maintenance Manual > Operating Principle > Maintenance Function Operating Principle Basic Operation Maintenance Function Ink System © 2011 MIMAKI ENGINEERING CO.,LTD.
- Page 14 Maintenance Manual > Operating Principle > Maintenance Function > Carriage out Rev. Model UJF-3042/FX Issued 2010.08.27 Revised 2011.09.30 F/W ver 1.80 / 1.00 Remark 1.2.1 Carriage out LCD display MAINTENANCE STATION STATION STATION STATION <ENT> COMPLETED <ENT> MENT :CARRIAGE PLEASE WAIT ...
- Page 15 Maintenance Manual > Operating Principle > Maintenance Function > Wiper Cleaning Rev. Model UJF-3042/FX Issued 2010.08.27 Revised 2011.09.30 F/W ver 1.80 / 1.00 Remark 1.2.2 Wiper Cleaning Indication on LCD MAINTENANCE STATION STATION STATION <ENT> COMPLETED <ENT> MENT :WIPER CLEANING ...
- Page 16 Maintenance Manual > Operating Principle > Maintenance Function > Wiper Bottle Rev. Model UJF-3042/FX Issued 2010.08.27 Revised 2011.09.30 F/W ver 1.80 / 1.00 Remark 1.2.3 Wiper Bottle Indication on LCD MAINTENANCE STATION STATION STATION <ENT> COMPLETED <ENT> MENT :WIPER BOTTLE ...
- Page 17 Maintenance Manual > Operating Principle > Maintenance Function > Waste Ink Tank Rev. Model UJF-3042/FX Issued 2010.08.27 Revised 2011.09.30 F/W ver 1.80 / 1.00 Remark 1.2.4 Waste Ink Tank Indication on LCD MAINTENANCE STATION STATION STATION <ENT> COMPLETED <ENT>...
- Page 18 Maintenance Manual > Operating Principle > Maintenance Function > Cartridge Exchange Rev. Model UJF-3042/FX Issued 2010.08.27 Revised 2011.09.30 F/W ver 1.80 / 1.00 Remark 1.2.5 Cartridge Exchange Indication on LCD STATION MAINTENANCE STATION COMPLETED <ENT> STATION <ENT> MENT :EXCH CARTRIDGE ...
- Page 19 Maintenance Manual > Operating Principle > Maintenance Function > Filter Check Rev. Model UJF-3042/FX Issued 2010.08.27 Revised 2011.09.30 F/W ver 1.80 / 1.00 Remark 1.2.6 Filter Check Indication on LCD STATION MAINTENANCE STATION COMPLETED <ENT> STATION <ENT> MENT :CHECK FILTER ...
- Page 20 Maintenance Manual > Operating Principle > Maintenance Function > NOZZLE WASH Rev. Model UJF-3042/FX Issued 2010.08.27 Revised 2011.09.30 F/W ver 1.80 / 1.00 Remark 1.2.7 NOZZLE WASH Indication on LCD Indicate 1 STATION MAINTENANCE STATION Fill the liquid. HEAD [123] STATION <ENT>...
-
Page 21: Discharge Way Washing
Maintenance Manual > Operating Principle > Maintenance Function > Discharge way washing Rev. Model UJF-3042/FX Issued 2010.08.27 Revised 2011.09.30 F/W ver 1.80 / 1.00 Remark 1.2.8 Discharge way washing Indication on LCD STATION MAINTENANCE STATION COMPLETED <ENT> STATION <ENT>... - Page 22 Maintenance Manual > Operating Principle > Maintenance Function > CUSTODY WASH Rev. Model UJF-3042/FX Issued 2010.08.27 Revised 2011.09.30 F/W ver 1.80 / 1.00 Remark 1.2.9 CUSTODY WASH Indication on LCD Indicate 1 Indicate 2 MAINTENANCE STATION Fill the liquid.
- Page 23 Maintenance Manual > Operating Principle > Maintenance Function > HEAD MAINTENANCE Rev. Model UJF-3042/FX Issued 2010.08.27 Revised 2011.09.30 F/W ver 1.80 / 1.00 Remark 1.2.10 HEAD MAINTENANCE Indication on LCD MAINTENANCE STATION STATION STATION <ENT> MENT :HEAD MENT COMPLETED <ENT>...
- Page 24 Maintenance Manual > Operating Principle > Ink System Operating Principle Basic Operation Maintenance Function Ink System © 2011 MIMAKI ENGINEERING CO.,LTD.
- Page 25 Maintenance Manual > Operating Principle > Ink System > Monitoring of the Amount of Remaining Ink Rev. Model UJF-3042/FX Issued 2013.07.18 Revised F/W ver Remark 1.80 / 1.00 1.3.1 Monitoring of the Amount of Remaining Ink Outline This printer supports both 220cc and 600cc cartridges.
- Page 26 Maintenance Manual > Electrical Parts > Block Diagram Electrical Parts Block Diagram Operating Description Circuit Board Specifications © 2011 MIMAKI ENGINEERING CO.,LTD.
-
Page 27: Table Of Contents
Maintenance Manual > Electrical Parts > Block Diagram > Internal Connection Diagram Rev. Model UJF-3042/FX Issued 2010.08.27 Revised 2011.09.30 F/W ver 1.80 / 1.00 Remark 2.1.1 Internal Connection Diagram Absence1 CS[1..2] Presence1 NES[1..2] Absence2 CS[1..2] Presence2 NES[1..2] Absence3 CS[1..2] Presence3 NES[1..2]... - Page 28 Maintenance Manual > Electrical Parts > Block Diagram > Internal Connection Diagram Rev. Model UJF-3042/FX Issued 2010.08.27 Revised 2011.09.30 F/W ver 1.80 / 1.00 Remark 2.1.1 Internal Connection Diagram E106129 3042 SLIDER PCB H1~2 R HEAD1 CN7[1..50] CN?[1..50] CN8[1..50] CN?[1..50]...
- Page 29 Maintenance Manual > Electrical Parts > Operating Description Electrical Parts Block Diagram Operating Description Circuit Board Specifications © 2011 MIMAKI ENGINEERING CO.,LTD.
- Page 30 Maintenance Manual > Electrical Parts > Circuit Board Specifications Electrical Parts Block Diagram Operating Description Circuit Board Specifications © 2011 MIMAKI ENGINEERING CO.,LTD.
-
Page 31: Cn1[1
Maintenance Manual > Electrical Parts > Circuit Board Specifications > Power Supply PCB Assy. Rev. Model UJF-3042/FX Issued 2010.08.27 Revised 2011.09.30 F/W ver 1.80 / 1.00 Remark 2.3.1 Power Supply PCB Assy. Outline Board name :Power Supply PCB Assy. -
Page 32: Cn2[1
Mounted position :Main Control Unit part Main specifications UJF-3042 MAIN PCB Assy is the PCB to connect the GP Key Board Assy, 3042 Station 3 PCB Assy, 3042 Slider Relay PCB Assy and the X Motor with the external IF. -
Page 33: Main Pcb Assy
Maintenance Manual > Electrical Parts > Circuit Board Specifications > Main PCB Assy. Rev. Model UJF-3042/FX Issued 2010.08.27 Revised 2011.09.30 F/W ver 1.80 / 1.00 Remark 2.3.2 Main PCB Assy. Test point Parts No. Signal Remarks TP6-7 TP1-5, TP10, TP11 Debug ... - Page 34 Mounted position :Operating part Main specifications The GP KeyBoard PCB Assy is connected with the UJF-3042 MAIN PCB Assy using 10-pin FFC. It displays information on the LCD, is operated with keys and informs information with sounds. Information display Displays on the LCD.
- Page 35 Maintenance Manual > Electrical Parts > Circuit Board Specifications > 3042 Station3 PCB Assy. Rev. Model UJF-3042/FX Issued 2010.08.27 Revised 2011.09.30 F/W ver 1.80 / 1.00 Remark 2.3.4 3042 Station3 PCB Assy. Outline Board name :3042 Station3 PCB Assy.
- Page 36 Maintenance Manual > Electrical Parts > Circuit Board Specifications > 3042 Station3 PCB Assy. Rev. Model UJF-3042/FX Issued 2010.08.27 Revised 2011.09.30 F/W ver 1.80 / 1.00 Remark 2.3.4 3042 Station3 PCB Assy. Parts No. Connected to:* Connecting Remarks destination CN...
- Page 37 Maintenance Manual > Electrical Parts > Circuit Board Specifications > 3042 Slider Relay PCB Assy. Rev. Model UJF-3042/FX Issued 2010.08.27 Revised 2011.09.30 F/W ver 1.80 / 1.00 Remark 2.3.5 3042 Slider Relay PCB Assy. Outline Board name :3042 Slider Relay PCB Assy.
- Page 38 Maintenance Manual > Electrical Parts > Circuit Board Specifications > 3042 Slider Relay PCB Assy. Rev. Model UJF-3042/FX Issued 2010.08.27 Revised 2011.09.30 F/W ver 1.80 / 1.00 Remark 2.3.5 3042 Slider Relay PCB Assy. Parts No. Connected to:* Connecting Remarks...
- Page 39 Maintenance Manual > Electrical Parts > Circuit Board Specifications > 3042 Slider Relay PCB Assy. Rev. Model UJF-3042/FX Issued 2010.08.27 Revised 2011.09.30 F/W ver 1.80 / 1.00 Remark 2.3.5 3042 Slider Relay PCB Assy. Power supply confirmation point Confirmation point...
-
Page 40: 2011 Mimaki Engineering Co.,Ltd
:3042 Pump3 PCB Assy. Mounted position :Y-Bar part Main specifications This PCB is used for the power supply at floodlighting side of the UJF-3042 /FX station part and the beam sensor Assy. Stepping moter control(For Ink pump) Controls the pump motors up to four. -
Page 41: 2011 Mimaki Engineering Co.,Ltd
Maintenance Manual > Electrical Parts > Circuit Board Specifications > 3042 Pump3 PCB Assy. Rev. Model UJF-3042/FX Issued 2010.08.27 Revised 2011.09.30 F/W ver 1.80 / 1.00 Remark 2.3.6 3042 Pump3 PCB Assy. Power supply confirmation point Confirmation point DC Power Voltage Remarks Parts No. -
Page 42: 2011 Mimaki Engineering Co.,Ltd
Maintenance Manual > Electrical Parts > Circuit Board Specifications > ID Contact PCB CN032 Assy. Rev. Model UJF-3042/FX Issued 2010.08.27 Revised 2011.09.30 F/W ver 1.80 / 1.00 Remark 2.3.7 ID Contact PCB CN032 Assy. Outline Board name :ID Contact PCB CN032 Assy. -
Page 43: 2011 Mimaki Engineering Co.,Ltd
Maintenance Manual > Electrical Parts > Circuit Board Specifications > 3042 Slider PCB Assy. Rev. Model UJF-3042/FX Issued 2010.08.27 Revised 2011.09.30 F/W ver 1.80 / 1.00 Remark 2.3.8 3042 Slider PCB Assy. Outline Board name :3042 Slider PCB Assy. -
Page 44: 2011 Mimaki Engineering Co.,Ltd
Maintenance Manual > Electrical Parts > Circuit Board Specifications > 3042 Slider PCB Assy. Rev. Model UJF-3042/FX Issued 2010.08.27 Revised 2011.09.30 F/W ver 1.80 / 1.00 Remark 2.3.8 3042 Slider PCB Assy. Test point Parts No. Signal Remarks TP8 - 11... -
Page 45: List Of Connectors
Maintenance Manual > Electrical Parts > Circuit Board Specifications > Encorder PCB Assy. Rev. Model UJF-3042/FX Issued 2010.08.27 Revised 2011.09.30 F/W ver 1.80 / 1.00 Remark 2.3.9 Encorder PCB Assy. Outline Board name :Encorder PCB Assy. Mounted position :Carriage part ... -
Page 46: Cn2
Maintenance Manual > Electrical Parts > Circuit Board Specifications > LEDUVx2-DRIVE PCB Assy. Rev. Model UJF-3042/FX Issued 2010.08.27 Revised 2011.09.30 F/W ver 1.80 / 1.00 Remark 2.3.10 LEDUVx2-DRIVE PCB Assy. Outline Board name :LEDUVx2-DRIVE PCB Assy. Mounted position :UV control part ... -
Page 47: 2011 Mimaki Engineering Co.,Ltd
Maintenance Manual > Electrical Parts > Circuit Board Specifications > Water cool LED_1inch-UVLED PCB Assy. Rev. Model UJF-3042/FX Issued 2010.08.27 Revised 2011.09.30 F/W ver 1.80 / 1.00 Remark 2.3.11 Water cool LED_1inch-UVLED PCB Assy. Outline Board name :Water cool LED_1inch-UVLED PCB Assy. - Page 48 Maintenance Manual > Workflow > Ink Related Parts Workflow Ink Related Parts Driving Parts Electrical Parts Sensors UV UNIT © 2013 MIMAKI ENGINEERING CO.,LTD.
-
Page 49: 2011 Mimaki Engineering Co.,Ltd
Maintenance Manual > Workflow > Ink Related Parts > Replacement of Head Unit Rev. Model UJF-3042/FX Issued 2010.08.27 Revised 2011.09.30 F/W ver 1.80 / 1.00 Remark 3.1.1 Replacement of Head Unit Head Never rotate the screws which are not instructed to do so in the following procedure. -
Page 50: 2011 Mimaki Engineering Co.,Ltd
Maintenance Manual > Workflow > Ink Related Parts > Replacement of Dumper Rev. Model UJF-3042/FX Issued 2010.08.27 Revised 2011.09.30 F/W ver 1.80 / 1.00 Remark 3.1.2 Replacement of Dumper Dumper List of Replacement Procedures Item Work operation Description Ref. -
Page 51: 2011 Mimaki Engineering Co.,Ltd
Maintenance Manual > Workflow > Ink Related Parts > Replacement of Pump Head Rev. Model UJF-3042/FX Issued 2010.08.27 Revised 2011.09.30 F/W ver 1.80 / Remark 3.1.3 Replacement of Pump Head Pump Head 3 Pump Head 2 Pump Head 1 List of Replacement Procedures... -
Page 52: 2011 Mimaki Engineering Co.,Ltd
Maintenance Manual > Workflow > Ink Related Parts > Replacement of Cartridge Guide Assy. Rev. Model UJF-3042/FX Issued 2010.08.27 Revised 2011.09.30 F/W ver 1.80 / 1.00 Remark 3.1.4 Replacement of Cartridge Guide Assy. Cartridge Guide Assy. List of Replacement Procedures... -
Page 53: 2011 Mimaki Engineering Co.,Ltd
Maintenance Manual > Workflow > Ink Related Parts > Replacement of Cartridge Coupling Assy. Rev. Model UJF-3042/FX Issued 2010.08.27 Revised 2011.09.30 F/W ver 1.80 / 1.00 Remark 3.1.5 Replacement of Cartridge Coupling Assy. Cartridge Coupling Assy. Cartridge Coupling Assy. List of Replacement Procedures... - Page 54 Maintenance Manual > Workflow > Driving Parts Workflow Ink Related Parts Driving Parts Electrical Parts Sensors UV UNIT © 2013 MIMAKI ENGINEERING CO.,LTD.
-
Page 55: 2011 Mimaki Engineering Co.,Ltd
Maintenance Manual > Workflow > Driving Parts > Replacement of Z-Driving Screw Rev. Model UJF-3042/FX Issued 2010.08.27 Revised 2011.09.30 F/W ver 1.80 / 1.00 Remark 3.2.1 Replacement of Z-Driving Screw Z-Driving Screw List of Replacement Procedures Item Work operation Description Ref. -
Page 56: 2011 Mimaki Engineering Co.,Ltd
Maintenance Manual > Workflow > Driving Parts > Replacement of Tabel Absorption Fan Rev. Model UJF-3042/FX Issued 2010.08.27 Revised 2011.09.30 F/W ver 1.80 / 1.00 Remark 3.2.2 Replacement of Tabel Absorption Fan Table Absorption Fan Assy Table backside List of Replacement Procedures... - Page 57 Maintenance Manual > Workflow > Electrical Parts Workflow Ink Related Parts Driving Parts Electrical Parts Sensors UV UNIT © 2013 MIMAKI ENGINEERING CO.,LTD.
-
Page 58: Acin[1
Maintenance Manual > Workflow > Electrical Parts > Replacement of Main PCB Rev. Model UJF-3042/FX Issued 2010.08.27 Revised 2011.09.30 F/W ver 1.80 / 1.00 Remark 3.3.1 Replacement of Main PCB Main PCB Assy. Outline If Main PCB Assy. has replaced, various parameters must be registered to Main PCB ROM after the replacement. -
Page 59: 3042 Slider Relay Pcb Assy Cn5
Maintenance Manual > Workflow > Electrical Parts > Replacement of 3042 Slider Relay PCB Assy Rev. Model UJF-3042/FX Issued 2010.08.27 Revised 2011.09.30 F/W ver 1.80 / 1.00 Remark 3.3.2 Replacement of 3042 Slider Relay PCB Assy 3042 Slider Relay PCB Assy ... -
Page 60: 2011 Mimaki Engineering Co.,Ltd
Maintenance Manual > Workflow > Electrical Parts > Replacement of ID Contact PCB Rev. Model UJF-3042/FX Issued 2010.08.27 Revised 2011.09.30 F/W ver 1.80 / 1.00 Remark 3.3.3 Replacement of ID Contact PCB ID Contact PCB ID Contact PCB List of Replacement Procedures... - Page 61 Maintenance Manual > Workflow > Sensors Workflow Ink Related Parts Driving Parts Electrical Parts Sensors UV UNIT © 2013 MIMAKI ENGINEERING CO.,LTD.
- Page 62 Maintenance Manual > Workflow > UV UNIT Workflow Ink Related Parts Driving Parts Electrical Parts Sensors UV UNIT © 2013 MIMAKI ENGINEERING CO.,LTD.
-
Page 63: 2011 Mimaki Engineering Co.,Ltd
Maintenance Manual > Workflow > UV UNIT > Replacement of LEDUV Irradiation Assy Rev. Model UJF-3042/FX Issued 2010.08.27 Revised 2011.09.30 F/W ver 1.80 / 1.00 Remark 3.5.1 Replacement of LEDUV Irradiation Assy LEDUV Irradiation Assy List of Replacement Procedures... -
Page 64: 2011 Mimaki Engineering Co.,Ltd
Maintenance Manual > Workflow > UV UNIT > Replacement of LEDUVx2-DRIVE PCB Assy Rev. Model UJF-3042/FX Issued 2010.08.27 Revised 2011.09.30 F/W ver 1.80 / 1.00 Remark 3.5.2 Replacement of LEDUVx2-DRIVE PCB Assy LEDUVx2-DRIVE PCB Assy List of Replacement Procedures... - Page 65 Maintenance Manual > Adjustment > Operation Matrix Adjustment Operation Matrix Adjustment Items Mechanical Adjustment © 2013 MIMAKI ENGINEERING CO.,LTD.
- Page 66 Maintenance Manual > Adjustment > Adjustment Items Adjustment Operation Matrix Adjustment Items Mechanical Adjustment © 2013 MIMAKI ENGINEERING CO.,LTD.
-
Page 67: 2011 Mimaki Engineering Co.,Ltd
Maintenance Manual > Adjustment > Adjustment Items > PRINT ADJUST Rev. Model UJF-3042/FX Issued 2010.08.27 Revised 2011.09.30 F/W ver 1.80 / 1.00 Remark 4.2.1 PRINT ADJUST Outline Draw the built-in patterns, and compensate the parameter so that the drop positions of other heads are on the same line as the drop position of reference head (Head 1) in the Y-direction. -
Page 68: 2011 Mimaki Engineering Co.,Ltd
Maintenance Manual > Adjustment > Adjustment Items > HEAD ADJUST Rev. Model UJF-3042/FX Issued 2010.08.27 Revised 2011.09.30 F/W ver 1.80 / 1.00 Remark 4.2.2 HEAD ADJUST Outline On the drawing with the built-in patterns, the slant and the back and forth positions of each head are checked and mechanically adjusted. -
Page 69: 2011 Mimaki Engineering Co.,Ltd
Maintenance Manual > Adjustment > Adjustment Items > HEAD ADJUST Rev. Model UJF-3042/FX Issued 2010.08.27 Revised 2011.09.30 F/W ver 1.80 / 1.00 Remark 4.2.2 HEAD ADJUST Outline of Head Slant Adjustment (When CMWKWR is set) Slant adjust: Normal... -
Page 70: 2011 Mimaki Engineering Co.,Ltd
Maintenance Manual > Adjustment > Adjustment Items > HEAD ADJUST Rev. Model UJF-3042/FX Issued 2010.08.27 Revised 2011.09.30 F/W ver 1.80 / 1.00 Remark 4.2.2 HEAD ADJUST Procedures of Head Slant Adjustment 1. Set Media at X-origin. FUNCTION #ADJUST <ent>... -
Page 71: 2011 Mimaki Engineering Co.,Ltd
Maintenance Manual > Adjustment > Adjustment Items > HEAD ADJUST Rev. Model UJF-3042/FX Issued 2010.08.27 Revised 2011.09.30 F/W ver 1.80 / 1.00 Remark 4.2.2 HEAD ADJUST 9. Check if no displacement occurs between the 1st scanning and the 4nd scanning of the head. -
Page 72: 2011 Mimaki Engineering Co.,Ltd
Maintenance Manual > Adjustment > Adjustment Items > HEAD ADJUST Rev. Model UJF-3042/FX Issued 2010.08.27 Revised 2011.09.30 F/W ver 1.80 / 1.00 Remark 4.2.2 HEAD ADJUST Head Back/Forth Adjusting Patterns 1 head1 head2 Enlarged Basic head head3 Specified value: 0±10µm... -
Page 73: 2011 Mimaki Engineering Co.,Ltd
Maintenance Manual > Adjustment > Adjustment Items > HEAD ADJUST Rev. Model UJF-3042/FX Issued 2010.08.27 Revised 2011.09.30 F/W ver 1.80 / 1.00 Remark 4.2.2 HEAD ADJUST Head Back/Forth Adjusting Patterns 2 The pattern below is drawn in 1 Pass. This is the pattern to adjust back and forth using overlap of the basic Head and 3 nozzle of the Head 3. -
Page 74: 2011 Mimaki Engineering Co.,Ltd
Maintenance Manual > Adjustment > Adjustment Items > HEAD ADJUST Rev. Model UJF-3042/FX Issued 2010.08.27 Revised 2011.09.30 F/W ver 1.80 / 1.00 Remark 4.2.2 HEAD ADJUST Procedures of Head Back/Forth Adjustment 1. Set Media at X-origin. FUNCTION #ADJUST <ent>... -
Page 75: 2011 Mimaki Engineering Co.,Ltd
Maintenance Manual > Adjustment > Adjustment Items > HEAD ADJUST Rev. Model UJF-3042/FX Issued 2010.08.27 Revised 2011.09.30 F/W ver 1.80 / 1.00 Remark 4.2.2 HEAD ADJUST Head Back/Forth Adjustment Adjusting Procedure 1. Loosen the back/forth fixing screw of the target head. -
Page 76: 2011 Mimaki Engineering Co.,Ltd
Maintenance Manual > Adjustment > Adjustment Items > CAPPING Rev. Model UJF-3042/FX Issued 2010.08.27 Revised 2011.09.30 F/W ver 1.80 / 1.00 Remark 4.2.3 CAPPING Outline Adjusts the location for capping and wiper. Adjusted value is saved in the system parameter. -
Page 77: 2011 Mimaki Engineering Co.,Ltd
Maintenance Manual > Adjustment > Adjustment Items > ADJUST WIPER Rev. Model UJF-3042/FX Issued 2010.08.27 Revised 2011.09.30 F/W ver 1.80 / 1.00 Remark 4.2.4 ADJUST WIPER Outline Adjusts the wiper position. Adjustment procedure 1. Select [#ADJUST] -> [ADJUST WIPER]. -
Page 78: Head Control
Maintenance Manual > Adjustment > Adjustment Items > HEAD WASH(#ADJUST) Rev. Model UJF-3042/FX Issued 2010.08.27 Revised 2011.09.30 F/W ver 1.80 / 1.00 Remark 4.2.5 HEAD WASH(#ADJUST) Outline Discharge the ink and clean the Tube, Dumper and Head using dedicated cleaning liquid. This process is normally performed at the factory. -
Page 79: 2011 Mimaki Engineering Co.,Ltd
Maintenance Manual > Adjustment > Adjustment Items > HEAD WASH(#ADJUST) Rev. Model UJF-3042/FX Issued 2010.08.27 Revised 2011.09.30 F/W ver 1.80 / 1.00 Remark 4.2.5 HEAD WASH(#ADJUST) * Cleaning method of Air Bleeder Tube For this work, the syringe is used, however, do not pull out the piston when you connect with the air drain port. -
Page 80: 2011 Mimaki Engineering Co.,Ltd
Maintenance Manual > Adjustment > Adjustment Items > HEAD ID Rev. Model UJF-3042/FX Issued 2010.08.27 Revised 2011.09.30 F/W ver 1.80 / 1.00 Remark 4.2.6 HEAD ID Outline HEAD ID represents each head characteristic written at shipping. The variation between heads is unified by inputting the value to printer. -
Page 81: 2011 Mimaki Engineering Co.,Ltd
Maintenance Manual > Adjustment > Adjustment Items > HEAD TEMP Rev. Model UJF-3042/FX Issued 2010.08.27 Revised 2011.09.30 F/W ver 1.80 / 1.00 Remark 4.2.7 HEAD TEMP Function Confirms/sets the head temperature. Under normal conditions, do not change this. Procedure 1. -
Page 82: 2011 Mimaki Engineering Co.,Ltd
Maintenance Manual > Adjustment > Adjustment Items > EXCHANGE LED UV Rev. Model UJF-3042/FX Issued 2010.08.27 Revised 2011.09.30 F/W ver 1.80 / 1.00 Remark 4.2.8 EXCHANGE LED UV Outline To exchange the LED-UV UNIT, the cooling water must be drained according to the following steps. This procedure is used also for Water Cooling Device maintenance. -
Page 83: 2011 Mimaki Engineering Co.,Ltd
Model UJF-3042/FX Issued 2010.08.27 Revised 2011.09.30 F/W ver 1.80 / 1.00 Remark 4.2.9 SERIAL No. Outline Confirming and changing of the serial No. of UJF-3042/FX. Normally, don’t change the serial No., which has been registered. Work Procedures 1. Select [#ADJUST] -> [SERIAL No.]. FUNCTION #ADJUST <ent>... -
Page 84: 2011 Mimaki Engineering Co.,Ltd
Maintenance Manual > Adjustment > Adjustment Items > DEALER No. Rev. Model UJF-3042/FX Issued 2010.08.27 Revised 2011.09.30 F/W ver 1.80 / 1.00 Remark 4.2.10 DEALER No. Outline Check and set the dealer No. For dealer No., 8-digit alphameric characters (0 to 9, A to Z) can be input. -
Page 85: 2011 Mimaki Engineering Co.,Ltd
Maintenance Manual > Adjustment > Adjustment Items > ORIGIN ADJUST Rev. Model UJF-3042/FX Issued 2010.08.27 Revised 2011.09.30 F/W ver 1.80 / 1.00 Remark 4.2.11 ORIGIN ADJUST Origin Seal Outline The pattern is drawn and the origin position (the drawing reference point located at the front right) is parameter-com- pensated. -
Page 86: 2011 Mimaki Engineering Co.,Ltd
Maintenance Manual > Adjustment > Adjustment Items > TABLE ADJUST Rev. Model UJF-3042/FX Issued 2010.08.27 Revised 2011.09.30 F/W ver 1.80 / 1.00 Remark 4.2.12 TABLE ADJUST Outline [#TABLE ADJUST] consists of the following 4 items. Item Function GAP PIN Measure the Head gap and register the measured value, and then adjust it to the length of Gap pin. -
Page 87: 2011 Mimaki Engineering Co.,Ltd
Maintenance Manual > Adjustment > Adjustment Items > SET QUALITY Rev. Model UJF-3042/FX Issued 2010.08.27 Revised 2011.09.30 F/W ver 1.80 / 1.00 Remark 4.2.13 SET QUALITY Outline Setting of the operation mode of user-setting print quality. SET QUALITY List of Items... -
Page 88: 2011 Mimaki Engineering Co.,Ltd
Maintenance Manual > Adjustment > Adjustment Items > FEED COMP.2 Rev. Model UJF-3042/FX Issued 2010.08.27 Revised 2011.09.30 F/W ver 1.80 / 1.00 Remark 4.2.14 FEED COMP.2 Function Compensates basic feeding amount of media. (Provides a baseline value for user compensation value.) Adjust this when the parameter is initialized or the head is replaced. -
Page 89: 2011 Mimaki Engineering Co.,Ltd
Maintenance Manual > Adjustment > Adjustment Items > ANGLE ADJUST Rev. Model UJF-3042/FX Issued 2010.08.27 Revised 2011.09.30 F/W ver 1.80 / 1.00 Remark 4.2.15 ANGLE ADJUST Compensating to the (+) side Y-bar part Compensation value (+) side Pattern right end... -
Page 90: 2011 Mimaki Engineering Co.,Ltd
Maintenance Manual > Adjustment > Adjustment Items > DEFAULT SET Rev. Model UJF-3042/FX Issued 2010.08.27 Revised 2011.09.30 F/W ver 1.80 / 1.00 Remark 4.2.16 DEFAULT SET Outline Returning each parameter to the initial value. DEFAULT SET List of Items... -
Page 91: 2011 Mimaki Engineering Co.,Ltd
Maintenance Manual > Adjustment > Adjustment Items > Head Voltage Adjustment Rev. Model UJF-3042/FX Issued 2010.08.27 Revised 2011.09.30 F/W ver 1.80 / 1.00 Remark 4.2.17 Head Voltage Adjustment Outline This section describes the head voltage adjustment which is performed when the ink discharge becomes unstable and the deflection of ink drop flight path occurs. -
Page 92: 2011 Mimaki Engineering Co.,Ltd
Maintenance Manual > Adjustment > Adjustment Items > Head Voltage Adjustment Rev. Model UJF-3042/FX Issued 2010.08.27 Revised 2011.09.30 F/W ver 1.80 / 1.00 Remark 4.2.17 Head Voltage Adjustment 8. Select the nozzle row (color) to be adjusted. Select target nozzle #HEAD VOLT ADJUST [] / [] : Select nozzle... -
Page 93: 2011 Mimaki Engineering Co.,Ltd
Maintenance Manual > Adjustment > Adjustment Items > Shot Count Reset Rev. Model UJF-3042/FX Issued 2010.08.27 Revised 2011.09.30 F/W ver 1.80 / 1.00 Remark 4.2.18 Shot Count Reset Outline This section describes how to “reset the shot count” and “reset the offset value of the Head driving power voltage” of selected head. - Page 94 Maintenance Manual > Adjustment > Adjustment Items > Wash Tube Rev. Model UJF-3042/FX Issued 2012.05.31 Revised F/W ver 3.00/3.00 Remark 4.2.19 Wash Tube Outline After washing the head, run washing liquid through from the air purge port to the head in order to wash ink remaining in the air purge port.
- Page 95 Maintenance Manual > Adjustment > Adjustment Items > MACHINE NAME(UJF-3042FX) Rev. Model UJF-3042/FX Issued 2012.05.31 Revised 2013.02.08 F/W ver 3.50/3.50 Remark 4.2.20 MACHINE NAME(UJF-3042FX) Outline Switch the model name to UJF-3042FX or UJF-A3FX. This menu is used when A3FX for China is produced.
- Page 96 Maintenance Manual > Adjustment > Mechanical Adjustment Adjustment Operation Matrix Adjustment Items Mechanical Adjustment © 2013 MIMAKI ENGINEERING CO.,LTD.
-
Page 97: 2011 Mimaki Engineering Co.,Ltd
Maintenance Manual > Adjustment > Mechanical Adjustment > Adjustment of theTable Flatness Rev. Model UJF-3042/FX Issued 2010.08.27 Revised 2011.09.30 F/W ver 1.80 / 1.00 Remark 4.3.1 Adjustment of theTable Flatness Outline Adjust the table flatness by adjusting the contacting position between the four Up/Down cams and Rollers under the table. -
Page 98: 2011 Mimaki Engineering Co.,Ltd
Maintenance Manual > Adjustment > Adjustment Items > Adjustment of theTable Flatness Rev. Model UJF-3042/FX Issued 2010.08.27 Revised 2011.09.30 F/W ver 1.80 / 1.00 Remark 4.3.1 Adjustment of theTable Flatness 4. Place the Thickness gauge under the carriage (see the figure). -
Page 99: 2011 Mimaki Engineering Co.,Ltd
Maintenance Manual > Adjustment > Mechanical Adjustment > Carriage height Adjustment Rev. Model UJF-3042/FX Issued 2010.08.27 Revised 2011.09.30 F/W ver 1.80 / 1.00 Remark 4.3.2 Carriage height Adjustment Gap : 1.5mm Gap : 1.5mm As a precondition for this adjustment, the table flatness should be adjusted correctly. -
Page 100: 2011 Mimaki Engineering Co.,Ltd
Maintenance Manual > Adjustment > Mechanical Adjustment > Carriage height Adjustment Rev. Model UJF-3042/FX Issued 2010.08.27 Revised 2011.09.30 F/W ver 1.80 / 1.00 Remark 4.3.2 Carriage height Adjustment Adjustment procedure Perform the following steps as follow-ups of the procedure previously described in ”Check the Slant of carriage”. -
Page 101: 2011 Mimaki Engineering Co.,Ltd
Maintenance Manual > Adjustment > Mechanical Adjustment > Carriage Front/Rear Tilt Adjustment Rev. Model UJF-3042/FX Issued 2010.08.27 Revised 2011.09.30 F/W ver 1.80 / 1.00 Remark 4.3.3 Carriage Front/Rear Tilt Adjustment Outline The image quality deteriorates when the Carriage is not in parallel to the Table. -
Page 102: 2011 Mimaki Engineering Co.,Ltd
Maintenance Manual > Adjustment > Mechanical Adjustment > Carriage Front/Rear Tilt Adjustment Rev. Model UJF-3042/FX Issued 2010.08.27 Revised 2011.09.30 F/W ver 1.80 / 1.00 Remark 4.3.3 Carriage Front/Rear Tilt Adjustment Adjustment procedure Perform the following steps as follow-ups of the procedure previously described in ”Check for carriage Tilt”. -
Page 103: 2011 Mimaki Engineering Co.,Ltd
Maintenance Manual > Adjustment > Mechanical Adjustment > LED-UV Unit Height Adjustment Rev. Model UJF-3042/FX Issued 2010.08.27 Revised 2011.09.30 F/W ver 1.80 / 1.00 Remark 4.3.4 LED-UV Unit Height Adjustment LED-UV Unit 2.0mm Outline The up/down position of the LED-UV Unit is mechanically adjusted. The gap between the LED-UV Unit and table is set to 2mm while the head gap is 1.5mm. -
Page 104: 2011 Mimaki Engineering Co.,Ltd
Maintenance Manual > Adjustment > Mechanical Adjustment > LED-UV Unit Height Adjustment Rev. Model UJF-3042/FX Issued 2010.08.27 Revised 2011.09.30 F/W ver 1.80 / 1.00 Remark 4.3.4 LED-UV Unit Height Adjustment Adjustment procedure Perform the following steps as follow-ups of the procedure previously described in”Check the Height of LED-UV Unit”... -
Page 105: 2011 Mimaki Engineering Co.,Ltd
Maintenance Manual > Adjustment > Mechanical Adjustment > Work Area Sensor Height Adjustment Rev. Model UJF-3042/FX Issued 2010.08.27 Revised 2011.09.30 F/W ver 1.80 / 1.00 Remark 4.3.5 Work Area Sensor Height Adjustment Outline To protect the print head, check if the light axis of the LED transmission sensor is at the specified height, and adjust it if necessary. -
Page 106: 2011 Mimaki Engineering Co.,Ltd
Maintenance Manual > Test > Test Items Test Test Items Other Test © 2011 MIMAKI ENGINEERING CO.,LTD. -
Page 107: 2011 Mimaki Engineering Co.,Ltd
Maintenance Manual > Test > Test Items > CHECK PATTERN Rev. Model UJF-3042/FX Issued 2010.08.27 Revised 2011.09.30 F/W ver 1.80 / 1.00 Remark 5.1.1 CHECK PATTERN Outline Following 12 “CHECK PATTERN” types are printable. 100% 6.25% NOZZLE V-LINE H-LINE... -
Page 108: 2011 Mimaki Engineering Co.,Ltd
Maintenance Manual > Test > Test Items > AGEING Rev. Model UJF-3042/FX Issued 2010.08.27 Revised 2011.09.30 F/W ver 1.80 / 1.00 Remark 5.1.2 AGEING Outline For the durability testing, continuous reciprocating operation is executed. List of AGEING items... -
Page 109: 2011 Mimaki Engineering Co.,Ltd
Maintenance Manual > Test > Test Items > SENSOR TEST Rev. Model UJF-3042/FX Issued 2010.08.27 Revised 2011.09.30 F/W ver 1.80 / 1.00 Remark 5.1.3 SENSOR TEST Outline Each sensor is tested. List of SENSOR TEST Name of Test... -
Page 110: 2011 Mimaki Engineering Co.,Ltd
Maintenance Manual > Test > Test Items > PARAM. DRAW Rev. Model UJF-3042/FX Issued 2010.08.27 Revised 2011.09.30 F/W ver 1.80 / 1.00 Remark 5.1.4 PARAM. DRAW Outline Select a parameter, and draw the settings. The selectable parameters are as follows: ... -
Page 111: 2011 Mimaki Engineering Co.,Ltd
Maintenance Manual > Test > Test Items > MEMORY CHECK Rev. Model UJF-3042/FX Issued 2010.08.27 Revised 2011.09.30 F/W ver 1.80 / 1.00 Remark 5.1.5 MEMORY CHECK Outline Checks each memory of the machine. Content Item Content F-ROM check Executes hash check of F-ROM. -
Page 112: 2011 Mimaki Engineering Co.,Ltd
Maintenance Manual > Test > Test Items > Key Board Test Rev. Model UJF-3042/FX Issued 2010.08.27 Revised 2011.09.30 F/W ver 1.80 / Remark 5.1.6 Key Board Test Outline Tests the panel switch. Content When the panel switch is pressed, the name of the switch is displayed on the LCD. -
Page 113: 2011 Mimaki Engineering Co.,Ltd
Maintenance Manual > Test > Test Items > LCD Test Rev. Model UJF-3042/FX Issued 2010.08.27 Revised 2011.09.30 F/W ver 1.80 / 1.00 Remark 5.1.7 LCD Test Outline The characters are displayed on the LCD. Content After LCD test starts, each character will be displayed repeatedly on the LCD. -
Page 114: 2011 Mimaki Engineering Co.,Ltd
Maintenance Manual > Test > Test Items > Temperature Check Rev. Model UJF-3042/FX Issued 2010.08.27 Revised 2011.09.30 F/W ver 1.80 / 1.00 Remark 5.1.8 Temperature Check Outline Temperature check of each part that monitors temperature is available. Content The temperature in the table below is displayed. -
Page 115: 2011 Mimaki Engineering Co.,Ltd
Maintenance Manual > Test > Test Items > UV LEVEL Check Rev. Model UJF-3042/FX Issued 2010.08.27 Revised 2013.07.18 F/W ver 1.80 / 1.00 Remark 5.1.9 UV LEVEL Check Outline Operates for measuring the amount of light of LED-UV. Content Wear protective eyewear to prevent injury to your eyes. -
Page 116: 2011 Mimaki Engineering Co.,Ltd
Maintenance Manual > Test > Test Items > INK IC Check Rev. Model UJF-3042/FX Issued 2010.08.27 Revised 2011.09.30 F/W ver 1.80 / 1.00 Remark 5.1.10 INK IC Check Outline Check the ink cartridge IC. Content Check is performed by reading the IC chip data, and then displays the number of errors for each cartridge. -
Page 117: 2011 Mimaki Engineering Co.,Ltd
Maintenance Manual > Test > Test Items > INK TEST Rev. Model UJF-3042/FX Issued 2010.08.27 Revised 2011.09.30 F/W ver 1.80 / 1.00 Remark 5.1.11 INK TEST Outline This is a function to adjust the wave shape. Discharges by changing the wave shape and the voltage, and searches the proper wave shape. -
Page 118: 2011 Mimaki Engineering Co.,Ltd
Maintenance Manual > Test > Test Items > ENCORDER Check Rev. Model UJF-3042/FX Issued 2010.08.27 Revised 2011.09.30 F/W ver 1.80 / 1.00 Remark 5.1.12 ENCORDER Check Outline Checks the operation of the linear encoder and the motor encoder by moving the slider. -
Page 119: 2011 Mimaki Engineering Co.,Ltd
Maintenance Manual > Test > Test Items > EVENT LOG Rev. Model UJF-3042/FX Issued 2010.08.27 Revised 2011.09.30 F/W ver 1.80 / 1.00 Remark 5.1.13 EVENT LOG Outline Displays the event log. Content Displays the latest event log from the beginning in order. -
Page 120: 2011 Mimaki Engineering Co.,Ltd
Maintenance Manual > Test > Test Items > Message Check Rev. Model UJF-3042/FX Issued 2010.08.27 Revised 2011.09.30 F/W ver 1.80 / 1.00 Remark 5.1.14 Message Check Outline Error messages and warning messages are displayed. Content You can display error messages and warning messages with [] [] key in order. -
Page 121: 2011 Mimaki Engineering Co.,Ltd
Maintenance Manual > Test > Test Items > HW Test Rev. Model UJF-3042/FX Issued 2010.08.27 Revised 2011.09.30 F/W ver 1.80 / 1.00 Remark 5.1.15 HW Test Outline Port test of the hardware Content As this is a function for development, the details are not disclosed. -
Page 122: 2011 Mimaki Engineering Co.,Ltd
Maintenance Manual > Test > Other Test Test Test Items Other Test © 2011 MIMAKI ENGINEERING CO.,LTD. -
Page 123: 2011 Mimaki Engineering Co.,Ltd
Maintenance Manual > Test > Other Test > Ink route leak confirmation procedure Rev. Model UJF-3042/FX Issued 2010.08.27 Revised 2011.09.30 F/W ver 1.80 / 1.00 Remark 5.2.1 Ink route leak confirmation procedure Outline This chapter explains ink route leak confirmation procedure after replacing the dumper adapter and the dumper. - Page 124 Maintenance Manual > Disassembly and Reassembly > Covers Disassembly and Reassembly Covers Ink-related Parts Driving Parts PCBs Sensors Other Electrical Parts UV Parts Greasing © 2013 MIMAKI ENGINEERING CO.,LTD.
-
Page 125: 2011 Mimaki Engineering Co.,Ltd
Maintenance Manual > Disassembly and Reassembly > Covers > Cover Layout Rev. Model UJF-3042/FX Issued 2010.08.27 Revised 2011.09.30 F/W ver Remark 6.1.1 Cover Layout Front Cartrige Cover Left Cover Head Cover Slider PCB Cover Upper Cover Right Cover Front Cover... -
Page 126: 2011 Mimaki Engineering Co.,Ltd
Maintenance Manual > Disassembly and Reassembly > Covers > Key Panel Assy Rev. Model UJF-3042/FX Issued 2010.08.27 Revised 2011.09.30 F/W ver Remark 6.1.2 Key Panel Assy Key Panel Assy. To turn power off, be sure to turn the main power OFF. -
Page 127: 2011 Mimaki Engineering Co.,Ltd
Maintenance Manual > Disassembly and Reassembly > Covers > Key Panel Assy Rev. Model UJF-3042/FX Issued 2010.08.27 Revised 2011.09.30 F/W ver Remark 6.1.2 Key Panel Assy 4. Disconnect the following Connecters. Power Switch Relay Connector 1),Power Switch Relay Connector 2),Emergency Switch Relay Connector Emergency Switch Relay Connector 5. -
Page 128: 2011 Mimaki Engineering Co.,Ltd
Maintenance Manual > Disassembly and Reassembly > Covers > “Tube_FFC Holder” Stick the Protection tape Rev. Model UJF-3042/FX Issued 2010.08.27 Revised 2011.09.30 F/W ver Remark 6.1.3 “Tube_FFC Holder” Stick the Protection tape On the Bear Guide Lower part of the Slider PCB BKT Tube_FFC Holder To turn power off, be sure to turn the main power OFF. -
Page 129: 2011 Mimaki Engineering Co.,Ltd
Maintenance Manual > Disassembly and Reassembly > Covers > “Tube_FFC Holder” Stick the Protection tape Rev. Model UJF-3042/FX Issued 2010.08.27 Revised 2011.09.30 F/W ver Remark 6.1.3 “Tube_FFC Holder” Stick the Protection tape 4. Remove the “Tube_FFC Holder”. Tube_FFC Holder • Fixing Screw x2 Fixing Screw 5. -
Page 130: 2011 Mimaki Engineering Co.,Ltd
Maintenance Manual > Disassembly and Reassembly > Covers > “Tube_FFC Holder” Stick the Protection tape Rev. Model UJF-3042/FX Issued 2010.08.27 Revised 2011.09.30 F/W ver Remark 6.1.3 “Tube_FFC Holder” Stick the Protection tape 8. Take the Ink Tubes off from the “Tube_FFC Holder”... - Page 131 Maintenance Manual > Disassembly and Reassembly > Ink-related Parts Disassembly and Reassembly Covers Ink-related Parts Driving Parts PCBs Sensors Other Electrical Parts UV Parts Greasing © 2013 MIMAKI ENGINEERING CO.,LTD.
-
Page 132: 2011 Mimaki Engineering Co.,Ltd
Maintenance Manual > Disassembly and Reassembly > Ink-related Parts > Head Assy Rev. Model UJF-3042/FX Issued 2010.08.27 Revised 2011.09.30 F/W ver Remark 6.2.1 Head Assy Be sure to wear Protective Glasses and Working Gloves during the work operation.Ink may get in your eyes depending on the working condition, or hand skin may get rough if you touch the ink. -
Page 133: 2011 Mimaki Engineering Co.,Ltd
Maintenance Manual > Disassembly and Reassembly > Ink-related Parts > Head Assy Rev. Model UJF-3042/FX Issued 2010.08.27 Revised 2011.09.30 F/W ver Remark 6.2.1 Head Assy 4. Close the cap of the Air Bleeder Tube. 5. Push the syringe to discharge 30 cc of F-200 Cleaning Liquid from the nozzles. -
Page 134: 2011 Mimaki Engineering Co.,Ltd
Maintenance Manual > Disassembly and Reassembly > Ink-related Parts > Head Assy Rev. Model UJF-3042/FX Issued 2010.08.27 Revised 2011.09.30 F/W ver Remark 6.2.1 Head Assy Procedures of Disassembly and Reassembly 1. Turn the main power OFF Dumper & Screw Dumper Cover 2. -
Page 135: 2011 Mimaki Engineering Co.,Ltd
Maintenance Manual > Disassembly and Reassembly > Ink-related Parts > Head Assy Rev. Model UJF-3042/FX Issued 2010.08.27 Revised 2011.09.30 F/W ver Remark 6.2.1 Head Assy 8. Remove the GEN Head Holder (imetal plate) from the Head Assy. Screw : B3x6 x2... -
Page 136: 2011 Mimaki Engineering Co.,Ltd
Maintenance Manual > Disassembly and Reassembly > Ink-related Parts > Dumper Rev. Model UJF-3042/FX Issued 2010.08.27 Revised 2011.09.30 F/W ver Remark 6.2.2 Dumper Procedures To turn power off, be sure to turn the main power OFF. Be sure to wear Protective Glasses and Working Gloves during the work operation.Ink may get in your eyes depending on the working condition, or hand skin may get rough if you touch the ink. -
Page 137: 2011 Mimaki Engineering Co.,Ltd
Maintenance Manual > Disassembly and Reassembly > Ink-related Parts > Dumper Rev. Model UJF-3042/FX Issued 2010.08.27 Revised 2011.09.30 F/W ver Remark 6.2.2 Dumper 6. Take out the Dumper from the Dumper Cover. Dumper Cover Do not press the film or round button of the Dumper. -
Page 138: 2011 Mimaki Engineering Co.,Ltd
Maintenance Manual > Disassembly and Reassembly > Ink-related Parts > Pump Head Rev. Model UJF-3042/FX Issued 2010.08.27 Revised 2011.09.30 F/W ver Remark 6.2.3 Pump Head Removing Procedure of Pump Head To turn power off, be sure to turn the main power OFF. -
Page 139: 2011 Mimaki Engineering Co.,Ltd
Maintenance Manual > Disassembly and Reassembly > Ink-related Parts > Pump Head Rev. Model UJF-3042/FX Issued 2010.08.27 Revised 2011.09.30 F/W ver Remark 6.2.3 Pump Head Tube replacing/Pump head assembling procedure 4. Pull the catch part of Pump Cover frontward to remove the Pump Cover. -
Page 140: 2011 Mimaki Engineering Co.,Ltd
Maintenance Manual > Disassembly and Reassembly > Ink-related Parts > Pump Head Rev. Model UJF-3042/FX Issued 2010.08.27 Revised 2011.09.30 F/W ver Remark 6.2.3 Pump Head 9. Assemble the Nut and Sleeve to the right and left tube. Sleeve © 2011 MIMAKI ENGINEERING CO.,LTD. -
Page 141: 2011 Mimaki Engineering Co.,Ltd
Maintenance Manual > Disassembly and Reassembly > Ink-related Parts > Station Assy. Rev. Model UJF-3042/FX Issued 2010.08.27 Revised 2011.09.30 F/W ver Remark 6.2.4 Station Assy. Description of this section This section provides the procedure for removing the unit for easier maintenance of certain parts, such as the Pump Head and Wiper Assy. -
Page 142: 2011 Mimaki Engineering Co.,Ltd
Maintenance Manual > Disassembly and Reassembly > Ink-related Parts > Station Assy. Rev. Model UJF-3042/FX Issued 2010.08.27 Revised 2011.09.30 F/W ver Remark 6.2.4 Station Assy. 11. Remove the three screws. Screw : P4x8SMW x3 12. Remove the Station Assy. Carefully remove the Assy so as not to damage the cables or tubes. -
Page 143: 2011 Mimaki Engineering Co.,Ltd
Maintenance Manual > Disassembly and Reassembly > Ink-related Parts > Wipe Suction Pump Assy. Rev. Model UJF-3042/FX Issued 2010.08.27 Revised 2011.09.30 F/W ver Remark 6.2.5 Wipe Suction Pump Assy. Wipe Suction Pump Assy. Procedures To turn power off, be sure to turn the main power OFF. -
Page 144: 2011 Mimaki Engineering Co.,Ltd
Maintenance Manual > Disassembly and Reassembly > Ink-related Parts > Cartridge Guide Assy. Rev. Model UJF-3042/FX Issued 2010.08.27 Revised 2011.09.30 F/W ver Remark 6.2.6 Cartridge Guide Assy. Procedures To turn power off, be sure to turn the main power OFF. -
Page 145: 2011 Mimaki Engineering Co.,Ltd
Maintenance Manual > Disassembly and Reassembly > Ink-related Parts > Cartridge Guide Assy. Rev. Model UJF-3042/FX Issued 2010.08.27 Revised 2011.09.30 F/W ver Remark 6.2.6 Cartridge Guide Assy. 6. Remove the Cap Nut, and pull of the Ink Tube.. Take care not to stain any object by ink dripping and also not to lose the O-ring. -
Page 146: 2011 Mimaki Engineering Co.,Ltd
Maintenance Manual > Disassembly and Reassembly > Ink-related Parts > Cartridge Guide Assy. Rev. Model UJF-3042/FX Issued 2010.08.27 Revised 2011.09.30 F/W ver Remark 6.2.6 Cartridge Guide Assy. 12. Remove the Cartridge Base Assy from the Ink Slot Guide BKT1(or Ink Slot Guide BKT2). -
Page 147: 2011 Mimaki Engineering Co.,Ltd
Maintenance Manual > Disassembly and Reassembly > Ink-related Parts > Cartridge Coupling Assy. Rev. Model UJF-3042/FX Issued 2010.08.27 Revised 2011.09.30 F/W ver Remark 6.2.7 Cartridge Coupling Assy. Procedures Be sure to wear Protective Glasses and Working Gloves during the work operation.Ink may get in your eyes depending on the working condition, or hand skin may get rough if you touch the ink. -
Page 148: 2011 Mimaki Engineering Co.,Ltd
Maintenance Manual > Disassembly and Reassembly > Ink-related Parts > Capping Rev. Model UJF-3042/FX Issued 2010.08.27 Revised 2011.09.30 F/W ver Remark 6.2.8 Capping Cap Assy To turn power off, be sure to turn the main power OFF. Be sure to wear Protective Glasses and Working Gloves during the work operation. -
Page 149: 2011 Mimaki Engineering Co.,Ltd
Maintenance Manual > Disassembly and Reassembly > Ink-related Parts > Capping Rev. Model UJF-3042/FX Issued 2010.08.27 Revised 2011.09.30 F/W ver Remark 6.2.8 Capping 5. Remove the Cap Slider. (1) Remove the Cap Slider from the guide flute by extending the side surface of the Cap Base. -
Page 150: 2011 Mimaki Engineering Co.,Ltd
Maintenance Manual > Disassembly and Reassembly > Ink-related Parts > Wiper unit Assy(Belt, Sensor) Rev. Model UJF-3042/FX Issued 2010.08.27 Revised 2011.09.30 F/W ver Remark 6.2.9 Wiper unit Assy(Belt, Sensor) Wiper Unit Assy To turn power off, be sure to turn the main power OFF. -
Page 151: 2011 Mimaki Engineering Co.,Ltd
Maintenance Manual > Disassembly and Reassembly > Ink-related Parts > Wiper unit Assy(Belt, Sensor) Rev. Model UJF-3042/FX Issued 2010.08.27 Revised 2011.09.30 F/W ver Remark 6.2.9 Wiper unit Assy(Belt, Sensor) 4. Remove the following parts: Wiper Cover • Wiper Cover • Wiper BKT 2 Wiper BKT 2 5. - Page 152 Maintenance Manual > Disassembly and Reassembly > Driving Parts Disassembly and Reassembly Covers Ink-related Parts Driving Parts PCBs Sensors Other Electrical Parts UV Parts Greasing © 2013 MIMAKI ENGINEERING CO.,LTD.
-
Page 153: 2011 Mimaki Engineering Co.,Ltd
Maintenance Manual > Disassembly and Reassembly > Driving Parts > X-axis Motor Assy Rev. Model UJF-3042/FX Issued 2010.08.27 Revised 2011.09.30 F/W ver Remark 6.3.1 X-axis Motor Assy X-axis Motor Assy To turn power off, be sure to turn the main power OFF. -
Page 154: 2011 Mimaki Engineering Co.,Ltd
Maintenance Manual > Disassembly and Reassembly > Driving Parts > X-axis Motor Assy Rev. Model UJF-3042/FX Issued 2010.08.27 Revised 2011.09.30 F/W ver Remark 6.3.1 X-axis Motor Assy 6. Disconnect the Encoder Connector and relay connector, and Encoder Connector then take out the motor. -
Page 155: 2011 Mimaki Engineering Co.,Ltd
Maintenance Manual > Disassembly and Reassembly > Driving Parts > Y-axis Motor Rev. Model UJF-3042/FX Issued 2010.08.27 Revised 2011.09.30 F/W ver Remark 6.3.2 Y-axis Motor Y-axis Motor Procedures To turn power off, be sure to turn the main power OFF. -
Page 156: 2011 Mimaki Engineering Co.,Ltd
Maintenance Manual > Disassembly and Reassembly > Driving Parts > Y-axis Motor Rev. Model UJF-3042/FX Issued 2010.08.27 Revised 2011.09.30 F/W ver Remark 6.3.2 Y-axis Motor 6. Remove the Y Motor Assy from the Y-Motor BKT. Two Screws Screw : P4x10SMW x2 7. -
Page 157: 2011 Mimaki Engineering Co.,Ltd
Maintenance Manual > Disassembly and Reassembly > Driving Parts > Table Rev. Model UJF-3042/FX Issued 2010.08.27 Revised 2011.09.30 F/W ver Remark 6.3.3 Table Table Procedures To turn power off, be sure to turn the main power OFF. 1. Make a printer the next state. -
Page 158: 2011 Mimaki Engineering Co.,Ltd
Maintenance Manual > Disassembly and Reassembly > Driving Parts > Table Rev. Model UJF-3042/FX Issued 2010.08.27 Revised 2011.09.30 F/W ver Remark 6.3.3 Table 5. Open the Front Cover-TB.(Pull the cover toward you.) Lift straight up 6. Lift and remove the Table. -
Page 159: 2011 Mimaki Engineering Co.,Ltd
Maintenance Manual > Disassembly and Reassembly > Driving Parts > Z-Driving Screw Rev. Model UJF-3042/FX Issued 2010.08.27 Revised 2011.09.30 F/W ver Remark 6.3.4 Z-Driving Screw Procedures To turn power off, be sure to turn the main power OFF. Be sure to start the work after confirming the working process. -
Page 160: 2011 Mimaki Engineering Co.,Ltd
Maintenance Manual > Disassembly and Reassembly > Driving Parts > Z-Driving Screw Rev. Model UJF-3042/FX Issued 2010.08.27 Revised 2011.09.30 F/W ver Remark 6.3.4 Z-Driving Screw 3. Remove the Z Motor BKT. The Z Motor and Pulley can be kept attached. -
Page 161: Cn2[1
Maintenance Manual > Disassembly and Reassembly > Driving Parts > Slider Relay Cooling Fan Assy Rev. Model UJF-3042/FX Issued 2010.08.27 Revised 2011.09.30 F/W ver Remark 6.3.5 Slider Relay Cooling Fan Assy Slider Relay Cooling Fan Assy Procedures To turn power off, be sure to turn the main power OFF. -
Page 162: 2011 Mimaki Engineering Co.,Ltd
Maintenance Manual > Disassembly and Reassembly > Driving Parts > Mist Suction Fan Assy Rev. Model UJF-3042/FX Issued 2010.08.27 Revised 2011.09.30 F/W ver Remark 6.3.6 Mist Suction Fan Assy Mist Suction Fan Assy To turn power off, be sure to turn the main power OFF. -
Page 163: 2011 Mimaki Engineering Co.,Ltd
Maintenance Manual > Disassembly and Reassembly > Driving Parts > Tabel Absorption Fan Rev. Model UJF-3042/FX Issued 2010.08.27 Revised 2011.09.30 F/W ver Remark 6.3.7 Tabel Absorption Fan Procedure To turn power off, be sure to turn the main power OFF. -
Page 164: 2011 Mimaki Engineering Co.,Ltd
Maintenance Manual > Disassembly and Reassembly > Driving Parts > Linear Encorder Scale Rev. Model UJF-3042/FX Issued 2010.08.27 Revised 2011.09.30 F/W ver Remark 6.3.8 Linear Encorder Scale Linear Encoder Scale To turn power off, be sure to turn the main power OFF. -
Page 165: 2011 Mimaki Engineering Co.,Ltd
Maintenance Manual > Disassembly and Reassembly > Driving Parts > X Gear Box Rev. Model UJF-3042/FX Issued 2010.08.27 Revised 2013.07.18 F/W ver Remark 6.3.9 X Gear Box To turn power off, be sure to turn the main power OFF. Procedures 1. -
Page 166: 2011 Mimaki Engineering Co.,Ltd
Maintenance Manual > Disassembly and Reassembly > Driving Parts > X Gear Box Rev. Model UJF-3042/FX Issued 2010.08.27 Revised 2013.07.18 F/W ver Remark 6.3.9 X Gear Box 9. Remove the FFC from the Station III PCB, and remove the clamp on the FFC. -
Page 167: 2011 Mimaki Engineering Co.,Ltd
Maintenance Manual > Disassembly and Reassembly > Driving Parts > X Gear Box Rev. Model UJF-3042/FX Issued 2010.08.27 Revised 2013.08.01 F/W ver Remark 6.3.9 X Gear Box 14. Remove the X gearbox Assy. When passing the X gearbox Assy below the Z slide BKTF, use Z slide BKTF the available space to tilt the X gearbox Assy as needed. -
Page 168: 2011 Mimaki Engineering Co.,Ltd
Maintenance Manual > Disassembly and Reassembly > Driving Parts > Motor Coupling Rev. Model UJF-3042/FX Issued 2010.08.27 Revised 2013.07.18 F/W ver Remark 6.3.10 Motor Coupling Applicable scope: M013772_X gearbox Assy II (UJF-3042-FX #1191 or later) The coupling for the previous type, M009998_X gearbox Assy cannot be replaced. -
Page 169: 2011 Mimaki Engineering Co.,Ltd
Maintenance Manual > Disassembly and Reassembly > Driving Parts > Motor Coupling Rev. Model UJF-3042/FX Issued 2010.08.27 Revised 2013.07.18 F/W ver Remark 6.3.10 Motor Coupling 4. Temporarily tighten the screws (CS4x8 SMW) removed in Step Position the motor on top, and the X gearbox Assy vertically. - Page 170 Maintenance Manual > Disassembly and Reassembly > PCBs Disassembly and Reassembly Covers Ink-related Parts Driving Parts PCBs Sensors Other Electrical Parts UV Parts Greasing © 2013 MIMAKI ENGINEERING CO.,LTD.
-
Page 171: 2011 Mimaki Engineering Co.,Ltd
Maintenance Manual > Disassembly and Reassembly > PCBs > Power Supply PCB Assy Rev. Model UJF-3042/FX Issued 2010.08.27 Revised 2011.09.30 F/W ver Remark 6.4.1 Power Supply PCB Assy Power Supply Assy. Procedures Start work after a lapse of 5 minutes from turning the main power OFF; otherwise, high voltage may cause electric shock. -
Page 172: 2011 Mimaki Engineering Co.,Ltd
Maintenance Manual > Disassembly and Reassembly > PCBs > Main PCB Rev. Model UJF-3042/FX Issued 2010.08.27 Revised 2011.09.30 F/W ver Remark 6.4.2 Main PCB Procedures A button type lithium battery is used for this board. Warn following 1)~4). -
Page 173: 2011 Mimaki Engineering Co.,Ltd
Maintenance Manual > Disassembly and Reassembly > PCBs > 3042 Slider Relay PCB Assy Rev. Model UJF-3042/FX Issued 2010.08.27 Revised 2011.09.30 F/W ver Remark 6.4.3 3042 Slider Relay PCB Assy 3042 Slider Relay PCBAssy Procedures To turn power off, be sure to turn the main power OFF. -
Page 174: 2011 Mimaki Engineering Co.,Ltd
Maintenance Manual > Disassembly and Reassembly > PCBs > 3042 Station 3 PCB Assy Rev. Model UJF-3042/FX Issued 2010.08.27 Revised 2011.09.30 F/W ver Remark 6.4.4 3042 Station 3 PCB Assy Procedures To turn power off, be sure to turn the main power OFF. - Page 175 Maintenance Manual > Disassembly and Reassembly > PCBs > Slider PCB Rev. Model UJF-3042 Issued 2010.04.08 Revised F/W ver Remark 6.4.5 Slider PCB Slider PCB Assy. Procedures To turn power off, be sure to turn the main power OFF.
- Page 176 Maintenance Manual > Disassembly and Reassembly > PCBs > 3042 Pump 3 PCB Assy Rev. Model UJF-3042 Issued 2010.04.08 Revised F/W ver Remark 6.4.6 3042 Pump 3 PCB Assy 3042 Pump 3 PCB Assy Procedures To turn power off, be sure to turn the main power OFF.
-
Page 177: 2011 Mimaki Engineering Co.,Ltd
Maintenance Manual > Disassembly and Reassembly > PCBs > ID Contact PCB Rev. Model UJF-3042/FX Issued 2010.08.27 Revised 2011.09.30 F/W ver Remark 6.4.7 ID Contact PCB Procedures To turn power off, be sure to turn the main power OFF. -
Page 178: 2011 Mimaki Engineering Co.,Ltd
Maintenance Manual > Disassembly and Reassembly > PCBs > Keyboard PCB Rev. Model UJF-3042/FX Issued 2010.08.27 Revised 2011.09.30 F/W ver Remark 6.4.8 Keyboard PCB Keyboard PCB Assy. Procedures To turn power off, be sure to turn the main power OFF. -
Page 179: 2011 Mimaki Engineering Co.,Ltd
Maintenance Manual > Disassembly and Reassembly > PCBs > Linear Encoder PCB Rev. Model UJF-3042/FX Issued 2010.08.27 Revised 2011.09.30 F/W ver Remark 6.4.9 Linear Encoder PCB Linear Encoder PCB Assy. Procedures To turn power off, be sure to turn the main power OFF. - Page 180 Maintenance Manual > Disassembly and Reassembly > Sensors Disassembly and Reassembly Covers Ink-related Parts Driving Parts PCBs Sensors Other Electrical Parts UV Parts Greasing © 2013 MIMAKI ENGINEERING CO.,LTD.
-
Page 181: 2011 Mimaki Engineering Co.,Ltd
Maintenance Manual > Disassembly and Reassembly > Sensors > X origin sensor Rev. Model UJF-3042/FX Issued 2010.08.27 Revised 2011.09.30 F/W ver Remark 6.5.1 X origin sensor X origin sensor To turn power off, be sure to turn the main power OFF. -
Page 182: 2011 Mimaki Engineering Co.,Ltd
Maintenance Manual > Disassembly and Reassembly > Sensors > X origin sensor Rev. Model UJF-3042/FX Issued 2010.08.27 Revised 2011.09.30 F/W ver Remark 6.5.1 X origin sensor 5. Take the Sensor off. • Remove Fixng screw. • Disconnect the connecter of the sensor. -
Page 183: 2011 Mimaki Engineering Co.,Ltd
Maintenance Manual > Disassembly and Reassembly > Sensors > Z origin sensor Rev. Model UJF-3042/FX Issued 2010.08.27 Revised 2011.09.30 F/W ver Remark 6.5.2 Z origin sensor Z origin sensor To turn power off, be sure to turn the main power OFF. -
Page 184: 2011 Mimaki Engineering Co.,Ltd
Maintenance Manual > Disassembly and Reassembly > Sensors > Work area sensor Rev. Model UJF-3042/FX Issued 2010.08.27 Revised 2011.09.30 F/W ver Remark 6.5.3 Work area sensor Work area sensor Work area sensor Projection of the light side Light receiving side ... -
Page 185: 2011 Mimaki Engineering Co.,Ltd
Maintenance Manual > Disassembly and Reassembly > Sensors > Work area sensor Rev. Model UJF-3042/FX Issued 2010.08.27 Revised 2011.09.30 F/W ver Remark 6.5.3 Work area sensor Disassembly of the “ Light receiving side” 7. Loosen the Cable fixing. Work area sensor BKT 8. -
Page 186: 2011 Mimaki Engineering Co.,Ltd
Maintenance Manual > Disassembly and Reassembly > Sensors > Cover sensor Rev. Model UJF-3042/FX Issued 2010.08.27 Revised 2011.09.30 F/W ver Remark 6.5.4 Cover sensor Cover sensor To turn power off, be sure to turn the main power OFF. Working Procedure 1. -
Page 187: 2011 Mimaki Engineering Co.,Ltd
Maintenance Manual > Disassembly and Reassembly > Sensors > Table Cover sensor Rev. Model UJF-3042/FX Issued 2010.08.27 Revised 2011.09.30 F/W ver Remark 6.5.5 Table Cover sensor Table Cover sensor To turn power off, be sure to turn the main power OFF. - Page 188 Maintenance Manual > Disassembly and Reassembly > Other Electrical Parts Disassembly and Reassembly Covers Ink-related Parts Driving Parts PCBs Sensors Other Electrical Parts UV Parts Greasing © 2013 MIMAKI ENGINEERING CO.,LTD.
- Page 189 Maintenance Manual > Disassembly and Reassembly > UV Parts Disassembly and Reassembly Covers Ink-related Parts Driving Parts PCBs Sensors Other Electrical Parts UV Parts Greasing © 2013 MIMAKI ENGINEERING CO.,LTD.
-
Page 190: 2011 Mimaki Engineering Co.,Ltd
Maintenance Manual > Disassembly and Reassembly > UV Parts > LED UV UNIT Rev. Model UJF-3042/FX Issued 2010.08.27 Revised 2011.09.30 F/W ver Remark 6.7.1 LED UV UNIT LED UV UNIT The LED-UV UNIT “New Type” explained here has no compatibility with the “Old Type” as indi- cated below. -
Page 191: 2011 Mimaki Engineering Co.,Ltd
Maintenance Manual > Disassembly and Reassembly > UV Parts > LED UV UNIT Rev. Model UJF-3042/FX Issued 2010.08.27 Revised 2011.09.30 F/W ver Remark 6.7.1 LED UV UNIT Procedures 1. Drain the cooling water completely. Coupler of Cooling Water Tube x2 Follow the procedure given in “... -
Page 192: 2011 Mimaki Engineering Co.,Ltd
Maintenance Manual > Disassembly and Reassembly > UV Parts > LED UV UNIT Rev. Model UJF-3042/FX Issued 2010.08.27 Revised 2011.09.30 F/W ver Remark 6.7.1 LED UV UNIT 9. Remove the DRV PCB Cooling Fan Assy. FAN Connector (1) Pull the Connector off. (CN4) (2) Remove the Fixing screw. -
Page 193: 2011 Mimaki Engineering Co.,Ltd
Maintenance Manual > Disassembly and Reassembly > UV Parts > LED UV UNIT Rev. Model UJF-3042/FX Issued 2010.08.27 Revised 2011.09.30 F/W ver Remark 6.7.1 LED UV UNIT 12. Remove the Reflector BKT. Reflector BKT • Fixing screw x2 13. Remove the Glass Holder and the Glass. -
Page 194: 2011 Mimaki Engineering Co.,Ltd
Maintenance Manual > Disassembly and Reassembly > UV Parts > UV Cooling Unit Rev. Model UJF-3042/FX Issued 2010.08.27 Revised 2011.09.30 F/W ver Remark 6.7.2 UV Cooling Unit UV Cooling Unit Procedures To turn power off, be sure to turn the main power OFF. -
Page 195: 2011 Mimaki Engineering Co.,Ltd
Maintenance Manual > Disassembly and Reassembly > UV Parts > UV Cooling Unit Rev. Model UJF-3042/FX Issued 2010.08.27 Revised 2011.09.30 F/W ver Remark 6.7.2 UV Cooling Unit 5. Disconnect the relay connector of following Electrical Assy. Float Sensor Cooling Water Pump •... -
Page 196: 2011 Mimaki Engineering Co.,Ltd
Maintenance Manual > Disassembly and Reassembly > UV Parts > Cooling Water Pump Rev. Model UJF-3042/FX Issued 2010.08.27 Revised 2011.09.30 F/W ver Remark 6.7.3 Cooling Water Pump Cooling Water Pump To turn power off, be sure to turn the main power OFF. -
Page 197: 2011 Mimaki Engineering Co.,Ltd
Maintenance Manual > Disassembly and Reassembly > UV Parts > Radiator Fan Assy. Rev. Model UJF-3042/FX Issued 2010.08.27 Revised 2011.09.30 F/W ver Remark 6.7.4 Radiator Fan Assy. Radiator Fan Assy To turn power off, be sure to turn the main power OFF. - Page 198 Maintenance Manual > Disassembly and Reassembly > Greasing Disassembly and Reassembly Covers Ink-related Parts Driving Parts PCBs Sensors Other Electrical Parts UV Parts Greasing © 2013 MIMAKI ENGINEERING CO.,LTD.
-
Page 199: 2011 Mimaki Engineering Co.,Ltd
Maintenance Manual > Troubleshooting > Details on Errors and Malfunctions Troubleshooting Details on Errors and Malfunctions Detailed Methods of Coping with the Malfunctions © 2011 MIMAKI ENGINEERING CO.,LTD. -
Page 200: 2011 Mimaki Engineering Co.,Ltd
Hardware: Broken wire or faulty contact of cables Software: Transmission by improper application setting In the standard setting of UJF-3042/FX, priority is given to the host computer. Check the settings on the host computer to see if there is any improper parameter setting. -
Page 201: 2011 Mimaki Engineering Co.,Ltd
Maintenance Manual > Troubleshooting > Details on Errors and Malfunctions > Concerning Errors and Malfunctions Rev. Model UJF-3042/FX Issued 2010.08.27 Revised 2011.09.30 F/W ver Remark 7.1.1 Concerning Errors and Malfunctions Checking Procedure This section describes troubleshooting procedures for the problems for which error messages are displayed. -
Page 202: List Of Error Messages
Maintenance Manual > Troubleshooting > Details on Errors and Malfunctions > List of Error Messages Rev. Model UJF-3042/FX Issued 2010.08.27 Revised 2011.09.30 F/W ver 1.80 / 1.00 Remark 7.1.2 List of Error Messages List of Error Messages (1/9) Cause... - Page 203 Maintenance Manual > Troubleshooting > Details on Errors and Malfunctions > List of Error Messages Rev. Model UJF-3042/FX Issued 2010.08.27 Revised 2011.09.30 F/W ver 1.80 / 1.00 Remark 7.1.2 List of Error Messages List of Error Messages (2/9) Cause...
- Page 204 Maintenance Manual > Troubleshooting > Details on Errors and Malfunctions > List of Error Messages Rev. Model UJF-3042/FX Issued 2010.08.27 Revised 2011.09.30 F/W ver 1.80 / 1.00 Remark 7.1.2 List of Error Messages List of Error Messages (3/9) Cause...
- Page 205 Maintenance Manual > Troubleshooting > Details on Errors and Malfunctions > List of Error Messages Rev. Model UJF-3042/FX Issued 2010.08.27 Revised 2011.09.30 F/W ver 1.80 / 1.00 Remark 7.1.2 List of Error Messages List of Error Messages (4/9) Cause...
- Page 206 Maintenance Manual > Troubleshooting > Details on Errors and Malfunctions > List of Error Messages Rev. Model UJF-3042/FX Issued 2010.08.27 Revised 2011.09.30 F/W ver 1.80 / 1.00 Remark 7.1.2 List of Error Messages List of Error Messages (5/9) Cause...
- Page 207 Maintenance Manual > Troubleshooting > Details on Errors and Malfunctions > List of Error Messages Rev. Model UJF-3042/FX Issued 2010.08.27 Revised 2011.09.30 F/W ver 1.80 / 1.00 Remark 7.1.2 List of Error Messages List of Error Messages (6/9) Cause...
- Page 208 Maintenance Manual > Troubleshooting > Details on Errors and Malfunctions > List of Error Messages Rev. Model UJF-3042/FX Issued 2010.08.27 Revised 2011.09.30 F/W ver 1.80 / 1.00 Remark 7.1.2 List of Error Messages List of Error Messages (7/9) Cause List of Countermeasures Type of inserted Ink Cartridge is different.
- Page 209 Maintenance Manual > Troubleshooting > Details on Errors and Malfunctions > List of Error Messages Rev. Model UJF-3042/FX Issued 2010.08.27 Revised 2011.09.30 F/W ver 1.80 / 1.00 Remark 7.1.2 List of Error Messages List of Error Messages (8/9) Cause...
- Page 210 Maintenance Manual > Troubleshooting > Details on Errors and Malfunctions > List of Error Messages Rev. Model UJF-3042/FX Issued 2010.08.27 Revised 2011.09.30 F/W ver 1.80 / 1.00 Remark 7.1.2 List of Error Messages List of Error Messages (9/9) Cause...
- Page 211 Maintenance Manual > Troubleshooting > Details on Errors and Malfunctions > List of Error Messages Rev. Model UJF-3042/FX Issued 2010.08.27 Revised 2011.09.30 F/W ver 1.80 / 1.00 Remark 7.1.2 List of Error Messages Hexadecimal Reason for error occurrence Cause for occurrence...
- Page 212 Maintenance Manual > Troubleshooting > Details on Errors and Malfunctions > List of Warning Messages Rev. Model UJF-3042/FX Issued 2010.08.27 Revised 2011.09.30 F/W ver 1.80 / 1.00 Remark 7.1.3 List of Warning Messages List of Warning Messages (1/2) Message...
- Page 213 Maintenance Manual > Troubleshooting > Details on Errors and Malfunctions > List of Warning Messages Rev. Model UJF-3042/FX Issued 2010.08.27 Revised 2011.09.30 F/W ver 1.80 / 1.00 Remark 7.1.3 List of Warning Messages List of Warning Messages (2/2) Message...
-
Page 214: List Of System Halt
Maintenance Manual > Troubleshooting > Details on Errors and Malfunctions > List of SYSTEM HALT Rev. Model UJF-3042/FX Issued 2010.08.27 Revised 2011.09.30 F/W ver 1.80 / 1.00 Remark 7.1.4 List of SYSTEM HALT List of SYSTEM HALT (1/7) Cause... - Page 215 Maintenance Manual > Troubleshooting > Details on Errors and Malfunctions > List of SYSTEM HALT Rev. Model UJF-3042/FX Issued 2010.08.27 Revised 2011.09.30 F/W ver 1.80 / 1.00 Remark 7.1.4 List of SYSTEM HALT List of SYSTEM HALT (2/7) Cause...
- Page 216 Maintenance Manual > Troubleshooting > Details on Errors and Malfunctions > List of SYSTEM HALT Rev. Model UJF-3042/FX Issued 2010.08.27 Revised 2011.09.30 F/W ver 1.80 / 1.00 Remark 7.1.4 List of SYSTEM HALT List of SYSTEM HALT (3/7) Cause Corrective Measures No Slider PCB.
- Page 217 Maintenance Manual > Troubleshooting > Details on Errors and Malfunctions > List of SYSTEM HALT Rev. Model UJF-3042/FX Issued 2010.08.27 Revised 2011.09.30 F/W ver 1.80 / 1.00 Remark 7.1.4 List of SYSTEM HALT List of SYSTEM HALT (4/7) Cause...
- Page 218 Maintenance Manual > Troubleshooting > Details on Errors and Malfunctions > List of SYSTEM HALT Rev. Model UJF-3042/FX Issued 2010.08.27 Revised 2011.09.30 F/W ver 1.80 / 1.00 Remark 7.1.4 List of SYSTEM HALT List of SYSTEM HALT (5/7) Cause...
-
Page 219: Cn24[1
Maintenance Manual > Troubleshooting > Details on Errors and Malfunctions > List of SYSTEM HALT Rev. Model UJF-3042/FX Issued 2010.08.27 Revised 2011.09.30 F/W ver 1.80 / 1.00 Remark 7.1.4 List of SYSTEM HALT List of SYSTEM HALT (6/7) Cause... - Page 220 Maintenance Manual > Troubleshooting > Details on Errors and Malfunctions > List of SYSTEM HALT Rev. Model UJF-3042/FX Issued 2010.08.27 Revised 2011.09.30 F/W ver 1.80 / 1.00 Remark 7.1.4 List of SYSTEM HALT List of SYSTEM HALT (7/7) Cause...
-
Page 221: 2011 Mimaki Engineering Co.,Ltd
Maintenance Manual > Troubleshooting > Details on Errors and Malfunctions > Troubles Without Messages Dis- Rev. Model UJF-3042/FX Issued 2010.08.27 Revised 2011.09.30 F/W ver 1.80 / 1.00 Remark 7.1.5 Troubles Without Messages Displayed There is a possibility of electric shock. -
Page 222: 2011 Mimaki Engineering Co.,Ltd
Maintenance Manual > Troubleshooting > Detailed Methods of Coping with the Malfunctions Troubleshooting Details on Errors and Malfunctions Detailed Methods of Coping with the Malfunctions © 2011 MIMAKI ENGINEERING CO.,LTD. -
Page 223: Cn6[1
Detailed Methods of Coping with the Malfunctions Cannot start for “SYS- > > > Rev. Model UJF-3042/FX Issued 2010.08.27 Revised 2011.09.30 F/W ver 1.80 / 1.00 Remark 7.2.1 Cannot start for “SYSTEM HALT(1) 11c:SLDR PCB H” Outline If the result of FFC connection check between the Slider Relay PCB and the Slider PCB is NG, the relevant error is displayed and the startup operation stops. -
Page 224: Sw[1
Detailed Methods of Coping with the Malfunctions Discharging defect can- > > > Rev. Model UJF-3042/FX Issued 2010.08.27 Revised 2011.09.30 F/W ver 1.80 / 1.00 Remark 7.2.2 Discharging defect cannot be improved by cleaning. Outline In some cases, the nozzle missing and deflection cannot be improved by cleaning. As its cause, there is a possibility that dirt may adhere to the nozzle surface or ink may adhere to/fix to the nozzle surface due to mist. -
Page 225: 2011 Mimaki Engineering Co.,Ltd
Detailed Methods of Coping with the Malfunctions Discharging defect can- > > > Rev. Model UJF-3042/FX Issued 2010.08.27 Revised 2011.09.30 F/W ver 1.80 / 1.00 Remark 7.2.2 Discharging defect cannot be improved by cleaning. Countermeasure 2 Required items 1 Syringe kit for head washing (Type No. A103291) Syringe kit for head washing 2 Tube kit (Type No. -
Page 226: 2011 Mimaki Engineering Co.,Ltd
Maintenance Manual > Troubleshooting > Detailed Methods of Coping with the Malfunctions > Discharging defect cannot be improved by cleaning. Rev. Model UJF-3042/FX Issued 2010.08.27 Revised 2011.09.30 F/W ver 1.80 / 1.00 Remark 7.2.2 Discharging defect cannot be improved by cleaning. - Page 227 Maintenance Manual > Operation Flow > Basic Operation Operation Flow Basic Operation Print Mode Service Mode © 2009 MIMAKI ENGINEERING CO.,LTD.
-
Page 228: 2011 Mimaki Engineering Co.,Ltd
Maintenance Manual > Operation Flow > Basic Operation > Start Rev. Model UJF-3042/FX Issued 2010.08.27 Revised 2011.09.30 F/W ver 1.80 / 1.00 Remark 8.1.1 Start © 2011 MIMAKI ENGINEERING CO.,LTD. 8.1.1 R.2.0... -
Page 229: 2011 Mimaki Engineering Co.,Ltd
Maintenance Manual > Operation Flow > Print Mode Operation Flow Basic Operation Print Mode Service Mode © 2011 MIMAKI ENGINEERING CO.,LTD. -
Page 230: 2011 Mimaki Engineering Co.,Ltd
Maintenance Manual > Operation Flow > Print Mode > LOCAL / REMOTE Rev. Model UJF-3042/FX Issued 2010.08.27 Revised 2011.09.30 F/W ver 1.80 / 1.00 Remark 8.2.1 LOCAL / REMOTE FUNCTION © 2011 MIMAKI ENGINEERING CO.,LTD. 8.2.1 R.2.0... -
Page 231: 2011 Mimaki Engineering Co.,Ltd
Maintenance Manual > Operation Flow > Print Mode > FUNCTION Rev. Model UJF-3042/FX Issued 2010.08.27 Revised 2011.09.30 F/W ver 1.80 / 1.00 Remark 8.2.2 FUNCTION SETUP MAINTENANCE MACHINE SETUP #ADJUST #TEST #PARAMETER © 2011 MIMAKI ENGINEERING CO.,LTD. 8.2.2 R.2.0... -
Page 232: 2011 Mimaki Engineering Co.,Ltd
Maintenance Manual > Operation Flow > Print Mode > SETUP Rev. Model UJF-3042/FX Issued 2010.08.27 Revised 2011.09.30 F/W ver 1.80 / 1.00 Remark 8.2.3 SETUP © 2011 MIMAKI ENGINEERING CO.,LTD. 8.2.3 R.2.0... -
Page 233: 2011 Mimaki Engineering Co.,Ltd
Maintenance Manual > Operation Flow > Print Mode > MAINTENANCE Rev. Model UJF-3042/FX Issued 2010.08.27 Revised 2011.09.30 F/W ver 1.80 / 1.00 Remark 8.2.4 MAINTENANCE © 2011 MIMAKI ENGINEERING CO.,LTD. 8.2.4 R.2.0... -
Page 234: 2011 Mimaki Engineering Co.,Ltd
Maintenance Manual > Operation Flow > Print Mode > MACHINE SETUP Rev. Model UJF-3042/FX Issued 2010.08.27 Revised 2011.09.30 F/W ver 1.80 / 1.00 Remark 8.2.5 MACHINE SETUP © 2011 MIMAKI ENGINEERING CO.,LTD. 8.2.5 R.2.0... -
Page 235: 2011 Mimaki Engineering Co.,Ltd
Maintenance Manual > Operation Flow > Service Mode Operation Flow Basic Operation Print Mode Service Mode © 2011 MIMAKI ENGINEERING CO.,LTD. - Page 236 Maintenance Manual > Operation Flow > Service Mode > #ADJUST Rev. Model UJF-3042/FX Issued 2010.08.27 Revised 2011.09.30 F/W ver 1.80 / 1.00 Remark 8.3.1 #ADJUST © 2012 MIMAKI ENGINEERING CO.,LTD. 8.3.1 R.2.0...
- Page 237 Maintenance Manual > Operation Flow > Service Mode > #ADJUST Rev. Model UJF-3042/FX Issued 2010.08.27 Revised 2011.09.30 F/W ver 1.80 / 1.00 Remark 8.3.1 #ADJUST This can be set if the number of partition number of partition passes is not minimum.
- Page 238 Maintenance Manual > Operation Flow > Service Mode > #ADJUST Rev. Model UJF-3042/FX Issued 2010.08.27 Revised 2013.02.08 F/W ver 3.50/3.50 Remark 8.3.1 #ADJUST © 2012 MIMAKI ENGINEERING CO.,LTD. 8.3.1 R.2.1...
- Page 239 Maintenance Manual > Operation Flow > Service Mode > #TEST Rev. Model UJF-3042/FX Issued 2010.08.27 Revised 2011.09.30 F/W ver 3.00 / 3.00 Remark 8.3.2 #TEST This is not displayer for feed evalution pattern. This can be set if the number of partitiom passes is not ©...
- Page 240 Maintenance Manual > Operation Flow > Service Mode > #TEST Rev. Model UJF-3042/FX Issued 2010.08.27 Revised 2011.09.30 F/W ver 1.80 / 1.00 Remark 8.3.2 #TEST © 2012 MIMAKI ENGINEERING CO.,LTD. 8.3.2 R.2.0...
- Page 241 Maintenance Manual > Operation Flow > Service Mode > #TEST Rev. Model UJF-3042/FX Issued 2010.08.27 Revised 2011.09.30 F/W ver 1.80 / 1.00 Remark 8.3.2 #TEST © 2012 MIMAKI ENGINEERING CO.,LTD. 8.3.2 R.2.0...
-
Page 242: 2011 Mimaki Engineering Co.,Ltd
Maintenance Manual > Operation Flow > Service Mode > #PARAMETER Rev. Model UJF-3042/FX Issued 2010.08.27 Revised 2011.09.30 F/W ver 1.80 / 1.00 Remark 8.3.3 #PARAMETER © 2011 MIMAKI ENGINEERING CO.,LTD. 8.3.3 R.2.0... - Page 243 D500552-23-18072013 FW 3.5 / 3.5...
Need help?
Do you have a question about the UJF-3042 and is the answer not in the manual?
Questions and answers