Avaya 3740 User Manual
Hide thumbs
Also See for 3740:
- User manual (121 pages) ,
- Quick reference manual (5 pages) ,
- Installation manual (174 pages)

Related Manuals for Avaya 3740


Summary of Contents for Avaya 3740
- Page 1 Avaya 3740/ 3745/ 3749 DECT Telephones connected to Avaya Aura™ Communication Manager and IP Office User Guide 21-603690 02/2016 Issue 5.0...
- Page 2 Avaya including the selection, arrangement and Hosted Service design of the content is owned either by Avaya or its licensors and is protected THE FOLLOWING APPLIES IF YOU PURCHASE A HOSTED SERVICE by copyright and other intellectual property laws including the sui generis rights SUBSCRIPTION FROM AVAYA OR AN AVAYA CHANNEL PARTNER (AS relating to the protection of databases.
- Page 3 Avaya Support website: https://support.avaya.com PARTY TERMS AND REQUIRE A SERVICE PROVIDER TO BE such successor site as designated by Avaya), scroll to the bottom of the page, INDEPENDENTLY LICENSED DIRECTLY FROM THE THIRD PARTY and select Contact Avaya Support.
-
Page 5: Table Of Contents
Descriptions ........The Avaya 3740/3745/3749 DECT Telephone .... - Page 6 Switch between Calls ......Avaya 374x DECT Telephones - User Guide 02/2016...
- Page 7 Sent messages ....... . . Avaya 374x DECT Telephones - User Guide...
- Page 8 Defining navigation key ......Defining multi-function button for 3740 telephones... . .
- Page 9 Operation ........Avaya 374x DECT Telephones - User Guide...
- Page 10 ........150 Avaya 374x DECT Telephones - User Guide...
-
Page 11: Important Safety Information
Important safety information Read this chapter before using the Avaya 3740/3745 DECT Telephones or Avaya 3749 DECT Telephone. For safe and efficient operation of the telephone, observe the guidelines given in this manual and all necessary safety precautions when using the telephone. Follow the operating instructions and adhere to all warnings and safety precautions located on the product, the Quick Reference Guide and this User Manual. -
Page 12: Atex/Iecex Safety Instructions For 3749 Cordless Telephone
ATEX/IECEx Safety Instructions for 3749 Cordless Telephone Intrinsically safe use Avaya 374x DECT Telephones - User Guide 02/2016... -
Page 13: Charging The Battery
Do not use accessories to the product without ensuring that they are suitable for use in a ● hazardous area. Modification of the product is not permitted. ● Product repair has to be done at authorised repair shops only. ● Avaya 374x DECT Telephones - User Guide 02/2016... -
Page 14: Sensitive Electronic Environment (Eu/Efta Only)
European directive No. 1999/05/EC. The products Avaya 374x DECT Telephones comply with IP65 according to IEC 529 / EN 60 529. Any radio-based equipment can potentially cause interference with other equipment and can be interfered from other equipment. -
Page 15: Disposal Of Old Equipment (Eu/Efta Only)
For the time being we are not aware of any network on which the equipment will not work due to its design. In the event of problems, you should contact your equipment supplier or your Avaya service. The conformity declaration can be accessed at the following Internet address: http://www.avaya.com/gcm/emea/de/includedcontent/conformity.htm... -
Page 16: Regulatory Compliance Statements (Usa And Canada Only)
This device complies with FCC SAR limit of 1.6 W/kg. The maximum SAR value measured when used at the ear, and when worn on the body using belt clip: With Bluetooth Without Bluetooth values Head 0.013 W/Kg 0.008 W/Kg Body worn 0.016 W/Kg 0.011 W/Kg Avaya 374x DECT Telephones - User Guide 02/2016... -
Page 17: Frequency Range
The mains voltage of the adapter should match the local mains voltage, this can be 110 V or 230 V. Check if both voltages do match before installing the charger and adapter. Avaya 374x DECT Telephones - User Guide 02/2016... -
Page 18: Safety Precautions
Do not allow children to play with the telephone. It is not a toy. Children could hurt ● themselves or others. Children could also damage the telephone. Do not expose to prolong light. ● Avaya 374x DECT Telephones - User Guide 02/2016... -
Page 19: Usage
Like all other cordless telephones, this cordless telephone uses radio signals which do not guarantee a connection set-up under all circumstances. Generally, you should therefore not rely exclusively on cordless telephones when making indispensable calls (for example, medical emergencies). Avaya 374x DECT Telephones - User Guide 02/2016... -
Page 20: Environmental Requirements
Use the DECT cordless telephones within the following temperature ranges: ● For 3740 telephone, from -10 °C to +55 °C (14 °F to 131 °F) ● For 3745/ 3749 telephone, from -10 °C to +40 °C (14 °F to 104 °F) ●... - Page 21 3% Hydrochloric Acid ● M-alcohol (85% Methylated Ethanol) ● 60% Chlorhexidin 0.5 mg/ml ● Acetone can be damaging to the plastic casing of the telephone and should not be used. Avaya 374x DECT Telephones - User Guide 02/2016...
- Page 22 Avaya 374x DECT Telephones - User Guide 02/2016...
-
Page 23: Introduction
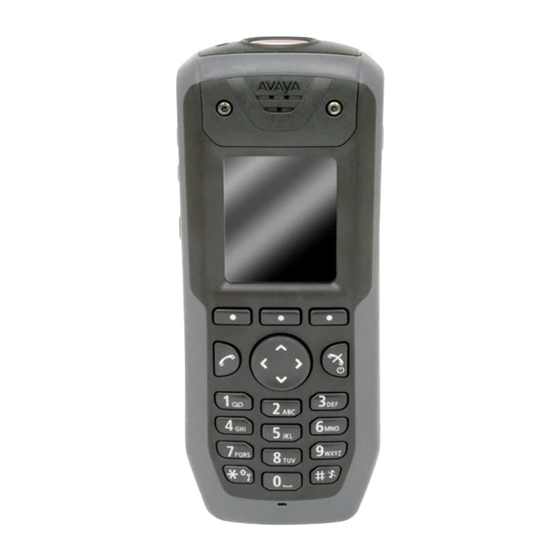
Introduction Introduction This document describes features and settings available for the 3740/3745/3749 handsets. The 3740 handset is a feature-rich telephone with illuminated display, telephony and messaging. The 3745 handset is a feature-rich telephone with color display, telephony, messaging, and Bluetooth. The 3749 handset is feature-rich telephone with color display, telephony, messaging, and Bluetooth. -
Page 24: Functions And Accessories
Central phonebook Call list with the 25 last calls programmable soft keys programmable hot keys Programmable navigation key Acoustic Location Signal (ALS) Poll Location Man-down and No-movement alarm Push button alarm Avaya 374x DECT Telephones - User Guide 02/2016... - Page 25 (SMS) Message acknowledgme Interactive messaging Colored messaging Message templates Voice mail access Enhanced DECT Security Headset connector Loudspeaking function Microphone on/ off during a call Vibrator Profiles Easy replacement of handset Avaya 374x DECT Telephones - User Guide 02/2016...
- Page 26 Use of the functions Central phonebook, SMS, Voice mail access, Call list, and Note: Centralized Management are system dependent. Table 2: Accessories of 37xx telephones Accessories 3740 3745 3749 Basic Charger Advanced Charger Charging rack Battery Pack Charger Avaya 374x DECT Telephones - User Guide 02/2016...
- Page 27 Headset with Microphone on Boom Peltor Hearing Protection Headset Headset adapter for Mic on Boom EX-classified headset adapter for standard and EX-classified Peltor headset 1. Requires the headset adapter for Mic on Boom. Avaya 374x DECT Telephones - User Guide 02/2016...
-
Page 28: Descriptions
The button is placed on the top side of the handset and can be used for sending alarms or dial a predefined number. Note: 3745 phones do not support man-down and no-movement. Earpiece speaker Avaya 374x DECT Telephones - User Guide 02/2016... - Page 29 A quick access to the handset’s Voice mail. See also Voice mail page 65. Off-hook key To answer a call, to pre-dial a number, and as a shortcut to the Call list. Avaya 374x DECT Telephones - User Guide 02/2016...
-
Page 30: The Avaya 3740/3745/3749 Dect Telephone
See Attach the Hinge-type Clip on page 128, or Attach the Swivel-type Clip on page 128. Use the clip to attach the telephone to a belt or similar. Avaya 374x DECT Telephones - User Guide 02/2016... -
Page 31: Chargers
Charger itself is supplied from the adapter. Important: For 3749 telephones, battery charging or replacement is NOT permitted in a Important: hazardous area. Avaya 374x DECT Telephones - User Guide 02/2016... -
Page 32: Charging The Telephone In Desktop Charger
The built in power supply can charge up to six cordless telephones. See Installation and Administration Manual, IP DECT. Multiple Battery Charger The Multiple Battery Charger is used for charging up to six spare batteries. Avaya 374x DECT Telephones - User Guide 02/2016... -
Page 33: Icons And Text In The Display
Note: For 3740 DECT telephones, the display is monochrome black and white, with Note: backlight. Avaya 374x DECT Telephones - User Guide... - Page 34 “Read message” icon in front of a message indicates that this message has been read. "Unsent message" icon "Sent message" icon "New colored message" icon indicates that a new colored text message(s) has arrived. The messages can be labelled with different colors. Avaya 374x DECT Telephones - User Guide 02/2016...
-
Page 35: Menu Icons
The ”Contacts” menu contains all names/numbers in the local phonebook. In addition, a company phonebook with up to 1000 entries can be downloaded to the phone via the PDM/AIWS2. A central phonebook can also be accessed from the "Contact" menu. Avaya 374x DECT Telephones - User Guide 02/2016... - Page 36 The "shortcuts" menu contains shortcuts for the Soft keys, Hot keys, and Navigation keys. The "Profiles" menu allows up to four different profiles to be added. The "Normal" profile is active by default. 1. This is a system dependent feature. Avaya 374x DECT Telephones - User Guide 02/2016...
-
Page 37: Keys And Buttons
Call contact list. Multifunction/Alarm Button The button is placed on the top side of the cordless telephone. On 3740, you can use this button as a shortcut to functions. The Multifunction/Alarm button supports long and double press modes. -
Page 38: Accessories
Accessories Belt clips You can use from the three belt clip options available: Hinge-type clip ● To prevent the telephone from slipping out of for example pocket or belt Avaya 374x DECT Telephones - User Guide 02/2016... -
Page 39: Leather Casing
You can perform the configuration in the PDM. See Installation and Administration Manual, IP DECT. If a customized headset profile is configured in the PDM, you can select the profile in the telephone menu. Avaya 374x DECT Telephones - User Guide 02/2016... -
Page 40: Menu Tree
Menu tree Note: In order to continuously improve the comprehensibility of menu terms, some of Note: them in your telephone may differ from those used in the following menu trees. Calls Avaya 374x DECT Telephones - User Guide 02/2016... -
Page 41: Contacts
When adding or editing a number in a contact, a variable or character U can be Tip: added in the Work/Mobile/Other number field. This allows the user to enter additional numerical characters before calling the number. See Admin menu page 109 for more information. Avaya 374x DECT Telephones - User Guide 02/2016... -
Page 42: Profiles
——> • Silent > > • Click > • Tone > ——> • Automatic • Answering behaviour • Loudspeaker > > • Add new The example profile does not contain all applicable settings. Avaya 374x DECT Telephones - User Guide 02/2016... -
Page 43: Messaging
0 = Overrides all messages and ongoing call is never disconnected. ● 1-9 = Comparison with message priority, highest priority will be shown and call ● setup priority higher or equal causes disconnection. Avaya 374x DECT Telephones - User Guide 02/2016... -
Page 44: My Favourites
**) Tip: When configuring the Phone Call function, a variable or character U can be added to the Enter number field. This allows the user to enter additional digits before calling the number. See Admin Avaya 374x DECT Telephones - User Guide 02/2016... -
Page 45: Connections
> —> —> • In charger • Call behavior • No action • Loudspeaking • End call —> • No action • Other actions • Switch off • Redirect • Sound off Avaya 374x DECT Telephones - User Guide 02/2016... -
Page 46: Settings
• Owner ID > • Alarm* ---> • Man-down • Activate alarm —> • No-movement • Device info > • Software —> > • Hardware • IPEI > • User ID > Avaya 374x DECT Telephones - User Guide 02/2016... -
Page 47: In Call
"Phonebook access" Cancel Switch > End call > Transfer > Transf. to new > Call "Phonebook access" Cancel Conference > Call back > Call waiting > DTMF DECT info > Link System Avaya 374x DECT Telephones - User Guide 02/2016... -
Page 48: Additional In Call Functions
The menu tree can be customized by hiding some of the functions that are available but for example not in use. Which functions that can be hidden are defined in the PDM/Device Manager. See the handset’s Configuration Manual. Avaya 374x DECT Telephones - User Guide 02/2016... -
Page 49: Basic Operation
Log In or Out of a Shared Phone Note: Shared Phone functionality is applicable in IP-DECT systems only. Shared Phone functionality is not applicable for 3740. The feature shared phone allows more than one user to use a handset. When a handset is configured to be a shared phone, it can be used by any shared phone user in the system. - Page 50 Note: If a phone is shared and one of the users logs off the shared phone, the lock that prevents the handset from unauthorized use is deactivated. For additional information, see Locking/Unlocking the telephone on page 52. Avaya 374x DECT Telephones - User Guide 02/2016...
-
Page 51: Turning The Audible Signal On/Off
You can activate an automatic key lock. The keypad will be locked automatically a Note: short time after the last keystroke. See Activate the Automatic Key Lock page 92. Note: While placed in charger, a telephone’s keypad is always unlocked. Note: Avaya 374x DECT Telephones - User Guide 02/2016... -
Page 52: Locking/Unlocking The Keypad During A Call
Note: configured via the PDM/AIWS2. Predefined emergency numbers can also be called while the keypad is locked. Additionally, if the Multifunction button (3740 only) is configured as a shortcut to a predefined number, it can also be used while the keypad is locked. See handset’s Configuration Manual. -
Page 53: Muting The Ringtone For Incoming Call Or Message
If the call is unanswered, it will revert to voicemail if the handset has been configured for voicemail. To mute an incoming call or message: 1. Long press the Sound off key while the phone is ringing. Avaya 374x DECT Telephones - User Guide 02/2016... -
Page 54: Calling
1. Press On-hook key to decline the call. Note: A priority call cannot be declined. Note: 1. When Bluetooth is enabled, the loudspeaker audio is lowered due to current limitations in the intrinsically safe handset. Avaya 374x DECT Telephones - User Guide 02/2016... -
Page 55: Ending A Call
Note: The number is not added to the call list when pre-dial is used. Dialing a number from the call list Tip: A number can be dialed from the Call list by pressing , selecting a number from Tip: the list and pressing "Call" or Avaya 374x DECT Telephones - User Guide 02/2016... -
Page 56: Dialing The Sender Of A Message
Select the contact from list, or search for the name or number by entering characters and selecting search. 5. Press the soft key "Call" or to make the call. Avaya 374x DECT Telephones - User Guide 02/2016... -
Page 57: Dialing A Name From The Central Phonebook
1. Press "More" during the call. 2. Select "Contacts". 3. Select "Call contact" for searching a local or company phonebook contact, or select "Central phonebook" for searching a central phonebook contact. 4. Select or search contact. Avaya 374x DECT Telephones - User Guide 02/2016... -
Page 58: Opening Messaging During The Call
28. Transferring the audio To transfer audio between the Bluetooth headset and the telephone’s earpiece during the call. 1. Press Soft key More. 2. Select Audio transfer. 3. Press Soft key Select. Avaya 374x DECT Telephones - User Guide 02/2016... -
Page 59: Starting A New Call During A Call
When a call is made to a busy handset, an automatically call back can be made when the busy handset is free. When a busy tone sounds, do as follows: 1. Press "More". 2. Select "Call back" 3. Press "Select". Avaya 374x DECT Telephones - User Guide 02/2016... -
Page 60: Transferring A Call
3. Press Soft key Select. Your are connected with the new caller. The other part is put on hold. When the line is free it will automatically call the hold part again. This is system dependent. Avaya 374x DECT Telephones - User Guide 02/2016... -
Page 61: Switch Between Calls
The first call is put on hold. 3. When finished speaking with the first caller, select the "More" soft key. 4. Select "End Call". 5. The second call is closed and the first call is retrieved. Avaya 374x DECT Telephones - User Guide 02/2016... -
Page 62: Enabling Dtmf
See the handset’s Configuration Manual for information. NOTE: PBX settings for the call diversion must be set to show the Divert calls menu in the handset. See the handset’s Configuration Manual. Avaya 374x DECT Telephones - User Guide 02/2016... -
Page 63: Declining A Call With A Predefined Message
An emergency number can be called even if the handset or keypad has been locked. For additional information, see sections Keypad Lock Settings on page 92 and Phone Lock Settings on page 93. Avaya 374x DECT Telephones - User Guide 02/2016... -
Page 64: Messaging
1. Enter Messaging menu. 2. Select Write new message. 3. Enter the message text. 4. Press Soft key Send. 5. Enter the call number 6. Press Soft key Send to send the message. Avaya 374x DECT Telephones - User Guide 02/2016... -
Page 65: Voice Mail
1. Perform a long press on digit key 1. Your voice mail will be called. If the extension number is not available a pop-up Voice mail number not defined is displayed. 2. Follow the given instruction in the Voice Mail. Avaya 374x DECT Telephones - User Guide 02/2016... -
Page 66: Menu Operation
7. Connections 4. Contacts 8. Calls Note: For 3740 DECT telephones, the menu is in monochrome black and white. Note: Calls Call lists The 25 last received, dialled or missed calls are stored in a call list. If a number occurs more than once the last time stamp, together with the total number of occurrences, is shown. - Page 67 1. Enter the menu by pressing the “Menu” soft key. 2. Select in the menu. 3. Select "Call list". 4. Step with the to select number in the list. 5. Press "More". 6. Select "Save number". Avaya 374x DECT Telephones - User Guide 02/2016...
-
Page 68: Missed Calls
The user can view missed calls by pressing "Yes". If the user presses "No", the missed calls can be viewed as follows: 1. Enter the menu by pressing the “Menu” soft key. Avaya 374x DECT Telephones - User Guide 02/2016... -
Page 69: Call Time
4. Select "Call time". Push to talk Group Call NOTE: Push To Talk (PTT) functionality is not applicable for 3740. The push-to-talk (PTT) function can be described as a group/conference call to a predefined group of members. If one of the group members wants to get in contact with the others, he/ she simply presses and holds to open the microphone. -
Page 70: Calling A Ptt Group
AIWS2 to be able to use this function. See the handset’s Configuration Manual, and Installation and Operation Manual for AIWS2. 1. Press "Menu". 2. Select in the menu. 3. Select "PTT groups". 4. Select PTT group. Avaya 374x DECT Telephones - User Guide 02/2016... -
Page 71: Re-Joining A Group
Deactivate the Absence Settings 1. Enter the menu by pressing the “Menu” soft key. 2. Select in the menu. 3. Select "Call services". 4. Select "Absence". Avaya 374x DECT Telephones - User Guide 02/2016... - Page 72 4. Select "Divert calls". 5. Select "When busy". 6. Select "Activate". 7. Enter number (maximum 24 digits) to divert to, or press the soft key to enter the call contact list. 8. Press "OK". Avaya 374x DECT Telephones - User Guide 02/2016...
-
Page 73: Contacts
. the contact can also be edited and a message sent by selecting "View" > "More". Note: It is not possible to edit a contact indicated by a icon in front of the name. Avaya 374x DECT Telephones - User Guide 02/2016... -
Page 74: Adding A Contact
4. Select "From call list". 5. Select number in the list. 6. Press "Add". 7. Select Work Number", "Mobile number", or "Other number". 8. Press "Add". 9. Enter name, see Alphanumeric keys on page 37. Avaya 374x DECT Telephones - User Guide 02/2016... -
Page 75: Editing A Contact
Note: If the parameter Force stimuli ringing is enabled, the handset uses the system-provided ring signals instead of the local ring signals. See the Configuration Manual for the Avaya 374x handsets. This function is applicable in legacy systems only (stimuli). -
Page 76: Delete Contact
1. Enter the menu by pressing "Menu". 2. Select in the menu. 3. Select "Central phonebook". 4. Select "Search by number". 5. Enter number. 6. Press "Search". The search result is displayed. Avaya 374x DECT Telephones - User Guide 02/2016... -
Page 77: Profiles
Note: You can also use WinPDM to add a new profile. Tip: A user can add a settings by importing a profile from an available profile. In Tip: Profile, press More > Import from > Select the available profile. Avaya 374x DECT Telephones - User Guide 02/2016... -
Page 78: Messaging
7. Make the changes. 8. Press "Save" to confirm. Messaging This applies to 3740: When a text message is received, the LED starts flashing and the message alert signal sounds. The “New message“ icon and a "New Message" pop-up are displayed. -
Page 79: Inbox
3. Select "Inbox" to view the message list. 4. Select a message by using the on the navigation key. 5. Press "View". Replying to sender 1. Enter the menu by pressing "Menu". 2. Select in the menu. Avaya 374x DECT Telephones - User Guide 02/2016... - Page 80 11. Press "Send" to forward the message. Calling a sender 1. Enter the menu by pressing "Menu". 2. Select in the menu. 3. Select "Inbox" to view the message list. Avaya 374x DECT Telephones - User Guide 02/2016...
-
Page 81: Saving A Number
3. Select "Inbox" to view the message list. 4. Select a message by using the on the navigation key. 5. Press "View". 6. Press "More". 7. Select "Save number". 8. Select "Work Number", "Mobile number", or "Other number". Avaya 374x DECT Telephones - User Guide 02/2016... -
Page 82: Writing New Messages
5. Press "Send". Note: A message can be saved and sent later by pressing the soft key "Back" and select "Yes". The message is stored under Unsent messages. See Editing unsent messages. Avaya 374x DECT Telephones - User Guide 02/2016... -
Page 83: Editing Unsent Messages
4. Select message in the list. 5. Press "View". Reading a sent message 1. Select View to read the message. Forwarding a message to another destination 1. Press "Menu". 2. Select in the menu. Avaya 374x DECT Telephones - User Guide 02/2016... - Page 84 See Redisplay the Message and Continue with the Call on page 85. Redisplay the message and terminate the call. See Redisplay the Message and ● Terminate the Call on page 85. Avaya 374x DECT Telephones - User Guide 02/2016...
-
Page 85: Voice Mail
If the content of the notification is displayed, press "Call" to dial the voice mail. If "Close" is selected, it is possible to dial the voice mail by a long press in idle mode, or from the Inbox menu. Avaya 374x DECT Telephones - User Guide 02/2016... -
Page 86: Check The Voice Mail Inbox
Adding favourites 1. Enter the menu by pressing "Menu". 2. Select in the menu. 3. Select "Add new". 4. Enter a name of the service in the field, and then press "OK" Avaya 374x DECT Telephones - User Guide 02/2016... -
Page 87: Editing Favourites
U in the Enter number field that allows the user to enter additional numerical characters before calling the number. See Admin menu on page 109 for more information. Defining soft keys 1. Enter the menu by pressing "Menu". Avaya 374x DECT Telephones - User Guide 02/2016... -
Page 88: Defining Hot Keys
9. Press "Save" Defining navigation key 1. Enter the menu by pressing "Menu". 2. Select in the menu. 3. Select "Navigation keys". 4. Select "Up", "Down", "Left", or "Right". 5. Select "Function". Avaya 374x DECT Telephones - User Guide 02/2016... -
Page 89: Defining Multi-Function Button For 3740 Telephones
Press "Yes" to proceed. 10. Press "Save". Defining multi-function button for 3740 telephones The Multifunction is not applicable for 3745/3749. The Multifunction button can be defined with two different functions; a long press activates one function, and a double press activates another function. -
Page 90: Settings
NOTE: If the parameter Force stimuli ringing is enabled, the handset uses the system-provided ring signals instead of the local ring signals. See the Configuration Manual for the Avaya 374x Handsets. This function is applicable in legacy systems only (stimuli). - Page 91 3. Select “Sound & Alerts”. 4. Select “Key sound”. 5. Select “Silent, “Click”, or “Tone”. It is possible to listen to the key sound by pressing "Play". 6. Press "Back". Avaya 374x DECT Telephones - User Guide 02/2016...
-
Page 92: Keypad Lock Settings
6. Press the "Back" soft key to redisplay the "Locks" menu. 7. Select "Auto lock time" and press the "Select" soft key. 8. Select the required lock time and press the "Select" soft key. Avaya 374x DECT Telephones - User Guide 02/2016... -
Page 93: Phone Lock Settings
PDM/AIWS2, any one of five predefined emergency number can be called while the keypad is locked Additionally, if the Multifunction button (3740 only) is configured as a shortcut to a predefined number, it can also be used while the keypad is locked. See handset Configuration Manual. - Page 94 5. Select "Change PIN code". 6. Enter the old PIN code. 7. Press "OK". 8. Enter the new PIN code. 9. Press "OK" and enter the new PIN code again. 10. Press "Save". Avaya 374x DECT Telephones - User Guide 02/2016...
-
Page 95: Display Settings
IDs of the phones. 6. Press "Back". Contrast 1. Enter the menu by pressing "Menu". 2. Select in the menu. 3. Select “Display”. Avaya 374x DECT Telephones - User Guide 02/2016... -
Page 96: Time And Date Settings
DD MMM YY, for example 30 Jan 11 ● MMM DD YYYY, for example Jan 30 2011 ● YYYY-MM-DD, for example 2011-01-30 (ISO 8601) ● MM/DD/YYYY, for example. 01/30/2011 (also called US) ● Avaya 374x DECT Telephones - User Guide 02/2016... -
Page 97: Answering
5. Select "Automatically" or "Loudspeaking". 6. Press "Change" to change the setting. The check box is marked. 7. Press "Back" to save the setting. To remove the setting, press "Change". The check box is unmarked. Avaya 374x DECT Telephones - User Guide 02/2016... -
Page 98: Change Text Size For Messages
Alphanumeric keys on page 37. 5. Press "Save". Alarm Settings Tip: It is recommended to configure a shortcut to this menu if it is frequently used, see Tip: Short cuts on page 87. Avaya 374x DECT Telephones - User Guide 02/2016... - Page 99 Menu operation Edit Alarm Data NOTE: This menu is not applicable for 3740. Information (for example a handset’s location) can be sent along with an alarm. It is recommended to create a shortcut for quick access to the "Edit alarm data" menu, see...
-
Page 100: Alarm Operations For 3749 Telephones
Personal Alarm (default) is displayed. Depending on set parameters, following occur: A beep is heard. ● The orange LED flashes twice. ● The vibrator stirs. ● Avaya 374x DECT Telephones - User Guide 02/2016... -
Page 101: Man-Down And No-Movement Alarm
ALS off. Depending on the PDM settings, it is possible to make the user enter a password when turning the ALS off. This password is the same as the phone lock password. Avaya 374x DECT Telephones - User Guide 02/2016... -
Page 102: Automatic Call After Alarm
Note: When Bluetooth is enabled, the loudspeaker audio is lowered due to current limitations in the intrinsically safe 3749 telephone. Connections Bluetooth NOTE: Bluetooth is not applicable for 3740. Enable Bluetooth Connection 1. Enter the menu by pressing "Menu". 2. Select in the menu. -
Page 103: Headset
NOTE: When Bluetooth is disabled and having an active call in loudspeaker mode on an intrinsically safe handset, the audio is not transferred to the headset when connecting it. 1. Only visible if a headset profile has been configured in the PDM/Device Manager. Avaya 374x DECT Telephones - User Guide 02/2016... -
Page 104: System
10. Enter AC code. The AC code length must be between 4 - 8 digits. 11. Press "Next". 12. An information text "Protection on?" is displayed. Select "Yes" if the new system is to be protected. Avaya 374x DECT Telephones - User Guide 02/2016... -
Page 105: Unsubscribe System
1. Enter the menu by pressing "Menu". 2. Select in the menu. 3. Select "System". 4. Select "Priority". 5. Change the priority if needed by selecting "Up" or "Down". The priority is saved when "Back" is selected. Avaya 374x DECT Telephones - User Guide 02/2016... -
Page 106: In Charger Action When Not In Call
This function must be programmed in the PBX to be able to redirect calls. 1. If the parameter Possible to turn off sound is set to "No" in PDM/Device Manager, the handset is not muted in charger. Avaya 374x DECT Telephones - User Guide 02/2016... -
Page 107: Procedure Call
"123" (or selects a contact with this number by pressing ) and presses "OK", the number *21*123 is dialed. Note that no call is established before the user presses "OK", that is, post-dial. Avaya 374x DECT Telephones - User Guide 02/2016... - Page 108 My Favourites My favourites Enter number: Enter number: Back Back Figure 8. Enter number dialog. Note: Using a shortcut to make a procedure call is not supported while the handset is locked. Avaya 374x DECT Telephones - User Guide 02/2016...
-
Page 109: Advanced Functions
This feature can be useful during administration of cordless telephones for new users. See also Installation and Administration Manual, IP DECT. Avaya 374x DECT Telephones - User Guide 02/2016... -
Page 110: Enhanced Messaging
They are shown as unread in the message list and will not be shown as read until you have closed them. See the Configuration Manual, Avaya 374x Handsets, TD 92657EN for more information on how to set the parameters. -
Page 111: Message Priority And Call Priority
(left in the figure). The messages are indicated by a gradient colour bar behind the envelopes. In addition, a gradient color bar is shown below the envelop when reading a colored message (right in the figure). Avaya 374x DECT Telephones - User Guide 02/2016... -
Page 112: Interactive Messaging
(NAK) to the system, if requested. For an example of an interactive message, see figure 10 on page 113. The options depend on the configuration in the client application. Avaya 374x DECT Telephones - User Guide 02/2016... -
Page 113: Message Templates
When a call is received that the user wishes to decline, but still acknowledge with a ● message, without having to type a completely new message. See Declining a Call with a Predefined Message on page 63. Avaya 374x DECT Telephones - User Guide 02/2016... -
Page 114: The Templates Menu
Predefined data can be sent from the handset by selecting a Service, see My favourites page 44. In addition, a shortcut can be created for quick access to a Service, see Short cuts page 87. Avaya 374x DECT Telephones - User Guide 02/2016... -
Page 115: Send Mobile Data With A Prefix
An ongoing update is indicated by in the handset display and an "Updating handset" message is displayed in the active area. Avaya 374x DECT Telephones - User Guide 02/2016... - Page 116 . Select the "OK" soft key to close the message. 12:03:00 12:03 2013-02-27 2013-02-27 Handset is Updated. Handset is Updated. Update Completed while in Charger Avaya 374x DECT Telephones - User Guide 02/2016...
-
Page 117: Troubleshooting
Go through the following lists if you encounter any problems. If this checklist does not solve the problem, contact your system administrator. If others have similar problems, there may be a system error. Avaya 374x DECT Telephones - User Guide 02/2016... - Page 118 Configuration Manual. Handset, with In Charger > Other actions> Switch off enabled, is not switched off when placed in charger. Error or Warning Messages Display shows Probable cause Action or comment Avaya 374x DECT Telephones - User Guide 02/2016...
- Page 119 Phonebook is not The phonebook does not Try again later or if fault available at the respond, not available at the persists do a factory reset via moment. moment. admin menu or PDM/Device Manager. Avaya 374x DECT Telephones - User Guide 02/2016...
- Page 120 1. 1) If a third handset, that is another handset other than the old replaced handset or new replacement handset, is inserted into the charger during Easy Replacement, this error indication appears. Replace the correct handset. Avaya 374x DECT Telephones - User Guide 02/2016...
- Page 121 2. 2) The charger has found that Easy Replacement does not work. Change back to the new handset. LED is flashing red, long flash (800 ms on, 100 ms off) Error during Easy Replacement. Both handsets need to be sent for service. Avaya 374x DECT Telephones - User Guide 02/2016...
-
Page 122: Operation Notice
NOTE: If handset restriction is enabled, it might not be possible to turn the sound off. See the handset’s Configuration Manual. When re-entering the coverage area it can take a couple of minutes before the handset automatically has registered into the system. Avaya 374x DECT Telephones - User Guide 02/2016... -
Page 123: Maintenance
NOTE: Only use the prescribed chargers for charging. Charge Spare Batteries Spare batteries can be charged with a separate battery pack charger. It can charge six batteries at the same time. Avaya 374x DECT Telephones - User Guide 02/2016... -
Page 124: Replace The Battery
The easy replacement procedure is done via the handset display and the DC4 Advanced Desktop Charger, or the CR3 Charging Rack. The following settings are replaced during easy replacement: DECT registration ● User parameters (including User ID) ● Contacts ● Avaya 374x DECT Telephones - User Guide 02/2016... -
Page 125: Before Starting Easy Replacement Procedure
1. Check that both the old handset (that is, the handset to be replaced) and the new handset (that is, the replacement handset) are of the same device type (for example 3740). 2. Make sure that the handset batteries are charged before starting the easy replacement procedure. - Page 126 When the text "Start phone replacement?" is displayed, release Press "Yes" (left soft key). The text "Follow the instructions. Each step can take several minutes." appears in the display. Press "OK" (left soft key). Avaya 374x DECT Telephones - User Guide 02/2016...
- Page 127 Orange, flashing (100 ms on, 800 ms “Change phone” indication during Easy off) Replacement. Red, flashing (100 ms on, 800 ms off) Error indication during Easy Replacement. Put back new handset in charger. Avaya 374x DECT Telephones - User Guide 02/2016...
-
Page 128: Attach The Hinge-Type Clip
Attach the Hinge-type Clip Attach the hinge-type belt clip as described in figure Figure 13. Screw the hinge-type clip into position. Attach the Swivel-type Clip Attach the swivel-type belt clip as described in figure Avaya 374x DECT Telephones - User Guide 02/2016... -
Page 129: Attach Cover For No Clip
Maintenance Figure 14. Screw the swivel-type clip into position. Attach Cover for No Clip Attach the enclosed cover as described in figure 15 when no clip is to be used. Avaya 374x DECT Telephones - User Guide 02/2016... - Page 130 Figure 15. Screw the cover into position. Avaya 374x DECT Telephones - User Guide 02/2016...
-
Page 131: Bluetooth Headset For 3745 And 3749 Phones
For optimal performance wear the Bluetooth headset and the telephone on the same side of your body. The best audio quality in the headset is achieved when no obstructions, including your body, are between the headset and the cordless telephone. Avaya 374x DECT Telephones - User Guide 2/2016... -
Page 132: Headsets
1. Enter the menu by pressing the Menu Soft key, or the confirmation button on the navigation key. 2. Select Connections icon. 3. Select Bluetooth. 4. Select Enable. A Bluetooth connection icon will be displayed in the header bar. Avaya 374x DECT Telephones - User Guide 2/2016... -
Page 133: Pairing And Connecting A Bluetooth Headset
2. Select Bluetooth > Headset. 3. Step with the navigation key, to the headset to be selected. 4. Press the Soft key Select, Connection successful is displayed. The headset is now selected. Avaya 374x DECT Telephones - User Guide 2/2016... -
Page 134: Removing A Headset
A ring signal sounds in both the selected Bluetooth headset and the telephone to signal an incoming call. To answer the call in the Bluetooth headset, press the button* on the headset. Avaya 374x DECT Telephones - User Guide 2/2016... -
Page 135: Ending A Call
You are on a call with the Bluetooth Headset. 1. Press the Soft key More on the telephone. 2. Select Audio transfer. Transferring a call to the Bluetooth headset You are on a call with the telephone. Avaya 374x DECT Telephones - User Guide 2/2016... -
Page 136: Toggling To A Headset With Cord
If the Bluetooth headset and the telephone get out of range from each other the connection is temporarily lost. Since the last connected headset is always considered selected, the connection is automatically established again when a call is made or received. Avaya 374x DECT Telephones - User Guide 2/2016... -
Page 137: Environmental Requirements
Too close to disturbing Disturbing devices can be WLAN devices. equipment, microwave etc. Headset can not connect Telephone is not turned Turn on telephone to telephone (see headset manual for details on how to connect) Avaya 374x DECT Telephones - User Guide 2/2016... - Page 138 Disconnect the connected headset already connected to the telephone Link key is missing in Repeat pairing procedure either headset or telephone. Too close to disturbing Disturbing devices can be WLAN devices. equipment, microwave etc. Avaya 374x DECT Telephones - User Guide 2/2016...
-
Page 139: Quick Reference Guide
Avaya 374x DECT Telephones Quick Reference Guide... - Page 140 Voice mail key Alphanumeric keys Tactile key Key lock and Upper/ Sound off key Lower Case key Space key Microphone Multi-purpose connector* *)Used for battery charging, software download, configuration and connection of headsets. Avaya 374x DECT Telephone - Quick Reference Guide...
- Page 141 Bluetooth (only for 3745 and 3749) Man-down alarm (only for 3749) No-movement alarm (only for 3749) New message Read message Missed call Incoming call Outgoing call System connection Key lock Phone lock Avaya 374x DECT Telephone - Quick Reference Guide...
- Page 142 Easy replaceable battery (for 3740 and 3745 telephones only) Bluetooth (for 3745 and 3749 telephones only) * System dependent Note: Your unit may have more functions than described here; see User Guide, Avaya 374x DECT Telephones. Avaya 374x DECT Telephone - Quick Reference Guide...
-
Page 143: Basic Functions
When the ring signal sounds; press the Off-hook key to answer. To end the call, press the On-hook key Turn loudspeaking function on/off During a call, press the left Soft key to turn the loudspeaking function on/off. Avaya 374x DECT Telephone - Quick Reference Guide... - Page 144 Receive a text message When a text message is received, the LED starts flashing and a message tone sounds. A pop-up New message(s):1 View now? is displayed and the Soft keys Yes/No to read Avaya 374x DECT Telephone - Quick Reference Guide...
- Page 145 MW-Consult. A long press on digit key 1 will call your voice mail. If the extension number is not available a pop-up Voice mail number not defined is displayed. See User Guide, Avaya 374x DECT Telephones. Menu Avaya 374x DECT Telephone - Quick Reference Guide...
- Page 146 For 3740 DECT telephones, the display is monochrome, black and white. For descriptions of all functions; see User Manual, Cordless Telephone 374x. Figure notes: Messaging Profiles Shortcuts My favourites Settings Connections Contacts Calls Navigate the menu Use the Navigation key to move around in the menu structure.
- Page 147 The Multifunction button can also be programmed for different functions with the use of long press and double press. For more information about Soft keys, Hot keys and Multifunction button, see User Guide, Avaya 374x DECT Telephones. Avaya 374x DECT Telephone - Quick Reference Guide...
- Page 148 , and step to Locks. Select Automatic key lock Off/On, select On/Off, and press Back. A locked keypad is indicated by the Key lock icon To unlock,press the key , and then the Soft key Yes. Avaya 374x DECT Telephone - Quick Reference Guide...
- Page 149 Leather casing incl. belt clip Belt clip, swivel type Desktop chargers Also available: • Rackmount Charger • Multiple Battery Charger for 3740 and 3745 DECT telephones • Headset Mic on boom • Peltor hearing protection headset Avaya 374x DECT Telephone - Quick Reference Guide...
-
Page 150: Index
....Conference Call ....LED indications Connections Lock/unlock Avaya 374x DECT Telephones - User Guide 2/2016... - Page 151 ....Quick Reference Guide ....Ring signal muted Avaya 374x DECT Telephones - User Guide 2/2016...
Need help?
Do you have a question about the 3740 and is the answer not in the manual?
Questions and answers