Interlogix TruVision NVR 10 User Manual
Hide thumbs
Also See for TruVision NVR 10:
- User manual (160 pages) ,
- Quick start manual (8 pages) ,
- User manual (151 pages)
Table of Contents
Advertisement
Quick Links
Advertisement
Table of Contents

Related Manuals for Interlogix TruVision NVR 10


Summary of Contents for Interlogix TruVision NVR 10
- Page 1 TruVision NVR 10 User Manual P/N 1072766-EN • REV D • ISS 13MAY15...
- Page 2 Copyright © 2015 United Technologies Corporation. All rights reserved. Interlogix is part of UTC Building & Industrial Systems, a unit of United Technologies Corporation. All rights reserved Trademarks and Trade names used in this document may be trademarks or registered patents trademarks of the manufacturers or vendors of the respective products.
-
Page 3: Table Of Contents
Search and play back recordings by time and video type 37 Search and play back recordings by event 38 Search bookmarked recordings 39 Search snapshots 39 Log search 40 Chapter 7 Playback functionality 41 Playback mouse menu 43 Instant playback 44 TruVision NVR 10 User Manual... - Page 4 Configure an FTP server to store snapshots 78 SNMP settings 78 UPnP settings 79 Network status 80 Export network packet data 81 Network statistics 81 Chapter 12 Recording 82 Recording schedule 82 Modify the instant replay duration 85 Manual recording 85 TruVision NVR 10 User Manual...
- Page 5 Plug-in installation 116 Web browser live view 117 Control a PTZ dome camera via the web browser 119 Play back recorded video 120 Search for event logs 121 Configure the recorder via the browser 122 TruVision NVR 10 User Manual...
- Page 6 Default menu settings 134 Appendix F TruVision Recorder Archiving Instructions 145 Searching and playing back recorded video 145 Exporting video recordings 146 Exporting video recordings via TruVision Navigator 147 Using TruVision Player 148 Index 150 TruVision NVR 10 User Manual...
-
Page 7: Important Information
Caution messages advise you of possible equipment damage. They tell you which actions to take or to avoid in order to prevent the damage. Note: Notes are used to point out important information that you should read. TruVision NVR 10 User Manual... -
Page 8: Product Introduction
Its dual streaming functionality allows the user to set up different settings for recording and streaming video in live view mode using main and substreams. The TruVision NVR 10 can be configured through the OSD, web browser, and TruVision Navigator via the SDK. - Page 9 Gateway address - 192.168.1.1 • Ports: When using the browser: When using TruNav: RTSP port: 554 RTSP port: 554 HTTP port: 80 Server/Client software port: 8000 Go to “Using the web browser” on page 114 for further information. TruVision NVR 10 User Manual...
-
Page 10: Physical Installation
When you receive the product, check the package and contents for damage, and verify that all items are included. There is an item list included in the package. If any of the items are damaged or missing, please contact your local supplier. TruVision NVR 10 User Manual... -
Page 11: Back Panel
CD with software and manuals • TruVision NVR 10 Quick Start Guide • TruVision NVR 10 User Manual (on CD) • TruVision Recorder Operator Guide (on CD) Back panel The figures below show the back panel connections and describe each connector on a typical NVR 10 digital video recorder. -
Page 12: Monitor Connections
The recorder supports up to 1280 × 1024 / 60 Hz resolution in VGA/HDMI. The monitor resolution should be at least 800 × 600. Adjust your monitor accordingly to this resolution. Rack mounting The TVNc models have a 1U desk-based chassis. They are not rack mountable. TruVision NVR 10 User Manual... - Page 13 1. Attach the two small front-rack mount ears (A) to the NVR. The screws are supplied. 2. Attach the two large rear support brackets (not supplied) to the rear rails (B). 3. Attach the NVR to the front rails (C). The screws are not supplied. TruVision NVR 10 User Manual...
-
Page 14: Getting Started
1. In live view mode, right-click the mouse and click Menu. The main menu window appears. 2. Select the Shutdown icon. 3. In the Shutdown popup menu, select Reboot. Click to confirm shutdown. You will be requested to enter the Admin password. TruVision NVR 10 User Manual... -
Page 15: The Startup Wizard
Press Enter on the front panel or remote control to display the virtual keyboard. Enter the default admin password, 1234. Note: You must enter an admin password. To change the Admin password, check New Admin password and enter the new password and confirm it. TruVision NVR 10 User Manual... - Page 16 6. Network configuration: Configure your network settings such as the NIC type, IP address, subnet mask, and default gateway. Enter the preferred DNS server address as well as the alternate one to use. TruVision NVR 10 User Manual...
- Page 17 Click Next to move to the next page, or Previous to return to the previous page. 9. Recording configuration: Configure your recording settings as required. The settings apply to all cameras connected to the recorder. TruVision NVR 10 User Manual...
- Page 18 For a description of the recorder main menu, see “Menu overview” on page 26. Caution: Important! Your TruVision device is delivered with default user name and password credentials for initial access, easy configuration and auto discovery. For security reasons, it is highly recommended to change the default credentials. TruVision NVR 10 User Manual...
-
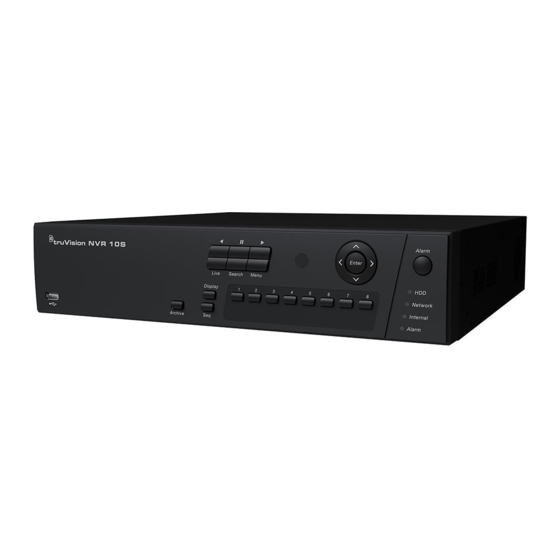
Page 19: Operating Instructions
The LED indicators light up to alert you of various conditions. The functions available can be limited by setting passwords. See Figure 3 on page 20 for more information. TruVision NVR 10 User Manual... - Page 20 USB mouse, CD/DVD burner, and USB Hard Disk Drive (HDD). Archive button Press once to enter quick archive mode. Press twice to start archiving. If the flash drive has an LED, it will flash during archiving. TruVision NVR 10 User Manual...
- Page 21 Playback mode Direction The left and right buttons are used to speed up and slow down recorded video. The up and down buttons are used to jump recorded video forwards or backwards by 30 s. TruVision NVR 10 User Manual...
-
Page 22: Using The Mouse
Move the pointer to a command, option, or button on a window. Click the left mouse button to enter or confirm a selection. You can purchase a spare mouse by ordering part number TVR-MOUSE-1. See Table 4 on page 23 for a description of the mouse buttons. TruVision NVR 10 User Manual... -
Page 23: Using The Ir Remote Control
The device ID address only applies when using a remote control and not when using a keypad. You can purchase a replacement remote control by ordering part number TVR- REMOTE-1. TruVision NVR 10 User Manual... - Page 24 Confirm selection. 11. Zoom + and - Use to control zoom of camera lens. 12. Preset Enter preprogrammed three-digit code to call up a preset. 13. Tour Enter preprogrammed three-digit code to call up shadow tour. TruVision NVR 10 User Manual...
- Page 25 If the IR remote control is not functioning properly, perform the following tests: • Check the battery polarity. • Check the remaining charge in the batteries. • Check that the IR remote control sensor is not masked. If the problem still exists, please contact your administrator. TruVision NVR 10 User Manual...
-
Page 26: Menu Overview
Table 5: Description of the menu toolbar icons Icon Name Description Display Settings Configures display settings including video format, resolution, video output interface, dwell time, multiview format, and camera sequencing. See Chapter 9 “Display settings” on page 52. TruVision NVR 10 User Manual... - Page 27 2. Click the required menu icon to display its submenu options. Modify the configuration parameters as required. 3. Click Apply to save the settings. 4. Click Exit to leave the menu setup and return to live view. TruVision NVR 10 User Manual...
- Page 28 Exiting the main menu Press the Menu button on the front panel to exit the current menu window and return to live view, or click Exit in a main menu, or right-click using the mouse. TruVision NVR 10 User Manual...
-
Page 29: Chapter 5 Live View
Indicates that live view is locked from the front panel. Mouse actions are still allowed. The recorder can display more than one icon at the same time. See “General recorder settings” on page 94 to display or hide these icons. TruVision NVR 10 User Manual... -
Page 30: Video Output
See “Single and multiview display ” on page 31 for more information. Multi Camera Switch between the different multiview options from the dropdown list. See “Single and multiview display ” on page 31 for more information. Previous Screen Displays the previous camera. TruVision NVR 10 User Manual... -
Page 31: Single And Multiview Display Mode
See “Layout” on page 53 for more information. Note: Dwell time must not be set to zero for sequencing to function. TruVision NVR 10 User Manual... -
Page 32: Live View Toolbar
See “Configure PTZ settings” on page 66 for more information. Digital Zoom: Enter digital zoom. See “Digital zoom” on page 33 for further information. Image Settings: Enter the image settings menu to modify the image lighting levels. There are two options: TruVision NVR 10 User Manual... -
Page 33: Digital Zoom
You can easily zoom in or out of a camera image in live view mode and playback using the digital zoom command. The zoom command magnifies the camera image four times. See Figure 9 below. Figure 9: Digital zoom window TruVision NVR 10 User Manual... -
Page 34: Ptz Preset And Tours
Table 9: Description of the PTZ control panel Name Description Directional pad/auto- Controls the movements and directions of the PTZ. The center scan buttons button is used to start auto-pan by the PTZ dome camera. TruVision NVR 10 User Manual... - Page 35 The PTZ control panel appears. 2. Scroll the toolbar to Shadow Tour and double-click the shadow tour from the list. The camera immediately carries out the shadow tour movement. TruVision NVR 10 User Manual...
-
Page 36: Chapter 6 Searching Files
You can easily search and play back recorded videos by time and date, events, bookmarks, and snapshots. Figure 11: The Search menu The Search window has five submenus that allow you to carry out different searches by theme: TruVision NVR 10 User Manual... -
Page 37: Search And Play Back Recordings By Time And Video Type
Search and play back recordings by time and video type You can search recorded video by time and video type, such as continuous recordings, alarms, and all recordings. Video can be played back simultaneously across several cameras. TruVision NVR 10 User Manual... -
Page 38: Search And Play Back Recordings By Event
- Click Play to playback the footage - Click Archive to archive results - Click Details to display more information about an event. Note: You can modify the pre- and post-play periods of a recording. TruVision NVR 10 User Manual... -
Page 39: Search Bookmarked Recordings
6. When in full-screen mode, move the cursor to the right edge of the window to see the complete list of snapshots found in the search. Click their Play buttons to see them in full-screen mode. TruVision NVR 10 User Manual... -
Page 40: Log Search
Log search You can open video footage from the results of a log search. Refer to “Search the system log” on page 111 for more information. TruVision NVR 10 User Manual... -
Page 41: Playback Functionality
You must have the access privilege to play back recordings (see “Customize a user’s access privileges” on page 104 for more information). Figure 13: Playback window (24-hour playback shown) TruVision NVR 10 User Manual... - Page 42 33 for more information. Archive files. Playback control toolbar: Reverse play the recording. Click again to pause. Stop playback. Time displayed is 00:00:00. Play recording. Fast forward playback by the configured skip time (default is 30 seconds). TruVision NVR 10 User Manual...
-
Page 43: Playback Mouse Menu
The playback pop-up menu appears (see Figure 15 below). The list of options available depends on the type of playback. Figure 15: The playback pop-up menus 24-hour playback: Search result playback: TruVision NVR 10 User Manual... -
Page 44: Instant Playback
Playback starts immediately. The Instant Playback scroll bar appears under the selected camera. 3. Click Pause on the toolbar to pause playback. Click Play to restart playback. Click Stop to stop playback and return to live view. TruVision NVR 10 User Manual... -
Page 45: 24-Hour Playback
Playback speed and skip time Use the direction buttons on the front panel to modify the playback speed, and to jump forwards or backwards. The default skip time is 30 seconds. However, you can easily change it. TruVision NVR 10 User Manual... -
Page 46: Playing Back Frame-By-Frame
• Using the front panel: 1. In playback mode move the left direction button to left to scroll down through the speed changes until single frame. 2. Press Enter to advance the video frame by frame. TruVision NVR 10 User Manual... -
Page 47: Digital Zoom In Playback
The bookmark is saved. 3. Click the bookmark management button to see the list of bookmarks saved. The name of a bookmark can be edited. The bookmark can also be deleted. TruVision NVR 10 User Manual... -
Page 48: Archiving Files
2. Press Archive on the front panel or remote control to open the quick archive window. 3. Click Start or press Archive on the front panel again. The unit starts to download all the files listed. TruVision NVR 10 User Manual... - Page 49 • Check for compatibility from vendor Refresh Refresh the search results if any parameters have been modified. Name Files found on the backup device are listed. Delete Click to delete a selected file from the backup device. TruVision NVR 10 User Manual...
-
Page 50: Create And Archive Video Clips
When an intruder, for example, crosses in front of several cameras you can save the video clip of the intruder’s path across these cameras in a single file. Up to 30 video clips can be made from a recording. TruVision NVR 10 User Manual... -
Page 51: Playing Back Archived Files On A Pc
Note that in some cases a limited file player is included in the recorder. If so, when opening the file player on your PC, the software will prompt a message stating that a full version of the player is available for download from our website. TruVision NVR 10 User Manual... -
Page 52: Display Settings
Chapter 9 Display settings Use the Display Settings menu to modify how the camera images appear on screen. Display settings Use the Display Settings menu to adjust the settings related to the local monitor output of the recorder, such as selecting the main and event monitors, multiview layout, display the monitor time bar, sequence dwell time options, and enable or disable the local audio output. -
Page 53: Layout
1 appear on channel 10, and the images of camera 10 appear on channel 1. This feature is useful when you want to watch the sequence of images from specific cameras so that they are next to each other on-screen. TruVision NVR 10 User Manual... - Page 54 See Figure 18 below. Each video tile displays both the order of the camera on screen and the camera number. Figure 18: Camera layout window Multiview layout selection Camera order in the sequence Camera number selection TruVision NVR 10 User Manual...
-
Page 55: Camera Setup
IP cameras through compliancy with the Onvif and PSIA standards for open camera communication. IP camera status The IP camera status menu allows you to add, edit and remove cameras to the recorder, as well as update the cameras’ firmware. TruVision NVR 10 User Manual... - Page 56 3. Check the boxes of the cameras that you want to add to the recorder. 4. Click to add the selected cameras to the list of devices in the recorder. Click Done when complete in order to return to the main window. TruVision NVR 10 User Manual...
-
Page 57: Camera Recording Settings
The camera recording settings allow you to define the configuration per camera per stream recording mode. To configure recording settings: 1. From the menu toolbar, click Camera Recording Settings. 2. Select the camera you want to configure. TruVision NVR 10 User Manual... - Page 58 HDD capacity. If the value is set to ‘0’, the option is disabled. Default is disable. • Record Audio: Enable to record sound with the images. Default is enable. 4. Click Apply to save the settings. 5. Click Apply to save the settings. TruVision NVR 10 User Manual...
-
Page 59: Poe Setup
IP cameras that can be connected depending on the PoE type used. Table 12: Maximum number of IP cameras that can be connected by PoE power consumption 12.5 W 15 W PoE-af PoE-at 4-channel 8-channel 16-channel TruVision NVR 10 User Manual... -
Page 60: Snapshots
The recorder lets you configure which information is displayed on-screen for each individual camera. The on-screen display (OSD) settings appear in live view mode and include the camera name, time and date. They are part of the image and are therefore also recorded. TruVision NVR 10 User Manual... -
Page 61: Image Settings
Click OK. 9. Click Apply to save the settings and then click Exit to return to live view. Image settings The Image tab allows you to adjust image settings for each individual camera channel. TruVision NVR 10 User Manual... -
Page 62: Motion Detection
Detection. If this is not enabled, motion will not be recorded. 4. Select the areas on-screen to be sensitive to motion. Click and drag the mouse cursor across the window to deselect areas sensitive to motion detection. TruVision NVR 10 User Manual... - Page 63 “Notify Alarm Host” is the default selection. More than one option can be selected. Click Apply to save settings. 10. Click to return to the motion detection settings window. 11. Click Exit to return to live view. TruVision NVR 10 User Manual...
-
Page 64: Privacy Mask
5. To copy the settings to other cameras, click Copy and select the desired cameras. Click OK. 6. Click Apply to save the settings and then click Exit to return to live view. TruVision NVR 10 User Manual... -
Page 65: Camera Tamper
A restricted access camera is not displayed on screen when no user is logged in. Instead a person walking by sees a black screen. See Figure 21 below. TruVision NVR 10 User Manual... -
Page 66: Vca Setup
2. Select the camera for which to set up the VCA alarm. 3. Check the Enable VCA Alarm box to enable the feature. 4. Click the Actions button to define which actions are required with the VCA events from each camera. TruVision NVR 10 User Manual... -
Page 67: Configure Ptz Settings
It is important to ensure that the settings correspond with those used in the PTZ camera. 3. Click Copy to copy the settings to another camera, if required, and select the cameras. 4. Click Apply to save the settings and then click Exit to return to live view. TruVision NVR 10 User Manual... -
Page 68: Ptz Presets And Tours
Deletes the selected shadow tour. Preset tour toolbar Adds a step to a selected preset tour. Starts the selected preset tour. Stops the selected preset tour. Deletes all the preset tour steps. Scroll up the list. TruVision NVR 10 User Manual... - Page 69 2. Select the preset tour number. 3. In the preset tour toolbar, click to add a step to the preset tour. The Step window appears. Select the preset number, dwell time and speed of the step. Click save the settings. TruVision NVR 10 User Manual...
- Page 70 PTZ control panel to move the camera along the desired path. 4. Click to save the shadow tour. Note: The shadow tour can be overwritten. 5. Click Exit to return to live view. TruVision NVR 10 User Manual...
- Page 71 1. From the menu toolbar, click Camera Setup > Preset/Tours. 2. Select the shadow tour from the list and click to start the tour. Click to stop the shadow tour. 3. Click Exit to return to live view. TruVision NVR 10 User Manual...
-
Page 72: Network Settings
Note: As every network configuration may differ, please contact your Network Administrator or ISP to see if your recorder requires specific IP addresses or port numbers. To configure general network settings: 1. From the menu toolbar, click Network Settings > Network Settings. TruVision NVR 10 User Manual... - Page 73 Enter the IP address for the recorder. This is the LAN IP address of the IPv4 Address recorder. Default value is 192.168.1.82. IPv4 Subnet Mask Enter the subnet mask for your network so the recorder will be recognized within the network. Default value is 255.255.255.0. TruVision NVR 10 User Manual...
-
Page 74: Pppoe Settings
Although not usually used, you can connect the recorder directly to a DSL modem. To do this, you need to select the PPPoE option in the network settings. Contact your ISP to get the user name and password. TruVision NVR 10 User Manual... -
Page 75: Ddns Settings
DynDNS: A third-party service where users need to apply for a DynDNS account on the Dyn.com website. • No-IP: A third-party service where users need to apply for a no-IP account on the no-ip.com website Figure 23: ezDDNS setup window TruVision NVR 10 User Manual... -
Page 76: Ntp Server Settings
Exit to return to live view. NTP server settings A Network Time Protocol (NTP) server can also be configured on your recorder to keep the date and time current and accurate. TruVision NVR 10 User Manual... -
Page 77: E-Mail Settings
Enter the sender’s email address. Select Receivers Select an email recipient. Up to three receivers can be selected. Receiver Name Enter the name of the receiver of the email. Receiver’s Address Enter the email address of the receiver. TruVision NVR 10 User Manual... -
Page 78: Configure An Ftp Server To Store Snapshots
IP address and port number, and set up the network management system as trap receiver, trap notifications (such as startup) are sent from the recorder to the network management system. Before configuring this function, you must first install the SNMP software. TruVision NVR 10 User Manual... -
Page 79: Upnp Settings
(see Figure 24 below). Figure 24: UPnP auto configuration screen To enable UPnP: 1. Connect the recorder to the router. Note: The router must support UPnP and this option must be enabled. TruVision NVR 10 User Manual... -
Page 80: Network Status
1. From the menu toolbar, click Network Settings > Detect. 2. Under the section “Network Delay, Packet Loss Test”, select the NIC to use and enter the destination address. Click Test. The test result appears in a pop-up window. TruVision NVR 10 User Manual... -
Page 81: Export Network Packet Data
2. The latest information is displayed on the bandwidth used by remote live view and playback as well by Net Receive Idle and Net Send Idle. Click Refresh to update the information. 3. Click Exit to return to live view. TruVision NVR 10 User Manual... -
Page 82: Recording
VCA or other events that are linked to that camera channel. This can be turned off in the individual action settings for each individual alarm if needed. Figure 25: Description of the recording schedule window TruVision NVR 10 User Manual... - Page 83 Exit to return live view. Define a schedule from the Edit menu To set up a daily recording schedule: 1. From the menu toolbar, click Recording > Recording Schedule. 2. Select a camera. TruVision NVR 10 User Manual...
- Page 84 10. Repeat steps 4 to 9 for the other cameras. 11. Click Apply to save the settings and to return to the schedule window. The recording schedule window appears showing the schedule selected (see Figure 25 on page 82 for an example). TruVision NVR 10 User Manual...
-
Page 85: Modify The Instant Replay Duration
This option lets you select more than one camera at a time. Go to Recording > Manual Recording to access the manual recording menu and check the boxes of the cameras to start or stop manual recording. TruVision NVR 10 User Manual... -
Page 86: Alarm And Event Setup
2. Select the alarm input number of a camera, which corresponds to the connector on the back panel of the recorder, and enter the name of the input, if required. 3. Select the alarm input type, NO (normally open) or NC (normally closed). Default is TruVision NVR 10 User Manual... -
Page 87: Set Up Alarm Outputs
Set up alarm outputs You can connect the recorder to an alarm system, such as a siren or intrusion system, which is then activated when an alarm is triggered. You can select how long the alarm TruVision NVR 10 User Manual... -
Page 88: Manual Trigger
Clear All: Stop all alarm outputs at once. 3. Click Exit to return to live view. The alarm is silenced. - Or - Press the Alarm button on the front panel or remote control. The alarm is silenced. TruVision NVR 10 User Manual... -
Page 89: Buzzer Settings
3. Check one or more response method: Display event icon, notification type, enable alarm audio, notify alarm host, send email, and trigger alarm output. Note: The list of options available depends on the system alarm selected. TruVision NVR 10 User Manual... -
Page 90: Detect Video Loss
6. Select the alarm response method. Click the Arming Schedule tab and select how you want the recorder to notify you of video loss. Select: Full-screen monitoring, enable alarm host, send email, and TruVision NVR 10 User Manual... -
Page 91: Alarm Host Setup
Up to three alarm hosts can be set. For each alarm host, the default port is 5001, 5002, and 5003. 3. Click Apply to save the settings. 4. Click Exit to return to live view. TruVision NVR 10 User Manual... -
Page 92: Chapter 14 Device Management
You can set up the date and time that will appear on-screen as well as on time stamped recordings. The start and end time of daylight saving time (DST) in the year can also be set. DST is deactivated by default. See Figure 26 on page 93 for the Time settings screen. TruVision NVR 10 User Manual... - Page 93 Enter the start date and time for daylight savings. Enter the end date and time for daylight savings. DST Bias Set the amount of time to move DST forward from the standard time. Default is 60 minutes. TruVision NVR 10 User Manual...
-
Page 94: General Recorder Settings
Define whether a login password is required to open the menu. Check the box to enable/disable and click Apply. Default is Disable. 5. Enable Wizard Immediately start Wizard without rebooting the system. Check the box to enable/disable and click Apply. Default is Enable. TruVision NVR 10 User Manual... -
Page 95: Configuration Files
Note: Only the administrator can restore the default settings. 2. To restore all parameters to default factory settings: Click the Default button. Enter the Admin password, click OK, and then click confirm that you want to restore all parameters to default. TruVision NVR 10 User Manual... -
Page 96: Upgrade System Firmware
It is possible to indicate holidays for which you can create a separate recording schedule. Once one or more holidays are created, a separate entry for holiday will be included in the recording schedule (refer to “Recording schedule” on page 82 of the manual) TruVision NVR 10 User Manual... - Page 97 5. Click Apply to save the settings and then to return to the Edit window. 6. Repeat steps 2 to 5 for other holiday periods. 7. Click Exit to return to live view. TruVision NVR 10 User Manual...
-
Page 98: Storage Management
2. Under the HDD Information tab, select the HDD to be initialized. 3. Click the Initialize button to begin initialization. After the HDD has been initialized, the status of the HDD changes from Abnormal to Normal. TruVision NVR 10 User Manual... -
Page 99: Storage Mode
Note: If the overwrite function is enabled, the maximum capacity for both recordings and snapshots is set to zero by default. To set the HDD quota for a camera: 1. From the menu toolbar, click Storage Management > Storage Mode. TruVision NVR 10 User Manual... - Page 100 Note: The Edit icon is only available if there are at least two HDDs installed. 4. Click the desired HDD property for the selected HDD: R/W or Read Only. 5. Click the group number for this HDD. 6. Click Apply to save and exit the window. TruVision NVR 10 User Manual...
-
Page 101: S.m.a.r.t. Settings
To view the S.M.A.R.T. information of a HDD: 1. From the menu toolbar, click Storage Management > S.M.A.R.T. Settings. 2. Select the HDD whose data you want to see. A detail listing of S.M.A.R.T. information is displayed. TruVision NVR 10 User Manual... -
Page 102: Bad Sector Detection
Error Info to see a list of the errors found. 5. If required, click Pause to pause the test or Cancel to cancel it. 6. Click Exit to return to live view. TruVision NVR 10 User Manual... -
Page 103: Chapter 16 User Management
The default password is 3333. Note: The default passwords should be changed for security reasons. Add a new user Only a system administrator can create a user. You can add up to 16 new users. TruVision NVR 10 User Manual... -
Page 104: Customize A User's Access Privileges
Local Information (Log) Management: Search and view logs of the recorder and view system information. • Local Parameter Settings: Configure parameters and import the configuration from the recorder. • Local Camera Management: Locally add, delete, and edit IP cameras. TruVision NVR 10 User Manual... -
Page 105: Remote Configuration Settings
Local Video Export: Locally back up recorded files from any of the channels. • Remote Live View: Remotely select and view live video over the network. • Remote Playback: Remotely play and download recorded files that are on the recorder. TruVision NVR 10 User Manual... -
Page 106: Delete A User
The Edit User pop-up window appears. 3. Edit the user information and click to save the settings and return to the previous window. 4. Click Exit to return to live view. TruVision NVR 10 User Manual... -
Page 107: Change The Admin Password
4. Enter the new admin password and confirm it. Change the admin MAC address, if required. Click to save the settings and return to the previous window. 5. Click Exit to return to live view. TruVision NVR 10 User Manual... -
Page 108: System Information
You can view the information on each camera: camera number, camera name, status, motion detection, tamper proof, video loss, preview link sum, and preview link information. Preview link sum shows the amount of remote applications that are TruVision NVR 10 User Manual... - Page 109 The “Preview Link Information” lists all the IP addresses of the streams viewed by the recorder. 5. To view alarm input information, click Alarm Inputs. You can view the alarm input number, alarm name, alarm type, alarm status, and triggered camera. TruVision NVR 10 User Manual...
- Page 110 1, IPv6 address 2, IPv6 default gateway, preferred DNS server, alternate DNS server, enable DHCP, enable PPPoE, PPPoE address, PPPoE subnet mask, PPPoE default gateway, MAC address, serer port, HTTP port, multicast IP, RTSP service port, enable Telnet, and total bandwidth limit (Kbps). TruVision NVR 10 User Manual...
-
Page 111: Search The System Log
Up to 2000 log files can be viewed at once. Log files can also be exported onto a USB device. The exported file is named according to the time it was exported. For example: 20140729124841logBack.txt. TruVision NVR 10 User Manual... - Page 112 Remote: Alarm Arming, Remote: Alarm Disarming, Remote: Operate Bookmark, Remote: Delete HDD, Remote: Restore Device Parameters Information All, Local HDD Information, HDD S.M.A.R.T., Start Recording, Stop Recording, Delete Expired Record, System Running Status 5. Click the Search button. A list of results appears. TruVision NVR 10 User Manual...
- Page 113 - Play: Click to start playback of the selected recording. - Export: Click to archive the selected file to a USB device. The export window appears. 7. Click Exit to return to live view. TruVision NVR 10 User Manual...
-
Page 114: Using The Web Browser
6. Enter the IP address or DDNS name in the “Add this website to the zone” field. 7. Click Add, and then click Close. 8. Click in the Internet Options dialog box. 9. Connect to the recorder for full browser functionality. TruVision NVR 10 User Manual... -
Page 115: Access The Web Browser
For TruVision recorder browser functionality in Mac Safari browsers a plug-in must be installed. System requirements • Mac OS > 10.7 • Safari > 8.0.5 Supported Recorders • TVR12HD v1.0.i • TVR44HD v1.0.c • TVN10 v2.0.f • TVN21 v3.0.b • TVR42 v1.2.d • TVR12 v1.2.c TruVision NVR 10 User Manual... -
Page 116: Plug-In Installation
Chapter 18: Using the web browser Plug-in installation 1. Download the TruVision Mac Safari Browser Plug-In v1.0 file from the Interlogix web page. Navigate from the home page by clicking on Video, then Recorders. Select your recorder, click on the Downloads link. Scroll down to Software. Click on the download link. -
Page 117: Web Browser Live View
Does not support display of intelligent information of VCA events on the live view page. Contact information For contact information, go to www.interlogix.com, or www.utcfssecurityproducts.eu Web browser live view The recorder web browser lets you view, record, and play back videos as well as manage all aspects of the recorder from any PC with Internet access. - Page 118 Video function toolbar Lets you do the following in live view: Switch between mainstream and substream. Start/stop all streaming from selected cameras. Start recording from selected cameras. Digital zoom. Turn POS/ATM text insertion on/off. TruVision NVR 10 User Manual...
-
Page 119: Control A Ptz Dome Camera Via The Web Browser
7. Auxiliary focus: Automatically focus the camera lens for the sharpest picture. 8. Start selected preset/tour/shadow tour (depending on function selected). 9. List presets available. 10. List preset tours available. 11. List shadow tours available. 12. Modify brightness, contrast, saturation, and hue values. TruVision NVR 10 User Manual... -
Page 120: Play Back Recorded Video
¼ speed, ½ speed, normal, X2 speed, X4 speed, and X8 speed. Current speed is displayed under the camera name on top right of window. Single frame: Click to play back one frame at a time. Stop all playback: Click to stop all cameras in playback. TruVision NVR 10 User Manual... -
Page 121: Search For Event Logs
To search for logs, click Log on the menu bar, select a log type, specify a date and time range, and then click Search. See Figure 32 on page 122 for an example of the results TruVision NVR 10 User Manual... -
Page 122: Configure The Recorder Via The Browser
Go to Browser Configuration to set up the browser parameters. See “Access the web browser” on page 115 for further information. Note: The configuration settings defined remotely are different from those that can be defined locally. TruVision NVR 10 User Manual... - Page 123 Define the PPPoE settings. See “PPPoE settings” on page 74 for more information. DDNS Define the DDNS settings. See “DDNS settings” on page 75 for more information. Define the NTP server settings. See ““NTP server settings” on page 76 for more information. TruVision NVR 10 User Manual...
- Page 124 See “Configuration files” on page 95 for more information. Upgrade Firmware Upgrade the recorder firmware. See “Upgrade system firmware” on page 96 for more information. Holiday Define how recordings occur during holiday periods. See TruVision NVR 10 User Manual...
- Page 125 Review the status of the alarm outputs. See Chapter 17 “System information” on page 108 for more information. Network Review the status of the network. See Chapter 17 “System information” on page 108 for more information. TruVision NVR 10 User Manual...
-
Page 126: Appendix A Specifications
5MPX / 3MPX / Full HD 1080p, UXGA / HD 720p / VGA / 4CIF / DCIF / 2CIF / CIF / QCIF Internal SATA slots Maximum capacity supported 4/6 TB 2 TB Capacity per SATA drive 2/3 TB 1/2 TB TruVision NVR 10 User Manual... - Page 127 Browser interface / TruVision Navigator / TVRmobile Browser requirements IE 8, 9, 10, 11 Software TruVision Navigator 5.0 SP2 or later Mobile applications TVRmobile 2.0 or later Integrated solutions Advisor, OnGuard (planned), TruPortal (planned), MasterMind TruVision NVR 10 User Manual...
- Page 128 Appendix A: Specifications TVN 10 TVN 10c Supported devices Interlogix IP cameras Consult IP camera compatibility chart Interlogiw IP encoders TVE-400, TVE-800, TVE-1600 Third party IP cameras Onvif TruVision NVR 10 User Manual...
-
Page 129: Appendix B Product Codes
TruVision NVR 10, 4 channels, 20 Mbps, 1TB TVN-1004c-2T TruVision NVR 10, 4 channels, 20 Mbps, 2TB TVN-1004cS-1T TruVision NVR 10, 4 channels, 4 channel PoE switch, 20 Mbps, 1TB TVN-1004cS-2T TruVision NVR 10, 4 channels, 4 channel PoE switch, 20 Mbps, 2TB TVN-1008-2T... -
Page 130: Appendix C Port Forwarding Information
Note: These links are not affiliated with nor supported by Interlogix technical support. Many router manufacturers also offer guides on their websites as well as including documentation with the product. On most routers the brand and model number is located on or near the serial number sticker on the bottom of the device. - Page 131 Appendix C: Port forwarding information If you cannot find any information for your particular router, please contact your router manufacturer or internet service provider for further assistance. TruVision NVR 10 User Manual...
-
Page 132: Appendix D Maximum Pre-Recording Times
Note: This information only applies when the bit rate is set to Constant (see “Camera recording settings” on page 57 for more information). Maximum pre-recording time Constant bit rate (seconds) 1024 1280 TruVision NVR 10 User Manual... - Page 133 Appendix D: Maximum pre-recording times Maximum pre-recording time Constant bit rate (seconds) 1536 1792 2048 3072 4096 TruVision NVR 10 User Manual...
-
Page 134: Appendix E Default Menu Settings
Camera No., Status, Edit, Advanced Set, Live View, Camera Name, IP Camera Address, Manage Port, Protocol, Device Model, Serial Number, and Firmware Camera Recording Settings Record Camera: IP Camera 1 Record Stream Mode: Main Stream (TL-Hi) Stream Type: Video & Audio TruVision NVR 10 User Manual... - Page 135 Display Name: Yes Display Date: Yes Display Day: Yes Date Format: MM-DD-YYYY Time Format: 12-hour Display Mode: Non-transparent & Not Flashing Image Image Settings Camera: IP Camera 1 Image Setting: Standard Brightness: 128 Contrast: 128 TruVision NVR 10 User Manual...
- Page 136 Enable VCA Alarm: No Actions: Trigger Channel [camera-self]; Arming Schedule - All day for whole week; Actions: (Null) PTZ Preset/Tours Preset/Tours Camera: IP Camera 1 Save Preset Call Preset Shadow Tour 1 Preset Tour 1 TruVision NVR 10 User Manual...
- Page 137 RTSP Server Port: 554 Enable Telnet: No Outgoing Bandwidth Limit (Kbps): 81920 PPPoE PPPoE Enable PPPOE: (Null) User Name: (Null) Password: (Null) Confirm: (Null) DDNS DDNS Enable DDNS: No DDNS Type: ezDDNS Server Address: www.tvr-ddns.net Host Name: (Null) TruVision NVR 10 User Manual...
- Page 138 FTP Server: (Null) FTP Port: 21 User Name: (Null) Password: (Null) Directory: Use root directory Parent Directory: (Null) Secondary Directory: (Null) (Null) Secondary Directory: SNMP SNMP Enable SMNP: No SNMP Version: SNMP Port: 161 Read Community: public TruVision NVR 10 User Manual...
- Page 139 Camera: IP Camera 1 Enable Recording: Enabled Schedule: All day for whole week TL-Hi General General Instant Replay Duration: 5 minutes Manual Recording Manual Recording Disable Alarm & Event Setup Alarm Input Alarm Input Alarm Input No.: A<-1 TruVision NVR 10 User Manual...
- Page 140 Alarm Host Setup Alarm Host Setup Alarm Host 1 IP: (Null Alarm Host 1 Port: 5001 Alarm Host 2 IP: (Null) Alarm Host 2 Port: 5001 Alarm Host 3 IP: (Null) Alarm Host 3 Port: 5001 TruVision NVR 10 User Manual...
- Page 141 Enable Front Panel Lock: Disable Configuration Files Import/Export Config Files Device Name: (Null) Upgrade Firmware: Local Upgrade Source: USB Device Name: (Null) Holiday Holiday Settings Status: All Disabled; Start Date: 1st. Jan; End Date: 1st Jan TruVision NVR 10 User Manual...
- Page 142 Flags ; Threshold ; Value ; Worst ; Raw Value Bad Sector Detection Bad Sector Detection HDD No. HDD Capacity: (Null) Block Capacity: (Null) Status: (Null) Error Count: (Null) User Management Users User Management operator: 4321 guest: (Null) TruVision NVR 10 User Manual...
- Page 143 Alarm Outputs Alarm Outputs No.; Alarm Name; Alarm Status Network Network IPv4 Address: IPv4 Subnet Mask IPv4 Default Gateway IPv6 Address 1 IPv6 Address 2 IPv6 Default Gateway Preferred DNS Server Alternate DNS Server Enable DHCP TruVision NVR 10 User Manual...
- Page 144 Server Port HTTP Port Multicast IP RTSP Service Port Enable Telnet Outgoing Bandwidth Limit (Kbps) Label; Status; Capacity; Free Space; Property; Type; Group Log search Log search Start Time: End Time: Event: All Type: All TruVision NVR 10 User Manual...
-
Page 145: Appendix F Truvision Recorder Archiving Instructions
Playback button to reverse playback. Mouse: In the playback toolbar on the bottom of the window, click buttons to speed up and slowdown playback. Click on the timeline to jump forwards or backwards in time. TruVision NVR 10 User Manual... -
Page 146: Exporting Video Recordings
Name, select the storage media used for archiving. 5. Check Include Player Player Backup depending on the recorder model) to include the Player tool with the archived files. 6. Click Archive to export the currently selected video file. TruVision NVR 10 User Manual... -
Page 147: Exporting Video Recordings Via Truvision Navigator
TruVision Navigator need to be viewed using the TruVision export file tool. 1. In the playback window, drag the blue seek triangle in the Controller timeline to locate the desired time frame of the video segment. TruVision NVR 10 User Manual... -
Page 148: Using Truvision Player
3. The Merge window appears. Click Add File to add the files you want to merge onto a selected video file. Under Output Setting, select the video file to which you want to add the files. TruVision NVR 10 User Manual... - Page 149 Appendix F: TruVision Recorder Archiving Instructions 4. Click OK. TruVision NVR 10 User Manual...
-
Page 150: Index
55 restore, 95 Digital zoom description, 33 Language playback, 42 change GUI language, 94 playback, 43 Live view mouse menu, 30 Digital zoom in playback, 47 Live view toolbar, 32 DST, 92 Login password, 94 TruVision NVR 10 User Manual... - Page 151 Shadow tour tour snapshots, 39 calling up, 35 web browser, 120 Shadow tours Playback control panel set up, 70 description, 42 Single view display mode, 31 Playback control toolbar Skip time quick access, 43 playback, 45 TruVision NVR 10 User Manual...
- Page 152 Warning buzzer modify, 89 Web browser accessing, 115 camera management, 122 control PTZ dome camera, 119 remote configuration of recorder, 122 search and play back recorded video, 120 search event logs, 121 video snapshot, 120 TruVision NVR 10 User Manual...