Sign In
Upload
Manuals
Brands
Yaesu Manuals
Transceiver
FTM-400XDR
Yaesu FTM-400XDR Manuals
Manuals and User Guides for Yaesu FTM-400XDR. We have
10
Yaesu FTM-400XDR manuals available for free PDF download: Operating Manual, Instruction Manual, Firmware Update Instruction Manual, Quick Start Manual, Field Manual
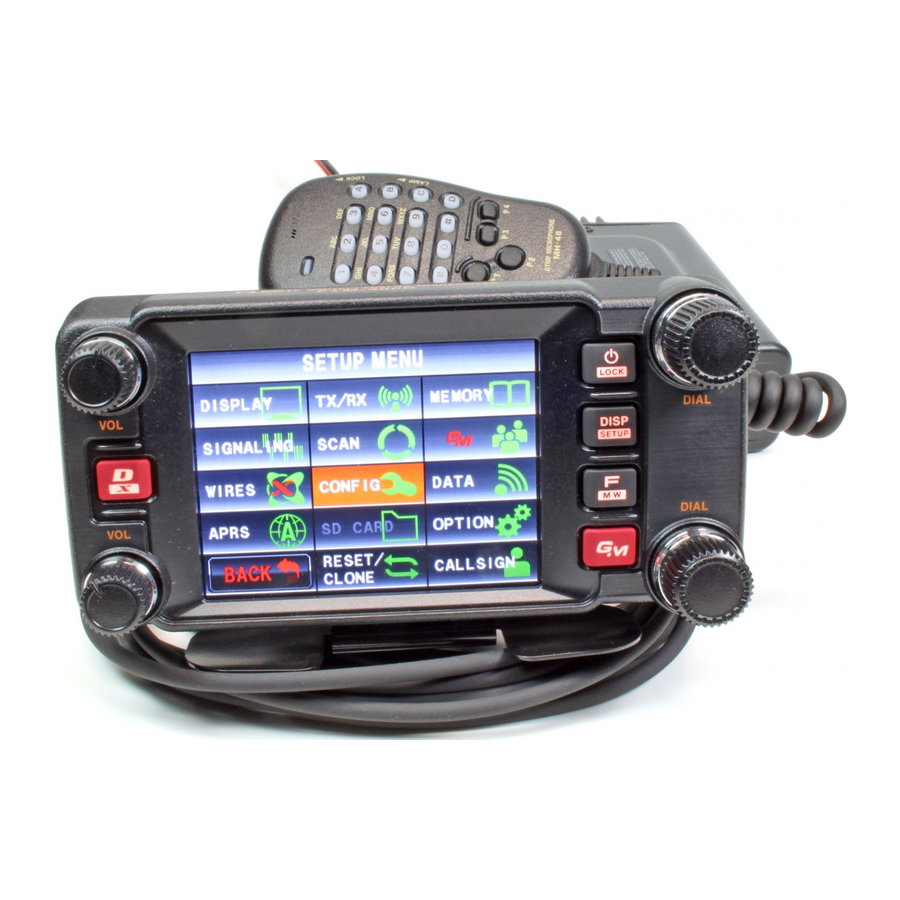
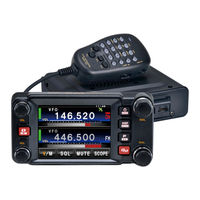
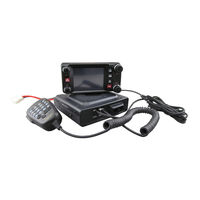
Yaesu FTM-400XDR Operating Manual (219 pages)
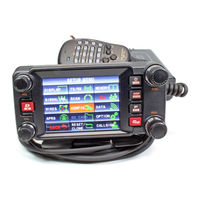
144/430MHz 50W Dual Band C4FM FDMA/FM
Brand:
Yaesu
| Category:
Transceiver
| Size: 78 MB
Table of Contents
Introduction
2
Features of this Radio
2
Important Precautions for Mobile Radio Operation
3
About the Touch Panel
4
About Registered Trademarks and Copyrights
4
How to Read this Manual
5
Table of Contents
6
Before Using
9
Safety Precautions (Make Sure to Read These)
9
Accessories
13
Name and Function of each Component
14
Controller
14
Front
14
Back
15
Left Side
15
Main Body
16
Front
16
Back
16
Microphone (MH-48A6JA)
17
Explanation of the Screen
18
Installation And Connection
24
Installing the Radio
24
Precautions During Installation
24
Installation Location When Used in a
24
Mobile Unit
24
About the Antenna
25
Install the Antenna
25
Installing the Main Body
27
Installing the Controller
28
Connecting the Radio
29
Connecting the Controller to the Main Body
29
Connecting the Microphone
29
Connecting the Antenna
29
Connecting the Power Supply
30
Connecting the Car Battery
30
Connecting the External
32
Power Supply Equipment
32
Setting up the Micro-SD Card
33
Micro-SD Cards that Can be Used
33
Things to Note When Using Micro-SD Cards
33
Installing the Micro-SD Card
34
Removing the Micro-SD Card
34
Initializing the Micro-SD Card
35
Basic Operations
36
Receiving
36
Turning the Power on
36
Switching the Power off
36
Inputing the Call Sign
37
Switching the Operating Band
38
Adjusting the Volume
38
Adjusting the Squelch Level
39
Tuning the Radio
40
Changing the Frequency Steps
41
Switching the Operating Mode
44
Switching the Communication Mode
45
Switching the Modulation Mode
46
Displaying the Band Scope
47
Muting the Audio
48
Communicating
49
Transmitting
49
Adjusting the Transmit Power
50
Adjusting the Sensitivity of the Microphone
50
Communicating in the FM Mode
51
Communicating Using the Repeater
52
Other Settings
54
Changing the Beep Volume
54
Locking the Knobs and Switches
55
Adjusting the Date and Time
56
Adjusting the Display Brightness
58
Changing the Background Color of the Frequency Display Area
60
Reconfiguring the Settings
61
Using The Memory
62
Writing to the Memory
62
Recalling the Memory
63
Recalling the Home Channel
63
Changing the Frequency of the Home Channel
64
Erasing the Memory
65
Naming the Memory
66
Changing the Method of the Memory Tag Display
67
Split Memory
68
Receiving Weather Broadcast Channels
70
(USA Version Only)
70
Assigning the "WX" Function to a Programmable Key on the Microphone
71
Recalling the Weather Channels
71
Listening the Weather Alert
71
Scanning
72
Signal Search
72
VFO Scan
72
Setting the Receive Operation When the Scanning Stops
73
Memory Scan
74
Selecting the Scanning Method
75
Setting the Specified Memories
75
Scan Only the Specified Memory Channels
76
Setting the Memories to be Skipped
77
Scanning the Programmable Memories (PMS)
79
Writing into the Programmable Memory
79
Scanning the Programmable Memory
80
Monitoring the Home Channel
81
Using the Dual Receive
81
Setting the Restart Condition of Dual Receive
82
Using The Gps Function
83
What Is GPS
83
Positioning Using GPS
83
Positioning Using an External GPS Device
84
Checking the Satellite Capture Status
86
Displaying the Position Information
87
Displaying the Current Position
87
Information of Your Station
87
Displaying the Position Information of the Partner Station in the Digital Mode
87
Explanation of the Position Information
88
Screen
88
Recording the Position Information
89
(GPS Log Function)
89
Checking the Route Using a
90
Personal Computer
90
Measuring the Altitude
90
Other Settings
92
Using the Smart Navigation Function
93
Displaying the Compass Screen
93
Using the Real-Time Navigation Function
94
Using the Backtrack Function
95
Saving the Destination
95
Displaying the Position of the Destination in Real Time
97
Using The Aprs Function
98
What Is the APRS Function
98
Using The Gm Function
99
What Is the GM Function
99
Basic Methods to Use the GM Function
100
Convenient Functions
102
Communicating with Specified Partner Stations
102
Using the Tone Squelch
102
Setting the Tone Frequency
102
Using the Tone Squelch
103
Transmitting the Tone Signal
103
Using Digital Code Squelch
104
Setting the DCS Code
104
Using DCS
105
Using the Pager Function
106
Setting the Receive Station Code
106
Activating the Pager Function
108
Recalling a Specified Station
108
Notification of an Incoming Call from a
110
Partner Station Using the Bell
110
Other Squelch Functions
110
Using the DTMF Function
112
Registering the DTMF Code
112
Transmitting the Registered DTMF Code
113
Sending out the DTMF Code Manually
114
Using the Timer Function
115
Using the Stopwatch Function
115
Displaying the Timer / Clock Screen
115
Using the Lap Timer
116
Using the Countdown Timer
117
Using the APO Function
119
Using the TOT Function
120
Changing the Touch Key Function
121
Sending and Receiving Messages and Pictures
122
Viewing Messages and Pictures
122
Sorting the Messages and Pictures
123
Downloading Messages and Images
124
Sending Messages and Pictures
125
Creating and Sending a Message
125
Sending Saved Pictures
129
Replying to a Message or Picture
130
Forwarding Messages and Pictures
132
Functions To Be Used When Necessary
134
Using the Bluetooth Headset
134
Mounting the Bluetooth Unit "BU-2
134
Setting the Bluetooth Headset Operation
136
Identifying the Bluetooth Headset
137
Using the Bluetooth Headset
139
Taking Pictures with the Optional Camera
140
(Snapshot Function)
140
Connecting the Speaker Microphone
140
With Camera
140
Taking Pictures
141
Viewing a Saved Picture
143
Optional Receive Audio Record and Playback
144
Mounting the Voice Guide Unit "FVS-2
144
Using the Voice Memory
146
Setting the Voice Memory Operation
146
Recording the Receive Audio
147
Replaying the Recorded Audio
147
Erasing the Recorded Audio
148
Listening to the Frequency
149
Voice Announcement
149
Setting the Announce Function Operation
149
Voice Announcement
150
Copying the Radio Data to Another Transceiver
151
Using the Micro-SD Card
151
Copying Data to a Micro-SD Card
151
Copying Data from the Micro-SD Card
152
Using the Clone Function
153
External Device Connected
155
Connecting to a Personal Computer
155
To the Computer
156
Updating the Firmware of the Radio
157
For Packet Communication
158
Other Devices that Can be Connected
162
User Preferences
163
Set-Up Menu Basic Operations
163
Set-Up Menu List
164
Using the Set-Up Menu
171
Screen Display Settings
171
Select the Screen to be Displayed
171
POSITION INFORMATION Screens
172
Setting the Display Background Color
172
Setting the Band Scope Display Width
172
Setting the Display Brightness
173
Setting the Display Contrast
173
Switching the Time Display
173
And the Voltage Display
173
Transmit and Receive Settings
174
Setting the Signal Format
174
Setting the AMS Transmission Mode
174
Setting the Squelch Type of the Digital Mode
175
Setting the Squelch Code of the Digital Mode
176
Setting the Pop-Up Time for the Partner Station Information
177
Setting the Display Method for My Position
178
Setting the Standby Beep
178
Displaying the Version of the DSP Program
178
Setting the Sub-Band Mute
179
Setting the Sensitivity of the Microphone
179
Memory Channel Settings
179
Setting the Display Method for the Memory Tag
179
Setting the Memory Scan Method
179
Tone Signal Settings
180
Setting the Squelch Tone Frequency
180
(Ctcss)
180
Setting the DCS Code
180
Setting the Transmission Method
180
Of the DTMF Code
180
Registering the DTMF Code
180
Recalling Only Specified Stations
180
Setting the User Programmed
180
Reverse CTCSS Tone
180
Using the Bell Notification of an
181
Using the Bell
181
Setting the Squelch Type Separately
181
For Transmit and Receive
181
Setting the Weather Alert Operation
182
(USA Version Only)
182
Scan Settings
182
Setting the Signal Reception Method
182
Setting the Scanning Direction
182
Setting the Receive Operation
183
When the Scanning Stops
183
Group Monitor Function Settings
183
Settings on the Functions and Configuration
183
Setting the Date and Time
183
Setting the Display Format for the Date and Time
184
Setting the Time Zone
185
Setting the Auto Repeater Shift
186
Setting the Direction of the Repeater Shift
186
Setting the Shift Width of the Repeater
187
Setting the Frequency Step
188
Setting the Volume of the Beep
188
Setting the Clock Shift of the CPU
188
Setting the Program Key of the Microphone
189
Expanding the Receive Range
190
Setting the Unit Display
191
Switching the Power off Automatically
191
Limiting the Continuous Transmission Time
191
Setting the PIN Code of the Optional Bluetooth Headset
191
Setting the Geodetic Reference System
192
Of the GPS Function
192
Positioning Using the External GPS Device
192
Setting the Interval for Recording the GPS Position Information
192
Data Communication Settings
193
Setting the COM Port
193
APRS and Data Communication
196
Setting the Baud Rate of the APRS and Data Communication
197
Setting the Output Condition of the Squelch Detection and Squelch Terminal
198
APRS Function Settings
199
Micro-SD Card Settings
199
Writing Settings to the Micro-SD Card
199
Writing Group Ids to the Micro-SD Card
200
Initializing the Micro-SD Card
200
Optional Device Settings
200
Setting the Image of the Connected
200
Speaker Microphone with Camera
200
Setting the Operation of the Bluetooth Headset
201
Setting the Voice Memory Operation
201
Initialization and Saving Settings
201
Reconfiguring the Settings
201
Registering the Preset
201
Recalling the Registered Preset
202
Sorting the Registered Memory Channels
203
Copying Saved Data
203
Call Sign Settings
204
Changing the Call Sign
204
Appendix
206
Options List
206
Maintenance
207
Care and Maintenance
207
Replacing the Fuse
207
When You Have Difficulties
208
There Is no Power
208
There Is no Sound
208
There Is no Transmission
208
The Keys or Knobs will Not Operate
208
About Internal Spurious Signals
209
After-Market Services
209
Specification
210
Index
212
Advertisement
Yaesu FTM-400XDR Operating Manual (221 pages)
Dual Band Transceiver
Brand:
Yaesu
| Category:
Modem
| Size: 78 MB
Table of Contents
Introduction
2
Features of this Radio
2
Important Precautions for Mobile Radio Operation
3
About the Touch Panel
4
About Registered Trademarks and Copyrights
4
How to Read this Manual
5
Table of Contents
6
Before Using
9
Safety Precautions (Make Sure to Read These)
9
Accessories
13
Name and Function of each Component
14
Controller
14
Front
14
Back
15
Left Side
15
Main Body
16
Front
16
Back
16
Microphone (MH-48A6JA)
17
Explanation of the Screen
18
Installation And Connection
24
Installing the Radio
24
Precautions During Installation
24
Installation Location When Used in a Mobile Unit
24
About the Antenna
25
Install the Antenna
25
Installing the Main Body
27
Installing the Controller
28
Connecting the Radio
29
Connecting the Controller to the Main Body
29
Connecting the Microphone
29
Connecting the Antenna
29
Connecting the Power Supply
30
Connecting the Car Battery
30
Connecting the External Power Supply Equipment
32
Setting up the Micro-SD Card
33
Micro-SD Cards that Can be Used
33
Things to Note When Using Micro-SD Cards
33
Installing the Micro-SD Card
34
Removing the Micro-SD Card
34
Initializing the Micro-SD Card
35
Basic Operations
36
Receiving
36
Turning the Power on
36
Switching the Power off
36
Inputing the Call Sign
37
Switching the Operating Band
38
Adjusting the Volume
38
Adjusting the Squelch Level
39
Tuning the Radio
40
Changing the Frequency Steps
41
Switching the Operating Mode
44
Switching the Communication Mode
45
Switching the Modulation Mode
46
Displaying the Band Scope
47
Muting the Audio
48
Communicating
49
Transmitting
49
Adjusting the Transmit Power
50
Adjusting the Sensitivity of the Microphone
50
Communicating in the FM Mode
51
Communicating Using the Repeater
52
Other Settings
54
Changing the Beep Volume
54
Locking the Knobs and Switches
55
Adjusting the Date and Time
56
Adjusting the Display Brightness
58
Changing the Background Color of the Frequency Display Area
60
Reconfiguring the Settings
61
DG-ID / DP-ID Function
62
Digital Group ID (DG-ID) Feature
62
Communicating Only with the Specific Members by Setting the DG-ID Number Except for "00
62
Digital Personal ID (DP-ID) Feature
64
Registering the DP-ID to a DR-2X/XE Digital Repeater
64
Registering the Transceiver
64
Deleting the Registered DP-ID
65
Using The Memory
66
Writing to the Memory
66
Recalling the Memory
67
Recalling the Home Channel
67
Changing the Frequency of the Home Channel
68
Erasing the Memory
69
Naming the Memory
70
Changing the Method of the Memory Tag Display
71
Split Memory
72
Receiving Weather Broadcast Channels (USA Version Only)
74
Assigning the "WX" Function to a Programmable Key on the Microphone
75
Recalling the Weather Channels
75
Listening the Weather Alert
75
Scanning
76
Signal Search
76
VFO Scan
76
Setting the Receive Operation When the Scanning Stops
77
Memory Scan
78
Selecting the Scanning Method
79
Setting the Specified Memories
79
Scan Only the Specified Memory Channels
80
Setting the Memories to be Skipped
81
Scanning the Programmable Memories (PMS)
83
Writing into the Programmable Memory
83
Scanning the Programmable Memory
84
Monitoring the Home Channel
85
Using the Dual Receive
85
Setting the Restart Condition of Dual Receive
86
Using The Gps Function
87
What Is GPS
87
Positioning Using GPS
87
Positioning Using an External GPS Device
88
Checking the Satellite Capture Status
90
Displaying the Position Information
91
Displaying the Current Position Information of Your Station
91
Displaying the Position Information of the Partner Station in the Digital Mode
91
Explanation of the Position Information Screen
92
Recording the Position Information (GPS Log Function)
93
Checking the Route Using a Personal Computer
94
Measuring the Altitude
94
Other Settings
96
Using the Smart Navigation Function
97
Displaying the Compass Screen
97
Using the Real-Time Navigation Function
98
Using the Backtrack Function
99
Saving the Destination
99
Displaying the Position of the Destination in Real Time
101
Using The Aprs Function
102
What Is the APRS Function
102
Using The Gm / Wires-X Function
103
What Is the GM Function
103
Basic Methods to Use the GM/WIRES-X Function
104
What Is the WIRES-X Function
105
Convenient Functions
106
Communicating with Specified Partner Stations
106
Using the Tone Squelch
106
Setting the Tone Frequency
106
Using the Tone Squelch
107
Transmitting the Tone Signal
107
Using Digital Code Squelch
108
Setting the DCS Code
108
Using DCS
109
Using the Pager Function
110
Setting the Receive Station Code
110
Activating the Pager Function
112
Recalling a Specified Station
112
Notification of an Incoming Call from a Partner Station Using the Bell
114
Other Squelch Functions
114
Using the DTMF Function
116
Registering the DTMF Code
116
Transmitting the Registered DTMF Code
117
Sending out the DTMF Code Manually
118
Using the Timer Function
119
Using the Stopwatch Function
119
Displaying the Timer / Clock Screen
119
Using the Lap Timer
120
Using the Countdown Timer
121
Using the APO Function
123
Using the TOT Function
124
Changing the Touch Key Function
125
Sending and Receiving Messages and Pictures
126
Viewing Messages and Pictures
126
Sorting the Messages and Pictures
127
Downloading Messages and Images
128
Sending Messages and Pictures
129
Creating and Sending a Message
129
Sending Saved Pictures
133
Replying to a Message or Picture
134
Forwarding Messages and Pictures
136
Functions To Be Used When Necessary
138
Using the Bluetooth Headset
138
Mounting the Bluetooth Unit "BU-2
138
Setting the Bluetooth Headset Operation
140
Identifying the Bluetooth Headset
141
Using the Bluetooth Headset
143
Taking Pictures with the Optional Camera (Snapshot Function)
144
Connecting the Speaker Microphone with Camera
144
Taking Pictures
145
Viewing a Saved Picture
147
Optional Receive Audio Record and Playback
148
Mounting the Voice Guide Unit "FVS-2
148
Using the Voice Memory
150
Setting the Voice Memory Operation
150
Recording the Receive Audio
151
Replaying the Recorded Audio
151
Erasing the Recorded Audio
152
Listening to the Frequency Voice Announcement
153
Setting the Announce Function Operation
153
Listening to the Frequency Voice Announcement
154
Copying the Radio Data to Another Transceiver
155
Using the Micro-SD Card
155
Copying Data to a Micro-SD Card
155
Copying Data from the Micro-SD Card
156
Using the Clone Function
157
Using the Radio with an External Device Connected
159
Connecting to a Personal Computer
159
Sending Position Information to the Computer
160
Updating the Firmware of the Radio
161
Using the Radio as a Transceiver for Packet Communication
162
Other Devices that Can be Connected
166
Customize Menu Settings And User Preferences
167
Set-Up Menu Basic Operations
167
Set-Up Menu List
168
Using the Set-Up Menu
175
Screen Display Settings
175
Select the Screen to be Displayed
175
POSITION INFORMATION Screens
176
Setting the Display Background Color
176
Setting the Band Scope Display Width
176
Setting the Display Brightness
177
Setting the Display Contrast
177
Switching the Time Display and the Voltage Display
177
Transmit and Receive Settings
178
Setting the Signal Format
178
Setting the AMS Transmission Mode
178
Setting the Pop-Up Time for the Partner Station Information
180
Setting the Display Method for My Position
180
Setting the Standby Beep
180
Displaying the Version of the DSP Program
181
Setting the Sub-Band Mute
181
Setting the Sensitivity of the Microphone
182
Memory Channel Settings
182
Setting the Display Method for the Memory Tag
182
Setting the Memory Scan Method
182
Tone Signal Settings
182
Setting the Squelch Tone Frequency (CTCSS)
182
Setting the DCS Code
182
Setting the Transmission Method of the DTMF Code
182
Registering the DTMF Code
182
Recalling Only Specified Stations
183
Setting the User Programmed Reverse CTCSS Tone
183
Using the Bell Notification of an Incoming Call from a Partner Station Using the Bell
184
Setting the Squelch Type Separately for Transmit and Receive
184
Setting the Weather Alert Operation (USA Version Only)
184
Scan Settings
185
Setting the Signal Reception Method
185
Setting the Scanning Direction
185
Setting the Receive Operation When the Scanning Stops
186
Group Monitor Function Settings
186
Settings on the Functions and Configuration
186
Setting the Date and Time
186
Setting the Display Format for the Date and Time
187
Setting the Time Zone
188
Setting the Auto Repeater Shift
189
Setting the Direction of the Repeater Shift
189
Setting the Shift Width of the Repeater
190
Setting the Frequency Step
191
Setting the Volume of the Beep
191
Setting the Clock Shift of the CPU
191
Setting the Program Key of the Microphone
192
Expanding the Receive Range
193
Setting the Unit Display
194
Switching the Power off Automatically
194
Limiting the Continuous Transmission Time
194
Setting the PIN Code of the Optional Bluetooth Headset
194
Setting the Geodetic Reference System of the GPS Function
195
Positioning Using the External GPS Device
195
Setting the Interval for Recording the GPS Position Information
195
Data Communication Settings
196
Setting the COM Port
196
Setting the Operating Band of the APRS and Data Communication
199
Setting the Baud Rate of the APRS and Data Communication
200
Setting the Output Condition of the Squelch Detection and Squelch Terminal
201
APRS Function Settings
202
Micro-SD Card Settings
203
Writing Settings to the Micro-SD Card
203
Writing Group Ids to the Micro-SD Card
203
Initializing the Micro-SD Card
203
Optional Device Settings
203
Setting the Image of the Connected Speaker Microphone with Camera
203
Setting the Operation of the Bluetooth Headset
204
Setting the Voice Memory Operation
204
Initialization and Saving Settings
204
Reconfiguring the Settings
204
Registering the Preset
204
Recalling the Registered Preset
205
Sorting the Registered Memory Channels
206
Copying Saved Data
206
Call Sign Settings
207
Changing the Call Sign
207
Appendix
208
Options List
208
Maintenance
209
Care and Maintenance
209
Replacing the Fuse
209
When You Have Difficulties
210
There Is no Power
210
There Is no Sound
210
There Is no Transmission
210
The Keys or Knobs will Not Operate
210
About Internal Spurious Signals
211
After-Market Services
211
Specification
212
Index
214
Yaesu FTM-400XDR Instruction Manual (78 pages)
Portable Digital Node Function
Brand:
Yaesu
| Category:
Transceiver
| Size: 15 MB
Table of Contents
Preparation Procedure
2
Table of Contents
3
About this Manual
3
Introduction
4
What Is WIRES-X
4
What Is WIRES-X Portable Digital Node Function
4
System Requirements (Operating Environment)
7
Preparation
8
User Registration (Acquire an ID Number)
8
Install Latest WIRES-X Software to the PC
10
Install the USB Driver for the PC Connection Cable
11
Update the Firmware of the Transceiver
12
Connect the Transceiver and the PC
13
Communicating Only with C4FM Digital Mode (Portable Digital Node Mode)
13
Communicating with Digital or Analog FM Mode (Portable HRI Mode)
14
Initial Setting (Setting Is Required Only Once at the Beginning)
16
Start the Transceiver
16
Starting the WIRES-X Software
17
Communication Port Setting
17
Authenticate (Activate) the WIRES-X Server
18
Transceiver Settings (Access Point Only)
19
Basic Operation
21
Using the Portable Digital Node Mode
21
Connecting the Transceiver and the PC
21
Starting the WIRES-X Software
21
Starting the Transceiver in Special Mode
21
Setting the Transceiver (Access Point Only)
23
Start Operation of Portable Node
31
Connecting to a Node or a Room on the Internet
43
Communicating with Other Station
57
Disconnecting from the Node or Room
58
Closing the WIRES-X Software
58
Using the Portable HRI Mode
61
Connecting the Transceiver and the PC
61
Starting the WIRES-X Software
61
Starting the Transceiver in Special Mode
61
Connecting a Node or a Room by Operating the WIRES-X Software on the PC
62
Communicating with Other Station
63
Disconnecting from the Node or Room
64
Closing the WIRES-X Software
64
Operating the Transceiver in Portable HRI Mode
65
WIRES-X Software Main Screen
67
Functions to Use as Necessary
70
Audio Volume Adjustment of PC (Portable HRI Mode Only)
70
Adjusting Audio Level in the Access Point (Portable HRI Mode)
70
Adjusting Audio Level in the Direct Operation (Portable HRI Mode)
72
FT5D/FT3D/FT2D Direct Operation Dedicated Function
76
Bookmarking Frequently Connected Nodes or Rooms
77
Bookmarking Nodes or Rooms
77
Advertisement
Yaesu FTM-400XDR Instruction Manual (66 pages)
Portable Digital Node Function
Brand:
Yaesu
| Category:
Transceiver
| Size: 13 MB
Table of Contents
Preparation Procedure
2
Table of Contents
3
Introduction
4
What Is WIRES-X
4
What Is WIRES-X Portable Digital Node Function
4
System Requirements (Operating Environment)
7
Preparation
8
User Registration (Acquire an ID Number)
8
Install Latest WIRES-X Software to the PC
9
Install the USB Driver for the PC Connection Cable
11
Update the Firmware of the Transceiver
11
Connect the Transceiver and the PC
13
Communicating Only with C4FM Digital Mode (Portable Digital Node Mode)
13
Communicating with Digital or Analog FM Mode (Portable HRI Mode)
14
Initial Setting (Setting Is Required Only Once at the Beginning)
16
Start the Transceiver
16
Starting the WIRES-X Software
17
Communication Port Setting
17
Authenticate (Activate) the WIRES-X Server
18
Transceiver Settings (Access Point Only)
19
Basic Operation
21
Using the Portable Digital Node Mode
21
Connecting the Transceiver and the PC
21
Starting the WIRES-X Software
21
Starting the Transceiver in Special Mode
21
Setting the Transceiver (Access Point Only)
22
Start Operation of Portable Node
28
Connecting to a Node or a Room on the Internet
37
Communicating with Other Station
47
Disconnecting from the Node or Room
47
Closing the WIRES-X Software
47
Using the Portable HRI Mode
50
Connecting the Transceiver and the PC
50
Starting the WIRES-X Software
50
Starting the Transceiver in Special Mode
50
Connecting a Node or a Room by Operating the WIRES-X Software on the PC
51
Communicating with Other Station
51
Disconnecting from the Node or Room
52
Closing the WIRES-X Software
52
Operating the Transceiver in Portable HRI Mode
53
WIRES-X Software Main Screen
55
Functions to Use as Necessary
58
Audio Volume Adjustment of PC (Portable HRI Mode Only)
58
Adjusting Audio Level in the Access Point (Portable HRI Mode)
58
Adjusting Audio Level in the Direct Operation (Portable HRI Mode)
60
FT5D/FT3D/FT2D Direct Operation Dedicated Function
64
Bookmarking Frequently Connected Nodes or Rooms
65
Bookmarking Nodes or Rooms
65
Yaesu FTM-400XDR Instruction Manual (54 pages)
144/430MHz Dual Band C4FM/FM
Brand:
Yaesu
| Category:
Transceiver
| Size: 17 MB
Table of Contents
Table of Contents
2
Introduction
3
Operating the Character Input Screen
3
What Is WIRES-X
4
Terminology
5
Connecting to a Faraway Station Using WIRES-X
8
Finding a Local Node
8
Connecting in Digital Mode
8
Connecting to a Local Node
8
Connecting to a Node or Room on the Internet
10
Communicating with Others
14
Useful Functions in Digital Mode
14
Using a Preset Channel
14
Connecting to a Registered Node or Room
17
Releasing the WIRE-S X Connection
21
Connecting to an Analog Node
21
Connecting to a Node or Room on the Internet
21
Communicating with Others
22
Disconnecting from a Node or Room
22
Various Display Functions
22
Confirming the Digital Node Location
22
Switching the Dual Band Screen
23
Using the News Function of WIRES-X
24
Viewing Messages and Images
24
Viewing Text Data and Images of the Local Node
24
Viewing Text Data and Images of the WIRES-X Server (INT NEWS)
26
Viewing Information of a Node or Room on the Internet
28
Viewing Imported Data from Memory
29
Sorting Imported Data
30
Listening to Audio Messages
31
Listening to the Information of the Local Node
32
Listening to the WIRES-X Server (INT NEWS) Information
34
Listening to Information on a Node or Room on the Internet
37
Transmitting Messages and Images
39
Transmitting Data to a Local Node
39
Transmitting Data to a Node or Room on the Internet
42
Transmitting an Audio Message
44
Transmitting Data to a Local Node
44
Transmitting Data to a Node or Room on the Internet
47
Returning to the Connection Status Display Temporarily
47
Using WIRES-X and the GM Function Simultaneously
48
Registering a Local Node with a Group
48
WIRES-X Setup Menus
50
Using a WIRES-X Setup Menu
50
Setting the Transmit Frequencies for Repeaters/Wires-X
50
Setting the Item Order on the Node & Room List
51
Editing a Category Name
52
Deleting the Registered Nodes and Rooms
52
Yaesu FTM-400XDR Instruction Manual (20 pages)
144/430MHz 50W DUAL BAND TRANSCEIVER
Brand:
Yaesu
| Category:
Transceiver
| Size: 4 MB
Table of Contents
Table of Contents
2
Introduction
3
Operating the Character Input Screen
3
What Is the GM Function
4
Monitoring the Status of the Communication Sphere
4
Checking Messages and Pictures Received
5
Sending Messages and Pictures
7
Creating and Sending a New Message
7
Using Standard Messages
9
Registering a Standard Message
10
Replying to a Read Message or Viewed Picture
11
Forwarding Messages and Pictures
13
Sending a Picture that Has Been Taken
14
Using Position Information
16
Checking the Position of a Member
16
Saving the Position Information of a Member in the Memory
17
Displaying Position Information Saved in the Memory
18
GM Set-Up Menu List
19
GM Set Mode Function List
19
Yaesu FTM-400XDR Operating Manual (17 pages)
144/430MHz 50W Dual band transceiver
Brand:
Yaesu
| Category:
Transceiver
| Size: 4 MB
Table of Contents
Introduction
2
About Registered Trademarks and Copyrights
4
Controller
5
Table of Contents
6
Back
7
Initializing the Micro-SD Card
8
Yaesu FTM-400XDR Firmware Update Instruction Manual (16 pages)
Brand:
Yaesu
| Category:
Transceiver
| Size: 2 MB
Table of Contents
Important Notes
2
Using the Programmer
4
Setup Menu
14
Location Service
15
Standby Beep
15
Yaesu FTM-400XDR Quick Start Manual (2 pages)
Using WIRES-X node operations after the DG-ID function update
Brand:
Yaesu
| Category:
Transceiver
| Size: 0 MB
Yaesu FTM-400XDR Field Manual (2 pages)
Brand:
Yaesu
| Category:
Radio
| Size: 3 MB
Advertisement
Related Products
Yaesu FTM-400DR
Yaesu FTM-400DE
Yaesu FTM-400DDE
Yaesu FTM-400XDE
Yaesu FTM-400DR/DE
Yaesu FTM-400XD
Yaesu FTM-400XDR/DE
Yaesu FTM-100DR
Yaesu FTM-500DR
Yaesu FTM-510DE
Yaesu Categories
Transceiver
Radio
Receiver
Two-Way Radio
Repeater
More Yaesu Manuals
Login
Sign In
OR
Sign in with Facebook
Sign in with Google
Upload manual
Upload from disk
Upload from URL