Yaesu FTM-400XDR Instruction Manual
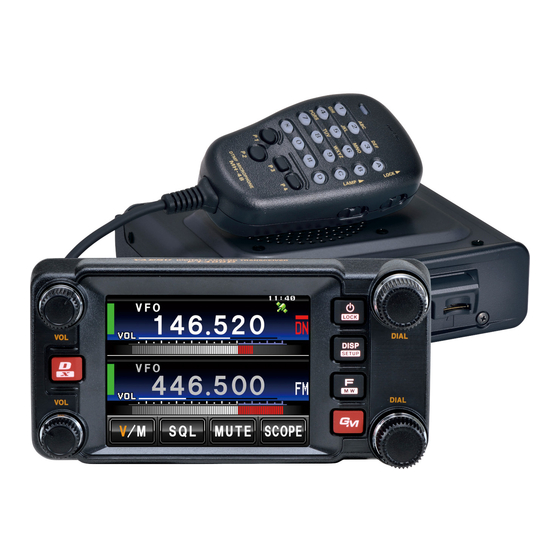
144/430mhz 50w dual band transceiver
Hide thumbs
Also See for FTM-400XDR:
- Operating manual (221 pages) ,
- Quick start manual (2 pages) ,
- Field manual (2 pages)
Table of Contents
Advertisement
Quick Links
144/430MHz 50W
DUAL BAND TRANSCEIVER
C4FM/FM
FTM-400XDR/XDE
FTM-400DR/DE
Instruction Manual
(GM Edition)
Thank you for purchasing this Yaeau product.
This instruction manual explains information related to the "GM Function" .
For information on basic operation of the transceiver, please refer to the enclosed
FTM-400XDR/XDE/DR/DE operating manual.
Advertisement
Table of Contents

Related Manuals for Yaesu FTM-400XDR


Summary of Contents for Yaesu FTM-400XDR
- Page 1 FTM-400XDR/XDE FTM-400DR/DE Instruction Manual (GM Edition) Thank you for purchasing this Yaeau product. This instruction manual explains information related to the “GM Function” . For information on basic operation of the transceiver, please refer to the enclosed FTM-400XDR/XDE/DR/DE operating manual.
-
Page 2: Table Of Contents
Contents Introduction ................................2 Operating the character input screen ........................2 What is the GM Function? ............................. 3 Monitoring the Status of the Communication Sphere ..................3 Checking Messages and Pictures Received ......................4 Sending Messages and Pictures........................... 6 Creating and sending a new message ........................6 Using standard messages ........................... -
Page 3: Introduction
Introduction Operating the character input screen The following screen is displayed when inputting text such as group names in the radio. z Alphabet input screen [Caps] The input switches between small and large character input each time this is touched. [123#%^] The screen changes to the number input screen when touched. -
Page 4: What Is The Gm Function
What is the GM Function? The GM (group monitor) function automatically checks the current operating frequency to find if other stations are operating in the DN mode with the GM function, and are within communication range. The GM function is a convenient method of exchanging messages, pictures and notifications with members that are within the sphere of communications. -
Page 5: Checking Messages And Pictures Received
Checking Messages and Pictures Received The messages (text) and pictures received from group members can be viewed. Press The call sign and signal strength of stations operating in the DN mode and those with their GM functions in operation, that are within communications range, will be displayed. - Page 6 Checking Messages and Pictures Received Touch [ A list of the pictures sent and received will be displayed. The icon on the left side of the list of pictures sent and received refers to the following. : Pictures stored on the micro-SD card : Pictures received during GM operation (viewed pictures) : Pictures received during GM operation (unviewed...
-
Page 7: Sending Messages And Pictures
Sending Messages and Pictures Messages (text) and pictures can be sent. Messages and pictures can be sent to specific members only, or to all members all at once. The following are the four types of transmission methods: (1) Create and send a new message (2) Reply to a read message or viewed picture (3) Forward a read message or viewed picture (4) Send a picture that has been taken... - Page 8 Sending Messages and Pictures Touch the character keys to enter the message The touched characters will be displayed at the top of the screen. Tips • Up to 80 characters can be entered. • English characters, numbers, symbols and katakana characters can be used.
-
Page 9: Using Standard Messages
Sending Messages and Pictures Using standard messages The following 19 standard messages have been saved in the radio's memory AS default to help save time and effort in text input. Good night Send messages Send pictures on my way wait for you Pick me up Good morning Thank you... -
Page 10: Registering A Standard Message
Sending Messages and Pictures Registering a standard message Up to 10 texts containing a maximum of 16 characters each can be registered as standard messages. Registered texts can be selected and used like the 43 standard messages that have been prepared in advance. Follow Steps 1 to 5 in “Creating and sending a new message”... -
Page 11: Replying To A Read Message Or Viewed Picture
Sending Messages and Pictures Replying to a read message or viewed picture A reply to a read message or viewed picture can be sent to the station which sent the message or picture. Press The call sign and signal strength of stations operating in the DN mode and those with their GM functions in operation, that are within communications range, will be displayed. - Page 12 Sending Messages and Pictures Touch the character keys to enter the reply message The first 16 characters can also be edited. Touch [ENT] The entered text will be confirmed and the display will return to the message details screen. Touch [SEND] The reply message will be sent.
-
Page 13: Forwarding Messages And Pictures
Sending Messages and Pictures Forwarding messages and pictures Messages and pictures that have been sent or received can be forwarded to group members. Press The call sign and signal strength of stations operating in the DN mode and those with their GM functions in operation, that are within communications range, will be displayed. -
Page 14: Sending A Picture That Has Been Taken
Sending Messages and Pictures The message or picture will be sent. “Completed” will be displayed when the message or picture is sent and the screen will then return to the list of messages or pictures. The tag of the message or picture sent will be added to the top of the list. - Page 15 Sending Messages and Pictures Turn , or touch the screen to select the picture to be sent Touch the selected picture The picture details will be displayed. Pictures with an icon displayed at the left end of the tag are pictures taken with the camera attached to the speaker microphone.
-
Page 16: Using Position Information
Using Position Information Using the internal GPS unit or an externally connected GPS device, the positions of group members within the sphere of communication can be shown in the compass display. The position information of group members at the current point in time can be saved in the memory for subsequent use in navigation. -
Page 17: Saving The Position Information Of A Member In The Memory
Using Position Information Press The direction of the selected member will be displayed in the compass. The compass panel will show the direction with the direction of advance of your own station on top (Heading Up), and the compass needle will point in the direction of the partner station. -
Page 18: Displaying Position Information Saved In The Memory
Using Position Information Touch [MEMORY] [], [L1] and [L2] will blink. Touch [], [L1] or [L2] The position information will be saved in the memory and the touched location will turn orange in color. When a tag in which position information is already saved in the memory is selected, the previous position information will be overwritten. -
Page 19: Gm Set-Up Menu List
When communicating with another transceiver, if the DP-ID of the stations are registered in each other‘s transceivers, they can communicate even if the DG-ID numbers are different. For details, refer to the FTM-400XDR/XDE/DR/DE operating Manual. z 2 RANGE RINGER Description: Activates/deactivates the alert sound when detecting stations within communication range. - Page 20 Copyright 2017 YAESU MUSEN CO., LTD. All rights reserved. No portion of this manual may be reproduced without the permission of 1709-B YAE SU MUSEN CO., LTD.
Need help?
Do you have a question about the FTM-400XDR and is the answer not in the manual?
Questions and answers