Sign In
Upload
Manuals
Brands
Midas Manuals
Recording Equipment
PRO6
Midas PRO6 Manuals
Manuals and User Guides for Midas PRO6. We have
3
Midas PRO6 manuals available for free PDF download: Owner's Manual, Quick Reference Manual
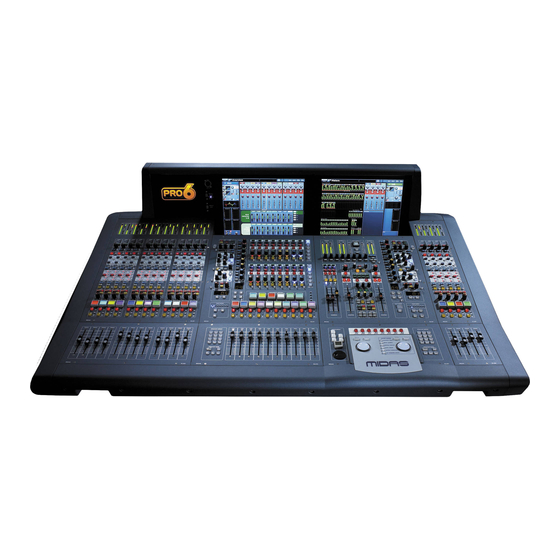
Midas PRO6 Owner's Manual (668 pages)
PRO SERIES LIVE AUDIO SYSTEMS
Brand:
Midas
| Category:
Music Mixer
| Size: 30.78 MB
Table of Contents
Important Safety Instructions
5
Instructions de Sécurité Importantes
6
PRO6 EC-Declaration of Conformity
7
PRO9 EC-Declaration of Conformity
11
Licences
13
General Precautions
17
Precautions
17
Safety Warnings
17
Audio Connections
18
Handling the Equipment
18
Electric Fields
19
Optional Equipment
19
Special Accessories
19
Recommandations
21
Connexions Audio
22
Table of Contents
25
Contents
36
Overview
43
Chapter 1: Introduction
45
About this Manual
45
Structure
45
Conventions
46
Terminology
46
GUI Diagrams
47
Training
47
PRO Series User Documentation
47
PRO Series Host Software Version
47
Warranty and Registration
47
Service and Support
47
Chapter 2: PRO Series Live Audio Systems
49
Introducing the PRO3
49
Introducing the PRO6
49
Introducing the PRO9
49
Overview
50
Key Features
51
Applications
55
System Components
56
FOH and MON
59
System Buses
59
MIX Matrix
60
Processing
62
Processing Components
62
Input Channel Processing
62
MIX Channel Processing
63
Output Channel Processing
63
Effects Processing and Geqs
64
Audio Physical Connections
64
Surround Capabilities
64
Network
65
Reliability (Redundancy)
65
Control Software
65
Gui
66
System Card Expansion
66
Console Linking
66
Integration of Third Party Hardware/Software
66
Chapter 3: About the Control Centre
69
Overview of the Control Centre
69
Bay and GUI Layout
70
Control Surface
71
Gui
72
Front and Rear Panel Connections
73
External Interfaces and Peripheral Devices
74
MIX Buses
74
Automation
75
Processing Elements
75
Getting Started
77
Chapter 4: Setting up the System
79
Initial Set-Up Procedure
79
Unpacking the Equipment
79
Making up a Rack
79
Outboard Equipment Rack Requirements
79
Wiring Instructions
80
Powering the System
84
Switching the Control Centre On/Off
85
Setting up the ID of the Unit(S)
86
Basic Operation of the PRO Series
87
Chapter 5: Before You Start
89
Principles of Operation
89
Operating Modes
89
Normal Mode
89
Using the 4-Channel Input Bay as Area B
89
Operating the Top Output Fast Strips from the Master Bay
90
Controlling the MIX Buses in Flip Mode
90
Hints and Tips
90
Saving Your Work
91
Saving a Show Versus Storing a Scene
91
Shutting down the Control Centre Properly
91
Chapter 6: Working with the Control Centre
93
About the PRO Series Controls
93
About Channel Operation
94
About GUI Operation
94
Click
95
Drag
95
Common GUI Screen Elements
95
Parameter Values Displayed on Touch
96
Operating the GUI Screen Controls
96
Using Drop-Down Lists
96
Spin Buttons
97
About Windows
97
Using the GUI Menu
98
Text Editing
99
Chapter 7: Navigation
101
An Introduction to Navigation
101
Navigating the Input Channels
101
Navigating the MIX Buses
106
Navigating the Output Channels
108
Navigation Via the GUI
110
Fault Finding a Problem Channel
111
Chapter 8: Patching
113
Introduction
113
Terms Used in PRO Series Patching
113
About the Patching Screen
113
What the Patching Screen Symbols Mean
116
About the Tabs in the from and to Sections
117
Navigating to the Patching Screen
127
About the Devices on the Stage and FOH I/O Tabs
127
Patching Tooltips
130
Standard Tooltip
130
List Tooltip
130
About the Patching Procedure
131
Configuring the Devices
131
About the Configuration Window
132
Device Configuration Procedure
132
Configuring the Snake Type
134
Setting up the I/O Rack Devices
134
Device Set-Up Procedure
135
How to Patch
136
Working with Patch Connectors
136
Single Patching (SINGLE)
138
Sequence Patching (SEQ.)
139
Automatic Patching (AUTO)
139
Clearing All Current Patching
140
Chapter 9: Basic Operation
141
Setting a MIC Amplifier's Input Gain
141
Setting the High and Low Pass Filters
142
Input Equalisation (E Zone)
143
Input Dynamics Processing (D Zone)
144
Output Processing
145
Using VCA/POP Groups
146
Configuring VCA/POP Groups
147
Setting up a MIX
148
MIX Bus Routing
150
Linking
150
Using Fader Flip
150
Setting up the Effects Rack
151
Simple Routing to Master Stereo Outputs
153
Scene and Show Management (Automation)
154
Managing the Shows
154
Managing the Scenes
156
Additional Control - Managing Events
158
Show Editor
159
Configuring the Inputs and Outputs
160
Using Copy and Paste
160
Copy and Paste Rules and Restrictions
161
User Library (Presets)
161
Surround Panning
162
Two-Man Operation
164
Saving Your Show Files to a USB Memory Stick
165
External AES50 Synchronisation
166
Security (Locking Mode)
166
Advanced Operation and Features
167
Chapter 10: Stereo Linking
169
Changing the Linking Options
170
Linking the Master Channels
171
Chapter 11: Panning
173
Stereo Panning
173
SIS™ (LCR) Mode
173
SIS Image Control Knob Fully Clockwise (LCR)
174
SIS Image Control Knob Fully Anti-Clockwise (Stereo)
174
SIS Image Control Knob Centred (Equal Power)
174
Surround Panning
175
About the Controls in Surround Mode
176
Speaker Placement
178
Chapter 12: Soloing
179
Using solo A/B
179
Solo Hierarchy
181
Solo in Place (SIP)
181
Chapter 13: Muting
183
Chapter 14: Monitors and Communications
185
Monitors (a and B)
185
Delay (GUI Only)
187
Solo System
187
Solo in Place Switch
188
C/O Switch
189
Monitor Output (a and B) Sections
189
Source (a and B) Sections
190
Solo (a and B) Sections
190
Solo Mode Section (GUI Only)
191
Solo System Section
191
Signal Generator
192
Talk Osc/Routing
194
Internal Talk Groups
195
Talk MIC
196
Internal Talk MIC
196
External Talkback
197
Chapter 15 Graphic Equaliser (GEQ)
199
Overview of the Geqs
199
About the Graphic Eqs Screen
200
About the GEQ Window
201
GEQ Front Panel Features
202
Configuring the Number of Geqs (and Effects)
203
Copying Settings between Geqs
204
Chapter 16: Internal Effects
205
Overview of the Internal Effects
205
Rack Unit Number Allocation
206
About the Effect Window
206
Working with the Effects
207
Effect Configuration
207
Effect Programs
208
Delay Effect
208
Virtual DN780 Reverb Effect
210
Flanger Effect
212
Phaser Effect
213
Pitch Shifter Effect
215
Feedback
216
SQ1 Dynamics Effect
216
3-Band Compressor Effect
217
Chapter 17: Control Groups
219
VCA and POP Groups
219
VCA Fast Strips
220
POP Groups
221
Working with VCA/POP Groups
221
Auto-Mute (Mute) Groups
222
Talk Groups
223
About the Control Group Screens
224
Management Section
224
Programming the Groups
225
Configuring the Groups
226
Chapter 18: Copy and Paste
227
Channels Versus Scenes
227
Chapter 19 Assignable Controls (I Zone)
229
About the I Zone
229
Controlling a Rotary Control
229
About the Assignable Controls Window
230
Using the I Zone to Control an Internal Effect/Geq
232
About the Assignable Controls Panel on the GUI
232
Rack and Unit Control Navigation
233
Controlling an Internal Effect Via the I Zone
235
Controlling a GEQ Via the I Zone
236
Chapter 20: Scenes and Shows
239
About Automation
239
Automation Controls
240
Next LCD Button
241
Automation Screen
241
Using the Right-Click Menu
242
Scenes
243
Scene Contents
244
Point Scenes
244
Numbering and Navigation
244
Global Scene
244
Initial Snapshot Scene (Scene 0)
244
Date and Time
245
Scene Cue List
245
Configuring the Scene Cue List View
247
Editing Scene Properties
247
Adding a New Scene
248
Copying and Deleting Scenes
248
Changing the Order of the Scenes
249
Overriding Store Scope
249
Using Patching in Automation
250
Using Zoom
250
Show Files
251
Managing Show Files
251
Managing Show Files on the Files Screen
252
Rehearsals
252
Safes
253
Chapter 21 Scope (Automation)
255
About Scope
255
About the Recall Scope Screen
255
Selecting Scope Parameter Sections
257
Selecting Bus Parameters
260
Saving Scope Parameters in a Scene
261
Using Store Scope
261
Chapter 22 Events (Automation)
263
Chapter 23 Crossfades
263
Global Scene
263
Connecting up the MIDI/GPIO Equipment
264
About Events
263
MIDI
263
Gpio
263
Internal
263
About the Edit Event Window
264
Programming Events
265
Crossfades (Automation)
269
About the Crossfade Edit Event Window
269
About the Crossfade Parameters
270
Crossfade Set up Section in the Edit Event Window
271
How a Crossfade Operates
272
Crossfade Groups
273
Global Events
275
Manually Controlling a Crossfade
276
Chapter 24 User Libraries (Presets)
277
About the Preset Manager Screen
277
Managing User Libraries
278
Deleting Presets from a User Library
279
Chapter 25: File Management
281
About the Files Screen
281
About the Master Controller File Synchronisation Window
283
Chapter 26: Using Other Devices with the PRO Series
285
Using Multiple Digital Consoles
285
Synchronising the Consoles
285
Sharing DL431 MIC Splitter a and B Inputs
286
Using an External USB Mouse
286
Using an External USB Keyboard
286
Using an External Monitor
287
Chapter 27: Changing the User Settings
289
Setting the Meter Preferences
289
Configuring a Virtual Soundcheck
290
Restoring the PRO Series Defaults
290
Checking the PRO Series Build Information
290
Setting the Configuration Preferences
291
Changing the User Interface Preferences
292
Changing the Signal Processing Preferences
292
Configuring the Channels, Groups and Internal Units
293
Changing the Default Input/Output Names
293
Adjusting PRO Series Illumination
293
Setting the Time and Date
294
Chapter 28 Delay Compensation (Latency)
295
Insert Compensation
295
GEQ Compensation
296
GUI Delay Compensation Options
296
Monitor Mode (Align with Masters)
298
Zones
299
Master to Matrix Post-Processing Option
299
Solo Bus Delay Compensation
300
Typical Configurations
301
FOH MIX Setup
301
FOH MIX Low Latency
302
Monitor MIX
303
Monitor MIX (Low Latency)
304
Chapter 29: Panel Connections
307
Front Panel Connections
307
Rear Panel Connections
308
Mains Power and Ventilation Section
308
External Connections and Communications (Centre Left) Section
309
Audio, Networking and Synchronisation Section
315
I/O Section (Far Right)
318
Chapter 30: Inputs
319
Input Channel Routing
319
Input Channel Areas of the Control Surface
320
Input Fast Strips, Channel Strips and MIX Buses
321
Inputs on the GUI
322
GUI Input Fast Strips
322
GUI Channel Strips (Inputs)
322
Input Metering
324
Channel Configuration Controls
325
Input Channel ID (GUI Only)
326
Input Channel Source Select (GUI Only)
326
Input Channel Delay (GUI Only)
326
Stereo Linking (GUI Only)
326
Safes
327
MIC Amp Input Gain (Preliminary Input Processing)
328
Using Gain Swap
330
Processing Order
330
Direct Output
330
Dynamics (D Zone)
332
Compressor
332
Compressor Graph
334
Gate
336
Side Chain
338
Insert
340
EQ (E Zone)
341
EQ Graph
343
Mixes
345
Master Controls, Solo/Mute and Fader
348
Masters Sections and Pan Control
348
LCD Select Button
350
Mute, solo and Safes
350
Fader
351
Outputs
353
Chapter 31 Outputs
353
Output Channel Routing
353
Output Channel Areas on the Control Surface
354
Output Fast Strips, Channel Strips and MIX Buses
355
Outputs on the GUI
356
Output Fast Zone (Overview Screen)
356
GUI Channel Strips
356
Output Metering
360
Talk
361
Dynamics and EQ
361
Compressor (D Zone)
362
EQ (E Zone)
363
EQ Graph
367
Mute, Safes, Level and solo
367
Output Channel Configuration Controls
369
Output Channel ID (GUI Only)
369
Output Channel Source/Destination (GUI Only)
369
Stereo Linking (GUI Only)
370
Gain Swap (GUI Only)
370
MIX Mode (GUI Only)
370
Input Mode (GUI Only)
370
Fader Linking (GUI Only)
370
Bus Trim (GUI Only)
370
Direct Input (GUI Only)
370
Safes
371
Insert (GUI Only)
371
Output Channel Delay (GUI Only)
371
Processing Order
371
Mixes
371
Masters
372
Chapter 32: GUI Menu
373
Elements of the GUI Menu
374
GUI Menu Flowchart
375
GUI Menu Options
378
Appendices
381
Appendix A Application Notes
383
Spatial Imaging System (SIS™)
383
PRO Series Compressor Modes (Dynamic)
383
Description
383
Compressor Envelope Modes
385
PRO Series Input Channel EQ Modes
387
Basic Specification
387
Description of the Input Channel EQ Modes
387
PRO Series Output Channel EQ Modes
389
Basic Specification
389
Description of the Output Channel EQ Modes
389
Appendix B Technical Specification
391
PRO Series General Statistics
391
PRO Series General Specifications
393
PRO Series Audio Performance Specifications
394
Frequency Response
394
Gain Error at 1Khz
394
Input CMRR
395
Distortion at 0Dbu
395
Distortion at +20Dbu
396
Signal Path Noise 22Hz to 22Khz Unweighted
397
Dynamic Range 22Hz to 22Khz Unweighted
397
PRO Series System Inputs and Outputs
398
DL251 I/O Box
398
DL351 I/O Box
398
DL451 I/O Box
399
DL431 Splitter (Option)
400
DL371 Dsp/Router
401
PRO Series Control Surface
402
PRO Series Input and Output Characteristics
404
Analogue Input Characteristics
404
Analogue Output Characteristics
404
Digital I/O Characteristics
405
Miscellaneous Digital Characteristics
405
PRO Series Main Processing Functions
406
Main Input Channel Functions
406
Auxiliary Input Channel Functions
407
Output Channel Functions
408
Effects Channel Functions
409
PRO Series Status Functions
410
Meters
410
Screens
410
Screen Functions
410
LCD Switches
410
Appendix C Klark Teknik DN370 GEQ
411
Notes
411
Using the GEQ
411
Studio and Creative Use
411
Live Use (MON)
411
Bypassing the EQ
412
Audio Signal Path
413
Appendix D Klark Teknik DN780 Reverb
415
Parameter Application Notes
415
Pre-Delay
415
Pattern
415
Level
415
Decay
415
LF Key
415
HF Key
416
Room Size
416
About the Special Effects Programs
416
Direct Signal
416
Delay" Effect
416
ADT" Effect
416
Multi-Tap Echo" Effect
417
Sound-On-Sound" Effect
417
Infinite Room" Effect
418
Alive", "Non-Linear" and "Reverse" Effects
418
Technical Specifications
419
Audio
419
Digital
419
Parameters
419
Controls
419
Appendix E I/O Modules
421
DL441 Analogue Input Module
422
DL442 Analogue Output Module
423
DL443 Analogue Jack I/O Module
424
DL444 Analogue D-Type I/O Module
426
Connecting to Eight Xlrs
429
Pinouts for the Remote Status Connector
430
DL452 Digital I/O Module
431
Appendix F Replacing a Module
433
Replacing a Module
433
Appendix G Troubleshooting
435
No Audio
435
Diagnostics
435
About the Diagnostics Inspector Window
437
Swapping the Active Network
438
Swapping the Active Master Controller
438
Synchronising the Files
439
Mapping a GUI Screen to Another Bay
440
Reset Switches
440
Troubleshooting Automation
441
Error Messages
441
Error Condition Messages
442
Error Description Messages
443
Appendix H Updating PRO Series Host Software
449
About the PRO Series Updater
449
About the Updater Screen
450
Using the PRO Series Updater
452
What You will Need
452
Preparation
452
Updating Your System
452
Appendix I Documentation
457
System User Documentation
457
Supplementary Documentation
458
Appendix J Reference Tables
459
Definition of the Primary Buses
459
Navigating to the Patching Screen
460
Appendix K Parameters Affected by Scope
463
Introduction
463
Overview
464
Inputs
465
Patching
465
Configuration
466
Dynamics
468
Insert
469
Aux Send
471
Matrix Send
472
Fader
473
Returns (Aux Returns)
475
Patching
475
Configuration
476
Dynamics
477
Insert
477
Aux Send
477
Matrix Send
478
Fader
479
Auxes (Aux Sends)
481
Patching
481
Configuration
482
Dynamics
483
Insert
484
Aux Send
485
Aux Preset
485
Matrix Send
486
Fader
487
Matrices
489
Patching
489
Configuration
490
Dynamics
491
Insert
492
Aux Send
493
Aux Preset
493
Matrix Send
493
Fader
494
Masters
495
Patching
495
Configuration
496
Dynamics
497
Insert
498
Aux Send
499
Aux Preset
499
Matrix Send
500
Fader
501
GEQ Rack
502
Patching
502
Geq
503
Effects Rack
504
Patching
504
Effects
505
Groups
506
Appendix L Parameters Affected by Automate Patching
507
Inputs
507
Auxes
508
Matrices
508
Masters
509
Effects
509
System Devices
510
Monitors
510
Advertisement
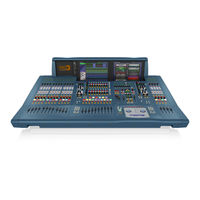
Midas PRO6 Owner's Manual (614 pages)
Live Audio System
Brand:
Midas
| Category:
Stereo System
| Size: 13.66 MB
Table of Contents
Important Safety Instructions
3
EC-Declaration of Conformity
5
Licences
7
Precautions
11
Table of Contents
15
Chapter 1 Introduction
27
About this Manual
27
Training
29
PRO6 User Documentation
29
PRO6 Host Software Version
29
Warranty and Registration
29
Service and Support
29
Key Features
32
Applications
33
System Components (Standard Supply)
34
FOH and MON
34
System Buses
34
MIX Matrix
35
Processing
36
Audio Physical Connections
38
Surround Capabilities
39
Network
39
Reliability (Redundancy)
39
Control Software
40
Gui
40
System Card Expansion
40
Console Linking
40
Integration of Third Party Hardware/Software
40
About the PRO6 Control Centre
43
Overview of the PRO6 Control Centre
43
Bay and GUI Layout
44
PRO6 Control Surface
45
Gui
46
Front and Rear Panel Connections
47
External Interfaces and Peripheral Devices
48
MIX Buses
48
Automation
49
Processing Elements
49
Setting up the System
53
Initial Set-Up Procedure
53
Unpacking the Equipment
53
Making up a Rack
53
Wiring Instructions
54
Powering the PRO6 System
56
Switching the PRO6 Control Centre On/Off
57
Setting up the DL351 Modular I/O Unit ID
58
Before You Start
61
Principles of Operation
61
Operating Modes
61
Hints and Tips
62
Saving Your Work
63
Working with the PRO6 Control Centre
65
About the PRO6 Controls
65
About Channel Operation
66
About GUI Operation
66
Common GUI Screen Elements
68
Parameter Values Displayed on Touch
68
Operating the GUI Screen Controls
68
Using the GUI Menu
70
Text Editing
71
Navigation
73
An Introduction to PRO6 Navigation
73
About the Navigational Controls
74
About GUI Navigation
75
About the Navigation 'Select' Sections
76
How to Navigate
77
Patching
81
Introduction
81
Terms Used in PRO6 Patching
81
About the Patching Screen
81
Patching Tooltips
93
About the Patching Procedure
94
Configuring the Devices
94
Configuring the PRO6 with the Snake Type
97
Setting up the I/O Rack Devices
97
How to Patch
99
Basic Operation
105
Setting a MIC Amplifier's Input Gain
105
Setting the High and Low Pass Filters
106
Input Equalisation (E Zone)
107
Input Dynamics Processing (D Zone)
108
Output Processing
109
Using VCA/POP Groups
110
Setting up a MIX
112
Using Fader Flip
114
Setting up the Effects Rack
115
Simple Routing to Master Stereo Outputs
117
Scene and Show Management (Automation)
118
Configuring the Inputs and Outputs
124
Using Copy and Paste
124
User Library (Presets)
125
Surround Panning
126
Two-Man Operation
128
Saving Your Show Files to a USB Memory Stick
129
External AES50 Synchronisation
130
Security (Locking Mode)
130
Advanced Operation and Features
131
Stereo Linking
133
Changing the Linking Options
134
Linking the Master Channels
135
Panning
137
Stereo Panning
137
SIS™ (LCR) Mode
138
Surround Panning
139
Speaker Placement
143
Soloing
145
Using solo A/B
145
Solo Hierarchy
147
Solo in Place (SIP)
147
Muting
149
Monitors and Communications
151
Monitors (a and B)
151
Solo System
153
Signal Generator
158
Talk Osc/Routing
159
Talk MIC
161
Graphic Equaliser (GEQ)
163
Configuring the Number of Geqs (and Effects)
163
About the Graphic Eqs Screen
165
About the GEQ Window
167
GEQ Front Panel Features
169
Copying Settings between Geqs
170
Internal Effects
171
Overview of the Internal Effects
171
About the Effect Window
172
Working with the Effects
173
Effect Configuration
173
Effect Programs
174
Delay Effect
175
Virtual DN780 Reverb Effect
176
Flanger Effect
179
Phaser Effect
180
Pitch Shifter Effect
181
SQ1 Dynamics Effect
182
3-Band Compressor Effect
182
Control Groups
183
VCA and POP Groups
183
Auto-Mute (Mute) Groups
187
Talk Groups
188
About the Control Group Screens
189
Programming the Groups
190
Configuring the Groups
190
Copy and Paste
191
Channels Versus Scenes
191
Assignable Controls (I Zone)
193
About the I Zone
193
Controlling a Rotary Control
193
Using the I Zone to Control an Internal Effect/Geq
196
Controlling an Internal Effect Via the I Zone
199
Controlling a GEQ Via the I Zone
200
Scenes and Shows (Automation)
203
About Automation
203
Automation Controls
204
Automation Screen
205
Using the Right-Click Menu
206
Scenes
207
Scene Contents
208
Point Scenes
208
Numbering and Navigation
208
Global Scene
208
Initial Snapshot Scene (Scene 0)
208
Date and Time
209
Scene Cue List
209
Editing Scene Properties
211
Adding a New Scene
212
Copying and Deleting Scenes
212
Changing the Order of the Scenes
213
Overriding Store Scope
213
Using Patching in Automation
214
Using Zoom
214
Show Files
215
Rehearsals
216
Safes
217
Scope (Automation)
219
About Scope
219
About the Recall Scope Screen
219
Selecting Scope Parameter Sections
220
Saving Scope Parameters in a Scene
223
Using Store Scope
224
Events (Automation)
225
About Events
225
About the Edit Event Window
226
Programming Events
227
Crossfades (Automation)
231
About the Crossfade Edit Event Window
231
How a Crossfade Operates
234
Crossfade Groups
235
Global Events
237
Manually Controlling a Crossfade
238
User Libraries (Presets)
239
About the Preset Manager Screen
239
Managing User Libraries
240
Deleting Presets from a User Library
241
File Management
243
About the Files Screen
243
About the Master Controller File Synchronisation Window
245
Using Other Devices with the PRO6
247
Using Multiple Digital Consoles
247
Using an External USB Mouse
248
Using an External USB Keyboard
248
Using an External Monitor
249
Changing the User Settings
251
Setting the Meter Preferences
251
Configuring a Virtual Soundcheck
252
Restoring the PRO6 Defaults
252
Checking the PRO6 Build Information
252
Setting the Configuration Preferences
253
Changing the User Interface Preferences
254
Changing the Signal Processing Preferences
254
Configuring the Channels, Groups and Internal Units
255
Changing the Default Input/Output Names
255
Adjusting PRO6 Illumination
255
Setting the Time and Date
256
Delay Compensation (Latency)
257
Insert Compensation
257
GEQ Compensation
258
GUI Delay Compensation Options
258
Monitor Mode (Align with Masters)
260
Zones
261
Master to Matrix Post-Processing Option
261
Solo Bus Delay Compensation
262
Typical Configurations
263
Panel Connections
269
Front Panel Connections
269
Rear Panel Connections
270
Inputs
281
Input Channel Routing
281
Input Channel Areas of the Control Surface
282
Input Fast Strips, Channel Strips and MIX Buses
283
Inputs on the GUI
284
Input Metering
286
Channel Configuration Controls
287
MIC Amp Input Gain (Preliminary Input Processing)
290
Dynamics (D Zone)
294
Insert
300
EQ (E Zone)
301
Mixes
304
Master Controls, Solo/Mute and Fader
307
Outputs
311
Output Channel Routing
311
Output Channel Areas on the Control Surface
312
Output Fast Strips, Channel Strips and MIX Buses
313
Outputs on the GUI
314
Output Metering
319
Talk
320
Dynamics and EQ
320
Mute, Safes, Level and solo
326
Output Channel Configuration Controls
327
Mixes
330
Masters
330
GUI Menu
331
GUI Menu Flowchart
332
GUI Menu Options
333
Appendices
335
Appendix A Application Notes
337
Spatial Imaging System (SIS™)
337
PRO6 Compressor Modes (Dynamic)
337
PRO6 Input Channel EQ Modes
341
PRO6 Output Channel EQ Modes
343
Appendix B Technical Specification
345
PRO6 General Statistics
345
PRO6 General Specifications
346
PRO6 Audio Performance Specifications
347
PRO6 System Inputs and Outputs
351
PRO6 Input and Output Characteristics
357
PRO6 Main Processing Functions
359
PRO6 Status Functions
362
Appendix C Klark Teknik DN370 GEQ
363
Notes
363
Using the GEQ
363
Audio Signal Path
365
Midas PRO6 Quick Reference Manual (84 pages)
Control Centre
Brand:
Midas
| Category:
Recording Equipment
| Size: 15.42 MB
Table of Contents
General Precautions
9
Safety Warnings
9
Audio Connections
10
Table of Contents
13
Introduction
15
Chapter 1: Introducing the PRO6
17
Overview of the PRO6 Live Performance System
17
System Components (Standard Supply)
18
About this Guide
18
Chapter 2: About the PRO6 Control Centre
19
Overview of the PRO6 Control Centre
19
Bay and GUI Layout
20
PRO6 Control Surface
21
Gui
22
Front Panel Connections
23
Rear Panel Connections
23
Chapter 3: Working with the PRO6 Control Centre
27
Basic GUI Operation
27
Operating the GUI Screen Controls
28
Using the GUI Menu
29
Text Editing
30
Chapter 4: Navigation
31
An Introduction to PRO6 Navigation
31
About the Navigational Controls
32
About the Navigation 'Select' Sections
33
How to Navigate
33
Chapter 5: Patching
37
Introduction
37
Function Buttons
38
About the Patching Procedure
39
Configuring the Devices
39
Configuring the PRO6 with the Snake Type
41
Setting up the I/O Rack Devices
41
How to Patch
43
Chapter 6 Basic Operation
45
Principles of Operation
45
Operating Modes
45
Normal Mode
45
Hints and Tips
46
Saving Your Work
47
Setting a MIC Amplifier's Input Gain
48
Setting the High and Low Pass Filters
49
Input Equalisation (E Zone)
50
Input Dynamics Processing (D Zone)
51
Using VCA/POP Groups
53
Setting up a MIX
55
Setting up the Effects Rack
58
Simple Routing to Master Stereo Outputs
60
Scene and Show Management (Automation)
60
Configuring the Inputs and Outputs
65
Using Copy and Paste
65
Surround Panning
68
Two-Man Operation
68
Saving Your Show Files to USB Memory Stick
70
Advertisement
Advertisement
Related Products
Midas PRO SERIES
Midas PRO2C
Midas PRO2
Midas PRO X
Midas PRO 1
Midas PRO3
Midas PRO9
Midas DL251
Midas DL252
Midas DL371
Midas Categories
Music Mixer
Amplifier
DJ Equipment
Media Converter
Recording Equipment
More Midas Manuals
Login
Sign In
OR
Sign in with Facebook
Sign in with Google
Upload manual
Upload from disk
Upload from URL