Table of Contents
Advertisement
Quick Links
Advertisement
Chapters
Table of Contents

Related Manuals for Sun Oracle SPARC T4-1


Summary of Contents for Sun Oracle SPARC T4-1
-
Page 1: Installation Guide
SPARC T4-1 Server Installation Guide Part No.: E22988-09 August 2013... - Page 2 Copyright © 2011, 2013, Oracle and/or its affiliates. All rights reserved. This software and related documentation are provided under a license agreement containing restrictions on use and disclosure and are protected by intellectual property laws. Except as expressly permitted in your license agreement or allowed by law, you may not use, copy, reproduce, translate, broadcast, modify, license, transmit, distribute, exhibit, perform, publish, or display any part, in any form, or by any means.
-
Page 3: Table Of Contents
Contents Using This Documentation vii Confirming Server and Site Specifications 1 Server Overview 1 Front Panel Components 3 Front Panel System LEDs and Buttons 4 Rear Panel Components 6 Rear Panel System LED and Button 7 Confirming Specifications 8 Physical Specifications 9 Minimum Clearance for Service Access 9 Electrical and Power Specifications 9 Environmental Specifications 11... - Page 4 Powering On the Server for the First Time 51 Oracle ILOM System Console 51 ▼ Connect a Terminal or Emulator to the SER MGT Port 52 ▼ Power On the Server for the First Time 53 SPARC T4-1 Server Installation Guide • August 2013...
- Page 5 ▼ Verify Functionality 55 Assigning a Static IP Address to the SP 55 ▼ Assign a Static IP Address to the SP 55 Oracle Solaris OS Configuration Parameters 57 Glossary 59 Index 65 Contents...
- Page 6 SPARC T4-1 Server Installation Guide • August 2013...
-
Page 7: Using This Documentation
Using This Documentation This installation guide provides instructions, background information, and reference material to help you install Oracle’s SPARC T4-1 Server. “Related Documentation” on page vii ■ “Feedback” on page vii ■ “Support and Accessibility” on page viii ■ Related Documentation... - Page 8 Support and Accessibility Description Links Access electronic support http://support.oracle.com through My Oracle Support For hearing impaired: http://www.oracle.com/accessibility/support.html Learn about Oracle’s http://www.oracle.com/us/corporate/accessibility/index.html commitment to accessibility viii SPARC T4-1 Server Installation Guide • August 2013...
-
Page 9: Confirming Server And Site Specifications
It contains these topics: Step Description Links Review the product notes for any late-breaking SPARC T4-1 Server Product Notes news. Review the server features, components, LEDs, and “Server Overview” on page 1 external I/O ports. - Page 10 Four 10/100/1000 Mbps, RJ-45-based, autonegotiating Ethernet ports (rear panel). Oracle Integrated Lights Out Manager (ILOM) with RJ-45 serial and Ethernet interfaces. Power supplies Two hot-swappable power supplies Cooling fans Six sets (N+1) of hot-swappable counter-rotating fan modules. SPARC T4-1 Server Installation Guide • August 2013...
-
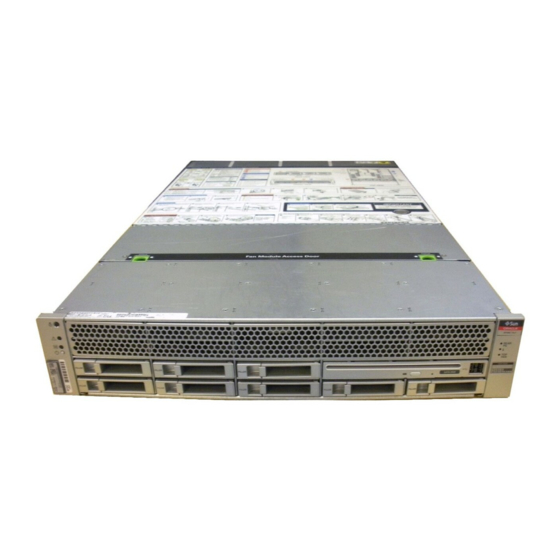
Page 11: Front Panel Components
Related Information SPARC T4-1 Server Service Manual ■ Oracle ILOM documentation ■ “Front Panel Components” on page 3 ■ “Front Panel System LEDs and Buttons” on page 4 ■ “Rear Panel Components” on page 6 ■ “Rear Panel System LED and Button” on page 7 ■... -
Page 12: Front Panel System Leds And Buttons
Locator LED and button Power Supply Service Required LED Fault - Service Required LED System Overtemperature Fault - Service Required LED Power OK LED Top Fan Fault - Service Required LED Power ON/Standby button SPARC T4-1 Server Installation Guide • August 2013... - Page 13 Front Panel System LED Descriptions TABLE: LED or Button Icon or Label Description Locator LED The Locator LED can be turned on to identify a particular system. When on, it and button blinks rabidly. There are two methods for turning a Locator LED on: (white) •...
-
Page 14: Rear Panel Components
11 Gbit Ethernet port NET2 Related Information “Front Panel Components” on page 3 ■ “Front Panel System LEDs and Buttons” on page 4 ■ “Rear Panel System LED and Button” on page 7 ■ SPARC T4-1 Server Installation Guide • August 2013... -
Page 15: Rear Panel System Led And Button
Rear Panel System LED and Button The following figure shows location of the system LEDs and the locator button on the rear panel. Rear Panel System LEDs FIGURE: Figure Legend Locator LED and button Power OK LED Fault - Service Required LED Confirming Server and Site Specifications... -
Page 16: Confirming Specifications
“Physical Specifications” on page 9 ■ “Minimum Clearance for Service Access” on page 9 ■ “Electrical and Power Specifications” on page 9 ■ “Environmental Specifications” on page 11 ■ “Acoustic Noise Emissions” on page 12 ■ SPARC T4-1 Server Installation Guide • August 2013... -
Page 17: Physical Specifications
“Physical Specifications” on page 9 ■ Electrical and Power Specifications Use these specifications only as a general planning guide. To determine power values based on expected workloads, use the SPARC T4-1 power calculator located at this online site: Confirming Server and Site Specifications... - Page 18 P / (V *0.90), where P = maximum operating input power and V=input voltage. For example: 620W / (100V * 0.90) = 6.89A. You can use this formula to calculate the maximum operating current at your input voltage. Related Information “Airflow Considerations” on page 12 ■ SPARC T4-1 Server Installation Guide • August 2013...
-
Page 19: Environmental Specifications
Environmental Specifications Install and operate the server in a site with an ambient temperature range of 21˚C (69.8˚F) to 23˚C (73.4˚F), which is an optimal range for server reliability. At 22˚C (71.6˚F) it is easy to maintain safe relative humidity levels. Operating in this temperature range provides a buffer if the environmental support systems fail. -
Page 20: Acoustic Noise Emissions
“Acoustic Noise Emissions” on page 12 ■ “Airflow Considerations” on page 12 ■ Acoustic Noise Emissions Declared noise emissions for the SPARC T4-1 server are in accordance with ISO 9296 standards. Acoustic Noise Emissions for the SPARC T4-1 Server TABLE: Description... - Page 21 Ensure that the server ventilation openings used for intake and outflow of air ■ provide an open area that is at least 60% of the open area perforations across the front and rear of the server. This 60% minimum open area equates to the following measurements: Metric Units US Units...
- Page 22 SPARC T4-1 Server Installation Guide • August 2013...
-
Page 23: Preparing For Installation
Preparing for Installation This chapter identifies steps you must take to prepare for the installation. It contains these topics: “Server Overview” on page 1 ■ “Front Panel Components” on page 3 ■ “Front Panel System LEDs and Buttons” on page 4 ■... - Page 24 Antistatic wrist strap ■ Rackmount kit ■ Cable management arm (if ordered) ■ SPARC T4-1 Server Getting Started Guide with license and safety documents ■ Optional components (for example, PCIe cards) that are packaged separately from ■ the other items Related Information “Server Overview”...
-
Page 25: Handling Precautions
Handling Precautions Caution – Deploy the antitilt bar on the equipment rack before beginning an installation. Caution – The server weighs approximately 60 lb (25. kg). Two people are required to lift and mount the server into a rack. Caution – When completing a two-person procedure, always communicate your intentions clearly before, during, and after each step to minimize confusion. -
Page 26: Tools Needed For Installation
You must also provide a system console device, such as one of the following: ASCII terminal ■ Workstation ■ Terminal server ■ Patch panel connected to a terminal server ■ Related Information “ESD Precautions” on page 17 ■ “Handling Precautions” on page 17 ■ SPARC T4-1 Server Installation Guide • August 2013... -
Page 27: Installing The Server
Installing the Server These topics describe how to install the server into a rack using the rail assembly in the rackmount kit. Perform these procedures if you purchased the rail assembly. Note – In this guide, the term rack means either an open rack or a closed cabinet. Step Description Links Verify that the rack is compatible with the server’s... - Page 28 Caution – Mechanical Loading: Mount the equipment in the rack so that the weight is distributed evenly. A hazardous condition can exist with uneven mechanical loading. SPARC T4-1 Server Installation Guide • August 2013...
-
Page 29: Stabilize The Rack
4. Fully extend the rack cabinet’s anti-tilt legs or anti-tilt bar, which are located at the bottom front of the rack cabinet. Related Information The rack documentation ■ SPARC T4-1 Server Safety and Compliance Guide ■ “Rack Compatibility” on page 19 ■ Installing the Server... -
Page 30: Installing Slide Rails
The slide rails adjust to fit rack depths from 24 in. (61 cm) to 36.5 in. (93 cm). The ■ middle and rear sections of the slide rails have holes for mounting the rail to the rack posts. SPARC T4-1 Server Installation Guide • August 2013... - Page 31 The front section extends out of the middle section, which allows the server to be ■ positioned far enough out of the rack for many service operations to be performed. The removable mounting bracket slides 14.5 in. (37 cm) out of the slide rail, then ■...
- Page 32 Locating the Locks on the Slide Rail Assembly FIGURE: Related Information “Rack Compatibility” on page 19 ■ “Install the Slide Rail Assemblies” on page 25 ■ SPARC T4-1 Server Installation Guide • August 2013...
-
Page 33: Install The Slide Rail Assemblies
▼ Install the Slide Rail Assemblies 1. Pull both mounting brackets completely out of their respective slide rails. a. Simultaneously press and hold the upper and lower lock buttons of the slide rail lock. Unlocking the Express Rail Slide Rail Assembly FIGURE: b. - Page 34 Position the mounting bracket against the chassis. Ensure that the slide rail lock is at the front and the keyed openings on the mounting bracket are aligned with the locating pins on the side of the chassis. SPARC T4-1 Server Installation Guide • August 2013...
- Page 35 Attaching an Express Rail Mounting Bracket to the Chassis FIGURE: b. Ensure that the heads of the four locating pins protrude through the keyed openings in the mounting bracket. Slide the mounting bracket toward the front of the chassis until the bracket locks into place with an audible click. c.
- Page 36 5. Extend the slide rails (outer section) to fit the rack and attach the slide rails to the rack. You hear an audible click when the rails securely attach to the rack. SPARC T4-1 Server Installation Guide • August 2013...
-
Page 37: Install The Server
Attaching Express Slide Rails to the Rack FIGURE: Caution – Deploy the antitilt feature on the rack before continuing the installation. Related Information “Rack Compatibility” on page 19 ■ “Slide Rail Assemblies” on page 22 ■ ▼ Install the Server Caution –... - Page 38 You will hear a click at that point. Caution – Before continuing, verify that the server is securely mounted in the rack, and that the slide rails are locked to the mounting brackets. SPARC T4-1 Server Installation Guide • August 2013...
-
Page 39: (Optional) Installing The Cma
Related Information “Rack Compatibility” on page 19 ■ “Slide Rail Assemblies” on page 22 ■ “Install the Slide Rail Assemblies” on page 25 ■ “Install the CMA” on page 31 ■ “Verify Correct Operation of the Slide Rails and the CMA” on page 36 ■... - Page 40 3. Insert the smaller extension into the clip located at the end of the mounting bracket. Slide the smaller extension into the square hole on the middle-in-width of the clip that is located at the end of the mounting bracket. SPARC T4-1 Server Installation Guide • August 2013...
- Page 41 Mounting the Inner CMA Connector FIGURE: 4. Insert the larger extension into the end of the right sliding rail. Installing the Server...
-
Page 42: Cma
5. Insert the hinged plastic connector at the left side of the CMA fully into the CMA rail extension. The plastic tab on the CMA rail extension locks the hinged plastic connector in place. SPARC T4-1 Server Installation Guide • August 2013... - Page 43 Mounting the Left Side of the Slide Rail FIGURE: Related Information “Rack Compatibility” on page 19 ■ “Slide Rail Assemblies” on page 22 ■ “Install the Slide Rail Assemblies” on page 25 ■ “Install the Server” on page 29 ■ “Verify Correct Operation of the Slide Rails and the CMA”...
-
Page 44: Verify Correct Operation Of The Slide Rails And The Cma
CMA. 1. For a free-standing rack, deploy the antitilt bar. 2. Unlock the slide lock buttons at the right and left sides of the chassis. SPARC T4-1 Server Installation Guide • August 2013... - Page 45 Unlocking the Slide Rail Assembly FIGURE: 3. If the server cables have been placed inside the CMA, inspect them for binding or kinks. 4. Slowly pull the server out of the rack until the slide rails reach their stops. 5. Verify that the CMA extends fully and does not bind in the slide rails. 6.
- Page 46 “Rack Compatibility” on page 19 ■ “Slide Rail Assemblies” on page 22 ■ “Install the Slide Rail Assemblies” on page 25 ■ “Install the Server” on page 29 ■ “Install the CMA” on page 31 ■ SPARC T4-1 Server Installation Guide • August 2013...
-
Page 47: Connecting Cables
Connecting Cables These topics explain how to connect the data and power cables to the server: Step Description Links Review the cabling requirements. “Cabling Requirements” on page 39 Review I/O port connector details. “Identifying Ports” on page 40 Connect the management and data “Connecting Data and Management cables. -
Page 48: Identifying Ports
“Connecting Cables” on page 39 ■ “Identifying Ports” on page 40 ■ Identifying Ports These topics provide reference information about the front and rear panel ports and pin assignments. “USB Ports” on page 41 ■ SPARC T4-1 Server Installation Guide • August 2013... -
Page 49: Usb Ports
“SER MGT Port” on page 41 ■ “NET MGT Port” on page 42 ■ “Gigabit Ethernet Ports” on page 43 ■ “Video Port” on page 43 ■ USB Ports Two USB ports can be accessed on the server’s front panel and two on the rear panel. Each Each USB port supplies 5V output at 500 mA. -
Page 50: Net Mgt Port
The NET MGT RJ-45 port, located on the rear panel, provides an optional Ethernet connection to the service processor. NET MGT Port FIGURE: Figure Legend Transmit Data + No Connect Transmit Data – Receive Data – Receive Data + No Connect No Connect No Connect SPARC T4-1 Server Installation Guide • August 2013... -
Page 51: Gigabit Ethernet Ports
Related Information “Front Panel Components” on page 3 ■ “Rear Panel Components” on page 6 ■ “Connect the NET MGT Port Cable” on page 45 ■ “Assign a Static IP Address to the SP” on page 55 ■ Gigabit Ethernet Ports Four RJ-45 Gigabit-Ethernet connectors (NET0, NET1, NET2, NET3) are located on the rear panel. -
Page 52: Connecting Data And Management Ports
▼ Connect the SER MGT Port Cable The SER MGT port is the farthest left RJ-45 port on the rear panel. ● Connect a Category 5 cable from the SER MGT port to the terminal device. SPARC T4-1 Server Installation Guide • August 2013... -
Page 53: Connect The Net Mgt Port Cable
SER MGT port – Rear Panel FIGURE: This port is needed to set up the NET MGT port. When connecting a DB-9 cable, use an RJ-45 to DB-9 adapter to perform the crossovers given for each connector. Note – Use the SER MGT port only for server management. This port is the default connection between the SP and a terminal or a computer. -
Page 54: Connect The Ethernet Network Cables
1. Connect a Category 5 cable from your network switch or hub to Ethernet Port 0 (NET0) on the rear of the chassis. NET0 is the farthest left port in the 4-port network cluster. SPARC T4-1 Server Installation Guide • August 2013... -
Page 55: Connect Other Data Cables
Ethernet Network Ports – Rear Panel FIGURE: 2. Connect Category 5 cables from your network switch or hub to the remaining Ethernet ports (NET1, NET2, NET3), as needed. Related Information “Connecting Cables” on page 39 ■ ▼ Connect Other Data Cables ●... -
Page 56: Secure Cables In The Cma
▼ Secure Cables in the CMA 1. Once the server cables are connected and placed inside the CMA, open the velcro cable straps and wrap the straps around the CMA securing the cables inside the CMA. SPARC T4-1 Server Installation Guide • August 2013... - Page 57 Securing the Server Cables With the CMA and Velcro Straps FIGURE: 2. Verify the operation of the slide rails and CMA, and cable service loops. Repeat the steps described in the procedure: “Verify Correct Operation of the Slide Rails and the CMA” on page Related Information “Install the CMA”...
- Page 58 SPARC T4-1 Server Installation Guide • August 2013...
-
Page 59: Powering On The Server For The First Time
Powering On the Server for the First Time These topics provide instructions for booting Oracle’s SPARC T4-1 server for the first time and for enabling the NET MGT port. It consists of the following topics: Step Description Links Review the behavior of Oracle ILOM console output “Oracle ILOM System Console”... -
Page 60: Connect A Terminal Or Emulator To The Ser Mgt Port
SP and host will be made. Related Information “Oracle ILOM System Console” on page 51 ■ “Power On the Server for the First Time” on page 53 ■ SPARC T4-1 Server Installation Guide • August 2013... -
Page 61: Power On The Server For The First Time
▼ Power On the Server for the First Time 1. Confirm that you have completed all of the preparations for installation. See the instructions in “Confirming Server and Site Specifications” on page 2. Confirm that you have completed the installation of the server in its rack. See the instructions in “Installing the Server”... - Page 62 “Connect a Terminal or Emulator to the SER MGT Port” on page 52 ■ “Connecting Cables” on page 39 ■ “Assign a Static IP Address to the SP” on page 55 ■ SPARC T4-1 Server Installation Guide • August 2013...
-
Page 63: Verify Functionality
▼ Verify Functionality ● After powering on the system for the first time, use the Sun Validation Test Suite (Sun VTS) software to verify the functionality and performance of the system, including network connections. Refer to the Sun VTS documentation for instructions on running these test utilities, available at: http://www.oracle.com/pls/topic/lookup?ctx=OracleVTS7.0 Assigning a Static IP Address to the SP... - Page 64 = xxx.xxx.xxx.xxx pendingipnetmask = 255.255.255.0 sidebandmacaddress = xx:xx:xx:xx:xx:xx state = enabled Commands: show -> 6. Commit the changes to the SP network parameters. -> set /SP/network commitpending=true Set 'commitpending' to 'true' SPARC T4-1 Server Installation Guide • August 2013...
-
Page 65: Oracle Solaris Os Configuration Parameters
Note – You can run the show /SP/network command again (after performing the set /SP/network commitpending=true command) to verify that the parameters have been updated. Related Information “Power On the Server for the First Time” on page 53 ■ Oracle Solaris OS Configuration Parameters When configuring the Oracle Solaris OS, you will be prompted for the following configuration parameters. - Page 66 “Oracle ILOM System Console” on page 51 ■ “Connect a Terminal or Emulator to the SER MGT Port” on page 52 ■ “Power On the Server for the First Time” on page 53 ■ SPARC T4-1 Server Installation Guide • August 2013...
-
Page 67: Glossary
Glossary ANSI SIS American National Standards Institute Status Indicator Standard. Alert standard format (Netra products only). Automatic system recovery. American wire gauge. blade Generic term for server modules and storage modules. See server module storage module. Server module. See server module. - Page 68 The part of the server or server module with the CPU and other hardware that runs the Oracle Solaris OS and other applications. The term host is used to distinguish the primary computer from the SP. See SP. SPARC T4-1 Server Installation Guide • August 2013...
- Page 69 ID PROM Chip that contains system information for the server or server module. Internet Protocol. Keyboard, video, mouse. Refers to using a switch to enable sharing of one keyboard, one display, and one mouse with more than one computer. Sound power level. Machine access code.
- Page 70 PCIe ExpressModule. Modular components that are based on the PCI Express industry-standard form factor and offer I/O features such as Gigabit Ethernet and Fibre Channel. POST Power-on self-test. PROM Programmable read-only memory. Predictive self healing. QSFP Quad small form-factor pluggable. SPARC T4-1 Server Installation Guide • August 2013...
- Page 71 RAID expansion module. Sometimes referred to as an HBA See HBA. Supports the creation of RAID volumes on drives. Serial attached SCSI. System configuration chip. Serial management port. A serial port on the server SP, the server module SP, SER MGT and the CMM.
- Page 72 User interface. Underwriters Laboratory Inc. US. NEC United States National Electrical Code. Coordinated Universal Time. Universal unique identifier. UUID World wide name. A unique number that identifies a SAS target. SPARC T4-1 Server Installation Guide • August 2013...
-
Page 73: Index
Index humidity, ambient relative, 11 acoustic noise emissions, 12 adapters for serial cables, 45 installing airflow requirements, 12 mounting brackets, 25 ambient temperature range, 11 server into rack, 19 anti-tilt legs or bar, 21 levers, locking, See "slide rail assembly locks" baud rate for serial terminal, 52 locating pins for mounting brackets, 25 bits setting for serial terminal, 52... - Page 74 11 physical, 9 server, 8 standby voltage, 3.3v, 53 stop bit, 52 temperature requirements, 11 unlocking mounting bracket, 25 USB ports described, 2 function, 40 output power, 41 pinouts, 41 SPARC T4-1 Server Installation Guide • August 2013...
Need help?
Do you have a question about the SPARC T4-1 and is the answer not in the manual?
Questions and answers