
Related Manuals for Sun Oracle Sun Blade T6340


Summary of Contents for Sun Oracle Sun Blade T6340
- Page 1 Sun Blade T6340 Server Module Installation and Administration Guide Part No. 820-3900-12 April 2010, Revision A...
- Page 2 Copyright © 2008, 2010, Oracle and/or its affiliates. All rights reserved. This software and related documentation are provided under a license agreement containing restrictions on use and disclosure and are protected by intellectual property laws. Except as expressly permitted in your license agreement or allowed by law, you may not use, copy, reproduce, translate, broadcast, modify, license, transmit, distribute, exhibit, perform, publish, or display any part, in any form, or by any means.
-
Page 3: Table Of Contents
Contents Using This Document vii Before You Begin the Installation 1 Hardware Overview 1 Physical Specifications 3 Environmental Requirements 3 Front Panel Features 4 Preinstalled Software 5 Managing the Server Module With ILOM 5 Service Processors 5 Chassis Management Module 6 ILOM on the CMM and Server Module SP 6 Establishing Communication With ILOM 6 Attaching a Serial Console to the Chassis Management Module 6... - Page 4 Powering On the Host 31 ▼ To Power on the Server Module Manually 32 ▼ To Shut Down Main Power Mode Installing the Solaris Operating System on a Hard Drive 32 Sun Blade T6340 Server Module Installation and Administration Guide • April 2010...
- Page 5 JumpStart Server Installation 33 JumpStart Server Configuration 33 Managing Disk Volumes 35 OS Patch Requirements 35 Disk Volumes 35 RAID Technology 36 Integrated Stripe Volumes (RAID 0) 36 Integrated Mirror Volumes (RAID 1) 37 Hardware Raid Operations 38 Physical Disk Slot Numbers, Physical Device Names, and Logical Device Names for Non-RAID Disks 38 ▼...
- Page 6 To Obtain the ok Prompt 62 OpenBoot Configuration Variables on the SP 63 For More Information 65 Device Tree for the Sun Blade T6340 Server Module 67 Index 69 Sun Blade T6340 Server Module Installation and Administration Guide • April 2010...
-
Page 7: Using This Document
Using This Document This guide describes how to install Oracle’s Sun Blade T6340 server module into the chassis. This guide also provides network connection and system configuration procedures. This section provides the following topics: “Related Documentation” on page viii ■... -
Page 8: Related Documentation
Connect server to network, Sun Blade T6340 Server Module Installation and Administration Guide, 820-3900 configure software Set remote access. View system Sun Integrated Lights Out Manager 2.0 Supplement for Sun Blade T6340 Server status and event logs. Modules, 820-3904 Diagnose and troubleshoot the Sun Blade T6340 Server Module Service Manual, 820-3902 server module. -
Page 9: Documentation Feedback
Submit comments about this document by clicking the Feedback[+] link at http://docs.sun.com. Include the title and part number of your document with your feedback: Sun Blade T6340 Server Module Installation and Administration Guide, part number 820- 3900-12. Using This Document... - Page 10 Sun Blade T6340 Server Module Installation and Administration Guide • April 2010...
-
Page 11: Before You Begin The Installation
C H A P T E R Before You Begin the Installation This chapter describes the hardware and software features of the Sun Blade T6340 server module. Hardware Overview The Sun Blade T6340 server module includes the features shown in... - Page 12 Remote console (remote KVMS) is configurable through OpenBoot PROM and ILOM. Power Power is provided from the chassis Cooling Environmental controls are provided from the chassis. Sun Blade T6340 Server Module Installation and Administration Guide • April 2010...
-
Page 13: Physical Specifications
Physical Specifications The Sun Blade T6340 server module is approximately 12.9 x 20.1 x 1.7 inches in a 1U form factor. The server module plugs in to a Sun Blade modular system, or chassis, which provides 12V power to each module, as well as cooling through fans. In addition to the 12V main power, the chassis provides 3.3V AUX power to each... -
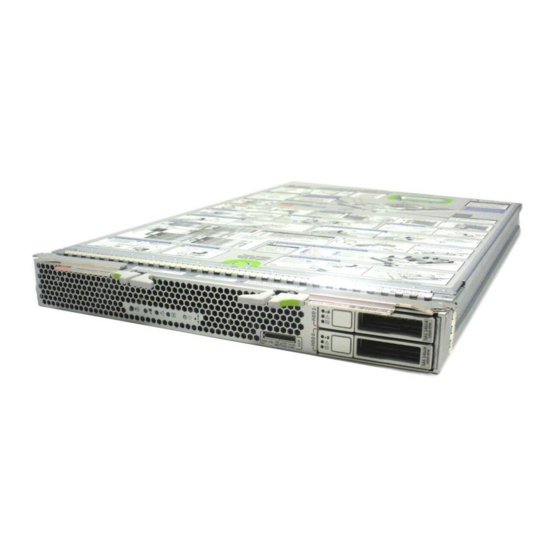
Page 14: Front Panel Features
Amber Drive Service Action Required LED Green OK LED Blue Drive Ready to Remove LED Power Button Chassis power connector Reset Button (for service use only) Chassis data connector Sun Blade T6340 Server Module Installation and Administration Guide • April 2010... -
Page 15: Preinstalled Software
Preinstalled Software You can order the Sun Blade T6340 server module with one or two hard disk drives assembled to order. You can also order the Solaris Operating System software and other software preinstalled on the root hard drive. For information about preinstalled software, refer to this site: http://www.sun.com/software/preinstall... -
Page 16: Chassis Management Module
(CMM). CMM ILOM is a modified version of ILOM firmware that is preinstalled on the CMM. Before installing the Sun Blade T6340 server module, you should have already installed and configured your Sun Blade modular system, including the CMM ILOM. -
Page 17: Attaching A Serial Console To The Server Module
Attaching a Serial Console to the Server Module To communicate directly with the Sun Blade T6340 server module, you can connect a serial console to the universal connector port (UCP) on the front panel of the server module by using a dongle cable. See “Connecting to the Server Module SP Using a... - Page 18 USB 2.0 (two connectors) DE-9 serial, male (TTYA) HD-15, female RJ-45 (Do not use this connector) Three-connector dongle cable (UCP-3) USB 2.0 (two connectors) RJ-45 serial HD-15, female Sun Blade T6340 Server Module Installation and Administration Guide • April 2010...
-
Page 19: Installation And Configuration
C H A P T E R Installation and Configuration Use the instructions in this chapter to install the server module into the chassis. Handling the Server Module Electronic equipment is susceptible to damage by static electricity. Use a grounded antistatic wriststrap, footstrap, or equivalent safety equipment to prevent electrostatic damage (ESD) when you install the server module. -
Page 20: Installing The Server Module Into The Chassis
6. Position the server module vertically so that the ejectors are on the right. Box 1 in shows the server module being inserted into the chassis. FIGURE 2-1 Sun Blade T6340 Server Module Installation and Administration Guide • April 2010... - Page 21 Inserting the Server Module Into the Chassis FIGURE 2-1 7. Push the server module into the slot until the module is about 1.5 cm (one-half inch) from the chassis front. See box 2 in FIGURE 2-1 8. Push the ejectors down until they snap into place. The server module is now flush with the modular system and the ejectors are locked.
-
Page 22: Connecting And Configuring The Server Module
Dongle cable with one RJ-45 serial, two USB 2 connectorsand one HD15-pin connector (VGA) RJ-45 cable connected to CMM serial port (SER Sun Blade T6340 server module with service processor MGT) (SP) Sun Blade T6340 Server Module Installation and Administration Guide • April 2010... -
Page 23: Connecting To The Server Module
Before you can use the Ethernet connection, you must know the IP addresses for the CMM and server module SP to which you want to connect. To configure the IP address on the Sun Blade T6340 server module, refer to “Configuring and Viewing the IP Address for a Server Module SP”... - Page 24 ▼ To Log In or Out of the SP Using the Web Interface 1. To log in to the web interface, type the IP address of the SP into your web browser. The login screen is displayed: Sun Blade T6340 Server Module Installation and Administration Guide • April 2010...
- Page 25 Web Interface Login Screen FIGURE 2-3 2. Type your user name and password. When you first try to access the web interface, it prompts you to type the default user name and password. The default user name and password are: Default user name: root ■...
-
Page 26: Connecting To The Server Module Sp Through The Chassis Cmm Serial Connector
3. Connect a serial cable from the serial port (SER MGT) on the chassis to a terminal device. Refer to the modular system chassis documentation for the location of the serial port. Sun Blade T6340 Server Module Installation and Administration Guide • April 2010... - Page 27 Note – The serial port requires the pin assignments described in . Note that TABLE 2-1 these are the same as the serial cable connector for the Sun Advanced Lights Out Manager (ALOM) or Remote System Control (RSC). Serial Management Port Pinouts TABLE 2-1 Signal Description Request To Send (RTS)
- Page 28 10. When you are done, type exit. The server module ILOM exits and the CMM CLI prompt is displayed. The following display shows an example of the login screen: Sun Blade T6340 Server Module Installation and Administration Guide • April 2010...
-
Page 29: Connecting To The Server Module Sp Using A Dongle Cable
-> cd /CH/BL8/SP/cli /CH/BL8/SP/cli -> start Are you sure you want to start /CH/BL8/SP/cli (y/n)? y start: Connecting to /CH/BL8/SP/cli using Single Sign On Waiting for deamons to initialize... Daemons ready Password: changeme Sun (TM) Integrated Lights Out Manager Version 2.0.4.0 Copyright 2008 Sun Microsystems, Inc. -
Page 30: Configuring And Viewing The Ip Address For A Server Module Sp
Ethernet port: CMM serial port – You can attach a terminal device. Refer to “Connecting to the ■ Server Module SP Through the Chassis CMM Serial Connector” on page Sun Blade T6340 Server Module Installation and Administration Guide • April 2010... -
Page 31: To View Or Configure The Ip Address For The Server Module Sp When Assigned By Dhcp - Through The Cmm
CMM Ethernet port – You can connect to your management network. Refer to ■ “Connecting Through the Chassis CMM Ethernet Port” on page After attaching to the CMM by using one of these ports, you can log in to the CMM ILOM software to configure and view your server module IP address, whether the IP address is assigned by DHCP or a static IP address. -
Page 32: To View Or Configure The Ip Address For The Server Module Sp Using Static Ip Addresses - Through The Cmm
Where xxx.xxx.xx.xx, yyy.yyy.yyy.y and zzz.zzz.zz.zzz are the IP address, netmask, and gateway for your ILOM and network configuration. To determine these addresses, contact your system administrator. To revert to a dynamic Ethernet configuration: ■ Sun Blade T6340 Server Module Installation and Administration Guide • April 2010... - Page 33 -> set pendingipdiscovery=dhcp -> set commitpending=true The following display shows a typical session where the user looks at static settings, configures them to be dynamic, then looks at the new settings. Chapter 2 Installation and Configuration...
- Page 34 = 10.6.42.191 ipdiscovery = dhcp ipgateway = 10.6.42.1 ipnetmask = 255.255.255.0 macaddress = 00:14:4F:3A:26:74 pendingipaddress = 10.6.42.191 pendingipdiscovery = dhcp pendingipgateway = 10.6.42.1 pendingipnetmask = 255.255.255.0 Commands: show Sun Blade T6340 Server Module Installation and Administration Guide • April 2010...
-
Page 35: Configuring And Viewing The Ip Address For A Server Module Sp Through The Ucp
Configuring and Viewing the IP Address for a Server Module SP Through the UCP You can connect to the server module SP by one of these methods: Through the front-panel universal connector port (UCP) using a dongle cable. ■ Through the SP Ethernet port. You must already know the IP address to use this ■... -
Page 36: To View Or Configure The Ip Address For The Server Module Sp Using Static Ip Addresses - Through The Ucp And Dongle Cable
3. Follow the instructions in “To View or Configure the IP Address for the Server Module SP Using Static IP Addresses — Through the CMM” on page 22, starting with Step Sun Blade T6340 Server Module Installation and Administration Guide • April 2010... -
Page 37: Connecting A Remote Console Or Remote Kvms
KVMS These procedures are described in the Sun Integrated Lights Out Manager 2.0 Supplement for Sun Blade T6340 Server Modules, 820-3904 and chapter 12 of the Sun Integrated Lights out Manager 2.0 User’s Guide, 820-1188. Note – You should first read the Sun Integrated Lights Out Manager 2.0 Supplement for Sun Blade T6340 Server Modules, 820-3904. -
Page 38: To Switch Between The Ilom Prompt And The System Console
Pressing the terminal’s Enter or Return key should produce a prompt. ▼ To Switch Between the ILOM Prompt and the System Console 1. Establish an ILOM service processor session. Sun Blade T6340 Server Module Installation and Administration Guide • April 2010... -
Page 39: Connecting To The Server Module With A Local Graphics Monitor Or Local Kvms
2. To connect to the system console, at the ILOM command prompt, type: -> start /SP/console The start /SP/console command switches you to the system console. 3. To switch back to the -> prompt, type the #. (Hash-Period) escape sequence. ok #. -
Page 40: Changing The Ilom Password
1. At the initial login prompt on the server module SP, log in using the default administrator user name and password: hostname login: root Password: changeme 2. Use the ILOM password command to change the password. Sun Blade T6340 Server Module Installation and Administration Guide • April 2010... -
Page 41: Powering On The Host
-> set /SP/users/root password Enter new password: ******* Enter new password again: ******* -> After the root password has been set, on subsequent reboots, the ILOM CLI login prompt is displayed. Powering On the Host After the service processor boots, the ILOM CLI prompt (->) is displayed the first time the service processor is booted. -
Page 42: To Power On The Server Module Manually
Installing the Solaris Operating System on a Hard Drive The basic configuration of the Sun Blade T6340 server module ships with or without hard drives. If you ordered an optional hard drive with preinstalled software, refer “Preinstalled Software” on page... -
Page 43: Jumpstart Server Installation
http://docs.sun.com/ JumpStart Server Installation You can use a JumpStart server to install the OS. A JumpStart server consists of several components: Install client – The target system to be installed or upgraded. ■ Boot server – The network providing a failsafe operating system to the installing ■... - Page 44 Network Systems Group, Sun BluePrints OnLine, February 2005 Building a JumpStart Infrastructure by Alex Noordergraaf, Enterprise Engineering, ■ Sun BluePrints OnLine, April 2001 You can obtain these documents from the following site: http://www.sun.com/blueprints Sun Blade T6340 Server Module Installation and Administration Guide • April 2010...
-
Page 45: Managing Disk Volumes
Managing Disk Volumes This chapter describes redundant array of independent disks (RAID) concepts, and how to configure and manage RAID disk volumes using the Sun Blade T6340 server module on-board serial attached SCSI (SAS) disk controller. Note – The server module can be configured with a RAID Host Bus Adapter (HBA). -
Page 46: Raid Technology
Integrated stripe volumes provide for a logical unit (LUN) that is equal in capacity to the sum of all its member disks. For example, a three-disk IS volume configured on 72-gigabyte drives will have a capacity of 216 gigabytes. Sun Blade T6340 Server Module Installation and Administration Guide • April 2010... -
Page 47: Integrated Mirror Volumes (Raid 1)
Graphical Representation of Disk Striping FIGURE 3-1 Caution – There is no data redundancy in an IS volume configuration. Thus, if a single disk fails, the entire volume fails, and all data is lost. If an IS volume is manually deleted, all data on the volume is lost. IS volumes are likely to provide better performance than IM volumes or single disks. -
Page 48: Hardware Raid Operations
(such as ) or by its logical device /devices/pci@1f,700000/scsi@2/sd@1,0 name (such as ). In addition, some applications might report a disk slot c1t1d0 number (0 through 3). Sun Blade T6340 Server Module Installation and Administration Guide • April 2010... -
Page 49: To Create A Hardware Mirrored Volume
You can use to associate internal disk slot numbers with the logical and TABLE 3-1 physical device names for each hard drive. Disk Slot Numbers, Logical Device Names, and Physical Device Names TABLE 3-1 Disk Slot Number Logical Device Name Physical Device Name Slot 0 c1t0d0... - Page 50 For example, an IM with a secondary disk that has been removed from the chassis appears as: # raidctl -l c1t0d0 Volume Size Stripe Status Cache RAID Size Level Disk ---------------------------------------------------------------- c1t0d0 136.6G DEGRADED OFF RAID1 0.1.0 136.6G GOOD 136.6G FAILED Sun Blade T6340 Server Module Installation and Administration Guide • April 2010...
- Page 51 See the raidctl(1M) man page for additional details regarding volume and disk status. Note – The logical device names might appear differently on your system, depending on the number and type of add-on disk controllers installed. 2. Type the following command: # raidctl -c primary secondary The creation of the RAID volume is interactive, by default.
-
Page 52: To Create A Hardware Mirrored Volume Of The Default Boot Device
One alternate medium is a network installation image in single-user mode. (Refer to the Solaris 10 Installation Guide for information about configuring and using network-based installations.) Sun Blade T6340 Server Module Installation and Administration Guide • April 2010... - Page 53 1. Determine which disk is the default boot device. From the OpenBoot ok prompt, type the printenv command, and if necessary the devalias command, to identify the default boot device. For example: ok printenv boot-device boot-device = disk ok devalias disk disk /pci@0/pci@0/pci@2/scsi@0/disk@0,0 2.
-
Page 54: To Create A Hardware Striped Volume
Note – The logical device names might appear differently on your system, depending on the number and type of add-on disk controllers installed. 2. Type the following command: # raidctl -c –r 0 disk1 disk2 ... Sun Blade T6340 Server Module Installation and Administration Guide • April 2010... - Page 55 The creation of the RAID volume is interactive, by default. For example: # raidctl -c -r 0 c1t1d0 c1t2d0 c1t3d0 Creating RAID volume will destroy all data on spare space of member disks, proceed (yes/no)? yes May 16 16:33:30 wgs57-06 scsi: /pci@0/pci@0/pci@2/scsi@0 (mpt0): May 16 16:33:30 wgs57-06 Physical disk 0 created.
-
Page 56: To Configure And Label A Hardware Raid Volume For Use In The Solaris Operating System
You can safely ignore these messages. 2. Select the disk name that represents the RAID volume that you have configured. Sun Blade T6340 Server Module Installation and Administration Guide • April 2010... - Page 57 In this example, c1t2d0 is the logical name of the volume. # format Searching for disks...done AVAILABLE DISK SELECTIONS: 0. c1t0d0 <SUN72G cyl 14087 alt 2 hd 24 sec 424> /pci@0/pci@0/pci@2/scsi@0/sd@0,0 1. c1t1d0 <SUN72G cyl 14087 alt 2 hd 24 sec 424> /pci@0/pci@0/pci@2/scsi@0/sd@1,0 2.
- Page 58 See the format(1M) man page for additional details. 5. Write the new label to the disk using the label command. format> label Ready to label disk, continue? yes Sun Blade T6340 Server Module Installation and Administration Guide • April 2010...
-
Page 59: To Delete A Hardware Raid Volume
6. Verify that the new label has been written by printing the disk list using the disk command. format> disk AVAILABLE DISK SELECTIONS: 0. c1t0d0 <SUN72G cyl 14084 alt 2 hd 24 sec 424> /pci@0/pci@0/pci@2/scsi@0/sd@0,0 1. c1t1d0 <SUN72G cyl 14084 alt 2 hd 24 sec 424> /pci@0/pci@0/pci@2/scsi@0/sd@1,0 2. - Page 60 IS volume or the data it contains. For example: # raidctl -f -d c1t0d0 Volume c1t0d0 is deleted successfully! 4. To confirm that you have deleted the RAID array, type the following command: # raidctl Sun Blade T6340 Server Module Installation and Administration Guide • April 2010...
-
Page 61: To Perform A Mirrored Disk Hot-Plug Operation
For example: # raidctl Controller: 1 Disk: 0.0.0 Disk: 0.1.0 For more information, see the raidctl(1M) man page. ▼ To Perform a Mirrored Disk Hot-Plug Operation 1. Verify which hard drive corresponds with which logical device name and physical device name. “Disk Slot Numbers, Logical Device Names, and Physical Device Names”... - Page 62 Volume Size Stripe Status Cache RAID Size Level Disk ---------------------------------------------------------------- c1t0d0 136.6G OPTIMAL RAID1 0.0.0 136.6G GOOD 0.1.0 136.6G GOOD For more information, see the raidctl(1M) man page. Sun Blade T6340 Server Module Installation and Administration Guide • April 2010...
-
Page 63: To Perform A Nonmirrored Disk Hot-Plug Operation
▼ To Perform a Nonmirrored Disk Hot-Plug Operation 1. Verify which hard drive corresponds with which logical device name and physical device name. “Disk Slot Numbers, Logical Device Names, and Physical Device Names” on page 39. Ensure that no applications or processes are accessing the hard drive. 2. - Page 64 Type the following command: # cfgadm -c unconfigure Ap-Id For example: # cfgadm -c unconfigure c0::dsk/c1t3d0 This example removes c1t3d0 from the device tree. The blue OK-to-Remove LED lights. Sun Blade T6340 Server Module Installation and Administration Guide • April 2010...
- Page 65 4. Verify that the device has been removed from the device tree. Type the following command: # cfgadm -al Ap_Id Type Receptacle Occupant Condition scsi-bus connected configured unknown c1::dsk/c1t0d0 disk connected configured unknown c1::dsk/c1t1d0 disk connected configured unknown c1::dsk/c1t2d0 disk connected configured unknown...
- Page 66 Note that c1t3d0 is now listed as configured. Sun Blade T6340 Server Module Installation and Administration Guide • April 2010...
-
Page 67: Openboot Prom Features
This chapter describes some OpenBoot PROM features and procedures. OpenBoot ok Prompt Oracle’s Sun Blade T6340 server module with the Solaris OS installed operates at different run levels. For a full description of run levels, refer to the Solaris system administration documentation. -
Page 68: Openboot Ok Prompt Not Available After Solaris Os Has Started
However, it is not always possible to take such precautions, especially if the system is malfunctioning. Sun Blade T6340 Server Module Installation and Administration Guide • April 2010... -
Page 69: Graceful Shutdown
Graceful Shutdown The preferred method of reaching the ok prompt is to shut down the operating system by typing an appropriate command (for example, the init, or uadmin commands) as described in Solaris system administration documentation. For example, if you type init 0 at the Solaris prompt the system gradually takes you to the ok prompt: If the operating system is already halted, you can use the start /SP/console command without using set /HOST send_break_action=break to reach the ok... -
Page 70: To Reset The System Manually
Break key. The equivalent method uses the following pair of commands: Sun Blade T6340 Server Module Installation and Administration Guide • April 2010... -
Page 71: Procedures For Obtaining The Ok Prompt
1. Type set /HOST send_break_action=break This command forces a running server module to drop to a menu. For example: -> set /HOST send_break_action=break Set ’send_break_action’ to ’break’ -> start /SP/console Are you sure you want to start /SP/console (y/n)? y Serial console started. -
Page 72: To Obtain The Ok Prompt
• r – resets the domain and reboots to the Solaris OS if the auto-boot? option is set to true, or stops at the ok prompt if the auto-boot? option is set to false. Sun Blade T6340 Server Module Installation and Administration Guide • April 2010... -
Page 73: Openboot Configuration Variables On The Sp
OpenBoot Configuration Variables on the SP describes the OpenBoot firmware configuration variables. The OpenBoot TABLE 4-1 configuration variables are printed here in the order in which they appear when you type the following command: ok printenv OpenBoot Configuration Variables Stored on the Service Processor TABLE 4-1 Variable Name Possible Values... - Page 74 Solaris reference manual.. Executed if auto-boot? is true boot-command boot boot Device from which to boot. boot-device disk, net, disk, net cdrom multipath-boot? true, false false Sun Blade T6340 Server Module Installation and Administration Guide • April 2010...
-
Page 75: For More Information
OpenBoot Configuration Variables Stored on the Service Processor TABLE 4-1 Variable Name Possible Values Default Value Description boot-device-index If true, executes commands in NVRAMRC use-nvramrc? true, false false during server module startup. variable-name Command script to execute if nvramrc none use-nvramrc? is true. - Page 76 Sun Blade T6340 Server Module Installation and Administration Guide • April 2010...
- Page 77 A P P E N D I X Device Tree for the Sun Blade T6340 Server Module The table shows the Solaris Operating System device tree for some server module devices. Device Name in OpenBoot Device Location on Server Module...
- Page 78 Fabric Expansion Module (FEM) /pci@400/pci@0/pci@9 On-board USB 2.0 controller None /pci@500/pci@0/pci@2/pci@0/usb@0,2 On-board USB 1.x controller None /pci@500/pci@0/pci@2/pci@0/usb@0,1 On-board USB 1.x controller None /pci@500/pci@0/pci@2/pci@0/usb@0 Sun Blade T6340 Server Module Installation and Administration Guide • April 2010...
-
Page 79: Index
Index Symbols LEDs Activity, 56 -> commands OK-to-Remove, 54, 55 reset /SYS, 60 logical device names, table, 38 disk hot-plug mirrored disk, 51 Activity (disk drive LED), 56 nonmirrored disk, 53 architecture designation, 2 disk slot number, reference, 39 auto-boot (OpenBoot configuration variable), 57 disk volumes about, 35 deleting, 50... - Page 80 59 run levels accessing with ILOM set /HOST explained, 57 break_action=break command, 60 ok prompt and, 57 accessing with ILOM set /HOST send_break_action=break command, 58 Sun Blade T6340 Server Module Installation and Administration Guide • April 2010...
- Page 81 server module ILOM connecting through dongle cable, 19 connecting through the Ethernet port, 13 service processor (SP) managing with ILOM, 6 setenv (OpenBoot command), 29, 30 shutdown (Solaris command), 59, 62 shutting down power, 32 Solaris commands cfgadm, 53 cfgadm install_device, cautions against using, 54 cfgadm remove_device, cautions against using, 54...
- Page 82 Sun Blade T6340 Server Module Installation and Administration Guide • April 2010...
Need help?
Do you have a question about the Sun Blade T6340 and is the answer not in the manual?
Questions and answers