Table of Contents
Advertisement
Quick Links
LabelStations
Advanced Labelling Limited
58 Nuffield Road
Poole
Dorset
BH16 6BW
Tel.
01202 683212
Fax.
01202 683089
Email.
info@labelzone.co.uk
support@labelzone.co.uk
Web.
www.labelzone.co.uk
SALES
Pro 240
Pro 340
USER MANUAL
(for product information)
200 dpi
&
300 dpi
www.labelstation.co.uk
SUPPORT
JUMP TO CONTENTS
(for support and downloads)
Advertisement
Table of Contents

Related Manuals for LabelStation Pro 240


Summary of Contents for LabelStation Pro 240
- Page 1 LabelStations Pro 240 200 dpi & Pro 340 300 dpi USER MANUAL Advanced Labelling Limited 58 Nuffield Road Poole Dorset BH16 6BW JUMP TO CONTENTS Tel. 01202 683212 Fax. 01202 683089 Email. info@labelzone.co.uk support@labelzone.co.uk Web. www.labelzone.co.uk (for product information) www.labelstation.co.uk...
- Page 2 LabelStation Pro 240 Compliances CE CLASS A EN 55022:2006 +A1:2007 EN 55024:1998+A1:2001+A2:2003 EN 61000-4 SERIES REQULATIONS FCC CFR Title 47 Part 15 Subpart B:2009-Section 15.107 and 15.109 ICES-003 Issue 4:2004 Class A AS/NZS CISPR 22:2009 CLASS A GB4953-2001 GB9254-2008 (CLASS A) GB17625.1-2003...
- Page 3 LabelStation Pro 240 UL 60950-1(2nd Edition) CSA C22.2 No. 60950-1-07(2nd Edition) EN 60950-1/A1:2010 IEC 60950-1/A1:2009 IEC 60950-1:2005(2nd Edition) Page 3 of 67...
-
Page 4: Table Of Contents
LabelStation Pro 240 CONTENTS 1. Introduction......................... 6 1.1 Product Introduction...................... 6 1.2 Product Features ......................6 1.2.1 Printer standard features ..................6 1.2.2 Printer optional features ..................7 1.3 General Specifications ....................8 1.4 Print Specifications ....................... 8 1.6 Label Specifications ...................... 8 2. - Page 5 LabelStation Pro 240 3.1.2.11 Format Prefix: ....................34 3.1.2.12 Delimiter Character:..................34 3.1.2.13 Media Power Up: ..................... 35 3.1.2.14 Head Close:..................... 35 3.1.2.15 Label Top: ....................... 35 3.1.2.16 Left Position:....................36 3.1.2.17 Sensor ......................36 3.1.2.18 Status ......................36 3.1.2.19 Calibration ....................... 37 3.1.2.20 Serial Comm....................
-
Page 6: Introduction
To design label templates, please refer to your labelling software instructions. To write custom programs, please refer to the TSPL/TSPL2 programming manual that can be found in the accessories CD-ROM. 1.2 Product Features 1.2.1 Printer standard features The LabelStation 240 features the following: • Thermal transfer printing • Direct thermal printing •... -
Page 7: Printer Optional Features
LabelStation Pro 240 • Downloadable firmware upgrades • Text, bar code, graphics/image printing (Please refer to the TSPL/TSPL2 programming manual for supporting code page) Supported bar code Supported image 1D bar code 2D bar code Code 39, PDF-417, BITMAP, Code 93,... -
Page 8: General Specifications
LabelStation Pro 240 1.3 General Specifications General Specifications Physical dimensions 286 mm (W) x 259 mm (H) x 434 mm Weight 11 kg Electrical Internal switching power supply Input: AC 100-240V Output: DC 24V 3.3A Environmental condition Operation: 5 ~ 40IC (41 ~ 104IF),... -
Page 9: Operations Overview
LabelStation Pro 240 2. Operations Overview 2.1 Unpacking and Inspection This printer has been specially packaged to withstand damage during shipping. Please carefully inspect the packaging and printer upon receiving the bar code printer. Please retain the packaging materials in case you need to reship the printer. -
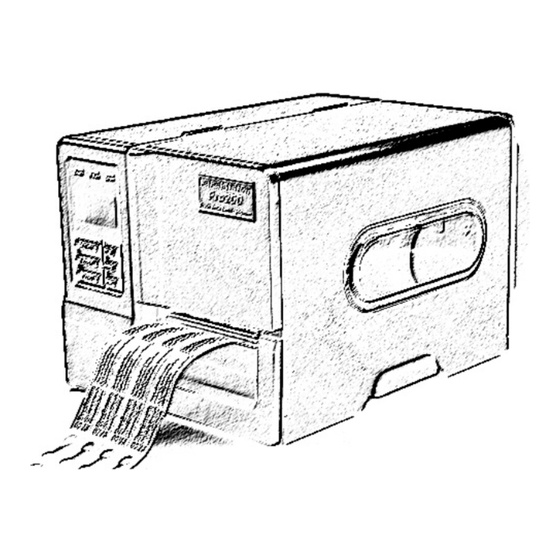
Page 10: Printer Overview
LabelStation Pro 240 2.2 Printer Overview 2.2.1 Front View LED indicators Menu key Pause key Feed key Label window Cover lift handle Paper exit chute Page 10 of 67... -
Page 11: Interior View
LabelStation Pro 240 2.2.2 Interior view Ribbon rewind spindle Label roll guard Ribbon supply spindle 3 inch core Print-head pressure adaptor adjustment Knob Label supply Print-head release lever spindle Ribbon expired sensor Ribbon guide bar Label guide bar Print-head Platen roller... -
Page 12: Power Switch
LabelStation Pro 240 2.2.3 Rear View SD card slot Ethernet interface (optional) Centronics parallel interface (optional) RS-232C Interface (115,200 bps max) USB host (option) Power switch Power jack socket Ethernet interface (optional) USB interface (USB 2.0 Fanfold label entry slot... -
Page 13: Operator Controls
LabelStation Pro 240 2.3 Operator Controls 2.3.1 Front Panel & Keys Basic Option LED indicators Pause button Keys Function Feed key Advance one (blank) label Pause key Pause/Resume printing Feed button Display Option LED indicators Keys Function Menu Enter/exit menu, or cancel setting... -
Page 14: Led Indicators
LabelStation Pro 240 2.3.2 LED Indicators Status Indication POWER Printer power off Printer power on ON-LINE Printer ready Flashing Printer paused or receiving data from PC ERROR Printer is ready Carriage (print-head) open, or cutter failure, or data being cleared... -
Page 15: Ribbon Installation
LabelStation Pro 240 2.5 Ribbon Installation 2.5.1 Loading the Ribbon 1. Open the printer side cover. 2. Push the new ribbon onto the ribbon supply spindle. Push the spare core onto the rewind New ribbon spindle. Push both as far as they will go. -
Page 16: Installation Of Label
LabelStation Pro 240 Rotate the ribbon rewind spindle until the ribbon leader has passed from view. 7. Close the print-head carriage, making sure the latches are engaged securely. Ribbon rewind Ribbon supply SCHEMATIC Ribbon guide bar Ribbon sensor 2.6 Installation of Label 2.6.1 Loading the Roll Label... - Page 17 LabelStation Pro 240 2. Push the print-head release lever (in direction indicated) to open the print-head carriage. Print-head carriage 3. Move the label roll guard horizontally to the end of label spindle then flip it down. Label roll guard 4. Place the roll of label on the label supply spindle. Flip up the label roll guard.
- Page 18 LabelStation Pro 240 5. Pull label roll leading edge forward through the label guide bar, label sensor and place the label leading edge onto the platen roller. Label supply spindle Label guide bar Label sensor bar 6. Adjust the label guide to fit the width of the Label sensor label.
-
Page 19: Loading Fan-Fold Label
LabelStation Pro 240 2.6.2 Loading Fan-fold Label Fan-fold label feeds through an aperture in the rear of the printer. For the initial three steps, see previous illustrations. 1. Open the printer right side cover. 2. Push the print-head release lever to open the print-head carriage. - Page 20 LabelStation Pro 240 2. Refer to chapter 2.6.1 to install the label. 3. Use the DiagTool to set the label sensor type and calibrate the appropriate sensor. Refer to chapter 4. 4. Pull the label through the front of the printer and remove some labels to expose the bare liner.
-
Page 21: Loading The Label In Cutter Mode (The Cutter Is An Optional Extra)
LabelStation Pro 240 Liner 7. Use the DiagTool (or labelling software) to set the printer to Peeler Mode. Refer to chapter 4. Peeling will now take place when a label is printed. Press the FEED button to test it. Printed label exits here Spent liner exits here 2.6.4 Loading the label in Cutter Mode (the cutter is an optional extra) - Page 22 LabelStation Pro 240 4. Close the print-head mechanism, pressing down where shown, and make sure the green latch is engaged properly. 5. Use the DiagTool (or labelling software) to set the printer to Cutter Mode. Refer to chapter 4. Press the FEED button to test.
-
Page 23: Print-Head Pressure Adjustment Knobs
LabelStation Pro 240 2.7 Print-head Pressure Adjustment Knobs There are two reasons for adjusting the print-head pressure to obtain good quality print: 1. Heavy gauge label, typically thicker than 0.19 mm or 190 microns (7.5 mils). This would require equal adjustment of the pressure knobs. -
Page 24: Setup Menu Overview
LabelStation Pro 240 3.1 Setup Menu Overview SET-UP PRINTER SET-UP SENSOR SERIAL COMM ETHERNET EXIT TSPL2 STATUS BAUD RATE STATUS ZPL2 CONFIGURE CALIBRATION PARITY EXIT EXIT DATA BITS EXIT STOP BIT(S) EXIT Page 24 of 67... -
Page 25: Printer Setup (Tspl2)
LabelStation Pro 240 3.1.1 Printer Setup (TSPL2) PRINTER SET-UP TSPL2 EXIT DENSITY PRINT MODE SHIFT X REFERENCE X NONE +000~-000 000~999 BATCH MODE PEELER MODE REFERENCE Y SHIFT Y CUTTER MODE COUNTRY CUTTER 000~999 +000~-000 EXIT CODE PAGE OFFSET +000~-... -
Page 26: Speed
LabelStation Pro 240 3.1.1.1 Speed: Print Setup 1/12 > Speed Speed Density Direction Use this option to setup print speed. Each increment/decrement is 1 ips. Printer default density is 5 ips (203 dpi) or 3 ips(300 dpi). Press UP key to raise the print speed, and press DOWN key to decrease print speed. -
Page 27: Print Mode: (None/Batch Mode/Peeler Mode/Cutter Mode/Cutter Batch)
LabelStation Pro 240 The print direction setting is either 1 or 0, the default direction being 0. Press UP key to set the direction to 1, and DOWN key to set it to 0, and SELECT key to enable the setting. Press MENU key to cancel the setting and return to the previous menu. -
Page 28: Offset
LabelStation Pro 240 3.1.1.5 Offset: Print Setup 5/12 Offset Direction Print Mode +000 > Offset This option is used to fine tune the post print stop location when a peeler or cutter is in use. Press the DOWN key to move the cursor from left to right over the digits, and press the UP key to change the value from “+”... - Page 29 LabelStation Pro 240 7-bit 8-bit code page name International code page number International Character Set Character Set United States British Multilingual German Slavic French Portuguese Danish Canadian/French Italian Nordic Spanish Swedish Swiss Windows Code Page (SBCS) Windows Code Page (DBCS)
-
Page 30: Country
LabelStation Pro 240 3.1.1.8 Country: Country 1/23 Print Setup 11/12 Reference Y > 001 Code Page > Country Use this option to set the country code for the LCD display. Press the UP and DOWN keys to select the country code, and press the SELECT key to enter the value. Press MENU key to cancel the setting and return to the previous menu. -
Page 31: Darkness
LabelStation Pro 240 3.1.2.1 Darkness: Print Setup 1/17 Darkness > Darkness Print Speed Tear-off Use this option to set print darkness (print temperature), minimum darkness being 0, to maximum darkness 30, in steps of 1. The default setting is 16. For any given type of label the best quality is obtained empirically by balancing print speed against darkness. -
Page 32: Print Mode Tear Off Peel Off Cutter
LabelStation Pro 240 Press to enter the value. Press MENU to cancel the setting and return to the SELECT previous menu. The default value is +000 Note: These settings, made at the printer, will be over-written by commands from the labelling software (label template) at print time unless the “Use current printer settings”... -
Page 33: List Fonts
LabelStation Pro 240 3.1.2.6 List Fonts: Print Setup 6/17 Self Test … Printing … > List Fonts List Images List Formats This feature is used to print out all available fonts stored in the printer’s DRAM, Flash or optional memory card. Make sure the printer is loaded with a wide enough label to accommodate this information. -
Page 34: Control Prefix
LabelStation Pro 240 This feature is used to print out the current printer configuration. Press SELECT key to begin. 3.1.2.10 Control Prefix: Print Setup 10/17 List Formats Control Prefix List Setup < ~ > 7EH > Control Prefix This option is used to set the control prefix character. Press the... -
Page 35: Media Power Up
LabelStation Pro 240 3.1.2.13 Media Power Up: Print Setup 13/17 Media Power U Format Prefix Length Delimiter Char > No Motion > Media Power Up Exit This option is used to set the action of the media (label) when you turn on the printer. The default SELECT setting is No Motion. -
Page 36: Left Position
LabelStation Pro 240 This option is used to adjust print position vertically on the label. The default value is +000 and the range of settings is -120 to +120 dots. Press the DOWN key to move the cursor from left digit to... -
Page 37: Calibration
LabelStation Pro 240 3.1.2.19 Calibration This option is used to calibrate the sensitivity of the various optical media sensors in the printer. Optical sensors allow the printer to track the passing of individual labels, and also detect the absence/presence of ribbon, and these sensors occasionally need recalibrating when a new roll of label or ribbon is fitted. - Page 38 LabelStation Pro 240 A-1 Automatic When you enter the Automatic option the message below appears and the printer feeds out a number of labels while calibrating the sensor, after which the LCD screen returns to the previous menu. Unprinted labels may be returned to the printer to save wasting them.
- Page 39 LabelStation Pro 240 Label sensor location Label backing paper (liner) 4. Position the label with liner under the media sensor. Press the SELECT key to get the printer to read the value. Gap Mode Complete Intensity Ref. Level Label sensor location Label with liner 5.
- Page 40 LabelStation Pro 240 DOWN 2. Press the to move the cursor from left digit to right digit, and press the to set the value from “0” to “9” Gap Size and the “dot/ mm/ inch”. Press the SELECT key to set the gap 0024 dot size.
- Page 41 LabelStation Pro 240 Entering the Manual option displays the following message, with steps which must be completed: Mode Actions DOWN 1. Press the to move the cursor from left digit to right digit, and press the to set the value from Paper Len.
- Page 42 LabelStation Pro 240 Label Sensor Blank label under sensor Note: The difference in value of “Ref. Level” when sensing the mark should be greater than when sensing blank label by no less than 128. If the sensor fails to differentiate by this much, manually increase Intensity until the above difference is achieved.
- Page 43 LabelStation Pro 240 C. Cont. Mode Calibration Cont. Mode > BLine Mode > Automatic Cont. Mode Manual Exit Exit key and Press the UP DOWN key to scroll the cursor to the sensor type. Press the SELECT key to enter the black-mark sensor calibration mode.
- Page 44 LabelStation Pro 240 On selecting the Manual option you will see the following message. These steps must be completed: Mode Actions 1. Remove the continuous label. Press the SELECT key to enter the value. Cont. Mode Remove Label Intensity Ref. Level 2.
-
Page 45: Serial Comm
LabelStation Pro 240 3.1.2.20 Serial Comm. SERIAL COMM. DATA BITS STOP BIT(S) BAUD RATE PARITY EXIT None 1200 bps 2400 bps Even EXIT EXIT 4800 bps EXIT 9600 bps 19200 bps 38400 bps 57600 bps 115200 bps EXIT Page 45 of 67... -
Page 46: Baud Rate
LabelStation Pro 240 3.1.2.21 Baud Rate Serial Comm. Baud Rate > Baud Rate > 9600 bps Parity 19200 bps Data Bits 38400 bps This option is used to set the RS-232 baud rate. The default setting is 9600 bps. Press the UP... -
Page 47: Ethernet
LabelStation Pro 240 3.1.2.25 Ethernet Use this menu to reset, configure, and check the status of the printer’s internal Ethernet module. This function is available on the LCD display only when the Ethernet card is fitted. Press the UP DOWN keys to select the different options and press the SELECT key to enter the value. -
Page 48: Configure: (Dhcp / Static Ip)
LabelStation Pro 240 3.1.2.28 Configure: (DHCP / Static IP) Use this menu to set the printer’s DHCP and Static IP. 3.1.2.28 DHCP Ethernet Configure Status > DHCP > Configure Static IP Reset Exit Press the UP DOWN keys to select the DHCP function and press the SELECT key to enter the value. -
Page 49: File Manager
LabelStation Pro 240 Static IP Select: Menu: Press the SELECT key to restart the printer with the new Ethernet module setting. Press MENU key to cancel the setting. 3.2 File Manager This feature is used to check the printer’s available memory and list all stored files. -
Page 50: Avail. Memory
LabelStation Pro 240 To delete the file use the DOWN button as follows: FLASH File List DEMO.TTF 1.75MB > DEMO.TTF DEMO.BAS DOWN: Delete To run the file (.BAS) use the SELECT button as follows: FLASH File List DEMO.BAS 406 Byte(s) DEMO.TTF... -
Page 51: Print Config
LabelStation Pro 240 3.3.1 Print Config. This feature is used to print out all the current configuration settings onto a label, including a test pattern to obviate any defective dot/pixels in the print-head (failed heater elements). Please refer to section 4.2. -
Page 52: Language
LabelStation Pro 240 3.4 Language Language Exit Russian Polish Spanish English Chinese (TC) Chinese (SC) Japanese German Italian French This option is used to setup the language on the display. Press the UP key and DOWN key to scroll the curser to desire language and press SELECT to select this option. Press MENU to cancel the setting and return to the previous menu. -
Page 53: Diagnostic Tool
LabelStation Pro 240 4. Diagnostic Tool The Diagnostic tool enables you to: • Explore the printer’s settings/status • Change the printer’s settings • Download graphics, fonts and firmware • Create a printer bitmap font • Send additional commands to a printer 4.1 Start the Diagnostic Tool... - Page 54 LabelStation Pro 240 Function Description Calibrate Sensor Calibrate the sensor specified in the Printer Setup group media sensor field Ethernet Setup Setup the IP address subnet mask gateway for the on board Ethernet (Please refer to next section) RTC Setup...
- Page 55 LabelStation Pro 240 Configuration Page Model & firmware version Serial number Serial port setting Mileage record (amount printed) Code page Firmware checksum Country code Print darkness (temperature) Print speed Label size (width & height) Black mark, gap size (one or other)
-
Page 56: Setting Ethernet By Diagnostic Utility (Option)
LabelStation Pro 240 5. Setting Ethernet by Diagnostic Utility (Option) The Diagnostic Utility is enclosed in the CD disk \Utilities directory. Users can use Diagnostic Tool to setup the Ethernet by RS-232, USB and Ethernet interfaces. The following contents will instruct users how to configure the Ethernet by these three interfaces. -
Page 57: Using Ethernet Interface To Setup Ethernet Interface
LabelStation Pro 240 3. Start the Diagnostic Utility by double-clicking the icon. Note: This utility does not work with printers of early version firmware. The printer must have V6.00 firmware or later. 4. Select “COM” as interface then click on the “Setup” button to setup the serial port baud rate, parity check, data bits, stop bit and flow control parameters. - Page 58 LabelStation Pro 240 5. Click the “Discover Device” button to list LabelStation printers on the network. The model is shown on the left and its corresponding IP address on the right along with other information. 6. Select the appropriate printer (click on it) then click “Change IP Address” to configure the IP address obtained by DHCP or static.
-
Page 59: Troubleshooting
LabelStation Pro 240 6. Troubleshooting 6.1 Common Problems The following guide lists most of the simple problems that can occur and offers outline solutions. More detailed assistance may be found in the Advanced Labelling User’s library or by contacting Support on 01202 683212 or support@labelzone.co.uk... - Page 60 LabelStation Pro 240 Printer status is The Gap or Check position of the Gap/Black Mark sensor and recalibrate as flagged as Black Mark shown in the instructions. Paper Jam sensor is not Check that the physical label dimensions match those in the adjusted to template.
- Page 61 LabelStation Pro 240 Check the card is inserted correctly and/or try it in another device. The SD Card is The SD Card Check the card’s specification. inoperable. is damaged or not inserted correctly. The card is not of an approved type.
- Page 62 LabelStation Pro 240 Label size Check settings of label template. Recalibrate the sensors. Clean the Labels skipped specified sensors with IPA (Isopropyl Alcohol) then recalibrate. during printing. incorrectly. Gap sensor (or Black Mark sensor) needs recalibrating. Optical window of Gap sensor...
- Page 63 LabelStation Pro 240 Offset required After ensuring that the sensors are calibrated, the label template is Incorrect print in label correct (label dimensions), and the correct printer driver is in use, do position – template. as follows: especially noticeable on In BarTender, click to print the label.
-
Page 64: Mechanism Fine Adjustment To Avoid Ribbon Wrinkles
LabelStation Pro 240 printer has been switched off Power has been Turn off the printer and wait until all LEDs have gone out before turning it on Power and Error switched OFF again. LEDs are and ON too fast. blinking fast... - Page 65 LabelStation Pro 240 Wrinkle appearance DIRECTION OF FEED Adjusting the print-head pressure (left) Adjust the print head pressure adjustment knob (right) Each print-head pressure adjustment knob has Each print-head pressure adjustment knob has five five settings. Turning clockwise increases the settings.
-
Page 66: Maintenance
LabelStation Pro 240 7. Maintenance Your printer requires routine cleaning, particularly the print-head and the platen roller (rubber roller). 1. Never clean the printer with an aggressive chemical agent or apply a cleaning solution with an abrasive material. The following materials are ideal:... - Page 67 LabelStation Pro 240 Notes: • X D o not touch the print-head with your hand. If you accidentally touch it, clean it with ethanol. • X U se only Ethanol. DO NOT use medical alcohol, which may damage the printer- head.
Need help?
Do you have a question about the Pro 240 and is the answer not in the manual?
Questions and answers