Xerox WorkCentre PE120 Service Manual
Hide thumbs
Also See for WorkCentre PE120:
- Quick manual (20 pages) ,
- Service manual (9 pages) ,
- Evaluator manual (7 pages)
Table of Contents
Advertisement
Quick Links
Advertisement
Table of Contents
Troubleshooting

Related Manuals for Xerox WorkCentre PE120


Summary of Contents for Xerox WorkCentre PE120
- Page 1 Service Manual...
- Page 3 ® WorkCentre PE120/120i Service Manual Warning The following servicing instructions are for use by qualified service personnel only. To avoid personal injury, do not perform any servicing other than that contained in the operating instructions, unless you are qualified to do so. First Printing: September 2004 071-0874-00...
- Page 4 Copyright © 2004 Xerox Corporation. All Rights Reserved. Unpublished rights reserved under the copyright laws of the United States. Contents of this publication may not be reproduced in any form without permission of Xerox Corporation. Copyright protection claimed includes all forms of matters of copyrightable materials and information now allowed by statutory or judicial law or hereinafter granted, including without limitation, material generated from the software programs which are displayed on the screen such as styles, templates, icons, screen displays, looks, etc.
-
Page 5: Table Of Contents
Contents Precautions 1.1 Safety Warnings........... . . 1-1 1.2 Safety Cautions . - Page 6 4.3 Main Controller Board (PBA) ......... 4-11 4.3.1 ASIC .
- Page 7 5.17 Cover Mid Front ..........5-17 5.18 Transfer Assembly.
- Page 8 7.2 System Malfuction........... 7-5 7.2.1 LCD Display is Defective .
- Page 9 Xerox Options and Accessories ........
- Page 10 1-vi WorkCentre PE 120/120i...
-
Page 11: Precautions
High voltages and lasers inside this product are dangerous. This system should only be serviced by a suitably trained and qualified service engineer. Use only Xerox replacement parts. There are no user serviceable parts inside the system. Do not make any unauthorized changes or additions to the system, these could cause the system to malfunction and create electric shock or fire hazards. -
Page 12: Safety Cautions
Take care not to cut or damage the power cable or plugs when moving the system. Use caution during thunder or lightening storms. Xerox recommends that this system be disconnected from the power source when these weather conditions are present. Do not touch the system or the power cord if it is still connected to the wall socket in these weather conditions. -
Page 13: Handling Precautions
Do not place candles or burning cigarettes on the system. These can cause a fire. 1.2.4 Assembly and Disassembly Precautions Always use Xerox parts. Take care to note the exact location of parts and cable routing before disassembling any part of the system. Ensure all parts and cables are replaced correctly. -
Page 14: Bodily Injury Warnings
Precautions 1.2.5 Bodily Injury Warnings Use caution around internal components. The fuser unit works at a high temperature. Use caution when working on the system. Wait for the fuser to cool down before disassembly. Use caution when working around rotating parts or moving gears. When operating the system, do not put your hands into any moving parts (Paper feeding entrance, motor, fan, etc.). -
Page 15: Esd Precautions
Precautions 1.3 ESD Precautions Some semiconductor components, and the respective sub-assemblies that contain them, are vulnerable to damage by Electro-Static Discharge (ESD). These components include Integrated Circuits (ICs), Large-Scale Integrated circuits (LSIs), field-effect transistors, and other semiconductor chip components. The following techniques will reduce the occurrence of component damage caused by static electricity. - Page 16 Precautions WorkCentre PE 120/120i...
-
Page 17: Reference Information
Reference Information This section contains a tools list, list of abbreviations used in this manual, and a clearance required specification when installing the WorkCentre PE120/120i. 2.1 Tools for Troubleshooting the system The following tools are recommended for safe and easy troubleshooting as described in this service manual:... -
Page 18: Common Acronyms And Abbreviations
Reference Information 2.2 Common Acronyms and Abbreviations The following table covers the acronyms and abbreviations that may be used in this manual. Definition Definition Alternating Current Electro Photographic Analog-to-Digital Converter Enhanced Parallel Port Access Point Firmware ASIC Application Specific Integrated Circuit FCF/FCT Tray 1 or First Cassette Feeder Ass’y... - Page 19 Reference Information Definition Definition Local Area Network Pages Per Minute Pound(s) PostScript Laser Beam system Pre-Transfer (Erase) Lamp Liquid Crystal Display Pulse Width Moduration Light Emitting Diode Q’ty Quantity Laser Scanner Unit Random Access Memory LVPS Low Voltage Power Supply Megabyte Resolution Enhancement Technology MDMC...
-
Page 20: Selecting A Location For The System
Reference Information 2.3 Selecting a Location for the system Leave enough room to open the ADF, system trays, covers, and allow for proper ventilation Provide the proper environment A sturdy, level surface Away from the direct airflow of air conditioners, heaters, or ventilators Free from extreme fluctuations in temperature, sunlight, or humidity Clean, dry, and free from excessive dust WorkCenter PE 120/120i... -
Page 21: Specifications
Specifications Specifications The specifiations in this manual are correct at the time of printing. Product specifications are subject to change without notice. 3.1 General Specifications Item Specification Major Functions Fax, Copy, Print, Scan, ADF, Direct Print, Scan-to-USB Memory, Scan to PC Width 450 mm (17.7 in.) Depth... -
Page 22: Electrical Specifications
Specifications 3.2 Electrical Specifications Item Specification Input Voltage 110 ~ 127 VAC 220 ~ 240 VAC Input Range 90 ~ 135 VAC 180 ~ 270 VAC Input Frequency: 50/60 Hz 50/60 Hz Frequency tolerance +3 Hz +3 Hz Power Consumption Ready: 70 Watts Average: 370 Watts Maximum: 700 Watts... -
Page 23: Media Specifications
Specifications 3.5 Media Specifications For more information on sizes, weights and approved media support for this system see the user manual.. Item Specification Input Capacity Tray 1 250 sheets Optional Tray 2 MP/Bypass Tray 50 sheets 50 sheets Output Capacity Face Down 150 sheets 20 lb. -
Page 24: Print Engine Specifications
Specifications 3.6 Print Engine Specifications Item Specification Print Speed Up to 22 ppm/Ltr, 20 ppm/A4 (600 dpi) Print emulation GDI, PCL6, PCL5e (std), PostScript Level 3 (PE120i only) Auto Emulation Sensing Font Type Number 45 Scalable, 1 bitmap Power Save ON/OFF Resolution Normal... -
Page 25: Scan Specifications
Specifications 3.7 Scan Specifications Item Specification Scan Method Color, single CCD Scan Speed ADF USB 1.1, 300 dpi, Letter, 128 MB RAM, all speeds are approximate Line art 75 seconds Grayscale 75 seconds Color 150 seconds Scan Speed on Platen Lineart 75 seconds Grayscale... -
Page 26: Copy Specifications
Specifications 3.8 Copy Specifications Item Specification Copy quality selection or image Text 600 x 300 dpi type selection modes Text/Photo 600 x 300 dpi Photo 600 x 600 dpi FCOT Standby/Ready approx. 10 seconds from platen approx. 15 seconds from ADF Cold status 50 seconds Copy Speed... -
Page 27: Telephone Specification
Specifications 3.8.1 Telephone Specification Item Specification Handset On-hook dial Search Yes (phonebook) 1-touch Dial 40 each: 20 dedicated buttons plus shift Speed Dial 200 locations (00 - 99), including 1-touch dials TAD I/F Tone/pulse Selectable in technical mode Pause Auto Redial Last Number Redial Distinctive Ring* *If available by local telephone service... -
Page 28: Fax Specification
Specifications 3.9 Fax Specification Item Specification Compatibility ITU-T G3 Communication System PSTN/PABX Modem Speed 33.6 Kbps TX Speed 3 seconds Compression MH/MR/MMR/JBIG/JPEG Color Fax Yes; Send only Resolution Standard 203 x 96 dpi Fine 203 x 196 dpi Super Fine 300 x 300 dpi Scan Speed Standard... -
Page 29: Product Summary
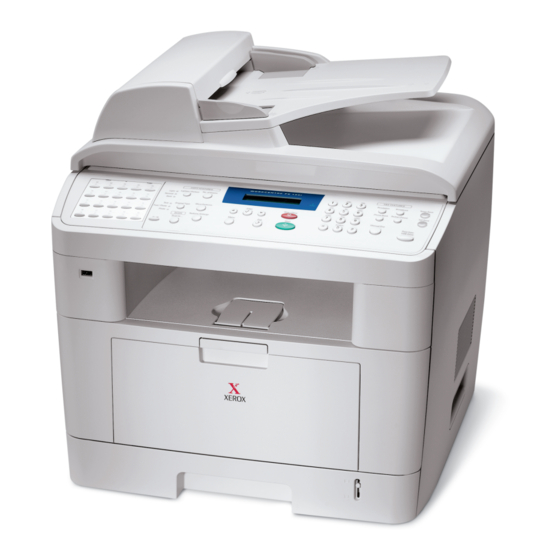
Product Summary Product Summary This section describes the functions and operating principals of the systems main components. 4.1 Printer Components - Front View Document Guides Document Cover Automatic Document Document Feeder Input Tray Document Output Tray USB Flash Drive Port Document Glass/ Platen Control Panel... -
Page 30: Rear View
Product Summary 4.1.2 Rear View Rear Door Control Board Cover Network Port WorkCentre PE120i Only) Rear Output Slot (Face Up) Parallel Connector Power Switch Connector AC Power Cord Connector Line Jack EXT Jack Tray 2 Cable Connector The figure above shows the WorkCentre PE120i. WorkCentre PE 120/120i... -
Page 31: Control Panel
Allows you to shift the one-touch buttons to the numbers 21 through 40. Allows you to access a list of your PC software programs that an image can be scanned to. You must create the scan list using the Xerox software (ControlCentre) provided with Scan this machine. - Page 32 Product Summary 4.1.3 Control Panel (Continued) Uses to scroll through the available options for the selected menu item. Confirms the selection on the display. Enters Menu mode and scrolls through the menus available. Sends you back to the upper menu level. Stops an operation at any time.
-
Page 33: System Layout
Product Summary 4.2 System Layout The system is made up of the an Automatic Document Feeder (ADF), scanner, platen, and control panel and the print engine, which performs the systems print, power, controller and interface functions. 4.2.1 Scanner Paper Path Scanner Part Doc. -
Page 34: Print Engine Paper Path Rollers
(CVT) glass and the image is captured as the document moves through the ADF. The WorkCentre PE120 scanner can be used to scan color or black and white images, including line art, photographs, and printed text. - Page 35 Line time: Copy, FAX, Binary (Lineart, Halftone) PC Scan: 1.5ms/Line Color PC Scan (Grey, 256 Color, True Color): 4.5ms/Line A/D conversion: 10 bit conversion Note For more information about scan settings, review the Scanning sections of the WorkCentre PE120 User Guide and the Multifunction Basics Prerequisite Training. 3) The Print Engine Engine Frame...
-
Page 36: Paper Feed
Product Summary 4.3.1 Paper Feed The paper feed system consists of an automatic document feeder, a 250-sheet main paper tray, bypass tray (MP), pickup rollers, friction pads and feed rollers. The rollers and sensors in the paper feed path control paper registration and guide the paper through the image transfer, image development, image fusing and exit assemblies. -
Page 37: Laser Scanner Unit (Lsu)
Product Summary If the heat lamp becomes too hot, the thermostat cuts off the power to the lamp in order to prevent overheating and any potential fire hazard is removed. 4.2.6.2 Heat Roller The heat roller transfers the heat from the heat lamp to the paper. The surface of the heat roller is coated with Teflon so that toner does not stick to the surface. -
Page 38: Toner Cartridge
Collected using an electro-static process and retained within the toner cartridge. No waste toner to dispose of. OPC Drum protecting shutter Toner CRUM Reader Identifies whether toner is Xerox branded toner or whether a Non-Xerox toner cartridge is installed in the printer 4-10 WorkCentre PE 120/120i... -
Page 39: Main Controller Board (Pba)
Product Summary 4.3 Main Controller Board (PBA) The engine board and controller board have been integrated into a single board consisting of the CPU and printer control functions. The CPU functions as the bus controller, I/O handler, motor driver and PC interface. The main board sends the current image video data to the laser unit and manages the electrophotographic printing process. -
Page 40: Asic
Product Summary 4.3.1 ASIC Completely integrated system for embedded applications 32 bit RISC architecture, efficient and powerful ARM9 core LSU interface module for interfacing PVC or HPVC with LSU 2 channel general purpose DMA controller for high speed I/O Dual memory bus architecture Operation frequency: AHB Bus: 60 Mhz, Internal system bus: 120 Mhz Operation voltage: 3.3 V Power on reset time: below 5.6 ms... -
Page 41: Memory
Product Summary 4.3.2 Memory The board has Flash ROM and DRAM memory units. There is 1 SODIMM socket to enable extra DRAM. 4.3.3 Flash Memory Record system program and download system program by PC interface. Fax for Journal list, and memory for One Touch Dial, Speed Dial List. Capacity: 4 MB Access Time: 70 nsec 4.3.4 SDRAM... - Page 42 Product Summary 4.3.6.4 Toner Remaining Sensing The printer does not have a toner remaining sensor. 4.3.5.5 Paper Exit Sensing This detects paper exiting from the system using an exit sensor on the engine board (CON2-24) and actuator on the frame. The CPU detects the on/off time of the exit sensor during normal operation or a jam2 is reported on the LCD.
-
Page 43: Switching Mode Power Supply (Smps) And High Voltage Power Supply (Hvps)4-15
Product Summary 4.4 Switching Mode Power Supply (SMPS) and High Voltage Power Supply (HVPS) The SMPS and HVPS are on one integrated board. The SMPS supplies the DC power to the printer. It takes either 110 V or 220 V and outputs the +5 V and +24 V supplies to the main board. - Page 44 Product Summary 3) Cleaning Voltage (THV-) The cleaning voltage removes toner contamination from the rear side of the paper by sending (-) polarity to the transfer roller, forcing toner to transfer back to the OPC drum. Output Voltage: -1200V, +300V/-150V Error Indicators: Smudges and toner contamination on the reverse side of the printed page.
-
Page 45: Switching Mode Power Supply
Product Summary 4.4.2 Switching Mode Power Supply The SMPS is the power source for the entire printer system. The SMPS supplies DC power for driving the printer, and the AC heater control which supplies power to fuser. The SMPS has two output channels: 3.3 V and +24 V. 1) AC Input Input Rated Voltage: AC 220 V ~ 240 V, AC 120 V ~ AC 220 V (EXP version) Input Voltage Range: AC 198 V ~ 264 V, AC 90 V ~ 135 V, AC 198 V ~ 264 V (EXP version) -
Page 46: Fuser Ac Power Control
Product Summary 4.4.3 Fuser AC Power Control The Fuser (HEAT LAMP) is heated using AC power. The AC power is controlled by a triac (THY1), a semiconductor switch. 'On/Off control' is achieved when the gate of the Triac is turned ON/OFF by a photo triac (PC1), this is an insulting part. -
Page 47: Drive
Product Summary 4.5.2 Drive The main motor drives the paper feed, developing unit, and the fuser. It is driven by software which controls the acceleration, constant speed and deceleration profiles. The motor is managed with an A3977 driver IC and controlled by step and enable signals from the CPU. -
Page 48: Ope (Control Panel) Pba
Product Summary 4.6 OPE (Control Panel) PBA The control panel board consists of various functin keys and an LCD to display system status, operator messages, menu items, and errors. Communication between the OPE and the CPU on the main board is serial. 4.7 USB Host The USB host board provides power to the USB connector to enable USB memory drive, used in conjunction with the USB direct printing and Scan to USB fumctions. -
Page 49: Liu Pba
Product Summary 4.8.2 LIU PBA The LIU board is the Line Interface Unit. It consists of a Tel_line Interface circuit and Telephone circuit. The Tel_Line circuit consists of a matching transfer to conform to the impedance of the receiving telephone line and a circuit to isolate the fax machine from the PSTN, and a surge absorber to protect against lighting strike surges on the incoming line. -
Page 50: Transformer Circuit
Product Summary 4.8.4 Transformer Circuit The Transformer circuit is a line impedance matching circuit which matches the internal impedance of the fax machine to the external -48Volt DC impedance of the PSTN system. The Transformer circuit insolates the fax machine electrically from the PSTN. 4.8.5 On Hook State DC10V ~ DC100V, DC Resistance: 5M. -
Page 51: Signal
Product Summary 4.8.7 Signal Input Signal Level Range : - 0dBm ~ - 48dBm DP (Dial Pulse) Dial Make / Brake Ratio : 40 : 60 Pulse Speed : 10 ± 0.8 pps, Minimum Pause : above 60 msec DTMF Signal Coding Format 1209 Hz 1446 Hz... - Page 52 Product Summary 4-24 WorkCentre PE 120/120i...
-
Page 53: Disassembly
Disassembly Disassembly 5.1 Precautions for Disassembly/Reassembly 5.1.1 Precautions When Removing Circuit Use only approved Xerox spare parts. Ensure that the part number, product name, any voltage, Boards current or temperature ratings are correct. Failure to do so could result in damage to the printer, circuit overload, fire or electric shock. -
Page 54: Rear Cover
Disassembly 5.2 Rear Cover (PL 8.1.23) Unclip the face up cover from the rear cover, as shown, then lift the face up cover out. Remove 4 screws securing the rear cover. Face Up Cover Remove the rear cover from the frame and scanner assembly. -
Page 55: Side Covers Right And Left
Disassembly 5.3 Side Covers Right and Left (PL 8.1.14, 21) First remove: Rear cover, see page 5-2. Paper tray. Side Cover (RH) Cassette For the left side cover repeat steps 3 ~ 5, except disconnect the loudspeaker wiring harness if equiped Open the front cover. -
Page 56: Front Cover
Disassembly 5.4 Front Cover (PL 8.1.22) Unclip the front cover from the frame and remove. Open the front cover and remove the toner cartridge. Front Cover 5.5 Scanner Assembly (PL 8.5) Remove 2 screws securing the scanner assembly. First remove: Rear cover, see page 5-2. - Page 57 Disassembly Disconnect 5 connectors and the ground wire Free the scanner cable harness from the clips screw from the PBA (main board). underneath to remove the scanner from the frame Pull up on the scanner assembly to remove it partially from the print engine. Lift the front part of the OPE front cover to release the tabs securing it to the scanner.
- Page 58 Disassembly Release the 3 clips on the front of the control panel, Remove the CCD cable as shown. unroute the wiring harness through the frame, and remove the control panel (OPE). CCD Cable Clips Pull up on the CCD shaft to remove it from the scanner.
- Page 59 Disassembly Remove the reduction gear and idle gear. Unplug the connector from the open sensor assembly. Gear-Reduction Gear-Timing Caution Unlatch the open sensor and remove. When reassembling the scanner module: Place the belt tension spring as close to the right side of the scanner as possible.
-
Page 60: Adf Motor Assembly
Disassembly 5.6 ADF Motor Assembly (PL 8.3.3) Remove the open cover. First remove: Rear cover, see page 5-2. Open Cover Left side cover, see page 5-3. Note It is not necessary to disassembly the ADF to replace the separator pad, simply open the cover and remove the pick up assembly. -
Page 61: Ope (Control Panel)
Disassembly Remove 2 screws securing the upper cover, and Unplug 1 connector and remove 5 screws securing remove the cover. the ADF motor assembly. Remove the motor. Note Before removing the motor assembly, note the position of the ferrite and harness routing. Upper Cover ADF Motor Ass’y ADF Lower Ass’y... -
Page 62: Middle Cover And Exit Roller
Disassembly 5.8 Middle Cover and Exit Roller (PL 8.6) and (PL 8.7.63) Remove the exit gear and bearing to remove the exit roller. First remove: Rear cover, see page 5-2. Left and right side covers, see page 5-3. Scanner assembly, see page 5-4. Remove 4 screws securing the middle cover. -
Page 63: Controller Shield Assembly
Disassembly 5.9 Controller Shield Assembly (PL 8.1.7) First remove: Main Board Rear cover, see page 5-2. Right side cover, see page 5-3.\ Remove all the connectors and 5 screws. Remove the shield. Controller Shield Ass’y Bracket Remove the network card if equiped (2 screws). Remove 3 screws to remove the bracket from the main board. -
Page 64: Engine Shield And Exit Board
Disassembly 5.10 Engine Shield and Exit Board (PL 8.1.10) Remove 11 screws securing the engine shield and tilt to one side. First remove: Unplug all the HVPS and SMPS harnesses. Rear cover, see page 5-2. Left and right side covers, see page 5-3. Unplug the exit, AC, LIU, and fan connectors. -
Page 65: Smps And Liu
Disassembly 5.11 SMPS and LIU (PL 8.1.6 and PL 8. 1.13) Remove 3 screws securing the SMPS and lift out the SMPS. First remove: Rear cover, see page 5-2. SMPS Left and right side covers, see page 5-3. Engine shield assembly, see page 5-12. Remove 2 screws securing the inlet bracket. -
Page 66: Fuser Assembly
Disassembly 5.12 Fuser Assembly Heat Roller and Halogen Lamp (PL 8.8) First remove: Remove 2 screws securing the halogen lamp then separate the lamp from the heat roller. Rear cover, see page 5-2. Unplug 2 connectors, one to the main board and one to the SMPS. -
Page 67: Thermistor
Disassembly Thermistor Remove 1 screw securing the thermistor. Unroute the thermistor wiring harness. Thermistor Thermistor 5.13 Fan (PL 8.1.27) First remove: Rear cover, see page 5-2. Right side cover, see page 5-3. Unplug the connector from the SMPS to the DC Fan exhaust fan. -
Page 68: Laser Scanner Unit (Lsu)
Disassembly 5.14 Laser Scanner Unit (LSU) (PL 8.1.4) Unplug the 2 connectors. First remove: Rear cover, see page 5-2. Left and right side covers, see page 5-3. Scanner assembly, see page 5-4. Front cover, see page 5-4. Middle cover, see page 5-10. Remove 4 screws securing the LSU to remove it from the frame. -
Page 69: Drive Assembly
Disassembly 5.16 Drive Assembly (PL 8.2) Take out the drive assembly then unplug the connector from the motor board. First remove: Rear cover, see page 5-2. Drive Ass’y Side cover, see page 5-3. Controller shield, see page 5-11. Remove 5 screws securing the drive assembly. Drive Ass’y Caution The 6 screw holes have numbers stamped into the... -
Page 70: Transfer Assembly
Disassembly 5.18 Transfer Assembly (PL 8.1.7) Unlatch the bushing and remove. Lift the transfer roller out as shown. First remove: Rear cover, see page 5-2. Transfer Roller Left and right side covers, see page 5-3. Bushing Scanner assembly, see page 5-4. Front cover, see page 5-4. - Page 71 Disassembly Remove the screws on the left and right sides of the Remove the feed gear 2. paper guide to remove the guides and the spring as shown. Screw Spring Feed Gear2 Guide Paper Remove the feed gear 1. Remove the 3 screws securing the feed bracket and remove the bracket.
-
Page 72: Pick Up Assembly
Disassembly 5.20 Pick Up Assembly (PL 8.7) Remove the 2 screws securing the manual solenoid and pick up solenoid. First remove: Rear cover, see page 5-2. Left and right side covers, see page 5-3. Front cover, see page 5-4 Scanner assembly, see page 5-4. Pick Up Solenoid Middle cover, see page 5-10. -
Page 73: Mp Or Main Cassette Pick Rollers
Disassembly MP or Main Cassette Pick Rollers Slide the white collar as far to the side as possible. Slide the pick up roller until it is free from the Remove the main paper tray, toner cartridge, and white collar on the opposite end. front cover, see page 5-4. - Page 74 Disassembly 5-22 WorkCentre PE 120/120i...
-
Page 75: Alignment And Adjustments
Alignment and Adjustments Alignment and Adjustments This chapter describes some of the main service procedures including: Using EDC mode, clearing paper jams and test patterns. Much of this chapter is also included in the user's guide. 6.1 Paper Path Scanner Part ADF-Roller Pickup-Roller Doc-Paper(30Sheets) -
Page 76: Copy And Scan Paper Path
Alignment and Adjustments 6.1.2 Copy and Scan Paper Path Scanner Part Doc. Paper (50 Sheets) Pickup Roller ADF Roller Sensor - Doc. White-Sheet White-Sheet White-Sheet Sensor - Regi Sensor - Scan CCD-Module Feed Roller Exit Roller 6.1.3 Printer Paper Path Engine Part L S U Fuser... -
Page 77: Clearing Paper Jams
Alignment and Adjustments 6.2 Clearing Paper Jams L S U ADF-Roller Pickup-Roller Fuser Toner Cartridge Doc-Paper(30Sheets) ADF-Idle Roller EXIT Sensor MP Sensor Sensor-Regi Sensor-Regi Sensor-Regi Feed Sensor Sensor-Doc Sensor-Doc Sensor-Doc Exit-Roller Feed-Roller Sensor-Scan Sensor-Scan Sensor-Scan Empty Sensor White-Sheet White-Sheet White-Sheet Document Jam (in the ADF area) Paper Jam 0 ( in the paper feed area) L S U... -
Page 78: Clearing Adf Jams
Alignment and Adjustments 6.2.1 Clearing ADF Jams “Document Jam” appears on the display if a jam has occured while feeding paper through the ADF. 6.2.1.1 ADF Misfeed Open the top cover and gently pull the document gently to the right and out the ADF Close the ADF top cover and reload the document(s). -
Page 79: Jam 0 - Paper In The Feed Area
Alignment and Adjustments 6.2.2 Jam 0 - Paper in the Feed Area Open and close the front cover, this causes the jammed paper to automatically exit the system. If the paper does not exit the system, open the paper tray and remove pulling the media straight out. Open and close the front cover to resume printing. -
Page 80: Jam 2 - Paper In The Exit Area
Alignment and Adjustments 6.2.4 Jam 2 - Paper in the Exit Area Open and close the front cover, this causes the jammed paper to automatically exit the system. Remove the jammed paper by pulling it straight out. If there is any resistance, open the rear cover and and remove the jammed paper from the back of the system. Front Back 6.2.5 MP Tray Jam - Paper in the Bypass Tray... -
Page 81: Control Panel Menu
Alignment and Adjustments 6.3 Control Panel Menu 1.Paper Setting 4.Fax Setup 3.Copy Setup 2.Machine Setup Receive Mode Copy Tray Machine ID Change Default Ring to Answer Fax Tray Date&Time Timeout Lighten/Darken Paper Tray Clock Mode Redial Term Paper Size Language Redials Power Save MSG Confirm. -
Page 82: Tech Mode
Alignment and Adjustments 6.4 Tech Mode In Tech (service) Mode the technician can check the system and perform various tests to help with diagnosing problems. While in Tech Mode the system still performs all normal operations. 6.4.1 Entering Tech Mode Press the following buttons in order: Menu, #, 1, 9, 3, 4 The LCD displays ‘TECH’... - Page 83 Alignment and Adjustments ERROR RATE When the error rate is about to exceed the set value, the Baud rate automatically adjusts to 2400 bps, this ensures that the error rate remains below the set value. You can select a rate between 5% and 10%. CLEAR ALL MEMORY All the values are returned to default, and all the information which was set by the user will be erased.
-
Page 84: Machine Test
Alignment and Adjustments 6.4.4 Machine Test SWITCH TEST This feature is used to test all the buttons/keys on the control panel. The results are displayed on the LCD each time a button/key is pressed. MODEM TEST This is used to hear various transmission signals to the telephone line from the modem. It is also used to check the modem, amplifier and speaker. -
Page 85: Engine Test Mode
Alignment and Adjustments 6.5 Engine Test Mode The engine test mode supplies functions to check the condition of each device in the print engine and displays the result of the test on the LCD. It is divided into 5 functions (0 - 4). 6.5.1 Entering Engine Test Mode Press the following buttons in order: Menu, #, 1, 9, 3, 1 The LCD briefly displays ‘ENGINE TEST’... -
Page 86: Detailed Description Engine Test Mode
Alignment and Adjustments 6.5.3 Detailed Description Engine Test Mode Function Name Description Display 01. Motor Test The main motor starts when executed and stops when Main Motor On/Off the stop key is pressed. 02. Pick Up Test Automatically stops, when the execution key is chosen. Tray 1, 2 Solenoid On/Off 03. -
Page 87: Identify Sale Date
Alignment and Adjustments 6.6 Identify Sale Date This function confirms the date that the consumer bought the product and used the product for the first time. When the consumer first operates the system, it will start the scan and page counters. The time the system was first used is also displayed. -
Page 88: Periodic Defective Image Or Abnormal Printing
Alignment and Adjustments 6.8 Periodic Defective Image or Abnormal Printing If a mark or other printing defect occurs at regular intervals down the printed page it may be caused by a damaged or contaminated roller. Measure the repeating defect and refer to the table below to identify the problem component. -
Page 89: Error Messages
Alignment and Adjustments 6.9 Error Messages The front panel displays the printer's status or error messages. Refer to the list below for an explanation of these messages and how to clear problems. MP TRAY JAM [DOOR OPEN] A paper jam has occurred in the bypass feeder or the media has been improperly fed. Solution: Clear the paper jam. - Page 90 Invalid Cartridge or No Cartridge A non-Xerox brand toner cartridge is installed. Solution: You must use a Xerox toner cartridge. [Line Error] The system cannot connect with the remote machine or has lost contact because of a problem with the phone line.
- Page 91 Alignment and Adjustments No. Not Available The user tried to delete the number for a delayed fax job. Solution: Verify the number to be deleted and try again. Or Delete the number after the delayed fax job is completed or deleted. [No Paper] Add Paper The paper in the paper tray has run out.
- Page 92 Alignment and Adjustments [Incompatible] The remote machine did not have the requested feature, such as a sending a color fax. This message also occurs if the remote machine does not have enough memory space to complete the operation you are attempting. Solution: Reconfirm the remote machine’s features.
-
Page 93: Troubleshooting
Troubleshooting Troubleshooting 7.1 Paper Feed Problems 7.1.1 Wrong Print Position Printing begins at the wrong position on the paper. Possible Cause Solution Defective feed sensor. Replace the defective acutator/sensor. 7.1.2 Jam 0 Description: Paper does not leave the tray. Jam 0 occurs if the paper is fed into the printer. L S U Fuser Toner Cartridge... -
Page 94: Jam 1
Troubleshooting 7.1.3 Jam 1 Description: There is a paper jam in front of or inside the fuser. There is a paper jam stuck in the discharge roller L S U and in the fuser, just after passing the feed actuator. Fuser Toner Cartridge EXIT... -
Page 95: Multiple Pick
Troubleshooting 7.2.5 Multiple Pick Description: Multiple sheets of paper are picked from the tray at the same time. Possible Cause Solution The paper guides are set incorrectly. Adjust the guides so they fit snuggly against the paper in the tray. The paper has a rough surface. -
Page 96: Defective Adf
Troubleshooting 7.2.8 Defective ADF Description: The ADF does not operate correctly Possible Cause Solution The ADF rubber or holder rubber are damaged or Replace the contaminated or damaged part. contaminated. Replace the sensors or ADF. The ADF document sensors (3 paper sensors) are not working correctly. -
Page 97: System Malfuction
Troubleshooting 7.2 System Malfuction 7.2.1 LCD Display is Defective Description: Strange characters are displayed on the LCD window and the control panel buttons do not work. Possible Cause Solution Memory needs to be cleared. Use Clear All Memory from Tech Mode. The control panel or harness may be defective. -
Page 98: Paper Empty Error
Troubleshooting 7.2.4 Paper Empty Error Description: Paper empty is displayed even when paper is loaded in the tray. Possible Cause Sequence of Repair Actions The paper empty sensor or actuator is damaged or faulty. Replace the defective actuator or sensor. The SMPS or main board is faulty. -
Page 99: Defective Motor Operation
Troubleshooting 7.2.8 Defective Motor Operation Description: The main motor is faulty and paper does not feed into the printer, resulting in a Jam0. Possible Cause Sequence of Repair Actions The main motor harness or motor board may be faulty. Check motor operation. The main board may be faulty. -
Page 100: Print Quality Problems
Troubleshooting 7.3 Print Quality Problems 7.3.1 Wrong Print Position Example Possible Cause Sequence of Repair Actions Printing begins with the paper in the wrong position. Defective feed sensor. Replace the defective actuator. 7.3.2 Vertical White Lines Example Possible Cause Sequence of Repair Actions There are white, vertical voids in the printed image. -
Page 101: Black/White Spot
Troubleshooting 7.3.4 Black/White Spot Example Possible Cause Sequence of Repair Actions Dark or blurry spots are randomly spread on the page, or white spots are randomly on the page. If dark or blurry black spots appear, Print several OPC cleaning mode prints and the rollers in the developer may be then run the self-test 2 or 3 times. -
Page 102: Dark Image Or Completely Black Print
Troubleshooting 7.3.6 Dark Image or Completely Black Print Example Possible Cause Sequence of Repair Actions The printed image is dark or the page is entirely black. Charge voltage fault due to bad Clean the high voltage contact terminals. contact between the toner cartridge Check the state of the connector between Digital Printer and printer contacts. -
Page 103: Background Contamination
Troubleshooting 7.3.8 Background Contamination Example Possible Cause Sequence of Repair Actions Light or dark background contamination appears all over the paper. Using unsupported media. Use only approved media. Printing large quantities of low The toner cartridge is designed to print Digital Printer coverage (2%) pages or not using 5,000 sheets at 5% coverage. -
Page 104: Ghosting 2
Troubleshooting 7.3.10 Ghosting 2 Example Possible Cause Sequence of Repair Actions Ghosting appears at 75.5 mm on the whole print. Bad contacts caused by Clean all high voltage contacts. contamination from toner particles Replace the HVPS. Digital Printer between the high voltage terminals, Digital Printer Replace the toner cartridge. - Page 105 Troubleshooting 7.3.12 Ghosting 4 Example Possible Cause Sequence of Repair Actions White ghosting occurs every 32 mm on a black image. The life of the toner cartridge may Replace the toner cartridge. be expired. Check the HVPS supply voltage. Digital Printer Digital Printer Abnormal output from the HVPS.
-
Page 106: Blank Page Is Printed 1
Troubleshooting 7.1.15 Blank Page is Printed 1 Example Possible Cause Sequence of Repair Actions The printed page is blank. Bad ground contacts in the OPC Clean the ground terminals on the toner and/or toner cartridge. cartridge and inside the printer. Digital Printer Check the OPC ground or the OPC diode Digital Printer... -
Page 107: Fax And Phone Problems
Troubleshooting 7.4 Fax and Phone Problems 7.4.1 No Dial Tone Description: There is no dial tone when the On-Hook dial button is pressed Possible Cause Sequence of Repair Actions The telephone line cord is incorrectly connected. Check the connection setup. The speaker may not be operating correctly. -
Page 108: Defective Fax Forward/Receive
Troubleshooting 7.4.3 Defective FAX FORWARD/RECEIVE Description: FAX FORWARD/RECEIVE is not working. Possible Cause Sequence of Repair Actions If MODEM testing is normal and there is no Check that you can hear a dial tone by pressing OHD. dial tone, then try replacing the LIU. Check that you can hear a RECEIVE tone when MODEM If testing the MODEM shows a fault replace testing in TECH Mode. -
Page 109: Defective Fax Receive 3
Troubleshooting 7.4.7 Defective FAX RECEIVE 3 Description: The phone is ringing continuosly, but the system will not answer the call. Possible Cause Sequence of Repair Actions Verify Receive mode is set to FAX mode. Replace the LIU. Replace the main board. 7.4.8 Defective FAX RECEIVE 4 Description: Received data is reduced by more than 50% while printing. -
Page 110: Copy Problems
Troubleshooting 7.5 Copy Problems 7.5.1 White Copies Description: A blank page prints out when copying. Possible Cause Sequence of Repair Actions The scanner cover is open. Close the scanner cover. Shade profile is incorrect. Test the shade profile in Tech Mode. Reference voltage on the main board is faulty. -
Page 111: Scanning Problems
Troubleshooting 7.6 Scanning Problems 7.6.1 PC Scanning Problems Description: Unable to Scan using a PC. Possible Cause Sequence of Repair Actions Faulty cable communication between the system and Reconnect the PC and system. Replace any computer. faulty cables. Driver is inproperly installed. Re-install the driver and settings. -
Page 112: Toner Cartridge Servicing
Troubleshooting 7.7 Toner Cartridge Servicing Use only Xerox toner cartridges in the printer. Non-Xerox toner or Third Party toner refills are not guaranteed to work with this printer and can cause malfunctions, print-quality problems, and jamming to occur. 7.7.1 Precautions for Toner Cartridges Excessive exposure to direct light for more than a few minutes can cause damage to the cartridge and degrade print quality. -
Page 113: Software Problems
Troubleshooting 7.9 Software Problems 7.9.1 The Printer is Not Responding to the Print Command The printer is on, but not operating in print mode. Run Self-Test Mode using the menu buttons, press Menu, Enter, Enter: If the test print works, there are no hardware problems within the printer and the user should check the application settings. -
Page 114: Spool Error
Troubleshooting 7.8.3 SPOOL Error Simultaneous Peripheral Operations Online (SPOOL) is the process Windows uses to manage print jobs. Jobs are processed and then stored on the hard disk until the printer is ready to accept them. Insufficient space on the hard disk in the directory assigned for the basic spool. Delete any unnecessary files to provide more space for spool storage. -
Page 115: Parts List
Parts List Parts List Contents 8.1 Main Assembly 8.2 Main Drive Assembly 8.3 ADF Assembly 8.4 Control Panel OPE Assembly 8.5 Scanner Assembly 8.6 Middle Cover Assembly 8.7 Frame Assembly 8.8 Fuser Unit Assembly 8.9 MP Assembly 8.10 Tray 1 (Cassette) Unit Assembly 8.11 Tray 2 (SCF - Optional Cassette) Unit Assembly Service Manual... -
Page 116: Main Assembly
Parts List 8.1 Main Assembly WorkCentre PE 120/120i... - Page 117 Main Assembly Parts List 8.1 Part Name and (part description) Part number Remark WorkCentre PE120/120i SYSTEM ELA HOU-SCAN ELA HOU-ADF 002N02331 ELA HOU-OPE (XEROX CONTROL PANEL) 002N02332 COVER-M-OPE FRONT ELA HOU PLATEN 002N02333 ELA HOU-UNIT FRAME 110_V 002N02353 110 V...
- Page 118 Parts List Part Name and (part description) Part number Remark 22-4 TRAY M EXIT MP 22-5 ADJUST M MP L 22-6 ADJUST M MP R 22-7 TRAY M COVER MP 22-8 GEAR PINION 22-9 TRAY M CASE MP 22-10 TRAY M LINK MP 22-11 SPRING CIS (2) 22-12...
-
Page 119: Main Drive Assembly
Parts List 8.2 Main Drive Assembly Main Drive Unit Assembly Parts List 8.2 Part Name and (part description) Part number Remark ELA UNIT- DRIVE BRACKET-GEAR MAIN GEAR-RDCN 53/26 GEAR-RDCN 113/33 GEAR-RDCN 57/18 WASHER-PLAIN BRACKET-MOTOR MAIN R2 GEAR-RDCN 103/41 GEAR-RDCN 90/31 MOTOR STEP-MAIN Service Manual... -
Page 120: Adf Assembly
Parts List 8.3 ADF Assembly ADF ASS'Y 1-2-4 1-2-1 1-2-2 1-2-3 3-14 2-16 3-18 3-11 3-18 3-16 3-15 3-17 3-10 3-16 3-13 3-18 3-19 3-20 3-21 2-15 3-12 3-19 2-15 2-17 2-19 2-22 2-18 2-12 2-10 2-22 2-19 2-20 2-13 2-20 2-21 2-14... - Page 121 Parts List 4-3-2 4-3-3 4-3-5 4-3-4 4-3-1 Service Manual...
- Page 122 Parts List ADF Assembly Parts List 8.3 Part Name and (part description) Part number Remark ELA HOU ADF - SYSTEM MEA UNIT ADF UPPER 022N02094 1 -1 COVER ADF UPPER MEA UNIT HOLDER ADF 019N00809 1-2-1 RMO ADF RUBBER 019N00566 1-2-2 HOLDER PAD ADF 1-2-3...
- Page 123 Parts List Part Name and (part description) Part number Remark 3-17 CBR HARNESS ADF GND 3-18 RING E 3-19 SCREW TAPTITE 3-20 WASHER PLAIN 3-21 SPRING ETC MEA COVER PLATEN COVER M PLATEN 4 IN 1 002N02342 SHEET WHITE SPONGE 019N00810 MEA TX STACKER (ADF Feed Tray Assembly) 050N00452...
-
Page 124: Control Panel Ope Assembly
Parts List 8.4 Control Panel OPE Assembly 8-10 WorkCentre PE 120/120i... - Page 125 Parts List Control Panel (OPE) Assembly Parts List 8.4 Part Name and (part description) Part number Remark ELA HOU OPE 4 IN 1 COVER M OPE SHEET OVERLAY OPE 4 IN 1 1 ea English 091N80214 Spanish 091N80215 Brazilian Portuguese 091N80216 French 091N80217...
-
Page 126: Scanner Assembly
Parts List 8.5 Scanner Assembly 1-3-1 1-3-2 1-3-4 1-3-3 2-15 2-15-4 2-15-3 2-15-7 2-15-6 2-15-5 2-15-8 2-10 2-11 2-15-1 2-13 2-12 2-15-2 2-16 2-14 8-12 WorkCentre PE 120/120i... - Page 127 Parts List Scanner Assembly Parts List 8.5 Part Name and (part description) Part number Remark ELA HOU PLATEN MEA UNIT SCAN UPPER COVER M SCAN UPPER 002N02344 GLASS SCAN 118N00500 MEA SCAN DUMMY (Constant Velocity (CVT) 002N02354 Window Assembly) 1-3-1 COVER M SCAN DUMMY 1-3-2 MCT GLASS ADG...
-
Page 128: Middle Cover Assembly
Parts List 8.6 Middle Cover Assembly Middle Cover Assembly Parts List 8.6 Part Name and (part description) Part number Remark ELA HOU COVER MIDDLE COVER M MIDDLE COVER REAR UPPER PMO STACKER RX BUSH F/DOWN CBF HARNESS OPE 152N11575 PBA SUB USB HOST 140N62944 8-14 WorkCentre PE 120/120i... -
Page 129: Frame Assembly
Parts List 8.7 Frame Assembly Service Manual 8-15... - Page 130 Parts List Frame Unit Assembly Parts List 8.7 Part Name and (part description) Part number Remark ELA UNIT-FRAME 110V 002N02353 110V ELA UNIT-FRAME 220V 002N02352 220V FRAME-BASE R2 GUIDE-P-TR 038N00407 PLATE-P-SAW 015N00500 GUIDE-M-TR RIB 038N00408 PMO-GEAR_EXIT_DRV16 FOOT-BACK FOOT-FRONT GROUND-GUDIE TR R2 MEC-TERMINAL PLATE-TERMINAL CON R2 PLATE-TERMINAL CR R2...
- Page 131 Parts List Part Name and (part description) Part number Remark SOLENOID-FEED R2 121N01077 SOLENOID-HB (MANUAL) 700N00094 MEA UNIT-GEAR PICKUP 007N01271 45-1 GEAR-PICK UP B_R2 45-2 GEAR-PICK UP A_R2 45-3 SPRING-CS MEA UNIT-BRACKET FEED 030N00690 46-1 BRACKET-FEED R2 46-2 GEAR-Z35 IDLE MEA UNIT-CLUTCH 022N01609 47-1...
-
Page 132: Fuser Unit Assembly
Parts List 8.8 Fuser Unit Assembly 8-18 WorkCentre PE 120/120i... - Page 133 Parts List Fuser Assembly Parts List 8.8 Part Name and (part description) Part number Remark ELA HOU-FUSER 110V 126N00214 110V ELA HOU-FUSER 220V 126N00215 220V COVER-FUSER R2 HOLDER-PLATE CLAW R2 SPRING ETC-CLAW PMO-ROLLER_EXIT SPRING ETC-FUSER EXIT THERMOSTAT-150 PMO-GEAR_EXIT_DRV16 GEAR-IDLE 23 RING-E GEAR-RDCN 25/15 ROLLER-HEATER...
-
Page 134: Mp Assembly
Parts List 8.9 MP Assembly 8-20 WorkCentre PE 120/120i... - Page 135 Parts List MP Assembly Parts List 8.9 Part Name and (part description) Part number Remark ELA UNIT-MP 022N02085 FRAME-17-MP SOLENOID-MP 121N01078 CBF HARNESS-MPF SEN BUSH-M-PICK-UP R MEA UNIT PICK UP MP 130N01366 HOUSING-M-PICK UP2_R2 HOUSING-M-PICK UP2_R2 SPONGE ROLLER PICK UP STOPPER-M-PICK UP_R2 HOLDER-M-PAD_MP HOLDER-M-SENSOR_MP...
-
Page 136: Tray 1 (Cassette) Unit Assembly
Parts List 8.10 Tray 1 (Cassette) Unit Assembly 8-22 WorkCentre PE 120/120i... - Page 137 Parts List Tray 1 (Cassette) Unit Assembly Parts List 8.10 Part Name and (part description) Part number Remark MEA UNIT-CASSETTE, USA FRAME-M-CASSETTE GUIDE-M-EXTENSION LARGE GUIDE-EXTENSION SMALL PLATE-P-KNOCK_UP SPRING-CS MEA UNIT-HOLDER PAD HOLDER-M-PAD SHEET-HOLDER PAD R2 RPR-FRICTION PAD IPR-PLATE PAD SPRING ETC-EXIT ROLL FD COVER-SUB CASSETTE R2 PMO-PLATE_LOCKER SPRING ETC-LOCKER,PLATE...
-
Page 138: Tray 2 (Scf - Optional Cassette) Unit Assembly
Parts List 8.11 Tray 2 (SCF - Optional Cassette) Unit Assembly 8-24 WorkCentre PE 120/120i... - Page 139 Parts List Tray 2 (SCF - Optional Cassette) Assembly Parts List 8.11 Part Name and (part description) Part number Remark ELA HOU-SCF COVER-M-FRONT SCF R2 002N02347 COVER-M-LEFT SCF 002N02348 COVER-M-RIGHT SCF 002N02349 COVER-M-REAR SCF 002N02350 FRAME-M-SCF HOUSING-M-PICKUP _R2 HOUSING-M-PICKUP2 _R2 SPONGE-ROLLER PICK_UP SHAFT-P-CORE PMO BUSHING FEED...
-
Page 140: Xerox Options And Accessories
CORE-FERRITE 39-12 CABLE TIE BUSH CABLE MEA CASSETTE MEC BRUSH ANTISTATIC SHEET BRUSH GUIDE CAM KNOCK UP Xerox Options and Accessories Part Name and (part description) Part number Remark AC POWER CORD, 110 V USA 117N01602 USB CABLE 117N01313 MEMORY... -
Page 141: Block Diagram
Block Diagram Block Diagram Service Manual... - Page 142 Block Diagram WorkCentre PE 120/120i...
- Page 143 Connection Diagram Connection Diagram Service Manual 10-1...
- Page 144 Connection Diagram 10-2 WorkCentre PE 120/120i...
- Page 145 071-0874-00...
Need help?
Do you have a question about the WorkCentre PE120 and is the answer not in the manual?
Questions and answers