Table of Contents
Advertisement
Quick Links
Advertisement
Table of Contents
Troubleshooting

Related Manuals for Arctic Cat 300 Utility


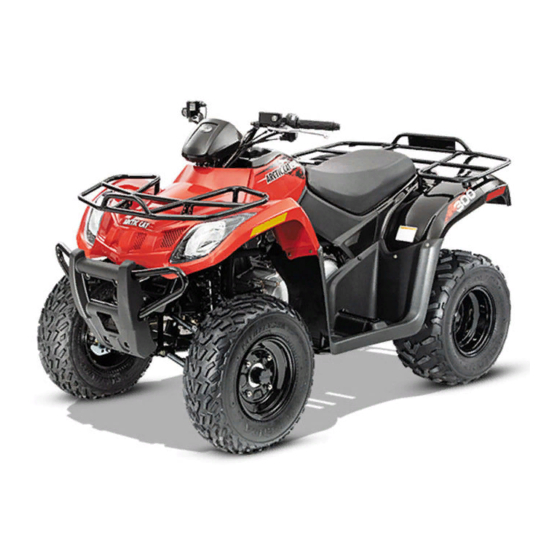
Summary of Contents for Arctic Cat 300 Utility
- Page 1 2014 SERVICE MANUAL [ATV]...
- Page 2 Arctic Cat ATV publications and decals display the words Warning, Caution, Note, and At This Point to emphasize important information. The symbol ! WARNING identifies personal safety-related information. Be sure to fol- low the directive because it deals with the possibility of serious injury or even death.
-
Page 4: Table Of Contents
TABLE OF CONTENTS General Information............2 Installing Engine/Transmission ........67 General Specifications..........2 Troubleshooting ............70 Torque Specifications............ 3 Fuel/Lubrication/Cooling ..........73 Carburetor ..............73 Torque Conversions (ft-lb/N-m)........4 Break-In Procedure............4 Throttle Cable Free-Play..........77 Gasoline - Oil - Lubricant ..........4 Engine RPM (Idle) ............ -
Page 5: General Information
Gasoline (recommended) 87 Octane Regular Unleaded Driven Plate (warpage) (max) 0.1 mm Engine Oil (recommended) Arctic Cat ACX All Weather (Synthetic) Clutch Spring Length (min) 27.5 mm Cooling System Capacity 1.4 L (1.5 U.S. qt) Clutch Wheel Inside Diameter (max) -
Page 6: Torque Specifications
ENGINE/TRANSMISSION Torque Specifications Torque Part Part Bolted To ft-lb N-m Cylinder Head Cylinder STEERING COMPONENTS Cylinder Nut Crankcase Torque Camshaft Holder Cylinder Head Part Part Bolted To ft-lb N-m Bevel Drive Gear (Utility) Driveshaft Handlebar Clamp Cap Screw Steering Head Magneto Rotor/Flywheel Crankshaft Steering Post Support Block... -
Page 7: Torque Conversions (Ft-Lb/N-M)
16.3 50.3 84.3 118.3 accumulation of moisture in the fuel system. 17.7 51.7 85.7 119.7 CAUTION Do not use white gas. Only Arctic Cat approved gaso- 20.4 54.4 88.4 122.4 line additives should be used. 21.8 55.8 89.8 123.8 RECOMMENDED ENGINE OIL 23.1... -
Page 8: Genuine Parts
RECOMMENDED TRANSMISSION Preparation For Storage LUBRICANT The recommended lubricant is Arctic Cat Gear Lube or an CAUTION equivalent gear lube which is SAE approved 80W-90 hyp- oid. This lubricant meets all the lubrication requirements of Prior to storing the ATV, it must be properly serviced to the Arctic Cat ATV front differential and rear drive. -
Page 9: Preparation After Storage
8. Tighten all nuts, bolts, cap screws, and screws mak- will assure many miles and hours of trouble-free riding. ing sure all calibrated nuts, cap screws, and bolts are Arctic Cat recommends the following procedure to pre- tightened to specifications. pare the ATV. -
Page 10: Periodic Maintenance/Tune-Up
R (4 Yrs) Coolant/Cooling System R (2 Yrs) * Service/Inspect more frequently when operating in adverse conditions. ** When using Arctic Cat ACX All Weather synthetic oil, oil change interval can be increased to every 1,000 miles or every year. -
Page 11: Lubrication Points
NOTE: Foam Filter Cleaner and Foam Filter Oil are available from Arctic Cat. It is advisable to lubricate certain components periodi- cally to ensure free movement. Apply light oil to the 5. Dry the filter. -
Page 12: Testing Engine Compression
3. Place Tappet Adjuster onto the jam nut securing the 5. While holding the throttle lever in the full-open posi- tappet adjuster screw; then rotate the adjuster dial tion, crank the engine over with the electric starter clockwise until the end is seated in the tappet until the gauge shows a peak reading (five to 10 adjuster screw. -
Page 13: Muffler/Spark Arrester
ATV0052B KM140B When installing the spark plug, make sure to tighten it 3. Install the spark arrester and secure with the cap securely. A new spark plug should be tightened 1/2 turn screw. Tighten securely. once the washer contacts the cylinder head. A used spark plug should be tightened 1/8-1/4 turn once the washer contacts the cylinder head. -
Page 14: Rear Drive Lubricant (Utility)
5. Install the screen/filter, spring, and screen/filter cap 2. If low, add SAE approved 80W-90 hypoid gear lube into the bottom of the engine and tighten to 11 ft-lb. as necessary. 6. Remove the oil fill plug and pour in 1.6 L (1.7 U.S. To change the lubricant, use the following procedure. -
Page 15: Drive Chain (Dvx)
NOTE: This ATV is equipped with an O-ring type roller chain. Each link incorporates small O-rings to seal out water and dirt. Care should be taken to choose cleaning solutions and lubricants that are suitable for O-ring type chains. 1. -
Page 16: Driveshaft/Coupling (Utility)
2. Using care not to bend or deform the spring clip, release the two ends of the spring clip from the light housing; then remove the bulb from the headlight housing. KM902A Driveshaft/Coupling (Utility) KM192A 3. Install the new bulb into the headlight housing; then secure with the spring clip. -
Page 17: Hydraulic Brake Systems
KM124B KM179A CHECKING ADJUSTMENT Hydraulic Brake Systems Stop the ATV completely and shift the transmission into the R position. The reverse gear indicator light should be illuminated. CHECKING/BLEEDING ! WARNING The hydraulic brake systems have been filled and bled at Never shift the ATV into reverse gear when the ATV is the factory. - Page 18 A. Remove the cover and fill the reservoir with DOT 3. If thickness of either brake pad is less than 1.0 mm 4 Brake Fluid. (0.039 in.), the brake pad must be replaced. B. Install and secure the cover; then slowly compress NOTE: The brake pads should be replaced as a set.
-
Page 19: Auxiliary/Rear Hydraulic Brake
2. Remove the left rear wheel. 3. Remove the two brake pad alignment pins (A); then remove the mounting cap screws (B). KM268 D. Spread the brake pads and place the brake caliper over the disc. Secure with the mounting cap screws. - Page 20 2. Remove the brake spring plate; then remove the brake pads. KM273A 3. Install the wheel. Tighten in a crisscross pattern to 40 ft-lb. KM905 4. Remove the ATV from the support stand. Inspecting and Measuring NOTE: Whenever installing new pads, the new pads 1.
-
Page 21: Burnishing Brake Pads
KM244 KM279 3. Burnish the brake pads. 2. Remove the front and rear V-belt housing cooling ducts. 3. Remove the cap screws securing the V-belt cover Burnishing Brake Pads noting the location of the different-lengthed cap screws for installing purposes; then using a rubber mallet, gently tap on the cover tabs to loosen the Brake pads (both hydraulic and auxiliary) must be bur- cover. - Page 22 KM262 KM263A 2. Install the centrifugal clutch housing onto the driven CAUTION shaft; then install the splined bushing and secure If the splines are not protruding as shown, the V-belt with the driven pulley retaining nut. Tighten to 40 ft- may be too deep in the drive sheaves.
-
Page 23: Steering/Frame/Controls
Steering/Frame/Controls The following steering components should be inspected periodically to ensure safe and proper operation. A. Handlebar grips not worn, broken, or loose. B. Handlebar not bent or cracked and has equal and complete full-left and full-right capability. C. Steering post bearing assembly/bearing housing not broken, worn, or binding. - Page 24 KM352A KM789A 6. Turn the handlebar to the left; then raise the body 6. Remove the side panels; then remove the cap screws turning it to the right and lift clear of the handlebar. and flange nuts securing the front and rear fenders to the frame and fender supports.
-
Page 25: Steering Post Cover/Instrument Pod
2. Using the existing hardware, secure the front fenders to the fender supports; then connect the headlight. 3. Using the existing hardware, secure the rear fenders to the forward fender supports; then secure the rear fender to the frame with four cap screws and flange nuts. -
Page 26: Steering Post/Tie Rods
INSPECTING (Utility) 3. Lift the handlebar out of the lower handlebar holders and lay the handlebar forward. The LCD gauge is not a serviceable component. To inspect the LCD gauge, see Electrical System. 4. Remove the cotter pins and slotted nuts securing the tie rod ends to the steering post arm;... - Page 27 2. Inspect the tie rods for damaged threads or wear. 3. Inspect the tie rods for cracks or unusual bends. 4. Inspect all welded areas for cracks or deterioration. 5. Inspect the steering post and steering-post holders for cracks, bends, or wear. 6.
-
Page 28: Measuring/Adjusting Toe-In/Toe-Out
4. Adjust toe-in to 15 mm (0.60 in.); then measure dis- tances (C) and (D). Distances (C) and (D) should be equal. 5. After all the adjustments are to specifications, tighten the tie-rod lock nuts to 15 ft-lb. NOTE: Prior to locking the jam nuts, make sure the ball joints are at the center of their normal range of motion and at the correct angle. -
Page 29: Auxiliary Brake Pedal/Master Cylinder Assembly
KM800A KM800B 3. Remove the brake lever, brakelight switch, and brake 4. Using new crush washers, secure the brake hose to lever lock. the master cylinder with the brake hose union bolt. Tighten to 25 ft-lb. INSPECTING 1. Inspect the pivot bolt securing the brake lever for wear. -
Page 30: Throttle Control
KM801A CD476 3. Remove the cotter pin from the clevis pin and remove the clevis pin; then remove the two cap screws securing the master cylinder to the frame and remove the master cylinder. KM801C 5. Fill the master cylinder reservoir with DOT 4 brake fluid and bleed the system (see Periodic Mainte- nance/Tune-Up - Hydraulic Brake Systems). -
Page 31: Troubleshooting
2. Thread the throttle cable into the throttle housing and turn the adjuster completely in; then connect the throttle cable to the throttle arm. 3. Install the throttle housing cover; then adjust the throttle cable (see Fuel/Lubrication/Cooling - Throt- tle Cable Free-Play). KM122B Troubleshooting Problem: Handling too heavy or stiff... -
Page 32: Engine/Transmission
Magneto Rotor Remover 0444-187 Tappet Adjuster 0444-189 NOTE: Arctic Cat recommends the use of new gas- kets, lock nuts, and seals and lubricating all internal Surface Plate 0644-016 components when servicing the engine/transmission. Driven Pulley Compressor... -
Page 33: Removing Engine/Transmission
11. Disconnect the stator connector, shift position con- nector, and coolant temperature sensor. Removing Engine/ Transmission Many service procedures can be performed without removing the engine/transmission from the frame. Closely observe the note introducing each sub-section for this important information. AT THIS POINT ... - Page 34 KM147A KM323 KM106A KM314 14. Loosen the clamps; then remove the front and rear V- 16. Remove the output drive sprocket cover; then belt cooling boots from the V-belt housing. remove the output drive sprocket. KM359A KM344A 17. Disconnect the shift linkage from the transmission shift arm.
- Page 35 18. Remove the front engine mounting through-bolt; then remove the left and right engine mounting brackets from the frame. 19. Attach a suitable lifting sling and engine lift to the front engine mounting boss. KM330 KM332 20. Raise the engine lift to take the slack out of the sling; then remove the upper rear and lower rear engine through-bolts.
- Page 36 KM314A KM347A KM314B KM324A 12. Remove the starter positive wire; then remove the engine ground wire from the crankcase. KM106A 4. Remove the gas tank cover panel and gas tank vent hose. KM319A 5. Remove the side panels; then remove the front rack 13.
- Page 37 16. Remove the front engine through-bolt; then remove the two engine mounting brackets from the frame. KM360A KM414A 17. Attach a suitable lifting sling and engine lift to the front engine mounting boss; then using an engine lift, apply slight upward pressure on the engine/ transmission.
-
Page 38: Top-Side Components
Removing Top-Side Components A. Valve Cover B. Cylinder Head NOTE: Remove the spark plug and timing inspec- tion plug; then rotate the crankshaft to top-dead-cen- ter of the compression stroke. 1. On the right side, remove the air hose from the cylin- KM325A der head cover. - Page 39 4. Remove the cap screws securing the cylinder head cover. Account for the O-ring. KM707A 7. Remove the camshaft gear from the cam chain; then secure the timing chain so it will not fall into the KM703 engine. Remove the camshaft. ...
-
Page 40: Servicing Top-Side Components
C. Cylinder D. Piston Servicing Top-Side Components NOTE: Steps 1-6 in the preceding sub-section must precede this procedure. AT THIS POINT VALVE ASSEMBLY To service cylinder, see Servicing Top-Side Compo- When servicing valve assembly, inspect valve seats, nents sub-section. valve stems, valve faces, and valve stem ends for pits, CAUTION discoloration, or other signs of abnormal wear. -
Page 41: Cylinder Head Assembly
Measuring Cylinder Head 1. Using a valve spring compressor, compress the valve springs and remove the valve cotters. Account for an Distortion upper spring retainer. 1. Remove any carbon buildup in the combustion chamber. 2. Lay a straightedge across the cylinder head; then using a feeler gauge, check the distortion factor between the head and the straightedge. - Page 42 Installing Valves Removing Piston Rings 1. Apply grease to the inside surface of the valve seals; 1. Starting with the top ring, slide one end of the ring then place a lower spring seat and valve guide seal out of the ring-groove. over each valve guide.
-
Page 43: Cylinder Assembly
Measuring Piston Pin (Outside Installing Piston Rings Diameter) and Piston-Pin Bore 1. Install ring expander (4) in the bottom groove of the piston; then install the thin oil rings (3) over the 1. Measure the piston pin outside diameter at each end expander making sure the expander ends do not and in the center. -
Page 44: Installing Top-Side Components
3. Place the cylinder on the surface plate covered with #400 grit wet-or-dry sandpaper. Using light pressure, move the cylinder in a figure eight motion. Inspect the sealing surface for any indication of high spots. A high spot can be noted by a bright metallic finish. Correct any high spots before assembly by continu- ing to move the cylinder in a figure eight motion until a uniform bright metallic finish is attained. - Page 45 C. Cylinder Head D. Valve Cover NOTE: Steps 1-4 in the preceding sub-section must precede this procedure. 5. While keeping tension on the cam chain, place the front cam chain guide into the cylinder. CAUTION Care should be taken that the bottom of the chain guide is secured in the crankcase boss.
-
Page 46: Left-Side Components
KM705 KM938A 11. Install the cam chain tensioner cover bolt and tighten 15. Install the air hose into the cylinder head. to 24 in.-lb. 12. Check that the cam gear alignment marks are cor- rectly oriented; then install and tighten the external cylinder head to cylinder cap screws to 7 ft-lb. -
Page 47: Servicing Left-Side Components
B. V-Belt Cover C. Drive Pulley D. Driven Pulley/Centrifugal Clutch Assembly NOTE: On the Utility, step 1 in the preceding sub- section must precede this procedure. 2. Remove the ten cap screws securing the V-belt cover; then remove the cover noting the location of the two dowel pins. - Page 48 6. Remove the spiral spring from the case by lifting the spring end up and out. Hold the remainder of the spring with thumbs and alternately release each thumb to allow the spring to gradually release from the case. 7. Unwind the rope from the reel and remove the rope. Cleaning and Inspecting 1.
- Page 49 KM400 KM401 8. Hold the ratchet guide down in place on the ratchet pins and secure with the cap screw coated with blue Loctite #243. Tighten securely. KM405 5. Align the inner hook of the spiral spring with the notch in the reel spacer. KM410 9.
-
Page 50: Drive Pulley
NOTE: If the bearing is worn excessively, turns roughly, or bearing seals are loose, the bearings must be replaced. KM389 DRIVEN PULLEY/CENTRIFUGAL CLUTCH ASSEMBLY KM254 Disassembling 2. Inspect the V-belt cover for cracks, distortion, and loose alignment pins. ! WARNING ... - Page 51 Inspecting 1. Inspect the pulley faces for wear, galling, or groov- ing. KM375 4. Remove the spring and spring seat; then remove the hub collar. KM394A 2. Inspect the O-rings on the movable face for nicks, tears, or swelling. KM385 5.
- Page 52 KM382A KM378 4. Inspect the pins and bushings for wear, flat spots, 7. Measure the thickness of the centrifugal clutch shoe looseness, or cracking. lining. The minimum service limit for the lining is 0.5 mm. NOTE: If any shoe lining is below the service limit, the complete set must be replaced.
-
Page 53: Installing Left-Side Components
KM384 KM373 4. Install the spring seat over the hub and movable face 7. Using a suitable holding fixture, tighten the drive hub. plate nut (coated with red Loctite #271) to 43 ft-lb. Installing Left-Side Components A. Drive Pulley B. Driven Pulley/Centrifugal Clutch Assembly C. -
Page 54: Right-Side Components
6. Install the centrifugal clutch housing and clutch collar; then secure with the flange nut and tighten to 40 ft-lb. KM369 4. Place the fixed drive face into position on the crank- shaft and engage the splines making sure the splines KM253 extend beyond the pulley face hub. -
Page 55: Removing Right-Side Components
Removing Right-Side Components A. Transmission (DVX) 1. Drain the transmission lubricant into a suitable con- tainer; then install the drain plug and tighten to 21 ft- KM611A 5. Remove the shift shaft; then remove the plug. Account for one shift cam stopper ball, spring, and seal/washer. - Page 56 KM621 KM106 7. Remove the shift fork; then remove the main shaft NOTE: If the engine has not been removed, remove assembly. the swing arm assembly (see Suspension - Swing Arm). 2. Using a crisscross pattern, remove four cap screws securing the secondary driven bevel gear assembly to the transmission case cover;...
- Page 57 KM649 KM652A 5. Using a Spanner Wrench to hold the centrifugal 7. Remove the shift shaft; then remove plug, seal/ clutch housing, remove the nut securing the second- washer, spring, and shift cam stopper ball. ary drive bevel gear to the driveshaft. KM677A KM650 ...
- Page 58 KM680 KM685 10. Remove the countershaft and driveshaft as an assembly. 12. To disassemble the driveshaft, use the following pro- cedure. A. Remove the thrust washer; then remove the reverse gear. KM681 11. To disassemble the countershaft, use the following procedure.
- Page 59 B. Water Pump C. Trigger Coil D. Stator Coil E. Rotor/Flywheel AT THIS POINT To remove/service the water pump, see Fuel/Lubrica- tion/Cooling. 14. Remove the right crankcase cover (see Fuel/Lubrica- tion/Cooling - Water Pump). 15. Remove the trigger coil mounting screws; then remove the wire set plate.
-
Page 60: Servicing Right-Side Components
KM775 KM766A 21. Remove the two cap screws securing the oil baffle to the crankcase and remove the baffle; then remove the snap ring securing the oil pump driven sprocket. KM766A NOTE: The starter one-way clutch bearing is direc- tion oriented and will only function if installed prop- KM428 erly. - Page 61 KM623 KM628 2. Inspect the shift forks for distortion, discoloration, 7. Inspect all bearings, bushings, seals, and shafts for scoring, or excessive wear. proper fit, surface mating, or discoloration. Replace as required. 3. Inspect the shift cam groove and shift cam gear for excessive wear.
- Page 62 KM628 KM617A 3. Install the drive axle into the transmission housing; 7. Install the shift cam stopper ball, spring, seal/washer, then secure with the circlip. and plug (threads coated with red Loctite #271). Tighten to 35 ft-lb. KM611A 4. Apply multi-purpose grease to the lip of the main KM619A drive seal;...
- Page 63 11. Inspect the driven shaft for scoring, discoloration, or worn splines. KM624 4. Inspect the shift shaft and gear for excessive wear. Check that the spring is not broken. KM421 SECONDARY GEARS Checking Backlash 1. Remove the secondary drive bevel gear cover. 2.
- Page 64 2. Clean the secondary driven bevel gear teeth of old oil NOTE: To correct tooth contact, increase or decrease and grease residue. shims as necessary on both secondary drive and driven gears equally. Use the “Tooth Contact/Shim 3. Apply a thin, even coat of a machinist-layout dye to Correction”...
- Page 65 4. Install the flat thrust washer and driven bevel gear on the driven shaft; then using the universal joint and vise to hold the shaft, install a new nut and tighten to 72 ft-lb. KM684 8. Install the low driven gear washer on the driveshaft; then install the low driven gear and thrust washer.
- Page 66 KM699 KM702A 11. Install the low/reverse shift fork into the low/reverse 15. Install the two alignment pins, gasket, and transmis- clutch dog; then install the shift cam into the trans- sion case cover and secure with eight cap screws. mission case and engage the shift fork pawl in the Tighten in a crisscross pattern to 20 ft-lb.
-
Page 67: Installing Right-Side Components
B. Rotor/Flywheel C. Trigger Coil D. Stator Coil 4. Install the starter idler shaft and gear in the crank- case; then install the starter driven gear on the crank- shaft. KM673 19. Loosely secure the secondary driven bevel gear assembly using the four cap screws; then using a crisscross pattern, tighten the cap screws until fully seated in the transmission housing. -
Page 68: Center Crankcase Components
Center Crankcase Components NOTE: This procedure cannot be done with the engine/transmission in the frame. Complete Remov- ing procedures for Top-Side, Left-Side, and Right- Side must precede this procedure. NOTE: For efficiency, it is preferable to remove and disassemble only those components which need to be addressed and to service only those components. -
Page 69: Assembling Crankcase Half
Measuring Connecting Rod NOTE: Proceed to check runout on the other end of (Small End Deflection) the crankshaft by positioning the indicator contact at point 2 and following steps 3-4. 1. Place the crankshaft on a set of V-blocks and mount a Measuring Crankshaft (Web-to- dial indicator and base on the surface plate. -
Page 70: Joining Crankcase Halves
KM728A CC871 5. In a crisscross/case-to-case pattern, tighten the cap screws until the halves are correctly joined; then Joining Crankcase Halves tighten to 8 ft-lb. NOTE: Rotate the crankshaft back and forth to ensure no binding or sticking occurs. 1. - Page 71 17. Install the gas tank (see Fuel/Lubrication/Cooling). 18. Install the air filter housing (see Steering/Frame). 19. Install the body (see Steering/Frame). 20. Install the gas tank cover panel. 21. Install the electrical tray. Install the battery and con- nect the positive cable; then connect the negative cable.
- Page 72 KM414 KM307A 5. Install the front engine through-bolt; then tighten the 10. Connect the engine ground wire to the engine; then engine mounting brackets to 16 ft-lb. connect the starter positive wire to the starter using the existing hardware. Tighten securely. KM414A 6.
-
Page 73: Troubleshooting
12. Install the coil (see Electrical System). 17. Install the battery; then connect the positive and neg- ative battery cables. 13. Install the carburetor (see Fuel/Lubrication/Cooling). 18. Pour in the recommended amount and grade of 14. Install the muffler assembly (see Steering/Frame). engine coolant, engine oil, and transmission lubri- cant. - Page 74 Problem: Engine noisy (Noise seems to come from transmission) Condition Remedy 1. Gears worn - rubbing 1. Replace gears 2. Splines worn 2. Replace shaft(s) 3. Primary gears worn - rubbing 3. Replace gears 4. Bearings worn 4. Replace bearings 5.
- Page 75 Problem: Engine lacks power Condition Remedy 1. Valve clearance incorrect 1. Adjust clearance 2. Valve springs weak 2. Replace springs 3. Valve timing out of adjustment 3. Adjust timing 4. Piston ring(s) - cylinder worn 4. Replace - service rings - cylinder 5.
-
Page 76: Fuel/Lubrication/Cooling
3. Remove the choke assembly from the carburetor leaving the choke cable attached to the choke Fuel/Lubrication/Cooling plunger. Carburetor KC0018 4. Remove the screw securing the throttle actuator cover to the carburetor; then remove the cover. 1. Screw 13. O-Ring 25. - Page 77 PR162B KC0022A 7. Disconnect the vent hose; then remove the carbure- tor. DISASSEMBLING 1. Remove the four Phillips-head screws securing the top cover; then remove the cover. KC0063A 4. Remove the float pin. KC0019A 2. Remove the vacuum piston assembly from the carbu- retor body.
- Page 78 2. Soak for 30 minutes; then rinse with clean, hot water. 3. Wash all non-metallic components with soap and water. Rinse thoroughly. 4. Dry all components with compressed air only mak- ing sure all holes, orifices, and channels are unob- structed.
- Page 79 CC761A KC0022A 2. Install the slow jet. Tighten securely. 6. Place the jet needle, spring seat, and spring into the vacuum piston; then place the assembly down into 3. Install the main jet into the needle jet holder and the carburetor. tighten securely;...
-
Page 80: Throttle Cable Free-Play
PR162C ATV-0047B 4. Place the throttle actuator cover into position on the 3. Tighten the jam nut against the throttle cable adjuster carburetor; then secure with the screw. securely; then slide the rubber boot over the adjuster. Engine RPM (Idle) To properly adjust the idle RPM, a tachometer is neces- sary. -
Page 81: Gas Tank Valve
In the OFF position, the valve will not allow gasoline to flow to the carburetor. In the ON position (the normal operating position), gasoline will flow from the tank to the carburetor. In this position, 4.54 L (1.2 U.S. gal.) will remain in the tank as a reserve quantity. -
Page 82: Oil Pump
Oil Pump NOTE: Whenever internal engine components wear excessively or break and whenever oil is contami- nated, the oil pump should be disassembled, cleaned, and inspected. NOTE: The oil pump is not a serviceable compo- nent. If the pump is defective, the oil pump must be replaced. -
Page 83: Hoses/Thermostat
2. Place the radiator with grommets and collars into 2. Using the following procedure, inspect the thermo- position on the frame; then install the cap screws and stat for proper operation. nuts. Tighten securely. A. Suspend the thermostat in a container filled with 3. -
Page 84: Troubleshooting
CLEANING AND INSPECTING 2. Install the water pump drive seal; then drive the mechanical seal into the crankcase cover using an 1. Clean all pump components in parts-cleaning sol- appropriate seal driver. vent. 3. Install the impeller with seal washer onto the water 2. -
Page 85: Electrical System
Electrical System Switches This section has been organized into sub-sections which Each time the ATV is used, switches should be checked show procedures for the complete servicing of the Arctic for proper operation. Use the following list for reference. Cat ATV electrical system. A. -
Page 86: Brakelight Switch (Auxiliary)
5. If the meter reads less than specified voltage, charge the battery using the following guidelines. Brakelight Switch A. When using an automatic battery charger, always (Auxiliary) follow the charger manufacturer’s instructions. B. When using a constant-current battery charger, use the following Battery Charging Chart. The switch connector is the two-prong white connector on the right side of the engine directly above the switch. -
Page 87: Coolant Temperature And Cooling Fan Switches
RESISTANCE (Switch) Fan Motor NOTE: The brake lever must be compressed for this test. Also, the ignition switch must be in the OFF position. The fan motor connector is located directly above the 1. Set the meter selector to the OHMS position. fan. -
Page 88: Fuses
NOTE: Make sure the fuses are returned to their proper position according to amperage. Refer to the fuse block cover for fuse placement. Ignition Coil The ignition coil is on the left side of the frame above the engine. To access the coil on the Utility, the left side panel must be removed (see Steering/Frame - Body). -
Page 89: Indicator Lights (Dvx)
AR603D KM123D 2. The meter reading must be within specification. 4. Connect the red MaxiClip to the blue/red wire. The reverse indicator light (10) must illuminate. NOTE: If the meter does not read as specified, replace the spark plug cap. 5. -
Page 90: Ignition Switch
14. Depress and release the Mode/Set button (1) to shift the clock set to the minute segment; then depress Handlebar Control Mode/Set button (2) to set the desired minute. Switches NOTE: In the clock set mode, the gauge will default to normal operation 10 seconds after the Mode/Set buttons are released. -
Page 91: Magneto Coils
RESISTANCE (Reverse Override) 2. Connect the red tester lead to the blue/yellow wire; then connect the black tester lead to the green/white 1. Set the meter selector to the OHMS position. wire. The meter reading must be within specification. 2. Connect the red tester lead to the green/red wire; PEAK VOLTAGE then connect the black tester lead to the blue/red ... -
Page 92: Cdi Unit
TESTING 1. Start the engine and warm up to normal operating temperature; then connect a multimeter to the battery as follows. 2. Select the DC Voltage position; then connect the red tester lead to the positive battery post and the black tester lead to the negative battery post. -
Page 93: Headlights
4. With the ignition switch in the ON position, select the DC volts position on the tester; then apply either Taillight - Brakelight brake. The meter must read battery voltage. If battery voltage is observed and no audible “click” was heard in step 1 or 2, remove the tester leads and replace the The connector is the 3-prong one located under the rear start-in-gear relay. -
Page 94: Troubleshooting
Troubleshooting Problem: Spark absent or weak Condition Remedy 1. Ignition coil defective 1. Replace ignition coil 2. Spark plug defective 2. Replace plug 3. Magneto defective 3. Replace magneto 4. CDI unit defective 4. Replace CDI unit 5. Pick-up coil defective 5. - Page 95 Problem: Battery discharges too rapidly Condition Remedy 1. Electrolyte contaminated 1. Replace battery 2. Specific gravity too high 2. Check charging 3. Battery short-circuited 3. Replace battery 4. Specific gravity too low 4. Recharge battery Problem: Battery polarity reversed Condition Remedy 1.
-
Page 96: Drive System
! WARNING Drive System Make sure the ATV is solidly supported on the support stand to avoid injury. SPECIAL TOOLS 2. Engage the brake lever lock; then remove the wheels. A number of special tools must be available to the techni- cian when performing service procedures in this section. - Page 97 7. Loosen the drive chain (see Periodic Maintenance); then slip the chain off the sprocket and remove the axle assembly from the right side. KM477 CLEANING AND INSPECTING 1. Inspect the sprocket teeth for wear. If they are worn KM476A as shown, replace the engine sprocket, rear sprocket, 8.
- Page 98 Removing Bearings 1. Remove the dust seals using an appropriate seal removal tool; then using an appropriate driver, drive the bearings out of the axle housing. Account for one spacer. NOTE: Do not reuse bearings after removal. KM481A 2. Install the brake caliper holder; then install the cir- clip and cap screw and finger-tighten only.
-
Page 99: Rear Drive Axle (Utility)
6. Coat the axle threads with red Loctite #271 and 10. Install the rear wheels and tighten in a crisscross pat- install one axle nut (left-hand threads); then using the tern to 40 ft-lb. Rear Axle Nut Wrench, tighten the inner axle nut to calculated specification. - Page 100 11. Disengage the universal joint from the transmission output shaft splines and set the driveshaft aside. KM505 8. Remove the left and right pivot caps; then remove the right-side pivot bolt. KM509 12. Remove the eight cap screws securing the swing arm to the final drive gear case.
- Page 101 14. Place the right end (shorter length) of the axle on a wood block; then using a rubber mallet, drive the gear case from the axle. KM540 4. Check that all bearings turn freely and smoothly and are not worn, discolored, or missing dust seals. KM538 5.
- Page 102 KM919A KM923 2. Remove the oil seal from the front of the gear case; then using the Pinion Gear Bearing Nut Wrench, remove the pinion nut. KM924A 4. Remove the oil seals from the case and cover; then drive the bearings out of the case. KM920A KM925 KM921...
- Page 103 KM927 KM926 KM928 KM928 5. Heat the gear case to approximately 180° F and using 2. Apply grease to the seal lips; then using a seal driver, a blind-bushing puller, remove the pinion needle drive the seals into the gear case and cover (flat side bearing.
- Page 104 4. If the pinion bearing was removed from the pinion, install the shim and bearing on the pinion shaft with the marked-side of the bearing directed toward the front of the pinion shaft. KM921 6. Apply grease to the pinion seal lips and install into the gear case until fully seated;...
- Page 105 Backlash Ring Gear Left Side Ring Gear Right Side Insufficient Decrease Shim Increase Shim Excessive Increase Shim Decrease Shim NOTE: Always change both shims by the same amount on opposite sides. If left shim is increased, right shim must be decreased by the same amount. 5.
- Page 106 3. Remove the three cap screws, the dust plate, and one O-ring from the left axle housing on the swing arm; then from the right side, drive out the axle bearing. KM529 NOTE: Apply a liberal amount of grease to the drive- shaft splines and the driveshaft spring.
- Page 107 KM532 KM131A 7. Install the right pivot bolt and left pivot adjusting 11. Pour the recommended gear lubricant into the fill bolt and tighten securely; then move the swing arm hole until lubricant is visible on the threads of the up and down to seat the bearings.
-
Page 108: Troubleshooting Drive System
Troubleshooting Drive System Problem: Power not transmitted from engine to wheels Condition Remedy 1. Rear axle shaft serration worn - broken 1. Replace shaft Troubleshooting Brake System Problem: Braking poor Condition Remedy 1. Pad worn 1. Replace pads 2. Pedal free-play excessive 2. -
Page 109: Suspension
Suspension The following suspension system components should be inspected periodically to ensure proper operation. A. Shock absorber rods not bent, pitted, or damaged. B. Rubber damper not cracked, broken, or missing. C. Shock absorber body not damaged, punctured, or leaking. KM462 D. -
Page 110: Rear Shock Absorber
CLEANING AND INSPECTING Rear Shock Absorber 1. Clean the shock absorber in parts-cleaning solvent. 2. Inspect the shock absorber body, bottom stop, and rubber bushing for damage and leaking oil. If any REMOVING defects are found, replace the shock absorber. 1. -
Page 111: Swing Arm
Swing Arm REMOVING AND DISASSEMBLING For the Utility, see Rear Drive Axle in Drive System. For the DVX, use the following procedure. 1. Secure the ATV on a support stand to elevate the wheels and to release load on the suspension. ! WARNING Make sure the ATV is solidly supported on the support KM495... - Page 112 10. Remove the lock nut and cap screw securing the cushion link to the cushion arm. Account for a bush- ing. CLEANING AND INSPECTING 1. Inspect the dust seals, bushings, and pivot axle for wear or damage. If any defect is found, they must be replaced.
- Page 113 2. If the bushing was removed from the middle boss of 8. Place the cushion arm and cushion arm/link assem- the cushion arm, press in a new bushing. bly into position and secure with the flange cap screws and new lock nuts. Tighten securely. ...
-
Page 114: Front A-Arms
5. Remove the hub assembly; then on the Utility, remove the disc cover. KM464 14. Remove the ATV from the support stand. KM569 6. Remove the cotter pin and slotted nut securing the tie Front A-Arms rod end to the knuckle; then remove the tie rod end from the knuckle. - Page 115 2. Inspect the ball joint for boot damage or wear. Replace the A-arm if the ball joint is damaged or worn. 3. Inspect the arm for broken welds, cracks, or bends. Replace if damaged. 4. Remove the bushings and dust seals and inspect for damage to seal lips and spacers.
-
Page 116: Wheels And Tires
KM581 Wheels and Tires TIRE SIZE ! WARNING Use only Arctic Cat approved tires when replacing tires. Failure to do so could result in unstable ATV operation. AF612D 2. Tighten in a crisscross pattern to 40 ft-lb. The ATV is equipped with low-pressure tubeless tires of the size and type listed. -
Page 117: Troubleshooting
4. Test drive the ATV on a dry, level surface and note 5. Increase the air pressure in the tires with the smallest any pulling to the left or right during acceleration, circumference measurement until all tires are equal deceleration, and braking. in circumference. - Page 118 Printed in U.S.A. Trademarks of Arctic Cat Inc., Thief River Falls, MN 56701 p/n 2259-825...
Need help?
Do you have a question about the 300 Utility and is the answer not in the manual?
Questions and answers