
Related Manuals for Datamax E-Class Mark III Professional


Summary of Contents for Datamax E-Class Mark III Professional
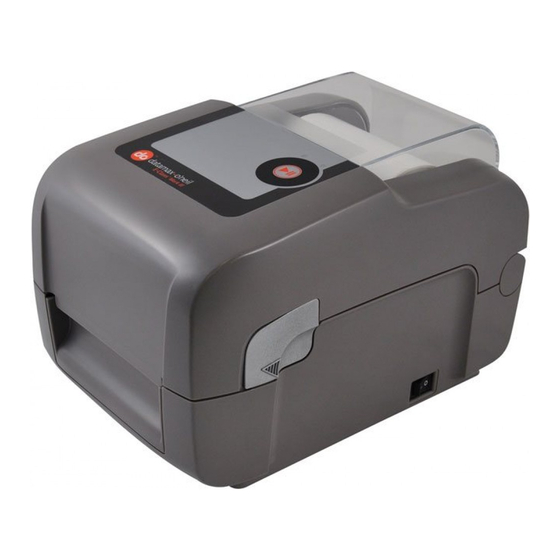
- Page 1 Operator’s Manual Professional and Professional + Models Professional + Professional...
-
Page 3: Limitation Of Liability
Datamax-O’Neil has been advised of the possibility thereof. Datamax-O’Neil’s liability, if any, to the purchaser or to the customer of the purchaser hereunder shall in no event exceed the total amounts paid to Datamax- O’Neil hereunder by the purchaser for a defective product. - Page 4 All rights reserved Copyright © 2012, Datamax-O’Neil Part Number: 88-2358-01, Revision A...
-
Page 5: Table Of Contents
Introduction ......................1 Unpacking the Printer ................... 1 Kensington Security Slot ..................2 Introduction ......................3 Connecting the Printer ..................3 2.2.1 Power Connections ..................3 2.2.2 Interface Connections ................. 4 2.2.3 USB Connection ..................5 Loading Media...................... 9 2.3.1 Loading Roll Media..................9 2.3.2 Loading - External Media ................ - Page 6 Menu System Overview ..................37 The User Menu....................37 The Advanced Menu.................... 38 Menu Details ..................... 39 & & & Introduction ...................... 53 Cleaning the Printhead ..................54 Ribbon Tension Adjustment ................. 56 Adjustable Media Sensor ..................57 Printhead Replacement ..................58 Platen Roller Replacement ...................
-
Page 7: E T T I N G S T A R T E D
Windows ® printer driver can be found on the Accessories CD-ROM, or it can be downloaded from our website at http://www.datamax-oneil.com. (If you wish to write custom programs or label formats, a copy of the Programmer’s Manual also is included for your reference, or the manual can be downloaded.) -
Page 8: Kensington Security Slot
Professional + modules equipped with the Key Lock Option also include a built-in Kensington Security Slot with a metal backing plate. The Kensington slot allows you to physically secure the printer from being stolen by tethering it to a larger object like a desk or counter. There are many security solutions offered by Kensington that are compatible with the slot. -
Page 9: R I N T E R S E T U P
This section explains how to connect your printer and load media (including ribbon, if equipped for thermal transfer operation). 2.2.1 Power Connections The printer is powered by an external auto-ranging power supply, which connects between the printer and an electrical outlet. Ensure that the operating ranges of the power supply are compatible with your electrical service, (see Appendix A for details) then connect power as follows: ... -
Page 10: Interface Connections
2.2.2 Interface Connections Before connecting interface cables to the printer, ensure that the Power Switch is in the OFF (O) position. Ethernet Port USB Port Serial Port USB Host Port Parallel Port Cable Requirements Choose the correct cable when interfacing the printer to the host: The Parallel Port (optional) supports parallel communications via a 36-pin male mini-Centronics ... -
Page 11: Usb Connection
2.2.3 USB Connection USB connection to PC requires installation of drivers for both the Port and the Windows Driver itself as described in Steps A and B below. All the files necessary for installation are located on the Accessories CD- Rom. - Page 12 8) When prompted click “Continue Anyway” 9) Windows will now load the drivers to assign the necessary ports to the printer. 10) Click Finish to close the wizard. Proceed to Step B to begin the installation of the Windows Printer Driver.
- Page 13 3) Select the “Install from a list or specific (Advanced)” radio button and then click Next. 4) Select the “Search for the best driver in these locations” radio button. 5) Check the “Include this location in the search” checkbox and then click Browse. 6) Navigate to driver folder on the CD-ROM, assuming your CD/DVD drive is labeled D: the path would be as follows:...
- Page 14 9) When prompted click “Continue Anyway” 10) Windows will now install the necessary files for the Windows printer driver. 11) Click Finish to close the wizard. The printer can now be selected for use in the printer dialogue box of any windows application. Chapter 2 –...
-
Page 15: Loading Media
The printer is equipped with an Adjustable Media Sensor and may require adjustment to match your media choice, refer to Section 4.4. 2.3.1 Loading Roll Media Load media as follows: 1) Pull forward on the Cover Latches and lift up on the cover. Pro+ models have Key Lock option that must be unlocked before the cover can be opened. - Page 16 4) Pull out enough media to exit the front of the printer. Adjust the Media Guides so they are lightly touching the edge of the media. 5) If using thermal transfer media (ribbon) proceed to Section 2.4 Loading Ribbon. Otherwise close the printer’s Cover and press downward until latched.
-
Page 17: Loading - External Media
2.3.2 Loading - External Media Using Internal Media Chute Guides Accessory (Professional model only) Load media as follows: 1) Slide the Media Guides outward. 2) Slide the Media Hangers outward and install the two Media Chute Guides into the Media Hangers. ... - Page 18 4) Route the media through the External Media Slot in the rear of the printer. Pull out enough media to exit the front of the printer. Adjust the Media Guides so they are lightly touching the edge of the media. ...
-
Page 19: Loading Media With The Peel And Present Option
2.3.3 Loading Media with the Peel and Present Option Load media for peeling (if the printer is equipped with the option) as follows: When using the Peel Mechanism do not exceed a print speed of 4 IPS. To utilize “Tear mode” with Peel and Present Option installed; move the Peeler Door to its open position. 1) Load media as described in Section 2.3, (steps 1-3). -
Page 20: Loading Media With The Cutter Option
2.3.4 Loading Media with the Cutter Option Load media for cutting (if the printer is equipped with the option) as follows: 1) Load media as described in Section 2.3, (steps 1-3). 2) Route the media through the opening in the Cutter. ... -
Page 21: Adjustable Media Core Hangers (Pro+ Models Only)
2.3.5 Adjustable Media Core Hangers (Pro+ models only) The Adjustable Media Core Hangers allow for support of media rolls with 3”, 1.5”, or 1” cores. To adjust: 1) Pull outward in on the Core Hanger and slide the Core Hanger up or down to the desired setting. Be sure both core hangers are set to the same position. -
Page 22: Loading Ribbon
The printer is capable of using C.S.I (Coated Side In) and C.S.O (Coated Side Out) ribbons in the following configurations: ½” Core Ribbons Ribbon Core Width: 4.3 inches (110mm) Ribbon Width: 1.0 - 4.3 inches (25 - 110mm); Centered on core 1”... - Page 23 2) Push out the Supply Hub and load the Supply Roll into the printer as shown. Depending on the size of the Supply Roll, the Media Bouncer may need to be pushed out of the way. 3) Once the Supply Roll is loaded, slide the Ribbon Handler Latch downward to unlatch the Ribbon Handler Assembly.
- Page 24 5) Route the ribbon from the supply roll to the Ribbon Core, as shown below. 6) If not already attached, affix the leader of the ribbon to the Ribbon Core using Tape. Rotate the Take-up Hub Wheel several times to secure the ribbon. ...
-
Page 25: Using The Ribbon Core Adapters
2.4.1 Using the Ribbon Core Adapters When using ribbons with a 1” (25.4mm) I.D. core, a Core Adapter must be used. 1) Slide the Ribbon Roll (with the leader positioned as shown above) onto a Core Adapter. Slide an empty Ribbon Core onto the remaining Core Adapter. ... - Page 26 Chapter 2 – Printer Setup...
-
Page 27: Introduction
The Front Panel consists of a graphic display, two indicator lights, four directional arrow buttons and one multi-function button, as detailed in the following sections. Green/Orange Status LED Red Error LED Graphic Display Directional Arrow Buttons ... -
Page 28: User Interface
The User Interface is divided in three sections, Feed/Pause, Test, and Menu. Button functions are dependent on the mode currently in use. Use the Up and Down arrow buttons to scroll to the item and then press the center button to enter that menu mode. -
Page 29: Menu Mode
Enters the Test mode menu/sub-menu items. Prints the chosen test label. Scrolls upward to the next menu item. Increments the Count value. Scrolls downward to the next menu item. Decrements the Count value. Exits the Test menu mode Displays the ‘Count’ screen. 3.3.3 Menu Mode The menu mode is covered in detail in Chapter 4. -
Page 30: Printer Configuration Tools
The printer contains many user adjustable parameters. These parameters are configurable using a few methods. The table below lists the most popular ways of configuring the printer and the advantages of each. Choose the method that best addresses your application. Method Description Pros... -
Page 31: Printer Configuration Utility (Netira Ct)
Older versions might not operate correctly with some printers. For the latest version please visit our web site at http://www.datamax-oneil.com 1) Once installed launch the NETira CT configuration utility: 2) Be sure the printer is ‘ON’. Connect the host to the printer (see Section 2.2.2 Interface Connections). - Page 32 c) In the toolbar, from the drop down menu box, select “TCP_IP”. Then click on the Query Printer Icon 3) At this point you may browse the Printer Component categories and make any changes necessary to the printer configuration. 4) Once complete, send the new settings to the printer using the ‘Send’...
-
Page 33: Windows Driver
“Install Driver” from the menu and follow the instructions on the screen to install. 3) When prompted, select your printer from the list, (i.e. Datamax-O’Neil E-4xxx Mark III). Continue to follow the on-screen instructions to install the driver. Chapter 3 – Printer Operation... -
Page 34: Important Notes
Important Notes: The Windows driver functions the same as any other Windows printer. While built-in help files provide information on all settings, there are some important setting parameters that should be observed for trouble free printing: Page Setup Tab: Stock Options Tab: Print Speed &... -
Page 35: Media Calibration
3.7.1 Quick Calibration Ensure the printer is properly loaded with media, proceed with calibration as follows: This calibration is not necessary when using continuous stock. Media containing large gaps may require a change in the Paper Out Distance before proceeding. ... -
Page 36: Manual Calibration
3.7.2 Manual Calibration The Manual Calibration can be performed using the NETira CT Utility (see Section 3.5) or using the front panel buttons via the printer’s menu, see Section 4.4. Manual Calibration provides dynamic readings, which can be helpful when using media with small position- critical notches or marks. -
Page 37: Advanced Entry Calibration
3.7.3 Advanced Entry Calibration Advanced Entry is an alternate calibration method for special-case media types, where sensor readings are taken using different sampling algorithms and from a list of these readings the best algorithm is selected for manual entry into the database. ... - Page 38 Advanced Entry Calibration (continued) Step Action Displayed Message Comment Using the button, set the Gain Number to 0. TRAN SENSOR GAIN This is the Label Value for a gain Record the sensor reading as a setting of 0. Label Value for Gain Number 00 in (0 - 31) a table (32 rows by four columns, with headings similar to those...
- Page 39 Advanced Entry Calibration (continued) Step Action Displayed Message Comment Raise the cover assembly then proceed according to the media type: (1) Do not position the Media Sensor under a perforation; and Die-cut – Remove a label or two if using preprinted media, ensure from the liner then position the TRAN SENSOR GAIN the label area placed over the...
- Page 40 Advanced Entry Calibration (continued) Step Action Displayed Message Comment TRAN SENSOR GAIN Using the button, increment the These are TOF Values, where Gain Number by one. Record the “245” represents the current TOF Value. Repeat this process for sensor reading. (0 - 31) each Gain Number.
- Page 41 Advanced Entry Calibration (continued) Step Action Displayed Message Comment Using the button, set the Gain Number determined in the This example uses Gain Number previous step. Press the button to enable the setting. Press the button again to re- enter the TRAN SENSOR GAIN (or REFL SENSOR GAIN, if using reflective media) menu item.
- Page 42 Advanced Entry Calibration (continued) Step Action Displayed Message Comment button to exit the Press the current menu level. Using the button, scroll to PAPER SENSOR LEVEL (or if using PAPER SENSOR LEVEL reflective media, REFL PAPER This is the Paper value. LEVEL) and then press the (0 - 255) button.
-
Page 43: E N U S Y S T E M
The Menu System contains two modes, each with a differing level of access to secondary menus or functions: The User Menu accesses basic printer settings and functions The Advanced Menu accesses all operational settings, functions, and diagnostics Prompts may appear before menu access is granted and before changes are enacted; see Security ... -
Page 44: The Advanced Menu
The Advanced Menu contains all setting, control, and functional selections in these menus: Media Settings Print Control Printer Options System Settings Communications Diagnostics After selecting the Advanced Menu, it will be shown whenever the MENU branch is accessed. To enable the Advanced Menu, proceed as follows: 1. -
Page 45: Menu Details
Media Settings The Media Settings menu contains label and ribbon sensing and sizing functions, as well as printhead cleaning selections: Media Type Media Index Type Auto Calibration* Label Length Maximum Label Length* Paper Empty Distance* ... - Page 46 DISPLAYED ITEM ITEM DESCRIPTION RIBBON LOW OPTIONS Defines the printer response when THERMAL TRANSFER mode is selected and the ribbon supply begins to diminish. RIBBON LOW Sets the ribbon supply threshold diameter (1.00 - 2.00 inches) that will trigger a Low Ribbon DIAMETER Warning prompt, where: 0.50...
-
Page 47: Print Control
Print Control The Print Control menu contains printing throughput, offset and custom setup functions: Heat Print Speed Feed Speed Reverse Speed* Slew Speed* Row Offset Column Offset Present Distance TOF Precedence* Custom Adjustments* ... -
Page 48: Printer Options
Printer Options The Printer Options menu contains file-handling, module, and optional equipment settings: Modules Present Sensor Cutter The menu selections are defined as follows: DISPLAYED ITEM ITEM DESCRIPTION MODULES Controls memory handling functions, where: DIRECTORY Allows viewing and printing of the available space and file types (including plug-in files) present on a module. -
Page 49: System Settings
System Settings The System Settings menu contains label formatting, operation, and control functions: Menu Mode Configuration File Internal Module* Default Module* Scaleable Font Cache* Single Byte Symbols* Double Byte Symbols* Time And Date ... - Page 50 DISPLAYED ITEM ITEM DESCRIPTION SCALEABLE FONT Configures the number of 1KB blocks (128 - 512) allocated for the scaleable font engine, where: CACHE 384 KBytes Is the Default Setting. SINGLE BYTE SYMBOLS Selects the code page used to print single byte fonts, including: ARABIC-8 ISO 15: ITALIAN ISO 17: SPANISH...
- Page 51 DISPLAYED ITEM ITEM DESCRIPTION CONFIGURATION LEVEL Displays the hardware and software levels of the printer, where: This information is also provided on the Configuration Label. PRINTER KEY Identifies the unique key number of the printer, in the form: , where: vvvv-cwxx-yyyyyy-zzz - Represents the printer model number.
- Page 52 DISPLAYED ITEM ITEM DESCRIPTION UNITS OF MEASURE Sets the measurement standard used, where: IMPERIAL Uses inches. (Default Setting) METRIC Uses millimeters and centimeters. INPUT MODE Defines the type of processing that will occur when data is received, where: Processes data for standard DPL printing. LINE Processes data for Line Mode (template) printing.
- Page 53 DISPLAYED ITEM ITEM DESCRIPTION COLUMN EMULATION Allows the column dots per inch to be adjusted (153 - 253 dots), so that numbers smaller than the printhead resolution reduce the printed output from right to left, where: XXX Dots Default setting is dependant on printer model. ROW EMULATION Allows the row dots per inch to be adjusted (103 - 303), so that numbers smaller than the printhead resolution enlarge the height of the printed output and numbers larger reduce it, where:...
- Page 54 Communications The Communications menu contains interface and host control functions: Serial Port A* Parallel Port A* USB Port* Network/Bluetooth* Host Settings* Items denoted with an asterisk (*) are only accessible through the Advanced Menu. The menu selections are defined as follows: DISPLAYED ITEM ITEM DESCRIPTION...
- Page 55 DISPLAYED ITEM ITEM DESCRIPTION NETWORK/BLUETOOTH Controls the communications settings for the network and Bluetooth interfaces, where: ACTIVE INTERFACE Selects the network interface currently in use by the printer, where: NONE Disables all interfaces WIRED Selects the Wired Ethernet interface ETHERNET WIRELESS Selects the Wireless Ethernet interface (if installed) ETHERNET...
- Page 56 DISPLAYED ITEM ITEM DESCRIPTION WIRELESS ETHERNET Controls the communications settings for the wireless Ethernet network interface, where: IP DISCOVERY Sets the address discovery method, where: USE STATIC The stored static IP, Subnet Mask, and / or Gateway Address will be used. ADDRESSES USE DHCP The card broadcasts over the network using DHCP protocol to receive addresses from the...
- Page 57 DISPLAYED ITEM ITEM DESCRIPTION HOST SETTINGS Controls the communications with a host device, where: The "ignore host" settings for ESC SEQUENCES, HEAT, SPEED, TOF SENSING, SYMBOL SET, CNTRL-CODES, STX-V SW SETTINGS, and MAX LENGTH will be unaffected when PL-Z Mode is selected (see Input Mode for details). HOST TIMEOUT Sets the number of seconds (1 - 60) that an established communications port must be idle before data can be received through an alternate port, where:...
- Page 58 Diagnostics The Diagnostics menu contains testing functions and printhead reporting selections: Hex Dump Mode* Options Testing* Print Test Rate (min)* Sensor Readings* Ribbon Sensor Limits* Flash Module Report* Items denoted with an asterisk (*) are only accessible through the Advanced Menu. The menu selections are defined as follows: DISPLAYED ITEM ITEM DESCRIPTION...
-
Page 59: Introduction
& & & This section details the cleaning, adjusting, and troubleshooting tips for the printer. The following table outlines the recommended maintenance schedule for the various printer parts. Area Method Interval Turn OFF the printer before cleaning the printhead. Printhead Use solvent* applied with a cotton swab to clean After every roll of media. -
Page 60: Cleaning The Printhead
Streaks can indicate a dirty or a faulty printhead. Proper cleaning is critical. To maintain peak performance of the printer, Datamax-O’Neil offers a complete line of cleaning products including pens, cards, films and swabs. To learn more visit our website. - Page 61 Cleaning Card Procedure If printing with direct thermal media, thermal transfer media with wax/resin ribbon combinations, or if the Cotton Swab technique was not successful, clean the printhead as follows: 1) Open the printer. Wait briefly for the Printhead to cool. 2) Remove media and ribbon then place a Cleaning Card under the Printhead (part number 70-2013- 01).
-
Page 62: Ribbon Tension Adjustment
The adjustable ribbon handler feature, found on printers equipped with the thermal transfer option, allows the optimum amount tension to be supplied by the ribbon supply hub. Adjust the ribbon tension as follows: 1) Turn ‘off’ the printer. 2) Hold the ribbon/ribbon hub to prevent it from turning. Then push in and rotate the Ribbon Tension Adjustment Knob to the position that matches the core size of the ribbon in use. -
Page 63: Adjustable Media Sensor
The optional Adjustable Media Sensor (AMS) allows the printer to accept a wider variety of media configurations. The table below defines general AMS positions for various media and Top of Form (TOF) types. AMS Positioning Media Type Sensor Location TOF Sensing Method Any location in the media path with Continuous Continuous... -
Page 64: Printhead Replacement
If the Printhead becomes damaged or worn, replace it as follows: Always follow proper Electro Static Discharge procedures when replacing the printhead. 1) Turn OFF the printer and remove the ribbon if installed. 2) Lower the Ribbon Handler Assembly. 3) Press outward on the two Printhead Carrier Tabs and rotate the Printhead Carrier down. - Page 65 5) Loosen the Printhead Screw and allow the Printhead to fall free. 6) Remove the Printhead Cable. Printhead Shield Printhead Screw Printhead Printhead Cable Sensor Installation: 1) Carefully connect the Printhead Cable to the new Printhead. 2) Position the Printhead in the Printhead Carrier and tighten the Printhead Screw.
-
Page 66: Platen Roller Replacement
The Platen Roller can be easily removed for cleaning, replacement, or clearing media jams. 1) Turn OFF the printer and remove the media if installed. 2) Lift up on the two Platen Roller Tabs. Platen Roller Tabs 3) Remove the Platen Roller Assembly from the printer. ... -
Page 67: Updating Firmware
When program updates and/or new features are added, they can be downloaded to the printer as follows: 1) Identify the new version for your model of printer from the Datamax-O’Neil Web site at www.datamax-oneil.com and download it onto your computer’s hard drive. - Page 68 Chapter 5 – Maintenance Adjustments...
-
Page 69: R O U B L E S H O O T I N G
Occasionally, situations arise that require troubleshooting. Possible problem situations and potential solutions are listed below. Contact a qualified technician for problems that persist or problems not covered in this section. The following section lists the symptoms and the associated page numbers of the topics covered. While not every situation is addressed, you may find some tips helpful. - Page 70 Skips every other label (print quality is good, but every other label is skipped): The label is formatted too close to the top edge of the label: Leave white space equal to 8-dot rows (about .02 inch [.5mm]) at the top of the label. The media is not calibrated: Calibrate it (see Section 3.7).
-
Page 71: Hex Dump Mode
The figure below is a sample Hex Dump Label. After sending a label format to the printer, the hex code output will be immediate. As a final note, many software programs use bit mapping to construct the label, making diagnosis difficult. Contact Datamax-O’Neil Technical Support with any questions. Chapter 6 – Troubleshooting... - Page 72 Chapter 6 – Troubleshooting...
-
Page 73: A A S S
Mechanical Pro Models: 8.01 inches (20.4 cm) Width Pro+ Models: 8.54 inches (21.7 cm) Pro Models: 11.10 inches (28.2 cm) Depth Pro+ Models: 14.17 inches (36.0 cm) Pro Models: 7.36 inches (18.7 cm) Height Pro+ Models: 9.45 inches (24.0 cm) Pro Models: 5.25 pounds (2.4 kg) Weight Pro+ Models: 7.75 pounds (3.5 kg) - Page 74 Media / Ribbon Media Types Roll-Fed, Die-Cut, Continuous, Fan-Fold Max. Media Width 4.4 inches (110mm) Min. Media Width 0.75 inches (19mm) 203 DPI Models: 4.25 inches (108mm) Max. Print Width 300 DPI Models: 4.12 inches (106mm) Print Length Range .236 – 99 inches (6 - 2514mm) Tear: 0.5 inches (12mm) Minimum Label Height Peel: 1.0 inches (25mm)
- Page 75 Approved Media To achieve optimum print quality and maximum printhead life, Datamax-O’Neil specifies the use of Datamax- O’Neil brand media and ribbons. These supplies are specially formulated for use in our printers; use of other supplies may affect the print quality, performance, and life of the printer or its components. For a current list of approved media and ribbons for use in direct thermal and thermal transfer applications, please contact a Media Representative at (407) 523-5650.
-
Page 76: A S P E C I F I C A T I O N S
Appendix A – Specifications... -
Page 77: Network Card Setup
Whether a wired or wireless connection is intended, it is recommend to establish a wired connection to the printer first. This will allow access to the printers internal web pages to configure the settings necessary for a typical wireless connection. If a wired connection is not or can not be achieved all connection parameters can also be set using the NETira CT configuration utility, see section 3.5. -
Page 78: Wireless Setup
1. Open your web browser. Type in the IP Address assigned to the printer. The printers default IP address is: 192.168.10.26. If a different IP Address has been assigned to the printer, make sure to enter the correct IP address. The following page will appear: The printer’s internal web pages are divided into 10 pages that are accessible via the navigation... -
Page 79: Wireless Setup - Infrastructure
B.2.1 Wireless Setup – Infrastructure After a successful setup is made via a wired connection, the Wireless connection (if equipped) can now be configured in infrastructure mode using a static or DHCP issued IP address. 1. Open your web browser. Type in the IP Address of the printer. -
Page 80: Wireless Setup - Ad-Hoc
The printer will now search for a server. Allow up to 90 seconds for the printer to retrieve an IP address. At this point it is recommended to print a Network Report. This Network Report is generated by the printer and lists important default information such as the IP and MAC Addresses as well as SSID for wireless equipped cards. - Page 81 5. Under the “WIFI Security and Authentication”, set any security/authentication settings necessary for your network. 6. Scroll down to the bottom of the page, enter the password (default is “sysadm”) and click Apply. 7. Click on the “General Network Settings” menu item on the left side of the screen. Locate and set the following items: 8.
-
Page 82: Installing The Printer Driver
Install the Printer Driver as follows (screen shots below are samples taken using Windows 2000; other versions will be similar): Start the Make sure that Windows Add Local Printer is Printer Wizard. selected and The following then click screen should Next>. - Page 83 Insert the Browse to the Accessories CD- \DRIVERS\ ROM and click folder on the Browse. CD-ROM. Ensure the file “Datamax- O’Neil.inf” is selected then click OK. Click OK. Choose your printer from the list and then click Next>. Assign a name...
- Page 84 Appendix B – WLAN & LAN Setup...
-
Page 85: C C B B Ss
Bluetooth connection parameters can be set using the NETira CT configuration utility, via an established serial or wired LAN connection. Launch the NETira CT configuration utility, and query (connect) to the printer, (see section 3.3 for more information on NETira CT). 1) Click on the General Network menu branch under the Printer Component section of the configuration utility. - Page 86 Appendix C – Bluetooth Setup...
-
Page 87: D M E N U L A N G U A G E
Different languages and / or Datamax-O’Neil-provided translations can be downloaded to replace the standard (English) menu of the printer by changing the spreadsheet that defines the system dictionary. To change the language you will add a new language column (or modify the existing column) in the spreadsheet, click on the “Generate DPL file(s)”... - Page 88 B. Click the “Enable Macro” box. The following screen appears: C. Click on Column J and enter the new language, or modify an existing one. Some tips on this process: Message Size – When entering new messages, reference the “MAX” column: this is the maximum •...
- Page 89 An error has occurred if the printer displays the new language selection, but all messages remain in English. In this case, re-check your process or contact Datamax-O’Neil Technical Support (be ready to provide the Common.xls and DPL download files created). Other error messages are also possible:...
-
Page 90: Advanced File Handling Information
To restore the factory generated EFIGS image, download the file *832296.01A to the printer. This file • is located on the Datamax-O’Neil FTP site. The letter at the end of the file name (e.g., A) specifies the revision. The latest revision will be available on the FTP site. - Page 91 • The screen shot below is an example of Unicode defined languages, Chinese & Russian. Note the only additional information required is the “double” in row 1. Appendix D – Menu Language...
Need help?
Do you have a question about the E-Class Mark III Professional and is the answer not in the manual?
Questions and answers