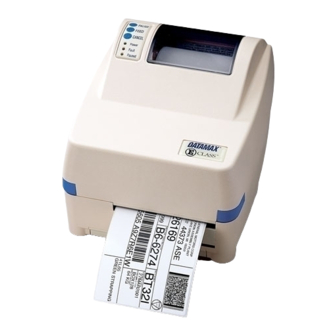
Datamax E-Class E-4304 Operator's Manual
Datamax operator's manual printer e-4203 / e-4204 / e-4304
Hide thumbs
Also See for E-Class E-4304:
- Programmer's manual (302 pages) ,
- Operator's manual (92 pages) ,
- Quick reference manual (46 pages)
Table of Contents
Advertisement
Quick Links
Download this manual
See also:
Quick Reference Manual
Advertisement
Chapters
Table of Contents

Subscribe to Our Youtube Channel
Related Manuals for Datamax E-Class E-4304


Summary of Contents for Datamax E-Class E-4304
- Page 1 E-4203 / E-4204 / E-4304 Operator’s Manual...
-
Page 3: Copyright Information
Information in this document is subject to change without notice and does not represent a commitment on the part of Datamax Barcode Products Corporation. No part of this manual may be reproduced or transmitted in any form or by any means, for any purpose other than the purchaser's personal use, without the expressed written permission of Datamax Corporation. -
Page 4: Agency Compliance And Approvals
Agency Compliance and Approvals: UL1950 Information Technology Equipment C22.2 No. 950-M93 Listed EN60950 For 230 Volt Operation (Europe): Use a cord set, marked "HAR," consisting of a min H05VV-F cord which has a minimum 0.75 square mm diameter conductors, provided with an IEC 320 receptacle and a male plug for the country of installation rated 6A, 250V Für 230 Volt (Europa): Benützen Sie ein Kabel, das mit "HAR"... -
Page 5: Important Safety Instructions
Important Safety Instructions This printer has been carefully designed to give you many years of safe, reliable performance. As with all electrical equipment, there are a few basic precautions you should take to avoid hurting yourself or damaging the printer: Carefully read the installation and operating instructions provided with your printer. -
Page 7: Table Of Contents
4.1 Lights... 15 4.2 Buttons ... 16 4.3 Normal Mode - Button Functions... 16 4.4 Printer Setup Mode - Button Functions... 17 4.4.1 Printer Setup Menu List ... 18 4.4.2 Menu Items and Values... 19 4.4.3 Example of Changing Baud Rate... 22 4.5 Label Alignment ... - Page 8 4.5.5 Label Alignment Troubleshooting... 28...
-
Page 9: Maintenance And Adjustments
5.6 Darkness Adjustment... 44 5.7 Resetting to the Factory Defaults... 44 5.8 Downloading Firmware and Fonts... 45 Troubleshooting 6.0 Introduction... 46 Specifications 7.0 Printer Specifications... 50 Appendix A ASCII Control Code Chart ... A-1 Appendix B Embedded Fonts and Barcodes... B-1 Appendix C... -
Page 11: Introduction
The E-4203, E-4204, and E-4304 hereafter referred to as ‘the printer’, is a user-friendly printer that blends quality and durability at an affordable price. The front panel was designed to make operation of the printer a simple task. The printer offers direct thermal and optional thermal transfer printing as well as RS232 serial and parallel interfaces for ease of connection to your host system. -
Page 12: About This Printer
Ø AGFA Scalable Font Engine Memory Ø 1 MB FLASH memory Ø 2 MB DRAM Memory Interfaces Ø This printer is equipped with an RS-232 serial interface and a Centronics parallel interface. Operational Ø Simple Media Loading Ø Media Tearbar Ø... -
Page 13: Optional Features
1.1.2 Optional Features Thermal Transfer Thermal transfer printing requires the use of a ribbon. The ink/wax from the ribbon transfers to the media by the printer to create an image. Thermal transfer printing provides exceptional clarity and scanability. External Cutter The external cutter provides ease of automatic cutting for tags and labels after a label is printed. - Page 14 E-4203/E-4204/E-4304...
-
Page 15: Before Using The Printer
Inspect the shipping container(s) for damage, if damage is evident notify the shipping company to report the nature and extent of the damage. The printer is carefully packaged to avoid any damage during transit. In order to operate the printer you will need to remove the packaging materials, (i.e., tape and foam) that were placed in the printer for... -
Page 16: Additional Requirements
Inspecting the Printer After removing the printer from the packaging material, check the contents of the package. The following items should be included: Ø Printer Ø External power supply Ø Accessories CD Ø Special or additional items purchased. Additional Requirements The following items are necessary for generating labels from your printer. -
Page 17: Introduction
(optional), and print a configuration label. 3.1 Connecting the Printer 3.1.1 Power Connection The printer is powered from an external power supply that connects to the printer as shown below. Several power supplies are available depending on your printer model. -
Page 18: Interface Connection
3.1.2 Interface Connection The printer can be connected to the host via a serial or parallel cable. 3.1.3 Interface Cables An interface cable is necessary to connect the printer to the host. The interface between the printer and the host will be either a serial RS-232C or parallel cable. -
Page 19: Loading Media
Close the cover and press the ‘Feed’ button several times to feed the media and ensure proper tracking. If the printer does not correctly sense the top of each label it may be necessary to perform the Calibration Procedure, Section 4.6. -
Page 20: Loading Media For Peel Configuration
2. Push the Printhead Latch down and raise the Printhead Carrier Assembly. 3. Place a roll of media (labels facing up) on the Media Hub and insert them into the printer. Slide the Media Hub Flange with its smooth side towards media onto the Media Hub. -
Page 21: Loading Ribbon (Thermal Transfer)
3.3 Loading Ribbon (Thermal Transfer) 1. Open the cover. 2. Remove the two ribbon hubs. 3. Slide a roll of Ribbon onto one of the Ribbon Hubs and an Empty Core onto the other hub. Push the Printhead Latch down and raise the Printhead Carrier Assembly. - Page 22 6. Place the Ribbon Hubs back into the printer and route the ribbon through the printhead carrier assembly as shown below. Note: Always make sure the ink side of the ribbon faces the media and NOT the printhead. 7. The ‘Media Type’ setting within the printer’s setup must be set to ‘Thermal Transfer’...
-
Page 23: Flash Memory Expansion
3.4 Flash Memory Expansion The printer can be equipped with an optional Flash Memory Expansion. This flash expansion can be used for storage of label formats and fonts. For font downloading instructions refer to Section 5.8 in this manual. To install the Flash Memory Expansion: Œ... - Page 24 E-4203/E-4204/E-4304...
-
Page 25: Front Panel Operation
4.0 Front Panel Operation The Front Panel consists of three lights and three dual- function buttons. The functions of these lights and controls are listed below. 4.1 Lights Ø Both the POWER and PAUSED lights will be on during power-up initialization, or “warm reset”. -
Page 26: Buttons
Normal: Normal printer functions (i.e. Pause, Feed, and Cancel). See Section 4.3 Printer Setup: Allows setting of the printer’s operating menu items (i.e. Media Settings, Communications, and Options. See Section 4.4 Calibration: Allows the printer to ‘calibrate’ the media for sensing of the Top of Form. -
Page 27: Printer Setup Mode - Button Functions
Media Settings, Communications, and Options. Note: It is recommend that the Printer Setup Mode is not executed with the printer in Peel Mode or the optional Present Sensor enabled. Depending on label size this can cause unpredictable results. -
Page 28: Printer Setup Menu List
4.4.1 Printer Setup Menu List The sample label below is the Printer Setup Menu List. This label shows all of the printer’s current values for each menu item that can be modified using the front panel. The number far left of the Menu Item corresponds to its position in the Menu List, for selection by pressing For example to “Direct Select”... -
Page 29: Menu Items And Values
4.4.2 Menu Items and Values The table below lists all the menu items and their possible values in the ‘Printer Setup Procedure’. 1) MEDIA TYPE Sets printing for either direct thermal (no ribbon) or thermal transfer (ribbon) stock. Possible Values:... - Page 30 Range: 75 – 410; default = *410 Units: .01 inch 10) CONT FORM LENGTH This command sets the page size (label length) when the printer’s ‘SENSOR TYPE’ is set to continuous media. Possible Values: Range: 0 – 9999; default = *100 Units: .01 inch...
- Page 31 (Label Alignment disabled) 20) STOP LOCATION (see Sets convenient stop locations for different printer configurations. Possible Values: *HOST (printer uses host values of SOP and Present Distance) PEEL (sets stop location just behind the peel bar) (sets stop location at the cutter...
-
Page 32: Example Of Changing Baud Rate
9600 bps to 19200 bps the same procedure can be used to change any of the printer’s menu items. Note: It is recommend that the Printer Setup Mode is not executed with the printer in Peel Mode or the optional Present Sensor enabled. Depending on label size this can cause unpredictable results. - Page 33 Continued… E-4203/E-4204/E-4304...
- Page 34 6. To confirm that your changes have been made press the buttons simultaneously, this will print the Database Configuration Label. The label should show the new Baud Rate value of 19200. FRI AUGUST 024, 2001 19:29 236 VER: ET4204 - 04.06 08/24/01 BOOT 83-2329-04A CODE 83-2325-04F FONT 83-2337-01A...
-
Page 35: Label Alignment
(between the media sensor and printhead) when printing the first label after changing media or at power-up. This is accomplished with providing the printer with a ‘ALIGNMENT LENGTH’ which can be manually measured and entered (see section 4.5.1) or automatically calculated using a Forced... -
Page 36: Label Alignment = Auto
To perform a FORCED ALIGNMENT press and hold the FEED button (approx. 4 seconds). The printer will measure and save the label length and then align the label. FORCED ALIGNMENT can result in wasted... -
Page 37: Label Alignment Recommended Settings
4.5.4 Label Alignment Recommended Settings Label Alignment is intended for use with label length less than the distance between the printhead and the edge sensor, or where label wastage at power-up is a concern. Label Alignment is not recommended for label stock lengths greater than 6.5” or for label stock containing 2 or more form lengths. -
Page 38: Label Alignment Troubleshooting
4.5.5 Label Alignment Troubleshooting Problem Description Attempting to With the Present perform Label Sensor enabled, Alignment results Label Alignment in no paper can not be movement. performed without a Label Length. First label wasted Alignment during alignment. Length is too All labels thereafter long. - Page 39 Problem Description Label Alignment is Label Alignment incorrect. Pressing Length is not FEED successively correct. The results in a short default Label label length, 1-inch. Alignment Length is 1.00”, and will result in this behavior when any larger label length is used without setting the appropriate...
- Page 40 Problem Description Tear Mode selected Another present but label stop position has been position (present determined. position) is not far Enabling the enough forward. Present Sensor causes the label stop position (present position) to be approximately 0.1” behind the peel bar. The Present Adjust value is not correct.
-
Page 41: Calibration Mode
4.6 Calibration Mode In ‘Calibration Mode’ the printer’s buttons allows the printer to ‘calibrate’ the media for sensing of the Top of Form either automatically or manually. Note: If at any time you wish to discard your changes and revert back to the previous calibration simply turn off the printer. -
Page 42: Media Sensor Calibration Procedure
4. Remove all media from the media sensor, close the printhead, and then press button. The printer will flash the FAULT light until it has finished analyzing the media sensor for no media. 5. Once the calibration is complete (all three operations performed) press the buttons simultaneously to accept the current calibration for “test”... -
Page 43: Auto Media Calibration Procedure
This operation feeds 10 inches of media using the current Media Sensor Calibration setting and calculates the TOF Delta and TOF Low values to be used. Upon completion the printer will exit back to ‘Calibration Mode’ flashing the PAUSED light if successful or the FAULT light if not successful. -
Page 44: Internal Labels
4.7.1 Database Configuration and Dot Check Label To print the Database Configuration and Dot Check Labels: With the printer on, loaded with media (at least 4 inches wide), and ribbon (if printing in thermal-transfer). Press the simultaneously to print the Database Configuration and Dot Check Label Alternately, press and hold the continue holding the F2 button until the PAUSED light turns off. - Page 45 The second label printed is the Dot Check Label. This label is used to determine whether the printhead is in need of replacement. 'Good' and 'Faulty' Dot Check Labels are shown below: E-4203/E-4204/E-4304 Good Test Label: Indicates that the printhead is operating normally.
-
Page 46: Test Label
4.7.2 Test Label This label is intended to be used to evaluate the current printer setup for print quality and label tracking and positioning. To print the Test Label: With the printer loaded with media (at least 4 inches wide), and ribbon... - Page 47 E-4203/E-4204/E-4304...
-
Page 48: Introduction
5.0 Introduction This chapter covers the cleaning, adjusting, and some troubleshooting tips involved with your printer. In addition, the following table provides a recommended cleaning schedule for the various parts of your printer. Area Printhead Turn off the printer before cleaning the printhead. -
Page 49: Cleaning The Printhead
5.1 Cleaning the Printhead Warning: Turn ‘off’ the printer and unplug the unit from the outlet before cleaning the printhead. 1. Turn ‘off’ the printer and open the cover. 2. Push the Printhead Latch down and raise the Printhead Carrier Assembly. -
Page 50: Media Width Adjustment
Thumbwheel to the left (frontward), for wide media move it to the right (rearward). 1. Load media into the printer. 2. Print a label, if it is light on the right-hand side then move the Thumbwheel to the right (rearward), (see example below). -
Page 51: Ribbon Width Adjustment
1. Turn ‘off’ the printer. 2. Hold the Hub and rotate the Ribbon Tension Adjustment Knob to meet your media/ribbon widths based on the table below. Ensure... -
Page 52: Fine Printhead Adjustment
5.4 Fine Printhead Adjustment A fine printhead adjustment set screw is located on top of the printhead carrier assembly that can be used for adjusting print quality. This adjustment is set at the factory and should not need further adjusting; however, with different types and thickness of media some adjustment may be necessary. -
Page 53: Printhead Replacement
An access hole in the assembly is provided for access. Note: Always follow proper ESD (Electro Static Discharge) procedures when replacing the printhead. 1. Turn off the printer. 2. Loosen the Printhead Screw until it is free from the printhead. -
Page 54: Darkness Adjustment
Print Speed through your software or DPL commands first. 5.7 Resetting to the Factory Defaults With the printer off, press and hold the F1, F2, and F3 buttons while turning the printer on. Continue to hold the buttons down until the PAUSED light turns off. -
Page 55: Downloading Firmware And Fonts
The printer stores its Boot Loader, Operating Program, and Font in Flash memory on the main PCB. This configuration allows updates and/or new features to the printer. 1. Identify the desired firmware revision from the Datamax FTP site at ftp://ftp.datamaxcorp.com your computer’s hard drive or a floppy disk. -
Page 56: Introduction
Contact a qualified service technician for problems that persist or are not covered in this section. Unacceptable print quality The Printer does not print or prints several labels at once The ribbon does not advance Skips every other label... -
Page 57: The Printer Does Not Print Or Prints Several Labels At Once
Faulty Printhead, replace, (see Chapter 5) or call for service. The Printer does not print or prints several labels at once: The labels are incorrectly loaded, see the loading instructions on the inside cover of the printer, or Chapter 3. -
Page 58: Prints Light On The Right Side Of The Label
The printhead is not locked down. Printer fails to turn on A fuse may be blown, call for service. Faulty AC cord, replace A bad power switch may exist on the printer, call for service. A faulty AC wall outlet. E-4203/E-4204/E-4304... -
Page 59: Label Advances 1-2 Inches Before A Fault Indication
Label advances 1-2 inches before a fault indication The ribbon is installed incorrectly. Make sure that the dull side (side with ink) is facing the paper. A bad ribbon/paper combination is resulting in an insufficient amount of friction between paper and ribbon. Ensure that the correct type of ribbon is being used. -
Page 60: Specifications
7.0 Printer Specifications Mechanical Width Depth Height Weight Operating Temperature AC INPUT POWER Printer Specifications Print Type Print Speed Resolution Tear Bar DRAM Memory E-4203/E-4204/E-4304 8.5” (21.6 cm) 9.5” (24.1 cm) 6.25” (15.9 cm 4 lbs. (1.8 kg) 40 F to 95 F (4 C to 35 C) 110V Standard (Non Auto-Ranging) (50-2024-01);... - Page 61 FLASH Memory E-4203/E-4204/E-4304...
- Page 62 Media/Ribbon Media Types Max. Media Width Min. Media Width Max. Print Width Print Length Range Media Thickness Range Supply Roll Capacity Ribbon Width Range Optional Ribbon Communications Interface Baud Speed Handshaking Parity Stop Bits Data Bits Fonts 9 Bit Map fonts Rotated 0, 90, 180, 270 degrees Imbedded Bar Codes Code 39, Interleaved 2 of 5,Code 128 A, B &...
-
Page 63: Approved Media
Approved Media To achieve optimum print quality and maximum printhead life, Datamax recommends the use of DATAMAX brand media and ribbons. These supplies are specially formulated for use in our printers; use of non-Datamax supplies may affect the print quality, performance, and life of the printer or its components. - Page 64 E-4203/E-4204/E-4304...
-
Page 65: Ascii Control Code Chart
ASCII Control Code Chart Char Ctrl @ Ctrl A Ctrl B Ctrl C Ctrl D Ctrl E Ctrl F Ctrl G Ctrl H Ctrl I Ctrl J Ctrl K Ctrl L Ctrl M Ctrl N Ctrl O Ctrl P Ctrl Q Ctrl R Ctrl S Ctrl T... - Page 66 Ø » £ Ø ¢ ¥ ƒ þNotes: For the hardware handshake XON/XOFF commands: XOFF The Euro 255 (FF) as a Datamax standard for resident bit-mapped fonts 0,1,2,3,4,5,6, and 9 (CG Triumvirate). Char ã Ã Ò Ê Ë È Í...
-
Page 67: Embedded Fonts And Barcodes
Embedded Fonts and Barcodes All character fonts and barcodes available with the printer are described in this section. Each font and barcode has a name associated with it for use in programming. Human-readable fonts have numeric names while barcode fonts have alpha names. - Page 68 The table below lists the font sizes. The numbers indicate the number of dots. FONT Font 0 Font 1 Font 2 Font 3 Font 4 Font 5 Font 6 Font 7 Font 8 Font 0 96-character alphanumeric, upper and lower case.
- Page 69 Font 4 62-character alphanumeric, uppercase. Font 6 62-character alphanumeric, uppercase. E-4203/E-4204/E-4304 Font 5 62-character alphanumeric, uppercase.
- Page 70 Font 7 OCR-A, size I. Font 8 OCR-B, size III. Font 9 Internal Triumvirate font. Point sizes are selected by the number in the barcode height. Larger point sizes can be obtained by increasing the height and width multipliers, 48pt and 72pt fonts are generated by doubling the 24pt and 36pt fonts respectively (see the Programmer's Manual for more information).
- Page 71 Barcodes Bar Code fonts have alpha names (left column in the table below). Uppercase alpha names will print barcodes with human-readable interpretations. Lowercase alpha names will print barcodes only. The table is followed by visual samples. Bar Code Type A / a Code 3 of 9 B / b UPC-A...
- Page 72 Bar Code Type UPS MaxiCode with Byte Count PDF417 PDF417 with Byte Count DataMatrix DataMatrix with Byte Count QR Code – Auto format QR Code – Manual format Aztec Aztec with Count TCIF Barcode (TLC39) MicroPDF417 MicroPDF417 Byte Count Length Check- Specified Varies...
- Page 73 Barcode A Code 3 of 9 Barcode C UPC-E Barcode E Code 128 Barcode G EAN-8 E-4203/E-4204/E-4304 Barcode B UPC-A Barcode D Interleaved 2 of 5 Barcode F EAN-13 Barcode H Health Industry Barcode (HIBC)
- Page 74 Barcode I Codabar Barcode K Plessey Barcode M 2 Digit UPC addendum Barcode O Code 93 Barcode J Interleaved 2 of 5 w/module 10 checksum Barcode L Interleaved 2 of 5 w/module 10 checksum and shipping bearer bars Barcode N 5 Digit UPC addendum Barcode p Postnet E-4203/E-4204/E-4304...
- Page 75 Barcode Q UCC/EAN Code 128 Barcode S UCC/EAN Code 128 Random Weight E-4203/E-4204/E-4304 Barcode R UCC/EAN Code 128 KMART NON EDI...
- Page 76 Barcode T Telepen Barcode u UPS MaxiCode Barcode z PDF 417 Barcode v FIM Bar Code W1c: DataMatrix Bar Code W1d: QR Code Bar Code W1z: MicroPDF417 Bar Code W1f: Aztec Bar Code W1T: TCIF Linked Barcode 3 of 9 (TLC39) E-4203/E-4204/E-4304 B-10...
-
Page 77: Limited Warranty Statement
Datamax Barcode Products Limited Warranty Statement E-Class 4203/4204/4304 Printer Printer Datamax warrants to Purchaser that under normal use and service, the E-Class 4203/4204/4304 Printer, (with the exception of the thermal printhead) purchased hereunder shall be free from defects in material and workmanship for a period of (365) days from the date of shipment by Datamax. -
Page 78: Thermal Printhead
E-Class 4203/4204/4304 thermal printhead. This one year (365 days) warranty is valid only if a Datamax - approved thermal label media is used, as defined in the then current Datamax list of approved thermal/thermal transfer media, a copy of which is available from Datamax. -
Page 79: Limitation Of Liability
Datamax’s products. Limitation of Liability In no event shall Datamax be liable to the purchaser for any indirect, special or consequential damages or lost profits arising out of or relating to Datamax’s products, or the performance or a breach thereof, even if Datamax has been advised of the possibility thereof. - Page 80 E-4203/E-4204/E-4304...
Need help?
Do you have a question about the E-Class E-4304 and is the answer not in the manual?
Questions and answers