Table of Contents
Advertisement
Advertisement
Table of Contents
Troubleshooting

Related Manuals for Datamax Allegro 2


Summary of Contents for Datamax Allegro 2
- Page 1 Allegro 2 Operator’s Manual...
- Page 2 Allegro2, SEAQ, and PC Batch are trademarks of Datamax Barcode Products Corporation. As an Energy Star Partner, Datamax Corporation has determined that this product meets the Energy Star guidelines for energy efficiency. Firmware (Software) Agreement: The enclosed Firmware (Software) resident in the EPROM’s is owned by Licensor or its suppliers and is licensed for used...
- Page 3 Agency Compliance and Approvals: UL1950 Information Technology Equipment CSA: C22.2 No. 950-M93 TUV: EN60950, IEC950 VDE: Class B Vfg. 243/1991 1. Nur für Gebrauch innerhalb eines Gebäudes geeignet. 2. Bei Gefahr, Kabel aus der Steckdose herausziehen 3. Falls kein Kabel mitgeliefert wurde, bitte Folgendes bei der Anschaffung eines Kabels beachten: Für 230 Volt (Europa): Benützen Sie ein Kabel, das mit "HAR"...
-
Page 5: Important Safety Instructions
To protect your Printer from overheating, make sure all openings on the Printer are not blocked. Do not place the Printer on or near a heat source, (i.e., a radiator or heat register). Do not use your Printer near water, or spill liquid of any kind into it. -
Page 7: Table Of Contents
2.5 Programming Commands ...23 2.6 Programming Examples...28 Creating Labels Using Internal Batch Software 3.0 Introduction ...31 3.1 The Printer used with a LINK CRT...32 3.2 Formatting and Printing Labels...35 3.3 Create/Modify Label Screen ...40 3.4 Print Label Screen ...53 3.5 System Maintenance Screen ...55 3.6 Quick Reference Listing ...57... - Page 8 Troubleshooting 4.0 Introduction ...59 4.1 Controlling print quality ...60 4.2 Aligning the Printhead ...61 4.2.1 Printhead Alignment Procedure ...63 4.2.2 Adjusting Printhead Pressure/Support 65 4.3 Troubleshooting ...66 Maintenance 5.0 Introduction ...69 5.1 Cleaning Schedule...70 5.2 Cleaning the Printhead...70 Appendix A ASCII Control Code Chart...A-1 Appendix B Switch Settings and Cable Interfacing...B-1...
-
Page 9: Getting Started
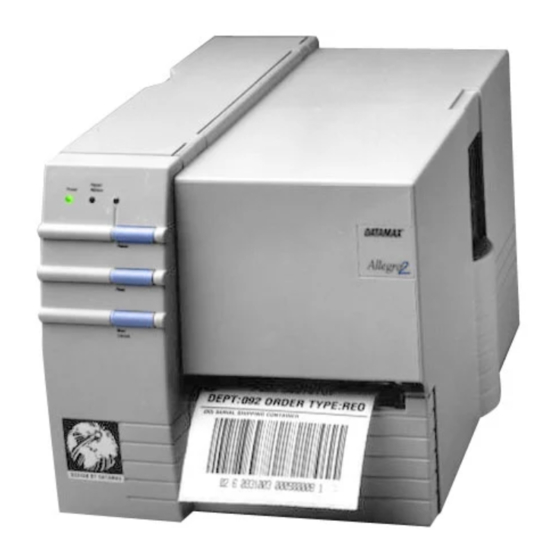
Inspect the shipping container(s), if damage is evident, contact the carrier to specify the nature and extent of the damage. Remove the contents from the box. The Printer is enclosed in a plastic bag to reduce the chance of moisture damage during shipment, remove the plastic bag before use. - Page 10 The following illustrations show the major components of your Printer. Figure 1-2 is a detailed view of the print mechanism from the side. Figure 1-3 is a back view of the Printer. Figure 1-5 is a view of Printer’s switches and indicators.
- Page 11 Getting Started Figure 1-3 Rear View Allegro2...
-
Page 12: Tear-Off Assembly Installation
Tear- off Assembly Installation To install the Tear-off Assembly complete the following steps: 1. Open the Printer's Side Cover. 2. Disengage the Printhead by rotating the Head-Lift Lever counterclockwise to the ‘up’ position. 3. Fit the Tear Bar Assembly to the slots below the drive roller and push it down until it snaps into place. -
Page 13: Using The Printer Control Panel
POT are listed in this section. Figure 1-5 Buttons, Lights and Switches Power Light: Allegro2 Getting Started The power light is turned on after the power switch on the rear of the Printer is turned on. - Page 14 A fault occurs with the cutter or rewind option. a run of labels in the process of being printed and continue on to the next run in the Printer’s buffer. Pressing this button causes the paper to automatically advance to the first print position of the next label.
- Page 15 Paper/Ribbon Light: Ribbon Switch: Darkness POT: Note: Do not use this control for adjusting individual label printing jobs, rather, use the software control with the ALT-P Print Parameters Screen in the Internal Batch Mode (see Section 4), or the proper command in RS-232 mode to vary darkness of printing on a per-label-format basis.
-
Page 16: Media Installation
Labels The Printer uses labels up to 4.65" (118mm) wide. The maximum diameter of a roll of labels used in the Printer is 8" (203mm). If a label is narrower than 3.5" (89mm) then the Printhead must be adjusted off the roller. Please refer to Section 4.2.2, “Adjusting Printhead Pressure and Support,”... -
Page 17: Label Loading Instructions
Feed Button, and does not seem to be stopping on a label edge, the Ribbon on/off Switch, (shown in Figure 1-5) was probably turned on without Thermal-Transfer Ribbon being installed. Slide this switch toward the front of the Printer for Direct- Thermal Printing. Allegro2... -
Page 18: Ribbon Loading Instructions
1.4.2 Ribbon Loading Instructions Load ribbon as shown below in Figure 1-7. The ribbon can be wound directly on to the hub and held with a clasp, or a used ribbon core can be placed on the hub. To load the ribbon complete the following steps: 1. -
Page 19: Using The Printer Options
The Label Printer has one module slot located on the left side for use with Memory Module Cartridges. -
Page 20: Options
Each module contains 256K of data storage for fonts, graphic images or label formats. An additional feature of the 512K RAM Module is that the Printer will use a part of its memory to extend the Printer’s bit-mapped label length from 8.25" (210mm) to 20.25" (514mm). -
Page 21: Present Sensor
Mechanism Kit, or the option can be purchased and installed at a later date. The Peel and Present Option automatically separates the label from the backing, the label then sets on the Printer until it is removed while the backing material is sent to the Internal Rewind. - Page 22 Getting Started Allegro2...
-
Page 23: Setting Up Your Printer
2.1 Power Up Self-Test Once labels are installed in the Printer as described in Section 1.4, a Self-Test should be performed. The Printer will power up in the Self-Test Mode when the Feed Button is pressed as the Printer is being turned on. - Page 24 Printer will stop feeding labels. If this occurs, refer to Section 1.4 and reload the Media, see Figure 1-6 to find the location of the Media Sensor. If a label edge is detected, the Printer will begin to print the Self-Test pattern. An example of a test pattern is shown in Figure 2-1.
-
Page 25: Interfacing To The Printer
(DTE). Pin 2 is transmit, pin 3 is receive and pin 7 is ground. The Printer supports both Xon/Xoff and CTS/DTR handshaking. Whenever the Printer is interfaced in a mode that does not use the CTS/DTR pins, a jumper should be placed on the PC side of the cable between pins 4 and 5 (CTS/RTS) to bypass the operation of those control lines. -
Page 26: Sample Installations
Printer to the CRT with the cable number 556000 and turn on switch 7 at the rear of the Printer. Next, plug the module into the slot on the side of the Printer to store label formats on the module. For a detailed explanation of the operation of this configuration, refer to Section 3, “Creating Labels Using Internal... - Page 27 PC. Through an entry screen, the operator selects the type and quantity of labels to be printed. The PC sends the data serially to the Printer and the operator receives the labels requested.
-
Page 28: Switch Settings
2.4 Switch Settings There are eight switches located on the back of the Printer as shown in Figure 2-2. The function of the switches are to control communications and are explained on the following pages. - Page 29 Setting the Baud Rate For all modes of operation, you must set the baud rate of the interface. On the back of the Printer, you will find a single eight- position Dip Switch, positions 1, 2, and 3 control the setting of the baud rate.
- Page 30 STX g Command. Switch SW-8: Controls the optional Cutter. SW-5 SW-6 SW-7 SW-8 Table 2-4 Switch Settings and Functions Setting Up Your Printer Prodigy Compatibility Prodigy Allegro Present Sensor Option Present Sensor Enabled Present Sensor Disabled...
-
Page 31: Programming Commands
In order to be ready for a command sequence, the Printer must first receive a special character called an “attention getter” that informs the Printer that it is about to receive a command and the type of command it will be. Immediate Commands, System-Level Commands, and Font-Loading Commands each have their own attention getter. - Page 32 The System-Level Commands are used to create formats, load and store graphic information, and control the Printer. Table 2-7 provides a brief description and format of each System-Level Command Character. Char Description Set time and date Enable feedback characters Get Printer time and date...
- Page 33 Print internal information and dot pattern Table 2-7 System-Level Commands (Continued) Allegro2 Setting Up Your Printer All references set to metric until reset Onnnn = 4 digits, in/100 or mm/10 qx = Module I.D. (Uppercase) Used for "black-strip" media sensing, (e.g.
- Page 34 A STX L Command switches the Printer from the System Level to the Label-Formatting Mode. All command characters after STX L are interpreted as Label Formatting Commands until the Label- Formatting Mode is terminated with the Command Character E. All Label -Formatting Commands are terminated with hex value 0D.
- Page 35 Set count by amount Table 2-8 Label-Formatting Commands (Continued) There are two special commands used by the Printer, the STX S, (Recall Global Data), and the STX T (print date and time) Commands. Unlike the other Label-Formatting Commands, which follow the STX L Command, these special commands are entered directly into the data field.
-
Page 36: Programming Examples
The commands used for bit-mapped font loading are usually generated by font-creation software. However, the assigned font ID number command must be sent to the Printer before the font file. Font-Loading Commands are listed in Table 2-10. *c###D )s#W *c#E... - Page 37 Refer to Figures 2-4 and 2-5 for a brief explanation of the data fields. <STX>L<CR> D11<CR> 1A93040001501000123456789<CR> 121100000000100Barcode A<CR> <STX>L Syntax L on line 1 is used to enter the label formatting mode. Allegro2 Setting Up Your Printer Figure 2-4 Example line 3 Figure 2-5 Example line 4...
- Page 38 Setting Up Your Printer Allegro2...
-
Page 39: Creating Labels Using Internal Batch Software
Creating Labels Using Internal Batch Software Introduction The Printer can be used in any one of three different operating modes: RS-232 to a host computer; a PC with a compatible software package, or; LINK MC2 CRT with Internal Batch Software, a stand- alone label creation package developed especially for the Printer. -
Page 40: The Printer Used With A Link Crt
LINK parallel port. 2. Check LINK CRT Settings The LINK CRT is shipped ready for use with the Printer and the settings are pre-set and should be changed only when necessary. If the terminal's settings have been changed since shipment from the factory, follow the terminal's set-up procedure to reset all default settings,(see Table 3-1). - Page 41 Table 3-1 LINK CRT Default Settings 3. Select Stand-Alone Labeling Software Mode The Printer is shipped in the RS-232 mode for use with PCs. To use the CRT, turn Dip Switch S1-7 to the ‘on’ position and insert the 256K Flash Module into the Printer before turning the power on.
- Page 42 4. Verify Setup, Power Up, and Load Media Check that all connections are made and that Dip Switch S1 is correctly configured. Turn on the CRT and Printer Power Switches. Press the F1 key on the CRT several times. The Create/Modify Label and Print Label Screens should toggle back and forth.
-
Page 43: Formatting And Printing Labels
Barcodes without human-readable interpretation lines are lowercase a through r, all fonts and barcodes can be magnified in height and width. Menu Screens The following three menu screens are available in the Printer's internal labeling software program: 1. Create/Modify Label 2. Print Label 3. - Page 44 Creating Labels Using Internal Batch Software F2 (LIST): Displays a library listing of every label format and/or graphic image loaded in the current memory module. F2 can be used only when the prompt is in the Label Name position of the Create/Modify or Print Screens. F3 (COPY): Used in the Create/Modify Label Screen only.
- Page 45 Creating Labels Using Internal Batch Software F6 and ALT-P: While in the far left position of the Create/Modify Label Screen or the Sample: position of the Print Label Screen, press ALT-P to bring up the Print Parameters Windows. It will look like this: HEAT FACTOR: PRINT SPEED: SLEW SPEED:...
- Page 46 Creating Labels Using Internal Batch Software Description Heat Factor Print Speed Slew Speed Dot Pattern Wide Dot Pattern High Label Advance (Back Feed) Form Edge Offset Row Offset Column Offset Update Count on Max. Label Width Max. Label Length Active Buffers Cut By Amount Edge/Reflective If ALT-P parameters are changed while in the Create/Modify Label...
-
Page 47: Other Important Keys
Creating Labels Using Internal Batch Software F9 and ALT-F: Feeds one label at a time from the Print Label Screen. It operates the same way as the front panel Feed Switch. This function is useful when loading new media to register the photoelectric sensor. Other Important Keys Several other keys are used in the editing and printing steps and are described below. -
Page 48: Create/Modify Label Screen
1. Power up the CRT terminal with the switch on the front of the unit. Turn the Printer on with the Power Switch located in the back of the Printer. The CRT screen will look like this: MODULE NAME: ________________... - Page 49 Creating Labels Using Internal Batch Software 2. The software’s two operating screens are Create/Modify Label and Print Label. All data is entered into fields. A field is a set of information such as a product name, address, barcode, number, etc., that is specified on individual lines on the CRT screen.
- Page 50 MODULE NAME: ________________ LABEL NAME: ________________ TYPE DATA/PROMPT ---- ----- -------------------------- NYLON INSULATED TOGGLE SWITCH B370040003003 DA100-PB-B L400080 DA100 PB B DA100 PB B SWITCH ACTION SPST on-None-OFF TERMINALS SOLDER/SPADE RATING @ 10 AMPS, 125VAC B200160003003 L194003 L194003 ALLEGRO2 LABEL PRINTER Allegro2...
- Page 51 Creating Labels Using Internal Batch Software 4. The Printer can print fonts, barcodes, and graphics at 0, 90, 180, or 270 degree rotations. Valid responses to the ROT prompt include: 5. In the FNT position, enter the type of font you want to print.
- Page 52 Creating Labels Using Internal Batch Software Y is another special font choice that is not actually a font. The Y font selects a graphic image that has already been loaded into the memory module. If this font is selected, enter the name of the graphic image in the Data/Prompt position.
- Page 53 Creating Labels Using Internal Batch Software 7. Enter the desired XH dimension. The default value for fonts is 1. The default value for element barcodes such as UPC or code 128 is 1. For ratio-based barcodes, the default value is 1. If you wish to magnify the height of a font, valid responses are 1 through 9 and A through O.
- Page 54 Creating Labels Using Internal Batch Software 9. The 4-digit Row Field tells the Printer "how far up" on the label to print the data. The default value is 00.00 and the maximum number cannot exceed the maximum label length set in the Print Parameters Window.
- Page 55 Creating Labels Using Internal Batch Software 11. The Type Position tells the Printer how the Data/Prompt area is to be used. There are six options. The most common type is ‘D’ for data, this tells the Printer that fixed data will be entered in this field. In other words,...
- Page 56 Information entered in the Data/Prompt Field in the next step will tell the Printer the increment value being use. When viewing the Print Label Screen, it will ask ‘Initial Increment?’ or ‘Initial Decrement?’ The number entered at this time will increment or decrement each time a label is printed.
- Page 57 Creating Labels Using Internal Batch Software Some of the data will need to be re-entered. Use the DEL Key, home key or arrow keys to change any information. If the Printer does not allow you to enter as many characters as you need, try backing up with the arrow keys and change the font size.
- Page 58 Creating Labels Using Internal Batch Software For special font Y, enter the name of the graphic image you want to call from the memory module for printing at this field position. You can enter up to 16 uppercase characters. Enter the desired prompt information. The field allows up to 44 characters to be entered.
- Page 59 Time and date string data is selected by using characters A through Z, and a through f as shown in Table 3-4 in order to retrieve data from the Printer's internal clock. Table 3-4 Time and Date Information Format yyyy Allegro2 Day number;...
- Page 60 Creating Labels Using Internal Batch Software In the following example the proper matching characters are sent to the Printer that request the day of week and date to be printed. This command causes the Printer to enter the Date Formatting Mode.
-
Page 61: Print Label Screen
Enter the Label Name you want to print and press the return key. The cursor will move to the Quantity Position. If the Printer does not find the Label Name you entered, you will receive an error message and will need to re-enter the Label Name. - Page 62 After the print job request is sent to the Printer, the cursor will move back to the Label Name Position. Additional print jobs now can be sent to the Printer or you can return to the Create/Modify Label Screen. Allegro2...
-
Page 63: System Maintenance Screen
2) COPY MODULE. 3) METRIC ? NO. 4) PRINT TEST LABEL. 5) SYSTEM TEST LABEL. 6) EDIT MODULE NAME. 7) RESET PRINTER. 8) EXIT TO RS-232 SYSTEM. 9) PACK MODULE DATA. ENTER NUMBER: ________ Figure 3-6 System Maintenance Menu To exit the screen, press the Esc key. All System Maintenance... - Page 64 If switch 7 is on than the Internal Batch will take over. This is the same as turning Switch 7 ‘off’ and resetting the Printer. You can use the <STX g> command to enter the Internal Batch without using switch 7 in the rear of the Printer.
-
Page 65: Quick Reference Listing
Creating Labels Using Internal Batch Software Quick Reference Listing The following pages list the valid commands for the Printer's Internal Labeling Software Program. Create/Modify Label Commands Command 1,2,3 and 4 Fonts 0 through 8, Smooth Font 9 Human Readable Barcodes Uppercase A through S, Except P (Postnet) -
Page 66: Special Keys
Creating Labels Using Internal Batch Software Print Parameters (ALT-P) Description Heat Factor Print Speed Slew Speed Dot Pattern Wide Dot Pattern High Form Edge Offset Form Advance (Back Feed) Row Offset Column Offset Update Count on Max. Label Width Max. Label Length Cut By Amount Sensor Type Special Keys... -
Page 67: Troubleshooting
Troubleshooting Introduction This chapter provides general operator service to help maintain print quality when using media other than the recommended 4 mil stock. It also provides basic ideas to help identify common installation and communication interface problems. If there is any doubt about your ability to perform the procedures outlined in this chapter, contact a qualified service technician or your service representative for instruction before making any adjustments. -
Page 68: Controlling Print Quality
The Printer has two ways to compensate for this; first set the burn time to a higher value by using the H-Label Formatting Command. This causes more heat to be transferred into the media, and consequently generates a darker image. -
Page 69: Aligning The Printhead
This causes heat to transfer to the paper more efficiently. Tag Stock or Stiff Media: The Printer is adjusted at the factory using 5 mil (.005") thick label stock. If heavier tag stock is used, the Printhead may need to be adjusted forward. - Page 70 The alignment procedure and the sequence that should be followed is described in section 4.2.1. This procedure should cure any Printer that may be troubled by poor print quality. All adjustments must be performed with label stock that is at least 4" (102mm) wide. If the final media used is different, then make the specific adjustments needed after the standard adjustments are completed.
-
Page 71: Printhead Alignment Procedure
Turn the Power Switch to the ‘on’ position and use full width paper and ribbon for this adjustment. Install a Thermal-Transfer Ribbon/ Media in the Printer and secure the ribbon to the Ribbon Take-up Hub in a counter-clockwise direction (see Section 1, Figure 1-7). - Page 72 Feed three or four labels and observe the ribbon as it travels from the Ribbon Supply Hub. f. Feed the ribbon and paper out the front of the Printer together and check the ribbon for drifting. If the ribbon overlaps one edge of the paper stock, the ribbon and paper are not following the same path.
- Page 73 Troubleshooting Allegro2...
-
Page 74: Adjusting Printhead Pressure/Support
4.2.2 Adjusting Printhead Pressure and Support The Printer's Printhead support plate requires adjustment if media widths of 3.5" (89mm) or less are used. Figure 4-2 shows the Printhead Mount Assembly, Ribbon Shield, Head Support Plate, and Adjustment Screw in an exploded view. - Page 75 Incorrect ribbon/paper combination being used. Be sure to use the correct ribbon type. The Printer Does Not Print, or Prints Several Labels at once: a. Labels are incorrectly loaded. See the loading instructions on the inside cover of the Printer, or Section 1.4.
-
Page 76: Ribbon Does Not Advance
Cancel and Pause Buttons, or turn the Printer ‘off’ and then ‘on’ again. b. Printer is set for 8-data bits but the transmitting device is set up for seven data bits (or vice versa). Check the current data bits setting from the Operators Panel. - Page 77 Printhead is not properly aligned, call for service. Printer fails to turn on a. Blown fuse, (see Figure 1-3 for location), call for service. b. Faulty AC cord. c. Bad Printer Power Switch, call for service. d. Faulty AC wall outlet. Allegro2...
-
Page 78: Maintenance
Printer. Interior and Exterior Interior During normal operation dust particles from label stock can build up inside the Printer. To prevent build-up, use a soft bristle brush or vacuum cleaner as needed. Exterior The exterior surface can be cleaned using a general purpose cleaner and a damp soft cloth or sponge. -
Page 79: Cleaning Schedule
Cleaning Schedule The following table provides a recommended cleaning schedule for the various parts of your Printer. Area Printhead Turn off the Printer before cleaning the Printhead. Use solvent* on a cotton swab to clean the Printhead from end to end. -
Page 80: Cleaning The Printhead
Cleaning the Printhead 1. Turn the power ‘off’ and unplug the Printer. Raise the cover and turn the Head-Lift Lever to the ‘up’ position. 3. Dampen a cotton swab with isopropyl alcohol and insert into the Printhead as shown below. Gently rub the underside of the Printhead with the moistened swab. - Page 81 Maintenance Allegro2...
-
Page 83: Ascii Control Code Chart
Appendix A ASCII Control Code Chart Char Ctrl @ Ctrl A Ctrl B Ctrl C Ctrl D Ctrl E Ctrl F Ctrl G Ctrl H Ctrl I Ctrl J Ctrl K Ctrl L Ctrl M Ctrl N Ctrl O Ctrl P Ctrl Q Ctrl R Ctrl S... - Page 84 Maintenance Allegro2...
- Page 85 Char Char Ç á ü í é ó â ú ä ñ à Ñ å ç ° ê ¿ è ® è ï î ì ¡ Ä – Å É Æ Æ ô ö ´ ò Á û Â ù À...
-
Page 87: Switch Settings And Cable Interfacing
Appendix B Switch Settings and Cable Interfacing Baud 9600 SW-1 SW-2 SW-3 SW-4 SW-5 SW-6 SW-7 SW-8 Allegro2 4800 2400 1200 Table B-1 Baud Rate Data Bits Parity None None Table B-2 Word Length Prodigy Compatible Prodigy Allegro Present Sensor Enabled Disabled Internal Batch Software... - Page 88 Printer Cabling and Interfacing: When the Printer receives data from any host system, it will not properly function with an incorrectly wired cable. Proper wiring diagrams can be found in Appendix E. Table B-1 contains a list of the signals that if correctly wired to the host system will cause the Printer to operate properly.
-
Page 89: Available Fonts And Barcodes
Appendix C Available Fonts and Barcodes All character fonts and barcodes available with the Printer are described in this section. Each font and barcode has a name associated with it for use in programming. Human-readable fonts have numeric names while barcode fonts have alpha names. - Page 90 Table C-2 lists the font sizes. The numbers indicate the number of dots. FONT HEIGHT Font 0 Font 1 Font 2 Font 3 Font 4 Font 5 Font 6 Font 7 Font 8 Font 0 96-character alphanumeric, upper and lower case.
- Page 91 Font 4 62-character alphanumeric, uppercase. Font 6 62-character alphanumeric, uppercase. Allegro2 Available Fonts and Barcodes Font 5 62-character alphanumeric, uppercase.
- Page 92 Available Fonts and Barcodes Font 7 OCR-A, size I. Font 8 OCR-B, size III. Font 9 Internal Triumvirate font. Point sizes are selected by the number in the barcode height. Larger point sizes can be obtained by increasing the height and width multipliers (see the Programmer's Manual for more information).
- Page 93 Barcodes Font Length Cksum Varies Varies Varies M-103 Varies M-43 Varies Varies M-10 Up to M-10 M-10 Varies Varies Table C-3 Barcode Characteristics Uppercase Barcode identifiers (I.D's) have corresponding lowercase I.D's that when selected suppress printing of associated human- readable text. Allegro2 Available Fonts and Barcodes Valid ASCII Characters...
- Page 94 Barcode A Code 3 of 9 Barcode C UPC-E Barcode E Code 128 Barcode G EAN-8 Available Fonts and Barcodes Barcode B UPC-A Barcode D Interleaved 2 of 5 Barcode F EAN-13 Barcode H Health Industry Barcode (HBIC) Allegro2...
- Page 95 Barcode I Codabar Barcode K Plessey Barcode M 2 Digit UPC addendum Barcode O Code 93 Allegro2 Available Fonts and Barcodes Barcode J Interleaved 2 of 5 w/module 10 checksum Barcode L Interleaved 2 of 5 w/module 10 checksum and shipping bearer bars Barcode N 5 Digit UPC addendum Barcode p Postnet...
- Page 96 Barcode Q UCC/EAN Code 128 Available Fonts and Barcodes Barcode R UCC/EAN Code 128 KMART NON EDI Allegro2...
-
Page 97: Appendix D Error Codes
Lowercase "v" There is an input buffer overflow situation. Uppercase "R" This code is sent every time the Printer is turned on. It signals that there was a hardware reset. Uppercase "T" This code signals that there was a software reset. A software reset results from sending the <SOH># command sequence to the Printer... - Page 98 Allegro2...
-
Page 99: Appendix E Cable Listings
Table E-1 Printer Interface Cables Table E-2 Printer Pin Connections Allegro2 Description Printer to CRT Terminal (DB25P) RS-232 Printer to PC 9 Pin (DB9S) RS-232 Printer to PC 25 Pin (DB25S) RS-232 Printer to PC Parallel Port (DB25P) Description CHASSIS... - Page 100 Cable Listings STRAIGHT CABLE ( MXM) Figure E-1 Null Modem Cable (MXM) Note: Cable is used for typical connection to other DCE equipment with Xon/Xoff flow control. STRAIGHT CABLE (MM) Figure E-2 Straight Cable (MM) Note: Cable is used for typical connection to other DCE equipment with Xon/Xoff flow control.
- Page 101 PC (DB25P) TO PRINTER Figure E-3 PC (DB25P) to Printer Note: Cable is used for connection to a PC compatible with DB25P communication ports. Flow control is either Xon/Xoff or CTS/DTR. Figure E-4 PC (DB9P) to Printer Note: Cable is used for connection to a PC compatible with DB9P communication ports.
- Page 102 Cable Listings Parallel to Serial Adapter (Part Number: 899516) If the Printer is being set up for parallel to serial communications a special Parallel to Serial Interface Adapter is needed, (Figure E-5). The Parallel to Serial Interface Adapter is designed specifically for use with your Label Printers.
-
Page 103: Appendix F Specifications
Appendix F Specifications Printing Type: Resolution: Print Speed: Barcode Modules: Maximum Print Width: Maximum Print Length: White Space Slew Rate: Maximum Fields Per Label: Minimum Dot Size: Optional Dot Sizes: Label Backfeed: Allegro2 Direct thermal or thermal transfer 203 dots per inch (8 dots/mm) 2.0 3.0"... - Page 104 Fonts Resident Fonts: Optional Fonts: Font Expansion, Rotation: Character Density: Barcodes Code 39, Interleaved 2 of 5, Code 128 (subsets A, B, and C), Codabar, LOGMARS, UPC-A, UPC-E, UPC 2& 5 digit addendum's, EAN-8, EAN-13, EAN 2 & 5 digit addendum's, UPC random weight, Code 93, MSI Plessey, Universal Shipping Container Symbology, UCC/EAN Code 128, Postnet Barcode Density:...
- Page 105 Media Width: Length: Thickness: Type: Supply Roll: Optional Front Rewind: Label Material: Thermal -Transfer Ribbons: Standard widths are 25mm, 38mm, 51mm, 64mm, Media Sensing: Note: The reflective sensor mark must be carbon based. The sensor is infrared and will reflect off of a plain black mark. Allegro2 Specifications 0.75"...
- Page 106 Label/Tag Media Specifications: Figure F-1 Media Specifications Label width Backing width Gap between labels Label length Backing thickness Label thickness Width of sensor opening Distance from edge of Media to edge of sensor opening Reflective sensor mark width Reflective sensor mark length Distance between reflective mark * Units of measure are in inches Table F-1 Media Dimensions...
-
Page 107: Communications Interfacing
Xon is transmitted and DTR goes high when 750 bytes are left in the buffer. Characters are transmitted with no parity from the Printer. 115, 220/240 VAC, 50/60 Hz 115 VAC: 1 amp time delay fuse; 230: 2 time delay fuses T 0.5 amp... - Page 108 Environmental Operating Temperature: Storage Temperature: Humidity: Ventilation: Dust: Electromagnetic Radiation: Physical Dimensions: Weight: Options Front Rewind: Cutter with Tray: Font Memory Cartridges: (pre-loaded from the manufacturer) Specifications 40°F to 90°F (4°C to 32°C) 32°F to 120°F (0°C to 49°C) 10% to 95% non-condensing Free air movement Non-conducting, non-corrosive Moderate RF fields can be tolerated...
- Page 109 256K Flash EEPROM Memory Module : 256K and 512K RAM Memory Modules: Parallel Adapter: PC-Batch Software: Allegro2 Specifications Used for permanent storage of custom fonts, graphics and formats. Used for temporary storage of fonts, formats and graphics; 512K Module also extends label length to 20.25"...
- Page 110 Specifications Allegro2...
-
Page 111: Appendix G Warranty Information
Datamax Barcode Products Limited Warranty Statement Printer Datamax warrants to Purchaser that under normal use and service, the Allegro2, (with the exception of the thermal Printhead) purchased hereunder shall be free from defects in material and workmanship for a period of (365) days from the date of shipment by Datamax. -
Page 112: Thermal Printhead
Datamax shall be subject to Datamax’s confirmation that such product meets Datamax warranty. In the event of a defect covered by its warranty, Datamax will return the repaired or replaced product to the Purchaser at Datamax’s cost. -
Page 113: Limitation Of Liability
Datamax’s products. Limitation of Liability In no event shall Datamax be liable to the purchaser for any indirect, special or consequential damages or lost profits arising out of or relating to Datamax’s products, or the performance or a breach thereof, even if Datamax has been advised of the possibility thereof.
Need help?
Do you have a question about the Allegro 2 and is the answer not in the manual?
Questions and answers