Table of Contents
Advertisement
Quick Links
Advertisement
Table of Contents

Related Manuals for Sagem MF 5890DN


Summary of Contents for Sagem MF 5890DN
- Page 1 5890dn User Manual...
- Page 2 ELCOME You have just acquired a new-generation communications terminal from SAGEM and we congratulate you on your choice. This multi-function terminal is capable of faxing, printing and scanning; it can also be used for communication on the Internet. Your terminal will meet all your professional requirements.
-
Page 3: O Peration
CANNER CONTROL PANEL key: photo printing. key: duplex (double-sided) scan/copy. key: selection of colour mode. key: reduce or enlarge. key: scan resolution. key: black and white copy. key: contrast setting. key: scan to e-mail (sending of Internet fax). Graphical colour screen. PC key: scan to PC / scan to FTP / scan to disk. - Page 4 RINTER CONTROL PANEL GO Key: Used to switch the printer between The console's LCD screen. Ready and Standby mode. Status of the indicators ATTENTION Indicator: CANCEL Key: Used to cancel a print job. On: A problem or error (e.g. a paper jam) has occurred. Key: Used to navigate in the sub-menus, to Blinking: The printer requires maintenance or is adjust certain settings and to display help messages...
- Page 5 Contents ONTENTS NSTALLATION Installing your terminal Installation requirements Unpacking the components Unpacking the additional paper tray (depending on option) Unpacking the scanner and the equipped interface Unpacking the printer Description of the multifunction terminal Installation of the terminal Connections 1-11 Installation of consumables 1-12 Loading paper...
-
Page 6: Table Of Contents
Sommaire Deactivating the Internet function 3-23 The SMS service 3-24 SMS Parameters 3-24 Sending an SMS 3-25 Erase an SMS 3-26 SMS Reception 3-26 SMS Server 3-27 IRECTORY Creating subscribers record Adding a record Creating subscribers lists Adding a list Adding or deleting a number from the list Consulting a record or a list... - Page 7 Contents Public Switched Telephone Network (PSTN) 5-13 Reception over the Internet 5-13 Copying 5-14 Local copy 5-14 DESCRIPTION OF ID CARD MODE 5-16 Specific copy settings 5-18 Using USB memory keys 5-21 Printing a photo from a USB memory key 5-22 Printing a document from a USB memory key 5-24...
-
Page 8: The Product
The manufacturer declares that the products are manufactured in accordance with ANNEX II of Directive R&TTE 1999/5/EC. The declaration of compliance can be consulted on the site www.sagem.com category "support", or can be requested at the following address: Sagem Communication - Customer relations department... -
Page 9: I Nstallation
NSTALLATION NSTALLING YOUR TERMINAL NSTALLATION REQUIREMENTS A proper location helps to ensure that your printer provides you with the long service life for which it is designed. Double-check to make sure that the location you select has the following characteristics: •... - Page 10 Installation • Make sure there is no chance of ammonia or other organic gasses being generated in the area. • The grounded power outlet (refer to the safety instructions in the Safety section) you plan to connect to for power should be nearby and not obstructed. •...
- Page 11 Installation • Make sure that the power to the printer is switched off before connecting or disconnecting an interface lead to the printer (use a shielded interface lead). • Never try to remove any secured panel or cover. The terminal contains high-voltage circuit which creates the danger of electrical shock when exposed.
- Page 12 Installation NPACKING THE COMPONENTS NPACKING THE ADDITIONAL PAPER TRAY DEPENDING ON OPTION Take the additional tray out of its box. Remove the protective side sections in the box. Remove the plastic bag from the additional tray. To install the additional tray, please see the paragraph Installation of the terminal, on page 1-8.
- Page 13 Installation NPACKING THE SCANNER AND THE EQUIPPED INTERFACE Open the shipping box and take out the parts : - the installation guide and the CD-Roms, - the scanner, - the document feeder, - the leads and cables: - telephone lead, mains lead, mains extension lead, Centronics cable.
- Page 14 Installation NPACKING THE PRINTER Open the shipping box and take out the parts: - the black toner cartridge, - the toner recovery box, - protective shell for paper, - the printer. Take the printer out of its protective packing. Remove the adhesive strips.
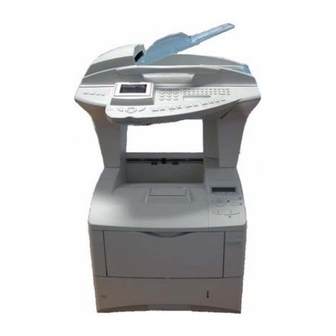
- Page 15 Installation ESCRIPTION OF THE MULTIFUNCTION TERMINAL Document feed tray Adjustable paper guide for scanning Original document Scroll scanner (ADF) output stacker Scanner control panel Access handle to flatbed scanner Memory key connector Printer output stacker Chip card reader Printer control panel Multi-purpose tray for special media Printer paper feed tray...
- Page 16 Installation NSTALLATION OF THE TERMINAL Installation of the equipped interface Unclip the cable covers located on the top of the printer from the rear and remove without forcing. Put the cable covers to one side for later. Place the paper protection shell at the rear of the printer.
- Page 17 Installation Position the scanner on the interface and check that it is properly clipped onto it. Put the document feeder in place by pushing its two locking pins into the corresponding openings on the scanner.
- Page 18 Installation Terminal connections Looking at the back of the terminal, you will find the available connections as shown below. Centronics Phone line connector LAN connector Mains socket Mains socket for parallel port L2 (according to extension lead model) On/Off switch Phone line Slave USB connector L1...
- Page 19 Installation ONNECTIONS The leads and cables are connected separately to the scanner and the printer. We advise you start with connecting the leads and cables that arrive on the scanner unit. Connecting the leads and cables to the scanner Make sure that the mains on/off switches of scanner and printer are set to "O". 1 - Connect the Centronics cable to the scanner, lock it with the two metal clips.
- Page 20 Installation Passing cables in the cable covers As soon as the cables have been connected, they must be placed in the cable covers in accordance with the following rule: when viewed from the rear of the terminal, the mains leads and mains extension lead must pass on the right-hand side and the other cables on the left-hand side.
- Page 21 Installation Shake the cartridge from side to side at least 10 times in order to distribute the toner evenly inside the cartridge, as shown in the illustration. Set the new toner container in the printer and push down on the top of the toner container to install it firmly in place as shown in the figure below.
- Page 22 Installation Open the left hand side cover. Open the cap of the new waste toner box. Place the waste toner box in the receptacle inside the printer, as shown in the illustration, then push it downwards until it clicks into position. Make sure that the waste toner box is correctly inserted and close the left cover.
-
Page 23: Loading Paper Into The Cassette
Installation OADING PAPER The following section describes the procedure for loading paper into the cassette and the multipurpose tray. OADING PAPER INTO THE CASSETTE Removing the cassette from the printer. The standard paper formats are shown inside the cassette. 1-15... - Page 24 Installation Turn the paper format thumbwheel until the format you intend to use is shown in the corresponding window. Paper format thumbwheel Paper format window Note When the paper format thumbwheel shows OTHER, the format must be configured from the printer control panel.
- Page 25 Installation If you intend using a paper format longer than A4, open the paper trays by pushing the release levers one by one and setting them according to the format of the paper selected. Pull the release lever and slide the paper stop to the desired paper format. When using paper of a non-standard format, move the guides and the paper stop completely out of the way, insert the paper, then re-adjust the guides and the stop according to the paper format.
- Page 26 Installation Flex the paper stack, then align it on a flat surface to prevent paper jams or slanted printing. Put the paper into the cassette. Make sure that the side to be printed is facing downwards and that the paper is not folded, curled or damaged. Note Do not load paper above the maximum loading marks on the paper guides.
- Page 27 Installation Place the stack of paper under the tabs, as shown below. Put the paper tray back into the printer and push it completely home. The front face of the cassette is equipped with a paper level indicator that lets you know the amount of paper remaining.
- Page 28 Installation Types of paper accepted by the printer : Printer paper tray 60 to 120 g/m Manual insertion 60 to 220 g/m Caution - Do not exceed the loading limits marked on the tray. The tray is designed for 500 x 80g/m²...
- Page 29 Installation OADING PAPER INTO THE MULTIFUNCTION TRAY The multifunction tray can contain different paper formats up to a maximum of about 100 sheets. Flex the stack of paper or transparent film, then align it on a flat surface to prevent paper jams or slanted printing.
- Page 30 Installation Adjust the position of the paper guides in the multifunction tray. Standard paper formats are marked on the multifunction tray. For standard formats, slide the guides to the corresponding position. Align the paper with the paper guides and push it in as far as it will go. Loading limit Loading limit Note...
- Page 31 Installation DJUSTING THE ORIGINAL DOCUMENT OUTPUT TRAY Depending on the format of the document to be scanned - A4 or LGAL (LEGAL) adjust the paper stop. 1-23...
- Page 32 Installation ALL CONNECTIONS Caution - Make sure that the mains On/Off switch of the scanner is set to "O" (Off). ELEPHONE AND LAN CONNECTIONS Connect the end of the telephone lead to the telephone wall socket (please see the paragraph Terminal connections, on page 1-10), for the connections to the scanner.
- Page 33 Installation ONFIGURING THE PRINTER DRIVER If you install the additional paper tray or the front/back module when the printer driver is already installed, you will need to configure the printer driver on your PC. Click on the START button, select CONTROL and then click on PRINTERS.
- Page 34 Installation 1-26...
-
Page 35: G Etting Started
Getting started ETTING STARTED AVIGATION METHODS RESENTATION The navigator gives you access to the menus visible on screen. The navigator This navigator has 4 keys and allows you to move within the menus available on your machine. -
Page 36: Moving Within The Menus
Getting started Moving within the menus Use key Symbol used OK the main menu or select the next line in a menu. OK the main menu or select the previous line in a menu. Confirm entry and go to the following menu. -
Page 37: The Display Screen
Getting started Use key Symbol used Confirm your entry. Delete a character by moving the cursor to the left. Confirm your entry and return to the initial screen. The display screen The screen comprises 3 or 6 lines of 20 characters. The currently selected line is highlighted in yellow. -
Page 38: Direct Access By Number
Getting started Press the key, the functions menu appear F---- FUNCTION 1 DIRECTORY 1 DIRECTORY 2 SETUP 2 SETUP 3 FAX 3 FAX Select the desired function by means of the navigator arrows. F---- FUNCTION 3 FAX 3 FAX 4 SMS SERVICE 4 SMS SERVICE 5 PRINT 5 PRINT... - Page 39 Getting started UIDE TO FUNCTION LIST MAIN MENU 1: D IRECTORY Functions Function description Page 11 OK OK a new contact in the directory p. 4-2 ONTACT 12 OK OK a relay broadcast list p. 4-4 13 OK Modify a record or a list p.
- Page 40 Getting started MAIN MENU 2: S ETUP Functions Function description Page 2522 OK Setting dialling prefix p. 3-4 REFIX SETTING 253 OK LAN prameters settings p. 3-12 OCAL ETWORK 2531 OK Select configuration mode p. 3-12 ONFIGURATION 2532 OK IP A Fax IP address p.
- Page 41 Getting started MAIN MENU 4: SMS S ERVICE Functions Function description Page 41 OK Send SMS p. 3-25 42 OK Read SMS received p. 3-27 43 OK Delete SMS received p. 3-27 ELETE 431 OK Select SMS to delete p. 3-27 ELECTION 432 OK SMS R...
- Page 42 Getting started MAIN MENU 8: A DVANCED FCT Functions Function description Page 80 OK Scanner calibration p. 6-17 ALIBRATION 81 OK Activate an access limitation lock p. 5-31 811 OK Locking code p. 5-31 OCKING 812 OK Activate keyboard lock p.
- Page 43 Getting started MAIN MENU 9: I NTERNET Functions Function description Page 9213 OK ISP password p. 3-18 ASSWORD 922 OK Message service parameters p. 3-18 SERV 9221 OK Message service identifier p. 3-18 DENTIFIER 9222 OK Message service password p. 3-18 ASSWORD 9233 OK Message service e-mail address...
-
Page 44: Control Panel Keys
Getting started RINT CONSOLE NAVIGATION BASICS AVIGATING THE MENUS Control panel keys The keys on the console are used to configure the printer. Some keys also have secondary functions. M enu Note: Any settings made using these keys affect only the current interface. Function key allows you to switch the printer between on-line and off-line mode. - Page 45 Getting started Function • The key lets you access the system menu in order to modify the MENU M enu configuration and the printing environment of the printer. • When you press this key when selecting a menu, the latter is aban- doned and the printer returns to normal operation.
- Page 46 Getting started CCESS TO FUNCTIONS This section explains how to use the menu selection system. The [MENU] key on the operator console allows you to use the menu to configure or adapt the printer environment, making settings such as the number of copies to be made, the emulation, etc.
- Page 47 Getting started Functions Description of the function Select font ELECT Select character encoding List of available fonts IST OF NTERNAL ONTS Set the number of copies to be made OPIES Choose the paper orientation RIENTATION LF A Action following a line break CTION CR A Action following a carriage return...
- Page 48 Getting started 2-14...
-
Page 49: S Etting Your Machine
ETTING YOUR MACHINE AIN SETTINGS At machine powerup, the screen displays: MONDAY 12 NOV 18:16 You have to set the date and time, telephone network, language parameter and verify the other parameters listed below. -
Page 50: Type Of Network
Setting your machine EFORE TRANSMISSION Date/Time You can, at any moment, modify the current date and time of your fax. You can also activate the automatic management of summer and winter time. The changeover is performed the last Sunday of March for the changeover to summer time and the last Sunday of October for the changeover to winter time. -
Page 51: Geographical Settings
Setting your machine Geographical settings These settings will enable you to use your machine in different preset countries using different languages. Country By choosing a country, you initialise: • the settings for the public telephone network, • the language by default. To select the country: 201 OK - SETUP / GEOGRAPHICAL / COUNTRY Select the required option and press the OK key to confirm. -
Page 52: Transmission Report
Setting your machine Programming your fax with the local prefix consists of two steps: • defining the minimal size (or equal) of the company’s outside numbers, • defining the outgoing local prefix of the company’s telephone network. This prefix will automat- ically be added as soon as an external number is dialled. -
Page 53: Document Depositing
Setting your machine • from the feeder of the sheet-feed scanner (please see the paragraph Document depositing, on page 5-2), transmission will occur after dialling. It allows transmission of larger documents. To select the way you want to feed your documents: 232 OK - SETUP / SEND / MEMORY SEND. -
Page 54: Saving An Access Code
Setting your machine Saving an access code 383 OK - FAX / FAX ANSW. / ANSWER CODE Enter the code (4 digits) and confirm with OK. Activating or deactivating the answering machine 382 OK - FAX / FAX ANSW. / ACTIVATION If you saved an access code for your fax answering machine, enter it and validate with OK. -
Page 55: Relay Broadcast
Setting your machine Relay broadcast Your fax machine (initiator) can relay a document, in other words, transmit a document to your subscribers via a remote fax and with a precise relay list. To do this the initiator fax and the remote fax must both have the relay function. To relay you need to supply the remote fax with the document and the relay list number. -
Page 56: Duplex Printing
Setting your machine Duplex printing This menu lets you define the default printing mode for received faxes. The two available modes are: • SINGLE SIDED, • DOUBLE SIDED. Note: All faxes received are printed according to the mode selected from the menu, no matter how the duplex key is set. To select the fax reception mode: 244 OK - SETUP / RECEPTION / DUPLEX Select the required option SINGLE SIDED or DOUBLE SIDED and validate your choice with... - Page 57 Setting your machine ECHNICAL PARAMETERS As delivered your fax is preset by default. However, you may adjust it to meet your requirements by resetting the technical parameters. To set the technical parameters: 29 OK - SETUP / TECHNICALS Select the desired parameter and confirm with OK. With the keys, modify the parameter settings by following the table below and press OK.
- Page 58 Setting your machine Parameter Setting Signification 10 - RX HEADER 1 - WITH If this parameter is on, all documents received by your fax 2 - WITHOUT will include the subscriber’s header with his name, number (if available) fax print date and the page number. 11 - RX SPEED 1 - 33600 Transmission speed for incoming documents.
-
Page 59: Automatic Configuration
Setting your machine Parameter Setting Signification 77 - LAN SPEED AUTO To define the communication speed of the peripheral units in 100 FULL relation to the implemented Local Area Network (LAN). 100 HALF 10 FULL 10 HALF 78 - WINS - DNS 1 - WITH Registration of the terminal in the WINS servers allows 2 - WITHOUT... -
Page 60: Manual Configuration
Setting your machine Once the message has disappeared, check for the IP Address, Sub-network mask SELF-CONF and Gateway address. If these are missing, you should carry out a manual configuration (see below). Manual configuration To configure your terminal manually, you should obtain the usual information used to set a peripheral device (IP address, sub-network mask, network and gateway address). -
Page 61: Sntp Server Configuration
Setting your machine These two addresses must be filled in for the Scan To Disk function. 2538 OK - SETUP / NETWORKS / LOCAL NETWORK / WINS 1 2539 OK - SETUP / NETWORKS / LOCAL NETWORK / WINS 2 Enter the IP address of each server, then validate with OK. - Page 62 Setting your machine Activating the server access 2553 OK - SETUP / NETWORKS / SNTP SERVER / ACTIVATION To activate the SNTP server, select WITH in the drop-down menu then validate with OK. Time zone 2554 OK - SETUP / NETWORKS / SNTP SERVER / TIME ZONE Select the time zone where the terminal is located from the drop-down list then validate with OK.
- Page 63 Setting your machine RINT FUNCTION SETTINGS The printer can be connected to the local network as it has its own IP address. Updating network settings The print console allows you to: • Turn TCP/IP, NetWare and EtherTalk on or off. •...
-
Page 64: System Requirements
Setting your machine Press the key. MENU Switch your terminal off and then back on again. You have now finished configuring the IP address. Manually configuring IP settings You can make these settings when the TCP/IP protocol is on. To configure your terminal manually, you will need the usual information for setting up a peripheral (IP address, subnet mask and gateway address). - Page 65 Setting your machine Accessing the Web Server Open a Web browser from a PC registered on the network. Enter the IP address of the terminal you want to configure in the ADDRESS field. Confirm by pressing The welcome window is displayed, choose the interface language. Change the settings of your choice on the screen then confirm.
-
Page 66: Access To Connection And Message Service Parameters
Setting your machine Access to connection and message service parameters 91 OK - INTERNET / SUPPLIER Select the Internet provider from the list NO ACCESS PROVIDER_1 PROVIDER_2 , and PROVIDER_3 PROVIDER_4 PROVIDER_5 PROVIDER_6 LOCAL NETWORK press OK. Choosing disables access to Internet functions. NO ACCESS 92 OK - INTERNET / INIT. - Page 67 Setting your machine Sample Internet settings for the terminal (56 kbps modem) Your access provider should give you the following information: CALL NUMBER: 08 60 00 10 00 CONNECTION IDENTIFIER: sg048944@wn.net CONNECTION PASSWORD: ***** MESSAGE SERVICE IDENTIFER: demo jt12 MESSAGE SERVICE PASSWORD: ***** E-MAIL ADDRESS: demo2@gofornet.com...
-
Page 68: Transmission Over The
Setting your machine SMTP AUTHENT. 9241 ACTIVATION With or Without Your terminal is now configured. ETTINGS The settings are divided into several categories: • the standard settings define the connection type and frequency to the Internet as well as the transmission type for your documents, •... -
Page 69: Mail Sorting
Setting your machine Selecting the transmission type 942 OK - INTERNET / SETTINGS / SEND TYPE then press OK to validate. Select one of the send options IMMEDIATE DURING CNX Changing the connection period ( type) PERIODIC 943 OK - INTERNET / SETTINGS / PERIOD With the mode, enter the new connection period by means of the numerical PERIODIC... - Page 70 Setting your machine - if your PC and fax share the same address, use the fax as a printer for E-Mails for the PC. 96 OK - INTERNET / MAILS SORT F@X Only mode and press OK to confirm. Select option F@X ONLY All E-Mails are polled and printed.
-
Page 71: Programmed Connection
Setting your machine NTERNET ONNECTION An Internet connection is made with an ISP. It allows both document sending and reception while connected. A connection takes place the following way: • Send to one or more of your subscriber’s Internet mailboxes, all fax-Internet documents waiting for transmission. -
Page 72: Sms Service
Setting your machine SERVICE Thanks to the button you can send an SMS to subscribers all over the world. An SMS (Short Message Service) is a service which permits short written messages to be sent to mobile phones or other SMS-compatible devices. - Page 73 Setting your machine ENDING AN To send an SMS to any SMS-compatible devices: Press the key. Write your SMS by means of the Qwerty keypad. To do so, you have a true editor at your disposal: • For the upper case letters, use the •...
-
Page 74: Sms Read
Setting your machine RASE AN Proceed as follows to erase an SMS: 43 OK - SMS SERVICE / DELETE SMS Select the messages to erase. 431 OK - SMS SERVICE / DELETE SMS / SELECTION Select SELECTION using keys and validate with OK key. and validate with OK key. -
Page 75: Print An Sms
Setting your machine Print an SMS Access by menus: 44 OK - SMS SERVICE / PRINT SMS • Direct access Press key Select PRINT SMS using keys and validate with OK key. Select SELECTION (to choose messages to print), NEW (to print all unread messages) or ALL (to print all messages in memory) using keys and validate with OK key. - Page 76 Setting your machine 3-28...
-
Page 77: Guide To Function List
IRECTORY Your fax lets you create a directory by memorising subscriber records and subscriber lists. • Your machine can store up to 500 subscriber records with names and phone numbers. • You may also group several names to build a subscriber list with up to 32 subscriber lists. A subscriber list is made from the subscriber records already stored. -
Page 78: Creating Subscribers Record
Directory REATING SUBSCRIBERS RECORD For each contact record, complete the fields listed below. Only fields with the Name and Telephone number have to be completed: • Contact NAME, • TEL and fax number of contact, • E-mail address, example: dupont@messagerie.com, •... - Page 79 Directory Your subscriber’s ID number will automatically appear on the screen, if you wish to modify this number you may do so by choosing another free number and validate with OK. Select the option assigned key if you want to assign a letter (shortcut key) to your WITH subscriber.
-
Page 80: Adding A List
Directory Select the option WITH shortcut key if you want to link a letter (shortcut key) to your contact. By default, the first available letter is shown. If you want to change it, scroll through the alphabet by means of the key, then validate with the OK key. -
Page 81: From The List
Directory From ... Procedure subscriber’s ID number Enter directly the subscriber’s ID number. Press key then select by means of the subscribers directory keys. For every subscriber included in the list repeat the above step then validate with OK. Note: you can stop record creation at any time by pressing The list ID number will automatically appear on the screen. - Page 82 Directory ONSULTING A RECORD OR A LIST Press key. The directory appears in alphabetical order. Select the subscriber record or subscriber list (L) you wish to consult. ODIFYING A RECORD OR A LIST 13 OK - DIRECTORY / MODIFY The directory appears in alphabetical order. Use the keys to select the subscriber list (L) you wish to modify and press OK to confirm.
-
Page 83: The File Structure
Directory RINTING THE DIRECTORY You may print all the numbers stored in the directory, including all the existing subscriber records or subscriber lists. To print the directory: 15 OK - DIRECTORY / PRINT The directory is printed in alphabetical order. MPORTING A DIRECTORY You can import an existing directory of contacts into your fax machine as an electronic file. - Page 84 Directory Caution - You must enter a value for at least one of the Fax number or E-mail address fields. To enter a blank line, key in four field separator characters in a row. For example: Smith;0123456789;jsmith@isp.co.uk;J;8 Jones;01987654321;;@;8 O'Connor;0123469874;d.oconnor@hello.net;U;8 Note: @ alone is the indication that no associated key is assigned to the entry.
- Page 85 Directory ROCEDURE To import a directory: 17 OK - DIRECTORY / IMPORTATION Select to authorise the importation of a directory. WITH Create your directory on a PC in a file whose structure corresponds to that set out above. In order to be recognised as a directory, the file name must include the word directory and must have a .csv extension.
-
Page 86: Ldap Server
Directory LDAP SERVER The LDAP server allows you to access a directory server, for contacts or lists of contacts (maximum 500 recipients). The LDAP function can be switched on only once there are at least 50 free entries in the unit's local directory. -
Page 87: To The Local Directory
Directory DDING A SERVER CONTACT TO THE LOCAL DIRECTORY On the Change menu: 13 OK - DIRECTORY / MODIFY Use the arrows to select the server contact to add to the local directory and press the OK key to confirm. Change the desired field(s) in the contact's file and press the OK key to confirm each change. - Page 88 Directory 4-12...
- Page 89 PERATION ENDING Faxes sent over the telephone network are sent from the feeder or the memory. Documents sent over the Internet are first memorised and sent at the time of Internet connection. Over the telephone network, your faxes are transmitted in black and white or in colour. Internet can be used to send black and white or colour documents (TIFF, PDF or secure PDF format).
-
Page 90: From The Flat Scanner
Operation OCUMENT DEPOSITING Scanner From the automatic feeder tray Place your original documents in the document feeder: Paper guides - face printed on the top, - first page under the stack. Set the paper guide to the document width. Once the operation is over, take your original documents back from the document exit tray. -
Page 91: From The Directory
Operation ELECTING ESOLUTION ONTRAST Selecting black-and-white or colour Black and white or colour mode is selected by pressing the key. Resolution You have several scan modes available to send your documents. The choice of the mode depends on the document to be sent: •... -
Page 92: Using The Last Number Dialled Key
Operation Assigned number dialling Press Your fax displays the names of your correspondents and the lists of correspondents in the address book in increasing alphabetical order. then Use the keys of the browser to scroll through the correspondents and lists of correspondents, and to select the correspondent or list of correspondents you require. -
Page 93: Public Switched Telephone Network (Pstn)
Operation To multiple numbers You may dial to send a document simultaneously to multiple call numbers. Caution - This may be achieved only if the machine is parametered to send from the memory (please see the paragraph Document feed type, on page 3-4). Enter the fax or E-mail address, or use the Directory (refer to above paragraphs). -
Page 94: Main Settings
Operation Adjust the contrast and confirm by pressing the OK key. and confirm with OK (please see the paragraph Select the feed type, FEEDER MEMORY Document feed type, on page 3-4). You may enter the number of pages before transmission and confirm with OK. Confirm postponed transmission by pressing Your document is stored and will be sent at the new time. -
Page 95: Scan To Email In Black And White
Operation Set the re-direction contact 392 OK - FAX / REROUTING / DESTINATION Using the keys within the navigator select the subscriber from the directory (if the directory is empty the display will show DIRECTORY EMPTY). Enter the number of the subscriber manually or store the name and related number in the directory (please see the paragraph Creating subscribers record, on page 4-2). -
Page 96: Text To Mail
Operation Press the key. The document is scanned and memorised, it will be sent at the time of Internet connection. If your contact has a PC, he will receive an E-mail to which your fax is attached in colour PDF, protected PDF or TIFF format, depending on the format choice you made. -
Page 97: Simply Put The File In An Ftp Server
Operation If you have started to scan with the flat scanner, the unit will scan the other pages. Put your second page to scan, select NEXT and validate with OK. Press key. Set contrast and resolution if necessary (please see the paragraph Selecting Resolution/ Contrast, on page 5-3). - Page 98 Operation Select B&W SCAN to send a document in black and white or COLOR SCAN to send a document in colour. Validate with OK key (this setting may be changed at any time during the send procedure with the colour key). Enter the name of the attachment and validate with OK key.
-
Page 99: Scan To Pc (Depends On Model)
Operation Enter the name of the attachment and validate with the OK key. Remark: To avoid "name collisions", a suffix is automatically added to the name that was entered, and incremented as necessary. If you entered DOCUMENT as the file name, you will find the file archived as, for instance, DOCUMENT000016.pdf. -
Page 100: Immediately Perform Transmission From The Waiting Queue
Operation - operation type regarding the document: transmission from memory, delayed transmission, deposit - number of pages of the document - document size (percentage of space stored in memory) • cancel a transmission request in the waiting queue. Immediately perform transmission from the waiting queue 61 OK - COMMANDS / PERFORM Select the document in the waiting queue and confirm your choice with OK or immediately perform the selected transmission. -
Page 101: Reception Over The Internet
Operation ANCELLING A TRANSMISSION IN PROGRESS Cancelling a transmission in progress is possible whatever the type of transmission but varies depending on whether the transmission is a single call number or a multi-call number. • For a single call number from the memory, the document is erased from the memory. •... -
Page 102: Local Copy
Operation OPYING Your fax offers to print out one more copies of one or more pages. You can also make copies in tiled or poster mode. The tiling function allows you to print a number of pages imported from the ADF scanner onto a page, at a reduced scale (there are 2 modes available: 2 scanned pages onto a sheet or 4 scanned pages onto a sheet). - Page 103 Operation "Sophisticated" copy Position the document (please see the paragraph Document depositing, on page 5-2). Press the key. A screen that shows the default copy settings is displayed. Modify the settings that you want to change, using the keys to select the field then press the OK key.
-
Page 104: Description Of Id Card Mode
Operation • The field allows you to set the desired brightness by means of the keys. BRIGHTNESS • The field allows you to set the desired zoom value between 25% and 400% by means of ZOOM keys or the numerical keyboard. - Select a 141 % zoom to obtain A4 format output starting from an A5 original. - Page 105 Operation The following will be displayed: 1>> DUPLEX/DUPLEX Press the OK key. The following will be displayed: 2 : RESOL. : FAST 3>> RESOL . : QUALITY Press the OK key. The following will be displayed: CONTRAST - ----------O-------- + With keys select contrast.
-
Page 106: Specific Copy Settings
Operation The following will be displayed: COPY IN PROGRESS Then, once the document has been scanned: TURN OVER DOC THEN OK Lift the flatbed scanner flap, turn over your card then close the flap. The following will be displayed: COPY IN PROGRESS Your fax machine will then print your card. - Page 107 Operation By entering new values of X and Y given in mm (X < 210 and Y < 286), you will move the scanning zone as shown on the figure below. Scanned area Select the X and Y coordinates with keys.
- Page 108 Operation 852 OK - ADVANCED FCT / SCAN. & PRINT / PAPER TRAY Select the paper tray that you want to use; AUTOMATIC, LOWER or UPPER using keys. Validate by pressing the OK key. 853 OK - ADVANCED FCT / SCAN. & PRINT / PAPER SAVE This function prints all your documents duplex.
-
Page 109: Using Usb Memory Keys
Operation SING MEMORY KEYS You can connect a USB memory key to your terminal. Connector for USB memory key Displaying the content of a USB memory key Remark: If the memory support contains more than 999 files, only the 999 most recent ones are taken into account. You have several display modes available to view the photos and documents stored on the memory support. -
Page 110: Printing A Photo From A Usb Memory Key
Operation Informations on the use of the photo USB memory key • If your multifunction terminal cannot read the USB memory key that you are using, check that it is compatible and that you have inserted it correctly. • Once in place, do not remove the device before the multifunction terminal has finished all the print commands. - Page 111 Operation 01 OK - MEDIA / PRINT PHOTO The screen you allows you to view the photos starting with the most recent one. Each photo is accompanied by the following informations: Total number of Order of the photo photos to be printed relative to the total number of photos on the USB...
-
Page 112: Printing A Document From A Usb Memory Key
Operation To print the current photo, select by means of the keys, then CURRENT PHOTO validate with the OK key or by typing 4 on the numerical keyboard. Remark: 24 photos can be printed in miniature on a index page. The photos are accompanied by their file name and their number on the USB memory key. -
Page 113: Recording A Document In A Usb Memory Key
Operation Select to start printing the list of all documents on the USB memory key or start printing all documents on the USB memory key. Select to select several documents with consecutive names. The screen then SERIES displays the alphabetical list of the documents on the USB memory key. At the FIRST FILE prompt select the first document of the series with the key, then at the... - Page 114 Operation Setting up the USB memory key file deletion to record new scans In the media menu, select by means of the keys and the OK key or use the DELETE 7 key of the numerical keyboard, 07 OK - MEDIA / DELETE Select AUTOMATIC Select...
-
Page 115: Analysis Of The Usb Memory Key
Operation Printing the re-routed documents This menu is only displayed when the FAX ARCHIVING function is activated. 052 OK - MEDIA / ARCHIVING FAX / PRINT To print out the re-routed documents automatically, select WITH using the keys and confirm with the OK key. Exit this menu by pressing the key. -
Page 116: Other Functions
Operation THER FUNCTIONS The incoming and outgoing logs list the last 30 transmissions (incoming and outgoing) made by your machine. An automatic print out will take place after every 30 transmissions. However, you may request a print out at any time. Each log (incoming or outgoing) contains a table with the following information: •... -
Page 117: Counters
Operation Printing the machine settings: 54 OK - PRINT / SETUP Your fax prints the list of stored parameters. OUNTERS At any time, you may consult the activity counters of your machine. To get access to the counters of the machine: 82 OK - ADVANCED FCT / COUNTERS These counters indicate the number of: •... -
Page 118: Placing A Document In Deposit
Operation Setting the machine for polled documents, you must define the poll number, then depending on the type of poll you may: • launch an immediate poll • program a delayed poll with a choosen time • launch a multi-poll, either immediately or later. Placing a document in deposit Insert the document to deposit in the feeder. -
Page 119: Lock
Operation There are restrictions to the use of your fax: • locking the printing of received documents (please see the paragraph Fax answering machine, on page 3-5) • locking the keyboard • locking the numbers • locking the Internet settings •... -
Page 120: Locking The Internet Settings
Operation Locking the numbers This function locks dialling and the numerical keypad is disabled. Transmissions are only possible from numbers included in the directory. You can still send mails by typing in the addressee’s address (if this has no numbers in it). To access the number interlocking option: 813 OK - ADVANCED FCT / LOCK / LOCK NUMBER Enter the four-digit interlock code with the keypad. -
Page 121: Department Code
Operation Locking the Media This function locks access to the Media (USB memory key) To access the Media locking menu : 816 OK - ADVANCED FCT / LOCK / LOCK MEDIA Enter your four-digit locking code on the keypad. Confirm by pressing the OK key. Confirm the locking code by typing it again. -
Page 122: Setting The Department Codes
Operation Deactivating the department code 881 OK - ADVANCED FCT / DEPT. CODE / ACTIVATION keys, select WITHOUT. Using the browser’s Press OK to confirm; the function is deactivated. Setting the department codes The administrator must enter the department number to be created, between 01 and 98; the number 00 is reserved for the administrator to enter his or her own department code and department name before being able to record other codes for different users. -
Page 123: Creating A Department Code
Operation Creating a department code Only the administrator, using the Mastercode is able to attribute other department codes. Enter your mastercode and confirm by OK. 882 OK - ADVANCED FCT / DEPT. CODE / NEW DEPT. Enter a number between 01 and 98 or select a free number using the keys, as shownon the machine’s display. -
Page 124: Printing A Department Code
Operation Printing a department code The administrator may print reports for each department entered. These reports show the department number (between 01 and 98), its name, the associated access code and the number of pages transmitted and copied by this department. 884 OK - ADVANCED FCT / DEPT. -
Page 125: Use Of The Department Codes By A Department
Operation SE OF THE DEPARTMENT CODES BY A DEPARTMENT To access the different machine functions, each department must enter its own access code as delivered by the administrator. When the "DEPARTMENT CODE" function is activated, the screen displays: THU 20 FEB 10:15 ENTER DEPT. -
Page 126: Mail Box (Mbx Fax)
Operation The charge code will always be hidden. The maximum length that can be entered is 30 characters. When dialing, only the digits are sent on the line. The "+" symbol inserted is not sent. In the example above, the number 97380884440123 is dialed. If your equipment is connected to a private exchange (PABX), enter the prefix (number used by your PABX to access the telephone network, for example 0), followed by a "/"... -
Page 127: Mbx Management
Operation MANAGEMENT Creating an MBX 71 OK - MAILBOXES / CREATE MBX Select a free MBX out of the 31 MBX or directly enter the number of a free MBX and confirm with OK. and press OK. Select option MAILBOX CODE Value 0000 is always displayed. -
Page 128: Deleting A Mbx
Operation Deleting a MBX Before deleting an MBX, you need to make sure it is empty, by printing its content. 74 OK - MAILBOXES / DELETE MBX Select a free MBX out of the 31 MBX, or enter the number of a free MBX directly (1-31) then confirm your choice with OK. -
Page 129: Mbx Polling From A Remote Fax
Operation MBX polling from a remote fax 36 OK - FAX / MBX POLLING Enter your subscriber’s number for MBX deposit or choose your dialling mode (please see the paragraph Dialling, on page 5-3) and validate OK. Enter the subscriber MBX number and press OK. Enter this MBX access code and press OK. - Page 130 Operation 5-42...
-
Page 131: Maintenance
AINTENANCE AINTENANCE ENERAL To ensure the best operating conditions for your fax, it is recommended that you regularly clean the inside. For normal usage, please respect the following rules: • Never leave the cover open unless required. • Do not attempt to oil the machine. •... - Page 132 Maintenance To check the remaining capacities of the consumables: 86 OK - ADVANCED FCT / CONSUMABLES The toner cartridge and the drum cartridge come with a chip card. After replacing a consumable item in the printer, you need to inform the machine about its features. For this purpose, the chip card supplied with each toner cartridge must be read by the machine each time a new consumable item is installed.
- Page 133 Maintenance Open the top cover. Push lock lever to the right and pull out the toner container. Lock Lever Put the old toner container in the plastic bag (contained in the toner kit) and discard it later according to the local code or regulations for waste disposal. Plastic Bag Take the new toner container out of the toner kit.
- Page 134 Maintenance Shake the new toner container at least 10 times as shown in the figure in order to distribute the toner evenly inside the container. Set the new toner container in the printer and push down on the top of the toner container to install it firmly in place as shown in the figure below.
- Page 135 Maintenance Open the left cover. While holding the waste toner box, press the lock lever and then gently remove the waste toner box. Lock Lever Note: Remove the waste toner box as gently as possible so as not to scatter the toner inside. Do not let the open- ing of the waste toner box face downward.
- Page 136 Maintenance To prevent toner from spilling, put the old waste toner box in the plastic bag (contained in the toner kit) and discard it later according to the local code or regulations for waste disposal. Plastic Bag Close the waste toner box (I) after removing it from the printer. To avoid spilling toner, put the closed waste toner box into the plastic bag (J) provided.
- Page 137 Maintenance Open the cap of the new waste toner box. New Waste Toner Box Insert the new waste toner box as shown in the figure below. When the box is set correctly, it will snap into place.
- Page 138 Maintenance Make sure that the waste toner box is correctly inserted and close the left cover. After replacing the toner cartridges and the waste toner box, clean the main charger units and the paper transfer unit. For instructions, please see the paragraph Cleaning the printer, on page 6-11.
- Page 139 Maintenance Use a lint free cloth to clean dust and dirt away from the registration roller (metal). Insert the developer unit together with the toner container, back into the machine. Close the top cover and MP tray. Press the OK key on the scanner control panel. The following message is displayed on the screen: I NSERT THE TONER CHIP CARD...
- Page 140 Maintenance Insert the chip card (supplied with the toner cartridge) into the reader, making sure that the card is oriented as shown in the illustration. The following message is displayed on the screen: C ? YES = OK - NO = C HANGE TONER Press OK when the chip card has been read The following message is displayed on the screen: N...
-
Page 141: Cleaning
Maintenance LEANING Cleaning the scanner’s reading devices When one or more vertical lines appear on transmitted copies or faxes, follow these steps: Open the scanner cover by pushing it backwards until held vertically in position Clean transparent scanning windows with a soft, lint-free cloth, dampened with alcohol. -
Page 142: Scanner Calibration
Maintenance Caution - Use a soft cloth to clean the printer. Never use abrasive or corrosive detergents. The fusing unit can become very hot during operation. To avoid injury - do not touch. Wait for at least 10 minutes after the printer has been turned off and make sure that the fusing unit has cooled before cleaning the interior of the printer. -
Page 143: Transmission From Memory
Maintenance Transmission from memory You have the choice between: • waiting until the transmission takes place at the given time • restarting the transmission using the transmission queue (please see the paragraph Immedi- ately perform transmission from the waiting queue, on page 5-12). In this case, for a document composed of several pages, the transmission will take place from the page where the error occurred •... - Page 144 Maintenance Code 0B - Wrong number of pages There is a difference between the number of pages indicated during preparation for the transmission and the number of pages sent- check the number of pages in the document. Code 0C - Received document error Ask the subscriber who called you to check the length of his document (it may be too long to be completely received).
- Page 145 Maintenance Internet codes Codes 40 and 41 - No reply from supplier The modem cannot connect to the Internet service provider. If this error always occurs, check the supplier’s dial-up number. Code 42 - Cannot access supplier The service provider refuses the connection, the service is temporarily unavailable. If this error always occurs, check the Internet connection parameters.
-
Page 146: Scanner Incidents
Maintenance CANNER INCIDENTS Scanner paper jam When a paper jam occurs, the following message appears on the control panel screen REMOVE DOCUMENT If jams often occur in a specific part of the unit, the latter needs to be checked, cleaned or repaired. Open the scanner cover. -
Page 147: Miscellaneous Incidents
Maintenance ISCELLANEOUS INCIDENTS At switch-on nothing appears on screen Check that the mains cable is plugged in, and check the mains plug if necessary. The fax does not detect the presence of your inserted document. The message does READY not appear on the screen. At the start and during scanning, appears on the screen. -
Page 148: Troubleshooting
Maintenance ROUBLESHOOTING General Guidelines The table below provides basic solutions for problems you may encounter with the printer. We suggest you consult this table to troubleshoot the problems before calling for service.. Symptom Check Items Corrective Action Print quality is not See Print Quality Problems on p. -
Page 149: Print Quality Problems
Maintenance Print Quality Problems The tables and diagrams in the following sections define print quality problems and the corrective action you can conduct to solve the problems. Some solutions may require cleaning or replacing parts of the printer. If the suggested corrective action will not solve the problem, call for service. RINTED ESULTS ORRECTIVE... -
Page 150: Error Messages
Maintenance RINTED ESULTS ORRECTIVE CTION Dirt on the top edge Clean the parts in the paper paths—such as the paper cassette, or back of the etc. paper Printing incomplete Check that the application software is correctly operated. or out of position Refer to Tips p. - Page 151 Maintenance Message Corrective Action This message warns following two cases. Check waste Install the new waste toner box. toner box The waste toner box is not installed. The waste toner box is full. Please clean the inside of the printer. Refer to Cleaning the Clean printer Printer, p.
- Page 152 Maintenance Message Corrective Action A Microdrive error has occurred. Look at the error code given in place Hard disk err ## of ## and refer to Storage Error Codes p. 6-25. To ignore the Press GO Microdrive error, press [GO]. This message is displayed when you attempt to use the printer’s I/F occupied operation panel to change the environmental settings on the interface...
- Page 153 Maintenance Message Corrective Action The total amount of data received by the printer exceeds the printer’s Memory overflow internal memory. Try adding more memory. Press [GO] to resume Press GO printing. You can abandon printing by pressing [Cancel]. If Auto Error Clear is set to On, printing will be automatically resumed after a preset period of time.
- Page 154 When the printer detects that the top tray is empty again, paper full the printer will continues printing into the top tray. The toner container is not original. Only genuine Sagem toner Unknown Toner cartridges must be used.
- Page 155 Maintenance Storage Error Codes Hard disk errors EANING Hard disk formatting error. If this error persists after the printer has been switched off and then switched back on, format the hard disk again. The disk system is not installed. Recheck the requirements for using the system and the devices.
-
Page 156: Clearing Paper Jams
Maintenance RAM Disk Errors (also called virtual disk) IGNIFICATION Format error. Try turning the power off and on again. RAM disk mode is Off. Turn RAM disk mode On from the operation panel. No disk space. Purge unnecessary files. Specified file is not on disk. Insufficient printer memory to support the RAM disk system. -
Page 157: Possible Paper Jam Locations
Maintenance Possible Paper Jam Locations The figure below explains the printer’s paper paths including the options. The locations where paper jams might occur are also shown here, with each location explained in the table below. Paper jams can occur in more than one component on the paper paths. Face-up Tray Paper Feeder Paper jam... -
Page 158: Paper Cassette
Maintenance Paper jam Reference Paper jam message Description location page Paper is jammed inside the page 6-31 Paper jam rear unit. Rear Unit General considerations for clearing jams Bear in mind the following considerations when attempting jam removal: • If paper jams occur frequently, try using a different type of paper, replace the paper with paper from another ream, flip the paper stack over, or rotate the paper stack 180 degrees. - Page 159 Maintenance Remove any partially fed paper. Check to see if paper is loaded correctly. If not, reload the paper. Push the paper cassette back in firmly. The printer warms up and resumes printing. Duplexer Paper is jammed in the duplex section. Remove the jammed paper using the procedure given below.
- Page 160 Maintenance Insert the paper cassette into the slot in the printer. The printer warms up and resumes printing. The Inside of Printer Open the top cover and MP tray. Lift the developer unit together with the toner container out of the printer. Open the feed cover.
- Page 161 Maintenance Insert the developer unit together with the toner container, back into the machine. Close the top cover and MP tray. The printer warms up and resumes printing. Rear Unit If paper is not completely ejected into the output tray, open the rear unit. Open the fuser cover and remove the jammed paper by pulling it out.
-
Page 162: Storage
Maintenance Paper Feeder Paper is jammed at optional paper cassette 2 (to 4). Refer to the Installation Guide for the optional paper feeder and remove the jammed paper. Envelope Feeder Paper is jammed at the optional envelope feeder. Remove the jammed paper using the same procedure as for a jam at the MP Tray. -
Page 163: Printer Unit
Maintenance Printer unit Make sure your terminal is properly switched off (switch set to 0). Disconnect the equipment from the network and the mains socket. Pack the printer in the following way: Remove the toner cartridge and the waste toner box from the printer. Put the toner cartridge in the plastic bag provided to avoid spilling any toner. - Page 164 Maintenance HARACTERISTICS Type of equipment: fast professional terminal, for use with all group 3 equipment according to the UIT-T recommendations. Dimensions (excluding options): Width : 457 mm Depth : 560 mm Height : 698 mm (excluding collector and 500 -sheet tray) 25 kg Weight: 220-240 V - 50/60 Hz - 4.7A...
- Page 165 Maintenance The effective transmission time for an A4 page varies from a few seconds to about one minute (depending on the line quality, modem speed, the amount of data in the original and the resolution) (*) Does not take into account the exchange initialisation procedure TCP/IP/PPP Protocols Internet : general characteristics SMTP/POP3/MIME protocols for electronic...
- Page 166 Maintenance Paper trays Cassette: - A5 to A4/Legal 148 to 216 mm × 210 to 315 mm. - Capacity 500 sheets (80 g/m²) Multipurpose tray: - 70 to 216 mm × 148 to 297 mm - Capacity 100 sheets (80 g/m²) Upper tray ⎯...
- Page 167 Maintenance Registered trade marks PRESCRIBE is a registered trade mark of the Kyocera Corporation. KPDL is a commercial trade mark of the Kyocera Corporation. Hewlett-Packard, PCL and PJL are registered trade marks of the Hewlett-Packard Company. Centronics is a commercial trade mark of Centronics Data Computer Inc. PostScript is a registered trade mark of Adobe Systems Incorporated.
- Page 168 Maintenance IBM Program License Agreement The following instructions are purposely provided in English. THE DEVICE YOU HAVE PURCHASED CONTAINS ONE OR MORE SOFTWARE PROGRAMS (“PROGRAMS”) WHICH BELONG TO INTERNATIONAL BUSINESS MACHINES CORPORATION (“IBM”). THIS DOCUMENT DEFINES THE TERMS AND CONDITIONS UNDER WHICH THE SOFTWARE IS BEING LICENSED TO YOU BY IBM. IF YOU DO NOT AGREE WITH THE TERMS AND CONDITIONS OF THIS LICENSE, THEN WITHIN 14 DAYS AFTER YOUR ACQUISITION OF THE DEVICE YOU MAY RETURN THE DEVICE FOR A FULL REFUND.
- Page 169 Maintenance 3. Limitation of Remedies IBM’s entire liability under this license is the following; For any claim (including fundamental breach), in any form, related in any way to this license, IBM's liability will be for actual damages only and will be limited to the greater of: the equivalent of U.S.$25,000 in your local currency;...
- Page 170 Maintenance Monotype Imaging License Agreement The following instructions are purposely provided in English. "Software" shall mean the digitally encoded, machine readable, scalable outline data as encoded in a special format as well as the UFST Software. You agree to accept a non-exclusive license to use the Software to reproduce and display weights, styles and versions of letters, numerals, characters and symbols ("Typefaces") solely for your own customary business or personal purposes at the address stated on the registration card you return to Agfa Japan.
- Page 171 Maintenance 10 IN NO EVENT WILL MONOTYPE IMAGING KK BE LIABLE FOR LOST PROFITS, LOST DATA, OR ANY OTHER INCIDENTAL OR CONSEQUENTIAL DAMAGES, OR ANY DAMAGES CAUSED BY ABUSE OR MISAPPLICATION OF THE SOFTWARE AND TYPEFACES. 11 Massachusetts U.S.A. law governs this Agreement. 12 You shall not sublicense, sell, lease, or otherwise transfer the Software and/or Typefaces without the prior written consent of Monotype Imaging KK.
- Page 172 Maintenance 6-42...
- Page 173 AFETY AFETY SAFETY WARNING Before powering on your unit, make sure the mains outlet it is connected to meets the requirements printed on the warning label on your unit, or on the separate power supply (depending on the model). This unit must not be installed on the floor. If your unit works with a battery, replace it only with the same type of battery or an equivalent type rec- ommended by the manufacturer.
- Page 174 Safety NVIRONMENT Preservation of the environment is an essential concern for the manufacturer. The desire of the manufacturer is to operate installations that respect the environment and hence it has decided to integrate environmental performance in the complete life cycle of its products, from the manufacturing phase to the commissioning, use and elimination.
- Page 175 The declaration of compliance can be consulted on the site www.sagem.com category "support", or can be requested at the following address: SAGEM Communication - Customer relations department...
- Page 176 Data subject to change without motice *252745055A* Sagem Communication Société anonyme au capital de 300 272 000 € - 480 108 158 RCS PARIS 27, rue Leblanc - 75512 PARIS CEDEX 15 - FRANCE www.sagem.com...
Need help?
Do you have a question about the MF 5890DN and is the answer not in the manual?
Questions and answers