Sign In
Upload
Download
Table of Contents
Contents
Add to my manuals
Delete from my manuals
Share
URL of this page:
HTML Link:
Bookmark this page
Add
Manual will be automatically added to "My Manuals"
Print this page
×
Bookmark added
×
Added to my manuals
Manuals
Brands
ESAB Manuals
Welding System
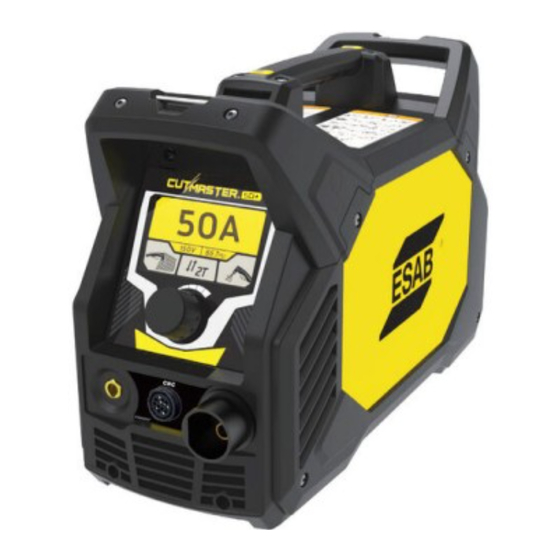
CUTMASTER 50+
Operating manual
ESAB CUTMASTER 50+ Operating Manual
Plasma cutting system
Hide thumbs
1
2
3
4
5
6
7
8
Table Of Contents
9
10
11
12
13
14
15
16
17
18
19
20
21
22
23
24
25
26
27
28
29
30
31
32
33
34
35
36
37
38
39
40
41
42
43
44
45
46
47
48
49
50
51
52
53
54
55
56
57
58
59
60
61
62
63
64
65
66
67
68
69
70
71
72
73
74
75
76
77
78
79
80
81
82
83
84
85
86
page
of
86
Go
/
86
Contents
Table of Contents
Troubleshooting
Bookmarks
Table of Contents
Table of Contents
Section 1: General Information
Safety Precautions
Notes, Cautions and Warnings
Section 2 System: Introduction
How to Use this Manual
Equipment Identification
Receipt of Equipment
Power Supply Specifications CE & RCM
2.04.01 Additional Power Supply Specifications
Input Wiring Specifications CE & RCM
Generator Recommendations CE & RCM
Power Supply Specifications ETL
2.07.01 Additional Power Supply Specifications
Input Wiring Specifications ETL
Generator Recommendations ETL
Power Supply Features
Section 2 Torch: Introduction
01 Scope of Manual
02 General Description
03 Specifications
04 Options and Accessories
05 Introduction to Plasma
Section 3 System: Installation
Unpacking
Lifting Options
Gas Connections
Primary Input Power Connections
Work Lead Connections
Section 3 Torch: Installation
01 Torch Connections
02 CNC Connections
03 Voltage Divider
04 Setting up Automation or Machine Torch
Section 4 System: Operation
Front Panel Controls / Features
Preparations for Operation
Section 4 Torch: Operation
01 Machine and Automated Torch Operation
02 Automation Torch Parts Selection
03 Machine and Hand Torch Parts Selection
04 Cut Quality
05 General Cutting Information
06 Hand Torch Operation
07 Gouging
Section 5 System: Service
General Maintenance
Maintenance Schedule
Common Faults
Basic Troubleshooting Guide
Power Supply Basic Parts Replacement
Section 5 Torch: Service
01 General Maintenance
02 Inspection and Replacement of Consumable Torch Parts
Section 6: Parts Lists
Introduction
Ordering Information
Power Supply Replacement
Replacement Parts
Options and Accessories
Replacement Parts for SL60 Hand Torch
CM50+ Torch Consumable Parts (SL60)
CM70+ Torch Consumable Parts (SL60)
Torch Consumable Parts Manual (SL60) Torch
Replacement Parts - for SL100 Mechanized Torches with Unshielded Leads
Torch Consumable Parts Machine (SL100) Torch
Appendix 1: Data Tag Information
Appendix 2: Torch Pin - out Diagrams
Appendix 3: Torch Connection Diagrams
Appendix 4: Raw Arc Voltage
Advertisement
Quick Links
Download this manual
CE & RCM
INPUT POWER
400V
PHASE
OUTPUT
MAX OUTPUT
CUTMASTER® 50+
CUTMASTER® 70+
PLASMA CUTTING SYSTEM
OPERATING
MANUAL
ETL
VOLTAGE
VOLTAGE
480V
MAX OUTPUT
70
50
AMPS
AMPS
Revision: AA Issue Date: June, 2023
0700 402 229
Manual No.:
esab.com
Table of
Contents
Previous
Page
Next
Page
1
2
3
4
5
Advertisement
Table of Contents
Need help?
Do you have a question about the CUTMASTER 50+ and is the answer not in the manual?
Ask a question
Questions and answers
Related Manuals for ESAB CUTMASTER 50+
Welding System ESAB Cutmaster 60 Operating Manual
(68 pages)
Welding System ESAB Cutmaster 80 Operating Manual
Plasma cutting system (120 pages)
Welding System Esab CaddyTig HF Instruction Manual
(11 pages)
Welding System ESAB Caddy Professional 250 Instruction Manual
(16 pages)
Welding System ESAB ESABMig C420 Service Manual
(46 pages)
Welding System ESAB Caddy 150 Instruction Manual
(16 pages)
Welding System ESAB ESABMig C240 Instruction Manual
(20 pages)
Welding System ESAB Caddy Tig 1500i TA34 Service Manual
(50 pages)
Welding System ESAB Caddy Series Instruction Manual
(26 pages)
Welding System ESAB OXWELD C-62 Instructions Manual
Cutting torch and powder-washing attachment (9 pages)
Welding System ESAB CIGWELD CutSkill 60 Operating Manual
(50 pages)
Welding System ESAB CIGWELD EasyWeld 130 Operating Manual
(66 pages)
Welding System ESAB Caddy 140 Instruction Manual
(12 pages)
Welding System ESAB Caddy 130 Service Manual
(36 pages)
Welding System ESAB Cigweld EasyWeld 160 Operating Manual
(84 pages)
Welding System ESAB CIGWELD BLUEVENOM PULSEMATE Operating Manual
Mig single and double pulse, remote pulse pendant (19 pages)
This manual is also suitable for:
Cutmaster 70+
Table of Contents
Print
Rename the bookmark
Delete bookmark?
Delete from my manuals?
Login
Sign In
OR
Sign in with Facebook
Sign in with Google
Upload manual
Upload from disk
Upload from URL


Need help?
Do you have a question about the CUTMASTER 50+ and is the answer not in the manual?
Questions and answers