Table of Contents
Advertisement
Quick Links
Advertisement
Table of Contents
Troubleshooting

Related Manuals for ESAB Cigweld EasyWeld 160


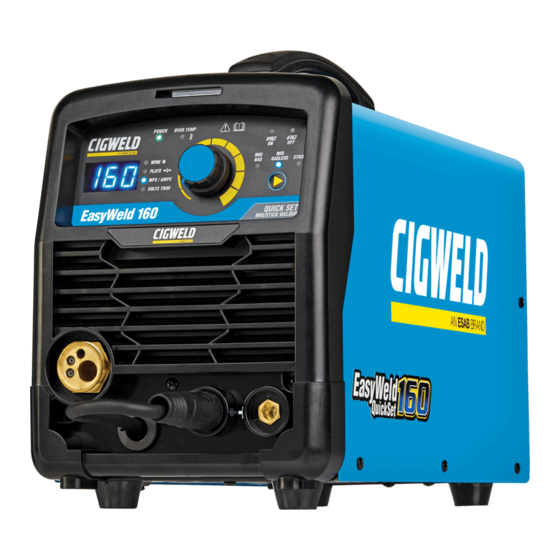
Summary of Contents for ESAB Cigweld EasyWeld 160
- Page 1 Art # A-14825_AB EasyWeld / HandyWeld 160 OPERATING MANUAL WARRANTY* OUTPUT CURRENT STICK WARRANTY* PLATE THICKNESS DIGITAL PRE-SETS 160A QUICK ELECTRODE CONTROL 3.2mm MAX EasyWeld 160: W1201160 HandyWeld 160: W1200160 Version No: AB Issue Date: 09-10-2021 Manual No: 0-5617...
- Page 2 YOU ARE IN GOOD COMPANY! The Brand of Choice for Contractors and Fabricators Worldwide. CIGWELD is a Market Leading Brand of Arc Welding Products for ESAB. We are a mainline supplier to major welding industry sectors in the Asia Pacific and emerging global markets including; Manufacturing, Construc- tion, Mining, Automotive, Engineering, Rural and DIY.
- Page 3 CIGWELD HandyWeld / EasyWeld 160 Welding Inverters Instruction Manual Number 0-5617 for: Part Numbers W1201160 and W1200160 Published by: CIGWELD Pty Ltd CIGWELD An ESAB Brand 71 Gower Street, Preston, Victoria, Australia, 3072 +61 3 9474 7400 +61 3 9474 7391 www.cigweld.com.au...
- Page 4 EasyWeld / HandyWeld 160 Be sure this information reaches the operator. You can get extra copies through your supplier. CAUTION These INSTRUCTIONS are for experienced operators. If you are not fully familiar with the principles of operation and safe practices for arc welding and cutting equipment, we urge you to read our booklet, “Precautions and Safe Practices for Arc Welding, Cutting, and Goug- ing,”...
- Page 5 DECLARATION OF CONFORMITY According to AS/NZS 3820:2020, Essential Safety Requirements for Electrical Equipment Radiocommunications Labelling (Electromagnetic Compatibility) Notice 2017 Type of equipment Arc welding power source Type designation EasyWeld 130 with serial number from: GC131-xxxx-xxxx EasyWeld 160 with serial number from: GC132-xxxx-xxxx HandyWeld 130 with serial number from: GC133-xxxx-xxxx HandyWeld 160...
-
Page 6: Table Of Contents
TABLE OF CONTENTS SECTION 1: ARC WELDING SAFETY INSTRUCTIONS AND WARNINGS ........1-1 1.01 Arc Welding Hazards ..................1-1 1.02 PRINCIPAL SAFETY STANDARDS ..............1-5 SECTION 2: INTRODUCTION ..................2-1 2.01 How To Use This Manual ................2-1 2.02 Equipment Identification ................. 2-1 2.03 Receipt Of Equipment .................. - Page 7 TABLE OF CONTENTS SECTION 6: STICK (MMAW) WELDING ................6-1 6.01 Setup For STICK (MMAW) Welding ..............6-1 6.02 Arc Welding Electrodes ................... 6-2 6.03 Types of Electrodes ..................6-2 6.04 Size of Electrode ..................... 6-3 6.05 Storage of Electrodes ..................6-3 6.06 Electrode Polarity ....................
- Page 8 This Page Intentionally Blank...
-
Page 9: Arc Welding Safety Instructions And Warnings
EasyWeld / HandyWeld 160 SECTION 1: ARC WELDING SAFETY INSTRUCTIONS AND WARNINGS WARNING PROTECT YOURSELF AND OTHERS FROM POSSIBLE SERIOUS INJURY OR DEATH. KEEP CHILDREN AWAY. PACE- MAKER WEARERS KEEP AWAY UNTIL CONSULTING YOUR DOCTOR. DO NOT LOSE THESE INSTRUCTIONS. READ OPERATING/INSTRUCTION MANUAL BEFORE INSTALLING, OPERATING OR SERVICING THIS EQUIPMENT. - Page 10 EasyWeld / HandyWeld 160 2. Wear approved safety glasses. Side shields WARNING recommended. ARC RAYS can burn eyes and skin; NOISE can damage hearing. 3. Use protective screens or barriers to protect others from flash and glare; warn others not to Arc rays from the welding process produce in- watch the arc.
- Page 11 EasyWeld / HandyWeld 160 4. Be alert that welding sparks and hot materials WARNING from welding can easily go through small cracks FUMES AND GASES can be hazardous to your and openings to adjacent areas. health. 5. Watch for fire, and keep a fire extinguisher Welding produces fumes and gases.
- Page 12 EasyWeld / HandyWeld 160 6. Turn face away from valve outlet when opening The following is a quotation from the General cylinder valve. Conclusions Section of the U.S. Congress, Office of Technology Assessment, Biological Effects of 7. Keep protective cap in place over valve except Power when cylinder is in use or connected for use.
-
Page 13: Principal Safety Standards
EasyWeld / HandyWeld 160 1.02 PRINCIPAL SAFETY STANDARDS Safety in welding and allied processes Part 1: Fire Precautions, AS 1674.1-1997 from SAI Global Limited, www.saiglobal.com. Safety in welding and allied processes Part 2: Electrical, AS 1674.2-2007 from SAI Global Limited, www. saiglobal.com. - Page 14 EasyWeld / HandyWeld 160 This Page Intentionally Blank GENERAL INFORMATION 0-5617...
-
Page 15: Introduction
EasyWeld / HandyWeld 160 SECTION 2: INTRODUCTION 2.02 Equipment Identification 2.01 How To Use This Manual The unit’s identification number (specification or This Owners Manual only applies to the Part Numbers part number), model, and serial number are located listed on page i. on the Data Plate which is fixed to the bottom of the To ensure safe operation, read the entire manual, welding machine. -
Page 16: Symbol Chart
EasyWeld / HandyWeld 160 2.04 Symbol Chart Note that only some of these symbols will appear on your model. Wire Feed Function Single Phase Wire Feed Towards Workpiece With Three Phase Output Voltage Off. Three Phase Static Frequency Converter- Welding Gun Dangerous Voltage Transformer-Rectifier Increase/Decrease... -
Page 17: Description
EasyWeld / HandyWeld 160 2.05 Description 2.06 User Responsibility The Cigweld EasyWeld 160 and HandyWeld 160 This equipment will perform as per the information welding machines offer many benefits of a professional contained herein when installed, operated, maintained welding machine in a compact, portable, easy to use... -
Page 18: Transporting Methods
EasyWeld / HandyWeld 160 2.08 Transporting Methods These units are equipped with a handle for carrying purposes. WARNING ELECTRIC SHOCK can kill. DO NOT TOUCH live electrical parts. Disconnect input power conductors from de-energized sup- ply line before moving the welding power source. WARNING FALLING EQUIPMENT can cause serious personal injury and equipment damage. -
Page 19: Specifications
EasyWeld / HandyWeld 160 2.10 Specifications Description EasyWeld 160 HandyWeld 160 Packaged Part Number W1201160 W1200160 Power Source Part Number W1201161 W1200161 Power Source Dimensions (L) 439.7mm × (W) 206.3mm ×(H) 308mm (L) 439.7mm × (W) 206.3mm ×(H) 308mm Power Source Weight 10.2Kg 10Kg Cooling... -
Page 20: Optional Accessories
EasyWeld / HandyWeld 160 NOTE 2 The Effective Input Current should be used for the determination of cable size & supply requirements. NOTE 3 Motor start fuses or thermal circuit breakers are recommended for this application. Check local requirements for your situation in this regard. - Page 21 EasyWeld / HandyWeld 160 EasyWeld 160 HandyWeld 160 Part Number Description Part Number Description Feed Roll 0.9/1.2mm V groove (hard W4018800 * E-180 Mig Gun 3m, Euro 7977660 wires) Feed Roll 0.8/0.9mm V groove knurled (flux Feed Roll 0.8/0.9mm U groove (soft 7977732 7977731 cored) supplied and fitted on machine...
- Page 22 EasyWeld / HandyWeld 160 Related Products Part Number Description 646766 WeldSkill Heavy Duty Welding Gloves - Medium 646755 WeldSkill Heavy Duty Welding Gloves - Large 646767 WeldSkill Heavy Duty Welding Gloves – XL 646771 WeldSkill Welding Jacket - Medium 646772 WeldSkill Welding Jacket - Large 646773 WeldSkill Welding Jacket - XL...
-
Page 23: Installation
EasyWeld / HandyWeld 160 SECTION 3: INSTALLATION 3.04 Mains Supply Voltage 3.01 Environment Requirements These units are designed for use in environments with increased hazard of electric shock. The Mains Supply Voltage should be within ± 15% of the rated Mains Supply Voltage. If actual Mains A. -
Page 24: Electromagnetic Compatibility
EasyWeld / HandyWeld 160 7. The time of day that welding or other activities 3.07 Electromagnetic Compatibility are to be carried out. WARNING 8. The immunity of other equipment in the en- Extra precautions for Electromagnetic Compat- vironment: the user shall ensure that other ibility may be required when this Welding Power equipment being used in the environment Source is used in a domestic situation. - Page 25 EasyWeld / HandyWeld 160 4. Equipotential Bonding Bonding of all metallic components in the welding installation and adjacent to it should be considered. However. Metallic components bonded to the work piece will increase the risk that the operator could receive a shock by touching the metallic components and the electrode at the same time.
- Page 26 EasyWeld / HandyWeld 160 This Page Intentionally Blank. INSTALLATION 0-5617...
-
Page 27: Operation
EasyWeld / HandyWeld 160 SECTION 4: OPERATION 4.01 Overview Standard operating procedures apply when using these Welding machines, i.e. connect work lead directly to workpiece with the spring loaded clamp. The MIG wire is fed from the spool through the feed roller system and into the MIG Gun (consult CIGWELD or the electrode wire manufacturers information for the correct polarity). - Page 28 EasyWeld / HandyWeld 160 3. Over Temp Indicator This welding power source is protected by a self resetting thermostat. The Over Temp indicator will illuminate and the error E01 also will be displayed if the machine has over heated which normally occurs if the duty cycle of the power source has been exceeded.
- Page 29 EasyWeld / HandyWeld 160 Voltage By turning the Control Knob, you can change the Pre-set Voltage from the Factory Set Quick Set values. Once the Volts Trim function is selected the Pre-set Voltage can be adjusted by turning the Control Knob Clockwise to increase the value or turning the Control Knob Anti-clockwise to decrease the value.
- Page 30 EasyWeld / HandyWeld 160 8. MIG Gun Polarity Lead The polarity lead is used to connect the MIG Gun to the appropriate positive or negative output terminal (allowing polarity reversal for different welding applications). The polarity lead should be connected in to the positive welding terminal (+) when using solid steel, stainless steel or aluminium MIG wire.
- Page 31 EasyWeld / HandyWeld 160 14. Hot Start Feature (Not Shown) This feature operates in Stick (MMAW) mode. The Hot Start feature improves the arc start characteristics by momentarily increasing the welding current to a level above the preset amperage (Welding Current). This is a preset feature and is not adjustable.
- Page 32 EasyWeld / HandyWeld 160 This Page Intentionally Blank. OPERATION 0-5617...
-
Page 33: Mig (Gmaw) Welding
EasyWeld / HandyWeld 160 SECTION 5: MIG (GMAW) WELDING 5.01 Shielding Gas Regulator/Flowmeter Operating Instructions WARNING This equipment is designed for use with welding grade (Inert) shielding gases only.. Shielding Gas Connection The CutSkill Preset Argon Regulator / Flowmeter and Gas Hose Kit is an optional accessory. Connect the gas regulator onto the gas cylinder/bottle by hand, keeping the round sight gauge in the vertical position. - Page 34 EasyWeld / HandyWeld 160 4. DO NOT use the regulator/flowmeter as a control valve. When downstream equipment is not in use for extended periods of time, shut off the gas at the cylinder valve and release the gas from the equipment. 5.
- Page 35 EasyWeld / HandyWeld 160 2. Since the regulator is a preset type, no adjustments to the regulator are necessary. Before opening the cylinder valve, be sure that the flow adjusting valve is in a finger-tight "OFF" position (clockwise). 3. Slowly and carefully, open the cylinder valve until the maximum pressure registers on the high pressure gauge.
-
Page 36: Attaching The Mig Gun (Euro, Easyweld 160 Only)
EasyWeld / HandyWeld 160 5.02 Attaching the MIG Gun (Euro, EasyWeld 160 only) Fit the MIG Gun to the power source by pushing the MIG Gun connector into the MIG Gun adaptor and screwing the plastic nut clockwise to secure the MIG Gun to the MIG Gun adaptor. Art # A-14827 Figure 5-4: Attaching the Euro MIG Gun to the EasyWeld 160 5.03 Installing Minispool (100mm diameter) -
Page 37: Installing Handispool (200Mm Diameter)
EasyWeld / HandyWeld 160 5.04 Installing Handispool (200mm diameter) As delivered from the factory, the unit is fitted with a Wire Spool Hub which accepts a Handispool of 200mm diameter. In order to fit a 200mm spool assemble parts in the sequence shown below in Figure 5-6. Adjustment of the nut will control the MIG Wire Spool Brake. -
Page 38: Inserting Wire Into The Wire Feed Mechanism
EasyWeld / HandyWeld 160 5.05 Inserting Wire into the Wire Feed Mechanism Release the tension from the pressure roller by turning the adjustable wire drive tension screw in an anti- clockwise direction. Then to release the pressure roller arm, pull the pressure roller arm tension screw outward to release the pressure roller arm (Figure 5-7). -
Page 39: Feed Roll Pressure Adjustment
EasyWeld / HandyWeld 160 5.06 Feed Roll Pressure Adjustment The pressure (top) roller applies pressure to the grooved feed roll via an adjustable pressure screw. These devices should be adjusted to a minimum pressure that will provide satisfactory WIREFEED without slippage. If slipping occurs, and inspection of the wire contact tip reveals no wear, distortion or burn back jam, the conduit liner should be checked for kinks and clogging by metal flakes and swarf. -
Page 40: Changing The Feed Roll
EasyWeld / HandyWeld 160 5.07 Changing the Feed Roll To change the feed roll, release the Wire Drive Tension Screw and lift the Pressure Roller Arm (top roller) up and out of the way. Loosen off and remove the feed roll retaining screw by turning in an anticlockwise direction. Once the feed roll is removed then to replace feed roll,ensuring you have the correct groove size matching the wire size you are using in the the welder. -
Page 41: Setup For Mig (Fcaw) Welding With Gasless Mig Wire
EasyWeld / HandyWeld 160 Wire Reel Brake Adjustment Nut Art # A-14833 Figure 5-12: Wire Reel Brake 5.09 Setup for MIG (FCAW) Welding with Gasless MIG Wire A. Ensure that the Power Source On/Off switch located on the rear of the Power Source is in the Off position. B. - Page 42 EasyWeld / HandyWeld 160 230/240 VAC Mains Supply Positive Welding Terminal (+) MIG Gun Work Lead Negative Welding Terminal (-) Polarity Lead Art # A-14835 Figure 5-13: Setup for MIG Welding with Gasless MIG Wire Select MIG Gasless Mode using the Process Selection Control button. (refer to section 4.02.1 for further information).
- Page 43 EasyWeld / HandyWeld 160 Volts Trim NOTE! At this moment you can operate with the recommended welding Quick Set data , once an arc is established, the digital display will be changed to show the welding current. If the Welding Current is found to be too High or too Low for the application the Wire Feed Speed can be adjusted to the desired value.
-
Page 44: Setup For Mig (Gmaw) Welding With Gas Shielded Mig Wire
EasyWeld / HandyWeld 160 5.10 Setup for MIG (GMAW) Welding with Gas Shielded MIG Wire Note: Argon Mini- Regulator and Gas Hose Kit Part No W4013010 is required in order to use Gas Shielded MIG Welding Wires. Note: Due to the higher Wire Feed Speed required to run ALU Wire successfully it must be run in the 0.6mm Wire Diameter, MIG Gas Mode. - Page 45 EasyWeld / HandyWeld 160 Gas Hose 240VAC Preset Argon Regulator Preset Argon Regulator Mains Supply Supply Input Lead Shielding Gas Cylinder Shielding Gas Hose MIG Gun Gas Inlet Connection Positive Welding Terminal (+) Polarity Lead Art # A-14834 Negative Welding Terminal (-) Work Lead Figure 5-20: Setup for MIG Welding with Gas Shielded MIG Wire Select MIG Gas (Solid) Mode using the Process Selection Control button.
- Page 46 EasyWeld / HandyWeld 160 Volts Trim NOTE! At this moment you can operate with the recommended welding Quick Set data , once an arc is established, the digital display will be changed to show the welding current. If the Welding Current is found to be too High or too Low for the application the Wire Feed Speed can be adjusted to the desired value.
-
Page 47: Mig (Gmaw/Fcaw) Basic Welding Technique
EasyWeld / HandyWeld 160 5.11 MIG (GMAW/FCAW) Basic Welding Technique Two different welding processes are covered in this section (GMAW and FCAW), with the intention of providing the very basic concepts in using the MIG mode of welding, where a welding gun is hand held, the electrode (welding wire) is fed into a weld puddle, and the arc is shielded by an inert welding grade shielding gas or inert welding grade shielding gas mixture. - Page 48 EasyWeld / HandyWeld 160 The welding gun should be held at an angle to the weld joint. (see Secondary Adjustment Variables below) Hold the gun so that the welding seam is viewed at all times. Always wear the welding helmet with proper filter lenses and use the proper safety equipment.
- Page 49 EasyWeld / HandyWeld 160 Distance from the MIG Gun Nozzle to the Work Piece The electrode wire stick out from the MIG Gun nozzle should be between 10mm to 20mm. This distance may vary depending on the type of joint that is being welded. Travel Speed The speed at which the molten pool travels influences the width of the weld and penetration of the welding run.
- Page 50 EasyWeld / HandyWeld 160 3. Nozzle Angle. This refers to the position of the welding gun in relation to the joint. The transverse angle is usually one half the included angle between plates forming the joint. The longitudinal angle is the angle between the centre line of the welding gun and a line perpendicular to the axis of the weld.
- Page 51 EasyWeld / HandyWeld 160 Setting of the Power Source Power source and Wirefeeder setting requires some practice by the operator, (however with the Quick Set feature of the EasyWeld/HandyWeld 160, setting up the correct parameters is a very simple procedure -refer to section 5.10), as the welding plant has two control settings that have to balance.
-
Page 52: Cigweld Mig Wire Selection Chart
EasyWeld / HandyWeld 160 5.12 CIGWELD MIG Wire Selection Chart EasyWeld / HandyWeld 160 DESCRIPTION DIAMETER PACK PART NUMBER APPLICATION 0.6mm Minispool 0.9kg WS0906 General purpose solid welding wire suitable for the all positional Gas Metal Arc Welding WELDSKILL 0.6mm Handispool 5kg WS5006 (GWAW) of mild and low alloy steels, used in... -
Page 53: Mig (Gmaw/Fcaw) Welding Troubleshooting
EasyWeld / HandyWeld 160 5.13 MIG (GMAW/FCAW) Welding Troubleshooting Solving Problems Beyond the Welding Terminals The general approach to fix Gas Metal Arc Welding (GMAW) problems is to start at the wire spool then work through to the MIG Gun. There are two main areas where problems occur with GMAW, Porosity and Inconsistent wire feed Solving Problems Beyond the Welding Terminals - Porosity When there is a gas problem the result is usually porosity within the weld metal. - Page 54 EasyWeld / HandyWeld 160 Solving Problems Beyond the Welding Terminals - Inconsistent Wire Feed Wire feeding problems can be reduced by checking the following points. FAULT CAUSE 1 Feed roll driven by motor in the A Wire spool brake is too tight. (Refer 5.08). wirefeed compartment slipping.
- Page 55 EasyWeld / HandyWeld 160 Basic MIG (GMAW) Welding Troubleshooting FAULT CAUSE REMEDY 1 Undercut A Welding arc voltage too A Decrease voltage or increase the Wire Feed Speed. high. B Incorrect gun angle B Adjust angle. C Excessive heat input C Increase the gun travel speed and/or decrease welding current by decreasing the voltage or decreasing the Wire Feed Speed.
- Page 56 EasyWeld / HandyWeld 160 This Page Intentionally Blank. MIG (GMAW) WELDING 5-24 Manual 0-5617...
-
Page 57: Stick (Mmaw) Welding
EasyWeld / HandyWeld 160 SECTION 6: STICK (MMAW) WELDING 6.01 Setup For STICK (MMAW) Welding A. Ensure that the Power Source On/Off switch located on the rear of the Power Source is in the Off posi- tion. B. Connect the Electrode Holder lead to the positive welding terminal (+). If in doubt, consult the electrode manufacturer. -
Page 58: Arc Welding Electrodes
EasyWeld / HandyWeld 160 6.02 Arc Welding Electrodes Manual Metal Arc Welding (MMAW) electrodes consist of a core wire surrounded by a flux coating. The flux coating is applied to the core wire by an extrusion process. The coating on arc welding electrodes serves a number of purposes: A. -
Page 59: Size Of Electrode
EasyWeld / HandyWeld 160 CIGWELD Electrode Selection Chart (cont'd) Description Diameter Pack Part No. Application HARDA is designed for hard surfacing of steel components subjected to wet or dry hard particle abrasion and low to moderate impact loading. The air hardening (~55RHc), low alloy steel deposit of WELDSKILL HARDA remains WeldSkill 3.2mm... -
Page 60: Effects Of Arc Welding Various Materials
EasyWeld / HandyWeld 160 6.07 Effects of Arc Welding Various Materials A. High tensile and alloy steels The two most prominent effects of welding these Art # A-07687 steels are the formation of a hardened zone in the weld area, and, if suitable precautions are not taken, Figure 6-2: Flat position, down hand butt weld the occurrence in this zone of under-bead cracks may result. -
Page 61: Joint Preparations
EasyWeld / HandyWeld 160 Art # A-07694 Art# A-07693 Figure 6-8: Overhead position, butt weld Figure 6-9: Overhead position fillet, weld 6.10 Joint Preparations In many cases, it will be possible to weld steel sections without any special preparation. For heavier sections and for repair work on castings, etc., it will be necessary to cut or grind an angle between the pieces being joined to ensure proper penetration of the weld metal and to produce sound joints. -
Page 62: Arc Welding Technique
EasyWeld / HandyWeld 160 6.11 Arc Welding Technique 20° Art # A-07696_AB A Word to Beginners For those who have not yet done any welding, the simplest way to commence is to run beads on a piece 1.6 mm (1/16”) of scrap plate. - Page 63 EasyWeld / HandyWeld 160 A. Butt Welds purpose to the backing run in securing proper fusion at the root of the weld. Set up two plates with their edges parallel, as shown in Figure 6-12, allowing 1.6mm to 2.4mm gap between B.
- Page 64 EasyWeld / HandyWeld 160 C. Vertical Welds 1. Vertical Up Tack weld a three feet length of angle iron to your work bench in an upright position. Use a 3.2mm Ferrocraft 21 electrode and set the cur- rent at 100 amps. Make yourself comfortable on a seat in front of the job and strike the arc Art # A-07703 in the corner of the fillet.
-
Page 65: Distortion
EasyWeld / HandyWeld 160 B. Expansion and Contraction of Parent Metal in the Art # A-07704 Fusion Zone: While welding is proceeding, a relatively small vol- ume of the adjacent plate material is heated to a very high temperature and attempts to expand in all directions. - Page 66 EasyWeld / HandyWeld 160 B. Distribution of Stresses Art # A-07709 Distortion may be reduced by selecting a welding sequence which will distribute the stresses suitably so that they tend to cancel each other out. See Figures 6-25 through 6-28 for various weld sequences. Choice of a suitable weld sequence is probably the most ef- fective method of overcoming distortion, although an unsuitable sequence may exaggerate it.
-
Page 67: Welding Problems
EasyWeld / HandyWeld 160 6.20 Welding Problems Description Possible Cause Remedy 1 Gas pockets or voids in weld metal A Electrodes are damp A Dry electrodes before use (Porosity) B Welding current is too high B Reduce welding current ... - Page 68 EasyWeld / HandyWeld 160 Lack of fusion caused by dirt, electrode angle incorrect, rate of travel too high Lack of Art # A-05867_AC inter-run fusion Lack of side fusion, scale dirt, small electrode, Lack of root fusion amperage too low Figure 6-30: Example of Lack of Fusion Description Possible Cause...
- Page 69 EasyWeld / HandyWeld 160 Description Possible Cause Remedy 6 Non-metallic particles are trapped in A Non-metallic particles may A If bad undercut is present, the weld metal (slag inclusion) be trapped in undercut from clean slag out and cover previous run with a run from a smaller diameter electrode ...
- Page 70 EasyWeld / HandyWeld 160 This Page Intentionally Blank. STICK (MMAW) Welding 6-14 0-5617...
-
Page 71: Routine Service Requirements And Power Source Problems
EasyWeld / HandyWeld 160 SECTION 7: ROUTINE SERVICE REQUIREMENTS AND POWER SOURCE PROBLEMS 7.02 Cleaning the Welding Power 7.01 Routine Maintenance & Source Inspection WARNING WARNING There are extremely dangerous voltage and There are extremely dangerous voltage and power levels present inside this product. Do power levels present inside this product. -
Page 72: Welding Power Source Problems
EasyWeld / HandyWeld 160 7.05 Welding Power Source Problems PROBLEM CAUSE REMEDY Mains Supply Voltage is A Power source is not in the Set the power source to MIG On, the On/Off switch on correct mode of operation. mode. Refer to Section 4.02.1. the rear panel is in the On position and the Power B MIG Gun Polarity Lead is not... - Page 73 EasyWeld / HandyWeld 160 PROBLEM CAUSE REMEDY When welding at A When output amperage Reduce output amperage (WFS maximum output (WFS exceeds the rated maximum and Volts). and Volts) the machine output of the machine by stops welding. 15%, the welding machine will sense this and initiates a safety circuit which stops the output current.
- Page 74 EasyWeld / HandyWeld 160 PROBLEM CAUSE REMEDY Welding wire continues to A MIG Gun trigger leads Repair or replace MIG Gun trigger feed when MIG Gun trigger shorted, or faulty MIG Gun switch/lead. is released. Trigger. Welding arc cannot be A MIG Gun polarity lead is not Connect the MIG Gun polarity established in MIG mode.
-
Page 75: Section 8: Key Spare Parts
EasyWeld / HandyWeld 160 SECTION 8: KEY SPARE PARTS 8.01 Key Spare Parts Art # A-14837 Figure 8-1 Key Spare Parts (EasyWeld 160 shown as example) WELDSKILL EASYWELD 160 and HANDYWELD 160 POWER SOURCE KEY SPARE PARTS ITEM PART NUMBER DESCRIPTION W7007250 Control Knob... -
Page 76: Easyweld 160 Mig Gun 3M Model No Cmg16El Spare Parts
EasyWeld / HandyWeld 160 8.02 EasyWeld 160 MIG Gun 3m Model No CMG16EL Spare Parts Art # A-14839 Figure 8-3 EASYWELD 160 MIG GUN 3M MODEL NO CMG16EL SPARE PARTS ITEM PART NUMBER DESCRIPTION W6000600 Gas Nozzle OTW11/23/R Contact Tip 0.6mm (Pack of 10) OTW11/30/R Contact Tip 0.8mm (Pack of 10) OTW11/35/R... -
Page 77: Handyweld 160 Mig Gun 3M Cmg16Dl Part No: W52Br16D3 Spare Parts
EasyWeld / HandyWeld 160 8.03 HandyWeld 160 MIG Gun 3m CMG16DL Part No: W52BR16D3 Spare Parts Art # A-14841 Figure 8-4 HANDYWELD 160 MIG GUN 3M CMG16DL PART NO: W52BR16D3 SPARE PARTS ITEM PART NUMBER DESCRIPTION W6000600 Gas Nozzle OTW11/23/R Contact Tip 0.6mm (Pack of 10) OTW11/30/R Contact Tip 0.8mm (Pack of 10) - Page 78 EasyWeld / HandyWeld 160 This Page Intentionally Blank. KEY SPARE PARTS 0-5617...
-
Page 79: Appendix 1: Circuit Diagram
EasyWeld / HandyWeld 160 APPENDIX 1: CIRCUIT DIAGRAM 0-5617 APPENDIX... - Page 80 EasyWeld / HandyWeld 160 This Page Intentionally Blank. APPENDIX 0-5617...
-
Page 81: Cigweld - Limited Warranty Terms
EasyWeld / HandyWeld 160 CIGWELD - LIMITED WARRANTY TERMS LIMITED WARRANTY: CIGWELD Pty Ltd, An ESAB Brand, hereafter, “CIGWELD” warrants to customers of its autho- rized distributors hereafter “Purchaser” that its products will be free of defects in workmanship or material. Should... - Page 82 EasyWeld / HandyWeld 160 WARRANTY SCHEDULE – EASYWELD 160 AND HANDYWELD 160 INVERTERS WARRANTY WARRANTY PERIOD – (Parts and Labour) EasyWeld 160 and HandyWeld 160 Inverter 1 Year Power Source ACCESSORIES WARRANTY PERIOD MIG Gun, electrode holder lead and work lead 3 Months MIG Gun consumable items CIGWELD Limited Warranty does not apply to;...
- Page 83 EasyWeld / HandyWeld 160 This Page Intentionally Blank.
- Page 84 CIGWELD Pty Ltd Malaysia - Indonesia - CIGWELD An ESAB Brand No 14 Jalan Teknologi 3/1 JI. Pulogadung No. 45 71 Gower Street, Preston VIC 3072 Australia Selangor Science Park 1 Kawasan Industri Pulogadung Customer Care: Kota Damansara, 47810 Petaling Jaya...
Need help?
Do you have a question about the Cigweld EasyWeld 160 and is the answer not in the manual?
Questions and answers