Handicare Freecurve Technical Manual
Hide thumbs
Also See for Freecurve:
- User manual (73 pages) ,
- Manual (7 pages) ,
- Instructions manual (7 pages)
Table of Contents
Advertisement
Quick Links
Advertisement
Chapters
Table of Contents

Related Manuals for Handicare Freecurve


Summary of Contents for Handicare Freecurve
- Page 1 Handicare Freecurve Technical manual...
-
Page 3: Table Of Contents
Technical manual Contents Introduction Installation Tools Electric schemes Traction motors Batteries Batteries condition test Charger Holiday switch Safety edges Printed circuit Seat levelling Armrest Key switch public building Tap to floor Powered swivel Active seat Footrest Remotes Charge/stop points Folding hinge Maintenance Lubrication Spare parts... -
Page 4: Introduction
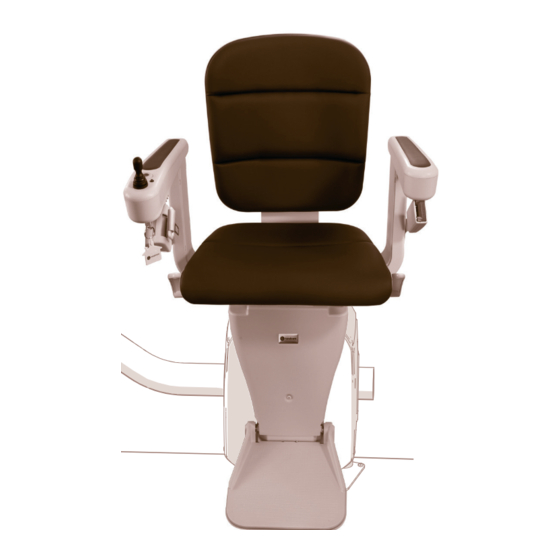
Handicare Freecurve Introduction General Power supply: 90 V ~ - 240 V ~ 3D-view Frequency: 50 / 60 Hz Current: 1 Amp Power consumption: 360 Watt Max. weight: 125 kg Max. speed: 0.11 m/sec (variable) Tips without recharging*: 10 uninterrupted Max. - Page 5 Technical manual Elegance • The Elegance chair can be delivered in cream, bordeaux red front view and cocoa brown. The material is leatherlook. • The armrest, footrest and seat fold up seperately. • The chair can swivel centric in both directions. •...
- Page 6 Handicare Freecurve Van Gogh • The rail of the Van Gogh chair lift is mounted on the outher 3D-view side of the stairs. • The maximum rail length is 35 metres. • Both forward and reverse bends can be incorporated in a single length of Van Gogh and Rembrandt rail.
- Page 7 Technical manual Vermeer • The Vermeer is a stairlift, fitted to the inside or the outside of the stairs, which travels to more than one floor. The Vermeer is intended for private and lockable public buildings. • Max. rail length (EN 81-40): 35 m •...
-
Page 8: Installation
Handicare Freecurve Installation Installation manual The installation is done according to the installation manual. Installation 11P00045 Installation manual Explanation drawing Special attention for: • Check that other users can safely use the stairs (install support brackets if necessary) • Check that the stairs can withstand 100N/cm2 •... - Page 9 Technical manual Installation Version 1.0...
- Page 10 Handicare Freecurve Explanation drawing Below you will find the QR-codes for the installation videos Installation Track assembly Rail joints Powerpack assembly Powerpack calibration Seat and footrest Finish installation Configuring the footrest Charge point correction Hinged track...
-
Page 11: Tools
Technical manual Tools In the installation manual you will find the standard tools. Below is a list of special tools Special tools Fitting kit rail joint C2043800 Torque wrench Allien cap 5,6,7,8 mm Grinder 11C00112 Electical override C5001000 Spiritleveler 11C00020 Allien key 7 11C00074 Install support AA10622 Bit 300 mm... - Page 12 Handicare Freecurve C2043800 Fitting kit rail joint Tools for installing the railjoint C2160000 coupling tool Tool for installing the railjoint, part of C2043800 11C00112 Grinder Tool for filing the domex, in case of a bump 11C00047 Body file blade Blade for tool 11C00112...
-
Page 13: Electric Schemes
Technical manual Electric schemes The electrical components are shown in the form of icons. The wire colours appearing in the connection diagram correspond to the wiring in the chair lift. Each connector has its own number which corresponds with the numbers in the chapter “fault finding”. Electric scheme Classic Elegance / Alliance... - Page 14 Handicare Freecurve...
- Page 15 Technical manual...
-
Page 16: Traction Motors
Handicare Freecurve Traction motors The unit has standard 2 traction motors to ride the unit over the rail which are applied with an electro mechanic brake. In axial direction the unit is kept horizontal by the tooth rack. Due to safety reasons the unit has 2 traction motors. When one of the motors breaks down, the other one will take care of a safe situation and is possible to bring the lift to a standstill. - Page 17 Technical manual In case of a defective encoder, the printed circuit does not know the position of the lift and will stop the lift. Traction motors Video principle DC-motor Instruction replacement of spareparts Schematics...
-
Page 18: Batteries
Handicare Freecurve Batteries The Freecurve has 2 maintenance free lead acid batteries of 12V=. wit- Rail length Battery Capacity Possible meters hout charging < 9 m Standard 8 Ahr 180 m 9-30 m Extra Power 12 Ahr 235 m > 30 m... - Page 19 Technical manual Ultra Power (LiFePo4): Ultra Power Kit • The LiFePo battery is an option for the Freecurve for heavy 3D-view duty use. The lift can ride 700 meters without charging. • The option is available fot the Freecurve in combination with all chairs and options.
-
Page 20: Batteries Condition Test
Handicare Freecurve Batteries condition test ACT chrome 12 V intelligent battery tester The ACT chrome is an intelligent battery tester, designed for 12 V lead acid batteries from 1.2 Ah to 200 Ah. The tester enables you to check the voltage and to test the capacity of new batteries straight from the box, as well as used batteries which may show abnormal Ah capacity. -
Page 21: Charger
Technical manual The Charger The battery charger is suited to an input voltage of between 100V~ and 240V~. The output voltage is between 27,4 V= and 27,7 V= when the stairlift is not charging. The output voltage is between 28,6 V= and 29,1 V= when the stairlift is charging. -
Page 22: Holiday Switch
To prevent this from happening, a holiday switch can be installed on the Freecurve lift. By activating this holiday switch the customer can switch of the battery power from the lift. Customers should be aware that the lift does not run when this switch is in the off position. -
Page 23: Safety Edges
Technical manual Safety edges Two direction-sensitive safety edges and one general safety edge have been included in the stairlift. The direction-sensitive safety edges The direction-sensitive safety edge prevents the lift from moving further in the direction that is blocked. However, the lift can still be moved in the opposite direction to remove the block. - Page 24 Handicare Freecurve Schematics directional safety Directional safety edges Left handed safety right Right handed safety right Left handed safety left Right handed safety left Schematics general safety...
-
Page 25: Printed Circuit
Wait for the pcb to give 2 beeps (within 30 seconds) Take the datacard out of the cardreader, note the projectnumber on the datacard and send this form with above information to the customersupport department of Handicare Disconnect the power of the lift. -
Page 26: Seat Levelling
Handicare Freecurve Seat leveling The datacard The datacard contains information of the stairlift: • The projectnumber • The position of the lift on the rail • The reference point • The speed • The railangles • The charge/stop stations •... - Page 27 Technical manual Schematics The tiltswitch The tilt switch has been included in the general safety lines and it interrupts the safety line if the chair tilts 5 degrees with respect to the horizon. Symptoms in case of a breakdown with the tiltswitch: •...
-
Page 28: Armrest
Handicare Freecurve Armrest The armrest for Classic, Elegance and Alliance are technically identical. Joystick Left Right Installation 11P00213 Change armrest cable 11P00223 Replace Classic Elegance armrest Classic changing left/ Replacing armrest 11P00219 11P00233 right cable 11P00220 Change parts Classic 11P00335... -
Page 29: Keyswitch Public Building
Technical manual Keyswitch public building Standard the keyswitch switches off the joystick and the remotes. Sometimes the owners of a public building request to switch off the joystick only by the keyswitch. In that case the engineer has to change the wiring of the keyswitch in a way that the keyswitch is part of the control line instead of the safety circuit. -
Page 30: Tap To Floor
Handicare Freecurve Tap to fl oor The Tap2Floor • Stairlift runs on joystick without stopping on any charge/ stop point after tapping (standard). • Stairlift with powered swivel can swivel automatic on a preferent intermediate landing after tapping (not in combination with turn &... -
Page 31: Powered Swivel
Technical manual Powered swivel The powered swivel chair • The powered swivel chair can be mounted on 3D-view the Classic/Elegance/Alliance chair. • The chair can swivel 45°, 65°, 85° or 90° and can also ride facing downwards in these positions. The positions can be changed on site by the engineer. - Page 32 Handicare Freecurve Turn & Go A special powered swivel chair is the turn & go. By operating the joystick or remote, the chair will swivel automatically at the bottom of the stairs and the user will ride in a swivelled position. The chair can not swivel towards the top fl oor upstairs, so a rail run out of 500 mm is always required.
-
Page 33: Active Seat
A demonstrator kit (AA13220) is available on the webshop. The Active Seat is a kit option for the Handicare Elegance and Alliance seat. The Active is available for new installations and existing installations as a kit and can be installed by the engineer. - Page 34 Handicare Freecurve Schematics Service instructions Active seat 11P00346 Active seat 11P00385 Demonstrator Fold up 11P00421...
-
Page 35: Footrest
Technical manual Footrest The footrest-folding • Manual folding 3D-view • Link with seat on the Classic, Elegance and Alliance seat is an option (footrest-linkage). • Powered and illuminated footrest on the Classic, Elegance and Alliance seat is an option. • Folding mechanism also functions if the chair is in a swiveled position. - Page 36 Handicare Freecurve The footrest-detection: • Footrest detection 3D-view - Both sides - Frontside - Underside - Underside when folded • The LED in the armrest will blink when the joystick is operated in the blocked direction. • The chair lift stops automatically in the event that an object becomes jammed between the footrest and the stairs.
- Page 37 Technical manual Footrest service instructions 11P00210 Footrest linkage 11P00211 Footrest linkage Classic chair Elegance chair Replace footrest Changing direction 11P00214 11P00216 (left-right) of footrest 11P00218 Changing footrest 11P00349 Powered footrest cable Powered footrest parts 11P00350...
-
Page 38: Remotes
Handicare Freecurve Remotes Remotes are standard delivered with a lift, one for each charge/stopping point. The remotes operate on 868 Mhz. The remotes are used to transport a lift without a person. Stairlift Status The remote control unit’s LED indicates the stairlift’s status:... - Page 39 Technical manual 915 Mhz remotes In the USA Stairlifts are delivered standard with 915 Mhz remotes. (2,4 Ghz as back up). In case of interference of 915 Mhz remotes, a conversion kit is available for 2,4 Ghz. Repeaters 915 Mhz / 2,4 Ghz 915Mhz / 2,4 Ghz service instruction For long lifts, repeater sets are available.
-
Page 40: Charge/Stop Points
Handicare Freecurve Charge/stop points Charging contacts are normally installed at the top and the bottom of the rail. Extra contacts can be installed to a maximum of 10. When installed in a spiral it might be necessary to cut the charge station in 2 pieces. -
Page 41: Folding Hinge
Technical manual Folding hinge The folding hinge is used in situations where the lift can not be parked downstairs. The folding rail’s motor receives its power from the unit. The contact between the unit and the folding rail’s motor is effected by means of wiper contacts. These wiper contacts are identical to those of the charging station;... - Page 42 Handicare Freecurve...
-
Page 43: Maintenance
Technical manual Maintenance Periodic preventive maintenance is necessary for long-term correct functioning. The stairlift must be serviced at least once a year. If the stair lift runs over more than 2 floor and/or has more than 2 users, it needs at least 2 maintenance visits a year. The service must be carried out by a qualified person. Maintenance Maintenance checklist... - Page 44 Handicare Freecurve Maintenance video’s Stairlift maintenance Rail Unit mechanical Unit electrical Chair Finish...
-
Page 45: Lubrication
Surfaces that require lubrication during maintenance are stipulated in the handbook. When you use a grease other than that recommended by Handicare the mixture of the 2 grease types may result in inferior lubrication and hence extra wear. -
Page 46: Spareparts
Handicare Freecurve Spareparts Spareparts can be ordered from the webshop on www.handicarepartners.com. For parts that are not on the webshop, you can contact dealerservice for price and availability. - Page 47 Technical manual Spareparts Classic Alliance Elegance Unit Hinge Sparepart book complete...
-
Page 48: Multimeter
Handicare Freecurve Multimeter A multimeter is an indispensable tool to measure voltage, current and resistance. The circuits should be tested as follows: • Use the electrical diagram to see which circuit you need to test • Disconnect the lift from the power supply •... -
Page 49: Electronic Parts
Technical manual Electronic parts Resistor A resistor is a component that resists the flow of current. It’s one of the most basic components used in electronic circuits. Resistors come in a variety of resistance values (how much they resist current, measured in units called ohms and designated by the symbol Ω) and power ratings (how much power they can handle without burning up, measured in watts). - Page 50 Handicare Freecurve Capacitor A capacitor is made up of two metallic plates. With a dielectric material in between the plates. When you apply a voltage over the two plates, an electric field is created. Positive charge will collect on one plate and negative charge on the other.
-
Page 51: Torque Settings
Technical manual Torque settings Bolts shall always be secured with the prescribed torque settings. If no torques are mentioned, you can use below table to find the correct setting. If bolts are overstressed this will lead to a stress fracture of a bolt. If the bolts in a dynamic situation are not tightened enough, this will lead to a fatigue fracture. -
Page 52: Circlip
Handicare Freecurve Circlip A circlip has a side with sharp corners and a side with rounded corners. The clips must be installed so that the “rounded” side faces the item being retained. A clip that is installed in the wrong way won’t be able to carry as much load and will fail more easily. -
Page 53: Threadlocking
Technical manual Threadlocking Introduction to anaerobic adhesives and sealants. Anaerobic adhesives and sealants were developed by the founder of the Loctite Corporation, now the Henkel Corporation, in 1953 and, since then, they have significantly evolved to meet the highest requirements of vehicle manufacturers and vehicle maintenance and repair. Anaerobic adhesives and sealants are resins that convert from liquid to a tough structural solid in the absence of air and the presence of metal. - Page 54 Handicare Freecurve Thru holes (bolts and nuts) Liquid, semi-solids and dry-to-touch tape. Apply Here Here Clean all threads (bolt and nut) with a cleaner. If necessary, spray all threads with LOCTITE® Primer. Allow to dry. Select the proper strength LOCTITE® threadlocker.
- Page 55 Technical manual Blind holes (studs, etc.) Liquid only. Onto Threads ® LOCTITE THREADLOCKER ® ™ Into Hole ® LOCTITE THREADLOCKER ™ / ™ or ™ Clean all threads (bolt and hole) with a cleaner. If necessary, spray all threads with LOCTITE® Primer. Allow to dry. Squirt several drops of LOCTITE®...
- Page 56 Handicare Freecurve Pre-assembled fasteners Liquid only. ® LOCTITE THREADLOCKER ™ here Not Here Clean bolts and nuts with a cleaner. Assemble components. Tighten nuts. Apply several drops of LOCTITE® Threadlocker 290™ at the nut and bolt juncture. Avoid touching bottle tip to metal.
-
Page 57: Handover/Approval
Handover the user manual and the key to the user. Handover / approval Type approval certificate Checklist One form is for the user, the other form shall be returned to Handicare. This can be done digitally by scanning or making a photo of the form. -
Page 58: Telephone Instruction
Handicare Freecurve Telephone instruction For the service desk there is a script available how to deal with service calls. Telephone instruction Telephone instruction... -
Page 59: Rescuing The User
Technical manual Rescuing the user Instructions for rescuing a user seated on a chair lift of the type Van Gogh or Rembrandt that is still at the top of the stairs. Check the status of the chair lift via the lamp in the on/off switch. Remove faults in the chair lift that could pose a danger to the user. - Page 60 Handicare Freecurve If you cannot remove the fault and the chair lift is to be removed from the rail, you may do this using the test box, Article number C5001000, in accordance with the instructions provided.
-
Page 61: Compatibility
The table below may also be useful if a unit is to be reused. Freecurve 2 unit, cannot be used on a rail with an inside curve C0020057, C0020081 and C0020090 are the only units that can be used on a rail with R250 curves. -
Page 62: Rework-Procedure
Handicare Freecurve Rework-procedure This procedure is meant for applying a rework. You can get an RA-number for a rework by contacting dealer support. Always mention this number on the outside of the returned rail parts. Return only the rail parts, without supports, charge points, folding hinge motors, joints etc. - Page 63 Technical manual Rework rails When a rail does not fi t, this can be caused by mistakes during measuring, producing or installing. To make a good judgement in case of a wrong rail we like to receive the underneath data which can be indicated on the installation drawing.
-
Page 64: Ra-Procedure
Handicare Freecurve RA-procedure For returning material to Handicare for guarantee or repair, contact dealer service for obtaining a RA- number. The RA-number should be visible on the outside of the return box. For returning seats and unit, use the special boxes. -
Page 65: Incident Report
Technical manual Incident reporting Incidents that concern the safety of the user, the engineer or other people shall be reported to Handicare as soon as possible. To have all information available, the incident form shall be fi lled in as complete as possible. -
Page 66: Faultfinding
Handicare Freecurve Faultfinding The solutions in red refer to the next pages. - Page 67 Technical manual Faultfinding The lift does not move in both directions The LED flashes upon joystick operation The LED remains dim upon joystick operation The LED remains off upon joystick operation The LED flashes upon joystick operation in one direction and remains dim in the other direction (the lift beeps upon operation of the joystick).
- Page 68 Handicare Freecurve The lift does not move in both directions The LED flashes upon joystick operation in both directions Connect the short-circuit connectors K6 and K9 A. The lift moves after operation of the direction switch (DS) The fault is located in the chair •...
-
Page 69: The Lift Does Not Move In Both Directions
Technical manual The lift does not move in both directions The LED remains dim upon joystick operation Connect the short-circuit connectors K6 and K9 A. The lift moves after operation of the direction switch (DS) The fault is located in the chair •... -
Page 70: The Led Remains Off Upon Joystick Operation
Handicare Freecurve The lift does not move in both directions The LED remains off upon joystick operation Connect the short-circuit connectors K6 and K9 A. The lift moves after operation of the direction switch (DS) The fault is located in the chair •... -
Page 71: The Led Flashes Upon Joystick Operation In One Direction And Remains Dim In The
Technical manual The lift does not move in both directions The LED flashes upon joystick operation in one direction and remains dim in the other direction (the lift beeps upon operation of the joystick). The lift is on the charge station. Connect the short-circuit connectors K6 and K9 A. -
Page 72: The Led Lights Up Upon Joystick Operation And Becomes Weak After 3 Seconds
Handicare Freecurve The lift does not move in both directions The LED lights up upon joystick operation and becomes weak after 3 seconds Connect the short-circuit connectors K6 and K9 The lift does not move after operation of the direction switch (DS) •... -
Page 73: Led Illuminates Bright, The Lift Does Not Move Upon Operating The Joystick
Technical manual The lift does not move in both directions LED illuminates bright, the lift does not move upon operating the joystick Connect the short-circuit connectors K6 and K9 A. The lift moves after operation of the direction switch (DS) The fault is located in the chair •... -
Page 74: The Lift Does Not Move In One Direction
Handicare Freecurve The lift does not move in one direction The LED remains dim upon joystick operation in the faulty direction Connect the short-circuit connectors K6 and K9 A. The lift moves after operation of the direction switch (DS) The fault is located in the chair •... -
Page 75: Charging
Technical manual Charging The batteries are not charging The red wire of the charge contacts is the “+”, the black wire is the “-”. When looking at the unit from the front side: the carbon brush on the right is the “+”, the one on the left is the “-”. Check the voltage on the charging station of the rail: The voltage is “0 V=”... -
Page 76: The Hinge
The hinge The resistance on the hinge contacts is 470 Ω when the motor is in the endposition. The resistance on the hinge contacts is 15 Ω when the motor is not in the endposition. Ride the litt to a charge contact The lift does not charge when it is on a charge contact The problem is in the unit •... -
Page 77: The Seat Inclines During The Ride
Technical manual The seat inclines during the ride The seat inclines in program mode • Incorrect datacard • The calibration has not be done on the calibration point • The linking of the remotes have not be done on the calibration point •... -
Page 78: The Remotes
The remotes The lift does not move and the LED in the remote control does not illuminate upon operation • The remote control batteries are flat, do not make contact or have been inserted the wrong way round • The child lock is activated (press and hold both buttons for 3 seconds) The lift does not move and the LED in the remote control illuminates upon operation •... -
Page 79: The Powered Swivel
Technical manual The powered swivel seat The powered swivel operates when the directional safety line is interrupted. The powered swivel does not operate when the general safety line is interrupted. The powered swivel does not function; the lift can ride •... -
Page 80: The Two-Way Powered Swivel Since Q4 2021
The two-way powered swivel seat (Q4 2021) The powered swivel operates when the directional safety line is interrupted. The powered swivel does not operate when the general safety line is interrupted. The powered swivel seat does not swivel • The lift is making its first ride since calibration •... -
Page 81: The Powered Footrest
Technical manual The powered footrest Voltages Elegance/Alliance Voltages Classic E16-3 24 V= always C19-3 24 V= always E16-1 0 V= always C19-1 0 V= always E15-3 10 V= C18-3 10 V= 16 V= down 16 V= down E15-4 0 V= always C18-4 0 V=... -
Page 82: Stairlift Rides Sometimes Slowly At Some Positions
Stairlift rides sometimes slowly at some positions 1) Drive lift to calibration position 2) Enable chair calibration mode (for rotating the chair motor only) 3) Press 3 switches at the same time for at least 2 seconds a. One bottom side cover switch (with the knee) b. -
Page 83: References
Technical manual References for faultfinding Page The general safety line 68, 71, 80, 81 The right safety line 71, 74 The left safety line 71, 74 The batteries 70, 80 The tractionmotors 69, 71, 72 The led The direction switch 69, 72, 74 The calibration switch The encoders... - Page 84 Handicare Freecurve...
- Page 86 Handicare Stairlifts B.V. Newtonstraat 35 1704 SB Heerhugowaard The Netherlands T +31 (0)72 576 88 88 F +31 (0)72 574 34 35 stairlifts@handicare.com www.handicare.com Handicare Accessibility Ltd. 82 First Avenue, Pensnett Estate Kingswinford, West Midlands DY6 7FJ, England T +44 (0)1384 408700 F +44 (0)1384 408719 enquiries@handicare.co.uk...
Need help?
Do you have a question about the Freecurve and is the answer not in the manual?
Questions and answers
How do you raise the seat
Manual movement of the chair during power failure