Thermo Scientific TSQ Series Hardware Manual
Hide thumbs
Also See for TSQ Series:
- Pre-installation requirements manual (50 pages) ,
- Hardware manual (140 pages)

Related Manuals for Thermo Scientific TSQ Series


Summary of Contents for Thermo Scientific TSQ Series
- Page 1 TSQ Series Hardware Manual Revision C 70111-97163 June 2014 For Research Use Only Not for use in Diagnostic Procedures...
- Page 2 © 2014 Thermo Fisher Scientific Inc. All rights reserved. The following names are registered trademarks in the United States and other countries. Swagelok is a registered trademark of the Crawford Fitting Company. Tygon is a registered trademark of Saint-Gobain Performance Plastics Company. Restek is a registered trademark of Restek Corporation. Microsoft and Windows are registered trademarks of Microsoft Corporation.
- Page 3 Regulatory Compliance Thermo Fisher Scientific performs complete testing and evaluation of its products to ensure full compliance with applicable domestic and international regulations. When the system is delivered to you, it meets all pertinent electromagnetic compatibility (EMC) and safety standards as described below. Changes that you make to your system may void compliance with one or more of these EMC and safety standards.
- Page 4 TSQ Quantum Ultra EMC Directive 89/336/EEC as amended by 92/31/EEC and 93/68/EEC EMC compliance has been evaluated by U.L. Underwriter’s Laboratory Inc. EN 55011 1998 EN 61000-4-3 2002 EN 61000-3-2 1995, A1; 1998, A2; EN 61000-4-4 1995, A1; 2001, A2; 2001 1998, A14;...
- Page 5 Notice on Lifting and Handling of Thermo Scientific Instruments For your safety, and in compliance with international regulations, the physical handling of this Thermo Fisher Scientific instrument requires a team effort to lift and/or move the instrument.
- Page 7 WEEE Compliance This product is required to comply with the European Union’s Waste Electrical & Electronic Equipment (WEEE) Directive 2002/96/EC. It is marked with the following symbol: Thermo Fisher Scientific has contracted with one or more recycling or disposal companies in each European Union (EU) Member State, and these companies should dispose of or recycle this product.
- Page 8 Conformité DEEE Ce produit doit être conforme à la directive européenne (2002/96/EC) des Déchets d'Equipements Electriques et Electroniques (DEEE). Il est marqué par le symbole suivant: Thermo Fisher Scientific s'est associé avec une ou plusieurs compagnies de recyclage dans chaque état membre de l’union européenne et ce produit devrait être collecté...
- Page 9 CAUTION CAUTION VORSICHT ATTENTION PRECAUCION AVVERTENZA Symbol Electric Shock: This instrument uses high Elektroschock: In diesem Gerät werden Choc électrique : l’instrument utilise des Descarga eléctrica: Este instrumento utiliza Shock da folgorazione. L’apparecchio voltages that can cause personal injury. Hochspannungen verwendet, die tensions capables d’infliger des blessures altas tensiones, capaces de producir lesiones è...
- Page 10 CAUTION CAUTION Symbol Electric Shock: This instrument uses high voltages that can cause personal injury. Before servicing, shut down the instrument and disconnect the instrument from line power. Keep the top cover on while operating the instrument. Do not remove protective covers from PCBs. Chemical: This instrument might contain hazardous chemicals.
-
Page 11: Table Of Contents
Divert/Inject Valve ..........16 Thermo Scientific TSQ Series Hardware Manual... - Page 12 Installing the Ion MAX or Ion MAX-S Ion Source Housing ....65 Ion MAX and Ion MAX-S Housing Maintenance ..... . .66 TSQ Series Hardware Manual Thermo Scientific...
-
Page 13: Cleaning
Index ............99 Thermo Scientific TSQ Series Hardware Manual xiii... -
Page 15: Preface
Preface About This Guide This TSQ Series Hardware Manual contains a description of the modes of operation and principle hardware components of your TSQ system. In addition, this manual provides step-by-step instructions for cleaning and maintaining your mass spectrometer. Related Documentation... -
Page 16: Safety Precautions
Observe the following safety precautions when you operate or perform service on the mass spectrometer. CAUTION Do Not Perform Any Servicing Other Than That Contained in the TSQ Series Hardware Manual. To avoid personal injury or damage to the instrument, do not perform any servicing other than that contained in the TSQ Series Hardware Manual or related manuals unless you are qualified to do so. -
Page 17: Solvent And Gas Purity Requirements
Chapter 8, “Replaceable Parts.” For mechanical failures: A mechanical assembly typically is to be repaired to the level of the smallest item listed in Chapter 8, “Replaceable Parts.” Thermo Scientific TSQ Series Hardware Manual xvii... -
Page 18: Contacting Us
To suggest changes to documentation or to Help • Fill out a reader survey online at www.thermo.com/lcms-techpubs. • Send an e-mail message to the Technical Publications Editor at techpubs-lcms@thermofisher.com. xviii TSQ Series Hardware Manual Thermo Scientific... -
Page 19: Introduction
Introduction TSQ™ Series mass spectrometers are members of the Thermo Scientific family of mass spectrometers. The TSQ Series mass spectrometer is an advanced analytical instrument that includes a syringe pump, a divert/inject valve, a mass spectrometer, and the Xcalibur™ data system. - Page 20 The instrument can also be used as a single-stage mass spectrometer by transmitting the ions through the first and second rod assemblies followed by mass analysis in the third rod assembly. TSQ Series Hardware Manual Thermo Scientific...
-
Page 21: Ionization Modes
• As ion transmission devices • As mass analyzers A rod assembly is a regular array of metal rods. See “Mass Analyzer” page 27 for a discussion of the rod assemblies used on the TSQ Series instrument. Thermo Scientific TSQ Series Hardware Manual... -
Page 22: Q1Ms And Q3Ms Scan Modes
(Q2 and Q3, or Q1 and Q2, respectively) act as ion transmission devices. In the Q1MS scan mode, Q1 is used as the mass analyzer; in the Q3MS scan mode, Q3 is used as the mass analyzer. TSQ Series Hardware Manual Thermo Scientific... -
Page 23: Product Scan Mode
A mass spectrum obtained in the product scan mode (product mass spectrum) is the mass spectrum of a selected parent ion. Figure 1 illustrates the product scan mode. Figure 1. Illustration of product scan mode RF Only + Ar Q1 Set Q3 Scanning Q3 m/z Thermo Scientific TSQ Series Hardware Manual... -
Page 24: Parent Scan Mode
The experiments are useful for the rapid detection of a series of structural homologs (for example, substituted aromatics, phthalates, steroids, or fatty acids) that have a common fragment ion (for example, m/z 149 for the phthalates). TSQ Series Hardware Manual Thermo Scientific... -
Page 25: Neutral Loss Scan Modes
CO from aldehydes, HX from halides, and H O from alcohols). Figure 3. Illustration of the neutral loss scan mode RF Only + Ar Q3 = Q1 - ∆ Q1 Scanning Q1 m/z Thermo Scientific TSQ Series Hardware Manual... -
Page 26: Data Dependent Scan Mode
TSQ system generates product spectra. Later, you can decide if the information is useful. Because a data-dependent scan needs to use a target ion from a previous scan, the first scan event cannot be a data-dependent scan. TSQ Series Hardware Manual Thermo Scientific... -
Page 27: Scan Types
SIM can improve the detection limit and decrease analysis time, but it can also reduce specificity. Because SIM monitors only specific ions, any compound that fragments to produce those ions will appear to be the target compound. The result can be a false positive. Thermo Scientific TSQ Series Hardware Manual... -
Page 28: Selected Reaction Monitoring
This sum is displayed versus the integral center of mass of the sampling intervals. In general, use the centroid scan data type for data acquisition for faster scan speed. Data processing is also much faster for centroid data. TSQ Series Hardware Manual Thermo Scientific... -
Page 29: Mass/Charge Range
The TSQ mass spectrometer can operate in a mass/charge range of 10 to 3000 Da (TSQ Quantum Access, TSQ Vantage EMR, and TSQ Quantum Ultra EMR) or 10 to 1500 Da (TSQ Vantage, TSQ Vantage AM, TSQ Quantum Ultra and TSQ Quantum Ultra AM). Thermo Scientific TSQ Series Hardware Manual... -
Page 31: Functional Description
The system electronics receive and amplify the ion current signal from the ion detection system. That signal is then passed on to the data system for further processing, storage, and display. The data system provides the primary TSQ mass spectrometer user interface. Thermo Scientific TSQ Series Hardware Manual... -
Page 32: Autosampler
LC/MS analyses. Autosampler Start/Stop signals with the TSQ mass spectrometer are provided by contact closure. Refer to the TSQ Series Getting Connected Guide for information on connecting an autosampler to the TSQ mass spectrometer by contact closure. -
Page 33: Liquid Chromatograph
You can control most LCs and the corresponding UV detectors directly from the TSQ data system computer. You can set the flow rate from 0 to 1000 µL/min. Refer to TSQ Series Getting Connected for information on connecting an LC to the TSQ mass spectrometer. -
Page 34: Divert/Inject Valve
Figure The divert valve enables switching the solvent front, gradient endpoint, or any portion of the LC run to waste. TSQ Series Getting Started provides procedures for plumbing the valve in the loop injector or divert valve configuration. You can control the divert/inject valve from the data system. You specify the parameters of the divert/inject valve on the Divert Valve page, accessible from the Instrument Setup window. -
Page 35: Divert/Inject Valve
Divert/inject valve plumbed as a loop injector and as a divert valve Plumbed as a loop injector Plumbed as a divert valve Plug (optional) waste From syringe pump From LC pump waste From LC pump ion source ion source Thermo Scientific TSQ Series Hardware Manual... -
Page 36: Mass Spectrometer
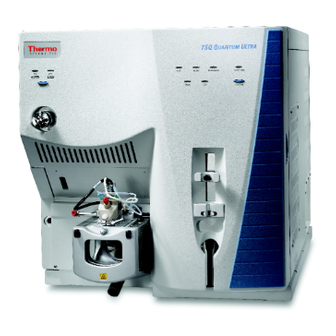
(TSQ Vantage and TSQ Quantum Access) and Figure 10 (TSQ Quantum Ultra). Figure 9. Front panel LEDs of the TSQ Vantage and TSQ Quantum Access mass spectrometers Power Vacuum Communicatio System Scan Syringe Pump TSQ Series Hardware Manual Thermo Scientific... - Page 37 When the divert/inject valve is set up for divert valve operation, the divert/inject valve button switches the LC flow between the mass spectrometer and the waste container and the labels Detector and Waste apply. Thermo Scientific TSQ Series Hardware Manual...
-
Page 38: Vent Valve
Vacuum + 30V – Max Electronics Start In Main Power Refer to Manual Forepump Power In Qualified Service Personnel Only V ~230, 50/60 Hz, 15.0 A Max V ~230, 50/60 Hz, 5.0 A Max TSQ Series Hardware Manual Thermo Scientific... -
Page 39: Api Source
(APCI) mode. For more information regarding the API source, refer to the Ion MAX and Ion MAX-S API Source Hardware Manual, H-ESI Probe Operator’s Manual, Ion MAX APPI Source Operator’s Manual, or Nanospray Ion Source Operator’s Manual. Thermo Scientific TSQ Series Hardware Manual... -
Page 40: Ion Source Interface
A potential of typically ±35 V (positive for positive ions and negative for negative ions) assists in repelling ions from the ion transfer tube to the skimmer. TSQ Series Hardware Manual Thermo Scientific... -
Page 41: Ion Optics
This fragmentation, called ion source collision-induced dissociation (CID), decreases sensitivity. When you tune the TSQ mass spectrometer, you adjust the tube lens offset voltage to maximize sensitivity by balancing desolvation with fragmentation. Thermo Scientific TSQ Series Hardware Manual... - Page 42 The tube lens and skimmer, or the S-lens and exit lens, mount to the ion source interface cage. TSQ Series Hardware Manual Thermo Scientific...
- Page 43 Source CID can also be accomplished by increasing the DC voltage offset between the skimmer, which is at ground potential, and the rest of the mass spectrometer beginning with Q00. You use the Source CID parameter in the Tune Master software to adjust this potential. Thermo Scientific TSQ Series Hardware Manual...
- Page 44 The value ranges between 0 and ±300 V. Lenses L11 and L12 also act as a vacuum baffle between the Q0 ion optics chamber and the mass analyzer chamber. TSQ Series Hardware Manual Thermo Scientific...
-
Page 45: Mass Analyzer
Figure 23. Mass analyzer, ion detection system, and ion optics Ion detection system Lens L4 Q3 quadrupole Lenses L31, L32, L33 Q2 collision cell Lenses Q00 rf Ion source L21, L22, L23 quadrupole quadrupole lens interface Thermo Scientific TSQ Series Hardware Manual... - Page 46 Q2 has become synonymous with the term collision cell. Technically, the collision cell is the chamber that encloses Q2 where collision-induced dissociation can take place if the argon collision gas is present. See Figure TSQ Series Hardware Manual Thermo Scientific...
- Page 47 The ratio of rf voltage to dc voltage determines the ability of the mass spectrometer to separate ions of different mass-to-charge ratios. Thermo Scientific TSQ Series Hardware Manual...
- Page 48 180) are maintained within bounded oscillations as their velocity carries them through the mass analyzer. At the same time, all other ions undergo unbounded oscillations. These ions strike one of the rod surfaces, become neutralized, and are pumped away, or they are ejected from the rod assembly. TSQ Series Hardware Manual Thermo Scientific...
- Page 49 The more stable the ion, the less likely a given collision will fragment the ion. The more massive the ion, the greater its ability to distribute the vibrational energy imparted by a collision. As a result, ion fragmentation might decrease. Thermo Scientific TSQ Series Hardware Manual...
- Page 50 • To minimize the amount of collision gas that enters the mass analyzers (Q1 and Q3) from the collision cell (Q2). (For high-mass transmission, it is important to maintain a low pressure in the mass analyzers.) TSQ Series Hardware Manual Thermo Scientific...
-
Page 51: Ion Detection System
The curved surface of the conversion dynode focuses these secondary particles and a voltage gradient accelerates the particles into the electron multiplier. Thermo Scientific TSQ Series Hardware Manual... - Page 52 Because of the off-axis orientation of the ion detection system relative to the mass analyzer, neutral molecules from the mass analyzer tend not to strike the conversion dynode or electron multiplier. As a result, noise from neutral molecules is reduced. TSQ Series Hardware Manual Thermo Scientific...
-
Page 53: Vacuum System And Inlet Gases Hardware
(1 mTorr) (or less) cell (or other region sample input (1 Torr) gauge device) Sample tube Triple-inlet Convectron turbomolecular pump gauge Convectron gauge Collision gas Exhaust divert valve Forepump(s) Argon Collision gas port gas valve Thermo Scientific TSQ Series Hardware Manual... -
Page 54: Collision Cell Chamber
The collision cell chamber, inside the analyzer chamber, has a user controlled argon pressure of between one and four mTorr when CID is turned on. Argon in the collision cell is evacuated by the forepump when CID is turned off. TSQ Series Hardware Manual Thermo Scientific... - Page 55 Power to the turbomolecular pump is shut off if the foreline pressure, as measured by the Convectron gauge, is too high, or if the turbomolecular temperature is too high. Thermo Scientific TSQ Series Hardware Manual...
- Page 56 You can set the collision gas pressure (0 to 4 milliTorr) in the Define Scan view of the Tune Master window. TSQ Series Hardware Manual Thermo Scientific...
- Page 57 Figure 32. Nitrogen and argon gas inlets Nitrogen In Nitrogen for Vent 690 ± 140 kPa 35 kPa MAX (100 ± 20 psi) (5 psi MAX) Argon In 135 ± 70 kPa (20 ± 10 psi) Thermo Scientific TSQ Series Hardware Manual...
-
Page 58: Electronic Assemblies
The Q1 and Q3 rf voltage amplifier circuits are identical, and the circuits for Q0 and Q2 are similar. The rf voltage generation electronic assemblies include the following components: • RF oscillator • RF Voltage Amplifier PCB • Low Pass Filter PCB • RF voltage coil TSQ Series Hardware Manual Thermo Scientific... -
Page 59: Data System
• High capacity hard disk drive • Recordable/rewriteable CD drive • Primary Ethernet port (data system to mass spectrometer) • Secondary Ethernet port (data system to local area network) • High performance video graphics card • DVD drive Thermo Scientific TSQ Series Hardware Manual... -
Page 60: Data System / Mass Spectrometer / Lc Interface
You set up the printer from the Print Setup dialog box. To open the Print Setup dialog box, choose File > Print Setup in any window. TSQ Series Hardware Manual Thermo Scientific... - Page 61 Line voltage 110/230 V ac Foreline 15A Max. (high vacuum) Auto-range MS pump RS232 from MS pump to Exhaust PC’s COM1 (part of Surveyor equipment) Line voltage Mechanical pump 110/230 V ac 15A Max. Auto-range Thermo Scientific TSQ Series Hardware Manual...
-
Page 63: System Shutdown, Startup, And Reset
For the recommended procedure, see “Shutting Down the System Completely” page To turn off the LC, autosampler, and computer in an emergency, use the on/off switches on the LC, autosampler, and computer, respectively. Thermo Scientific TSQ Series Hardware Manual... - Page 64 Vacuum + 30V – Max Electronics Start In Main Power Refer to Manual Forepump Power In Qualified Service Personnel Only V ~230, 50/60 Hz, 15.0 A Max V ~230, 50/60 Hz, 5.0 A Max TSQ Series Hardware Manual Thermo Scientific...
-
Page 65: Placing The System In Standby Condition
“Cleaning the Ion Sweep Cone and Ion Transfer Tube” page 5. Leave the mass spectrometer power on. 6. Leave the LC power on. 7. Leave the autosampler power on. 8. Leave the data system power on. Thermo Scientific TSQ Series Hardware Manual... -
Page 66: Shutting Down The System Completely
• After about two minutes, the pressure of the vacuum manifold reaches atmospheric pressure. 6. Unplug the power cord for the mass spectrometer. CAUTION Allow heated components to cool before servicing them. TSQ Series Hardware Manual Thermo Scientific... -
Page 67: Starting Up The System After A Complete Shutdown
To start up the LC, follow the startup procedure described in the manual that came with the LC. If necessary, configure the LC as described in TSQ Series Getting Connected. Do not turn on the liquid flow to the mass spectrometer. -
Page 68: Starting Up The Mass Spectrometer
7 × 10 Torr. If you have an autosampler, go to the next topic, “Starting Up the Autosampler.” If you do not have an autosampler, go to the topic “Setting Up Conditions for Operation.” TSQ Series Hardware Manual Thermo Scientific... -
Page 69: Starting Up The Autosampler
TSQ mass spectrometer (that is, optimize the tune and calibration parameters) perhaps once a quarter. Refer to “Automatic Tuning and Calibrating in the ESI/MS Mode” in the TSQ Series Getting Started Guide for a procedure for tuning and calibrating the TSQ mass spectrometer. -
Page 70: Resetting The Mass Spectrometer
To reset the data system by using the Windows shutdown and restart procedure 1. Choose Start > Shut Down from the Windows taskbar. The Shut Down Windows dialog box appears. 2. To start the Windows shutdown and restart procedure, select Restart and click OK. TSQ Series Hardware Manual Thermo Scientific... -
Page 71: Resetting The Data System By Turning The Personal Computer Off Then On
• Place the mass spectrometer in the Off condition. The Off condition is similar to standby, except all high voltage components of the mass spectrometer are turned off. Choose Control > Off from the Tune Master window to place the mass spectrometer in the Off condition. Thermo Scientific TSQ Series Hardware Manual... -
Page 72: On/Off Status
Sheath gas Auxiliary gas Argon collision gas Vent valve Closed Closed Closed Open Open (after 2 to 4 min) (after 2 to 4 min) Turbomolecular pump Forepump Vent Delay PCB Embedded computer Turbomolecular pump controller TSQ Series Hardware Manual Thermo Scientific... -
Page 73: Vacuum Service Switch
PS1 power supply, +24 V PS2 power supply, +5, ±15, ±24 V dc PS3 power supply, +36, -28 V dc Fan, turbomolecular pump Fan, above manifold Fan, center wall Convectron gauge, foreline Convectron gauge, collision cell Ion gauge Thermo Scientific TSQ Series Hardware Manual... -
Page 75: Daily Operation
APCI experiment, refer to “Optimizing the Mass Spectrometer with Your Compound in ESI/MS/MS Mode” or “Optimizing the Mass Spectrometer with Your Compound in APCI/MS/MS Mode” in the manual TSQ Series Getting Started Guide. Things to Do Before Operating the TSQ System... -
Page 76: Checking The Argon And Nitrogen Supplies
Full Instrument Control workspace. Compare the current values of the pressures in the vacuum manifold with the values listed in Table 3. If the current values are higher than normal, you might have an air leak. TSQ Series Hardware Manual Thermo Scientific... -
Page 77: Things To Do After Operating The Tsq System
• Flushing the Sample Transfer Line, Sample Tube, and API Probe • Placing the System in Standby Condition • Cleaning the Ion Sweep Cone and Ion Transfer Tube • Emptying the Solvent Waste Bottle Thermo Scientific TSQ Series Hardware Manual... -
Page 78: Flushing The Sample Transfer Line, Sample Tube, And Api Probe
Select Aux Valve Flow in the device list, and then type 5 in the box and press the ENTER key. d. Set the ESI spray voltage to 0: Select Spray Voltage in the device list, and then type 0 in the box and press the ENTER key. TSQ Series Hardware Manual Thermo Scientific... -
Page 79: Placing The System In Standby Condition
See the topic, “Maintaining the Ion Sweep Cone and Ion Transfer Tube” page Go to the next topic, “Emptying the Solvent Waste Bottle.” Thermo Scientific TSQ Series Hardware Manual... -
Page 80: Emptying The Solvent Waste Bottle
Thermo Fisher Scientific recommends checking the solvent level in the solvent waste bottle on a daily basis. If necessary, empty the solvent waste bottle. Dispose of the solvent waste in accordance with local and federal regulations. TSQ Series Hardware Manual Thermo Scientific... -
Page 81: Removing And Reinstalling The Ion Source Housing
2. Rotate the ion source housing locking levers 90 degrees to release the ion source housing from the ion source mount assembly. 3. Remove the ion source housing by pulling it straight off the ion source mount assembly, and place the housing in a safe location for temporary storage. Thermo Scientific TSQ Series Hardware Manual... - Page 82 Removing the Ion MAX or Ion MAX-S Ion Source Housing Figure 36. Ion MAX source housing (front) Ion source housing locking lever (2x) Ion source housing drain Figure 37. Ion MAX-S source housing (front) Ion source housing locking levers Ion source housing drain TSQ Series Hardware Manual Thermo Scientific...
-
Page 83: Installing The Ion Max Or Ion Max-S Ion Source Housing
Ion source housing locking levers Guide pin holes Figure 39. Ion source mount, showing the ion source housing guide pins and ion source interface release lever Ion source interface release lever Ion source housing guide pins Thermo Scientific TSQ Series Hardware Manual... -
Page 84: Ion Max And Ion Max-S Housing Maintenance
Be sure to follow all safety precautions in the sections regarding the installation and removal of the housing. For any additional service that might be required, contact your local Thermo Fisher Scientific service representative. TSQ Series Hardware Manual Thermo Scientific... -
Page 85: Maintenance
Procedures for replacing the ion transfer tube and the capillary heater assembly are also provided. For instructions on maintaining the LC or autosampler, refer to the manual that comes with the LC or autosampler. Thermo Scientific TSQ Series Hardware Manual... - Page 86 Ion detection system Clean ion detection system Whenever the side cover (electron multiplier and plate of the vacuum conversion dynode) manifold is removed Cooling fans Clean fan filters Every 4 months page 89 TSQ Series Hardware Manual Thermo Scientific...
-
Page 87: Frequency Of Cleaning
(if ever) required. (Q0 can be removed and cleaned along with Q00.) If you believe that the Q1, Q2, or Q3 quadrupoles need cleaning, contact Thermo Fisher Scientific and schedule a visit by a Thermo Fisher Scientific field service engineer. Thermo Scientific TSQ Series Hardware Manual... -
Page 88: Maintaining The Ion Sweep Cone And Ion Transfer Tube
4. Remove the ion transfer tube (P/N 97055-20199) by turning it counterclockwise with the custom removal tool (P/N 70111-20258, in the Accessory Kit) until you can pull it free from the ion source interface. See Figure TSQ Series Hardware Manual Thermo Scientific... - Page 89 Firmly press the ion sweep cone into the ion source mount. See Figure 41 Figure 12. Reinstall the Ion MAX or Ion MAX-S source housing on the mass spectrometer as described in the topic “Installing the Ion MAX or Ion MAX-S Ion Source Housing” page Thermo Scientific TSQ Series Hardware Manual...
-
Page 90: Maintaining The Ion Source Interface Assembly
You must replace the ion transfer tube if the ion transfer tube bore becomes corroded. You can easily remove the ion sweep cone and ion transfer tube to clean or replace them without venting the system. See “Maintaining the Ion Sweep Cone and Ion Transfer Tube” page TSQ Series Hardware Manual Thermo Scientific... -
Page 91: Shutting Down And Venting The System
2. Using a right-to-left motion, move the ion source interface release lever several times to loosen the ion source interface from the ion optics cage assembly. See Figure 3. Grab the exposed outer grooves of the ion source interface and firmly pull the assembly straight out. Thermo Scientific TSQ Series Hardware Manual... -
Page 92: Removing The S-Lens And Exit Lens (Tsq Vantage)
2. Grasp the two thumbscrews and carefully pull the S-lens straight out of the ion source interface cage. Place it on a clean, lint-free surface. 3. Remove the exit lens from the S-lens and place it on a clean, lint-free surface. TSQ Series Hardware Manual Thermo Scientific... -
Page 93: Cleaning The S-Lens And Exit Lens (Tsq Vantage)
2. Rinse the exit lens and S-lens with fresh methanol. 3. Air dry the exit lens and S-lens or blow dry them with nitrogen gas. Ensure that all solvent has evaporated from the components before reassembly. Thermo Scientific TSQ Series Hardware Manual... -
Page 94: Removing The Tube Lens And Skimmer (Tsq Quantum Access And Tsq Quantum Ultra)
4. Place the tube lens on a clean, lint-free surface. Figure 45. Removing the skimmer and tube lens from the ion source interface cage of the TSQ Quantum Access and TSQ Quantum Ultra Contact ring support Skimmer Ion source interface cage Tube lens TSQ Series Hardware Manual Thermo Scientific... -
Page 95: Cleaning The Tube Lens And Skimmer (Tsq Quantum Access And Tsq Quantum Ultra)
Hold the S-lens by the thumbscrews and orient the thumbscrews toward the thumbscrew holes on the ion source interface. Only one orientation will work. b. Carefully insert the S-lens into the ion source interface cage. c. Tighten the thumbscrews until fingertight. Thermo Scientific TSQ Series Hardware Manual... -
Page 96: Reinstalling The Tube Lens And Skimmer (Tsq Quantum Access And Tsq Quantum Ultra)
Figure 46. Ion source interface cage of the TSQ Quantum Access and TSQ Quantum Ultra, showing the skimmer and tube lens lead pin sockets Ion source interface cage Contact ring support Skimmer lead pin socket Tube lens lead pin socket TSQ Series Hardware Manual Thermo Scientific... -
Page 97: Reinstalling The Ion Source Interface Assembly
You might also need to reinstall an ion source probe and LC liquid lines, as appropriate, as described in the corresponding topics in the TSQ Series Getting Connected Guide. Starting Up the System Start up the system as described in the topic “Starting Up the System after a Complete Shutdown”... -
Page 98: Shutting Down And Venting The System
See Figure Figure 47. Removing the ion source interface cover screws Ion source interface cover screws 2. Using a hex ball driver, remove the roughing pump adapter access plate. See Figure TSQ Series Hardware Manual Thermo Scientific... - Page 99 Figure 49. Unplugging the ion source cable harness connector 4. Remove the ion optics cage assembly: a. Using a hex ball driver, remove the three screws fastening the ion optics cage assembly to the ion source mount assembly. See Figure Thermo Scientific TSQ Series Hardware Manual...
- Page 100 See Figure Figure 51. Pulling the ion source cable harness out of the ion optics cage assembly TSQ Series Hardware Manual Thermo Scientific...
- Page 101 Carefully slide the ion optics cage assembly out of the ion source mount assembly. Figure d. Place the ion optics cage assembly on a clean, lint-free surface. Figure 52. Removing the ion optics cage assembly Thermo Scientific TSQ Series Hardware Manual...
-
Page 102: Disassembling The Ion Optics Cage Assembly
5. Using a hex ball driver, remove the three Q00 mounting screws that fasten the Q00 RF lens assembly to the Q00/L0 mount. Leave the lens L0 mounted in the PEEK Q00/L0 mount. TSQ Series Hardware Manual Thermo Scientific... -
Page 103: Cleaning Q00 And L0
Note Wear clean gloves to handle the parts after you clean them. 2. Dry the parts with a rapid stream of nitrogen gas. 3. Inspect each part for contamination and dust. If necessary, repeat the cleaning procedure. Thermo Scientific TSQ Series Hardware Manual... -
Page 104: Reassembling The Ion Optics Cage Assembly
Orient the Q0 mount assembly so that the flat side is on the same side as the two contacts. b. Secure the Q0 mount assembly on the ion optics cage with the 3 Q0 mounting screws. Figure TSQ Series Hardware Manual Thermo Scientific... -
Page 105: Reinstalling The Ion Optics Cage Assembly
6. Carefully press the wiring harness down into the recess in the bottom of the ion source mount assembly so that the wires are out of the path of the ion source interface assembly that you will install in the next procedure. See Figure Thermo Scientific TSQ Series Hardware Manual... -
Page 106: Reinstalling The Ion Source Interface Assembly
Reinstall the Ion MAX-S ion source housing as described in the topic “Installing the Ion MAX or Ion MAX-S Ion Source Housing” page Starting Up the System Start up the system as described in the topic “Starting Up the System after a Complete Shutdown” page TSQ Series Hardware Manual Thermo Scientific... -
Page 107: Maintaining The Forepump
Cleaning the Fan Filters You must clean the two fan filters every four months. The fan filters are located on the rear of the front cover and on the right side cover of the TSQ Series mass spectrometer. To clean the fan filters 1. - Page 108 Align the front cover with the two guide pins on the TSQ mass spectrometer. v. Push the front cover against the TSQ mass spectrometer until the two spring catches lock. vi. Reconnect all tubing to the divert/inject valve and the syringe pump. TSQ Series Hardware Manual Thermo Scientific...
-
Page 109: Diagnostics And Pcb And Assembly Replacement
If there is a problem with the instrument electronics, the TSQ system diagnostics can often locate the problem. CAUTION Non-expert users should run only the following diagnostics: • Ion Source Board • System Control • Analyzer Control Board Thermo Scientific TSQ Series Hardware Manual... - Page 110 2. Choose Workspace > Full Instrument Control to display the Full Instrument Control Workspace. 3. Choose Workspace > Diagnostics to display the Diagnostics Workspace. Select Test Name: Ion Source Board, System Control, or Analyzer Control Board. TSQ Series Hardware Manual Thermo Scientific...
-
Page 111: Replacing A Fuse
CAUTION The TSQ mass spectrometer electronic assemblies are close-packed to minimize the size of the system. Due to the complexity of removing and reinstalling the TSQ mass spectrometer electronic assemblies, only a Thermo Fisher Scientific field service engineer can replace electronic assemblies. Thermo Scientific TSQ Series Hardware Manual... -
Page 113: Replaceable Parts
Fitting, HPLC, 10-32, long, one piece ......00109-99-00016 Thermo Scientific TSQ Series Hardware Manual... -
Page 114: Tsq Vantage Instrument Specific Accessory Kit
CsI ........... . HAZMAT-01-00004 TSQ Series Hardware Manual... -
Page 115: Fittings, Ferrules, And Sample Loops
5 µL sample loop, stainless steel........00110-22010 Thermo Scientific TSQ Series Hardware Manual... -
Page 117: Index
API probe argon supply API probe, flushing Thermo Scientific TSQ Series Hardware Manual... - Page 118 Ion Max-S API source reinstalling housing (figure) removing installing ion optics cage assembly location (figure) 74, 75, description filters Q0 quadrupole, discussion fittings, replaceable parts Q00, description forepump ion optics cage assembly description disassembling maintenance TSQ Series Hardware Manual Thermo Scientific...
- Page 119 System LED, mass spectrometer reset fuses, replacing System LED, mass spectrometer startup inlet gasses hardware Vacuum LED ion detection system electronic assemblies Vent Valve Closed ion gauge lens L0, description LEDs and system startup lenses Thermo Scientific TSQ Series Hardware Manual...
- Page 120 (Caution) figure Power Entry Module, description location (figure) Power LED on/off status description Q00/L0 mount assembly mass spectrometer reset exploded view (figure) mass spectrometer startup location (figure) TSQ Series Hardware Manual Thermo Scientific...
- Page 121 Neutral Loss, illustrated (figure) System LED Parent mass spectrometer reset Parent, illustrated (figure) mass spectrometer startup Product system reset button Product, illustrated (figure) description Q1MS and Q3MS location (figure) summary (table) mass spectrometer reset scan types Thermo Scientific TSQ Series Hardware Manual...
- Page 122 (figure) Q0 ion optics on/fff status Q0 offset on/off status Q00 offset reinstalling quadrupole RF and DC removing tube lens offset voltages Tune Master window, opening tuning discussed frequency (note) TSQ Series Hardware Manual Thermo Scientific...
Need help?
Do you have a question about the TSQ Series and is the answer not in the manual?
Questions and answers